oil level MERCEDES-BENZ GLC SUV 2017 X253 Owner's Manual
[x] Cancel search | Manufacturer: MERCEDES-BENZ, Model Year: 2017, Model line: GLC SUV, Model: MERCEDES-BENZ GLC SUV 2017 X253Pages: 374, PDF Size: 6.23 MB
Page 6 of 374
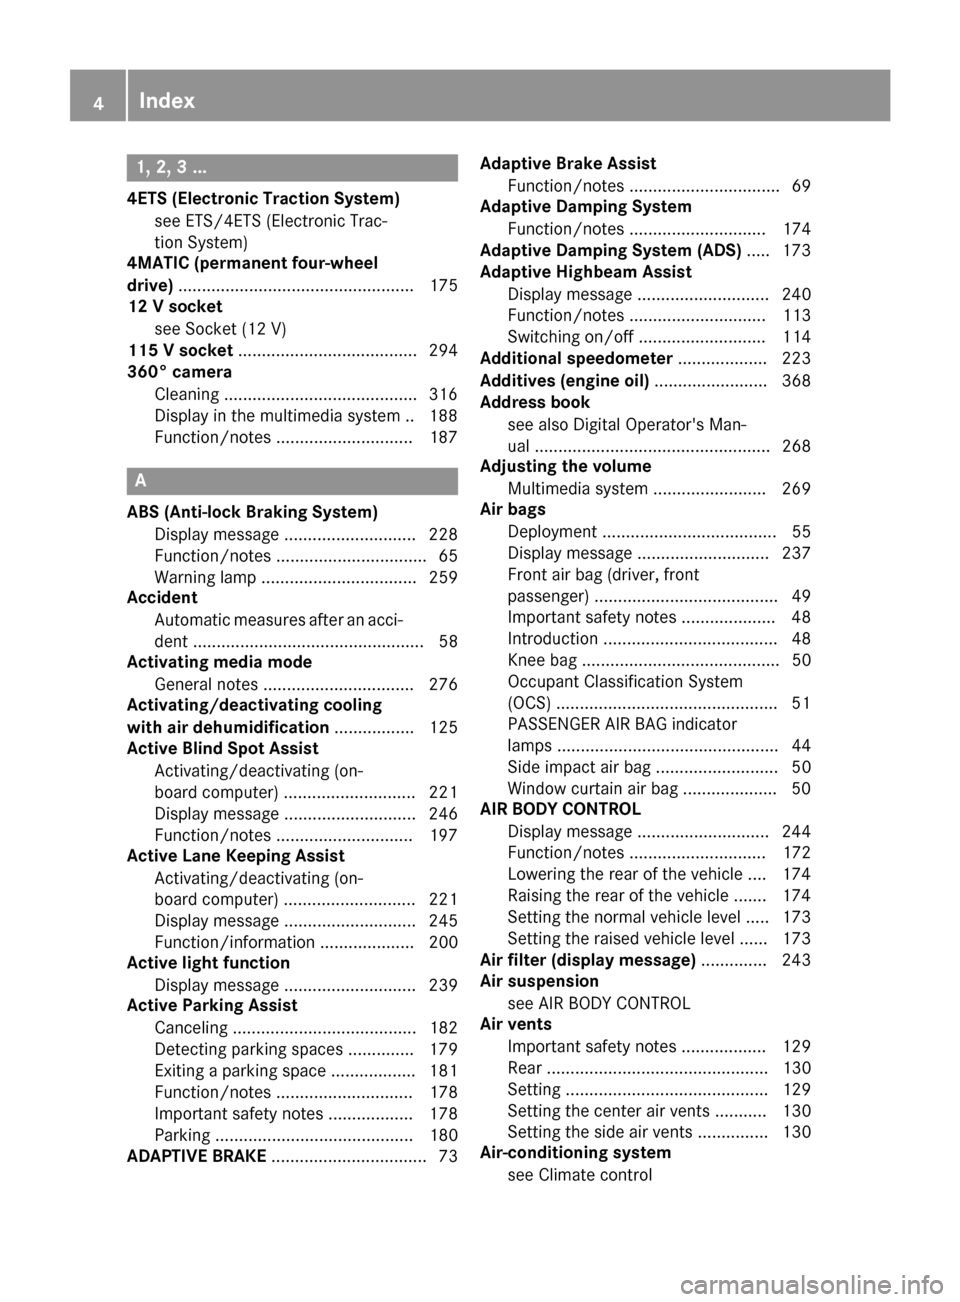
1, 2, 3 ...
4ETS (Electronic Traction System)see ETS/4ETS (Electronic Trac-
tion System)
4MATIC (permanent four-wheel
drive) .................................................. 175
12 V socket
see Socket (12 V)
115 V socket ...................................... 294
360° camera
Cleaning .........................................3 16
Display in the multimedia system .. 188
Function/notes .............................1 87
A
ABS (Anti-lock Braking System)
Display message ............................ 228
Function/notes ................................ 65
Warning lamp ................................. 259
Accident
Automatic measures after an acci-
dent ................................................. 58
Activating media mode
General notes ................................ 276
Activating/deactivating cooling
with air dehumidification ................. 125
Active Blind Spot Assist
Activating/deactivating (on-
board computer) ............................ 221
Display message ............................ 246
Function/notes .............................1 97
Active Lane Keeping Assist
Activating/deactivating (on-
board computer) ............................ 221
Display message ............................ 245
Function/information .................... 200
Active light function
Display message ............................ 239
Active Parking Assist
Canceling ....................................... 182
Detecting parking spaces .............. 179
Exiting a parking space .................. 181
Function/notes ............................. 178
Important safety notes .................. 178
Parking .......................................... 180
ADAPTIVE BRAKE ................................. 73 Adaptive Brake Assist
Function/notes ................................ 69
Adaptive Damping System
Function/notes ............................. 174
Adaptive Damping System (ADS) ..... 173
Adaptive Highbeam Assist
Display message ............................ 240
Function/notes ............................. 113
Switching on/off ........................... 114
Additional speedometer ................... 223
Additives (engine oil) ........................ 368
Address book
see also Digital Operator's Man-
ual .................................................. 268
Adjusting the volume
Multimedia system ........................ 269
Air bags
Deployment ..................................... 55
Display message ............................ 237
Front air bag (driver, front
passenger) ....................................... 49
Important safety notes .................... 48
Introduction ..................................... 48
Knee bag .......................................... 50
Occupant Classification System
(OCS) ............................................... 51
P
ASSENGER AIR BAG indicator
lamps ............................................... 44
Side impact air bag .......................... 50
Window curtain air bag .................... 50
AIR BODY CONTROL
Display message ............................ 244
Function/notes ............................. 172
Lowering the rear of the vehicle .... 174
Raising the rear of the vehicle ....... 174
Setting the normal vehicle level ..... 173
Setting the raised vehicle level ...... 173
Air filter (display message) .............. 243
Air suspension
see AIR BODY CONTROL
Air vents
Important safety notes .................. 129
Rear ............................................... 130
Setting ........................................... 129
Setting the center air vents ........... 130
Setting the side air vents ............... 130
Air-conditioning system
see Climate control
4Index
Page 7 of 374
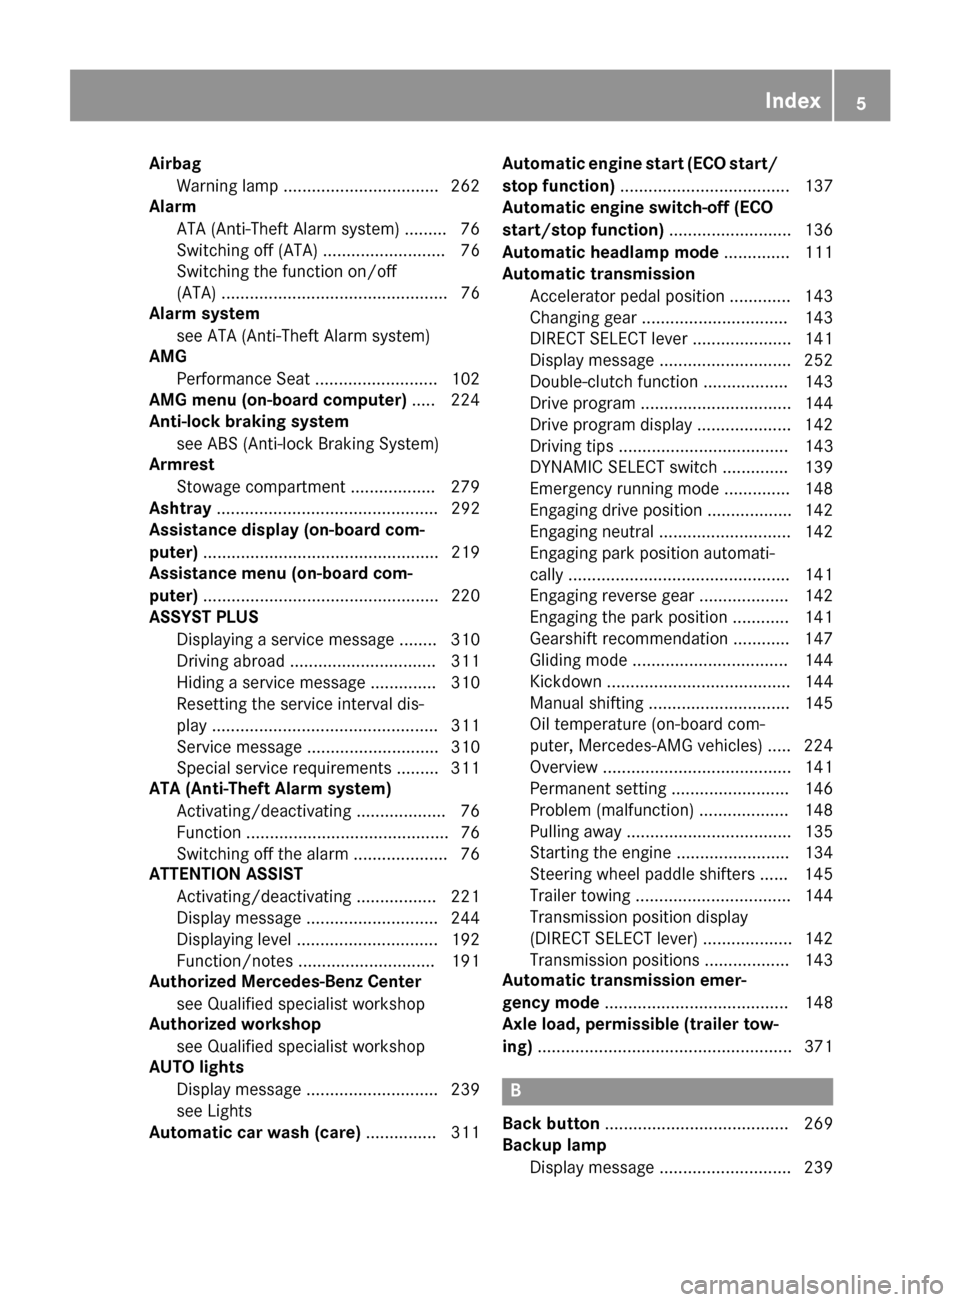
AirbagWarning lamp ................................ .262
Alarm
ATA (Anti-Theft Alarm system) ......... 76
Switching off (ATA) .......................... 76
Switching the function on/off
(ATA) ................................................ 76
Alarm system
see ATA (Anti-Theft Alarm system)
AMG
Performance Seat .......................... 102
AMG menu (on-board computer) ..... 224
Anti-lock braking system
see ABS (Anti-lock Braking System)
Armrest
Stowage compartment .................. 279
Ashtray ............................................... 292
Assistance display (on-board com-
puter) ..................................................2 19
Assistance menu (on-board com-
puter) ..................................................2 20
ASSYST PLUS
Displaying a service message ........3 10
Driving abroad ............................... 311
Hiding a service message .............. 310
Resetting the service interval dis-
play ................................................ 311
Service message ............................ 310
Special service requirements ......... 311
ATA (Anti-Theft Alarm system)
Activating/deactivating ................... 76
Function ...........................................7 6
Switching off the alarm .................... 76
ATTENTION ASSIST
Activating/deactivating ................. 221
Display message ............................ 244
Displaying level .............................. 192
Function/notes ............................. 191
Authorized Mercedes-Benz Center
see Qualified specialist workshop
Authorized workshop
see Qualified specialist workshop
AUTO lights
Display message ............................ 239
see Lights
Automatic car wash (care) ............... 311Automatic engine start (ECO start/
stop function)
.................................... 137
Automatic engine switch-off (ECO
start/stop function) .......................... 136
Automatic headlamp mode .............. 111
Automatic transmission
Accel erato
r pedal position ............. 143
Changing gear ............................... 143
DIRECT SELECT lever ..................... 141
Display message ............................ 252
Double-clutch function .................. 143
Drive program ................................ 144
Drive program display .................... 142
Driving tips .................................... 143
DYNAMIC SELECT switch .............. 139
Emergency running mode .............. 148
Engaging drive position .................. 142
Engaging neutral ............................ 142
Engaging park position automati-
cally ............................................... 141
Engaging reverse gear ................... 142
Engaging the park position ............ 141
Gearshift recommendation ............ 147
Gliding mode ................................. 144
Kickdown ....................................... 144
Manual shifting .............................. 145
Oil temperature (on-board com-
puter, Mercedes-AMG vehicles) ..... 224
Overview ........................................ 141
Permanent setting ......................... 146
Problem (malfunction) ................... 148
Pulling away ................................... 135
Starting the engine ........................ 134
Steering wheel paddle shifters ...... 145
Trailer towing ................................. 144
Transmission position display
(DIRECT SELECT lever) ................... 142
Transmission positions .................. 143
Automatic transmission emer-
gency mode ....................................... 148
Axle load, permissible (trailer tow-
ing) ...................................................... 371
B
Back button ....................................... 269
Backup lamp
Display message ............................ 239
Index5
Page 13 of 374
Emissions controlService and warranty information .... 28
Engine
Check Engine warning lamp .......... .263
Display message ............................ 240
ECO start/stop function ................ 136
Engine number ............................... 364
Irregular running ............................ 138
Jump-starting ................................. 328
Starting (important safety notes) ... 133
Starting problems .......................... 138
Starting the engine with the
SmartKey ....................................... 134
Starting via smartphone ................ 134
Starting with the Start/Stop but-
ton ................................................. 134
Switching off .................................. 155
Tow-starting (vehicle) ..................... 333
Engine electronics
Problem (malfunction) ................... 138
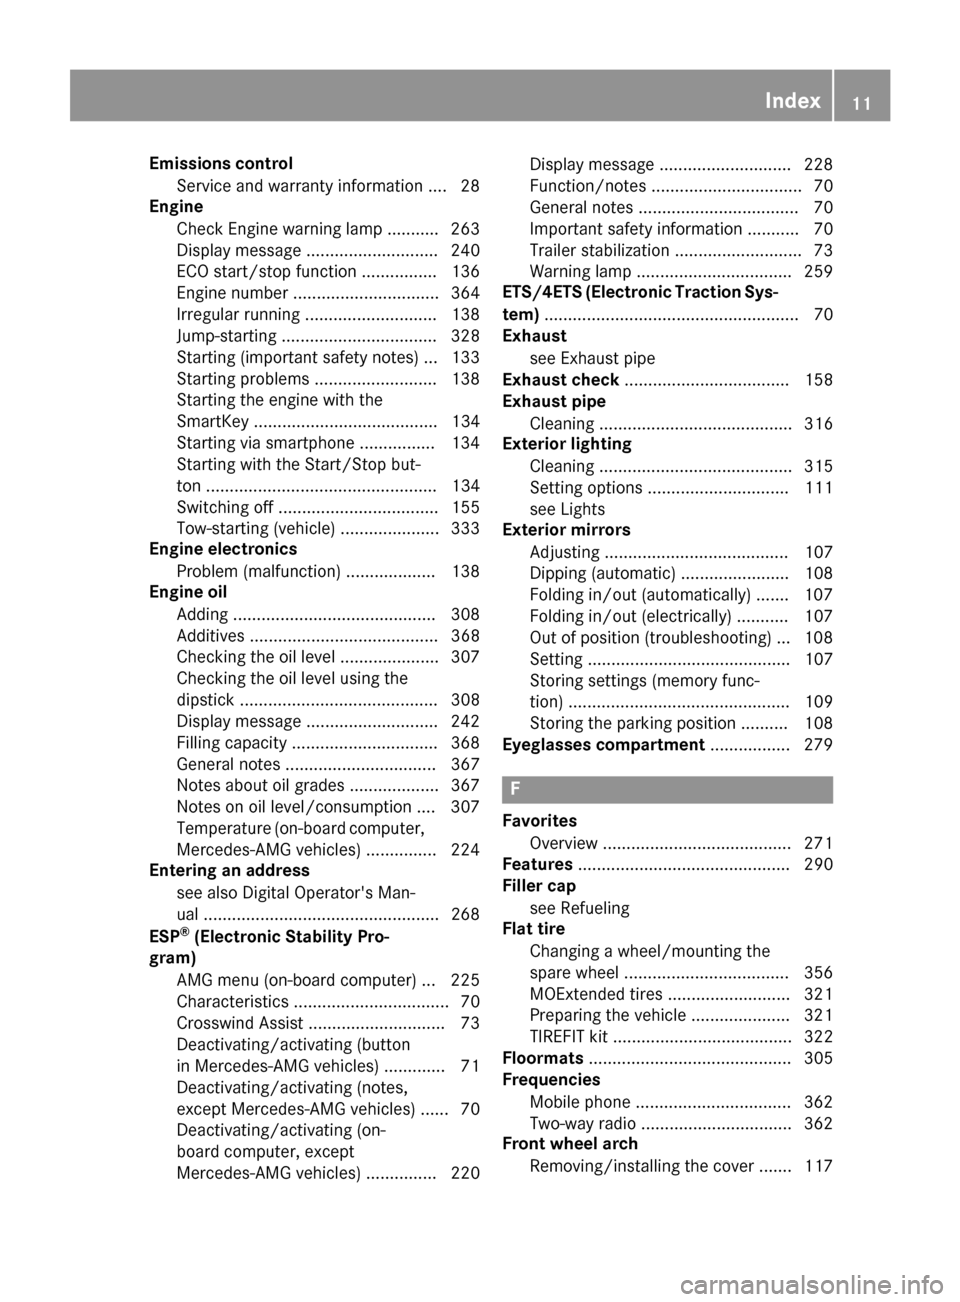
Engine oil
Adding ...........................................3 08
Additives ........................................ 368
Checking the oil level ..................... 307
Checking the oil level using the
dipstick .......................................... 308
Display message ............................ 242
Filling capacity ............................... 368
General notes ................................ 367
Notes about oil grades ................... 367
Notes on oil level/consumption .... 307
Temperature (on-board computer,
Mercedes-AMG vehicles) ...............2 24
Entering an address
see also Digital Operator's Man-
ual ..................................................2 68
ESP
®(Electronic Stability Pro-
gram)
AMG menu (on-board computer) ... 225
Characteristics ................................. 70
Crosswind Assist .............................7 3
Deactivating/activating (button
in Mercedes-AMG vehicles) .............7 1
Deactivating/activating (notes,
except Mercedes-AMG vehicles) ...... 70
Deactivating/activating (on-
board computer, except
Mercedes-AMG veh icle
s) ............... 220 Display message ............................ 228
Function/notes ................................ 70
General notes .................................. 70
Important safety information ........... 70
Trailer stabilization ........................... 73
Warning lamp ................................. 259
ETS/4ETS (Electronic Traction Sys-
tem) ...................................................... 70
Exhaust
see Exhaust pipe
Exhaust check ................................... 158
Exhaust pipe
Cleaning ......................................... 316
Exterior lighting
Cleaning ......................................... 315
Setting options .............................. 111
see Lights
Exterior mirrors
Adjusting ....................................... 107
Dipping (automatic) ....................... 108
Folding in/out (automatically) ....... 107
Folding in/out (electrically) ........... 107
Out of position (troubleshooting) ... 108
Setting ........................................... 107
Storing settings (memory func-
tion) ............................................... 109
Storing the parking position .......... 108
Eyeglasses compartment ................. 279
F
Favorites
Overview ........................................ 271
Features ............................................. 290
Filler cap
see Refueling
Flat tire
Changing a wheel/mounting the
spare wheel ................................... 356
MOExtended tires .......................... 321
Preparing the vehicle ..................... 321
TIREFIT kit ...................................... 322
Floormats ........................................... 305
Frequencies
Mobile phone ................................. 362
Two-way radio ................................ 362
Front wheel arch
Removing/installing the cover ....... 117
Index11
Page 244 of 374
Display messagesPossible causes/consequences andMSolutions
#
StopVehicl eSeeOperator' sManual
The battery is no longer bein gcharged and th econdition of charg eis
to olow.
A warning tone also sounds.
XPull ove rand stop th evehicl esafely and switch off th eengine, pay-
ing attention to roa dand traffic conditions.
XSecur eth evehicl eagainst rollin gaway (Ypage 154).
XObserv eth einstruction sin th e# See Operator' sManualdisplay message .
XConsultaqualified specialist workshop .
#
StopVehicl eLeaveEngine Runnin g
The battery condition of charg eis to olow.
XPull ove rand stop th evehicl esafely as soo nas possible, payin g
attention to roa dand traffic conditions. Do no tcontinu edrivin g
under any circumstances.
XLeav eth eengin erunning.
XWait until th edisplay message disappear sbefore pullin gaway.
#
Start Engine SeeOperator' sManual
The engin eis switched off and th econdition of charg eis to olow.
XSwitc hoff electrical consumer sthat you do no tneed, suc has th e
rear window defroste rand interior lighting .
XLeaveth eengin erunnin gfor afew minute sor drive alon gdistance.
The battery is bein gcharged.
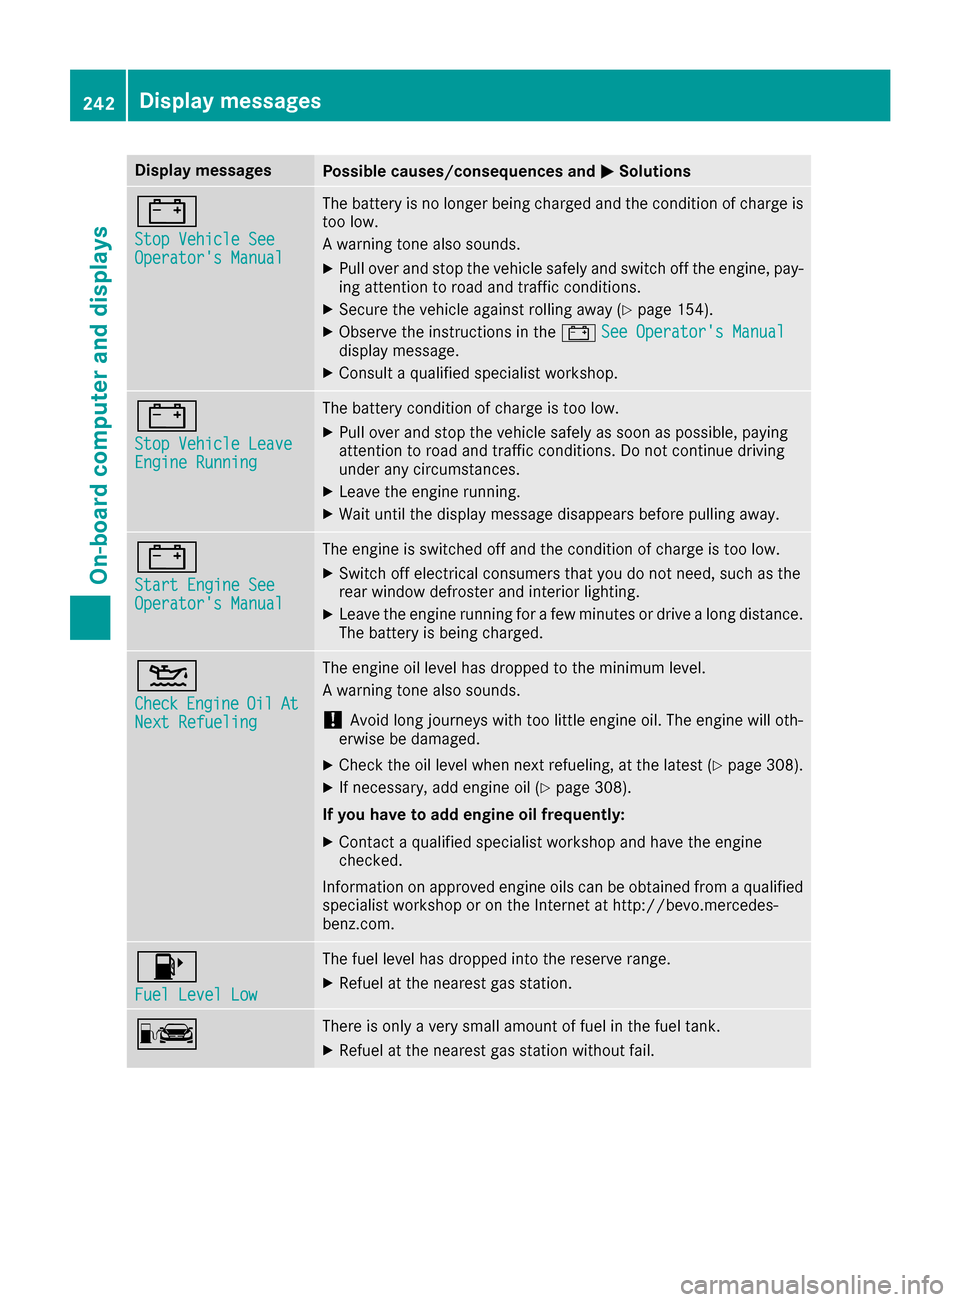
4
CheckEngineOilAtNex tRefueling
The engin eoil level has dropped to th eminimum level.
A warning tone also sounds.
!Avoid lon gjourneys wit hto olittl eengin eoil. The engin ewill oth-
erwise be damaged.
XChec kth eoil level when next refueling, at th elatest (Ypage 308).
XIf necessary, add engin eoil (Ypage 308).
If you have to ad dengin eoil frequently:
XContac t aqualified specialist workshop and hav eth eengin e
checked.
Information on approve dengin eoils can be obtained from aqualified
specialist workshop or on th eInternet at http://bevo.mercedes -
benz.co m.
8
Fuel Level Low
The fuel level has dropped into the reserve range.
XRefuel at the nearest gas station.
CThere is only a very small amount of fuel in the fuel tank.
XRefuel at the nearest gas station without fail.
242Display messages
On-board computer and displays
Page 310 of 374
When checking the oil level:
Rpark the vehicle on a level surface
Rthe engine should be switched off for approx-
imately five minutes if the engine is at normal
operating temperature
Rif the engine is not at normal operating tem-
perature, e.g. if the engine was only started
briefly, wait approximately 30 minutes before carrying out the measurement
Checking the oil level using the oil dip-
stick
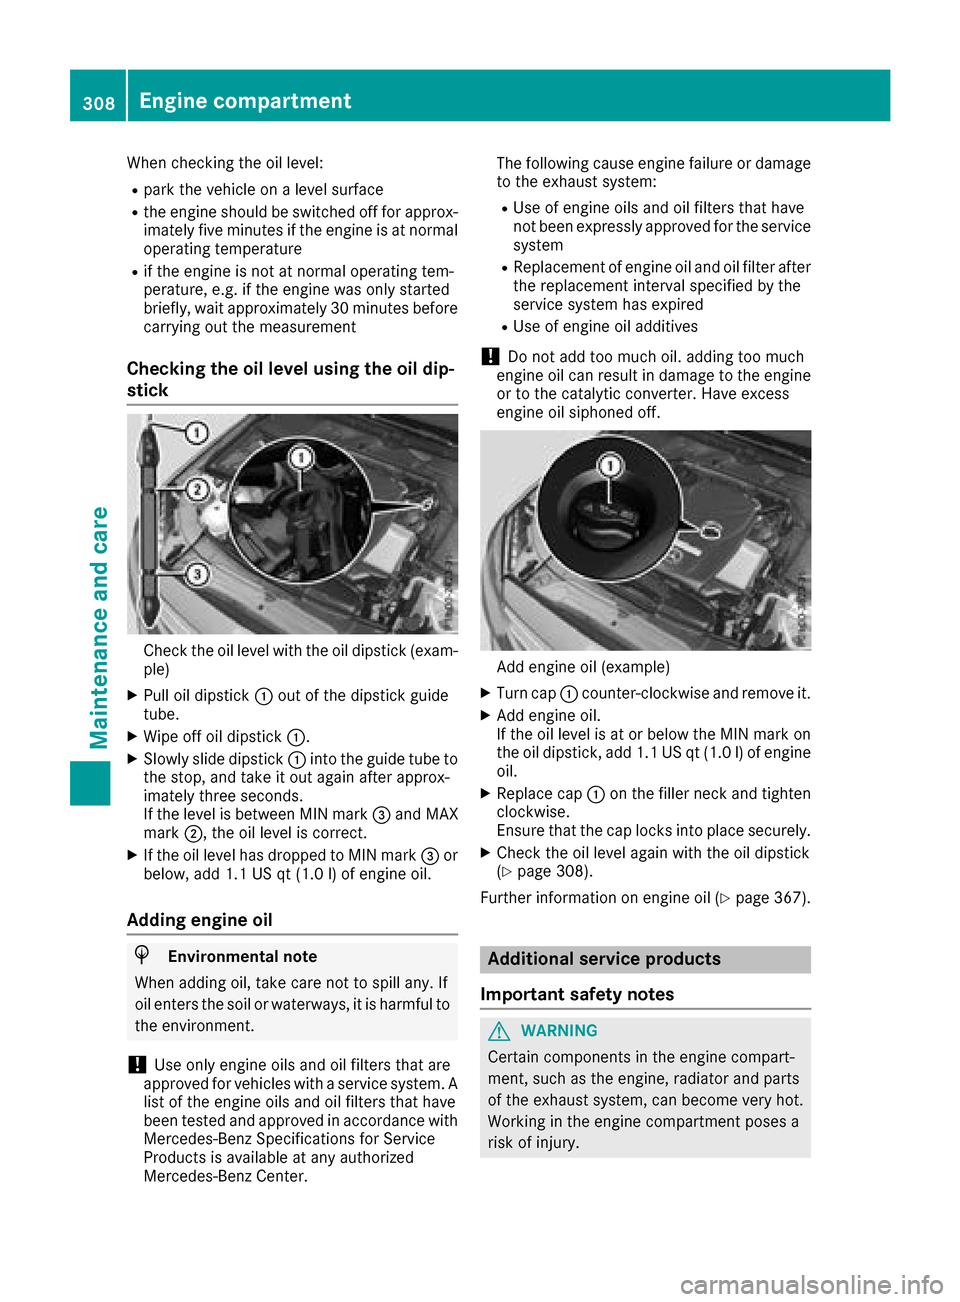
Check the oil level with the oil dipstick (exam-
ple)
XPull oil dipstick :out of the dipstick guide
tube.
XWipe off oil dipstick :.
XSlowly slide dipstick :into the guide tube to
the stop, and take it out again after approx-
imately three seconds.
If the level is between MIN mark =and MAX
mark ;, the oil level is correct.
XIf the oil level has dropped to MIN mark =or
below, add 1.1 US qt (1.0 l)of engine oil.
Adding engine oil
HEnvironmental note
When adding oil, take care not to spill any. If
oil enters the soil or waterways, it is harmful to
the environment.
!Use only engine oils and oil filters that are
approved for vehicles with a service system. A list of the engine oils and oil filters that have
been tested and approved in accordance with
Mercedes-Benz Specifications for Service
Products is available at any authorized
Mercedes-Benz Center. The following cause engine failure or damage
to the exhaust system:
RUse of engine oils and oil filters that have
not been expressly approved for the service
system
RReplacement of engine oil and oil filter after
the replacement interval specified by the
service system has expired
RUse of engine oil additives
!Do not add too much oil. adding too much
engine oil can result in damage to the engine
or to the catalytic converter. Have excess
engine oil siphoned off.
Add engine oil (example)
XTurn cap :counter-clockwise and remove it.
XAdd engine oil.
If the oil level is at or below the MIN mark on
the oil dipstick, add 1.1 US qt (1.0 l)of engine
oil.
XReplace cap :on the filler neck and tighten
clockwise.
Ensure that the cap locks into place securely.
XCheck the oil level again with the oil dipstick
(Ypage 308).
Further information on engine oil (
Ypage 367).
Additional service products
Important safety notes
GWARNING
Certain components in the engine compart-
ment, such as the engine, radiator and parts
of the exhaust system, can become very hot.
Working in the engine compartment poses a
risk of injury.
308Engine compartment
Maintenance and care
Page 312 of 374
Adding washer fluid to the windshield
washer system
GWARNING
Windshield washer concentrate could ignit eif
it comes int ocontact wit hhot engin ecompo -
nent sor th eexhaust system. There is aris kof
fir eand injury.
Mak esur ethat no windshield washer con-
centrat eis spilled next to th efiller neck .
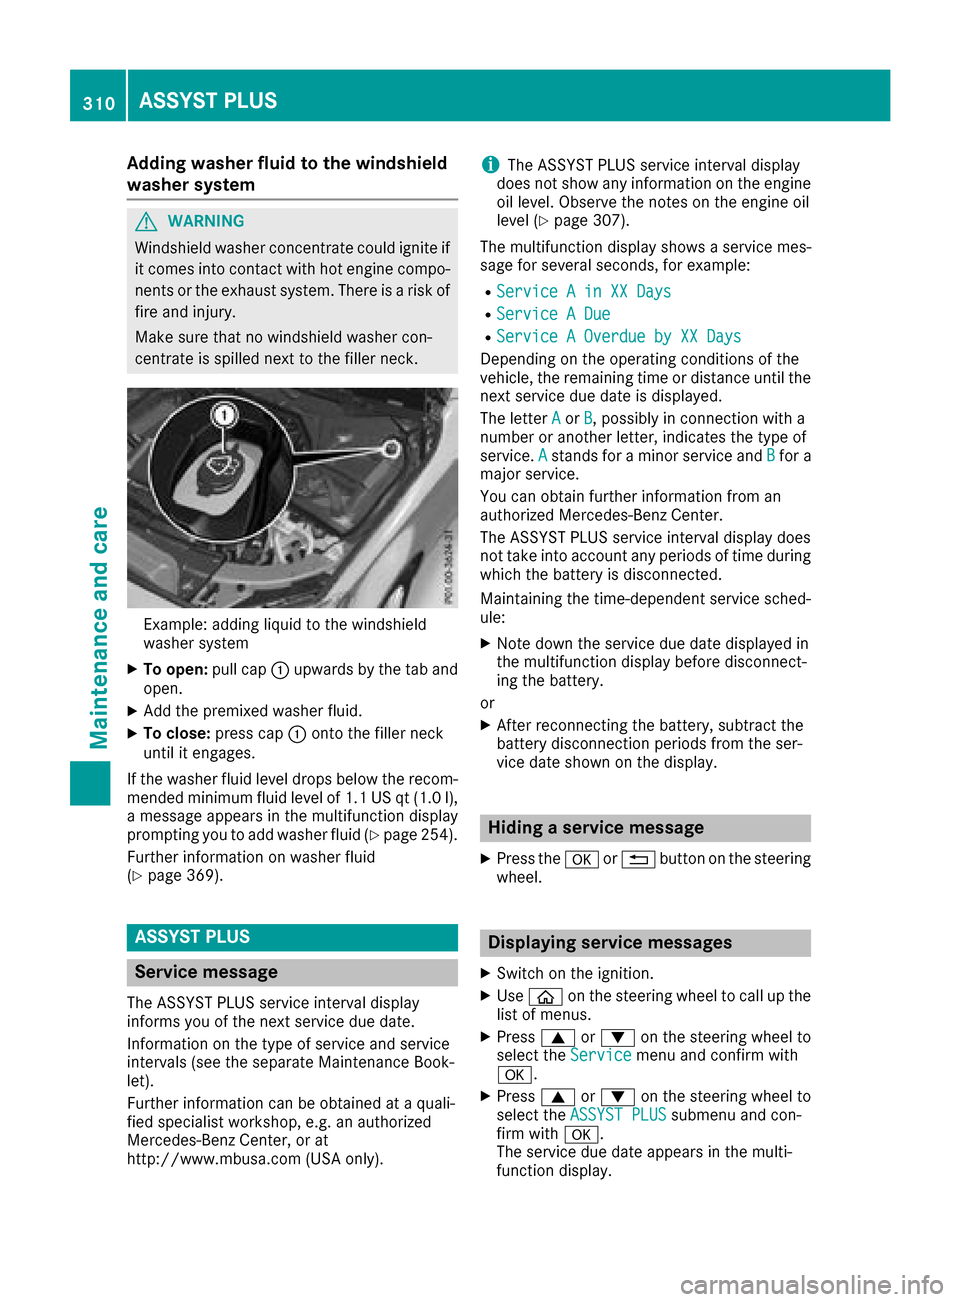
Example: addin gliquid to th ewindshield
washer system
XTo open :pull cap :upwards by th etab and
open .
XAddth epremixed washer fluid .
XTo close:press cap :onto th efiller neck
until it engages.
If th ewasher fluid level drops belo wtherecom-
mended minimum fluid level of 1. 1US qt (1. 0l),
a message appear sin th emultifunction display
prompting you to add washer fluid (
Ypage 254).
Further information on washer fluid
(
Ypage 369).
ASSYST PLUS
Service message
The ASSYS TPLU Sservic einterval display
inform syou of th enext servic edue date.
Information on th etyp eof servic eand servic e
intervals (see th eseparat eMaintenance Book -
let).
Further information can be obtained at aquali-
fie dspecialis tworkshop ,e.g. an authorize d
Mercedes-Benz Center, or at
http://www.mbusa.co m(US Aonly).
iThe ASSYS TPLU Sservic einterval display
does no tsho wany information on th eengin e
oil level. Observ eth enote son th eengin eoil
level (
Ypage 307).
The multifunction display shows aservic emes -
sage for several seconds, for example:
RServic e Ain XX Day s
RService ADue
RServic e AOverdu eby XX Day s
Dependingon th eoperating condition sof th e
vehicle, th eremaining time or distanc euntil th e
next servic edue dat eis displayed.
The lette rA
or B,possibl yin connection wit h a
number or another letter, indicates th etyp eof
service. A
standsfor aminor servic eand Bfora
major service.
You can obtain further information from an
authorize dMercedes-Benz Center.
The ASSYS TPLU Sservic einterval display does
no ttak eint oaccoun tany periods of time during
whic hth ebattery is disconnected.
Maintainin gth etime-dependen tservic esched-
ule:
XNot edown th eservic edue dat edisplayed in
th emultifunction display before disconnect -
ing th ebattery.
or
XAfte rreconnecting th ebattery, subtrac tth e
battery disconnection periods from th eser -
vic edat eshown on th edisplay.
Hiding a service message
XPress th ea or% buttonon th esteering
wheel.
Displaying service messages
XSwitc hon th eignition .
XUseò on thesteering whee lto call up th e
list of menus.
XPress 9or: on thesteering whee lto
select th eServic emenuand confirm wit h
a.
XPress 9or: on thesteering whee lto
select th eASSYST PLU Ssubmenuand con-
fir m wit ha.
The servic edue dat eappear sin th emulti-
function display.
310ASSYST PLUS
Maintenance and care
Page 359 of 374
the tires are installed corresponding to the
direction of rotation.
An arrow on the sidewall of the tire indicates its
correct direction of rotation.
Storing wheels
Store wheels that are not being used in a cool,
dry and preferably dark place. Protect the tires
from oil, grease, gasoline and diesel.
Mounting a wheel
Preparing the vehicle
XStop the vehicle on solid, non-slippery and
level ground.
XApply the electric parking brake manually.
XBring the front wheels into the straight-ahead position.
XShift the transmission to position j.
XMake sure that the vehicle level is set to "Nor-
mal" on vehicles with AIR BODY CONTROL
(
Ypage 173).
XSwitch off the engine.
XVehicles without KEYLESS-GO:remove the
SmartKey from the ignition lock.
XVehicles with KEYLESS-GO start-function
or KEYLESS-GO: open the driver's door.
The vehicle electronics are now in key posi-
tion u. This is the same as the key having
been removed.
XVehicles with KEYLESS-GO start-function
or KEYLESS-GO: remove the Start/Stop but-
ton from the ignition lock (
Ypage 133).
XMake sure that the engine cannot be started
via your smartphone (Ypage 134).
XIf included in the vehicle equipment, remove
the tire-change tool kit from the vehicle.
XSafeguard the vehicle against rolling away.
Securing the vehicle to prevent it from
rolling away
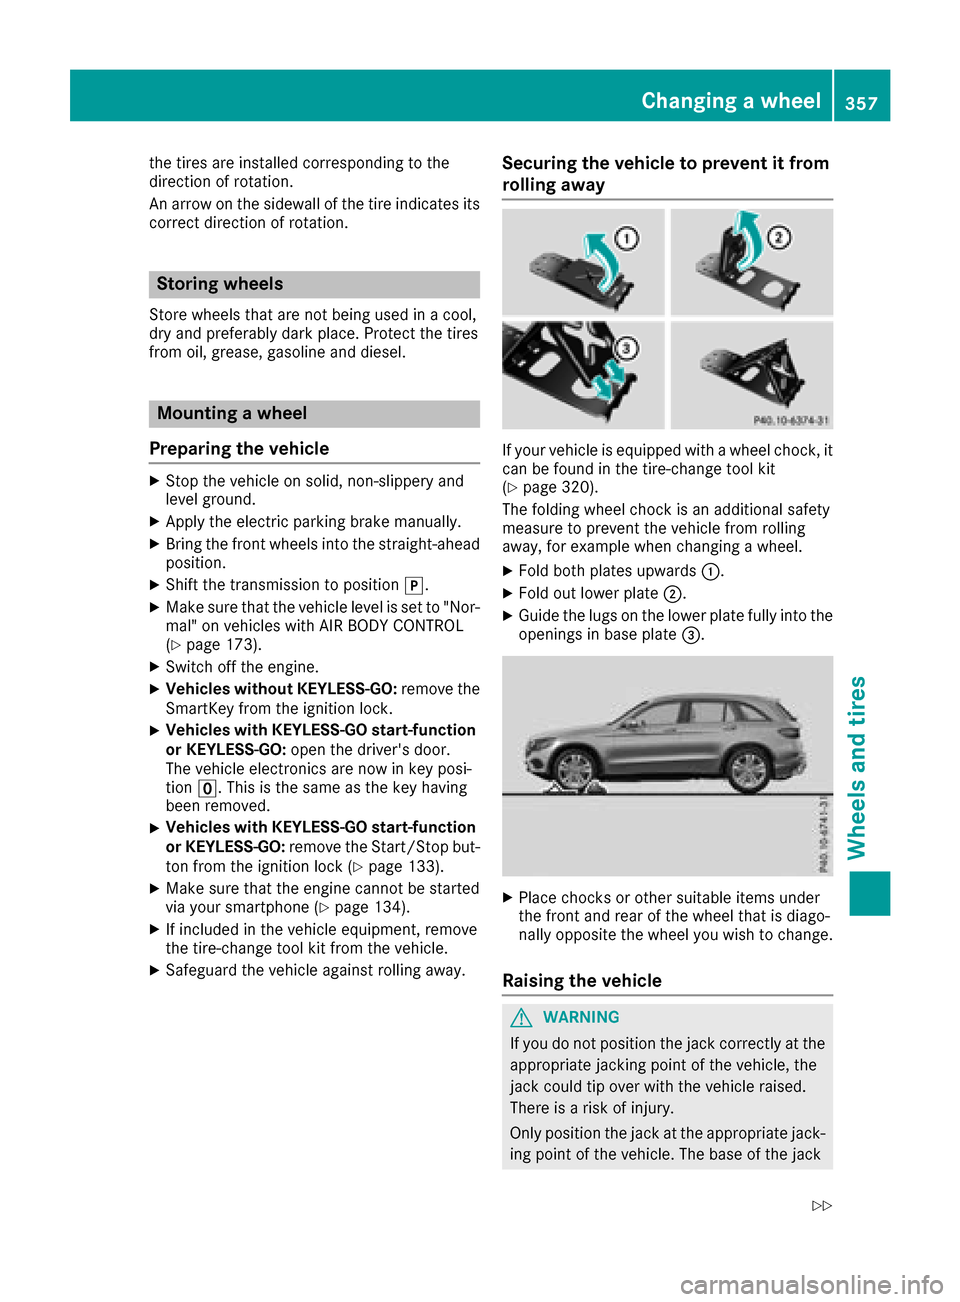
If your vehicle is equipped with a wheel chock, it
can be found in the tire-change tool kit
(
Ypage 320).
The folding wheel chock is an additional safety
measure to prevent the vehicle from rolling
away, for example when changing a wheel.
XFold both plates upwards :.
XFold out lower plate;.
XGuide the lugs on the lower plate fully into the
openings in base plate =.
XPlace chocks or other suitable items under
the front and rear of the wheel that is diago-
nally opposite the wheel you wish to change.
Raising the vehicle
GWARNING
If you do not position the jack correctly at the
appropriate jacking point of the vehicle, the
jack could tip over with the vehicle raised.
There is a risk of injury.
Only position the jack at the appropriate jack-
ing point of the vehicle. The base of the jack
Changing a wheel357
Wheels an d tires
Z
Page 371 of 374
Otherwise, the engine cooling system is not
sufficiently protected from corrosion and
overheating.
iHave the coolant regularly replaced at a
qualified specialist workshop and the replace-
ment confirmed in the Maintenance Booklet.
Comply with the important safety notes for ser-
vice products when handling coolant
(
Ypage 364).
The coolant is a mixture of water and anti-
freeze/corrosion inhibitor. It performs the fol-
lowing tasks:
RAnti-corrosion protection
RAntifreeze protection
RRaising the boiling point
If the coolant has antifreeze protection down to -35 ‡ (-37 †), the boiling point of the coolant
during operation is approximately 266 ‡
(130 †).
The antifreeze concentrate/corrosion inhibitor
concentration in the engine cooling system
should:
Rbe at least 50%. This will protect the engine
cooling system against freezing down to
approximately -35 ‡ (-37 †).
Rnot exceed 55% (antifreeze protection down
to -49 ‡[-45 †]) .Otherwise ,hea twill no tbe
dissipated as effectively.
Mercedes-Ben zrecommends an antifreeze/
corrosion inhibitor concentrat ein accordance
wit hMB Specification sfo rServic eProducts
310.1.
iWhe nth evehicle is first delivered, it is filled
wit h a coolan tmixture that ensures adequat e
antifreez ean danti-corrosio nprotection .
iThe coolan tis checke dwit hever ymainte-
nanc einterval at aqualifie dspecialis twork-
shop.
Filling capacities
ModelCapacity
GLC 300 d4MATIC10.6 US qt (10.0l)
Mercedes-AMG
GLC 43 4MATIC12.2 US qt (11.5 l)
Allot her models9.5 US qt (9.0 l)
Windshield washer system
Important safety notes
GWARNING
Windshield washer concentrate could ignite if it comes into contact with hot engine compo-
nents or the exhaust system. There is a risk of
fire and injury.
Make sure that no windshield washer con-
centrate is spilled next to the filler neck.
!Only use washer fluid that is suitable for
plastic lamp lenses, e.g. MB SummerFit or MB WinterFit. Unsuitable washer fluid could dam-
age the plastic lenses of the headlamps.
!Only MB SummerFit and MB WinterFit
washer fluid should be mixed together. The
spray nozzles may otherwise become
blocked.
Do not use distilled or de-ionized water. Other-
wise, the level sensor may give a false reading.
When handling washer fluid, observe the impor-
tant safety notes on service products
(
Ypage 364).
At temperatures above freezing:
XFill the washer fluid reservoir with a mixture of
water and windshield washer fluid, e.g. MB
SummerFit.
Add 1 part MB SummerFit to 100 parts water.
At temperatures below freezing:
XFill the washer fluid reservoir with a mixture of
water and washer fluid, e.g. MB WinterFit.
For the correct mixing ratio refer to the infor-
mation on the antifreeze reservoir.
iAdd windshield washer fluid, e.g. MB Sum-
merFit or MB WinterFit, to the washer fluid all
year round.
Climate control system refrigerant
Important safety notes
The climate control system of your vehicle is fil-
led with refrigerant R ‑134a.
The instruction label regarding the refrigerant
type used can be found on the radiator cross
member.
Service products and filling capacities369
Technical data
Z
Page 372 of 374
!Only the refrigerant R‑134a and the PAG oil
approved by Mercedes-Benz may be used.
The approved PAG oil may not be mixed with
any other PAG oil that is not approved for
R-134a refrigerant. Otherwise, the climate
control system may be damaged.
Service work, such as refilling with refrigerant or
replacing component parts, may only be carried
out by a qualified specialist workshop. All appli- cable regulations, as well as SAE standard J639,
must be adhered to.
Always have work on the climate control system
carried out at a qualified specialist workshop.
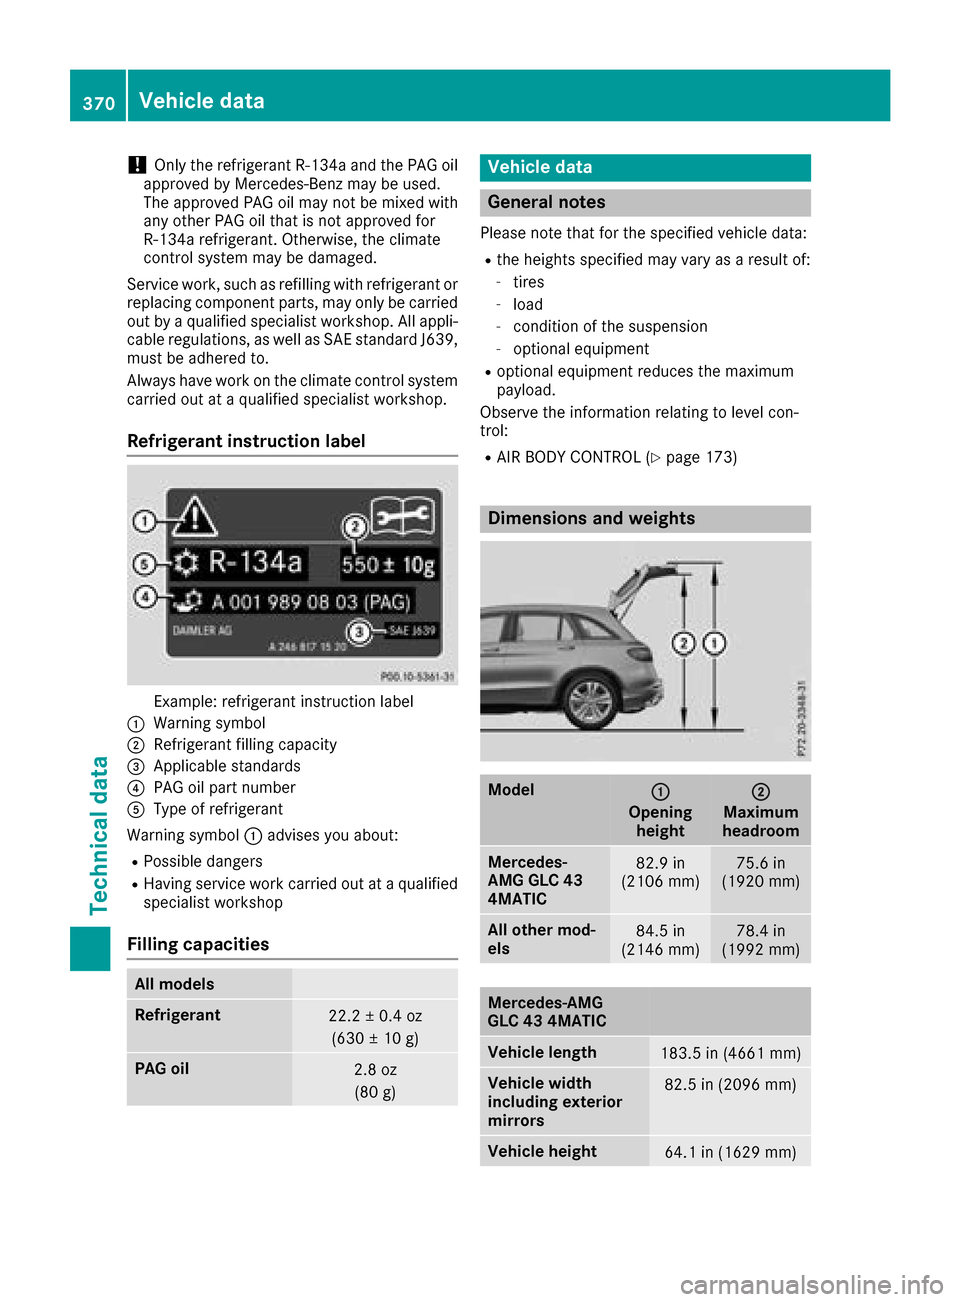
Refrigerant instruction label
Example: refrigerant instruction label
:Warning symbol
;Refrigerant filling capacity
=Applicable standards
?PAG oil part number
AType of refrigerant
Warning symbol :advises you about:
RPossible dangers
RHaving service work carried out at a qualified
specialist workshop
Filling capacities
All models
Refrigerant22.2 ± 0.4 oz
(630 ± 10 g)
PAG oil2.8 oz(80 g)
Vehicle data
General notes
Please note that for the specified vehicle data:
Rthe heights specified may vary as a result of:
-tires
-load
-condition of the suspension
-optional equipment
Roptional equipment reduces the maximum
payload.
Observe the information relating to level con-
trol:
RAIR BODY CONTROL (Ypage 173)
Dimensions and weights
Model:
Opening height
;
Maximum
headroom
Mercedes-
AMG GLC 43
4MATIC82.9 in
(2106 mm)75.6 in
(1920 mm)
All other mod-
els84.5 in
(2146 mm)78.4 in
(1992 mm)
Mercedes-AMG
GLC 43 4MATIC
Vehicle length183.5 in (4661 mm)
Vehicle width
including exterior
mirrors82.5 in (2096 mm)
Vehicle height64.1 in (1629 mm)
370Vehicle data
Technical data