air condition MERCEDES-BENZ GLK SUV 2012 User Guide
[x] Cancel search | Manufacturer: MERCEDES-BENZ, Model Year: 2012, Model line: GLK SUV, Model: MERCEDES-BENZ GLK SUV 2012Pages: 381, PDF Size: 12.68 MB
Page 140 of 381
Auxiliary heating
Important safety notes G
WARNING
Exhaust fumes are produced when the auxili-
ary heating is in operation. Inhaling these
exhaust fumes can be poisonous. You should
therefore switch off the auxiliary heating in
confined spaces without an extraction sys-
tem, e.g. a garage. G
WARNING
When operating the auxiliary heating parts of
the vehicle can get very hot. Make sure that
the exhaust system does not under any cir-
cumstances come into contact with easily
ignitable material such as dry grass or fuels.
The material could otherwise ignite and set
the vehicle alight. Choose your parking spot
accordingly.
Operating the auxiliary heating is thus pro-
hibited at filling stations or when your vehicle
is being refuelled. You must therefore switch
off the auxiliary heating at filling stations.
! Operating the auxiliary heating/ventila-
tion draws on the vehicle battery. After you
have heated or ventilated the vehicle a
maximum of two times, drive for a longer
distance.
i Switch the auxiliary heating on regularly
once a month for about ten minutes.
The auxiliary heating heats the air in the
passenger compartment to the selected tem-
perature. It does not use the heat of the run-
ning engine to do this. The auxiliary heating
is operated directly using the vehicle's fuel.
For this reason, the tank content must be at
least at reserve fuel level to ensure that the
auxiliary heating functions.
The auxiliary heating/ventilation automati-
cally adjusts to changes in temperature and
weather conditions. For this reason, the aux-
iliary heating could switch from ventilation
mode to heating mode or from heating mode
to ventilation mode. The auxiliary heating switches off automati-
cally after 50 minutes. This time limit can be
altered. To do this, visit a qualified specialist
workshop.
You cannot use the auxiliary ventilation to
cool the vehicle interior to a temperature
lower than the outside temperature.
Before switching on
X
Turn the key to position 2in the ignition
lock.
X Set the temperature.
The auxiliary heating/ventilation can be acti-
vated even when climate control is set to
manual. Optimum comfort can be attained
when the system is set to automatic mode.
Set the temperature to 22 †.
The auxiliary heating/ventilation can be acti-
vated or deactivated using the remote control
or the button on the centre console.
The on-board computer can be used to spec-
ify up to three departure times, one of which
may be preselected (Y page 242).
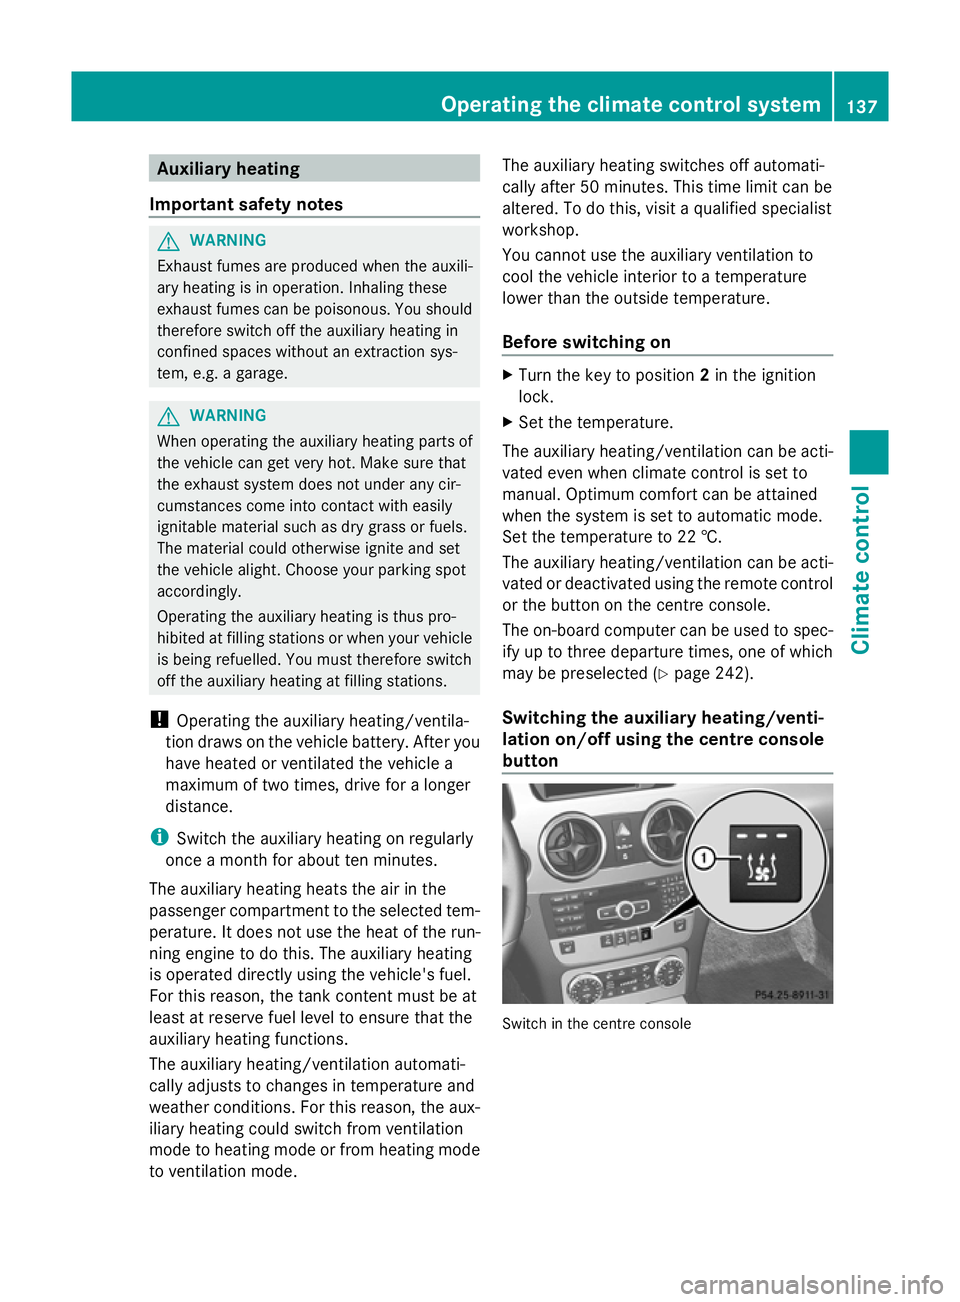
Switching the auxiliary heating/venti-
lation on/off using the centre console
button Switch in the centre consoleOperating the climate control system
137Climate control Z
Page 154 of 381
Activating
X
Press button :.
Indicator lamp ;lights up. If all conditions
for automatic engine switch-off
(Y page 151) are fulfilled, the ¤symbol
is shown in green in the multifunction dis-
play.
If not all conditions for automatic engine
switch-off are fulfilled, the
(Y page 151) ¤symbol is shown in yel-
low in the multifunction display. If this is the
case, the ECO start/stop function is not
available.
i If indicator lamp ;is off, the ECO start/
stop function has been deactivated man-
ually or as the result of a malfunction. The
engine will then not be switched off auto-
matically when the vehicle stops.
i The ECO start/stop function is activated
each time the engine is switched on.
Automatic engine switch-off The ECO start/stop function is operational
and the ¤symbol is displayed in green in
the multifunction display if:
R the indicator lamp in the ECO button is lit
green..
R the vehicle is stationary
R the outside temperature is within the com-
fort range.
R the engine is at normal operating temper-
ature.
R the set temperature for the vehicle interior
has been reached.
R the battery is sufficiently charged.
R the system detects that the windscreen is
not misted up when the air-conditioning
system is switched on.
R the bonnet is closed.
R the driver's door is closed and the driver's
seat belt is fastened.
If not all conditions for automatic engine
switch-off (Y page 151) are fulfilled, the ¤
symbol is shown in yellow in the multi-
function display.
i The engine can be switched off automat-
ically a maximum of four times (initial stop,
then three subsequent stops) in succes-
sion. The ¤symbol is shown in yellow
in the multifunction display after the engine
has been started automatically for the
fourth time. When the ¤symbol is
shown in green in the multifunction display,
automatic engine switch-off is again possi-
ble.
i During automatic engine switch-off, the
climate control system only operates at a
reduced capacity. If you require full climate
control capacity, the ECO start/stop func-
tion can be deactivated by pressing the
ECO button (Y page 150).
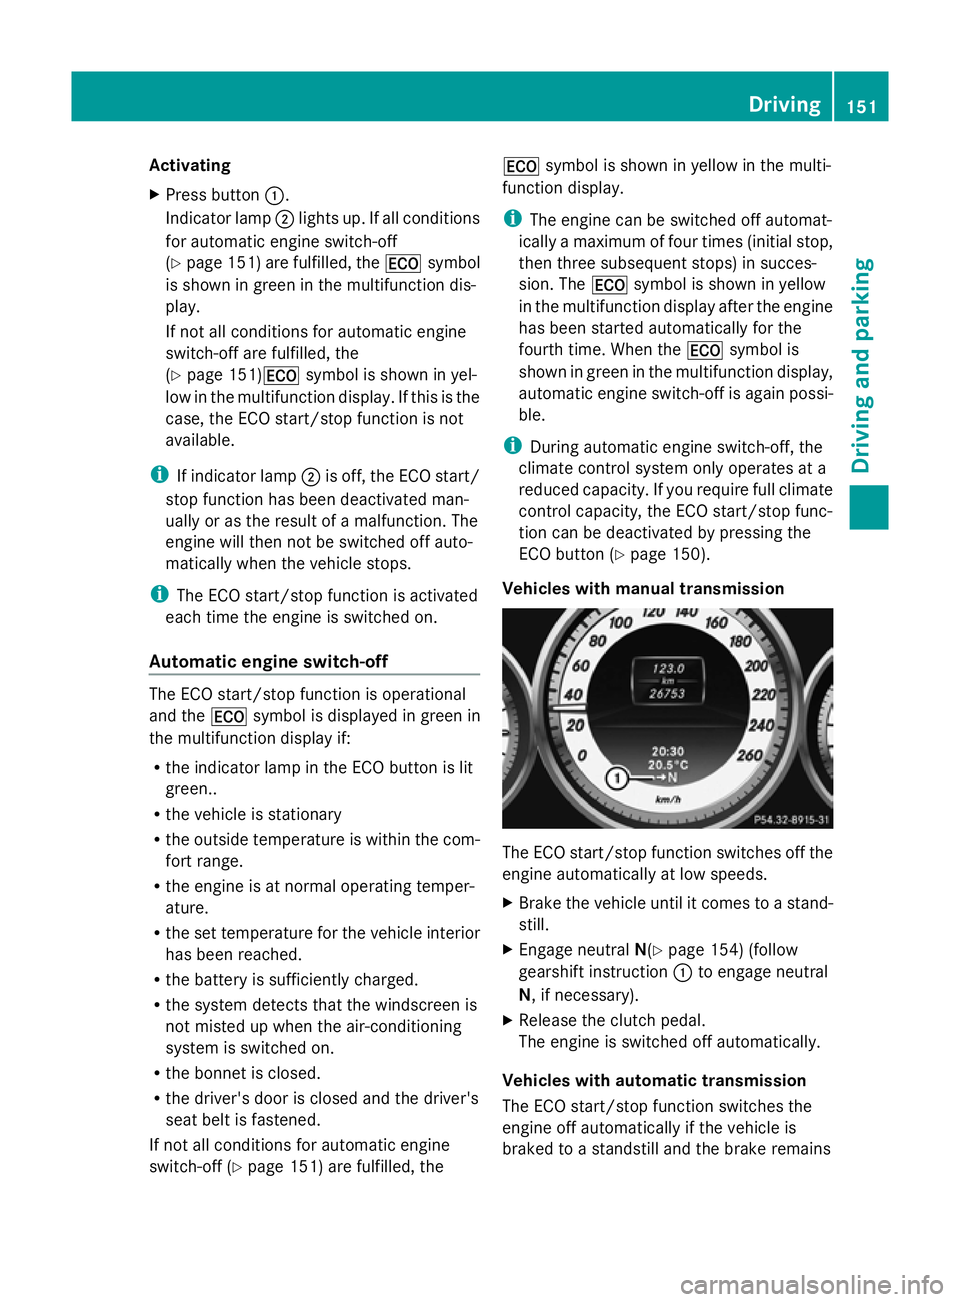
Vehicles with manual transmission The ECO start/stop function switches off the
engine automatically at low speeds.
X
Brake the vehicle until it comes to a stand-
still.
X Engage neutral N(Ypage 154) (follow
gearshift instruction :to engage neutral
N, if necessary).
X Release the clutch pedal.
The engine is switched off automatically.
Vehicles with automatic transmission
The ECO start/stop function switches the
engine off automatically if the vehicle is
braked to a standstill and the brake remains Driving
151Driving and pa rking Z
Page 155 of 381
depressed with the transmission in position
D or N.
i If you shift the transmission from Rto D,
the ECO start/stop function is available
again once the ¤symbol reappears in
green in the multifunction display.
i You can also activate the HOLD function
when the vehicle is stationary if the engine
has been switched off automatically. It is
then not necessary to continue applying
the brakes during the automatic stop
phase. When you depress the accelerator
pedal, the engine starts automatically and
the braking effect of the HOLD function is
deactivated. Depress the accelerator pedal
gently, as the engine must be started first.
Automatic engine start The engine is started automatically if:
R you switch off the ECO start/stop function
by pressing the ECO button
R you unfasten your seat belt or open the
driver's door
R the vehicle starts to roll
R the brake system requires this
R the temperature in the vehicle interior devi-
ates from the set range
R the system detects moisture on the wind-
screen when the air-conditioning system is
switched on
R the battery's charge status is too low
Vehicles with manual transmission
The engine is started automatically if:
R you depress the clutch pedal
R you depress the accelerator pedal
! Only engage gear when the clutch pedal
is depressed. Vehicles with automatic transmission
The engine is started automatically if:
R
you release the brakes when in transmis-
sion position Dor N
R you depress the accelerator pedal
R you engage reverse gear R
R you move the transmission out of position
P
i Shifting the transmission to position P
does not start the engine.
i If you shift the transmission from Rto D,
the ECO start/stop function is available
again as soon as the ¤symbol reap-
pears in the multifunction display. 152
DrivingDriving and parking
Page 170 of 381
i
The ECO display summarises the driving
characteristics from the start of the journey
to its completion. Therefore, there are
dynamic changes in the bars at the start of
a journey. During a prolonged driving time,
these changes are smaller. For dynamic
changes, perform a manual reset.
For further information on the ECO display,
see (Y page 231). Short journeys
! Vehicles with a diesel particle filter: if
the vehicle is mostly driven for short dis-
tances, it is possible that malfunctions may
occur during the automatic cleaning of the
diesel particle filter. This may lead to fuel
collecting in the engine oil and cause
engine failure. Therefore, if you frequently
drive short distances, you should take a 20
minute trip on a motorway or rural road at
least every 500km. Braking
Important safety notes G
WARNING
If you shift down on a slippery road surface in
an attempt to increase the engine's braking
effect, the drive wheels could lose their grip.
This increases the risk of skidding and having
an accident.
Do not shift down for additional engine brak-
ing on a slippery road surface.
Downhill gradients On long and steep downhill gradients, you
must select shift range
1,2or 3in good time.
Take particular note of this when driving a
laden vehicle and when towing a trailer.
i This also applies if you have activated
cruise control or SPEEDTRONIC. This will use the braking effect of the engine,
so less braking will be required to prevent the
vehicle from gaining speed. This relieves the
load on the brake system and prevents the
brakes from overheating and wearing too
quickly.
Heavy and light loads
G
WARNING
The braking system can overheat if you leave
your foot on the brake pedal while driving.
This increases the braking distance and could
even cause the braking system to fail. There
is a risk of an accident.
Never use the brake pedal as a footrest. Do
not simultaneously depress both the brake
pedal and the accelerator pedal while driving.
! Depressing the brake pedal constantly
results in excessive and premature wear to
the brake pads.
If the brakes have been subjected to a heavy
load, do not stop the vehicle immediately.
Drive on for a short while. This allows the air-
flow to cool the brakes more quickly.
If the brakes have been used only moderately,
you should occasionally test their effective-
ness. To do this, brake more firmly from a
higher speed. This improves the grip of the
brakes.
Wet road surfaces If you have driven for a long time in heavy rain
without braking, there may be a delayed reac-
tion from the brakes when braking for the first
time. This may also occur after the vehicle has
been washed.
You have to depress the brake pedal more
firmly. Maintain a greater distance from the
vehicle in front.
After driving on a wet road or having the vehi-
cle washed, brake firmly while paying atten-
tion to the traffic conditions. This will warm
up the brake discs, thereby drying them more Driving tips
167Driving and parking Z
Page 181 of 381
Permanent SPEEDTRONIC
You can use the on-board computer to limit
the speed permanently to a value between
160 km/h(e.g. for driving on winter tyres) and
the maximum speed (Y page 241).
Shortly before the stored speed is reached, it
appears in the multifunction display.
Permanent SPEEDTRONIC remains active,
even if variable SPEEDTRONIC is deactivated.
You cannot exceed the stored limit speed,
even if you depress the accelerator pedal
beyond the pressure point (kickdown). DISTRONIC PLUS
Important safety notes DISTRONIC PLUS regulates the speed and
automatically helps you maintain the dis-
tance to the vehicle detected in front. DIS-
TRONIC PLUS brakes automatically so that
the set speed is not exceeded.
On long and steep downhill gradients, espe-
cially if the vehicle is laden or towing a trailer,
you must select shift range 1,2or 3in good
time. By doing so, you will make use of the
braking effect of the engine. This relieves the
load on the brake system and prevents the
brakes from overheating and wearing too
quickly.
If DISTRONIC PLUS detects a slower-moving
vehicle in front, your vehicle is braked in order
to maintain the preset distance to the vehicle
in front. G
WARNING
Do not change down for additional engine
braking on a slippery road surface. This could
cause the drive wheels to lose their grip and
the vehicle could skid. G
WARNING
DISTRONIC PLUS is only an aid designed to
assist driving. The driver remains fully respon-
sible for the vehicle's distance from other vehicles, the vehicle's speed and for braking
in good time.
DISTRONIC PLUS does not react in particular
to:
R pedestrians
R stationary obstacles on the road, e.g. stop-
ped or parked vehicles
R oncoming and crossing traffic
DISTRONIC PLUS may not detect narrow vehi-
cles driving in front, e.g. motorcycles, or vehi-
cles driving on a different line. Therefore,
always pay attention to traffic conditions even
when DISTRONIC PLUS is activated. Other-
wise, you may fail to recognise dangers in
time, cause an accident and injure yourself
and others. G
WARNING
DISTRONIC PLUS cannot take account of road
and traffic conditions. If DISTRONIC does not
recognise or no longer recognises the vehicle
in front, do not activate DISTRONIC or, if it is
already active, deactivate it. This is especially
the case:
R before corners
R on filter lanes
R when changing to a lane with faster moving
traffic
R in complex driving situations or where lanes
are diverted, e.g. at roadworks on a motor-
way
DISTRONIC PLUS otherwise maintains the
current speed set by you or accelerates up to
the set speed.
DISTRONIC PLUS cannot take account of
weather conditions. Deactivate, or do not
activate, DISTRONIC PLUS:
R if the roads are slippery, snow-covered or
icy. The wheels could lose their grip when
braking or accelerating. The vehicle could
start to skid.
R if the sensors are dirty or there is poor vis-
ibility, e.g. due to snow, rain or fog. Dis-
tance control may be impaired. 178
Driving systemsDriving and parking
Page 205 of 381
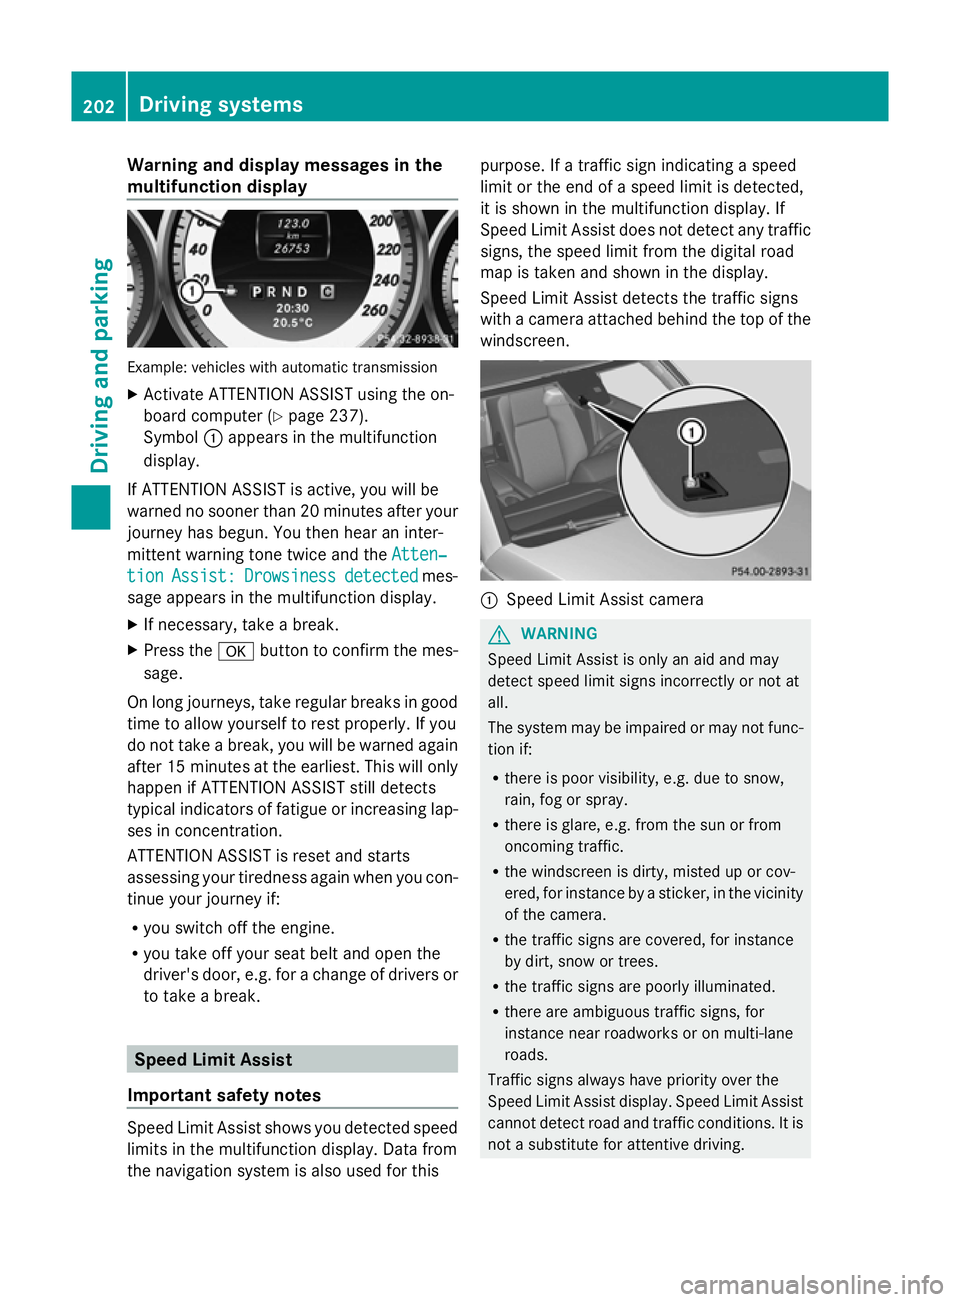
Warning and display messages in the
multifunction display Example: vehicles with automatic transmission
X Activate ATTENTION ASSIST using the on-
board computer (Y page 237).
Symbol :appears in the multifunction
display.
If ATTENTION ASSIST is active, you will be
warned no sooner than 20 minutes after your
journey has begun. You then hear an inter-
mittent warning tone twice and the Atten‐
Atten‐
tion tion Assist:
Assist: Drowsiness
Drowsiness detected
detectedmes-
sage appears in the multifunction display.
X If necessary, take a break.
X Press the abutton to confirm the mes-
sage.
On long journeys, take regular breaks in good
time to allow yourself to rest properly. If you
do not take a break, you will be warned again
after 15 minutes at the earliest. This will only
happen if ATTENTION ASSIST still detects
typical indicators of fatigue or increasing lap-
ses in concentration.
ATTENTION ASSIST is reset and starts
assessing your tiredness again when you con-
tinue your journey if:
R you switch off the engine.
R you take off your seat belt and open the
driver's door, e.g. for a change of drivers or
to take a break. Speed Limit Assist
Important safety notes Speed Limit Assist shows you detected speed
limits in the multifunction display. Data from
the navigation system is also used for this purpose. If a traffic sign indicating a speed
limit or the end of a speed limit is detected,
it is shown in the multifunction display. If
Speed Limit Assist does not detect any traffic
signs, the speed limit from the digital road
map is taken and shown in the display.
Speed Limit Assist detects the traffic signs
with a camera attached behind the top of the
windscreen.
:
Speed Limit Assist camera G
WARNING
Speed Limit Assist is only an aid and may
detect speed limit signs incorrectly or not at
all.
The system may be impaired or may not func-
tion if:
R there is poor visibility, e.g. due to snow,
rain, fog or spray.
R there is glare, e.g. from the sun or from
oncoming traffic.
R the windscreen is dirty, misted up or cov-
ered, for instance by a sticker, in the vicinity
of the camera.
R the traffic signs are covered, for instance
by dirt, snow or trees.
R the traffic signs are poorly illuminated.
R there are ambiguous traffic signs, for
instance near roadworks or on multi-lane
roads.
Traffic signs always have priority over the
Speed Limit Assist display. Speed Limit Assist
cannot detect road and traffic conditions. It is
not a substitute for attentive driving. 202
Driving systemsDriving and parking
Page 209 of 381
the lane markings on the road incorrectly or
not at all.
The system may be impaired or may not func-
tion if:
R there is poor visibility, e.g. due to insuffi-
cient illumination of the road, or due to
snow, rain, fog or spray.
R there is glare, e.g. from oncoming traffic,
the sun, or reflection from other vehicles.
R the windscreen is dirty, misted up or cov-
ered, for instance by a sticker, in the vicinity
of the camera
R several or no lane markings for a single lane
are present.
R the lane markings are worn away, dark or
covered up, e.g. by dirt or snow.
R the distance to the vehicle in front is too
small and the lane markings thus cannot be
detected.
R the lane markings on the road are unclear,
e.g. near roadworks.
R the lane markings change quickly, e.g.
lanes branch off, cross one another or
merge.
R the road is narrow and winding.
Lane Keeping Assist cannot detect road and
traffic conditions. It is not a substitute for
attentive driving. You are responsible for the
vehicle's speed, braking in good time, and
steering correctly. Always adapt your driving
style to suit the prevailing road and weather
conditions. Always pay attention to traffic
conditions and your surroundings. Otherwise,
you may fail to recognise dangers in time,
cause an accident and injure yourself and oth-
ers.
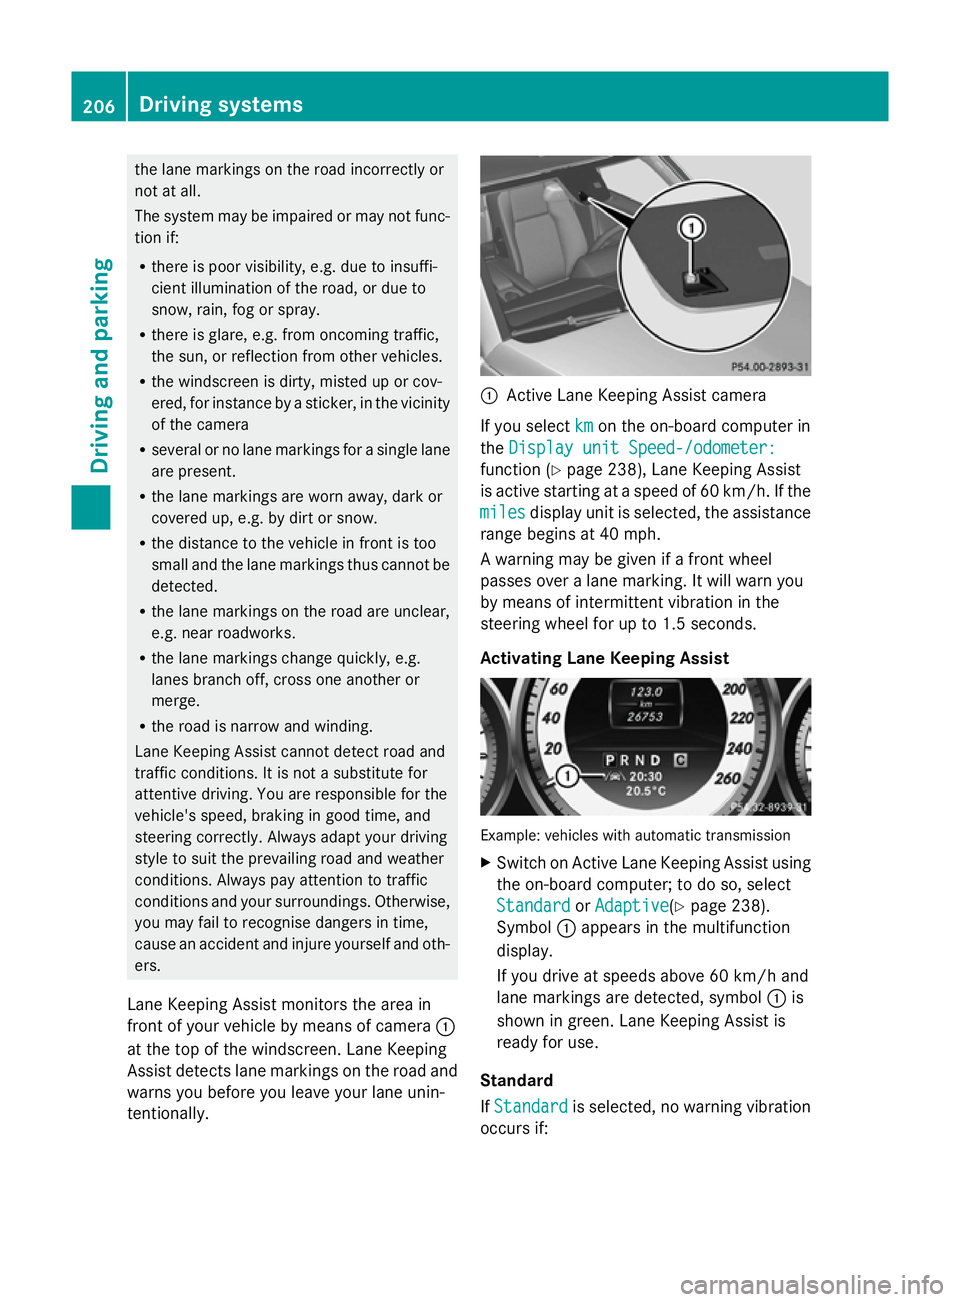
Lane Keeping Assist monitors the area in
front of your vehicle by means of camera :
at the top of the windscreen. Lane Keeping
Assist detects lane markings on the road and
warns you before you leave your lane unin-
tentionally. :
Active Lane Keeping Assist camera
If you select km kmon the on-board computer in
the Display unit Speed-/odometer:
Display unit Speed-/odometer:
function ( Ypage 238), Lane Keeping Assist
is active starting at a speed of 60 km/h. If the
miles
miles display unit is selected, the assistance
range begins at 40 mph.
A warning may be given if a front wheel
passes over a lane marking. It will warn you
by means of intermittent vibration in the
steering wheel for up to 1.5 seconds.
Activating Lane Keeping Assist Example: vehicles with automatic transmission
X
Switch on Active Lane Keeping Assist using
the on-board computer; to do so, select
Standard Standard orAdaptive
Adaptive (Ypage 238).
Symbol :appears in the multifunction
display.
If you drive at speeds above 60 km/h and
lane markings are detected, symbol :is
shown in green. Lane Keeping Assist is
ready for use.
Standard
If Standard Standard is selected, no warning vibration
occurs if: 206
Driving systemsDriving an
d parking
Page 210 of 381
R
you have switched on the turn signals. In
this case, the warnings are suppressed for
a certain period of time.
R a driving safety system intervenes, such as
ABS, BAS or ESP ®
.
Adaptive
If Adaptive
Adaptive is selected, no warning vibration
occurs if:
R you have switched on the turn signals. In
this case, the warnings are suppressed for
a certain period of time.
R a driving safety system intervenes, such as
ABS, BAS or ESP ®
.
R you accelerate hard, e.g. kickdown.
R you brake hard.
R you steer actively, e.g. swerve to avoid an
obstacle or change lane quickly.
R you cut the corner on a sharp bend.
In order that you are warned only when nec-
essary and in good time if you cross the lane
marking, the system recognises certain con-
ditions and warns you accordingly.
The warning vibration occurs earlier if:
R you approach the outer lane marking on a
bend.
R the road has very wide lanes, e.g. a motor-
way.
R the system recognises solid lane markings.
The warning vibration occurs later if:
R the road has narrow lanes.
R you cut the corner on a bend.
Towing a trailer
If you attach a trailer, make sure that you have
correctly established the electrical connec-
tion. This can be accomplished by checking
the trailer lighting. Active Driving Assistance package
General notes The Active Driving Assistance package con-
sists of DISTRONIC PLUS (Y
page 178), Active
Blind Spot Assist (Y page 203) and Active
Lane Keeping Assist (Y page 210).
Active Blind Spot Assist Important safety notes
G
WARNING
Active Blind Spot Assist is only an aid and may
detect vehicles/obstacles incorrectly or not
at all.
The system may be impaired or may not func-
tion if:
R there is poor visibility, e.g. due to snow,
rain, fog or spray.
R the rear and/or front sensors are dirty.
Active Blind Spot Assist may not detect nar-
row vehicles, such as motorcycles or bicycles,
or only detect them too late. It cannot detect
vehicles which are overtaken at a small dis-
tance and then enter the blind spot area.
Active Blind Spot Assist cannot detect road
and traffic conditions. It is not a substitute for
attentive driving. You are responsible for the
vehicle's speed, braking in good time, and
steering correctly. Always adapt your driving
style to suit the prevailing road and weather
conditions. Always pay attention to traffic
conditions and your surroundings. Otherwise,
you may fail to recognise dangers in time,
cause an accident and injure yourself and oth-
ers.
Active Blind Spot Assist uses a radar sensor
system to monitor the area to the sides of
your vehicle which are behind the driver. A
warning display in the exterior mirrors draws
your attention to vehicles detected in the
monitored area. If you then switch on the cor-
responding turn signal to change lane, you
will also receive an optical and audible colli-
sion warning. If a risk of lateral collision is Driving syste
ms
207Driving an d parking Z
Page 213 of 381
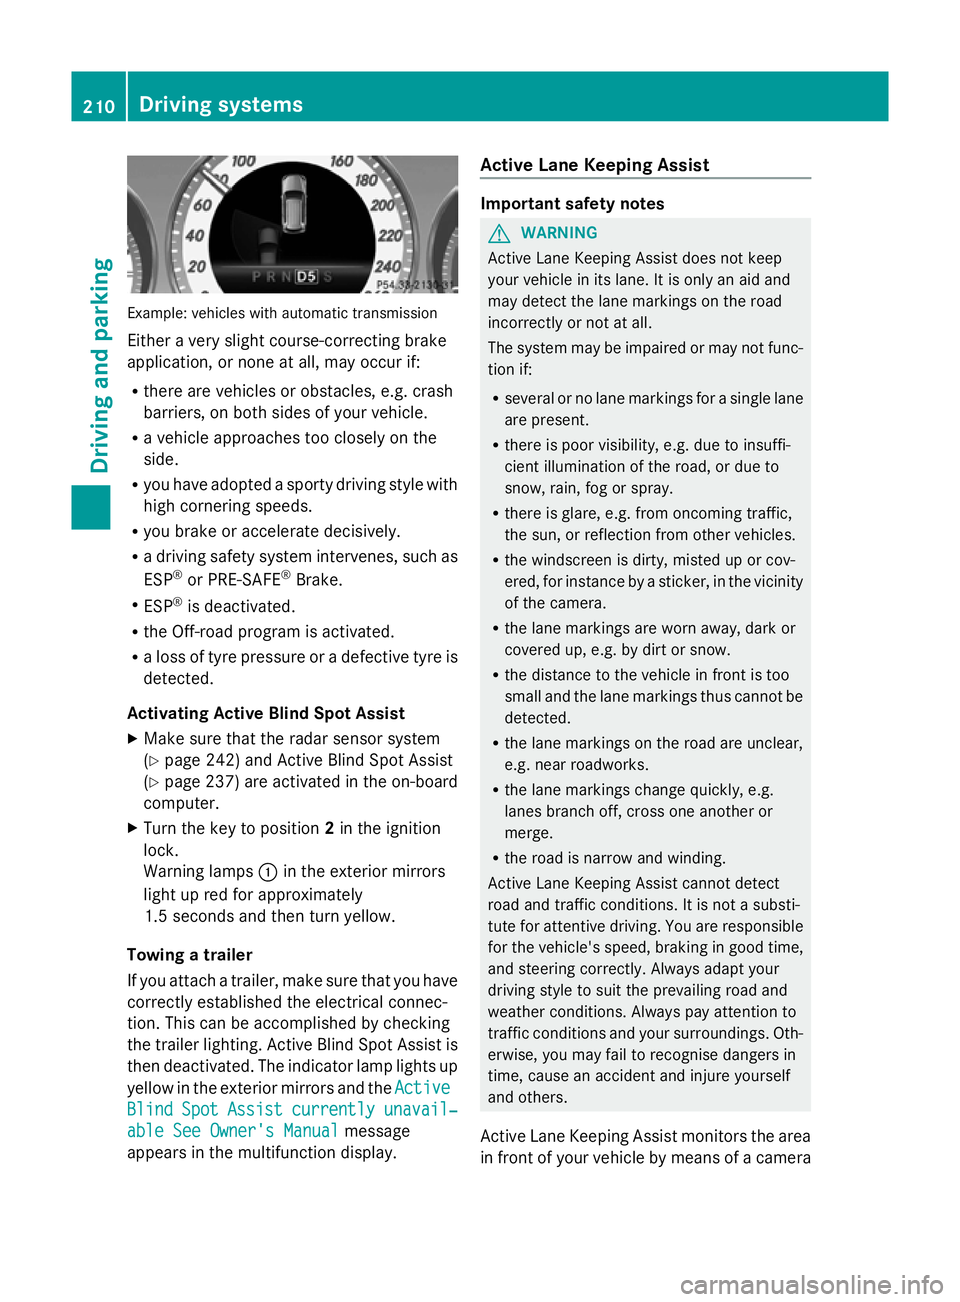
Example: vehicles with automatic transmission
Either a very slight course-correcting brake
application, or none at all, may occur if:
R there are vehicles or obstacles, e.g. crash
barriers, on both sides of your vehicle.
R a vehicle approaches too closely on the
side.
R you have adopted a sporty driving style with
high cornering speeds.
R you brake or accelerate decisively.
R a driving safety system intervenes, such as
ESP ®
or PRE-SAFE ®
Brake.
R ESP ®
is deactivated.
R the Off-road program is activated.
R a loss of tyre pressure or a defective tyre is
detected.
Activating Active Blind Spot Assist
X Make sure that the radar sensor system
(Y page 242) and Active Blind Spot Assist
(Y page 237) are activated in the on-board
computer.
X Turn the key to position 2in the ignition
lock.
Warning lamps :in the exterior mirrors
light up red for approximately
1.5 second s andthen turn yellow.
Towing a trailer
If you attach a trailer, make sure that you have
correctly established the electrical connec-
tion. This can be accomplished by checking
the trailer lighting. Active Blind Spot Assist is
then deactivated. The indicator lamp lights up
yellow in the exterior mirrors and the Active
Active
Blind Blind Spot
SpotAssist
Assist currently
currently unavail‐
unavail‐
able See Owner's Manual
able See Owner's Manual message
appears in the multifunction display. Active Lane Keeping Assist Important safety notes
G
WARNING
Active Lane Keeping Assist does not keep
your vehicle in its lane. It is only an aid and
may detect the lane markings on the road
incorrectly or not at all.
The system may be impaired or may not func-
tion if:
R several or no lane markings for a single lane
are present.
R there is poor visibility, e.g. due to insuffi-
cient illumination of the road, or due to
snow, rain, fog or spray.
R there is glare, e.g. from oncoming traffic,
the sun, or reflection from other vehicles.
R the windscreen is dirty, misted up or cov-
ered, for instance by a sticker, in the vicinity
of the camera.
R the lane markings are worn away, dark or
covered up, e.g. by dirt or snow.
R the distance to the vehicle in front is too
small and the lane markings thus cannot be
detected.
R the lane markings on the road are unclear,
e.g. near roadworks.
R the lane markings change quickly, e.g.
lanes branch off, cross one another or
merge.
R the road is narrow and winding.
Active Lane Keeping Assist cannot detect
road and traffic conditions. It is not a substi-
tute for attentive driving. You are responsible
for the vehicle's speed, braking in good time,
and steering correctly. Always adapt your
driving style to suit the prevailing road and
weather conditions. Always pay attention to
traffic conditions and your surroundings. Oth-
erwise, you may fail to recognise dangers in
time, cause an accident and injure yourself
and others.
Active Lane Keeping Assist monitors the area
in front of your vehicle by means of a camera 210
Driving systemsDriving an
d parking
Page 227 of 381
Useful information
i This Owner's Manual describes all mod-
els, series and optional equipment for your
vehicle that were available at the time of
going to press. National variations are pos-
sible. Note that your vehicle may not be
equipped with all of the functions descri-
bed. This is also the case for systems and
functions relevant to safety.
i Read the information on qualified special-
ist workshops: (Y page 27). Important safety notes
G
WARNING
Only use the on-board computer when road
and traffic conditions permit. You would oth-
erwise be distracted and unable to concen-
trate properly on driving, and could cause an
accident. G
WARNING
No messages will be displayed if either the
instrument cluster or the multifunction dis-
play is inoperative.
As a result, you will not be able to see infor-
mation about your driving conditions, such as
speed, outside temperature, warning and indi-
cator lamps, display messages or system fail-
ures. Driving characteristics may be impaired.
Adjust your driving style and vehicle speed
accordingly.
Contact a qualified specialist workshop
immediately. G
WARNING
The on-board computer only records and dis-
plays malfunctions and warnings from certain
systems. For this reason, you should always
make sure that your vehicle is safe to use. You
could otherwise cause an accident by driving
an unsafe vehicle. G
WARNING
The operating safety of your vehicle could be
impaired if maintenance work is carried out
incorrectly. This could cause you to lose con-
trol of your vehicle and cause an accident.
Moreover, the safety systems may no longer
be able to protect you or others as they are
designed to do.
Always have service work carried out at a
qualified specialist workshop.
Illustration of the instrument cluster
R 4-button multifunction steering wheel, see
(Y page 31)
R 12-button multifunction steering wheel,
see (Y page 33) Displays and operation (4-button mul-
tifunction steering wheel)
Instrument cluster lighting
The lighting in the instrument cluster, in the
displays and the controls in the vehicle inte-
rior can be adjusted using the brightness con-
trol knob.
The brightness control knob is located on the
bottom left of the instrument cluster
(Y page 33).
X Turn the brightness control knob clockwise
or anti-clockwise.
If the light switch is set to Ã,Tor
L, the brightness is dependent upon
the brightness of the ambient light.
i The light sensor in the instrument cluster
automatically controls the brightness of
the multifunction display.
In daylight, the displays in the instrument
cluster are not illuminated. Coolant temperature gauge
The coolant temperature gauge is in the
instrument cluster on the left-hand side. 224
Displays and operation (4-button multifunction steering wheel)On-board computer and displays