winter tires MERCEDES-BENZ GLS 2018 Owners Manual
[x] Cancel search | Manufacturer: MERCEDES-BENZ, Model Year: 2018, Model line: GLS, Model: MERCEDES-BENZ GLS 2018Pages: 398, PDF Size: 5.73 MB
Page 5 of 398
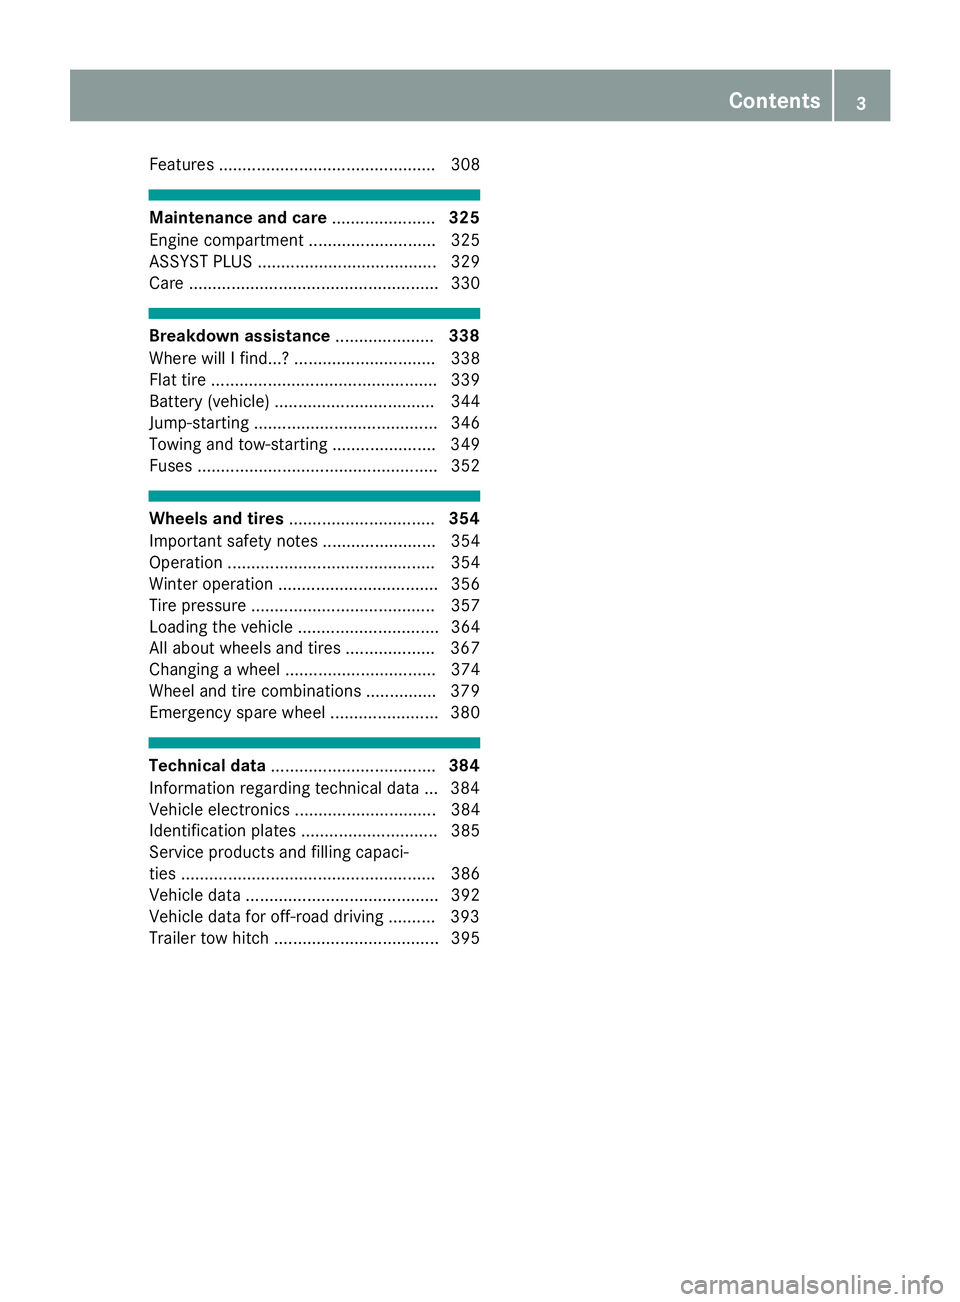
Features .............................................. 308
Maintenance and care ...................... 325
Engine compartment ........................... 325
ASSYST PLUS ...................................... 329
Care ..................................................... 330
Breakdown assistance ..................... 338
Where will I find...? .............................. 338
Flat tire ................................................ 339
Battery (vehicle) .................................. 344
Jump-starting ....................................... 346
Towing and tow-starting ...................... 349
Fuses ................................................... 352
Wheels and tires ............................... 354
Important safety notes ........................ 354
Operation ............................................ 354
Winter operation .................................. 356
Tire pressure ....................................... 357
Loading the vehicle .............................. 364
All about wheels and tires ................... 367
Changing a wheel ................................ 374
Wheel and tire combinations ............... 379
Emergency spare wheel ....................... 380
Technical data ................................... 384
Information regarding technical data ... 384
Vehicle electronics .............................. 384
Identification plates ............................. 385
Service products and filling capaci-
ties ...................................................... 386
Vehicle data ......................................... 392
Vehicle data for off-road driving .......... 393
Trailer tow hitch ................................... 395 Contents 3
Page 22 of 398
Opening/closing .............................. 93
Problem (malfunction) ..................... 96
Resetting ......................................... 94
see Panorama roof with power
tilt/sliding panel
SmartKey
Changing the battery ....................... 80
Changing the programming ............ .7 9
Checking the battery ...................... .8 0
Convenience closing feature ............ 91
Convenience opening feature .......... 90
Dis play message ............................ 278
Door central locking/unlocking ...... .7 7
Important safety notes .................... 77
KEYLESS-GO start function .............. 79
Loss ................................................ .8 1
Mechanical key ................................ 79
Overview .......................................... 77
Positions (ignition lock) ................. 140
Problem (malfunction) ..................... 81
Starting the engine ........................ 142
Smartphone
Starting the engine ........................ 142
SMS
see also Digital Operator's Man-
ual .................................................. 292
Snow chains
Information .................................... 356
Sockets
Center console .............................. 312
General notes ................................ 312
Luggage compartment .................. .3 13
Rear compartment ......................... 312
Sound
Switching on/off ........................... 293
Special seat belt retractor .................. 60
Specialist workshop ............................ 31
Speed, controlling
see Cruise control
Speedometer
Digital ............................................ 237
In the Instru ment
cluster ................. 37
Segments ...................................... 233
Selecting the display unit .............. .2 43
Standing lamps
Display message ............................ 260
Switching on/off ........................... 116 Start/Stop button
Starting the engine ........................ 142
Start/stop function
see ECO start/stop function
Starting (engine) ................................ 141
STEER CONTROL .................................. 75
Steering
Display message ............................ 277
Steering Pilot
Activating/deactivating ................. 241
Display message ............................ 271
Steering wheel
Adjusting (electrically) ................... 109
Adjusting (manually) ...................... 108
Button overview ............................... 38
Buttons (on-board computer) ......... 234
Cleaning ......................................... 336
Important safety notes .................. 108
Steering wheel heating .................. 109
Storing settings (memory func-
tion) ............................................... 113
Steering wheel heating
Problem (malfunction) ................... 109
Switching on/off ........................... 109
Steering wheel paddle shifters ........ 152
Stopwatch (RACETIMER) ................... 246
Stowage areas ................................... 300
Stowage compartments
Armrest (under) ............................. 301
Center console .............................. 302
Center console (rear) ..................... 302
Cup holders ................................... 308
Eyeglasses compartment ............... 302
Glove box ....................................... 301
Important safety information ......... 300
Stowage net ................................... 302
Stowage net ....................................... 302
Summer tires
In winter ........................................ 356
Sun visor ............................................ 310
Suspension setting
AIRMATIC ...................................... 188
AMG adaptive sport suspension
system ........................................... 191
Suspension tuning
SETUP (on-board computer,
Mercedes-AMG vehicles) ............... 24620
Index
Page 24 of 398
Average weight of the vehicle
occupants (definition) .................... 372
Bar (definition) ............................... 372
Changing a wheel .......................... 374
Characteristics .............................. 372
Checking ........................................ 354
Curb weight (definition) ................. 373
Definition of terms ......................... 372
Direction of rotation ...................... 375
Display message ............................ 273
Distribution of the vehicle occu-
pants (definition) ............................ 374
DOT (Department of Transporta-
tion) (definition) ............................. 372
DOT, Tire Identification Number
(TIN) ............................................... 371
GAWR (Gross Axle Weight Rating)
(definition) ..................................... 372
GTW (Gross Trailer Weight) (defi-
nition) ............................................ 373
GVW (Gross Vehicle Weight) (def-
inition) ........................................... 373
GVWR (Gross Vehicle Weight Rat-
ing) (definition) .............................. 373
Important safety notes .................. 354
Increased vehicle weight due to
optional equipment (definition) ...... 372
Information on driving .................... 354
Kilopascal (kPa) (definition) ........... 373
Labeling (overview) ........................ 369
Load bearing index (definition) ...... 374
Load index ..................................... 371
Load index (definition) ................... 373
M+S tires ....................................... 356
Maximum load on a tire (defini-
tion) ............................................... 373
Maximum loaded vehicle weight
(definition) ..................................... 373
Maximum permissible tire pres-
sure (definition) ............................. 373
Maximum tire load ......................... 371
Maximum tire load (definition) ....... 373
MOExtended tires .......................... 356
Optional equipment weight (defi-
nition) ............................................ 374
PSI (pounds per square inch) (de f-
i
nition) ........................................... 373
Replacing ....................................... 374 Service life ..................................... 355
Sidewall (definition) ....................... 374
Snow chains .................................. 356
Speed rating (definition) ................ 373
Storing ........................................... 375
Structure and characteristics
(definition) ..................................... 372
Summer tires in winter .................. 356
Temperature .................................. 368
TIN (Tire Identification Number)
(definition) ..................................... 374
Tire bead (definition) ...................... 373
Tire pressure (definition) ................ 373
Tire pressures (recommended) ...... 372
Tire size (data) ............................... 379
Tire size designation, load-bearing
capacity, speed rating .................... 369
Tire tread ....................................... 355
Tire tread (definition) ..................... 373
Total load limit (definition) ............. 374
Traction ......................................... 368
Traction (definition) ....................... 374
Tread wear ..................................... 368
TWR (permissible trailer drawbar
noseweight) (definition) ................. 374
Uniform Tire Quality Grading
Standards ...................................... 367
Uniform Tire Quality Grading
Standards (definition) .................... 372
Wear indicator (definition) ............. 374
Wheel and tire combination ........... 379
Wheel rim (definition) .................... 372
see Flat tire
Tool
see Vehicle tool kit
Top Tether ............................................ 63
Tow-starting
Emergency engine starting ............ 352
Important safety notes .................. 349
Towing a trailer
Axle load, permissible .................... 395
Cleaning the trailer tow hitch ......... 335
Coupling up a trailer ...................... 227
Decoupling a trailer ....................... 229
Driving tips .................................... 225
Important safety notes .................. 224
Installing the ball coupling ............. 226
Lights displ ay me ssage .................. 26022
Index
Page 27 of 398
Rear window wiper ........................ 12 3
Replacin g th e wiper blade s ............ 123
Switching on/off ........................... 122
Winter driving
Slippery road surfaces ................... 169
Winter operation
Overview ........................................ 356
Radiator cover ............................... 326
Winter tires
M+S tires ....................................... 356
Wiper blades
Cleaning ......................................... 333
Replacing ....................................... 123
Replacing (rear window) ................ 124
Replacing (windshield) ................... 123
Wooden trim (cleaning instruc-
tions) .................................................. 336
Workshop
see Qualified specialist workshop
Z ZONE function
Switching on/off ........................... 133 Index 25
Page 68 of 398
Never leave animals unattended in the vehi-
cle. Always secure animals properly during
the journey, e.g. use a suitable animal trans-
port box.
Driving safety systems
Overview of driving safety systems In this section, you will find information about
the following driving safety systems: R
ABS ( A nti-lock B raking S ystem)
( Y
page 66)R
BAS ( B rake A ssist S ystem) ( Y
page 67)R
Active Brake Assist ( Y
page 67)R
ESP ®
( E lectronic S tability P rogram)
( Y
page 70)R
EBD ( E lectronic B rake force D istribution)
( Y
page 72)R
ADAPTIVE BRAKE ( Y
page 72)R
Active Brake Assist with cross-traffic function
( Y
page 72)R
Steering Pilot STEER CONTROL
( Y
page 75)
Important safety notes If you fail to adapt your driving style or if you are
inattentive, the driving safety systems can nei-
ther reduce the risk of an accident nor override
the laws of physics. Driving safety systems are
merely aids designed to assist driving. You are
responsible for maintaining the distance to the
vehicle in front, for vehicle speed, for braking in
good time, and for staying in lane. Always adapt
your driving style to suit the prevailing road and
weather conditions and maintain a safe distance
from the vehicle in front. Drive carefully.
The driving safety systems described only work
as effectively as possible when there is ade-
quate contact between the tires and the road
surface. Pay particular attention to the informa-
tion regarding tires, recommended minimum
tire tread depths etc. in the "Wheels and tires"
section ( Y
page 354).
In wintry driving conditions, always use winter
tires (M+S tires) and if necessary, snow chains.
Only in this way will the driving safety systems
described in this section work as effectively as
possible. ABS (Anti-lock Braking System)
General information ABS regulates brake pressure in such a way that
the wheels do not lock when you brake. This
allows you to continue steering the vehicle when
braking.
The �% ABS warning lamp in the instrument
cluster lights up when the ignition is switched
on. It goes out when the engine is running.
ABS works from a speed of about 5 mph
(8 km/h), regardless of road-surface conditions.
ABS works on slippery surfaces, even when you
only brake gently.
Important safety notes
i Observe the "Important safety notes" sec-
tion ( Y
page 66).
G WARNING
If ABS is faulty, the wheels could lock when
braking. The steerability and braking charac-
teristics may be severely impaired. Addition-
ally, further driving safety systems are deac-
tivated. There is an increased danger of skid-
ding and accidents.
Drive on carefully. Have ABS checked imme-
diately at a qualified specialist workshop.
When ABS is malfunctioning, other systems,
including driving safety systems, will also
become inoperative. Observe the information
on the ABS warning lamp ( Y
page 282) and dis-
play messages which may be shown in the
instrument cluster ( Y
page 249).
Braking X
If ABS intervenes: continue to depress the
brake pedal vigorously until the braking sit-
uation is over. X
To make a full brake application: depress
the brake pedal with full force.
If ABS intervenes when braking, you will feel a
pulsing in the brake pedal.
The pulsating brake pedal can be an indication
of hazardous road conditions, and functions as a
reminder to take extra care while driving.66
Driving safety systems
Safety
Page 220 of 398
When Adaptive is selected, no warning vibra-
tion occurs if: R
you switch on the turn signals. In this event,
the warnings are suppressed for a certain
period of time R
a driving safety system intervenes, e.g.
ABS, BAS or ESP ®
R
you accelerate hard, e.g. kickdown R
you brake hard R
you steer actively, e.g. swerve to avoid an
obstacle or change lanes quickly R
you cut the corner on a sharp bend
Towing a trailer When you attach a trailer, make sure you have
correctly established the electrical connection.
This can be accomplished by checking the trailer
lighting. Lane-correcting brake application does
not take place when towing a trailer. Active Lane
Keeping Assist is not activated and the lines in
the assistance graphic are gray.
Off-road driving systems
4MATIC (permanent four-wheel drive) 4MATIC ensures that all four wheels are perma-
nently driven. Together with ESP ®
and 4ETS, it
improves the traction of your vehicle whenever
a drive wheel spins due to insufficient grip.
If you fail to adapt your driving style, 4MATIC can
neither reduce the risk of accident nor override
the laws of physics. 4MATIC cannot take
account of road, weather and traffic conditions.
4MATIC is only an aid. You are responsible for
the distance to the vehicle in front, for vehicle
speed, for braking in good time and for staying in
your lane.
! Never tow the vehicle with one axle raised.
This may damage the transfer case. Damage
of this sort is not covered by the Mercedes-
Benz Limited Warranty. All wheels must
remain either on the ground or be fully raised.
Observe the instructions for towing the vehi-
cle with all wheels in full contact with the
ground.
! A function or performance test should only
be carried out on a two-axle dynamometer.
Before you operate the vehicle on such a
dynamometer, please consult a qualified workshop. You could otherwise damage the
drive train or the brake system.
i In wintry driving conditions, the maximum
effect of 4MATIC can only be achieved if you
use winter tires (M+S tires), with snow chains
if necessary.
Further information about "Driving off-road"
( Y
page 170).
DSR (Downhill Speed Regulation) General notes DSR is an aid to assist you when driving down-
hill. It keeps the speed of travel at the speed
selected on the on-board computer. The steeper
the downhill gradient, the greater the DSR brak-
ing effect on the vehicle. When driving on flat
stretches of road or on an uphill gradient, the
DSR braking effect is minimal or nonexistent.
DSR controls the vehicle’s speed when it is acti-
vated and the transmission is in position D , R or
N . You can drive at a higher or a lower speed
than that set on the on-board computer at any
time by accelerating or braking.
Important safety notes
G WARNING
If the speed driven and the set speed deviate
and you activate DSR on a slippery road sur-
face, the wheels may lose traction. There is an
increased danger of skidding and accidents.
Before switching DSR on, please take into
consideration the road surface and the differ-
ence between driving speed and the set
speed.
If you fail to adapt your driving style, DSR can
neither reduce the risk of accident nor override
the laws of physics. DSR cannot take account of
road, weather and traffic conditions. DSR is only
an aid. You are responsible for the distance to
the vehicle in front, for vehicle speed, for brak-
ing in good time and for staying in your lane.
You are always responsible for keeping control
of the vehicle and for assessing whether the
downhill gradient can be managed. DSR may not
always be able to keep to the set speed, depend-
ing on road surface and tire conditions. Select a
set speed suitable for the prevailing conditions
and when necessary, apply the brakes manually.218
Driving systems
Driving and parking
Page 333 of 398
To avoid damage to the vehicle, deactivate
Distance Pilot DISTRONIC and the HOLD
function in the following or similar situations: R
when towing the vehicle R
in the car wash
! Never clean your vehicle in a Touchless
Automatic Car Wash as these use special
cleaning agents. These cleaning agents can
damage the paintwork or plastic parts.
! Make sure that: R
the side windows and the sliding sunroof
are fully closed. R
that the blower of the ventilation/heating
system is switched off (OFF button has
been pressed). R
the windshield wiper switch is at position
�Z .
The vehicle may otherwise be damaged.
! In car washes with a towing mechanism,
make sure that the automatic transmission is
in transmission position �\\ ; otherwise, the
vehicle could be damaged. R
Vehicles with a SmartKey:
Do not remove the SmartKey from the igni-
tion lock. Do not open the driver's door or
front-passenger door when the engine is
switched off. Otherwise, the automatic
transmission selects park position �] auto-
matically and locks the wheels. You can
prevent this by shifting the automatic trans-
mission to �\\ beforehand.R
Vehicles with KEYLESS-GO:
Do not open the driver's door or front-
passenger door when the engine is
switched off. Otherwise, the automatic
transmission selects park position �] auto-
matically and locks the wheels.
Observe the following to make sure that the
automatic transmission stays in position �\\ :X
Make sure the vehicle is stationary and the
ignition is switched off. X
Turn the SmartKey to position in the ignition
lock �H ( Y
page 140).
Use the SmartKey instead of the Start/Stop
button on vehicles with KEYLESS-GO. X
Depress and hold the brake pedal. X
Shift the automatic transmission to position
�\\ . X
Release the brake pedal. X
Release the electric parking brake. X
Switch off the ignition and leave the SmartKey
in the ignition lock.
You can wash the vehicle in an automatic car
wash from the very start.
If the vehicle is very dirty, pre-wash it before
cleaning it in an automatic car wash.
After using an automatic car wash, wipe off wax
from the windshield and the wiper blades. This
will prevent smears and reduce wiping noises
caused by residue on t he windshield.
Washing by hand In some countries, washing by hand is only
allowed at specially equipped washing bays.
Observe the legal requirements in all countries
concerned. X
Do not use hot water and do not wash the
vehicle in direct sunlight. X
Use a soft sponge to clean. X
Use a mild cleaning agent, such as a car
shampoo approved by Mercedes-Benz. X
Thoroughly hose down the vehicle with a gen-
tle jet of water. X
Do not point the water jet directly towards the
air inlets. X
Use plenty of water and rinse out the sponge
frequently. X
Rinse the vehicle with clean water and dry
thoroughly with a chamois. X
Do not let the cleaning agent dry on the paint-
work.
When using the vehicle in winter, remove all
traces of road salt deposits carefully and as
soon as possible.
Power washers
G WARNING
The water jet from a circular jet nozzle (dirt
blasters) can cause invisible exterior damage
to the tires or chassis components. Compo-
nents damaged in this way may fail unexpect-
edly. There is a risk of an accident.
Do not use power washers with circular jet
nozzles to clean the vehicle. Have damaged
tires or chassis components replaced imme-
diately. Care 331
Maintenance and care Z
Page 358 of 398
MOExtended tires (tires with run-flat
properties) With MOExtended tires (tires with run flat char-
acteristics), you can continue to drive your vehi-
cle even if there is a total loss of pressure in one
or more tires.
MOExtended tires may only be used in conjunc-
tion with an active tire pressure loss warning
system or with an active tire pressure monitor
and on wheels specifically tested by Mercedes-
Benz.
Notes on driving with MOExtended tires with a
flat tire ( Y
page 340).
i Vehicles equipped with MOExtended tires
are not equipped with a TIREFIT kit at the fac-
tory. It is therefore recommended that you
additionally equip your vehicle with a TIREFIT
kit if you mount tires that do not feature run-
flat properties, e.g. winter tires. A TIREFIT kit
may be obtained from a qualified specialist
workshop.
Winter operation
General notes Have your vehicle winter-proofed at a qualified
specialist workshop at the onset of winter.
Observe the notes in the "Changing a wheel"
section ( Y
page 374).
Driving with summer tires At temperatures below 45 ‡ (+7 †), the elas-
ticity of summer tires and therefore also the
traction and braking capability are reduced con-
siderably. Change the tires on your vehicle to
M+S tires. Using summer tires at very cold tem-
peratures could cause cracks to form, thereby
damaging the tires permanently. Mercedes-
Benz cannot accept responsibility for this type
of damage.
G WARNING
Damaged tires can cause tire inflation pres-
sure loss. As a result, you could lose control of
your vehicle. There is a risk of accident.
Check the tires regularly for signs of damage
and replace any damaged tires immediately. M+S tires
G WARNING
M+S tires with a tire tread depth of less than
�
Page 382 of 398
Notes on the vehicle equipment – always equip
the vehicle: R
with tires of the same size on a given axle (left
and right) R
with the same type of tires at a given time
(summer tires, winter tires, MOExtended
tires)
i Vehicles equipped with MOExtended tires
are not equipped with a TIREFIT kit at the fac-
tory. It is therefore recommended that you
additionally equip your vehicle with a TIREFIT
kit if you mount tires that do not feature run-
flat properties, e.g. winter tires. A TIREFIT kit
may be obtained from a qualified specialist
workshop.
Emergency spare wheel
Important safety notes
G WARNING
The wheel or tire size as well as the tire type of
the spare wheel or emergency spare wheel
and the wheel to be replaced may differ.
Mounting an emergency spare wheel may
severely impair the driving characteristics.
There is a risk of an accident.
To avoid hazardous situations: R
adapt your driving style accordingly and
drive carefully. R
never mount more than one spare wheel or
emergency spare wheel that differs in size. R
only use a spare wheel or emergency spare
wheel of a different size briefly. R
do not switch ESP ®
off.R
have a spare wheel or emergency spare
wheel of a different size replaced at the
nearest qualified specialist workshop.
Observe that the wheel and tire dimensions
as well as the tire type must be correct.
! Mercedes-AMG vehicles with
"Minispare" emergency spare wheel: only
use the "Minispare" emergency spare wheel
on the rear axle . If you mount the
"Minispare" emergency spare wheel on the
front axle, this could result in damage to the
brake system. If a tire on the front axle is defective, an intact
wheel from the rear axle must first be
replaced with the "Minispare" emergency
spare wheel. The damaged wheel on the front
axle can then be replaced by the undamaged
wheel from the rear axle.
Make sure to note the placard on the
"Minispare" emergency spare wheel.
When using an emergency spare wheel or spare
wheel of a different size, you must not exceed
the maximum speed of 50 mph (80 km/h).
You should regularly check the pressure of the
emergency spare wheel, particularly prior to
long trips, and correct the pressure as neces-
sary ( Y
page 357). The value on the wheel is
valid.
Snow chains must not be mounted on emer-
gency spare wheels.
General notes Information regarding permitted emergency
spare wheels can be found at an authorized
Mercedes-Benz Center.
Mounting the emergency spare wheel is descri-
bed under "Mounting a wheel" ( Y
page 375).
An emergency spare wheel may also be moun-
ted against the direction of rotation. Observe
the time restriction on use as well as the speed
limitation specified on the emergency spare
wheel.
Replace the tires after six years at the latest,
regardless of wear. This also applies to the
emergency spare wheel.
When you are driving with the collapsible spare
wheel mounted, the tire pressure loss warning
system or the tire pressure monitor cannot func-
tion reliably. Only restart the tire pressure loss
warning system or tire pressure monitor when
the defective wheel has been replaced with a
new wheel.
Vehicles with tire pressure monitor: after
mounting an emergency spare wheel, the sys-
tem may still display the tire pressure of the
removed wheel for a few minutes. The value dis-
played for the mounted emergency spare wheel
is not the same as the current tire pressure of
the emergency spare wheel.380
Emergency spare wheel
Wheels and tires