bluetooth MERCEDES-BENZ GLS-Class SUV 2017 X166 Owner's Manual
[x] Cancel search | Manufacturer: MERCEDES-BENZ, Model Year: 2017, Model line: GLS-Class SUV, Model: MERCEDES-BENZ GLS-Class SUV 2017 X166Pages: 390, PDF Size: 9.71 MB
Page 2 of 390
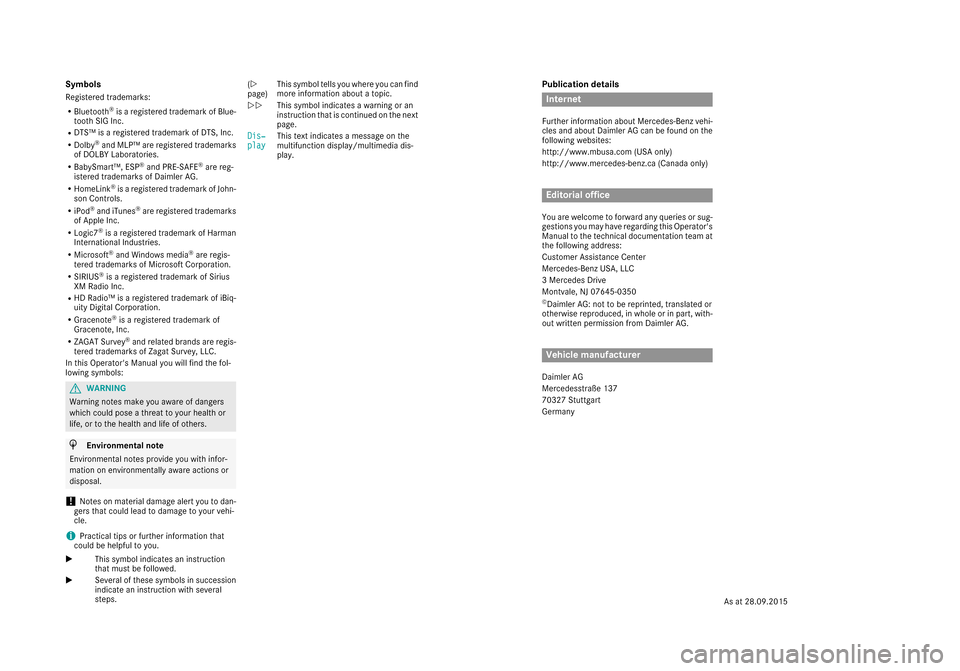
Publication details
Internet
Further information about Mercedes-Benz vehi-
cles and about Daimler AG can be found on the
following websites:
http://www.mbusa.com (USA only)
http://www.mercedes-benz.ca (Canada only)
Editorial office
You are welcome to forward any queries or sug-
gestions you may have regarding this Operator's
Manual to the technical documentation team at
the following address:
Customer Assistance Center
Mercedes-Benz USA, LLC
3 Mercedes Drive
Montvale, NJ 07645-0350
©Daimler AG: not to be reprinted, translated or
otherwise reproduced, in whole or in part, with- out written permission from Daimler AG.
Vehicle manufacturer
Daimler AG
Mercedesstraße 137
70327 Stuttgart
Germany
Symbols
Registered trademarks:
RBluetooth®is a registered trademark of Blue-
tooth SIG Inc.
RDTS™ is a registered trademark of DTS, Inc.
RDolby®and MLP™ are registered trademarks
of DOLBY Laboratories.
RBabySmart™, ESP®and PRE-SAFE®are reg-
istered trademarks of Daimler AG.
RHomeLink®is a registered trademark of John-
son Controls.
RiPod®and iTunes®are registered trademarks
of Apple Inc.
RLogic7®is a registered trademark of Harman
International Industries.
RMicrosoft®and Windows media®are regis-
tered trademarks of Microsoft Corporation.
RSIRIUS®is a registered trademark of Sirius
XM Radio Inc.
RHD Radio™ is a registered trademark of iBiq-
uity Digital Corporation.
RGracenote®is a registered trademark of
Gracenote, Inc.
RZAGAT Survey®and related brands are regis-
tered trademarks of Zagat Survey, LLC.
In this Operator's Manual you will find the fol-
lowing symbols:
GWARNING
Warning notes make you aware of dangers
which could pose a threat to your health or
life, or to the health and life of others.
HEnvironmental note
Environmental notes provide you with infor-
mation on environmentally aware actions or
disposal.
!Notes on material damage alert you to dan-
gers that could lead to damage to your vehi-
cle.
iPractical tips or further information that
could be helpful to you.
X This symbol indicates an instruction
that must be followed.
X Several of these symbols in succession
indicate an instruction with several
steps. (Y
page)
This symbol tells you where you can find
more information about a topic.
YY This symbol indicates a warning or an
instruction that is continued on the next
page.
Dis‐
playThis text indicates a message on the
multifunction display/multimedia dis-
play.
As at 28.09.2015
Page 8 of 390
Axle load, permissible (trailer tow-
ing) ...................................................... 387
B
Back button ...................................... .288
Bag hook ............................................ 299
Ball coupling
Installing ........................................ 223
Removing ....................................... 227
BAS (Brake Assist System) ................. 64
Battery (SmartKey)
Checking .......................................... 77
Important safety notes .................... 77
Replacing ......................................... 77
Battery (vehicle)
Charging ........................................ 338
Display message ............................ 258
Important safety notes .................. 336
Jump starting ................................. 338
Overview ........................................ 336
Belt
see Seat belts
Blind Spot Assist
Activating/deactivating ................. 238
Display message ............................ 265
Notes/function .............................. 207
Trailer towing ................................. 209
see Active Blind Spot Assist
Blootooth
®
Connecting a different mobile
phone ............................................ 292
BlueTEC
Adding DEF ....................................1 56
BlueTEC (DEF) ....................................3 81
Bluetooth
®
Searching for a mobile phone ........2 91
see also Digital Operator's Man-
ual ..................................................2 87
Telephony ...................................... 290
Brake Assist
see BAS (Brake Assist System)
Brake fluid
Display message ............................ 250
Notes ............................................. 382
Brake force distribution
see EBD (electronic brake force
distribution) Brake lamps
Display message ............................ 256
Brakes
ABS ..................................................6 3
Adaptive Brake Assist ...................... 65
BAS .................................................. 64
Brake fluid (notes) ......................... 382
Display message ............................ 245
High-performance brake system .... 166
Hill start assist ............................... 141
Impo
rtant safety notes .................. 164
Maintenance .................................. 165
Parking brake ................................ 160
Riding tips ...................................... 164
Warning lamp ................................. 276
Breakdown
Where will I find...? ........................ 331
see Flat tire
see Towing away
Brightness control (instrument
cluster lighting) ................................... 34
Bulbs
see Replacing bulbs
C
CaliforniaImportant notice for retail cus-
tomers and lessees .......................... 26
Calling up a malfunction
see Display messages
Car
see Vehicle
Care
360° camera ................................. 328
Car wash ........................................ 324
Carpets .......................................... 330
Display ........................................... 329
Exhaust pipe .................................. 328
Exterior lights ................................ 327
Gear or selector lever .................... 329
Interior ........................................... 329
Matte finish ................................... 326
Notes ............................................. 324
Paint .............................................. 326
Plastic trim .................................... 329
Power washer ................................ 325
Rear view camera .......................... 328
6Index
Page 16 of 390
Locking centrallysee Central locking
Locking verification signal (on-
board computer) .............................. .239
LOW RANGE
Display message ............................ 263
Off-road gear ................................. 219
LOW RANGE off-road gear ................ 219
Low-beam headlamps
Display message ............................ 256
Replacing bulbs .............................1 18
Switching on/off ........................... 113
Lumbar support
Adjusting (on the seat) .................. 103
Luxury head restraints ....................... 97
M
M+S tires............................................ 348
Malfunction message
see Display messages
Matte finish (cleaning instruc-
tions) ..................................................3 26
mbrace
Call priority ....................................3 11
Display message ............................ 250
Downloading destinations
(COMAND) ..................................... 312
Downloading routes ....................... 314
Emergency call .............................. 309
General notes ................................ 308
Geo fencing ................................... 315
Locating a stolen vehicle ...............3 13
MB info call button ........................ 311
Remote fault diagnosis .................. 313
Remote vehicle locking .................. 313
Roadside Assistance button .......... 310
Search & Send ............................... 312
Self-test ......................................... 309
Speed alert .................................... 314
System .......................................... 308
Triggering the vehicle alarm ........... 315
Vehicle remote unlocking .............. 313
Mechanical key
Function/notes ................................ 76
General notes .................................. 76
Inserting .......................................... 76
Locking vehicle ................................ 81 Removing ......................................... 76
Unlocking the driver's door .............. 81
Media Interface
USB port in the armrest of the
center console ............................... 295
see Digital Operator's Manual
Memory card (audio) ......................... 235
Memory function ............................... 110
Mercedes-Benz Intelligent Drive
360°camera .................................. 201
Active Blind Spot Assist ................. 210
Active Lane Keeping Assist ............ 213
ATTENTION ASSIST ........................ 205
Blind Spot Assist ............................ 207
Distance Pilot DISTRONIC ............. 174
Distance Pilot DISTRONIC with
Steering Pilot ................................. 180
General notes ................................ 172
Lane Keeping Assist ...................... 209
Parking Assist PARKTRONIC .......... 190
Parking Pilot .................................. 193
PRE-SAFE
®PLUS (anticipatory
occupant protectio n P
LUS) .............. 56
Rear view camera .......................... 197
Traffic Sign Assist .......................... 206
Message memory (on-board com-
puter) .................................................. 244
Mirror
Vanity mirror (sun visor) ................ 304
Mirror turn signal
Cleaning ......................................... 327
Mirrors
see Exterior mirrors
see Rear-view mirror
see Vanity mirror (in the sun visor)
Mobile phone
Connecting (Bluetooth
®inter-
face) .............................................. 290
Connecting another mobile
phone ............................................ 292
Frequencies ................................... 376
Installation ..................................... 376
Menu (on-board computer) ............ 235
Transmission output (maximum) .... 376
Modifying the programming
(SmartKey) ........................................... 76
MOExtended tires .............................. 332
14Index
Page 237 of 390
XTo select a preset list or station list:press
and briefly hold the 9or: button until
the preset list or station list in the desired
frequency range is shown in the multifunction display.
XTo select a station: briefly press9
or :.
iSIRIUS XM satellite radio functions like a
normal radio.
For more information on radio operation, see
"Satellite radio" in the separate operating
instructions.
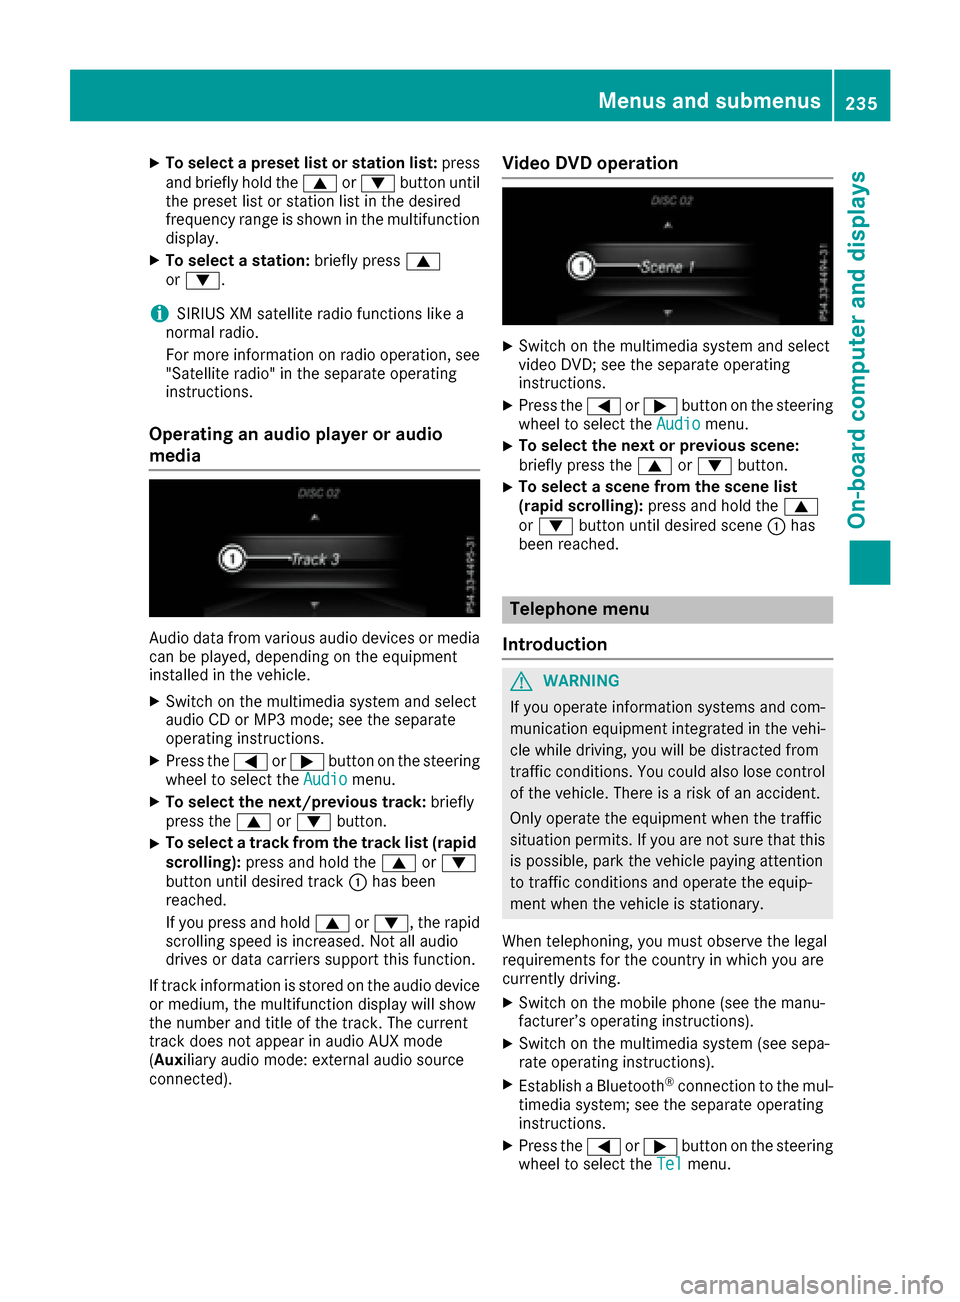
Operating an audio player or audio
media
Audio data from various audio devices or media
can be played, depending on the equipment
installed in the vehicle.
XSwitch on the multimedia system and select
audio CD or MP3 mode; see the separate
operating instructions.
XPress the =or; button on the steering
wheel to select the Audiomenu.
XTo select the next/previous track: briefly
press the 9or: button.
XTo select a track from the track list (rapid
scrolling): press and hold the 9or:
button until desired track :has been
reached.
If you press and hold 9or:, the rapid
scrolling speed is increased. Not all audio
drives or data carriers support this function.
If track information is stored on the audio device
or medium, the multifunction display will show
the number and title of the track. The current
track does not appear in audio AUX mode
( Aux iliary audio mode: external audio source
connected).
Video DVD operation
XSwitch on the multimedia system and select
video DVD; see the separate operating
instructions.
XPress the =or; button on the steering
wheel to select the Audiomenu.
XTo select the next or previous scene:
briefly press the9or: button.
XTo select a scene from the scene list
(rapid scrolling): press and hold the 9
or : button until desired scene :has
been reached.
Telephone menu
Introduction
GWARNING
If you operate information systems and com-
munication equipment integrated in the vehi-
cle while driving, you will be distracted from
traffic conditions. You could also lose control
of the vehicle. There is a risk of an accident.
Only operate the equipment when the traffic
situation permits. If you are not sure that this
is possible, park the vehicle paying attention
to traffic conditions and operate the equip-
ment when the vehicle is stationary.
When telephoning, you must observe the legal
requirements for the country in which you are
currently driving.
XSwitch on the mobile phone (see the manu-
facturer’s operating instructions).
XSwitch on the multimedia system (see sepa-
rate operating instructions).
XEstablish a Bluetooth®connection to the mul-
timedia system; see the separate operating
instructions.
XPress the =or; button on the steering
wheel to select the Telmenu.
Menus and submenus235
On-board computer and displays
Z
Page 292 of 390
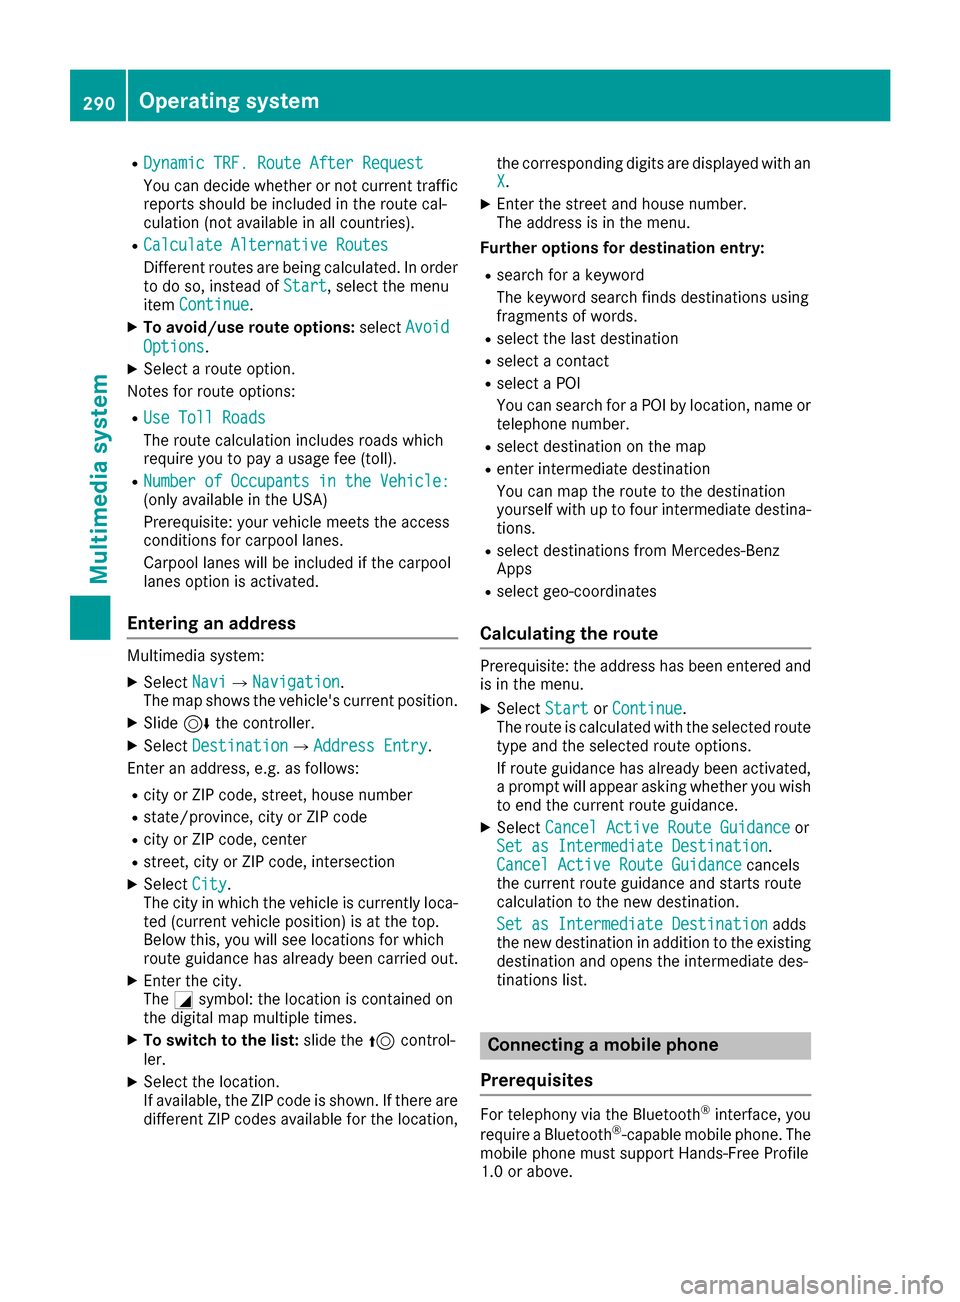
RDynamic TRF. Route After Request
You can decide whether or not current trafficreports should be included in the route cal-
culation (not available in all countries).
RCalculate Alternative Routes
Different routes are being calculated. In order
to do so, instead of Start, select the menu
item Continue.
XTo avoid/use route options: selectAvoid
Options.
XSelect a route option.
Notes for route options:
RUse Toll Roads
The route calculation includes roads which
require you to pay a usage fee (toll).
RNumber of Occupants in the Vehicle:(only available in the USA)
Prerequisite: your vehicle meets the access
conditions for carpool lanes.
Carpool lanes will be included if the carpool
lanes option is activated.
Entering an address
Multimedia system:
XSelect NaviQNavigation.
The map shows the vehicle's current position.
XSlide 6the controller.
XSelect DestinationQAddress Entry.
Enter an address, e.g. as follows:
Rcity or ZIP code, street, house number
Rstate/province, city or ZIP code
Rcity or ZIP code, center
Rstreet, city or ZIP code, intersection
XSelect City.
The city in which the vehicle is currently loca-
ted (current vehicle position) is at the top.
Below this, you will see locations for which
route guidance has already been carried out.
XEnter the city.
The Gsymbol: the location is contained on
the digital map multiple times.
XTo switch to the list: slide the5control-
ler.
XSelect the location.
If available, the ZIP code is shown. If there are
different ZIP codes available for the location, the corresponding digits are displayed with an
X
.
XEnter the street and house number.
The address is in the menu.
Further options for destination entry:
Rsearch for a keyword
The keyword search finds destinations using
fragments of words.
Rselect the last destination
Rselect a contact
Rselect a POI
You can search for a POI by location, name or
telephone number.
Rselect destination on the map
Renter intermediate destination
You can map the route to the destination
yourself with up to four intermediate destina-
tions.
Rselect destinations from Mercedes-Benz
Apps
Rselect geo-coordinates
Calculating the route
Prerequisite: the address has been entered and
is in the menu.
XSelect StartorContinue.
The route is calculated with the selected route
type and the selected route options.
If route guidance has already been activated,
a prompt will appear asking whether you wish
to end the current route guidance.
XSelect Cancel Active Route Guidanceor
Set as Intermediate Destination.
Cancel Active Route Guidancecancels
the current route guidance and starts route
calculation to the new destination.
Set as Intermediate Destination
adds
the new destination in addition to the existing
destination and opens the intermediate des-
tinations list.
Connecting a mobile phone
Prerequisites
For telephony via the Bluetooth®interface, you
require a Bluetooth®-capable mobile phone. The
mobile phone must support Hands-Free Profile
1.0 or above.
290Operating system
Multimedia system
Page 293 of 390
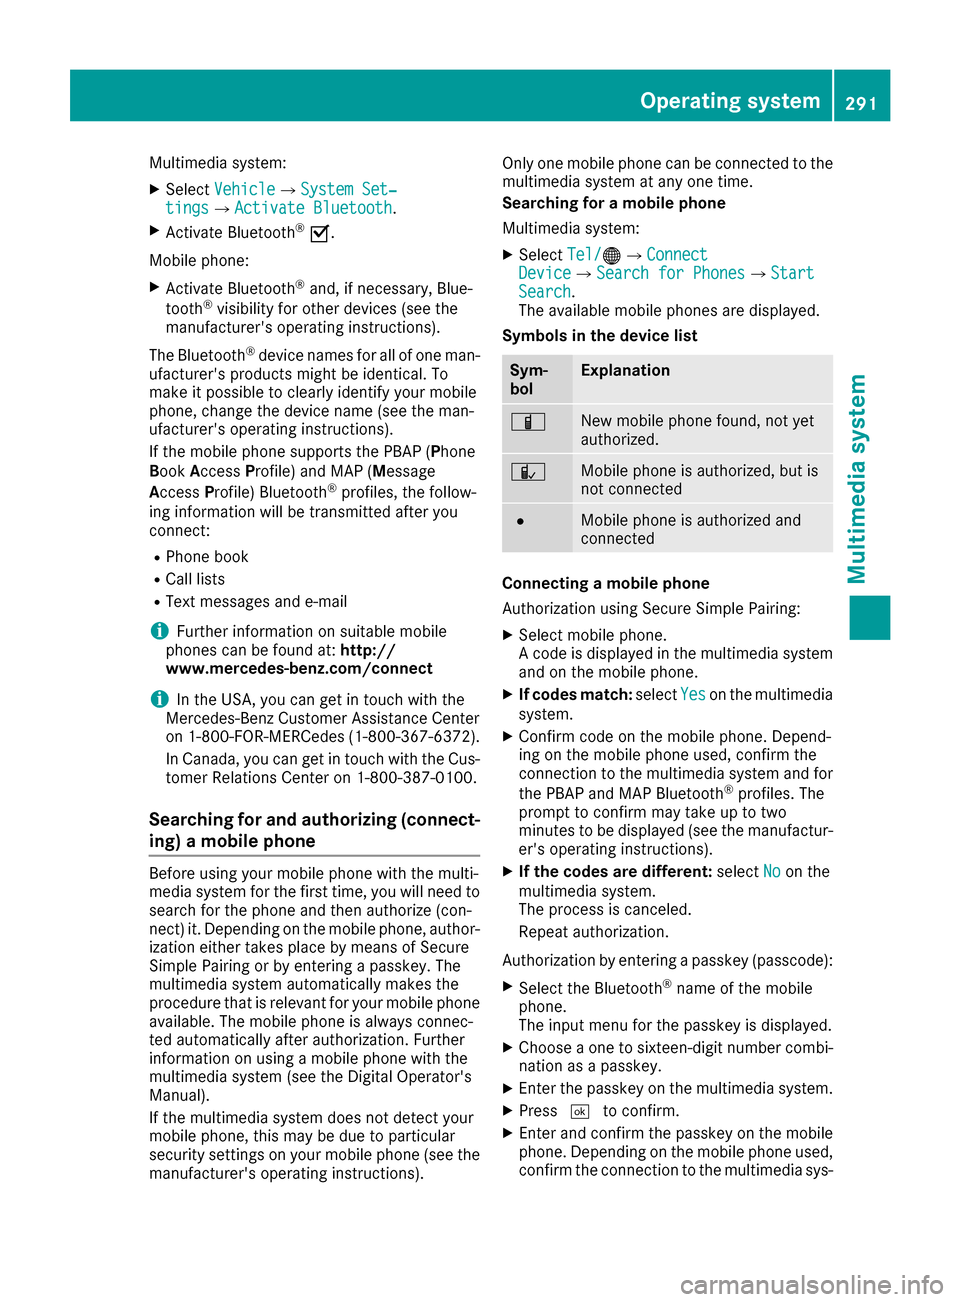
Multimedia system:
XSelectVehicleQSystem Set‐tingsQActivate Bluetooth.
XActivate Bluetooth®O.
Mobile phone:
XActivate Bluetooth®and, if necessary, Blue-
tooth®visibility for other devices (see the
manufacturer's operating instructions).
The Bluetooth
®device names for all of one man-
ufacturer's products might be identical. To
make it possible to clearly identify your mobile
phone, change the device name (see the man-
ufacturer's operating instructions).
If the mobile phone supports the PBAP (Phone
Book Access Profile) and MAP (Message
Access Profile) Bluetooth
®profiles, the follow-
ing information will be transmitted after you
connect:
RPhone book
RCall lists
RText messages and e-mail
iFurther information on suitable mobile
phones can be found at: http://
www.mercedes-benz.com/connect
iIn the USA, you can get in touch with the
Mercedes-Benz Customer Assistance Center
on 1-800-FOR-MERCedes (1-800-367-6372).
In Canada, you can get in touch with the Cus-
tomer Relations Center on 1-800-387-0100.
Searching for and authorizing (connect-
ing) a mobile phone
Before using your mobile phone with the multi-
media system for the first time, you will need to
search for the phone and then authorize (con-
nect) it. Depending on the mobile phone, author- ization either takes place by means of Secure
Simple Pairing or by entering a passkey. The
multimedia system automatically makes the
procedure that is relevant for your mobile phone
available. The mobile phone is always connec-
ted automatically after authorization. Further
information on using a mobile phone with the
multimedia system (see the Digital Operator's
Manual).
If the multimedia system does not detect your
mobile phone, this may be due to particular
security settings on your mobile phone (see the
manufacturer's operating instructions). Only one mobile phone can be connected to the
multimedia system at any one time.
Searching for a mobile phone
Multimedia system:
XSelect
Tel/®QConnectDeviceQSearch for PhonesQStartSearch.
The available mobile phones are displayed.
Symbols in the device list
Sym-
bolExplanation
ÏNew mobile phone found, not yet
authorized.
ÑMobile phone is authorized, but is
not connected
#Mobile phone is authorized and
connected
Connecting a mobile phone
Authorization using Secure Simple Pairing:
XSelect mobile phone.
A code is displayed in the multimedia system
and on the mobile phone.
XIf codes match: selectYeson the multimedia
system.
XConfirm code on the mobile phone. Depend-
ing on the mobile phone used, confirm the
connection to the multimedia system and for
the PBAP and MAP Bluetooth
®profiles. The
prompt to confirm may take up to two
minutes to be displayed (see the manufactur-
er's operating instructions).
XIf the codes are different: selectNoon the
multimedia system.
The process is canceled.
Repeat authorization.
Authorization by entering a passkey (passcode):
XSelect the Bluetooth®name of the mobile
phone.
The input menu for the passkey is displayed.
XChoose a one to sixteen-digit number combi- nation as a passkey.
XEnter the passkey on the multimedia system.
XPress ¬to confirm.
XEnter and confirm the passkey on the mobile
phone. Depending on the mobile phone used,
confirm the connection to the multimedia sys-
Operating system291
Multimedia system
Z
Page 294 of 390
tem and for the PBAP and MAP Bluetooth®
profiles. The prompt to confirm may take up
to two minutes to be displayed (see the man-
ufacturer's operating instructions).
Switching between mobile phones
If you have authorized more than one mobile
phone, you can switch between the individual
phones.
Multimedia system:
XSelect Connect Device.
XSelect a mobile phone from the device list.
Media mode
General notes
If you wish to play external media sources, the
default display must already be turned on. Fur-
ther information on media mode (see the Digital
Operator's Manual).
The following external media sources can be
used:
RApple®devices (e.g. iPhone®)
RUSB devices (e.g. USB stick, MP3 player)
(Ypage 292)
RCD
RDVD (COMAND)
RSD cards
Rvia devices connected by Bluetooth®
iInformation on single CD/DVD drive or DVD
changer (see the Digital Operator's Manual).
Using the device list
Multimedia system:
XSelect MediaQDevices.
The available media sources will be shown.
The #dot indicates the current setting.
XSelect the media source.
Playable files are played.
Inserting/removing an SD card
Important safety notes
GWARNING
SD cards are small parts. They can be swal-
lowed and cause choking. This poses an
increased risk of injury or even fatal injury.
Keep the SD card out of the reach of children. If a SD card is swallowed, seek medical atten-
tion immediately.
!If you are no longer using the SD card, you
should remove it and store it outside the vehi-
cle. High temperatures can damage the card.
Inserting an SD card
The SD card slot is on the control panel.
XInsert the SD card into the SD card slot until
the SD card engages. The side with the con-
tacts must face downwards.
Removing an SD card
XPress the SD card.
The SD card is ejected.
XRemove the SD card.
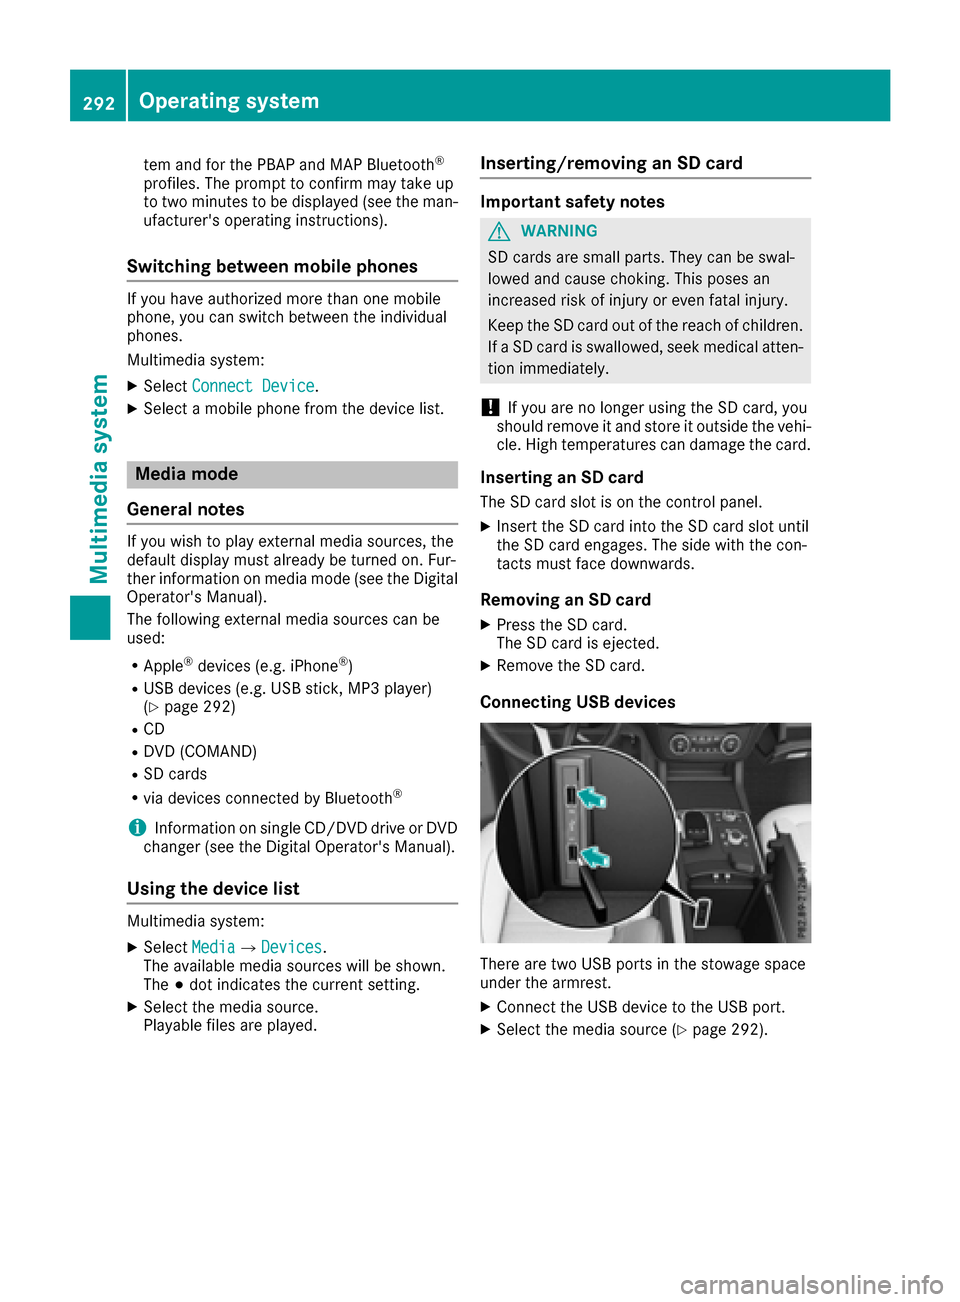
Connecting USB devices
There are two USB ports in the stowage space
under the armrest.
XConnect the USB device to the USB port.
XSelect the media source (Ypage 292).
292Operating system
Multimedia system