ground clearance MERCEDES-BENZ GLS SUV 2016 Owners Manual
[x] Cancel search | Manufacturer: MERCEDES-BENZ, Model Year: 2016, Model line: GLS SUV, Model: MERCEDES-BENZ GLS SUV 2016Pages: 397, PDF Size: 14.21 MB
Page 180 of 397
twigs can gather between the underbody and
the underbody panelling. If these materials
come in contact with hot parts of the exhaust
system, they can catch fire.
In such situations, have the vehicle checked
and repaired immediately at a qualified spe-
cialist workshop. If on continuing your jour-
ney you notice that driving safety is impaired, pull over and stop the vehicle immediately,
paying attention to road and traffic condi-
tions. In such cases, consult a qualified spe-
cialist workshop.
When driving off-road, substances such as sand,
mud and water or water mixed with oil may get
into the brakes. This may lead to a reduction in
braking performance or total brake failure as a
result of increased wear. The braking charac-
teristics will vary depending on the substances
that get into the brakes. Clean the brakes after
driving off-road. If you notice grinding noises or a reduction in braking performance, have the
brake system checked at a qualified specialist
workshop immediately. Adapt your driving style
to the altered braking characteristics.
Driving off-road increases the possibility of dam- age to the vehicle, which may cause assemblies
or systems to fail. Adapt your driving style to the conditions of the terrain. Drive carefully. Have
vehicle damage rectified immediately at a quali-
fied specialist workshop.
Do not shift into transmission position Nwhen
driving off-road. You could lose control of the
vehicle if you attempt to brake the vehicle using
the service brake. If the gradient is too steep for your vehicle, back up in reverse gear.
General notes H
Environmental note
Protection of the environment is of primary
importance. Treat nature with respect.
Observe all prohibiting signs.
Read this section before driving your vehicle off- road. Practise by driving over more gentle off-
road terrain first. The following driving systems are specially
adapted to off-road driving:
R the Offroad drive program (vehicles without
Off-Road Engineering package)
(Y page 228)
R Offroad andOffroad Plus drive programs
(vehicles with Off-Road Engineering package) (Y page 229)
R LOW RANGE offroad gear (vehicles with the
Off-Road Engineering package)
(Y page 230)
R Differential lock (vehicles with the Off-Road
Engineering package) (Y page 230)
R Off-road ABS (Y page 69)
R Off-road 4ETS (Y page 72)
R Off-road ESP ®
(Y page 74)
R AIRMATIC package (vehicle level)
(Y page 196)
R DSR (Downhill Speed Regulation)
(Y page 227)
Observe the following notes:
R Stop the vehicle before driving off-road. If
necessary, select the offroad program
(Y page 229) or shift to the LOW RANGE off-
road gear (Y page 230).
R Select a vehicle level suitable for the off-road
terrain. To avoid damaging the vehicle, ensure
sufficient ground clearance at all times.
R Make sure that items of luggage and loads are
stowed safely and are well secured
(Y page 316).
R Always keep the engine running and in gear
when driving on a downhill gradient. Activate
DSR (Y page 227).
R Drive slowly and evenly, if necessary at walk-
ing pace.
R Ensure that the wheels are in contact with the
ground at all times.
R Drive with extreme care on unknown off-road
routes where visibility is poor. For safety rea-
sons, get out of the vehicle first and survey
the off-road route.
R Look out for obstacles such as rocks, holes,
tree stumps and furrows.
R Take care when turning on an uphill or down-
hill slope or when driving across a slope. The
vehicle could otherwise tip over.
R Always keep the doors, the tailgate and the
sliding sunroof closed while the vehicle is in
motion. Driving
tips
177Driving an d parking Z
Page 182 of 397

R
Drive quickly to overcome the rolling resist-
ance. Otherwise, the vehicle could dig itself
into the sand.
R Drive in the tracks of other vehicles if possi-
ble. Make sure that:
- the tyre ruts are not too deep
- the sand is firm enough
- your vehicle has sufficient ground clear-
ance
Tyre ruts and unpaved roads !
Check that the ruts are not too deep and
that your vehicle has sufficient clearance.
Otherwise, your vehicle could be damaged or bottom out and get stuck.
Observe the following rules when driving along
ruts in off-road terrain or on roads with loose
gravel:
R Select the Offroaddrive program (vehicles
without Off-Road Engineering package)
(Y page 228).
R Select the Offroaddrive program (vehicles
with Off-Road Engineering package)
(Y page 229).
R Select a higher vehicle level.
R Avoid high engine speeds.
R Shift to a lower gear using the left-hand steer-
ing wheel gearshift paddle.
R Drive slowly.
R Where ruts are too deep, drive with the
wheels on one side on the middle section of
turf if possible.
Driving over obstacles !
Obstacles could damage the floor of the
vehicle or components of the chassis. Ask
passengers for guidance when driving over
large obstacles. Any damage to the vehicle
always increases the risk of an accident.
Observe the following rules when driving over
tree stumps, large stones and other obstacles:
R Select the Offroaddrive program (vehicles
without Off-Road Engineering package)
(Y page 228).
R Select the Offroaddrive program (vehicles
with Off-Road Engineering package)
(Y page 229). R
Select LOW RANGE offroad gear (vehicles
with Off-Road Engineering package)
(Y page 230)
R Raise the vehicle level.
R Avoid high engine speeds.
R Shift to a lower gear using the left-hand steer-
ing wheel gearshift paddle.
R Drive very slowly.
R Drive straight over the centre of obstacles. Travelling uphill
Approach/departure angle G
WARNING
If you drive on a steep incline at an angle or
turn on a steep incline, the vehicle could slip
sideways, tip and overturn. There is a risk of
an accident.
When driving on an incline, drive into the line of fall (upwards or downwards in a straight
line) and do not turn.
R Observe the warnings for off-road driving
(Y page 176).
R Follow the line of fall when driving on slopes
and steep inclines.
R Select the Offroaddrive program (vehicles
without Off-Road Engineering package)
(Y page 228).
R Select the Offroaddrive program (vehicles
with Off-Road Engineering package)
(Y page 229).
R Before driving on extreme uphill and downhill
gradients, select the LOW RANGE offroad
gear (vehicles with Off-Road Engineering
package) (Y page 230).
R Drive slowly.
R Accelerate gently and make sure that the
wheels are gripping.
R Avoid high engine speeds, except when driv-
ing on sandy and muddy routes with high driv-
ing resistance.
R Use the left-hand steering wheel gearshift
paddle to shift to a lower gear appropriate to
the gradient.
R Use the left-hand gearshift paddle to shift to a
lower gear on long and steep downhill gradi-
ents. Driving
tips
179Driving an d parking Z
Page 199 of 397
Deactivate the HOLD function (Y
page 196).
Activation conditions You can activate the HOLD function if:
R the vehicle is stationary
R the engine is running or if it has been auto-
matically switched off by the ECO start/stop
function
R the driver's door is closed or if your seat belt
is fastened
R the electric parking brake is released
R the transmission is in position D,Ror N
R Distance Pilot DISTRONIC is deactivated
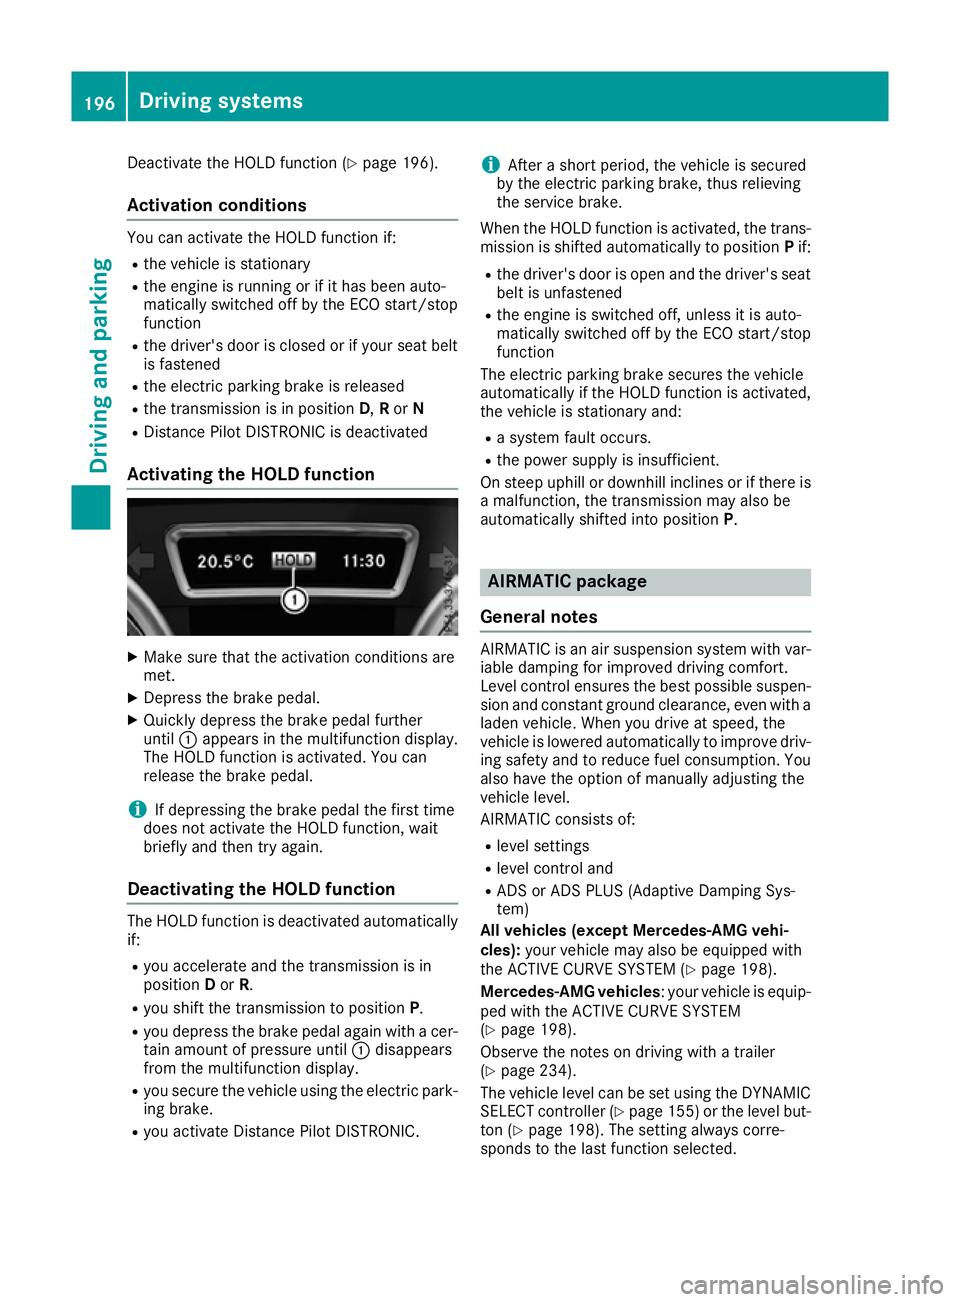
Activating the HOLD function X
Make sure that the activation conditions are
met.
X Depress the brake pedal.
X Quickly depress the brake pedal further
until :appears in the multifunction display.
The HOLD function is activated. You can
release the brake pedal.
i If depressing the brake pedal the first time
does not activate the HOLD function, wait
briefly and then try again.
Deactivating the HOLD function The HOLD function is deactivated automatically
if:
R you accelerate and the transmission is in
position Dor R.
R you shift the transmission to position P.
R you depress the brake pedal again with a cer-
tain amount of pressure until :disappears
from the multifunction display.
R you secure the vehicle using the electric park-
ing brake.
R you activate Distance Pilot DISTRONIC. i
After a short period, the vehicle is secured
by the electric parking brake, thus relieving
the service brake.
When the HOLD function is activated, the trans-
mission is shifted automatically to position Pif:
R the driver's door is open and the driver's seat
belt is unfastened
R the engine is switched off, unless it is auto-
matically switched off by the ECO start/stop
function
The electric parking brake secures the vehicle
automatically if the HOLD function is activated,
the vehicle is stationary and:
R a system fault occurs.
R the power supply is insufficient.
On steep uphill or downhill inclines or if there is
a malfunction, the transmission may also be
automatically shifted into position P. AIRMATIC package
General notes AIRMATIC is an air suspension system with var-
iable damping for improved driving comfort.
Level control ensures the best possible suspen- sion and constant ground clearance, even with a laden vehicle. When you drive at speed, the
vehicle is lowered automatically to improve driv-
ing safety and to reduce fuel consumption. You
also have the option of manually adjusting the
vehicle level.
AIRMATIC consists of:
R level settings
R level control and
R ADS or ADS PLUS (Adaptive Damping Sys-
tem)
All vehicles (except Mercedes-AMG vehi-
cles): your vehicle may also be equipped with
the ACTIVE CURVE SYSTEM (Y page 198).
Mercedes-AMG vehicles : your vehicle is equip-
ped with the ACTIVE CURVE SYSTEM
(Y page 198).
Observe the notes on driving with a trailer
(Y page 234).
The vehicle level can be set using the DYNAMIC
SELECT controller (Y page 155)or the level but-
ton (Y page 198). The setting always corre-
sponds to the last function selected. 196
Driving systemsDriving and parking
Page 242 of 397
Problems with trailer towing
Problem
Possible causes/consequences and
M
MSolutions The displaced ball cou-
pling does not reach the
securely locked position. R
The indicator lamp in the button flashes.
R The Check trailer hitch lock Check trailer hitch lock message appears in the multi-
function display.
X Initiate a new swivelling procedure.
If the ball coupling does not reach the safely engaged position as a
result:
X Start the engine
or
X Pull and hold the button during the whole swivelling procedure.
If the unlocked ball coupling does not reach the safely engaged posi- tion even after several attempts:
X Make sure that there is sufficient ground clearance before continu-
ing the journey.
X Consult a qualified specialist workshop.
As long as the Check trailer hitch lock
Check trailer hitch lock display message is
shown in the multifunction display, no trailer should be attached. Unlocking using the
button in the tailgate:
The ball coupling does
not swivel, even though:
R
the vehicle is station-
ary
R no trailer cable is con-
nected
R the button was briefly
pulled The on-board voltage is too low.
X Start the engine.
If the ball coupling still does not unlock:
X Consult a qualified specialist workshop. Towing a trailer
239Driving and parking Z
Page 278 of 397
Display messages
Possible causes/consequences and
M
MSolutions Ø
Eng. start not pos‐ Eng. start not pos‐
sible in ..km sible in ..km The AdBlue
®
system is malfunctioning. A warning tone also sounds.
X Consult a qualified specialist workshop immediately. Ø
Eng. start not pos‐ Eng. start not pos‐
sible sible The AdBlue
®
system is malfunctioning. A warning tone also sounds.
You can no longer start the engine.
X Consult a qualified specialist workshop immediately. Driving systems
Display messages
Possible causes/consequences and
M
MSolutions À
Attention Assist: Attention Assist:
Take a break! Take a break! Based on certain criteria, ATTENTION ASSIST has detected fatigue or
increasing lapses in concentration on the part of the driver. A warning tone also sounds.
X If necessary, take a break.
During long journeys, take regular breaks in good time so that you get enough rest. À
Attention Assist Attention Assist
inoperative inoperative ATTENTION ASSIST is inoperative.
X Consult a qualified specialist workshop. Á
Please reduce speed Please reduce speed You cannot change the vehicle level.
Possible causes:
R You are driving too fast for the selected vehicle level.
R You are driving too fast with a trailer or the trailer tow hitch socket
is being used, e.g. for a rear-mounted cycle rack.
X Drive more slowly and then select the desired vehicle level again:
R Vehicles with the Off-Road Engineering package (Y page 192)
R Vehicles with the AIRMATIC package (Y page 198)
X Observe the notes on towing a trailer (Y page 234).Á
Compressor is cool‐ Compressor is cool‐
ing ing You have selected a higher vehicle level. The compressor first needs
to cool down because of frequent level changes.
X Drive in a manner appropriate for the current vehicle level.
X Ensure sufficient ground clearance.
X Allow the compressor to cool down.
When the compressor has cooled down, the display message dis-
appears. The vehicle then continues rising to the selected level. Display
messages
275On-board computer and displays Z
Page 279 of 397
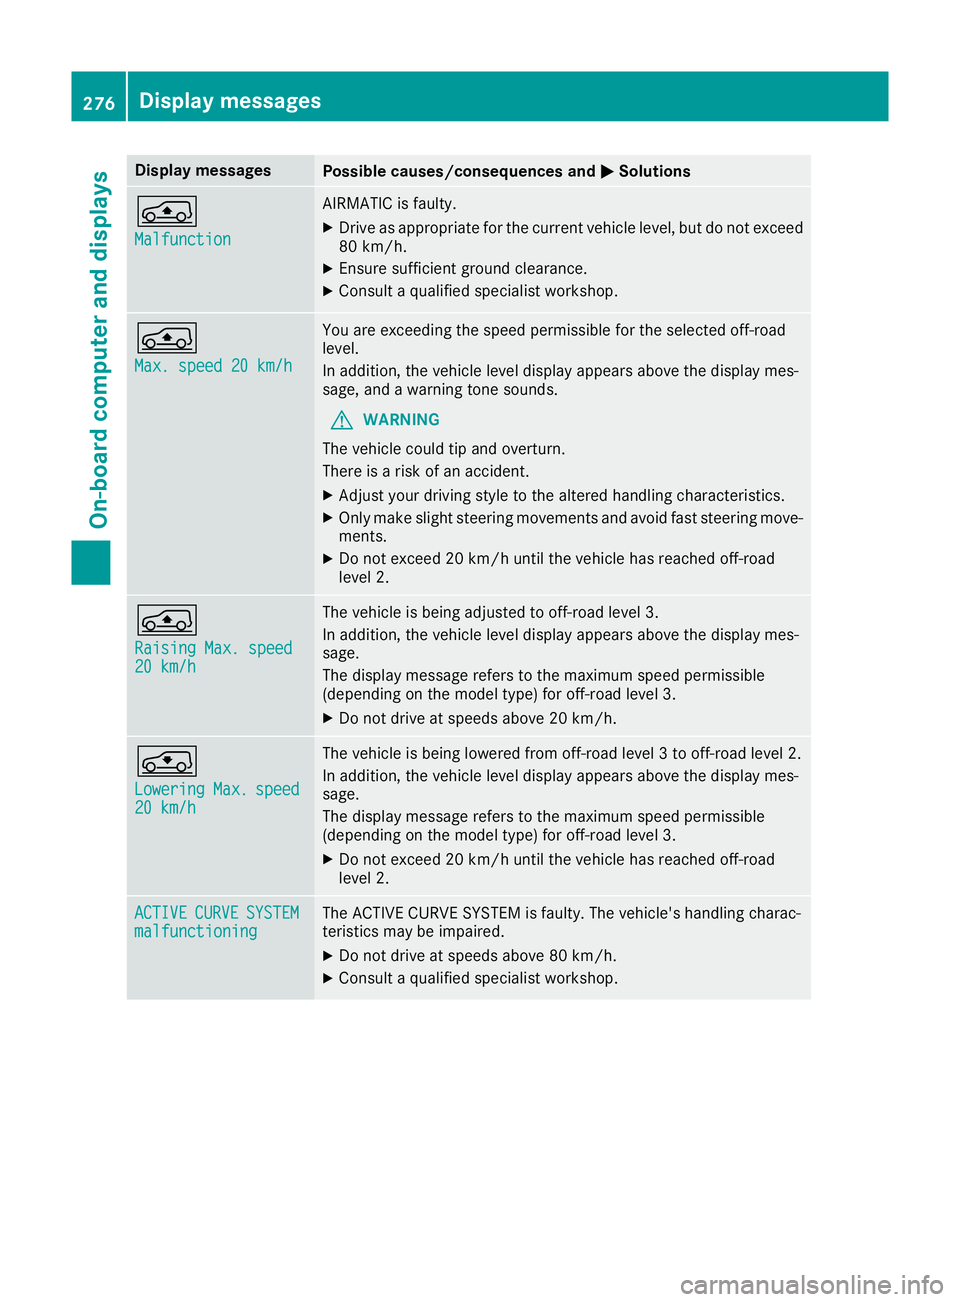
Display messages
Possible causes/consequences and
M
MSolutions Á
Malfunction Malfunction AIRMATIC is faulty.
X Drive as appropriate for the current vehicle level, but do not exceed
80 km/h.
X Ensure sufficient ground clearance.
X Consult a qualified specialist workshop. Á
Max. speed 20 km/h Max. speed 20 km/h You are exceeding the speed permissible for the selected off-road
level.
In addition, the vehicle level display appears above the display mes-
sage, and a warning tone sounds.
G WARNING
The vehicle could tip and overturn.
There is a risk of an accident.
X Adjust your driving style to the altered handling characteristics.
X Only make slight steering movements and avoid fast steering move-
ments.
X Do not exceed 20 km/h until the vehicle has reached off-road
level 2. Á
Raising Raising
Max. speed
Max. speed
20 km/h
20 km/h The vehicle is being adjusted to off-road level 3.
In addition, the vehicle level display appears above the display mes-
sage.
The display message refers to the maximum speed permissible
(depending on the model type) for off-road level 3.
X Do not drive at speeds above 20 km/h. g
Lowering Lowering
Max.
Max.speed
speed
20 km/h
20 km/h The vehicle is being lowered from off-road level 3 to off-road level 2.
In addition, the vehicle level display appears above the display mes-
sage.
The display message refers to the maximum speed permissible
(depending on the model type) for off-road level 3.
X Do not exceed 20 km/h until the vehicle has reached off-road
level 2. ACTIVE ACTIVE
CURVE
CURVESYSTEM
SYSTEM
malfunctioning
malfunctioning The ACTIVE CURVE SYSTEM is faulty. The vehicle's handling charac-
teristics may be impaired.
X Do not drive at speeds above 80 km/h.
X Consult a qualified specialist workshop. 276
Display
messagesOn-board computer and displays
Page 291 of 397
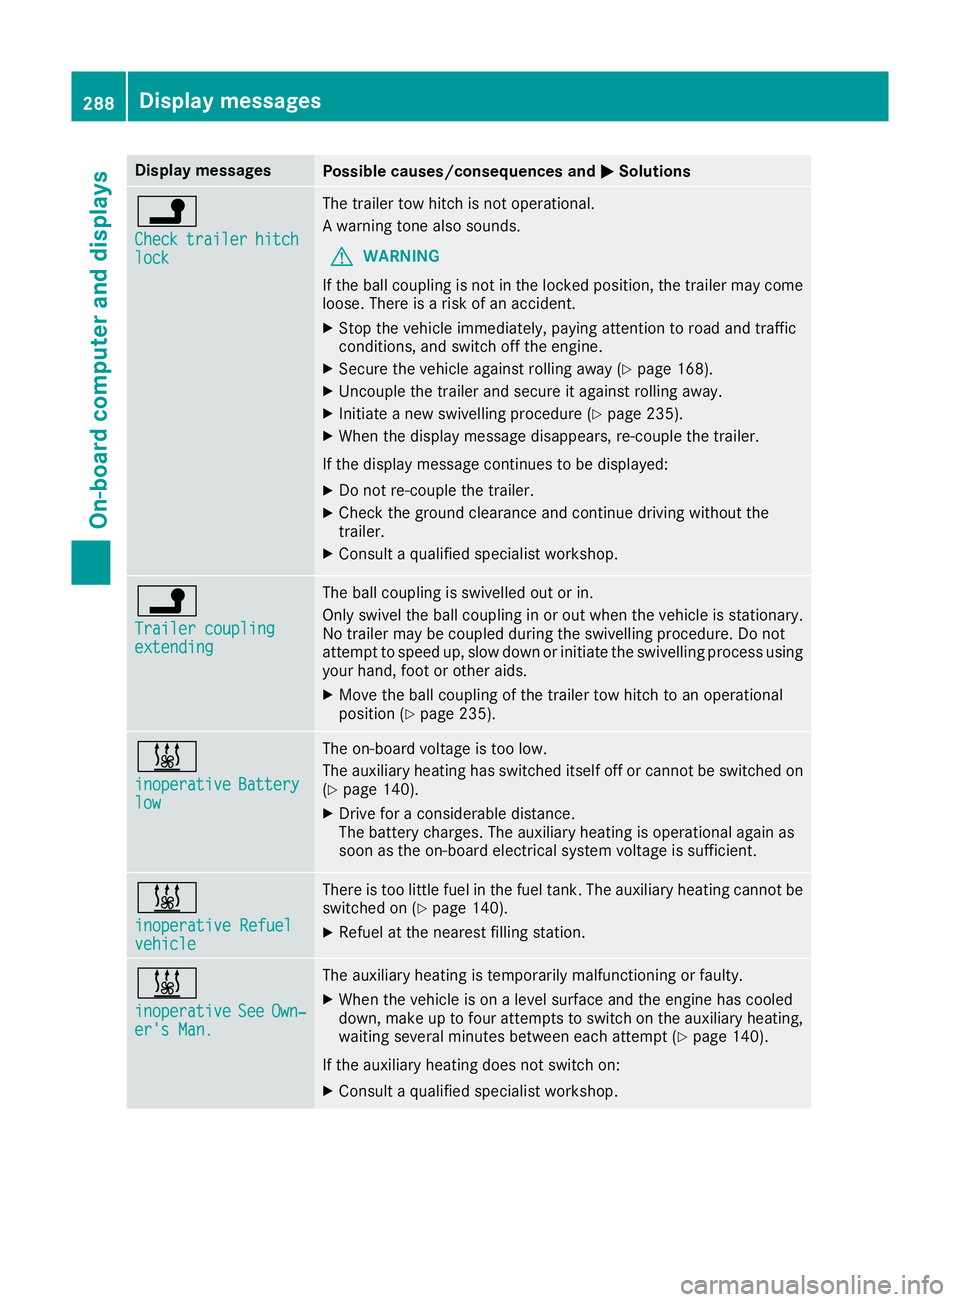
Display messages
Possible causes/consequences and
M
MSolutions j
Check Check
trailer
trailer hitch
hitch
lock
lock The trailer tow hitch is not operational.
A warning tone also sounds.
G WARNING
If the ball coupling is not in the locked position, the trailer may come
loose. There is a risk of an accident.
X Stop the vehicle immediately, paying attention to road and traffic
conditions, and switch off the engine.
X Secure the vehicle against rolling away (Y page 168).
X Uncouple the trailer and secure it against rolling away.
X Initiate a new swivelling procedure (Y page 235).
X When the display message disappears, re-couple the trailer.
If the display message continues to be displayed: X Do not re-couple the trailer.
X Check the ground clearance and continue driving without the
trailer.
X Consult a qualified specialist workshop. j
Trailer coupling Trailer coupling
extending extending The ball coupling is swivelled out or in.
Only swivel the ball coupling in or out when the vehicle is stationary.
No trailer may be coupled during the swivelling procedure. Do not
attempt to speed up, slow down or initiate the swivelling process using your hand, foot or other aids.
X Move the ball coupling of the trailer tow hitch to an operational
position (Y page 235). &
inoperative inoperative
Battery
Battery
low
low The on-board voltage is too low.
The auxiliary heating has switched itself off or cannot be switched on
(Y page 140).
X Drive for a considerable distance.
The battery charges. The auxiliary heating is operational again as
soon as the on-board electrical system voltage is sufficient. &
inoperative Refuel inoperative Refuel
vehicle vehicle There is too little fuel in the fuel tank. The auxiliary heating cannot be
switched on (Y page 140).
X Refuel at the nearest filling station. &
inoperative inoperative
See
SeeOwn‐
Own‐
er's Man.
er's Man. The auxiliary heating is temporarily malfunctioning or faulty.
X When the vehicle is on a level surface and the engine has cooled
down, make up to four attempts to switch on the auxiliary heating,
waiting several minutes between each attempt (Y page 140).
If the auxiliary heating does not switch on: X Consult a qualified specialist workshop. 288
Display
messagesOn-board computer and displays
Page 341 of 397
Washing the vehicle and cleaning the
paintwork
Automatic car wash G
WARNING
Braking efficiency is reduced after the vehicle has been washed. There is a risk of an acci-
dent.
After washing the vehicle, brake carefully
while paying attention to the traffic conditions in order to restore full braking efficiency.
! Before driving into an automatic car wash,
make sure that it is suitable for the dimen-
sions of the vehicle. In particular, make sure
that:
R there is enough ground clearance between
the vehicle underbody and the guide rails of the automatic car wash.
R the clearance width of the automatic car
wash is sufficient, particularly the width of
the guide rails
R you enter the automatic car wash straight
and in the centre of the guide rails in order
to avoid damaging the tyres or wheel rims.
Fold in the exterior mirrors before the vehicle is washed. The exterior mirrors could other-
wise be damaged.
! When DISTRONIC PLUS or the HOLD func-
tion is activated, the vehicle brakes automat- ically in certain situations.
To avoid damage to the vehicle, deactivate
DISTRONIC PLUS and the HOLD function in
the following or similar situations:
R when towing away
R in a car wash
! Make sure that:
R the side windows and sliding sunroof are
closed completely.
R the blower for the ventilation/heating is
switched off (OFF button is depressed).
R the windscreen wiper switch is at position
0.
The vehicle could otherwise be damaged.
! In car washes with a towing mechanism,
make sure that the automatic transmission is in transmission position N, otherwise the
vehicle could be damaged. R
Vehicles with a key:
do not remove the key from the ignition
lock. Do not open the driver's door or front-
passenger door when the engine is
switched off. Otherwise, the automatic
transmission selects park position Pauto-
matically and locks the wheels. You can
prevent this by shifting the automatic trans- mission to Nbeforehand.
R Vehicles with KEYLESS-GO:
do not open the driver's door or front-
passenger door when the engine is
switched off. Otherwise, the automatic
transmission selects park position Pauto-
matically and locks the wheels.
Observe the following to make sure that the
automatic transmission stays in position N:
X Make sure the vehicle is stationary and the
ignition is switched off.
X Turn the key to position 2in the ignition lock
(Y page 148).
Use the key instead of the Start/Stop button on vehicles with KEYLESS-GO.
X Depress the brake pedal and keep it
depressed.
X Shift the automatic transmission to position
N.
X Release the brake pedal.
X Release the electric parking brake.
X Switch off the ignition and leave the key in the
ignition lock.
You can wash the vehicle in an automatic car
wash from the very start.
If the vehicle is very dirty, wash off excess dirt
before cleaning the vehicle in an automatic car
wash.
After using an automatic car wash, wipe off the
wax from the windscreen and the windscreen
wiper blades. This will prevent smears and
reduce wiping noises caused by residue on the
windscreen.
Washing by hand In some countries, washing by hand is only
allowed at specially equipped washing bays.
Observe the legal requirements for each indi-
vidual country.
X Do not use hot water and do not wash the
vehicle in direct sunlight.
X Use a soft sponge to clean. 338
CareMaintenance and care