Door lock MERCEDES-BENZ M-Class 2011 W164 Owner's Manual
[x] Cancel search | Manufacturer: MERCEDES-BENZ, Model Year: 2011, Model line: M-Class, Model: MERCEDES-BENZ M-Class 2011 W164Pages: 372, PDF Size: 16.23 MB
Page 8 of 372
Cargo tie down rings ......................... 260
CD player/CD changer (on-board
computer) .......................................... 212
Center console ..................................... 31
Central locking Automatic locking (on-board
computer) ...................................... 217
SmartKey ......................................... 72
Changing bulbs
Headlamps ..................................... 111
Changing gears .................................. 146
Changing the programming SmartKey ......................................... 75
Checklist
After driving off-road ...................... 168
Before driving off-road ...................167
Child-proof locks
Rear doors ....................................... 63
Special seat belt retractor ...............61
Children
In the vehicle ................................... 58
Restraint systems ............................ 59
Child seat
Automatic recognition .....................48
Automatic recognition/air bag
deactivation, self-test ......................50
ISOFIX (LATCH-type child seat
anchors) ........................................... 61
Special seat belt retractor ...............61
Top Tether ....................................... 62
Troubleshooting ............................... 51
Cigarette lighter ................................ 267
Climate control Activating/deactivating .................128
Activating/deactivating air-
recirculation mode .........................133
Controlling automatically ...............130
Cooling with air dehumidification ..129
Defrosting the windshield ..............132
Demisting the windows .................. 133
Dual-zone automatic climate
control ........................................... 123
Important safety information .........122
Indicator lamp ................................ 130
Multi-zone automatic climate
control ........................................... 124
Problems with "cooling with air
dehumidification" ........................... 130Problems with the rear window
heating .......................................... 133
Rear control panel .................125, 128
Refrigerant ..................................... 362
Setting the air distribution .............132
Setting the airflow .........................132
Setting the air vents ......................135
Setting the temperature ................131
Setting the temperature (rear
compartment) ................................ 131
Switching the MONO function on/
off .................................................. 132
Switching the rear window
heating on/off ............................... 133
Switching the residual heat
function on/off .............................. 134
Clock (on-board computer) ............... 215
Cockpit ................................................. 27
Collapsible spare wheel Inflating ......................................... 309
see Emergency spare wheel
Combination switch .......................... 109
Compass ............................................ 279
Calling up ....................................... 279
Consumption statistics (on-board
computer) .......................................... 219
Convenience closing feature .............. 86
Convenience opening feature ............ 86
Coolant (engine) Checking the level .........................285
Display message ............................ 233
Notes ............................................. 362
Temperature gauge ........................ 208
Cooling
see Climate control
Cornering light (display message) ... 230
Crash-responsive emergency
lighting ............................................... 111
Cruise control .................................... 171
Cruise control lever .......................172
Display message ............................ 239
Cup holder ......................................... 265
Center console .............................. 265
Rear compartment .........................266
Current fuel consumption (on-
board computer) ............................... 2206IndexBA 164.1 USA, CA Edition B 2011; 1; 2, en-USd2mskotVersion: 3.0.3.52010-04-21T17:25:06+02:00 - Seite 6
Page 9 of 372
Customer Assistance Center(CAC) ............................................... 22
Customer Relations Department ....... 22
D
Dashboard see Cockpit
Date (on-board computer) ................ 215
Daytime driving lights Display message ............................ 233
Switching on/off (on-board
computer) ...................................... 215
Delayed switch-off
Exterior lighting (on-board
computer) ...................................... 216
Interior lighting (on-board
computer) ...................................... 217
Diesel particle filter .......................... 161
Differential locks ............................... 196
Differential locks (display
message) ............................................ 238
Digital speedometer Displaying ...................................... 208
Setting the unit (on-board
computer) ...................................... 214
DIRECT SELECT lever
see Automatic transmission
Display (cleaning instructions) ........ 292
Display messages Brakes ........................................... 228
Calling up (on-board computer) .....222
Clearing (on-board computer) ........222
Engine ............................................ 233
Lamps ............................................ 233
Safety systems .............................. 223
Service interval display ..................287
Tires ............................................... 241
Vehicle ........................................... 243
Distance recorder ............................. 208
Distance warning function
(vehicles with DISTRONIC) ................. 69
Activating/deactivating (on-
board computer) ............................ 219
Distance warning lamp ..................... 253
DISTRONIC ......................................... 173
Display message ............................ 240
Displays in the multifunction
display ........................................... 179
Driving tips .................................... 179
Setting the specified minimum
distance ......................................... 177
Warning lamp ................................. 253
Door
Automatic locking ............................ 79
Automatic locking (on-board
computer) ...................................... 217
Display message ............................ 244
Emergency locking ........................... 80
Emergency unlocking .......................80
Opening (from inside) ......................79
Door control panel
Overview .......................................... 33
Doors
Important safety notes ....................78
Drinking and driving ......................... 160
Drinks holder see Cup holder
Drive program
Automatic ...................................... 148
Manual ........................................... 149
Driving abroad ................................... 171
Driving in mountainous terrain Approach/departure angle ............170
Driving on flooded roads .................. 164
Driving safety system EBD (Electronic Brake force
Distribution) ..................................... 68
ESP ®
(Electronic Stability
Program) .......................................... 66
ETS/4ETS (Electronic Traction
System) ........................................... 67
Important safety information ...........65
Driving safety systems
ABS (Anti-lock Braking System) .......65
BAS (Brake Assist System) ..............66
Distance warning system
(vehicles with DISTRONIC) ...............69
Overview .......................................... 65
Driving systems
Blind Spot Assist ............................ 189
Cruise control ................................ 171
DISTRONIC .................................... 173
Level control .................................. 181Index7BA 164.1 USA, CA Edition B 2011; 1; 2, en-USd2mskotVersion: 3.0.3.52010-04-21T17:25:06+02:00 - Seite 7
Page 11 of 372
Exhaust tail pipe (cleaning
instructions) ...................................... 291
Exterior lighting see Lights
Exterior mirrors
Adjusting ....................................... 101
Dipping (automatic) .......................102
Folding in/out (automatically) .......102
Folding in/out (electrically) ...........102
Folding in when locking (on-board
computer) ...................................... 218
Out of position ............................... 102
Setting ........................................... 102
Storing settings (memory
function) ........................................ 103
Storing the parking position ..........103
Exterior view ........................................ 26
F
Filling capacity see Technical data
First-aid kit ......................................... 297
Flat tire Changing a wheel/mounting the
spare wheel ................................... 305
MOExtended run-flat system .........311
Preparing the vehicle .....................300
Raising the vehicle .........................306
TIREFIT kit ...................................... 301
Floormat ............................................. 279
Front fog lamp (display
message) ............................................ 232
Fuel Additives ........................................ 359
Notes ............................................. 358
Premium-grade unleaded gasoline . 358
Refueling ........................................ 151
Specifications ................................ 358
Troubleshooting ............................. 155
Fuel consumption
Current (on-board computer) .........220
Notes ............................................. 160
Fuel filler cap (display message) ..... 236
Fuel filler flap Emergency release ........................153
Opening/closing ............................ 153
Fuel filter (display message) ............ 236
Fuel level
Calling up the range (on-board
computer) ...................................... 220
Fuses
Dashboard fuse box .......................321
Engine emergency stop .................322
Fuse allocation chart .....................321
Fuse box in the cargo
compartment ................................. 321
Fuse box in the engine
compartment ................................. 321
Notes ............................................. 320
G
Garage door opener Clearing the memory .....................279
Notes ............................................. 276
Opening/closing the garage door ..278
Programming the remote control ...276
Gear indicator (on-board
computer) .......................................... 209
Gear or selector lever (cleaning
guidelines) ......................................... 292
Genuine Mercedes-Benz parts ......... 354
Genuine wood trim and trim strips
(cleaning instructions) ...................... 292
Glove box ........................................... 257
GTW (Gross Trailer Weight)
(definition) ......................................... 345
H
Headlamp cleaning system .............. 109
Adding washer fluid .......................286
Notes ............................................. 363
Headlamp delayed switch-off
see Delayed switch-off, exterior lighting
Headlamp mode (daytime driving)
see Daytime running lamps
Headlamps
Cleaning ......................................... 291
Misting up ...................................... 110
Setting ........................................... 116
Head restraint
Adjusting (electrically) .....................95
Head restraints
Adjusting (manually) ........................95
Index9BA 164.1 USA, CA Edition B 2011; 1; 2, en-USd2mskotVersion: 3.0.3.52010-04-21T17:25:06+02:00 - Seite 9
Page 35 of 372
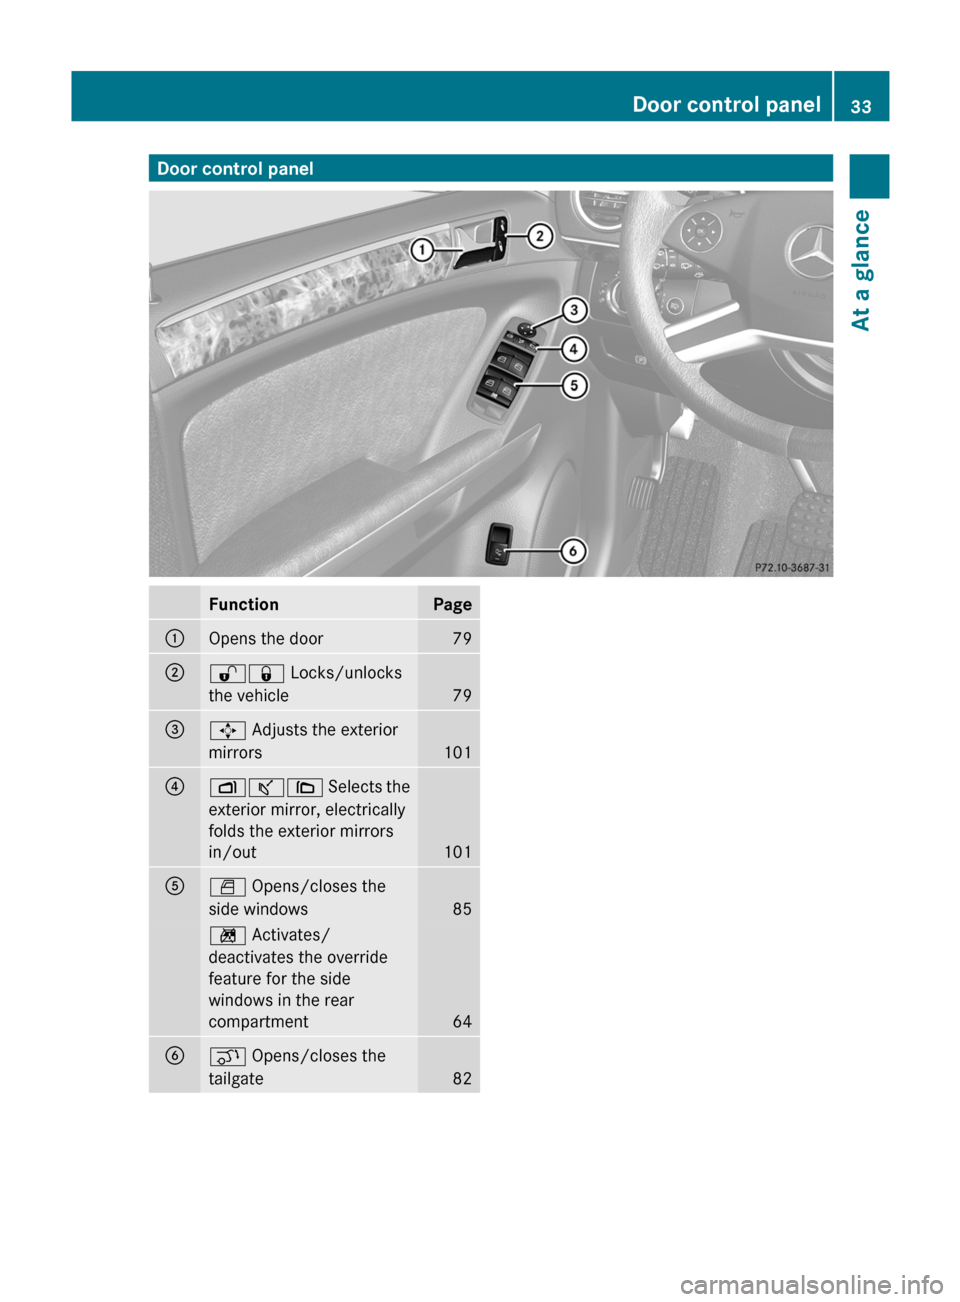
Door control panelFunctionPage:Opens the door79;%& Locks/unlocks
the vehicle
79
=7 Adjusts the exterior
mirrors
101
?Zª\ Selects the
exterior mirror, electrically
folds the exterior mirrors
in/out
101
AW Opens/closes the
side windows
85
n Activates/
deactivates the override
feature for the side
windows in the rear
compartment
64
Bq Opens/closes the
tailgate
82
Door control panel33At a glanceBA 164.1 USA, CA Edition B 2011; 1; 2, en-USd2mskotVersion: 3.0.3.52010-04-21T17:25:06+02:00 - Seite 33
Page 47 of 372
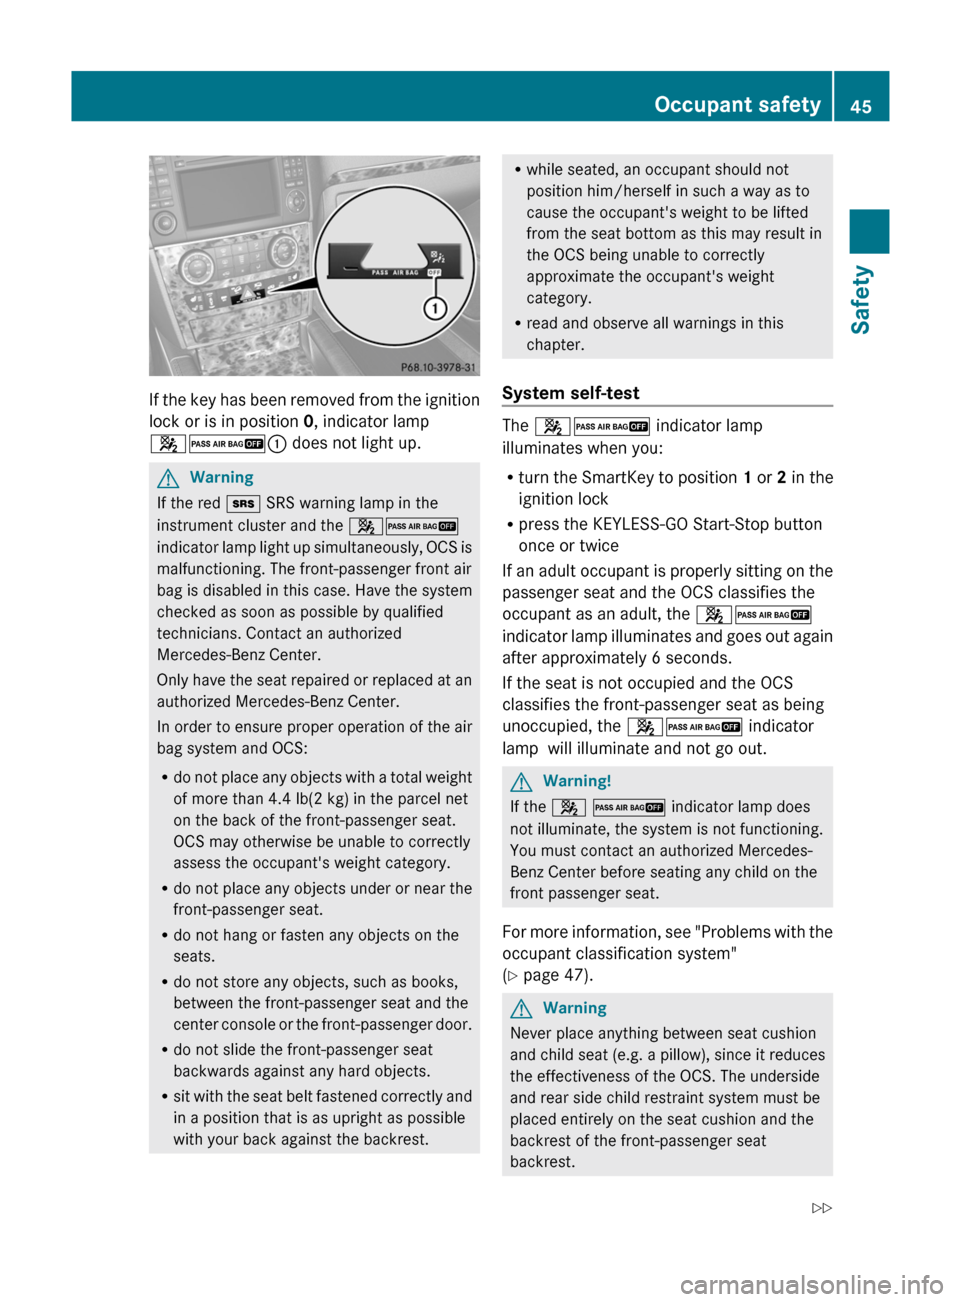
If the key has been removed from the ignition
lock or is in position 0, indicator lamp
42 : does not light up.
GWarning
If the red + SRS warning lamp in the
instrument cluster and the 42
indicator lamp light up simultaneously, OCS is
malfunctioning. The front-passenger front air
bag is disabled in this case. Have the system
checked as soon as possible by qualified
technicians. Contact an authorized
Mercedes-Benz Center.
Only have the seat repaired or replaced at an
authorized Mercedes-Benz Center.
In order to ensure proper operation of the air
bag system and OCS:
R do not place any objects with a total weight
of more than 4.4 lb(2 kg) in the parcel net
on the back of the front-passenger seat.
OCS may otherwise be unable to correctly
assess the occupant's weight category.
R do not place any objects under or near the
front-passenger seat.
R do not hang or fasten any objects on the
seats.
R do not store any objects, such as books,
between the front-passenger seat and the
center console or the front-passenger door.
R do not slide the front-passenger seat
backwards against any hard objects.
R sit with the seat belt fastened correctly and
in a position that is as upright as possible
with your back against the backrest.
R while seated, an occupant should not
position him/herself in such a way as to
cause the occupant's weight to be lifted
from the seat bottom as this may result in
the OCS being unable to correctly
approximate the occupant's weight
category.
R read and observe all warnings in this
chapter.
System self-test
The 42 indicator lamp
illuminates when you:
R turn the SmartKey to position 1 or 2 in the
ignition lock
R press the KEYLESS-GO Start-Stop button
once or twice
If an adult occupant is properly sitting on the
passenger seat and the OCS classifies the
occupant as an adult, the 42
indicator lamp illuminates and goes out again
after approximately 6 seconds.
If the seat is not occupied and the OCS
classifies the front-passenger seat as being
unoccupied, the 42 indicator
lamp will illuminate and not go out.
GWarning!
If the 4 2 indicator lamp does
not illuminate, the system is not functioning.
You must contact an authorized Mercedes-
Benz Center before seating any child on the
front passenger seat.
For more information, see "Problems with the
occupant classification system"
( Y page 47).
GWarning
Never place anything between seat cushion
and child seat (e.g. a pillow), since it reduces
the effectiveness of the OCS. The underside
and rear side child restraint system must be
placed entirely on the seat cushion and the
backrest of the front-passenger seat
backrest.
Occupant safety45SafetyBA 164.1 USA, CA Edition B 2011; 1; 2, en-USd2mskotVersion: 3.0.3.52010-04-21T17:25:06+02:00 - Seite 45Z
Page 58 of 372
XWithout twisting it, place the shoulder
section of the seat belt over the center of
the shoulder and the lap section across the
hips.XEngage belt tongue ; in buckle =.
Seat belt adjustment: if necessary, the
driver's and front-passenger seat belts
automatically adjust to the upper body
( Y page 56).XIf necessary, adjust the seat belt to the
appropriate height ( Y page 56).XIf necessary, pull upwards on the shoulder
section of the seat belt to tighten the belt
across your body.
All seat belts in the vehicle, except the
driver's seat belt, are equipped with a special
seat belt retractor to secure child restraint
systems properly. For further information on
"Special seat belt retractors", see
( Y page 61).
For more information about releasing the seat
belt with release button ?, see "Releasing
seat belts" ( Y page 56).
Seat belt adjustment
The belt adjustment function adjusts the
driver's and front-passenger seat belt to the
upper body of the occupants. The belt strap
is tightened slightly when:
R you engage the belt tongue in the belt
buckle and you then turn the SmartKey to
position 2 in the ignition lock.
R the SmartKey is in position 2 in the ignition
lock and you then engage the belt tongue
in the buckle.
The seat-belt adjustment will apply a certain
tightening force if any slack is detected
between the occupant and the seat belt. Do
not hold on to the seat belt tightly while it is
adjusting. You can switch the belt adjustment
on and off in the on-board computer
( Y page 218).
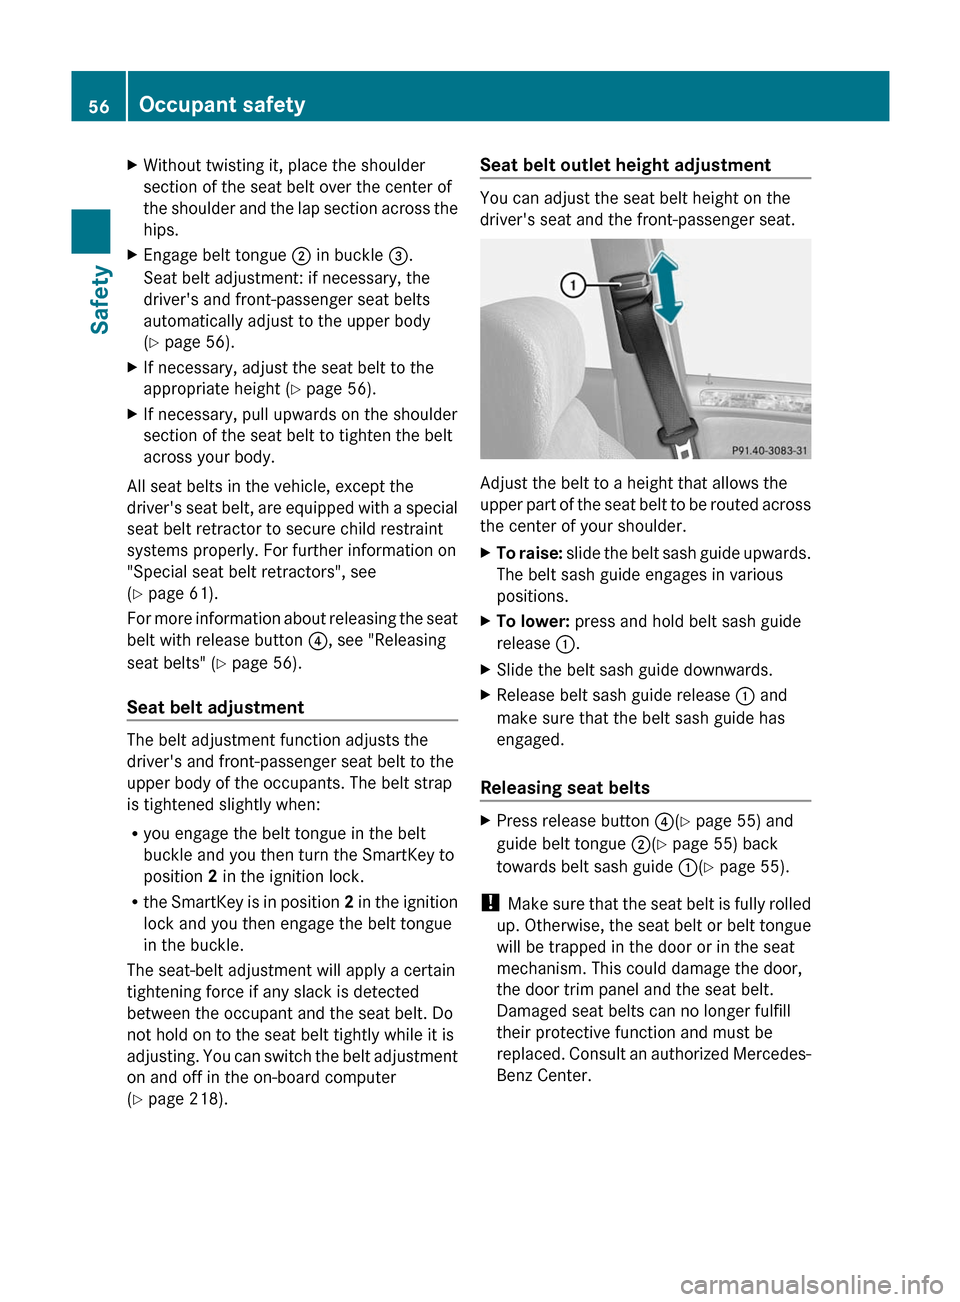
Seat belt outlet height adjustment
You can adjust the seat belt height on the
driver's seat and the front-passenger seat.
Adjust the belt to a height that allows the
upper part of the seat belt to be routed across
the center of your shoulder.
XTo raise: slide the belt sash guide upwards.
The belt sash guide engages in various
positions.XTo lower: press and hold belt sash guide
release :.XSlide the belt sash guide downwards.XRelease belt sash guide release : and
make sure that the belt sash guide has
engaged.
Releasing seat belts
XPress release button ?(Y page 55) and
guide belt tongue ;(Y page 55) back
towards belt sash guide :(Y page 55).
!
Make sure that the seat belt is fully rolled
up. Otherwise, the seat belt or belt tongue
will be trapped in the door or in the seat
mechanism. This could damage the door,
the door trim panel and the seat belt.
Damaged seat belts can no longer fulfill
their protective function and must be
replaced. Consult an authorized Mercedes-
Benz Center.
56Occupant safetySafety
BA 164.1 USA, CA Edition B 2011; 1; 2, en-USd2mskotVersion: 3.0.3.52010-04-21T17:25:06+02:00 - Seite 56
Page 60 of 372
Rthe belt tongue is engaged in the buckle on
each of the three-point seat belts in the
front
R the front-passenger seat is occupied and
the belt tongue is engaged in the buckle on
the front-passenger side.
The ETDs on the outside seats in the rear
compartment are triggered independently of
the lock status of the seat belts.
The ETDs are triggered depending on the type
and severity of an accident:
R in the event of a head-on or rear-end
collision if the vehicle decelerates or
accelerates rapidly in a longitudinal
direction during the initial stages of the
impact
R in the event of a side impact, on the side
opposite the impact if the vehicle
decelerates or accelerates rapidly in a
lateral direction
R in certain situations if the vehicle overturns
and the system determines that it can
provide additional protection.
If the ETDs/belt buckle tensioners are
triggered, you will hear a bang and a small
amount of powder may also be released. Only
in rare cases will the bang affect your hearing.
The powder that is released generally does
not constitute a health hazard. The + SRS
warning lamp lights up.
i If the belt buckle tensioners have been
triggered on the front seats, the buckle will
be pulled down and will be almost flush with
the upper edge of the seat. The + SRS
warning lamp is lit.GWarning
The belt buckle tensioners on the front seats
only function if the belt buckles can be pulled
down unobstructed. They must not be
restricted in any way. Therefore, do not grab
the belt buckles and do not place any objects
under the belt buckles. Otherwise, the
tensioning of the belt by the buckle is
restricted or will not function, and will not
provide any additional protection.
GWarning
Pyrotechnical ETDs/belt buckle tensioners
that were activated must be replaced.
For your safety, when disposing of the
pyrotechnic ETDs/belt buckle tensioners
always follow our safety instructions. These
instructions are available from any authorized
Mercedes-Benz Center.
The PRE-SAFE ®
system is equipped with
electrically reversible pre-tensioners that do
not need replacing after deployment.
Children in the vehicle
Important safety guidelines
GWarning
When leaving the vehicle, always remove the
SmartKey from the ignition lock. Always take
the SmartKey with you and lock the vehicle.
Do not leave children unattended in the
vehicle, even if they are secured in a child
restraint system, or with access to an
unlocked vehicle. A child's unsupervised
access to a vehicle could result in an accident
and/or serious personal injury. The children
could:
R injure themselves on parts of the vehicle
R be seriously or fatally injured through
excessive exposure to extreme heat or cold
R injure themselves or cause an accident with
vehicle equipment that can be operated
even if the SmartKey is removed from the
ignition lock or removed from the vehicle,
such as seat adjustment, steering wheel
adjustment, or the memory function
If children open a door, they could injure other
persons or get out of the vehicle and injure
themselves or be injured by following traffic.
Do not expose the child restraint system to
direct sunlight. The child restraint system's
metal parts, for example, could become very
hot, and the child could be burned on these
parts.
58Children in the vehicleSafety
BA 164.1 USA, CA Edition B 2011; 1; 2, en-USd2mskotVersion: 3.0.3.52010-04-21T17:25:06+02:00 - Seite 58
Page 65 of 372

XMove the head restraint upwards.XInstall the ISOFIX child restraint system
with Top Tether. Comply with the
manufacturer's installation instructions
when doing so.XRoute Top Tether belt ? under the head
restraint between the two head restraint
bars.XRoute Top Tether belt ? downwards
between the cargo compartment cover and
rear seat backrest.XHook Top Tether hook = of Top Tether
belt ? into Top Tether anchorage ;.
Ensure that:
R Top Tether hook = is hooked into Top
Tether anchorage ; as shown
R Top Tether belt ? is not twisted
R Top Tether belt ? is routed between the
rear seat backrest and the cargocompartment cover if the cargo
compartment cover is installed
R Top Tether belt ? is routed between the
rear seat backrest and the cargo net if
the cargo net is installed.XTension Top Tether belt ?. Comply with
the manufacturer's installation
instructions when doing so.XMove the head restraint back down again
slightly if necessary ( Y page 96). Make
sure that you do not interfere with the
correct routing of Top Tether belt ?.
Child-proof locks
Child-proof locks for the rear doors
GWarning
Observe "Important safety instructions"
( Y page 58).
GWarning
Children could open a rear door from inside
the vehicle. This could result in serious
injuries or an accident. Therefore, when
children ride in the rear always secure the rear
doors with the child-proof locks.
You secure each door individually with the
child-proof locks on the rear doors. A door
secured with a child-proof lock cannot be
opened from inside the vehicle. When the
vehicle is unlocked, the door can be opened
from the outside.
Children in the vehicle63SafetyBA 164.1 USA, CA Edition B 2011; 1; 2, en-USd2mskotVersion: 3.0.3.52010-04-21T17:25:06+02:00 - Seite 63Z
Page 66 of 372
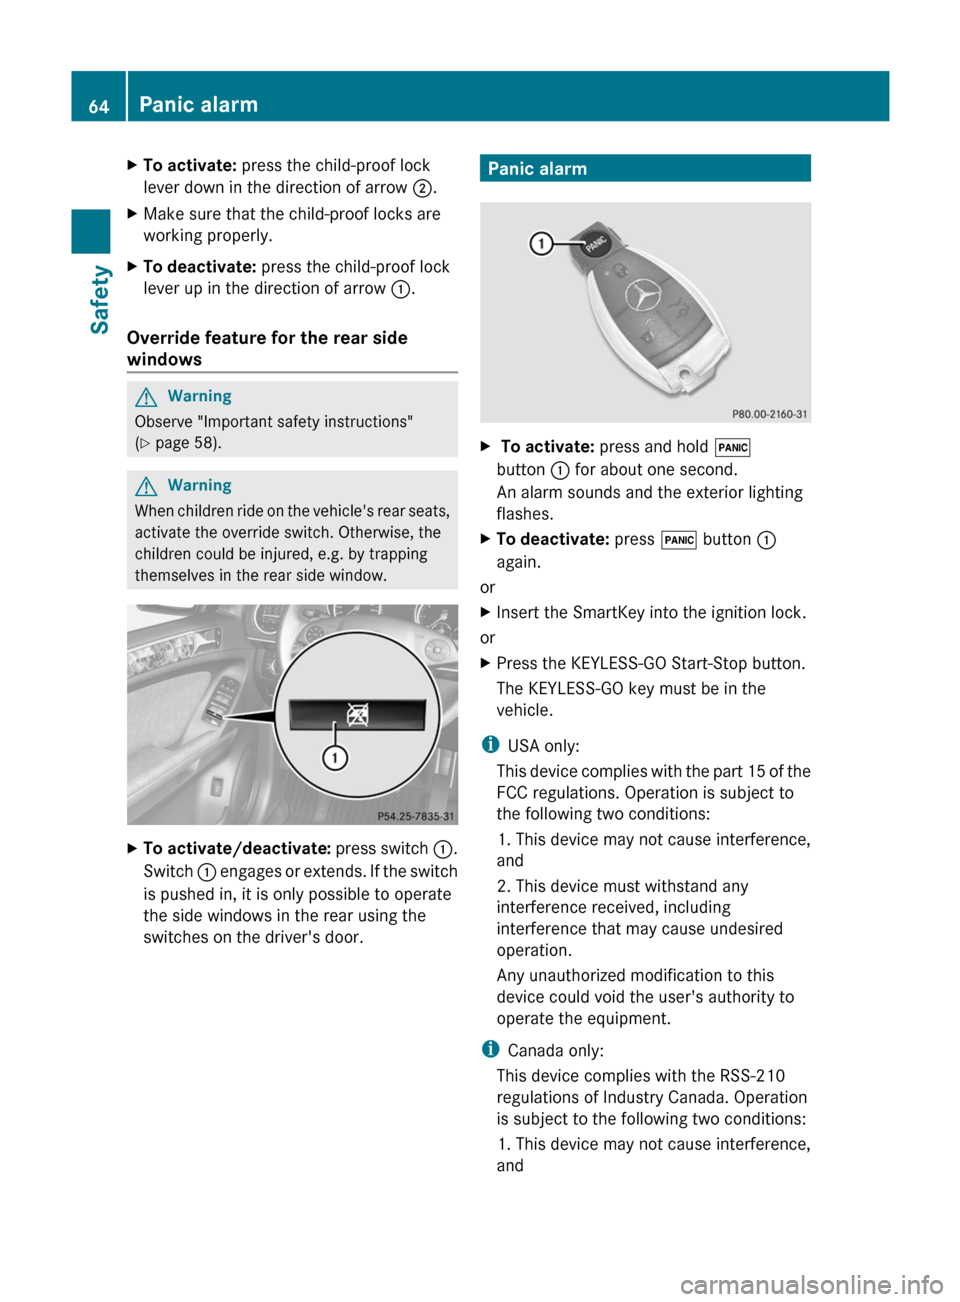
XTo activate: press the child-proof lock
lever down in the direction of arrow ;.XMake sure that the child-proof locks are
working properly.XTo deactivate: press the child-proof lock
lever up in the direction of arrow :.
Override feature for the rear side
windows
GWarning
Observe "Important safety instructions"
( Y page 58).
GWarning
When children ride on the vehicle's rear seats,
activate the override switch. Otherwise, the
children could be injured, e.g. by trapping
themselves in the rear side window.
XTo activate/deactivate: press switch :.
Switch : engages or extends. If the switch
is pushed in, it is only possible to operate
the side windows in the rear using the
switches on the driver's door.Panic alarmX To activate: press and hold !
button : for about one second.
An alarm sounds and the exterior lighting
flashes.XTo deactivate: press ! button :
again.
or
XInsert the SmartKey into the ignition lock.
or
XPress the KEYLESS-GO Start-Stop button.
The KEYLESS-GO key must be in the
vehicle.
i USA only:
This device complies with the part 15 of the
FCC regulations. Operation is subject to
the following two conditions:
1. This device may not cause interference,
and
2. This device must withstand any
interference received, including
interference that may cause undesired
operation.
Any unauthorized modification to this
device could void the user's authority to
operate the equipment.
i Canada only:
This device complies with the RSS-210
regulations of Industry Canada. Operation
is subject to the following two conditions:
1. This device may not cause interference,
and
64Panic alarmSafety
BA 164.1 USA, CA Edition B 2011; 1; 2, en-USd2mskotVersion: 3.0.3.52010-04-21T17:25:06+02:00 - Seite 64
Page 71 of 372
emergency braking situations, for example.
You could lose control of the vehicle and
cause an accident.
Adapt your driving style to the changed
driving characteristics.
Distance warning function (vehicles
with DISTRONIC)
This function warns you from a speed of
approximately 20 mph (30 km/h), if:
R for a period of several seconds, the
distance to the vehicle in front is too short
for the speed at which you are traveling.
The · distance warning lamp in the
instrument cluster will light up.
R you are approaching the vehicle in front
rapidly. An intermittent warning tone will
then sound and the · distance warning
lamp in the instrument cluster will light up.
You must apply the brakes yourself in order
to maintain the appropriate distance to the
vehicle in front and prevent a collision.
GWarning!
If the distance warning lamp · in the
instrument cluster comes on while driving
and/or an intermittent warning sounds,
immediate attention on the part of the driver
is required. As required by the traffic
situation, apply the brakes and navigate
around a possible obstacle. However, do not
drive by relying on the distance warning
function, as this will result in an emergency
braking application. This will not always
enable you to avoid a collision, especially
when traveling on varying road surface
conditions and with varying driver reaction.
Complex driving situations are not always
fully recognized by the distance warning
function. This could result in wrong or missing
distance warnings.
XTo activate/deactivate: activate or
deactivate the distance warning function in
the on-board computer ( Y page 219).
After activation, the Ä symbol is
displayed in the lower multifunction
display.
Anti-theft systems
Immobilizer
The immobilizer prevents your vehicle from
being started without the correct SmartKey.
When leaving the vehicle, always take the
SmartKey with you and lock the vehicle. The
engine can be started by anyone with a valid
SmartKey that is left inside the vehicle.
XTo activate with the SmartKey: remove
the SmartKey from the ignition lock.XTo activate with KEYLESS-GO: switch the
ignition off and open the driver's door.XTo deactivate: switch on the ignition.
i
The immobilizer is always deactivated
when you start the engine.
In the event that the engine cannot be
started when the starter battery is fully
charged, the immobilizer may be faulty.
Contact an authorized Mercedes-Benz
Center or call 1-800-FOR-MERCedes (in
USA) or 1-800-387-0100 (in Canada).
ATA (Anti-Theft Alarm system)
A visual and audible alarm is triggered if the
alarm system is armed and you open:
R a door
R the vehicle with the mechanical key
R the tailgate
R the hood
The alarm is not switched off, even if you
close the open door that has triggered it, for
example.
Anti-theft systems69SafetyBA 164.1 USA, CA Edition B 2011; 1; 2, en-USd2mskotVersion: 3.0.3.52010-04-21T17:25:06+02:00 - Seite 69Z