ECU MERCEDES-BENZ M-Class 2014 W166 Owner's Guide
[x] Cancel search | Manufacturer: MERCEDES-BENZ, Model Year: 2014, Model line: M-Class, Model: MERCEDES-BENZ M-Class 2014 W166Pages: 462, PDF Size: 6.23 MB
Page 88 of 462

Problem Possible causes/consequences and
0001 Solutions
The engine cannot be
started using the
SmartKey. The on-board voltage is too low.
X
Switch off non-essential consumers, e.g. seat heating or interior
lighting, and try to start the engine again.
If this does not work:
X Check the starter battery and charge it if necessary
(Y page 388).
or
X Jump-start the vehicle (Y page 389).
or
X Consult a qualified specialist workshop. The engine cannot be
started using KEYLESS-
GO. The SmartKey is in
the vehicle. Ad
oor is open. Therefore, the SmartKey cannot be detected as
easily.
X Close the door and try to start the vehicle again. There is interference from a powerful source of radio waves.
X
Start your vehicle with the SmartKey in the ignition lock. Doors
Important safety notes
G
WARNING
If children are left unsupervised in the vehicle,
they could:
R open the doors, thus endangering other
people or road users.
R get out and disrupt traffic.
R operate the vehicle's equipment.
Additionally, children could set the vehicle in
motion if, for example, they:
R release the parking brake.
R shift the automatic transmission out of
parking position P.
R starting the engine.
There is a risk of an accident and injury.
When leaving the vehicle, always take the
SmartKey with you and lock the vehicle. Never
leave children or animals unattended in the
vehicle. Always keep the SmartKey out of
reach of children. G
WARNING
If persons, particularly children are subjected
to prolonged exposure to extreme heat or
cold, there is a risk of injury, possibly even
fatal. Never leave children unattended in the
vehicle. G
WARNING
If objects, luggage or loads are not secured or
not secured sufficiently, they could slip, tip
over or be flung around and thereby hit vehicle
occupants. There is a risk of injury,
particularly in the event of sudden braking or
a sudden change in direction.
Always store objects so that they cannot be
flung around. Secure objects, luggage or
loads against slipping or tipping before the
journey.
You should preferably place luggage or loads
in the cargo compartment. Observe the
loading guidelines (Y page 332).86
DoorsOpening and closing
Page 89 of 462

Unlocking and opening doors from
the inside
You can open a door from inside the vehicle
even if it has been locked. You can only open
the rear doors from inside the vehicle if they
are not secured by the child-proof locks
(Y page 66).
If the vehicle has been locked with the
SmartKey or with KEYLESS-GO, opening a
door from the inside will trigger the anti-theft
alarm system. Switch off the alarm
(Y page 76). X
Front door: pull door handle 0003.
If the door is locked, locking knob 0002pops
up. The door is unlocked and can be
opened.
X Rear door: pull up locking knob 0002on the
relevan trear door.
The rear door is unlocked and can be
opened. Centrally locking and unlocking the
vehicle from the inside
You can centrally lock or unlock the vehicle
from the inside. The buttons are located on
both fron tdoors. 0002
To unlock
0003 To lock
X To unlock: press button 0002.
X To lock: press button 0003.
If the front-passenger door is closed, the
vehicle locks.
Meanwhile, the fuel filler flap will not be
locked or unlocked.
You cannot unlock the vehicle centrally from
the inside if the vehicle has been locked with
the SmartKey or KEYLESS-GO.
You can open a front door from inside the
vehicle even if it has been locked.
If the vehicle has been locked using the
locking button for the central locking, or has
been locked automatically, and a door is
opened from the inside:
R the vehicle will be fully unlocked if it had
previously been fully unlocked
R only the door which has been opened form
the inside is unlocked if only the driver's
door had been previously unlocked Doors
87Opening and closing Z
Page 91 of 462

X
Open the driver's door.
X Close the front-passenger door, the rear
doors and the tailgate.
X Press the locking button (Y page 87).
X Check whether the locking knobs on the
front-passenger door and the rear doors
are still visible.P ress downthe locking
knobs by hand, if necessary.
X Close the driver's door.
X Take the mechanical key out of the
SmartKey (Y page 82).
X Insert the mechanical key into the lock of
the driver's door as far as it will go. 0005
To lock
X Turn the mechanical key clockwise as far
as it will go to position 0005.
X Turn the mechanical key back and remove
it.
X Make sure that the doors and the tailgate
are locked.
X Insert the mechanical key into the
SmartKey.
i If you lock the vehicle as described above,
the fuel filler flap is not locked. The anti-
theft alarm system is not armed. Cargo compartment
Important safety notes
G
WARNING
If persons, particularly children are subjected
to prolonged exposure to extreme heat or cold, there is a risk of injury, possibly even
fatal. Never leave children unattended in the
vehicle.
G
WARNING
Combustion engines emit poisonous exhaust
gases such as carbon monoxide. If the tailgate
is open when the engine is running,
particularly if the vehicle is moving, exhaust
fumes could enter the passenger
compartment. There is a risk of poisoning.
Turn off the engine before opening the
tailgate. Never drive with the tailgate open. G
WARNING
If objects, luggage or loads are not secured or
not secured sufficiently, they could slip, tip
over or be flung around and thereby hit vehicle
occupants. There is a risk of injury,
particularly in the event of sudden braking or
a sudden change in direction.
Always store objects so that they cannot be
flung around. Secure objects, luggage or
loads against slipping or tipping before the
journey.
! The tailgate swings upwards and to the
rear when opened. Therefore, make sure
that there is sufficient clearance above and
behind the tailgate.
i Tailgate opening dimensions
(Y page 452).
You should preferably place luggage or loads
in the cargo compartment. Observe the
loading guidelines (Y page 332).
Do not leave the SmartKey in the cargo
compartment. You could otherwise lock
yourself out.
Vehicles without the EASY-PACK
tailgate: the tailgate can be:
R opened and closed manually from outside
R unlocked from inside with the emergency
release Cargo compartment
89Opening and closing Z
Page 108 of 462

years old and under mus
tbe seated and
properly secured in an appropriately sized
child restraint system or booster seat
recommended for the size and weight of the
child. For additional information, see the
"Children in the vehicle" section.
Ac hild's risk of serious or fatal injuries is
significantly increased if the child restraints
are not properly secured in the vehicle and/
or the child is not properly secured in the child
restraint.
! To avoid damage to the seats and the seat
heating, observe the following information:
R keep liquids from spilling on the seats. If
liquid is spilled on the seats, dry them as
soon as possible.
R if the seat covers are damp or wet, do not
switch on the seat heating. The seat
heating should also not be used to dry
the seats.
R clean the seat covers as recommended;
see "Interior care".
R do not transport heavy loads on the
seats. Do not place sharp objects on the
seat cushions, e.g. knives, nails or tools.
The seats should only be occupied by
passengers, if possible.
R when the seat heating is in operation, do
not cover the seats with insulating
materials, e.g. blankets, coats, bags,
seat covers, child seats or booster seats.
! Make sure that there are no objects in the
footwell or behind the seats when resetting
the seats. There is a risk that the seats
and/or the objects could be damaged.
i It is not possible to remove the head
restraints from the front seats. The rear-
compartmenth ead restraints, however,
can be removed (Y page 108).
For more information, contact a qualified
specialist workshop. i
Further related subjects:
R Important safety notes on air bags
(Y page 44)
R Cargo compartment enlargement
(folding down the rear bench seat)
(Y page 335)
R Securing children in the vehicle
(Y page 60) Adjusting the seats electrically
0002
Head restraint height
0003 Seat cushion angle
0023 Seat height
0022 Seat fore-and-aft adjustment
0020 Backrest angle
i Vehicles with memory function: if PRE-
SAFE ®
has been triggered, the front-
passenger seat will be moved to a better
position if it was previously in an
unfavorable position.
i You can store the seat settings using the
memory function (Y page 117). Adjusting the head restraints
General notes Pay attention to the important safety notes
(Y
page 105).
Do not rotate the head restraints of the front
and rear seats. Otherwise, you cannot adjust 106
SeatsSeats, steering wheel and mirrors
Page 132 of 462

Halogen headlamps
0002
Low-beam headlamp: H7 55 W
0003 High-bea mheadlamp: H7 55 W
0023 Parking lamp/standing lamp: W 5 W BV
0022 Side marker lamp: WY 5 W Tail lamp
0002
Brake lamp: P 21 W-L Changing the front bulbs
Removing and installing the cover in the
front wheel housing You must remove the cover from the front
wheel housing before you can change the
fron
tbulbs. X
To remove: switch off the lights.
X Turn the fron twheels inwards.
X Remove securing pin 0003using a suitable
tool.
X Slide cover 0002up and remove it.
X To install: insert cover 0002again and slide
it down until it engages.
X Insert securing pin 0003.
Low-beam headlamps (halogen
headlamps) X
Remove the cover in the front wheel
housing (Y page 130).
X Turn housing cover 0002counter-clockwise
and pull it out.
X Turn bulb holder 0003counter-clockwise and
pull it out.
X Take the bulb out of bulb holder 0003.
X Insert the new bulb into bulb holder 0003.
X Insert bulb holder 0003into the lamp and turn
it clockwise. 130
Replacing bulbsLights and windshield wipers
Page 158 of 462

Useful information
i This Operator's Manual describes all
models and all standard and optional
equipment of your vehicle available at the
time of publication of the Operator's
Manual. Country-specific differences are
possible. Please note that your vehicle may
not be equipped with all features
described. This also applies to safety-
related systems and functions.
i Read the information on qualified
specialist workshops: (Y page 28).Notes on breaking-in
anew vehicle Important safety notes
New and replaced brake pads and discs only
reach their optimum braking effect after
several hundred kilometers of driving.
Compensate for this by applying greater force
to the brake pedal. The first 1000 miles (1500 km)
The more you look after the engine when it is
new, the more satisfied you will be with its
performance in the future.
R You should therefore drive at varying
vehicle and engine speeds for the first
1000 miles (1500 km).
R Avoid heavy loads, e.g .driving at full
throttle, during this period.
R Change gearing ood time, before the
tachometer needle is 0001of the way to the
red area of the tachometer.
R Do not manually shift to a lower gear to
brake the vehicle.
R If possible, do not depress the accelerator
pedal past the point of resistance
(kickdown).
After 1000 miles (1500 km), you can increase
the engine speed gradually and accelerate
the vehicle to full speed. Additional breaking-in notes for AMG
vehicles:
R
Do not drive faster than 85 mph
(140 km/h) for the first 1,000 miles
(1,500 km).
R Only allow the engine to reach a maximum
engine speed of 4,500 rpm briefly.
R Change gear in good time.
R Ideally, for the first 1,000 miles (1,500 km),
drive in program C.
i You should also observe these notes on
breaking in if the engine or parts of the drive
train on your vehicle have been replaced.
i Always observe the respective speed
limits. Driving
Important safety notes
G
WARNING
Objects in the driver's footwell can restric tthe
pedal travel or obstruct adepressed pedal.
The operating and road safety of the vehicle
is jeopardized. There is a risk of an accident.
Make sure that all objects in the vehicle are
stowed correctly, and that they cannot enter
the driver's footwell. Install the floormats
securely and as specified in order to ensure
sufficien tclearance for the pedals. Do not use
loose floormats. G
WARNING
Unsuitable footwear can hinde rcorrect usage
of the pedals, e.g.:
R shoes with thick soles
R shoes with high heels
R slippers
There is a risk of an accident.
Wear suitable footwear to ensure correct
usage of the pedals. 156
DrivingDriving and parking
Page 163 of 462

To ensure that you do not roll backwards
when pulling away on an uphill slope, engage
the electric parking brake.
X Press and hold handle 0002.
The electric parking brake continues to
brake and prevent the vehicle from rolling
backwards.
The red 0007(USA only) or 000C(Canada
only) indicator lamp in the instrument
cluster remains on.
X Depress the accelerator pedal.
X As soon as the vehicle/trailer combination
is held by the driving force of the engine,
release lever 0002.
The electric parking brake is released.
The red 0007(USA only) or 000C(Canada
only) indicator lamp in the instrument
cluster goes out.
Hill starta ssist Hill start assist helps you when pulling away
forwards or in reverse on an uphill gradient.
It holds the vehicle for a short time after you
have removed your foot from the brake pedal.
This gives you enough time to move your foot
from the brake pedal to the accelerator pedal
and to depress it before the vehicle begins to
roll. G
WARNING
After a short time, hill start assist will no
longer brake your vehicle and it could roll
away. There is a risk of an accident and injury.
Therefore, quickly move your foot from the
brake pedal to the accelerator pedal. Never
leave the vehicle when it is held by hill start
assist.
X Remove your foot from the brake pedal.
The vehicle is then held for about a second.
X Pull away.
Hill start assist is not active if:
R you are pulling away on a level road or on
a downhill gradient.
R the transmission is in position N.R
the electric parking brake is applied.
R ESP ®
is malfunctioning. ECO start/stop function
Introduction The ECO start/stop function switches the
engine off automatically if the vehicle is
stopped under certain conditions.
The engine starts automatically when the
driver wants to pull away again. The ECO
start/stop function thereby helps you to
reduce the fuel consumption and emissions
of your vehicle.
Important safety notes
G
WARNING
If the engine is switched off automatically and
you exit the vehicle, the engine is restarted
automatically. The vehicle may begin moving.
There is a risk of accident and injury.
If you wish to exit the vehicle, always turn off
the ignition and secure the vehicle against
rolling away.
General notes 0002
ECO start/stop display
If the 0012 symbol is shown in green in the
multifunction display, the ECO start/stop
function switches the engine off
automatically if the vehicle stops moving.
Every time you switch on the engine using the
SmartKey or the Start/Stop button, the ECO
start/stop function is activated.
If the ECO start/stop function has been
manually deactivated (Y page 163) or a Driving
161Driving and parking Z
Page 164 of 462

malfunction has caused the system to be
deactivated, the
0012symbol is not
displayed.
AMG vehicles: theStop/Start active or
Stop/Start inactive message in the AMG
menu in the multifunction display goes out.
AMG vehicles: the ECO start/stop function
is only available in drive program C.
For further information on automatic engine
switch-off (Y page 162) and automatic
engine start (Y page 162).
Automatic engine switch-off If the vehicle is braked to a standstill in
Dor
N, the ECO start/stop function switches off
the engine automatically.
The ECO start/stop function is operational
and the 0012symbol is displayed in green in
the multifunction display, if:
R the indicator lamp in the ECO button is lit
green.
R no off-road progra mhas been selected.
R the outside temperature is within the
comfort range.
R the engine is at normal operating
temperature.
R the set temperature for the vehicle interior
has been reached.
R the battery is sufficiently charged.
R the system detects that the windshield is
no tfogged up when the air-conditioning
system is switched on.
R the hood is closed.
R the driver's door is closed and the driver's
seat belt is fastened.
If conditions for automatic engine switch-off
have not been fulfilled, the 0012symbol will
be shown in yellow.
AMG vehicles: the AMG menu in the
multifunction display additionally shows the
Stop/Start inactive message.i
All of the vehicle's systems remain active
when the engine has been stopped
automatically.
i The HOLD function can be activated if the
engine has been switched off
automatically. It is then not necessary to
continue applying the brakes during the
automatic stop phase. When you depress
the accelerator pedal, the engine starts
automatically and the braking effect of the
HOLD function is deactivated.
i All vehicles (apart from AMG
vehicles): automatic engine switch-off can
take place a maximum of four times
consecutively (initial stop then repeated
three times). The 0012symbol is shown in
yellow in the multifunction display after the
engine has been started automatically for
the fourth time. When the 0012symbol is
shown in green in the multifunction display,
automatic engine switch-off is again
possible.
i AMG vehicles: times which the engine
can be automatically switched off.
Automatic engine start The engine starts automatically if:
R
you switch off the ECO start/stop function
by pressing the ECO button.
R you release the brakes when in
transmission position Dor Nand when the
HOLD function is not active.
R you depress the accelerator pedal.
R you engage reverse gear R.
R you move the transmission out of position
P.
R you switch to drive program Sor M(AMG
vehicles).
R you switch to an off-road program (except
for AMG vehicles).
R you unfasten your seat belt or open the
driver's door.
R the vehicle starts to roll. 162
DrivingDriving and parking
Page 169 of 462
Using the SmartKey:
R
Make sure that the ignition is switched on.
R When the vehicle is stationary, depress the
brake pedal and keep it depressed.
R Shift to neutral N.
R Release the brake pedal.
R If the electric parking brake is engaged,
release it.
R Switch off the ignition and leave the
SmartKey in the ignition lock.
Using KEYLESS-GO:
R Make sure that the ignition is switched on.
R When the vehicle is stationary, depress the
brake pedal and keep it depressed.
R Engage park position P.
R Release the brake pedal.
R Remove the Start/Stop button from the
ignition lock.
R Insert the SmartKey into the ignition lock.
R Switch on the ignition.
R Depress the brake pedal and keep it
depressed.
R Shift to neutral N.
R Release the brake pedal.
R If the electric parking brake is engaged,
release it.
R Switch off the ignition and leave the
SmartKey in the ignition lock.
Engaging drive position D X
When the vehicle is stationary, depress the
brake pedal.
X Push the DIRECT SELECT lever down past
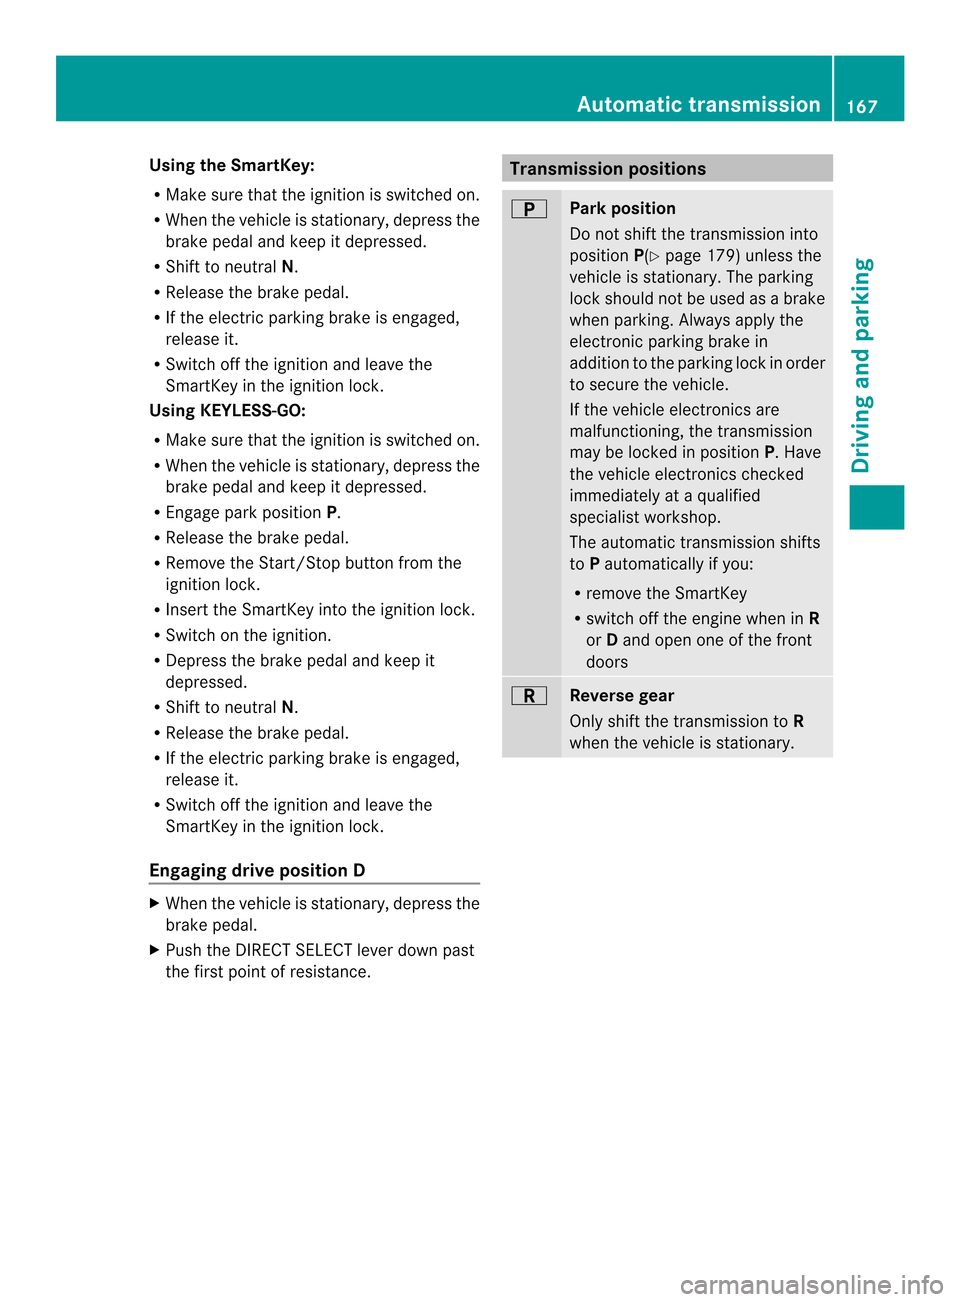
the first point of resistance. Transmission positions
0004
Par
kposition
Do not shift the transmission into
position P(Ypage 179) unless the
vehicle is stationary. The parking
lock should not be used as a brake
when parking .Always apply the
electronic parking brake in
additio nto the parking lock in order
to secure the vehicle.
If the vehicle electronics are
malfunctioning, the transmission
may be locked in position P. Have
the vehicle electronics checked
immediately at a qualified
specialist workshop.
The automatic transmission shifts
to Pautomatically if you:
R remove the SmartKey
R switch off the engine when in R
or Dand open one of the front
doors 0006
Reverse gear
Only shift the transmission to
R
when the vehicle is stationary. Automatic transmission
167Driving and parking Z
Page 180 of 462

is not permitted if the vehicle is not parked
on a level surface. There is a danger of
overfilling, which could result in damage to
components of the BlueTE
Cexhaus tgas
aftertreatment.
! Rinse surfaces that have come into
contact with DE Fimmediately with water or
remove DEF using a damp cloth and cold
water. If the DEF has already crystallized,
use a sponge and cold water to clea nit. DEF
residues crystallize after time and
contaminate the affected surfaces.
! DEF is not a fuel additive and must not be
added to the fuel tank. If DEF is added to
the fuel tank, this can lead to engine
damage.
For further information on DEF, see
(Y page 447).
Opening the DEF filler cap The fuel filler flap is unlocked or locked
automatically when you open or close the
vehicle with the SmartKey or with KEYLESS-
GO.
X
Switch the ignition off.
X Press the fuel filler flap in the directio nof
arrow 0002.
The fuel fille rflap swings up.
X Turn blue DE Ffiller cap 0003counter-
clockwise and remove it.
DEF filler cap 0003is secured with a plastic
strip. DEF refill bottle !
Only screw on the DE Frefill bottle hand-
tight .Itcould otherwise be damaged. X
Unscrew the protective cap from DEF refill
bottle 0002.
X Place DEFr efill bottle0002on the filler neck
as shown and screw it on clockwise until
hand-tight.
X Press DEFr efill bottle0002towards the filler
neck.
The DEFt ank is filled. This may take up to
one minute.
i When DE Frefill bottle 0002is no longer
pressed, filling stops and the bottle may be
taken off again after being only partially
emptied.
X Release DEFr efill bottle0002.
X Turn DEFr efill bottle 0002counter-clockwise
and remove it.
X Screw the protective cap onto DEF refill
bottle 0002again.
DEFr efill bottles can be obtained at many gas
stations or at an authorized Mercedes-Benz
Center .Refill bottles without a threaded cap
do not provide overfill protection. DEF may
leak if overfilled. Mercedes Benzo ffers
special refill bottles with a threaded seal.
These are available at any authorized
Mercedes-Benz Center. 178
RefuelingDriving and parking