trailer hitch MERCEDES-BENZ M-Class 2015 W166 Owner's Manual
[x] Cancel search | Manufacturer: MERCEDES-BENZ, Model Year: 2015, Model line: M-Class, Model: MERCEDES-BENZ M-Class 2015 W166Pages: 466, PDF Size: 8.92 MB
Page 9 of 466
Cargo net
Attaching ...................................... .342
Important safety information ......... 342
Cargo tie down rings ......................... 339
Car key see SmartKey
CD player/CD changer (on-board
computer) .......................................... 273
Center console Lower section .................................. 39
Upper section .................................. 38
Central locking
Automatic locking (on-board com-
puter) ............................................. 279
Locking/unlocking (SmartKey) ....... .80
Changing bulbs
Brake lamps .................................. .132
High-beam headlamps ................... 131
Low-beam headlamps .................... 130
Parking lamps ................................ 131
Side marker lamps ......................... 131
Standing lamps (front) ................... 131
Child-proof locks
Important safety notes .................... 66
Rear doors ....................................... 66
Children
In the vehicle ................................... 61
Restraint systems ............................ 62
Special seat belt retractor .............. .61
Child seat
Forward-facing restraint system ...... 65
LATCH-type (ISOFIX) child seat
anchors ............................................ 63
On the front-passenger seat ............ 65
Rearward-facing restraint system .... 65
Top Tether ...................................... .64
Cigarette lighter ................................ 348
Cleaning Mirror turn signal .......................... .375
Trailer tow hitch ............................ .376
Climate control
Automatic climate control (3-
zone) .............................................. 142
Controlling automatically .............. .146
Cooling with air dehumidification .. 144
Defrosting the windows ................. 150
Defrosting the windshield .............. 149 Dual-zone automatic climate con-
trol ................................................. 139
General notes ................................ 138
Indicator lamp ................................ 146
Information about using auto-
matic climate control ..................... 144
Maximum cooling .......................... 149
Overview of systems ..................... .138
Problems with cooling with air
dehumidification ............................ 146
Problem with the rear window
defroster ........................................ 151
Rear control panel ......................... 142
Refrigerant ..................................... 455
Refrigerant filling capacity ............. 455
Setting the air distribution ............. 148
Setting the airflow ......................... 148
Setting the air vents ..................... .152
Setting the climate mode (AIR
FLOW) ............................................ 147
Setting the temperature ................ 147
Switching air-recirculation mode
on/off ............................................ 151
Switching on/off ........................... 144
Switching residual heat on/off ...... 151
Switching the rear window
defroster on/off ............................ 150
Switching the ZONE function on/
off ................................................. .149
Climate control system
Automatic engine start .................. 163
Automatic engine switch-off .......... 162
Deactivating/activating ................. 163
General information ....................... 162
Important safety notes .................. 162
Introduction ................................... 162
Coat hooks ......................................... 342
Cockpit Overview .......................................... 34
see Instrument cluster
COLLISION PREVENTION ASSIST
Operation/notes .............................. 70
COMAND
ON&OFFROAD menu ..................... 255
see separate operating instructions
COMAND display
Cleaning ......................................... 377 Index
7
Page 23 of 466
Maximum load on a tire (defini-
tion) ............................................... 422
Maximum permissible tire pres-
sure (definition) ............................. 422
Maximum tire load .........................4 19
Maximum tire load (definition) ....... 422
MOExtended tires .......................... 402
Optional equipment weight (defi-
nition) ............................................ 422
PSI (pounds per square inch) (def-
inition) .......................................... .422
Replacing ....................................... 423
Service life ..................................... 402
Sidewall (definition) ....................... 422
Speed rating (definition) ................ 421
Storing .......................................... .424
Structure and characteristics
(definition) ..................................... 420
Temperature .................................. 416
TIN (Tire Identification Number)
(definition) ..................................... 422
Tire bead (definition) ..................... .422
Tire pressure (definition) ................ 422
Tire pressures (recommended) ...... 421
Tire size (data) ............................... 428
Tire size designation, load-bearing capacity, speed rating .................... 417
Tire tread ....................................... 401
Tire tread (definition) ..................... 422
Total load limit (definition) ............. 423
Traction ......................................... 416
Traction (definition) ....................... 422
Tread wea r..................................... 416
TWR (permissible trailer drawbar
noseweight) (definition) ................. 422
Uniform Tire Quality Grading
Standards ...................................... 415
Uniform Tire Quality Grading
Standards (definition) .................... 421
Wear indicator (definition) ............. 423
Wheel and tire combination ........... 430
Wheel rim (definition) .................... 421
see Flat tire
Top Tether ............................................ 64
Towing a trailer Active Parking Assist ..................... 224
Axle load, permissibl e.................... 460
Cleaning the trailer tow hitch ......... 376 Coupling up a traile
r...................... 259
Decoupling a trailer ....................... 261
Driving tips .................................... 257
ESP ®
(Electronic Stability Pro-
gram) ............................................... 74
Important safety notes .................. 256
Installing the ball coupling ............. 258
Mounting dimensions .................... 459
Power supply ................................. 263
Pulling away with a traile r.............. 161
Removing the ball coupling ............ 262
Storing the ball coupling ................ 262
Trailer drive progra m..................... 249
Trailer load s................................... 460
Towing away
Important safety guidelines ........... 393
Installing the towing eye ................ 394
Removing the towing eye ............... 395
With both axles on the ground ....... 395
With the rear axle raised ................ 395
Tow-starting
Emergency engine starting ............ 396
Important safety notes .................. 393
Trailer coupling
see Towing a trailer
Trailer loads and drawbar nose-
weights ............................................... 262
Trailer towing Active Blind Spot Assist ................. 244
Active Lane Keeping Assist ............ 247
Blind Spot Assist ............................ 239
PARKTRONIC ................................. 219
Permissible trailer loads and
drawbar noseweights ..................... 262
Transfer case ..................................... 177
Transmission see Automatic transmission
Transmission position display ......... 168
Transmission position display
(DIRECT SELECT lever) ...................... 168
Transporting the vehicle .................. 395
Traveling uphill Brow of hill ..................................... 195
Driving downhill ............................. 195
Maximum gradient-climbing capa-
bility ............................................... 195 Index
21
Page 221 of 466
Transmission
position Warning display
D
Front area activated
R,
Nor the vehicle
is rolling back-
wards Rear and front areas
activated
P
No areas activated
One or more segments light up as the vehicle
approaches an obstacle, depending on the
vehicle's distance from the obstacle.
From the:
R sixth segment onwards, you will hear an
intermittent warning tone for approx-
imately two seconds.
R seventh segment onwards, you will hear a
warning tone for approximately two sec-
onds. This indicates that you have now
reached the minimum distance.
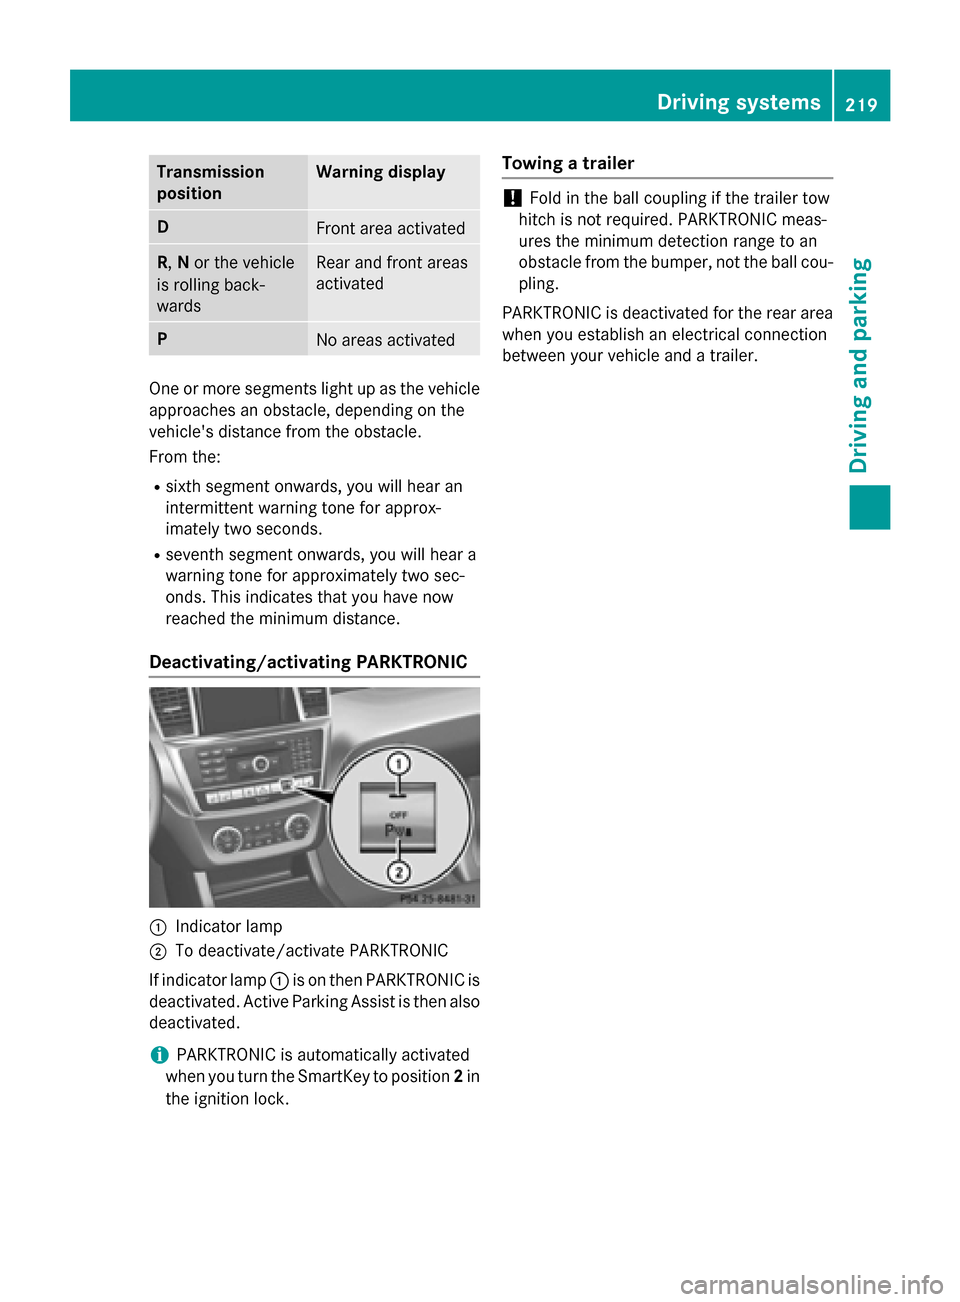
Deactivating/activating PARKTRONIC 0043
Indicator lamp
0044 To deactivate/activate PARKTRONIC
If indicator lamp 0043is on then PARKTRONIC is
deactivated. Active Parking Assist is then also
deactivated.
i PARKTRONIC is automatically activated
when you turn the SmartKey to position 2in
the ignition lock. Towing a trailer !
Fold in the ball coupling if the trailer tow
hitch is not required. PARKTRONIC meas-
ures the minimum detection range to an
obstacle from the bumper, not the ball cou- pling.
PARKTRONIC is deactivated for the rear area
when you establish an electrical connection
between your vehicle and a trailer. Driving systems
219Driving and parking Z
Page 226 of 466
the
Park Assist Finished
Park Assist Finished message
appears in the multifunction display. You will
then have to steer and merge into traffic on
your own. PARKTRONIC is still available. You
can take over the steering, before the vehicle has exited the parking space completely. This
is useful, for example when you recognize
that it is already possible to pull out of the
parking space.
Canceling Active Parking Assist X
Stop the movement of the multifunction
steering wheel or steer yourself.
Active Parking Assist will be canceled at
once. The Park Assist Canceled
Park Assist Canceled mes-
sage appears in the multifunction display.
or X Press the PARKTRONIC button on the cen-
ter console (Y page 219).
PARKTRONIC is switched off and Active
Parking Assist is immediately canceled.
The Park Assist Canceled Park Assist Canceled message
appears in the multifunction display.
Active Parking Assist is canceled automati-
cally if: R the electric parking brake is engaged
R transmission position Pis selected
R parking using Active Parking Assist is no
longer possible
R you are driving faster than 6 mph (10 km/h)
R a wheel spins, ESP ®
intervenes or fails. The
00E5 warning lamp lights up in the instru-
ment cluster.
A warning tone sounds. The parking symbol
goes out and the Park Assist Canceled
Park Assist Canceled
message appears in the multifunction dis-
play.
If Active Parking Assist is canceled, you must
steer again yourself.
Towing a trailer For vehicles with a trailer tow hitch, the min-
imum length for parking spaces is slightly
increased. If you have attached a trailer to your vehicle,
you should not use Active Parking Assist.
Once the electrical connection is established
between your vehicle and the trailer, Active
Parking Assist is no longer available. PARK-
TRONIC is deactivated for the rear area. Rear view camera
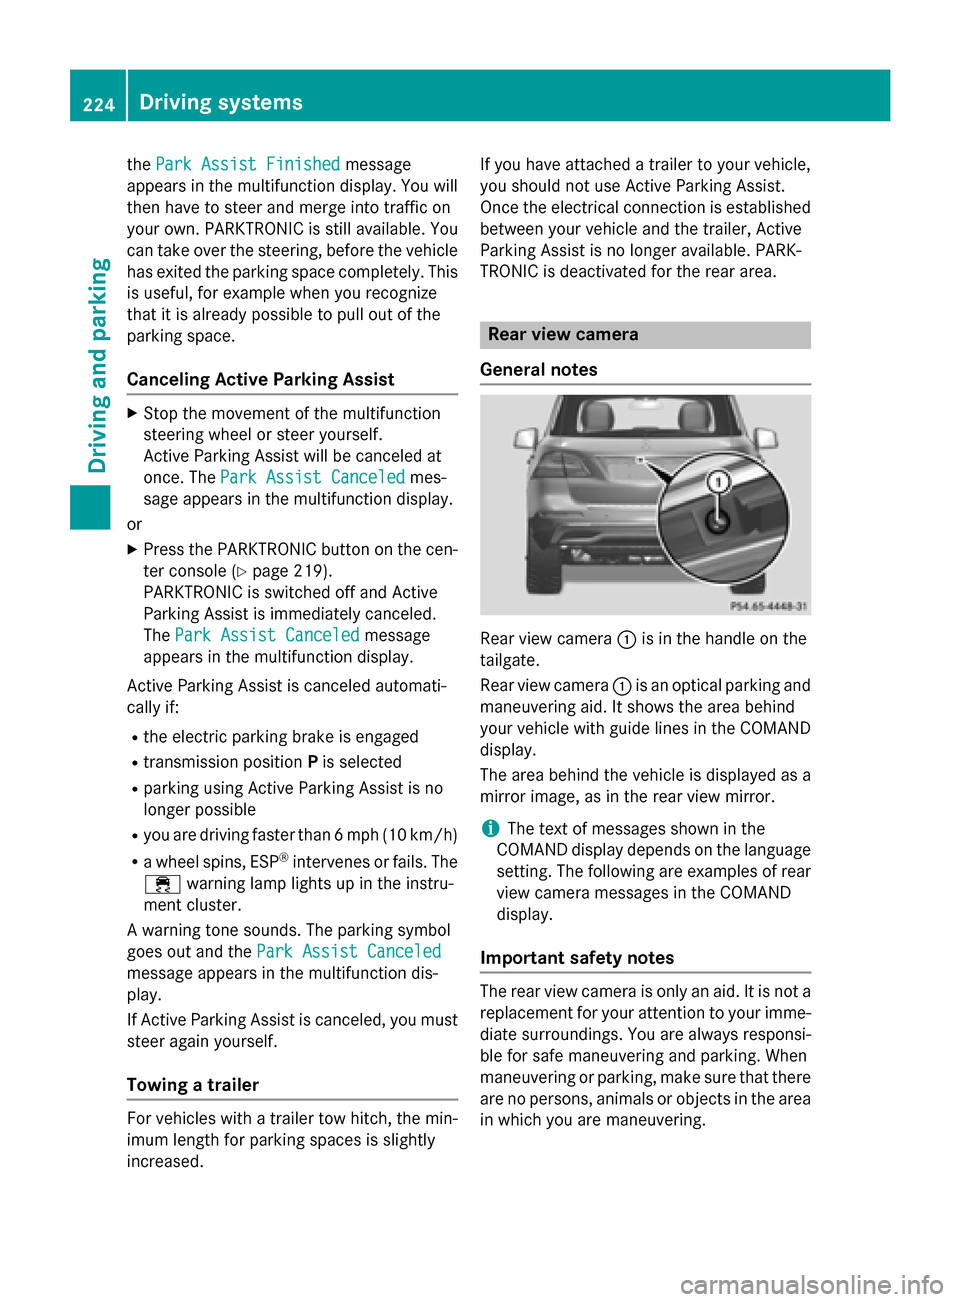
General notes Rear view camera
0043is in the handle on the
tailgate.
Rear view camera 0043is an optical parking and
maneuvering aid. It shows the area behind
your vehicle with guide lines in the COMAND display.
The area behind the vehicle is displayed as a
mirror image, as in the rear view mirror.
i The text of messages shown in the
COMAND display depends on the language
setting. The following are examples of rear view camera messages in the COMAND
display.
Important safety notes The rear view camera is only an aid. It is not a
replacement for your attention to your imme- diate surroundings. You are always responsi-
ble for safe maneuvering and parking. When
maneuvering or parking, make sure that there are no persons, animals or objects in the area
in which you are maneuvering. 224
Driving systemsDriving an
d parking
Page 227 of 466
Under the following circumstances, the rear
view camera will not function, or will function
in a limited manner:
R if the tailgate is open
R in heavy rain, snow or fog
R at night or in very dark places
R if the camera is exposed to very bright light
R if the area is lit by fluorescent bulbs or LED
lighting (the display may flicker)
R if there is a sudden change in temperature,
e.g. when driving into a heated garage in
winter
R if the camera lens is dirty or obstructed
R if the rear of your vehicle is damaged. In this
event, have the camera position and setting checked at a qualified specialist workshop
The field of vision and other functions of the
rear view camera may be restricted due to
additional accessories on the rear of the vehi-
cle (e.g. license plate holder, bicycle rack).
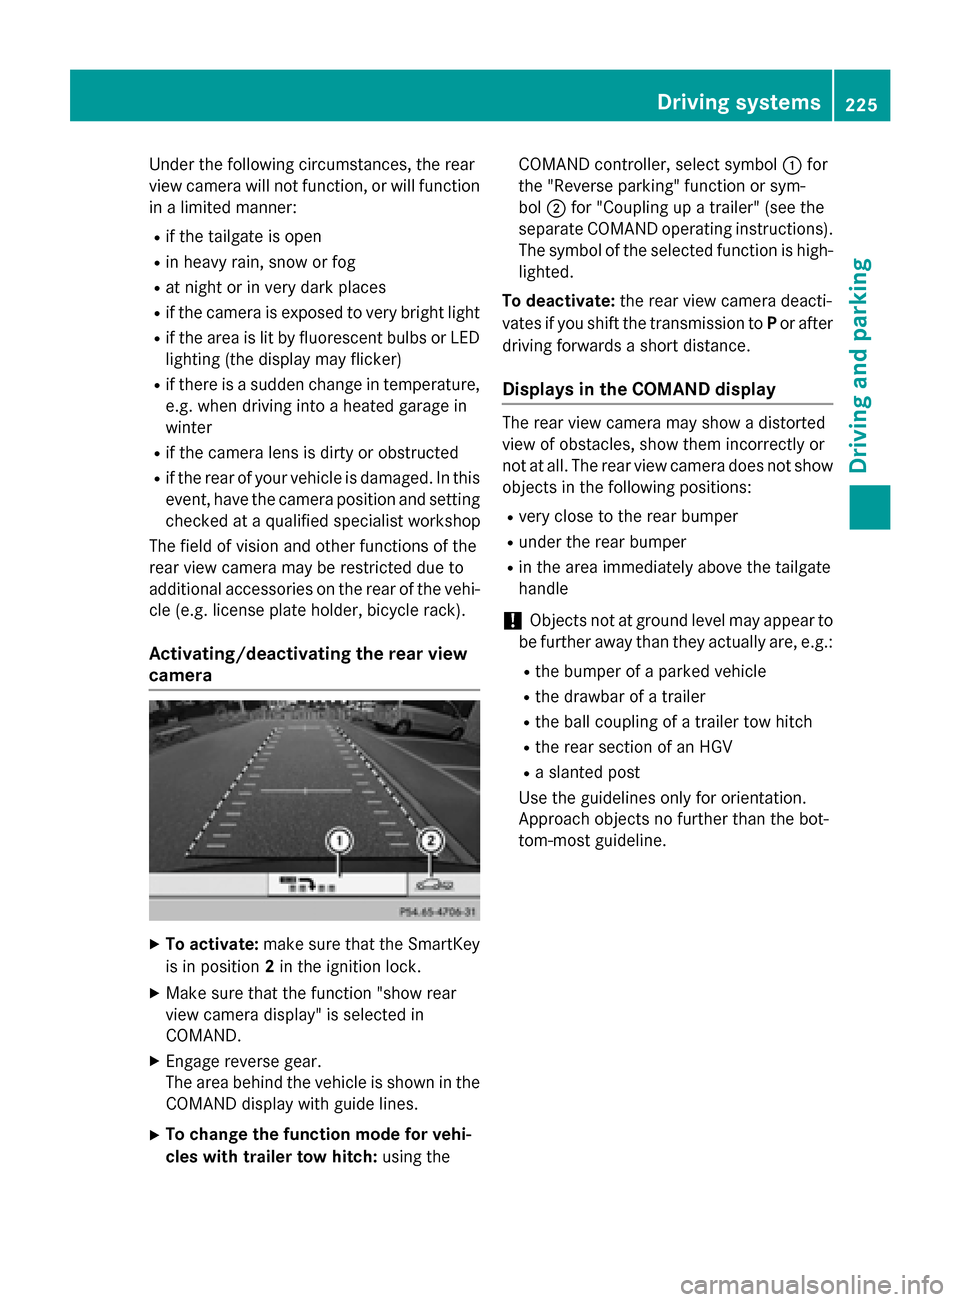
Activating/deactivating the rear view
camera X
To activate: make sure that the SmartKey
is in position 2in the ignition lock.
X Make sure that the function "show rear
view camera display" is selected in
COMAND.
X Engage reverse gear.
The area behind the vehicle is shown in the
COMAND display with guide lines.
X To change the function mode for vehi-
cles with trailer tow hitch: using theCOMAND controller, select symbol
0043for
the "Reverse parking" function or sym-
bol 0044for "Coupling up a trailer" (see the
separate COMAND operating instructions). The symbol of the selected function is high- lighted.
To deactivate: the rear view camera deacti-
vates if you shift the transmission to Por after
driving forwards a short distance.
Displays in the COMAND display The rear view camera may show a distorted
view of obstacles, show them incorrectly or
not at all. The rear view camera does not show
objects in the following positions:
R very close to the rear bumper
R under the rear bumper
R in the area immediately above the tailgate
handle
! Objects not at ground level may appear to
be further away than they actually are, e.g.:
R the bumper of a parked vehicle
R the drawbar of a trailer
R the ball coupling of a trailer tow hitch
R the rear section of an HGV
R a slanted post
Use the guidelines only for orientation.
Approach objects no further than the bot-
tom-most guideline. Driving systems
225Driving and parking Z
Page 230 of 466
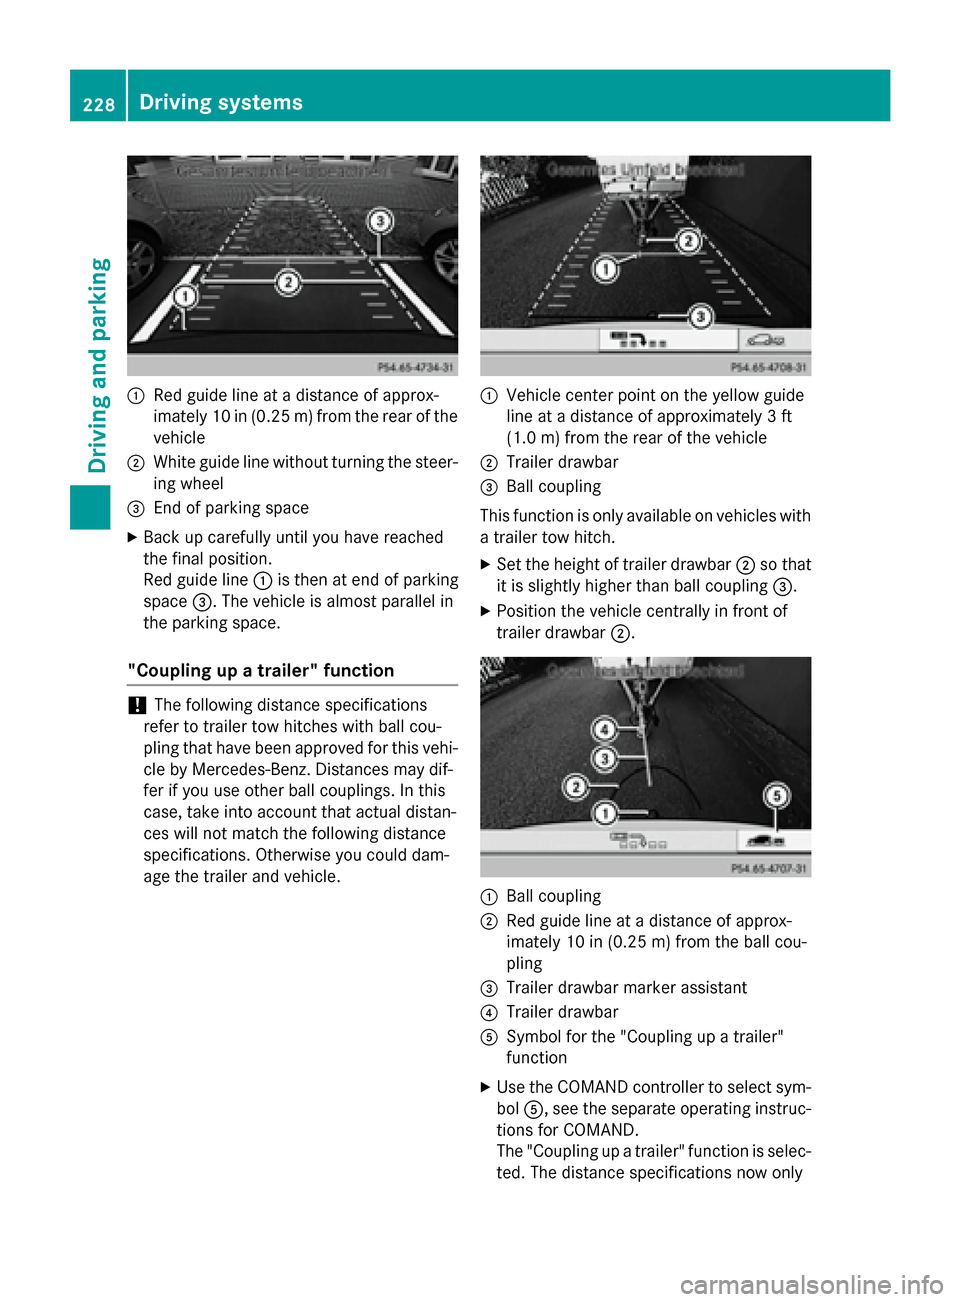
0043
Red guide line at a distance of approx-
imately 10 in (0.25 m) from the rear of the
vehicle
0044 White guide line without turning the steer-
ing wheel
0087 End of parking space
X Back up carefully until you have reached
the final position.
Red guide line 0043is then at end of parking
space 0087. The vehicle is almost parallel in
the parking space.
"Coupling up a trailer" function !
The following distance specifications
refer to trailer tow hitches with ball cou-
pling that have been approved for this vehi-
cle by Mercedes-Benz. Distances may dif-
fer if you use other ball couplings. In this
case, take into account that actual distan-
ces will not match the following distance
specifications. Otherwise you could dam-
age the trailer and vehicle. 0043
Vehicle center point on the yellow guide
line at a distance of approximately 3 ft
(1.0 m) from the rear of the vehicle
0044 Trailer drawbar
0087 Ball coupling
This function is only available on vehicles with
a trailer tow hitch.
X Set the height of trailer drawbar 0044so that
it is slightly higher than ball coupling 0087.
X Position the vehicle centrally in front of
trailer drawbar 0044. 0043
Ball coupling
0044 Red guide line at a distance of approx-
imately 10 in (0.25m)from the ball cou-
pling
0087 Trailer drawbar marker assistant
0085 Trailer drawbar
0083 Symbol for the "Coupling up a trailer"
function
X Use the COMAND controller to select sym-
bol 0083, see the separate operating instruc-
tions for COMAND.
The "Coupling up a trailer" function is selec- ted. The distance specifications now only 228
Driving systemsDriving and parking
Page 231 of 466
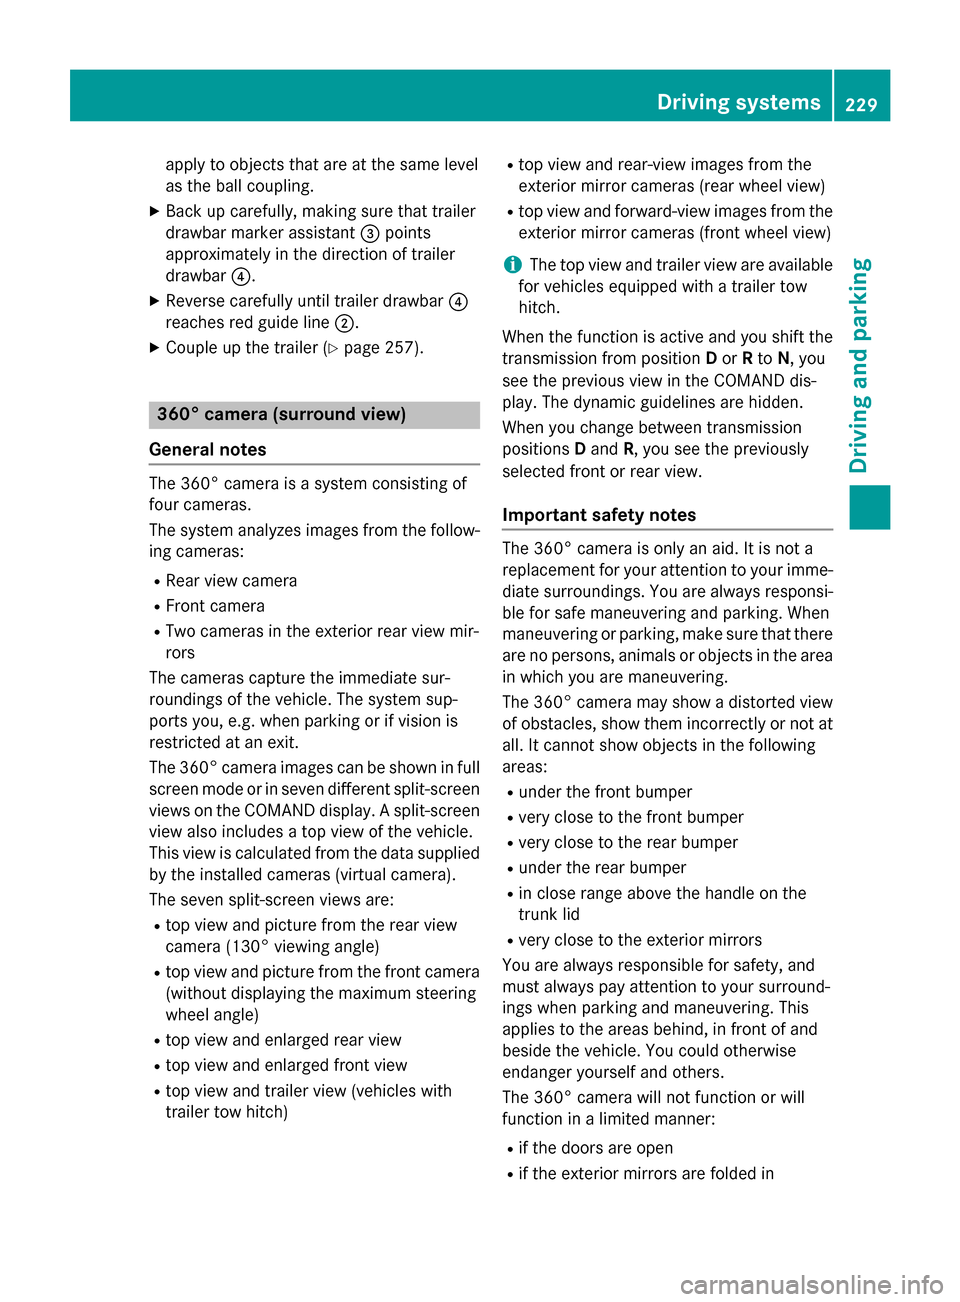
apply to objects that are at the same level
as the ball coupling.
X Back up carefully, making sure that trailer
drawbar marker assistant 0087points
approximately in the direction of trailer
drawbar 0085.
X Reverse carefully until trailer drawbar 0085
reaches red guide line 0044.
X Couple up the trailer (Y page 257).360° camera (surround view)
General notes The 360° camera is a system consisting of
four cameras.
The system analyzes images from the follow-
ing cameras:
R Rear view camera
R Front camera
R Two cameras in the exterior rear view mir-
rors
The cameras capture the immediate sur-
roundings of the vehicle. The system sup-
ports you, e.g. when parking or if vision is
restricted at an exit.
The 360° camera images can be shown in full
screen mode or in seven different split-screen views on the COMAND display. A split-screenview also includes a top view of the vehicle.
This view is calculated from the data supplied
by the installed cameras (virtual camera).
The seven split-screen views are: R top view and picture from the rear view
camera (130° viewing angle)
R top view and picture from the front camera
(without displaying the maximum steering
wheel angle)
R top view and enlarged rear view
R top view and enlarged front view
R top view and trailer view (vehicles with
trailer tow hitch) R
top view and rear-view images from the
exterior mirror cameras (rear wheel view)
R top view and forward-view images from the
exterior mirror cameras (front wheel view)
i The top view and trailer view are available
for vehicles equipped with a trailer tow
hitch.
When the function is active and you shift the
transmission from position Dor Rto N, you
see the previous view in the COMAND dis-
play. The dynamic guidelines are hidden.
When you change between transmission
positions Dand R, you see the previously
selected front or rear view.
Important safety notes The 360° camera is only an aid. It is not a
replacement for your attention to your imme-
diate surroundings. You are always responsi- ble for safe maneuvering and parking. When
maneuvering or parking, make sure that there are no persons, animals or objects in the area
in which you are maneuvering.
The 360° camera may show a distorted view of obstacles, show them incorrectly or not at
all. It cannot show objects in the following
areas:
R under the front bumper
R very close to the front bumper
R very close to the rear bumper
R under the rear bumper
R in close range above the handle on the
trunk lid
R very close to the exterior mirrors
You are always responsible for safety, and
must always pay attention to your surround-
ings when parking and maneuvering. This
applies to the areas behind, in front of and
beside the vehicle. You could otherwise
endanger yourself and others.
The 360° camera will not function or will
function in a limited manner:
R if the doors are open
R if the exterior mirrors are folded in Driving systems
229Driving and parking Z
Page 233 of 466
X
To switch to full screen mode: select
Full Screen
Full Screen by turning00790052007Athe
COMAND controller and press 0098to con-
firm.
Displays in the COMAND display Important safety notes
! Objects not at ground level may appear to
be further away than they actually are, e.g.:
R the bumper of a parked vehicle
R the drawbar of a trailer
R the ball coupling of a trailer tow hitch
R the rear section of an HGV
R a slanted post
Use the guidelines only for orientation.
Approach objects no further than the bot-
tom-most guideline.
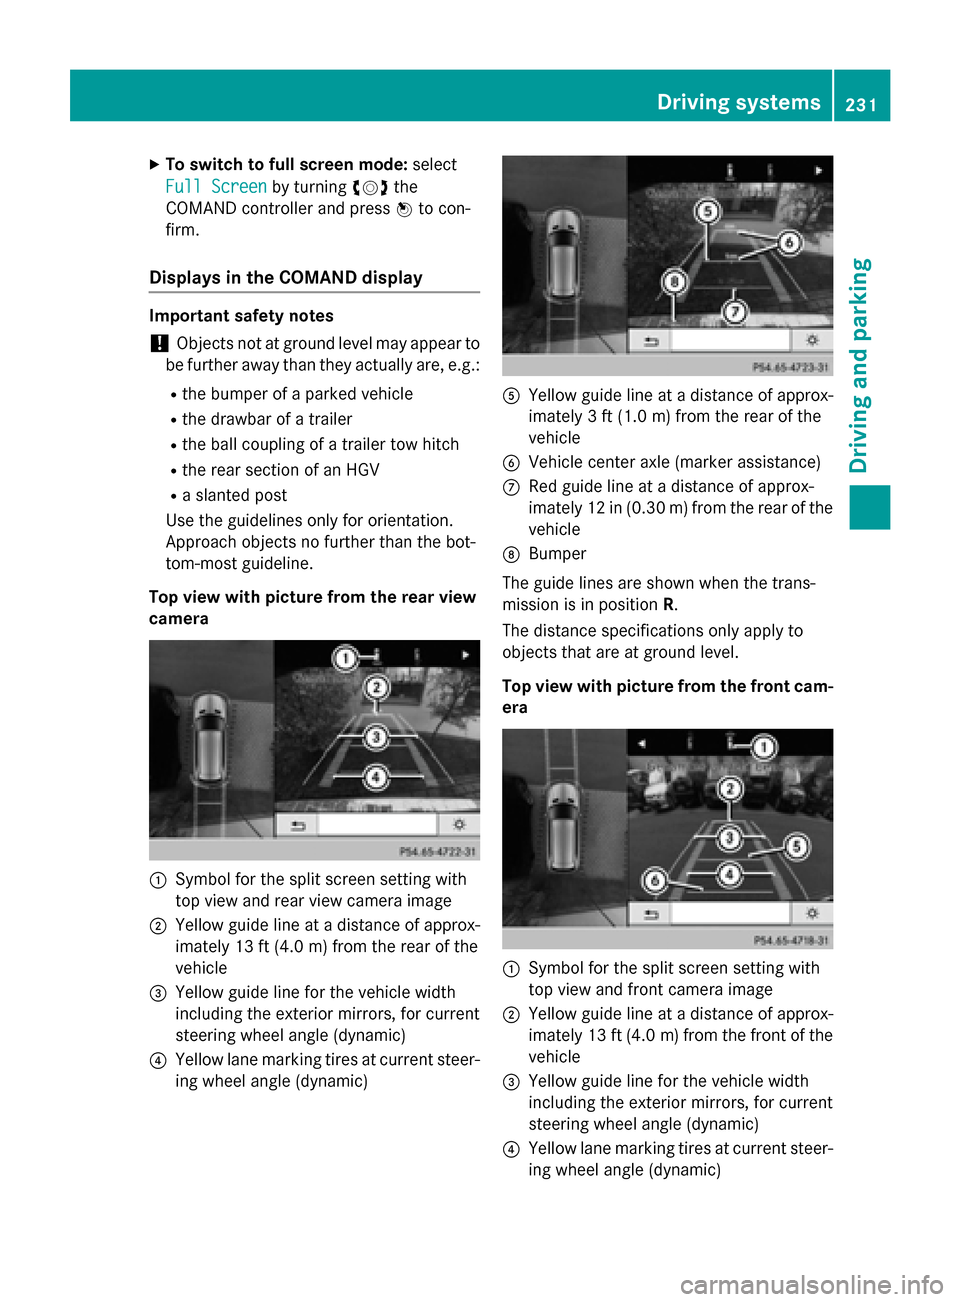
Top view with picture from the rear view
camera 0043
Symbol for the split screen setting with
top view and rear view camera image
0044 Yellow guide line at a distance of approx-
imately 13 ft (4.0 m) fromthe rear of the
vehicle
0087 Yellow guide line for the vehicle width
including the exterior mirrors, for current
steering wheel angle (dynamic)
0085 Yellow lane marking tires at current steer-
ing wheel angle (dynamic) 0083
Yellow guide line at a distance of approx-
imately 3 ft (1.0 m) fromthe rear of the
vehicle
0084 Vehicle center axle (marker assistance)
006B Red guide line at a distance of approx-
imately 12 in (0.30 m) fromthe rear of the
vehicle
006C Bumper
The guide lines are shown when the trans-
mission is in position R.
The distance specifications only apply to
objects that are at ground level.
Top view with picture from the front cam- era 0043
Symbol for the split screen setting with
top view and front camera image
0044 Yellow guide line at a distance of approx-
imately 13 ft (4.0 m)from the front of the
vehicle
0087 Yellow guide line for the vehicle width
including the exterior mirrors, for current
steering wheel angle (dynamic)
0085 Yellow lane marking tires at current steer-
ing wheel angle (dynamic) Driving systems
231Driving and parking Z
Page 248 of 466
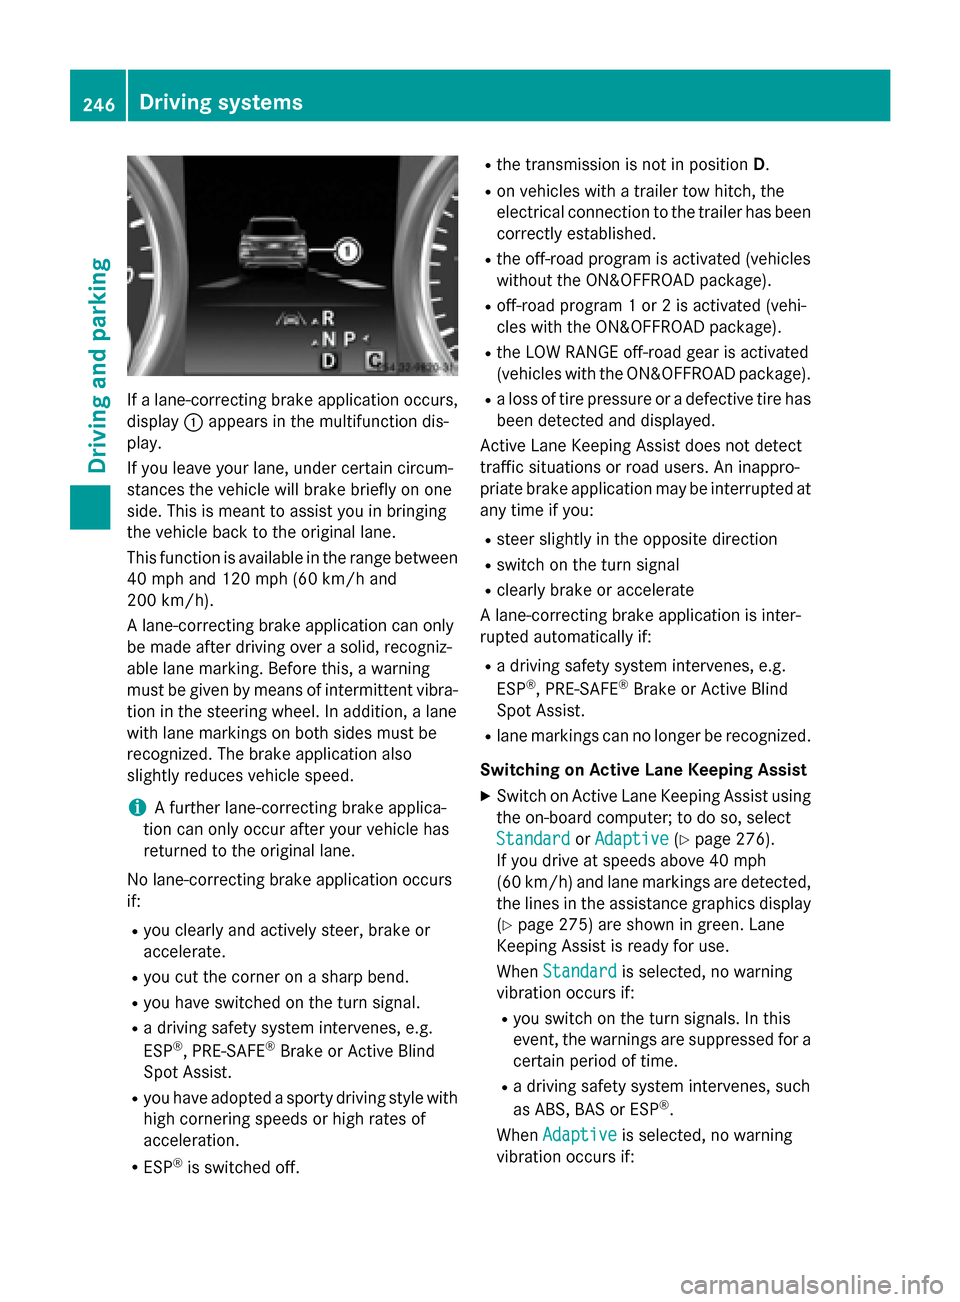
If a lane-correcting brake application occurs,
display 0043appears in the multifunction dis-
play.
If you leave your lane, under certain circum-
stances the vehicle will brake briefly on one
side. This is meant to assist you in bringing
the vehicle back to the original lane.
This function is available in the range between
40 mph and 120 mph (60 km/h and
200 km/h).
A lane-correcting brake application can only
be made after driving over a solid, recogniz-
able lane marking. Before this, a warning
must be given by means of intermittent vibra-
tion in the steering wheel. In addition, a lane
with lane markings on both sides must be
recognized. The brake application also
slightly reduces vehicle speed.
i A further lane-correcting brake applica-
tion can only occur after your vehicle has
returned to the original lane.
No lane-correcting brake application occurs
if:
R you clearly and actively steer, brake or
accelerate.
R you cut the corner on a sharp bend.
R you have switched on the turn signal.
R a driving safety system intervenes, e.g.
ESP ®
, PRE-SAFE ®
Brake or Active Blind
Spot Assist.
R you have adopted a sporty driving style with
high cornering speeds or high rates of
acceleration.
R ESP ®
is switched off. R
the transmission is not in position D.
R on vehicles with a trailer tow hitch, the
electrical connection to the trailer has been
correctly established.
R the off-road program is activated (vehicles
without the ON&OFFROAD package).
R off-road program 1 or 2 is activated (vehi-
cles with the ON&OFFROAD package).
R the LOW RANGE off-road gear is activated
(vehicles with the ON&OFFROAD package).
R a loss of tire pressure or a defective tire has
been detected and displayed.
Active Lane Keeping Assist does not detect
traffic situations or road users. An inappro-
priate brake application may be interrupted at
any time if you:
R steer slightly in the opposite direction
R switch on the turn signal
R clearly brake or accelerate
A lane-correcting brake application is inter-
rupted automatically if:
R a driving safety system intervenes, e.g.
ESP ®
, PRE-SAFE ®
Brake or Active Blind
Spot Assist.
R lane markings can no longer be recognized.
Switching on Active Lane Keeping Assist
X Switch on Active Lane Keeping Assist using
the on-board computer; to do so, select
Standard
Standard orAdaptive Adaptive (Ypage 276).
If you drive at speeds above 40 mph
(60 km/h) and lane markings are detected, the lines in the assistance graphics display(Y page 275) are shown in green. Lane
Keeping Assist is ready for use.
When Standard Standard is selected, no warning
vibration occurs if:
R you switch on the turn signals. In this
event, the warnings are suppressed for a
certain period of time.
R a driving safety system intervenes, such
as ABS, BAS or ESP ®
.
When Adaptive Adaptive is selected, no warning
vibration occurs if: 246
Driving systemsDriving and parking
Page 258 of 466
R
uphill or downhill gradient in percentage
R on-road/off-road program selected
R condition of the differential lock for the
transfer case
R the LOW RANGE off-road gear is selected
R condition of the LOW RANGE off-road
gear
R the on-road trailer program is selected Towing a trailer
Important safety notes
G
WARNING
Installing an unsuitable ball coupling may
result in overloading of the trailer tow hitch
and the rear axle. This applies especially if the ball coupling in question is longer or angled
differently. This could seriously impair the
driving characteristics and the trailer can
come loose. There is a risk of an accident.
You should only ever install a ball coupling
that has the permissible dimensions and that
is designed to meet your trailer-towing
requirements. Do not modify the ball coupling
or the trailer tow hitch.
You will find the values approved by the man-
ufacturer on the vehicle identification plates
and those for the towing vehicle under "Tech- nical data" (Y page 460). G
WARNING
If the ball coupling is not installed correctly or not secured with the bolt provided and the
corresponding spring cotter, the trailer may
come loose. There is a risk of an accident.
Always install and secure the ball coupling as
described. Before every journey, ensure that
the ball coupling is secured with the bolt and
the corresponding spring cotter. G
WARNING
If you rest your foot on the brake pedal while
driving, the braking system can overheat. This increases the stopping distance and can even cause the braking system to fail. There is a
risk of an accident.
Never use the brake pedal as a footrest. Never
depress the brake pedal and the accelerator
pedal at the same time. G
WARNING
When the vehicle/trailer combination begins
to lurch, you could lose control of it. The vehi- cle/trailer combination could even rollover.
There is a risk of an accident.
On no account should you attempt to
straighten up the vehicle/trailer combination
by increasing the speed. Reduce vehicle
speed and do not countersteer. Apply the
brake as necessary.
! Depressing the brake pedal constantly
results in excessive and premature wear to
the brake pads.
Please observe the manufacturer's operating instructions for the trailer coupling if a
detachable trailer coupling is used.
Couple and uncouple the trailer carefully. If
you do not couple the trailer to the towing
vehicle correctly, the trailer could become
detached.
Make sure that the following values are not
exceeded:
R the permissible trailer drawbar noseweight
R the permissible trailer load
R the permissible rear axle load of the towing
vehicle
R the maximum permissible gross vehicle
weight of both the towing vehicle and the
trailer
The applicable permissible values, which
must not be exceeded, can be found:
R in the vehicle documents
R on the identification plates for the trailer
tow hitch and the trailer
R on the vehicle identification plate
If the values differ, the lowest value applies. 256
Towing a trailerDriving and pa
rking