warning MERCEDES-BENZ METRIS 2019 MY19 Operator’s Manual
[x] Cancel search | Manufacturer: MERCEDES-BENZ, Model Year: 2019, Model line: METRIS, Model: MERCEDES-BENZ METRIS 2019Pages: 318, PDF Size: 5.07 MB
Page 278 of 318
XConnect the negative terminal clamp of the
jumper cable to negative terminal;of the
donor veh icle's battery, and then to earth
contact ?of your own veh icle.
XInsert the key into the ignition lock and start
the engine.
You can now switch electrical consumers
back on except the lighting system.
XBefore disconnecting the jumper cables, let
the engine run for several minutes.
XDisconnect the negative terminal of the
jumper cable from earth contact ?and then
from negative terminal ;of the donor veh i-
cle's battery.
XDisconnect the positive terminal clamp of the
jumper cable from positive terminal Aon the
jump-starting connection point, and then
from positive terminal =of the donor veh i-
cle's battery.
Contact protection cover :isautomatically
returned forwards to its original position by
the spring force and the jump-starting con-
nection pointis closed.
XPosition the cover on positive terminal =of
the donor veh icle's battery.
You can now switch on the lighting system.
XHave the battery checked at a qualified spe-
cialist workshop.
Tow-starting and towing away
Important safety notes
GWAR NING
Functions relevant to safety are restricted or
no longer availab leif:
Rthe engine isnot running.
Rthe brake system or the power steering is
malfunctioning.
Rthere isa malfunction inthe voltage supply
or the veh icle's electrical system.
If your veh icle is bein g towed, much more
force may benecessary to steer or brake.
There isa risk of an acc ident.
In such cases, use a tow bar. Before to wing,
make sure that the steering moves freely.
GWARNING
You can no longer steer the vehicle ifthe
steering wheel lock has been engaged. There
is a risk of an accident.
Alwa ysswit ch off the ignition when to wingthe
vehicle with a tow cable or a tow bar.
GWARNING
When to wingor tow-starting another vehicle
and its weight isgreater than the permissible
gross weight of your vehicle, the:
Rthe to wingeye could detach itself
Rthe vehicle /trailer combination could roll-
over.
There is a risk of an accident.
When towing or tow-starting another vehicle,
its weight should not be greater than the per- missible gross weight of your vehicle.
In formation on the gross vehicle weight can be
found on the vehicle identification plate
(
Ypage 305).
!Secure the tow rope or tow bar to the to wing
eye or trailer tow hitch only. Otherwise, the
vehicle could become damaged.
!Do not use the to wingeye for recovery, this
could damage the vehicle. If indoubt, recover
the vehicle with a crane.
!Drive slowly and smoothly when to wing.
Excessive tractive power could otherwise
damage the vehicles.
!Shift the automatic transmission to Nand
do not open the driver's or front passenger's
door during to wing. The automatic transmis-
sion may otherwise shift to position P,whic h
could damage the transmission.
!The vehicle can be towed a maximum of
30 miles (50km ).The to wingspeed of 30 mph
(50 km/h) must not be exceeded.
If the vehicle has to betowed more than
30 mile
s(50k
m) ,the entire vehicl emust be
raised and transported.
When towing away, you must observe the legal
requirements for the country in which you are
currently driving.
It is better to have the vehicle transported than
to have it towed.
276Tow-starting and towing away
Breakdown assistance
Page 279 of 318
Have the vehicle transported on a transporter or
trailer if it has transmission damage.
The automatic transmission must be in position
iwhen the vehicle is being towed away. If the
automatic transmission cannot be shifted to
position i, have the vehicle transported on a
transporter or trailer.
The battery must be connected and charged.
Otherwise, you:
Rcannot turn the key to position 2in the igni-
tion lock.
Rcannot shift the transmission to position i.
Before the vehicle is towed, switch off the auto-
matic locking feature (
Ypage 74). You could
otherwise lock yourself out of the vehicle when
pushing or towing away the vehicle.
Installing/removing the towing eye
The fixture for the front towing eye is located in the
bumper.
The rear towing eye is located under the bumper.
If you tow or tow-start a vehicle, attach the tow-
ing device to rear towing eye ;.
If your vehicle is equipped with a trailer tow
hitch, attach the towing device to the trailer tow
hitch (
Ypage 165). Installing the front towing eye
XTake the towing eye and screwdriver from the
vehicle tool kit (Ypage 272).
XPress the arrow on the cover
:and remove
cover :from the opening.
You will see the fixture for the towing eye.
XScrew in the towing eye clockwise to the stop.
XInsert the screwdriver into the towing eye and
tighten the towing eye.
XStow the screwdriver in the vehicle tool kit
(Ypage 272).
Removing the front towing eye
XRemove the screwdriver from the vehicle tool
kit (Ypage 272).
XInsert the screwdriver into the towing eye and
turn the screwdriver counter-clockwise.
XUnscrew the towing eye.
XInsert cover :with the lug at the top and
press it in at the bottom until it engages.
XStow the towing eye and the screwdriver with
the vehicle tool kit (Ypage 272).
Towing with the rear axle raised
!
Vehicles with automatic transmission must
not be towed with the rear axle raised. The
vehicle/trailer combination may otherwise
swerve or even roll over.
!The ignition must be switched off if the vehi-
cle is being towed with the front or rear axle
raised. Otherwise, ESP
®may intervene and
damage the brake system.
XSwitch on the hazard warning lamps
(Ypage 98).
XTurn the front wheels to the straight-ahead
position.
XRelease the parking brake.
XIf necessary, turn the key to position 0in the
ignition lock and remove it.
XTake the key with you when leaving the vehi-
cle.
XDo not exceed the towing speed of 30 mph
(50 km/h).
Please observe the important safety instruc-
tions when towing your vehicle with the rear axle
raised (
Ypage 276).
Tow-starting and towing away277
Breakdown assistance
Z
Page 280 of 318
Towing the vehicle with both axles on
the ground
Important safety notes
GWARNING
You can no longer steer the vehicle if the
steering wheel lock has been engaged. There
is a risk of an accident.
Always switch off the ignition when towing the
vehicle with a tow cable or a tow bar.
!Do not exceed the towing speed of 30 mph
(50 km/h). You could otherwise damage the
transmission.
Please observe the important safety notes
before towing your vehicle (
Ypage 276).
Towing vehicles with automatic trans-
mission
XTurn the key to position 2in the ignition lock.
XDepress the brake pedal and keep it
depressed.
XShift the automatic transmission to position
N.
XLeave the key in position 2in the ignition lock.
XSwitch on the hazard warning lamps
(Ypage 98).
XRelease the parking brake.
XRelease the brake pedal.
XDo not exceed the towing speed of 30 mph
(50 km/h).
Recovering a vehicle that is stuck
!
When recovering a vehicle that has become
stuck, pull it as smoothly and evenly as pos-
sible. Excessive tractive power could damage
the vehicles.
If the drive wheels get trapped on loose or
muddy ground, recover the vehicle with the
utmost care. This is especially the case if the
vehicle is laden.
Never attempt to recover a vehicle with a trailer
attached.
Pull out the vehicle backwards, if possible, using
the tracks it made when it became stuck.
Transporting the vehicle
!
You may only secure the vehicle by the
wheels, not by parts of the vehicle such as
axle or steering components. Otherwise, the
vehicle could be damaged.
The towing eye or trailer tow hitch can be used
to pull the vehicle onto a trailer or transporter if
you wish to transport it.
XTurn the key to position 2in the ignition lock.
XShift the transmission to position N.
XRelease the parking brake.
If the vehicle is loaded:
XShift the transmission to position P.
XTurn the key to position 0in the ignition lock
and remove it.
XMake sure the parking brake is applied.
XLash down the vehicle.
Tow-starting (emergency engine
starting)
General notes
!Vehicles with automatic transmission must
not be tow-started. You could otherwise dam-
age the automatic transmission.
You can find information on jump-starting under
"Jump-starting“ (
Ypage 274).
Electrical fuses
The fuse allocation chart and important safety
information on the fuses can be found in the
"Fuse allocation chart" supplement.
278Electrical fuses
Breakdown assistance
Page 281 of 318
Useful information
This Operator's Manual describes all models as
well as standard and optional equipment of your
vehicle that were available at the time of going
to print. Country-specific variations are possi-
ble. Note that your vehicle may not be equipped
with all of the described functions. This also
applies to systems and functions relevant to
safety.
Read the information on qualified specialist
workshops (
Ypage 31).
Important safety notes
GWarning
A flat tire severely impairs the driving, steer-
ing and braking characteristics of the vehicle.
There is a risk of an accident.
do not drive with a flat tire. Immediately
replace the flat tire with your spare wheel, or
consult a qualified specialist workshop.
GWARNING
If wheels and tires of the wrong size are used, the wheel brakes or suspension components
may be damaged. There is a risk of an acci-
dent.
Always replace wheels and tires with those
that fulfill the specifications of the original
part.
When replacing wheels, make sure to use the
correct:
Rdesignation
Rmodel
When replacing tires, make sure to use the
correct:
Rdesignation
Rmanufacturer
Rmodel
Accessories that are not approved for your vehi-
cle by Mercedes-Benz or are not being used cor-
rectly can impair operating safety. Before purchasing and using non-approved
accessories, visit a qualified specialist work-
shop and inquire about:
Rsuitability
Rlegal stipulations
Rfactory recommendations
Information on the dimensions and types of
wheels and tires for your vehicle can be found
under "Wheel and tire combinations"
(
Ypage 302).
Information on your vehicle's tire pressure can
be found:
Rin the Tire and Loading Information placard on
the B-pillar, driver's side
Rin the tire pressure table inside the fuel filler
flap (Ypage 283)
Runder "Tire pressure tables" (Ypage 290)
Runder "Tire pressure" (Ypage 282)
Modifications to the brake system or wheels are not permitted. The use of a spacer and brake
dust shields is not permitted. This invalidates
the general operating permit for the vehicle.
Further information on wheels and tires can be
obtained at any qualified specialist workshop.
Operation
Information for a journey
If the vehicle is heavily laden, check the tire
pressures, and correct them, if necessary
(
Ypage 282).
While driving, pay attention to vibrations, noises
and unusual handling characteristics, e.g. pull-
ing to one side. This may indicate that the
wheels or tires are damaged. If you suspect that
a tire is defective, reduce your speed immedi-
ately. Stop the vehicle as soon as possible to
check the wheels and tires for damage. Hidden
tire damage could also be causing the unusual
handling characteristics. If you find no signs of
damage, have the tires and wheels checked at a
qualified specialist workshop.
When parking your vehicle, make sure that the
tires do not get deformed by the curb or other
obstacles. If it is necessary to drive over curbs,
speed humps or similar elevations, try to do so
slowly and not at a sharp angle. Otherwise, the
tires, particularly the sidewalls, can get dam-
aged.
Operation279
Wheels and tires
Z
Page 282 of 318
Regular wheel and tire checks
GWARNING
Damaged tires can cause tire inflation pres-
sure loss. As a result, you could lose control of
your vehicle. There is a risk of accident.
Check the tires regularly for signs of damage
and replace any damaged tires immediately.
Check the wheels and tires of your vehicle for
damage regularly, i.e. at least every two weeks,
as well as after driving off-road or on rough
roads. Damaged wheels can cause a loss of tire
pressure. Pay particular attention to damage
such as:
Rcuts in the tires
Rpunctures
Rtears in the tires
Rbulges on tires
Rdeformation or severe corrosion on wheels
Regularly check the tire tread depth and the
condition of the tread across the whole width of
the tire (
Ypage 280). If necessary, turn the
front wheels to full lock in order to inspect the
inner side of the tire surface.
All wheels must have a valve cap to protect the valve against dirt and moisture. Do not install
anything onto the valve other than the standard
valve cap or other valve caps approved for your vehicle by dealers listed on the inside of the
front cover. Do not install any other valve caps
or systems, e.g. tire pressure monitor systems.
Regularly check the pressure of all the tires,
particularly prior to long trips. Adjust the tire
pressure if ne
cessary (Ypage 282).
The service life of tires depends on various fac-
tors, including the following:
Rdriving style
Rtire pressure
Rmileage
Tire tread
GWARNING
Insufficient tire tread will reduce tire traction.
The tire is no longer able to dissipate water.
This means that on wet road surfaces, the risk
of hydroplaning increases, in particular where
speed is not adapted to suit the driving con-
ditions. There is a risk of accident.
If the tire pressure is too high or too low, tires may exhibit different levels of wear at differ-
ent locations on the tire tread. Thus, you
should regularly check the tread depth and
the condition of the tread across the entire
width of all tires.
Minimum tire tread depth for:
RSummer tires: âin (3 mm)
RM+S tires: ãin (4 mm)
For safety reasons, replace the tires before
the legally prescribed limit for the minimum
tire tread depth is reached.
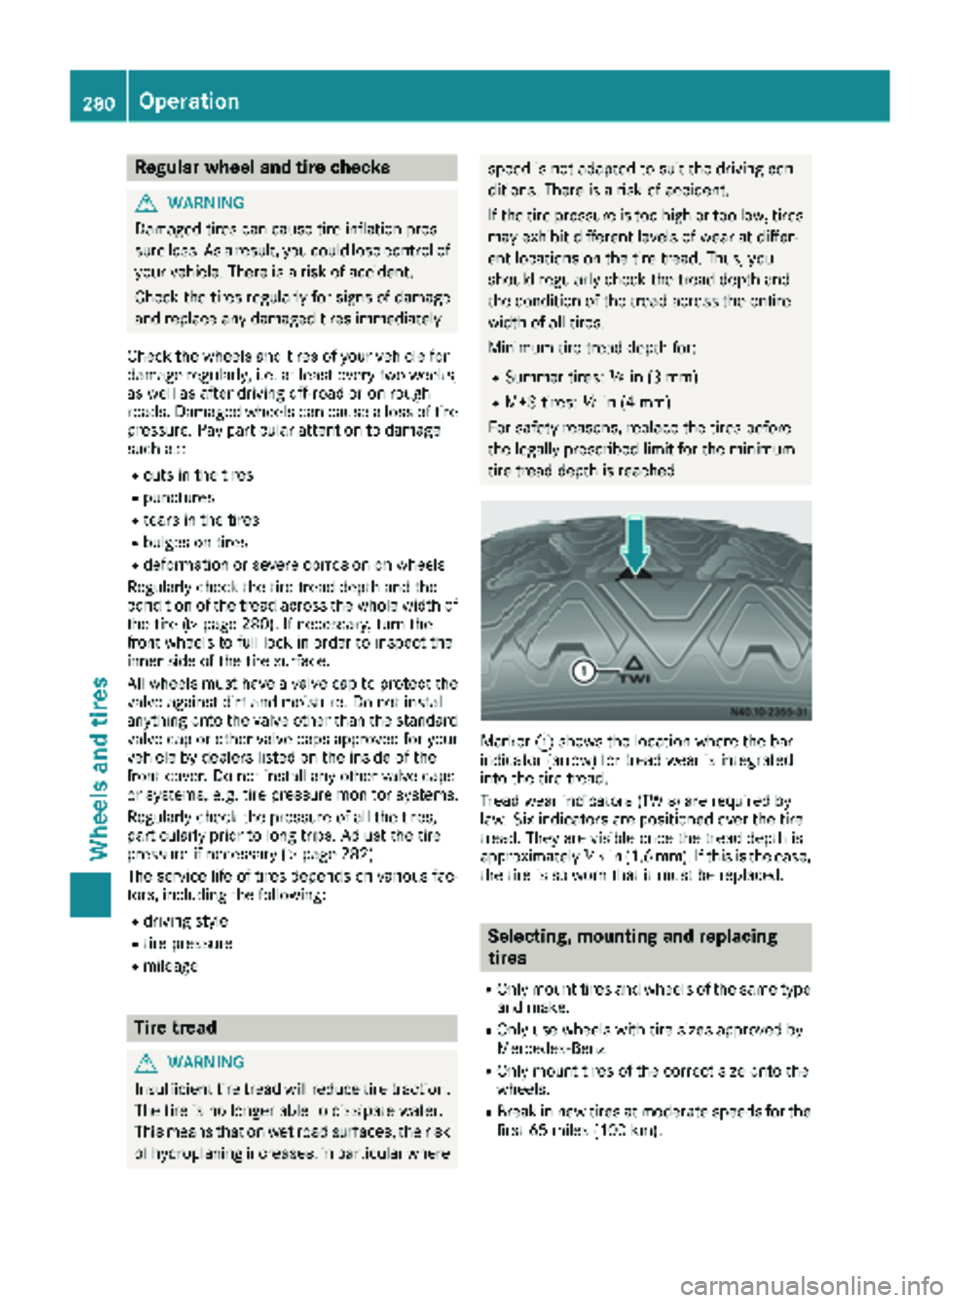
Marker :shows the location where the bar
indicator (arrow) for tread wear is integrated
into the tire tread.
Tread wear indicators (TWIs) are required by
law. Six indicators are positioned over the tire
tread. They are visible once the tread depth is
approximately áin (1.6 mm). If this is the case,
the tire is so worn that it must be replaced.
Selecting, mounting and replacing
tires
ROnly mount tires and wheels of the same type
and make.
ROnly use wheels with tire sizes approved by
Mercedes-Benz.
ROnly mount tires of the correct size onto the
wheels.
RBreak in new tires at moderate speeds for the
first 65 miles (100 km).
280Operation
Wheels and tires
Page 283 of 318
RDo not drive with tires which have too little
tread depth, as this significantly reduces the
traction on wet roads (hydroplaning).
RReplace the tires after six years at the latest,
regardless of wear. This also applies to the
spare wheel.
Operation in winter
General notes
Have your vehicle winterproofed at a qualified
specialist workshop at the onset of winter.
Only use wheels with tire sizes approved by
Mercedes-Benz.
Prior to the onset of winter, ensure that snow
chains are stowed in the vehicle (
Ypage 282).
Snow chains cannot be mounted on all wheel/
tire combinations. Observe the restrictions on
the use of snow chains under "Wheel/tire com-
binations" (
Ypage 302).
Also observe the notes in the "Changing a
wheel" section (
Ypage 298).
Driving with summer tires
At temperatures below 45 ‡ (+7 †), summer
tires lose elasticity and therefore traction and
braking power. Change the tires on your vehicle
to M+S tire s. Usingsu mmer tires at very cold
temperatures could cause tears to form,
thereby damaging the tires permanently.
Mercedes-Benz cannot accept responsibility for
this type of damage.
M+S tires
GWARNING
Wheel and tire dimensions as well as the type of tire can vary between the spare wheel and
the wheel to be replaced. When the spare
wheel is mounted, driving characteristics may be severely affected. There is a risk of an acci-
dent.
In order to reduce risks:
Ryou should therefore adapt your driving
style and drive carefully.
Rnever mount more than one spare wheel
that differs from the wheel to be replaced.
Ronly use a spare wheel that differs from the
wheel to be replaced for a short time.
Rhave a spare wheel that differs from the
wheel that has been changed replaced at
the nearest qualified specialist workshop.
You must observe the correct wheel and
tire dimensions as well as the wheel type.
GWARNING
M+S tires with a tire tread depth of less than
ã in (4 mm) are not suitable for use in winter
and do not provide sufficient traction. There is
a risk of an accident.
M+S tires with a tread depth of less than ãin
(4 mm) must be replaced immediately.
Use winter tires or all-season tires at tempera-
tures below 45 ‡ (+7 †). Both types of tire are
identified by the M+S marking.
Only winter tires bearing the isnowflake
symbol in addition to the M+S marking provide
the best possible grip in wintry road conditions.
Only these tires will allow driving safety systems
such as ABS and ESP
®to function optimally in
winter. These tires have been developed specif-
ically for driving in snow.
For safe driving, use M+S tires of the same make
and tread pattern on all wheels.
Always observe the maximum permissible
speed specified for the M+S tires you have
mounted.
If you mount M+S tires that have a lower maxi-
mum permissible speed than the maximum
design speed of the vehicle, affix a correspond- ing warning label in the driver's field of vision.
You can obtain this at a qualified specialist work-
shop.
Once you have mounted the winter tires:
XCheck the tire pressure (Ypage 282).
XRestart the tire pressure monitor
(Ypage 289).
Operation in winter281
Wheels and tires
Z
Page 284 of 318
Snow chains
GWARNING
If snow chains are installed to the front
wheels, they may drag against the vehicle
body or chassis components. This could
cause damage to the vehicle or the tires.
There is a risk of an accident.
To avoid hazardous situations:
Rnever install snow chains to the front
wheels
Ralways install snow chains in pairs to the
rear wheels.
GWARNING
If you drive too fast with snow chains moun-
ted, they may snap. As a result, you could
injure others and damage the vehicle. There is
a risk of an accident.
Observe the maximum permissible speed for
operation with snow chains.
Observe the country-specific laws and regula-
tions for operation with snow chains.
!Check the snow chains for damage before
mounting them. Damaged or worn snow
chains may snap and damage the following
components:
Rwheel
Rwheel housing
Rwheel suspension
For this reason, you must use only snow
chains that are free of defects. Observe the
manufacturer's mounting instructions.
!Vehicles with steel wheels: if you mount
snow chains on steel wheels, you may dam-
age the hub caps. Remove the hub caps from
the relevant wheels before mounting the
snow chains.
Snow chains increase traction on roads in wintry conditions.
For safety reasons, Mercedes-Benz recom-
mends that you only use snow chains or traction
aids which have been approved for Mercedes-
Benz vehicles. The snow chains or traction aids
must be of class U or meet the SAE type U
specification. Information about snow chains can be obtained
from any Mercedes-Benz Commercial Van Cen-
ter.
When mounting snow chains, please bear the
following points in mind:
RSnow chains cannot be mounted on all
wheel/tire combinations. When mounting the
snow chains, note the permissible tire and
snow chain dimensions. Observe the restric-
tions on the use of snow chains under
"Wheel/tire combinations" (
Ypage 302).
RMount snow chains only in pairs and only to
the rear wheels. Observe the manufacturer's
mounting instructions.
ROnly use snow chains when the road is cov-
ered by a layer of snow. Remove the snow
chains as soon as possible when you come to
a road that is not snow-covered.
RThe use of snow chains may be restricted by
local regulations. Observe the appropriate
regulations before mounting snow chains.
RWhen driving with snow chains installed, do
not exceed the maximum permissible speed
of 30 mph (50 km/h).
RCheck the tension of the chains after a dis-
tance of approximately 0.5 miles (1.0 km).
You may wish to deactivate ESP
®when pulling
away with snow chains installed (Ypage 66).
This allows the wheels to spin in a controlled
manner, achieving an increased driving force
(cut
ting action).
Tire pressure
Tire pressure specifications
Important safety notes
GWARNING
Underinflated or overinflated tires pose the
following risks:
Rthe tires may burst, especially as the load
and vehicle speed increase.
Rthe tires may wear excessively and/or
unevenly, which may greatly impair tire
traction.
Rthe driving characteristics, as well as steer-
ing and braking, may be greatly impaired.
There is a risk of an accident.
282Tire pressure
Wheels and tires
Page 285 of 318
Follow recommended tire inflation pressures
and check the pressure of all the tires includ-
ing the spare wheel:
Rmonthly, at least
Rif the load changes
Rbefore beginning a long journey
Runder different operating conditions, e.g.
off-road driving
If necessary, correct the tire pressure.
GWARNING
If you fit unsuitable accessories onto tire
valves, the tire valves may be overloaded and
malfunction, which can cause tire pressure
loss. Due to their design, retrofitted tire pres- sure monitors keep the tire valve open. This
can also result in tire pressure loss. There is a
risk of an accident.
Only screw the standard valve cap or other
valve caps approved by Mercedes-Benz for
your vehicle onto the tire valve.
!The pressure difference between tires on
any one axle must be no greater than 10 kPa
(0.1 bar/1.5 psi).
iThe specifications shown on the sample Tire
and Loading Information placard and tire
pressure table are examples. Tire pressure
data are vehicle-specific and may deviate
from the data illustrated here. The tire pres-
sure specifications that are valid for your vehi-
cle can be found on the Tire and Loading
Information placard and the tire pressure
table on the vehicle.
HEnvironmental note
Check the tire pressure regularly, at least
every 14 days.
General notes
You will find information on tire pressure for the vehicle's factory-mounted tires on the plates
described here.
The recommended tire pressure for various
operating conditions can be found on the Tire
and Loading Information placard on the B-pillar
on the driver's side of the vehicle or on the tire
pressure table inside the fuel filler flap. Further information on tire pressure can be
obtained at a qualified specialist workshop.
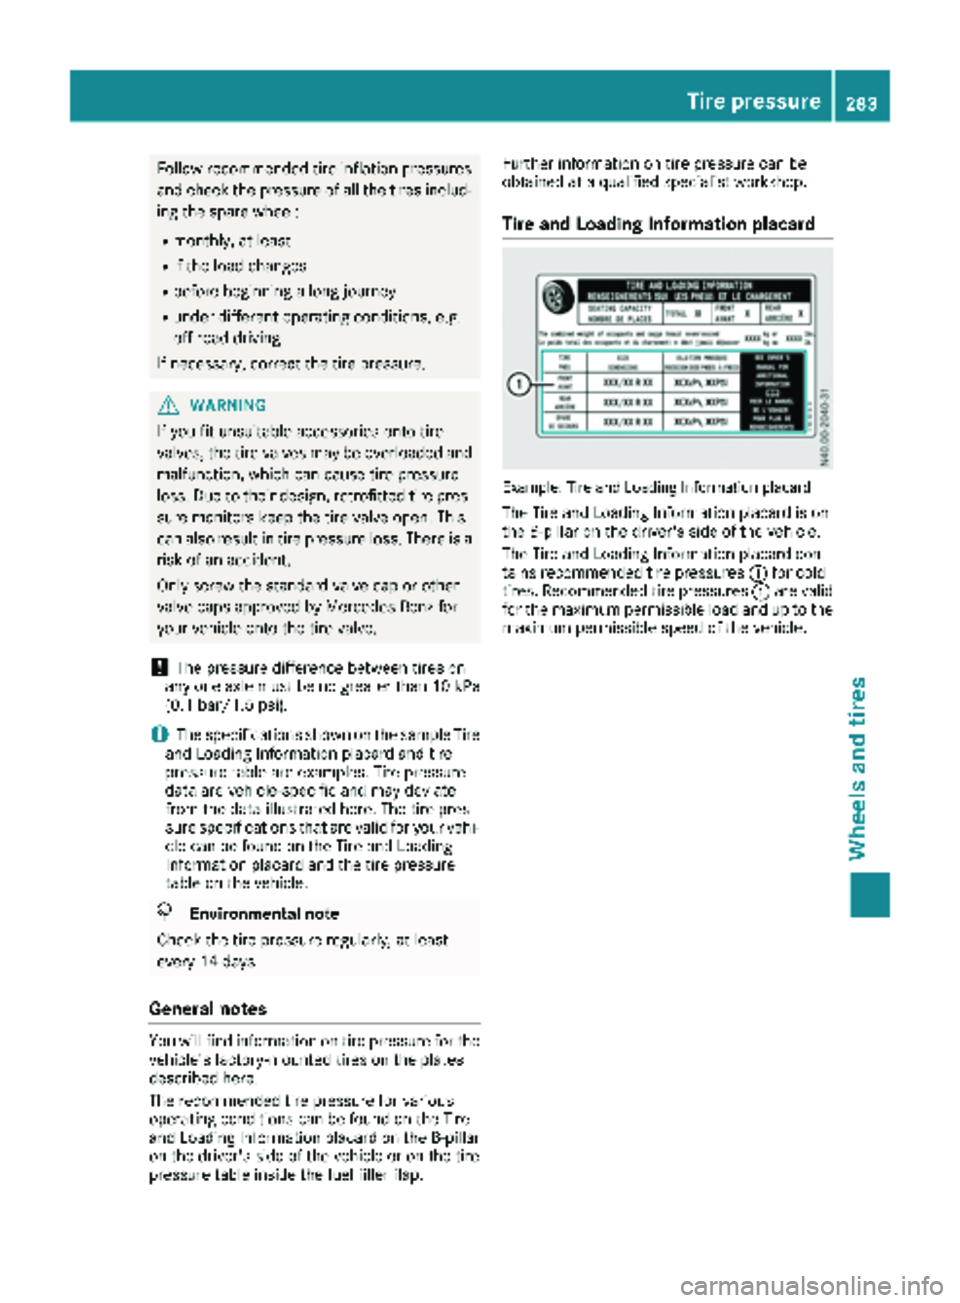
Tire and Loading Information placard
Example: Tire and Loading Information placard
The Tire and Loading Information placard is on
the B-pillar on the driver's side of the vehicle.
The Tire and Loading Information placard con-
tains recommended tire pressures
:for cold
tires. Recommended tire pressures :are valid
for the maximum permissible load and up to the
maximum permissible speed of the vehicle.
Tire pressure283
Wheels and tires
Z
Page 287 of 318
Important notes on tire pressure
GWARNING
If th etire pressur edrops repeatedly, th e
wheel, valv eor tire may be damaged. Tir e
pressur ethat is to olow may result in atire
blow-out .Ther eis aris kof an accident.
RChec kth etire for foreign objects .
RCheckwhether th ewhee lis losing air or th e
valv eis leaking .
If you are unable to rectify th edamage, con-
tac t a qualified specialist workshop.
Use asuitable pressur egauge to chec kth etire
pressure. The outer appearanc eof atire does
no tpermit any reliable conclusio nabout th etire
pressure. On vehicles equipped wit hth eelec -
tronic tire pressur emonitor, th etire pressur e
can be checke dusin gth eon-board computer.
The tire temperature and pressur eincreas e
when th evehicl eis in motion .This is dependen t
on th edriving spee dand th eload.
Therefore, you should only correc ttire pressur e
when th etires are cold.
The tires are cold:
Rif th evehicl ehas been parked for at least
three hour swithout direct sunligh ton th e
tires ,and
Rif th evehicl ehas no tbeen driven further than
1 mile (1. 6km)
Tir etemperature changes depending on th e
ambien ttemperature, driving spee dand tire
load. If th etire temperature changes by 18 ‡
(10 †), th etire pressur echa
nges by approx
-
imately 10 kP a(0.1 ba r/1.5psi) . Take this into
account when checking the pressure of warm
tires. Only correct the tire pressure if it is too low
for the current operating conditions. If you
check the tire pressure when the tires are warm,
it results in a higher value than when the tires
are cold. This is normal. Do not under any cir-
cumstances release the air in order to adjust the pressure to the prescribed value for cold tires.
The tire pressure would otherwise be too low.
Observe the recommended tire pressure for
cold tires on the tire pressure table in the fuel
filler flap. Driving with tire pressure that is too high or too
low can:
Rshorten the service life of the tires
Rcause increased tire damage
Rhave a negative effect on handling character-
istics and thus the driving safety (e.g. hydro-
planing)
Underinflated or overinflated tires
Underinflated tires:
GWARNING
Tires with pressure that is too low can over-
heat and burst as a consequence. In addition, they also suffer from excessive and/or irreg-
ular wear, which can severely impair the brak-
ing properties and the driving characteristics.
There is a risk of an accident.
Avoid tire pressures that are too low in all the
tires, including the spare wheel.
Underinflated tires can:
Rfail from being overheated
Radversely affect handling
Rwear excessively and/or unevenly
Rhave an adverse effect on fuel consumption
Overinflated tires
GWARNING
Tires with excessively high pressure can burst
because they are damaged more easily by
road debris, potholes etc. In addition, they
also suffer from irregular wear, which can
severely impair the braking properties and the driving characteristics. There is a risk of an
accident.
Avoid tire pressures that are too high in all the
tires, including the spare wheel.
Overinflated tires can:
Rincrease the braking distance
Radversely affect handling
Rwear excessively and/or unevenly
Radversely affect ride comfort
Rbe more susceptible to damage
Tire pressure285
Wheels and tires
Z
Page 288 of 318
Maximum tire pressures
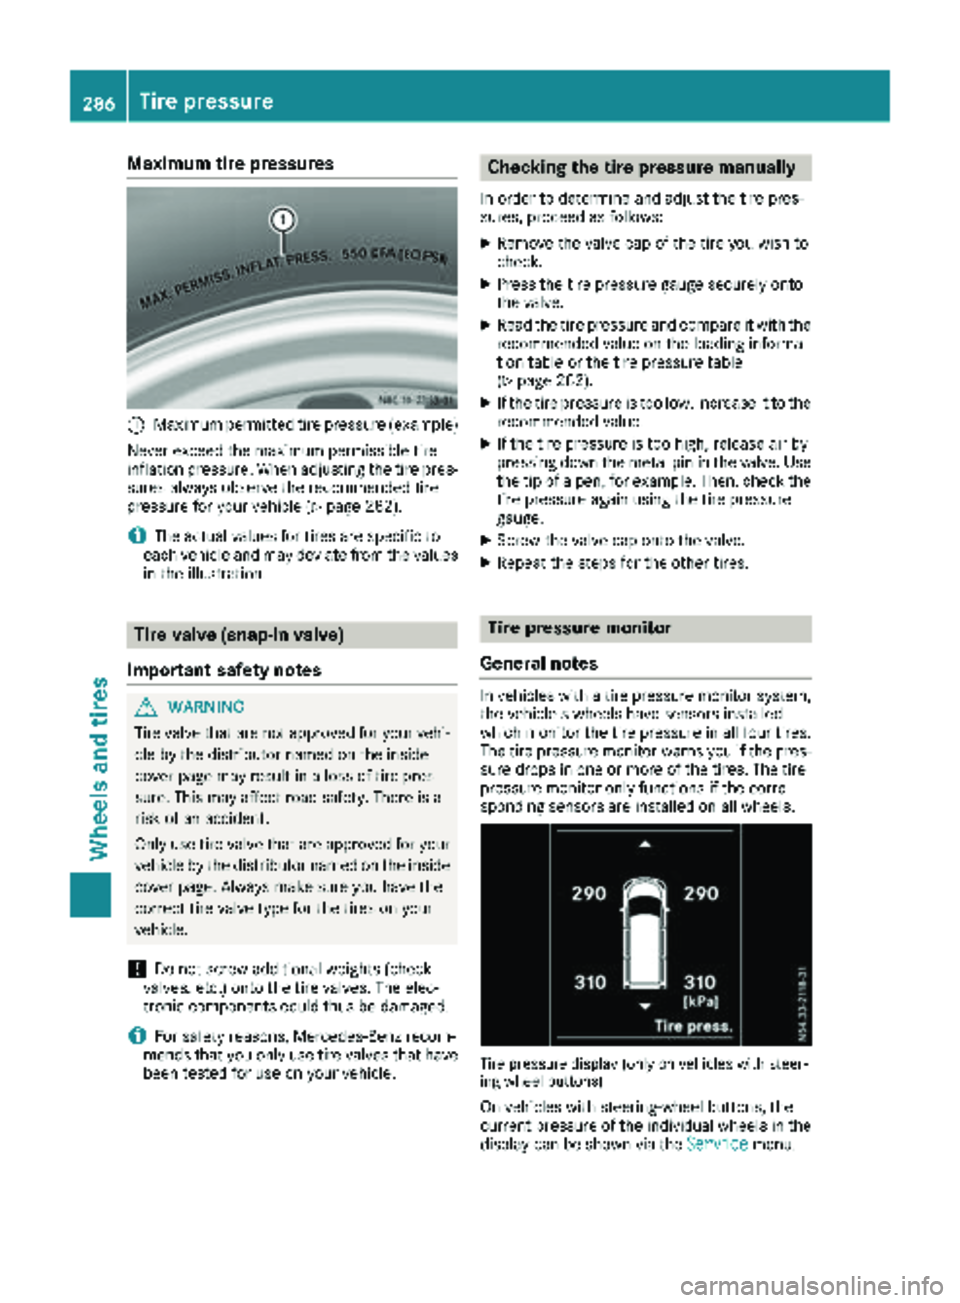
:Maximum permitted tire pressure (example)
Never exceed the maximum permissible tire
inflation pressure. When adjusting the tire pres-
sures always observe the recommended tire
pressure for your vehicle (
Ypage 282).
iThe actual values for tires are specific to
each vehicle and may deviate from the values
in the illustration.
Tire valve (snap-in valve)
Important safety notes
GWARNING
Tire valve that are not approved for your vehi-
cle by the distributor named on the inside
cover page may result in a loss of tire pres-
sure. This may affect road safety. There is a
risk of an accident.
Only use tire valve that are approved for your
vehicle by the distributor named on the inside
cover page. Always make sure you have the
correct tire valve type for the tires on your
vehicle.
!Do not screw additional weights (check
valves, etc.) onto the tire valves. The elec-
tronic components could thus be damaged.
iFor safety reasons, Mercedes-Benz recom-
mends that you only use tire valves that have been tested for use on your vehicle.
Checking the tire pressure manually
In order to determine and adjust the tire pres-
sures, proceed as follows:
XRemove the valve cap of the tire you wish to
check.
XPress the tire pressure gauge securely onto
the valve.
XRead the tire pressure and compare it with the
recommended value on the loading informa-
tion table or the tire pressure table
(
Ypage 282).
XIf the tire pressure is too low, increase it to the
recommended value.
XIf the tire pressure is too high, release air by
pressing down the metal pin in the valve. Use
the tip of a pen, for example. Then, check the
tire pressure again using the tire pressure
gauge.
XScrew the valve cap onto the valve.
XRepeat the steps for the other tires.
Tire pressure monitor
General notes
In vehicles with a tire pressure monitor system,
the vehicle's wheels have sensors installed
which monitor the tire pressure in all four tires.
The tire pressure monitor warns you if the pres- sure drops in one or more of the tires. The tire
pressure monitor only functions if the corre-
sponding sensors are installed on all wheels.
Tire pressure display (only on vehicles with steer-
ing wheel buttons)
On vehicles with steering-wheel buttons, the
current pressure of the individual wheels in the
display can be shown via the Service
menu.
286Tire pressure
Wheels and tires