engine MERCEDES-BENZ METRIS 2020 MY20 Operator’s Manual
[x] Cancel search | Manufacturer: MERCEDES-BENZ, Model Year: 2020, Model line: METRIS, Model: MERCEDES-BENZ METRIS 2020Pages: 320, PDF Size: 26.38 MB
Page 146 of 320
Driving on flooded roads
!
Do not drive through flooded areas. Check
the depth of any water before driving
through it. Drive slowly through standing
water. Otherwise, water could enter the
vehicle interior or engine compartment. It
can then damage the engine's or automatic
transmission's electronic components. It
can also be sucked in by the engine's air
intake connection and cause engine dam-
age.
If you have to drive on stretches of road on
which water has collected, please bear in mind
that: R the water level of standing water should not
be above the lower edge of the front
bumper
R you must not drive faster than walking
speed Driving in winter
G
WARNING
If you shift down on a slippery road surface
in an attempt to increase the engine's brak-
ing effect, the drive wheels could lose their
grip. There is an increased danger of skid-
ding and accidents.
Do not shift down for additional engine brak-
ing on a slippery road surface.
! An accumulation of snow and ice, particu-
larly when frozen, caught in the area around
the air intake slots, moving parts, the axles
and the wheel arches may:
R restrict air intake
R damage vehicle parts
R cause malfunctions by restricting the
mobility intended by the design (e.g.
reduced possible steering input).
Regularly check the vehicle and remove
snow or ice when traveling in wintry condi-
tions.
If there is any damage, inform a qualified
specialist workshop.
! Vehicles with automatic transmission may
only briefly coast in neutral position N.
Extended coasting of the wheels, e.g. when
towing, results in transmission damage. Have your vehicle winterized at a qualified spe-
cialist workshop at the onset of winter.
Drive particularly carefully on slippery roads.
Avoid sudden acceleration, steering and brak-
ing maneuvers. Do not use cruise control.
If the vehicle threatens to skid or cannot be
stopped when moving at low speed:
X Shift the transmission to position i.
X Try to maintain control of the vehicle using
corrective steering.
The outside temperature indicator is not
designed to serve as an ice-warning device
and is therefore unsuitable for that purpose.
Changes in the outside temperature are dis-
played after a short delay.
Indicated temperatures just above the freezing
point do not guarantee that the road surface is
free of ice. The road may still be icy, especially
in wooded areas or on bridges. If you do not
adjust your driving style, the vehicle may start
to skid. Always adapt your driving style and
drive at a speed to suit the prevailing weather
conditions.
You should pay special attention to road con-
ditions when temperatures are around freezing
point.
You can find further information under:
R "M+S tires" ( Y page
280)
R "Snow chains" (Y page 281)
R "Driving with summer tires" (Y page 280)
Also observe the notes under "Winter opera-
tion" (Y page 280). Driving off-road
Important safety notes G
WARNING
If you drive on a steep incline at an angle or
turn when driving on an incline, the vehicle
could slip sideways, tip and rollover. There is
a risk of an accident.
Always drive on a steep incline in the line of
fall (straight up or down) and do not turn the
vehicle. 144
Driving tips
Driving and parking
Page 147 of 320
G
WARNING
When driving off-road, your body is subject
to forces from all directions, due to the
uneven surface. You could be thrown from
your seat, for instance. There is a risk of
injury.
Always wear a seat belt, even when driving
off-road. G
WARNING
If you drive over obstacles or in ruts, the
steering wheel may jerk out of your grip,
causing injury to your hands.
Always hold the steering wheel firmly with
both hands. When driving over obstacles,
you must expect steering forces to increase
briefly and suddenly. G
WARNING
Flammable material such as leaves, grass or
twigs may ignite if they come into contact
with hot parts of the exhaust system. There
is a risk of fire.
When driving on an unpaved road or off-
road, check the vehicle underside regularly.
In particular, remove trapped plant parts or
other flammable material. Contact a quali-
fied specialist workshop immediately if dam-
age is detected.
! When driving off-road or on unpaved surfa-
ces, check the underside of the vehicle as
well as the wheels and tires at regular inter-
vals. In particular, remove trapped foreign
objects, such as stones and branches.
Such foreign objects could:
R damage the chassis, the fuel tank or the
brake system
R cause imbalance and thereby vibrations
R be thrown out as you continue your jour-
ney
If there is any damage, inform a qualified
specialist workshop.
When driving off-road and on construction
sites, sand, mud and water mixed with oil, for
example, may get into the brakes. This may
lead to a reduction in braking performance or
total brake failure, also as a result of increased wear. The braking characteristics will vary
depending on the material that has got into
the system. Clean the brakes after driving off-
road. If you then notice reduced braking per-
formance or hear scraping noises, have the
brake system checked at a qualified specialist
workshop. Adjust your driving style to the
changed braking characteristics.
Driving off-road or on construction sites
increases the possibility of vehicle damage
which may in turn lead to the failure of certain
assemblies and systems. Adapt your driving
style to the off-road driving conditions. Drive
carefully. Have any vehicle damage rectified at
a qualified specialist workshop as soon as pos-
sible.
When loading your vehicle for driving off-road
or on a construction site, keep the vehicle's
center of gravity as low as possible.
Rules for driving off-road !
Always bear the vehicle's ground clear-
ance in mind and avoid obstacles, e.g. deep
ruts.
Obstacles may damage the following parts
of the vehicle:
R the chassis
R the drive train
R the fuel and supply tanks
For this reason, you should always drive
slowly when driving off-road. If you have to
drive over obstacles, have the front
passenger direct you.
i We recommend that you additionally carry
a shovel and a recovery rope with shackle in
the vehicle.
R Ensure that loads and items of luggage are
securely stowed or lashed down
(Y page
242).
R Before driving off-road, stop the vehicle and
shift to a low gear.
R If the surface requires, temporarily deacti-
vate ESP ®
when pulling away (Y page 69).
R Only drive off-road with the engine running
and a gear engaged.
R Drive slowly and smoothly. Walking pace is
necessary in many situations.
R Avoid spinning the drive wheels.
R Make sure that the wheels always remain in
contact with the ground. Driving tips
145
Driving and parking Z
Page 148 of 320
R
Drive with extreme care over unknown ter-
rain where you can only see for a short dis-
tance. As a precaution, get out of the vehi-
cle to take a look at the route to be taken in
advance.
R Check the water depth before fording.
R Watch out for obstacles (e.g. rocks, holes,
tree stumps and ruts).
R Avoid edges where the surface could crum-
ble or break away.
Checklist after driving off-road !
If you detect damage to the vehicle after
driving off-road, have the vehicle checked
immediately at a qualified specialist work-
shop.
Off-road driving places a higher demand on
your vehicle than normal road operation.
Check your vehicle after driving on rough ter-
rain. By doing so you will notice any damage in
good time and reduce the risk of an accident
for yourself and other road users. Clean your
vehicle thoroughly before driving on public
roads.
Observe the following points after driving off-
road, on construction sites and before driving
on public roads:
X Activate ESP ®
(Y page 69).
X Clean the headlamps and tail lamps and
check them for damage.
X Clean the front and rear license plates.
X Clean the windshield, windows and exterior
mirrors.
X Clean the steps, door sills and grab handles.
This increases safety of footing.
X Clean the wheels/tires, wheel housings and
the underbody of the vehicle with a water
jet.
This increases road grip, especially on wet
road surfaces.
X Check the wheels/tires and wheel housings
for trapped foreign objects and remove
them.
Trapped foreign objects can damage the
wheels/tires and may be flung out from the
vehicle when you continue driving.
X Check the underbody for trapped branches
or other parts of plants and remove them.
Trapped branches or other parts of plants
increase the risk of fire and can cause dam- age to fuel lines, brake hoses and the rubber
bellows of axle joints and drive shafts.
X Clean the brake disks, brake pads and axle
joints, particularly after operation in sand,
mud, grit/gravel, water or similarly dirty
conditions.
X Check the entire floor assembly, the tires,
wheels, bodywork structure, brakes, steer-
ing, chassis and exhaust system for any
damage.
X Check the service brake for operating
safety, e.g. carry out a brake test.
X If you notice strong vibrations after driving
off-road, check the wheels and drive train
for foreign objects again. Remove any for-
eign objects which can lead to imbalances
and thus cause vibrations. Driving in mountainous areas
When driving in mountainous areas, note that
the power output of the engine, and with it its
gradient climbing capability, decrease with
increasing altitude. Please take note of this
particularly when driving with a trailer in moun-
tainous areas.
The maximum permissible trailer loads are
valid for journeys at altitudes up to
1100 yds
(1000 m) above sea level with gradients up to
12%.
Information on maximum permissible trailer
loads can be found in your vehicle registration
papers and on the vehicle identification plate
(Y page 304) or under "Trailer loads" ( Y page 315).
When driving at altitudes of 2700 yds
(2500 m) above sea level, the ECO start/stop
function is no longer available.
Notes on braking on downhill gradients can be
found in the "Braking" section (Y page 142). Driving systems
Cruise control
General notes Cruise control maintains the speed of the vehi-
cle for you. It brakes automatically in order to
avoid exceeding the set speed.146
Driving systems
Driving and parking
Page 150 of 320
Storing and maintaining the current
speed
X
Accelerate the vehicle to the desired speed
above 20 mph (30 km/h
).
X Briefly push the cruise control lever up : or
down =.
X Release the accelerator pedal.
Cruise control is activated. The current
speed is stored and shown briefly in the dis-
play's text field.
The display also shows the V symbol and
the stored speed:
R in the header on vehicles without steering
wheel buttons (Y page
176)
R in the status area on vehicles with steer-
ing wheel buttons (Y page 183)
Resuming the stored speed G
WARNING
If you call up the stored speed and it differs
from the current speed, the vehicle acceler-
ates or decelerates. If you do not know the
stored speed, the vehicle could accelerate
or brake unexpectedly. There is a risk of an
accident.
Pay attention to the road and traffic condi-
tions before calling up the stored speed. If
you do not know the stored speed, store the
desired speed again.
X Briefly pull the cruise control lever towards
you ;.
X Release the accelerator pedal.
Cruise control is activated and resumes the
vehicle's speed to the last speed stored.
The stored speed is shown briefly in the dis-
play.
The display also shows the V symbol and
the stored speed:
R in the header on vehicles without steering
wheel buttons (Y page
176)
R in the status area on vehicles with steer-
ing wheel buttons (Y page 183)
i When you pull the cruise control lever
towards you for the first time after starting
the engine, cruise control adopts the cur-
rent speed. Setting the speed It may be a moment before the vehicle starts
to accelerate or brake to the set speed. Take
this delay into account when setting the
speed.
X
Press the cruise control lever up : to
increase the speed or down = to reduce
the speed.
The vehicle will accelerate or decelerate.
The speed is shown in the display.
X Release the cruise control lever once the
desired speed is reached.
The displayed speed is stored.
or
X Briefly press the cruise control lever as far
as the 1st pressure point up : or down =.
The last speed stored is increased/reduced
in increments of
1 mph (1 km/h).
or X Briefly press the cruise control lever beyond
the pressure point up : or down =.
The last speed stored is increased/reduced
in increments of
5 mph (10 km/h).
i Cruise control is not deactivated if you
depress the accelerator pedal. If you accel-
erate briefly to overtake, for example, cruise
control resumes the vehicle’s speed to the
last speed stored after you have finished
overtaking.
Deactivating cruise control There are various ways to deactivate cruise
control:
X Briefly press the cruise control lever for-
wards ?.
or X Apply the brakes.
The last speed set remains stored. The last
speed stored is deleted when you switch off
the engine.
Cruise control is deactivated automatically
when:
R you apply the brakes
R you apply the parking brake and the F
(only USA) or J (only Canada) indicator
lamp in the instrument cluster lights up
R you are driving slower than
20 mph
(30 km/h) 148
Driving systems
Driving and parking
Page 157 of 320
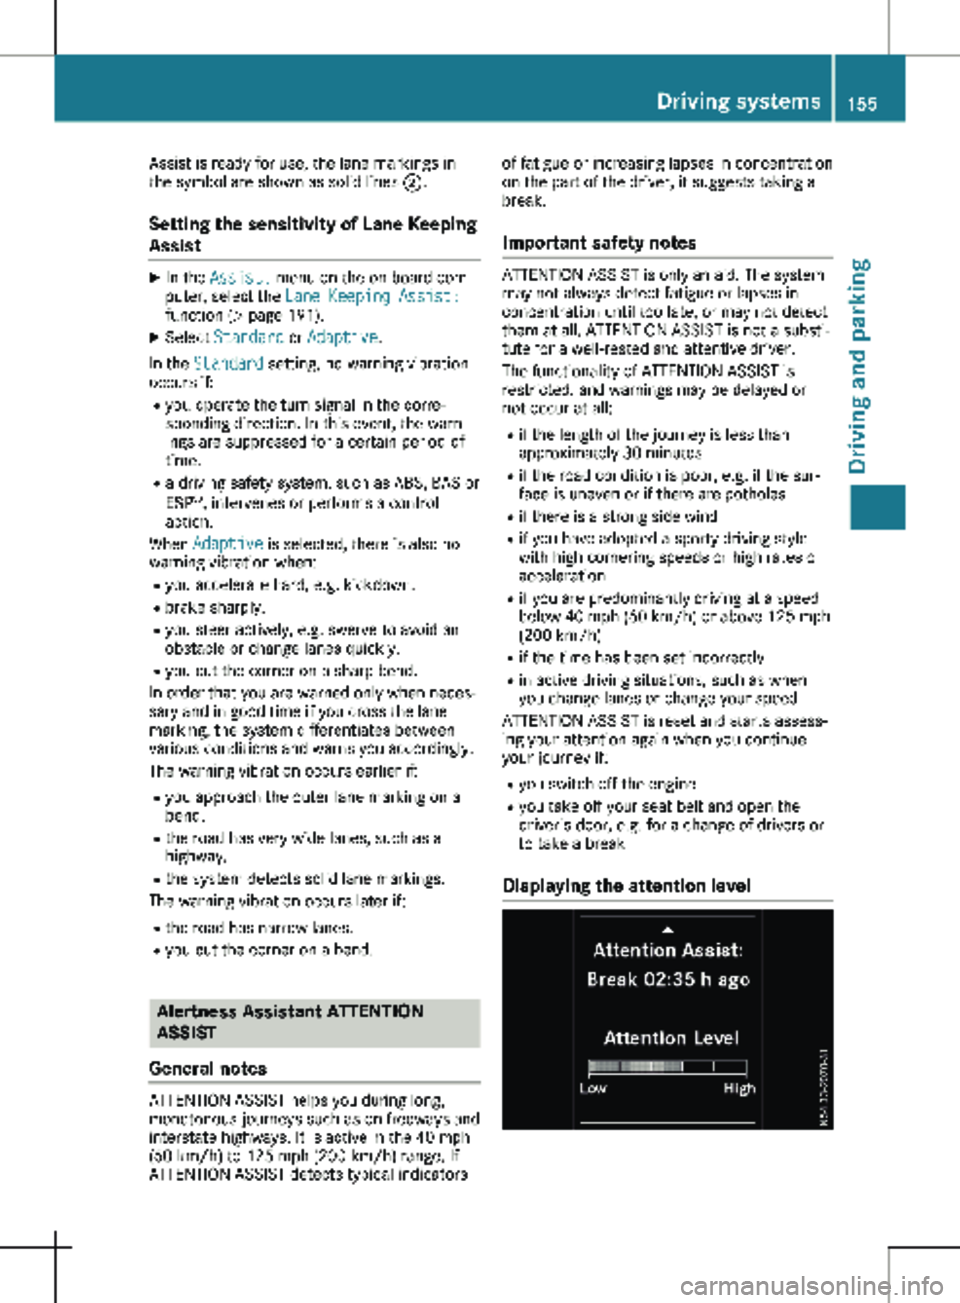
Assist is ready for use, the lane markings in
the symbol are shown as solid lines
;.
Setting the sensitivity of Lane Keeping
Assist X
In the Assist. menu on the on-board com-
puter, select the Lane Keeping Assist:
function
(Y page 191).
X Select Standard or Adaptive.
In the Standard setting, no warning vibration
occurs if:
R you operate the turn signal in the corre-
sponding direction. In this event, the warn-
ings are suppressed for a certain period of
time.
R a driving safety system, such as ABS, BAS or
ESP ®
, intervenes or performs a control
action.
When Adaptive is selected, there is also no
warning vibration when: R you accelerate hard, e.g. kickdown.
R brake sharply.
R you steer actively, e.g. swerve to avoid an
obstacle or change lanes quickly.
R you cut the corner on a sharp bend.
In order that you are warned only when neces-
sary and in good time if you cross the lane
marking, the system differentiates between
various conditions and warns you accordingly.
The warning vibration occurs earlier if:
R you approach the outer lane marking on a
bend.
R the road has very wide lanes, such as a
highway.
R the system detects solid lane markings.
The warning vibration occurs later if:
R the road has narrow lanes.
R you cut the corner on a bend. Alertness Assistant ATTENTION
ASSIST
General notes ATTENTION ASSIST helps you during long,
monotonous journeys such as on freeways and
interstate highways. It is active in the 40 mph
(
60 km/h) to 125 mph (200 km/h) range. If
ATTENTION ASSIST detects typical indicators of fatigue or increasing lapses in concentration
on the part of the driver, it suggests taking a
break.
Important safety notes ATTENTION ASSIST is only an aid. The system
may not always detect fatigue or lapses in
concentration until too late, or may not detect
them at all. ATTENTION ASSIST is not a substi-
tute for a well-rested and attentive driver.
The functionality of ATTENTION ASSIST is
restricted, and warnings may be delayed or
not occur at all:
R if the length of the journey is less than
approximately
30 minutes
R if the road condition is poor, e.g. if the sur-
face is uneven or if there are potholes
R if there is a strong side wind
R if you have adopted a sporty driving style
with high cornering speeds or high rates of
acceleration
R if you are predominantly driving at a speed
below 40 mph (60 km/h) or above 125 mph
(200 km/h)
R if the time has been set incorrectly
R in active driving situations, such as when
you change lanes or change your speed
ATTENTION ASSIST is reset and starts assess-
ing your attention again when you continue
your journey if:
R you switch off the engine
R you take off your seat belt and open the
driver's door, e.g. for a change of drivers or
to take a break
Displaying the attention level Driving systems
155
Driving and parking Z
Page 158 of 320
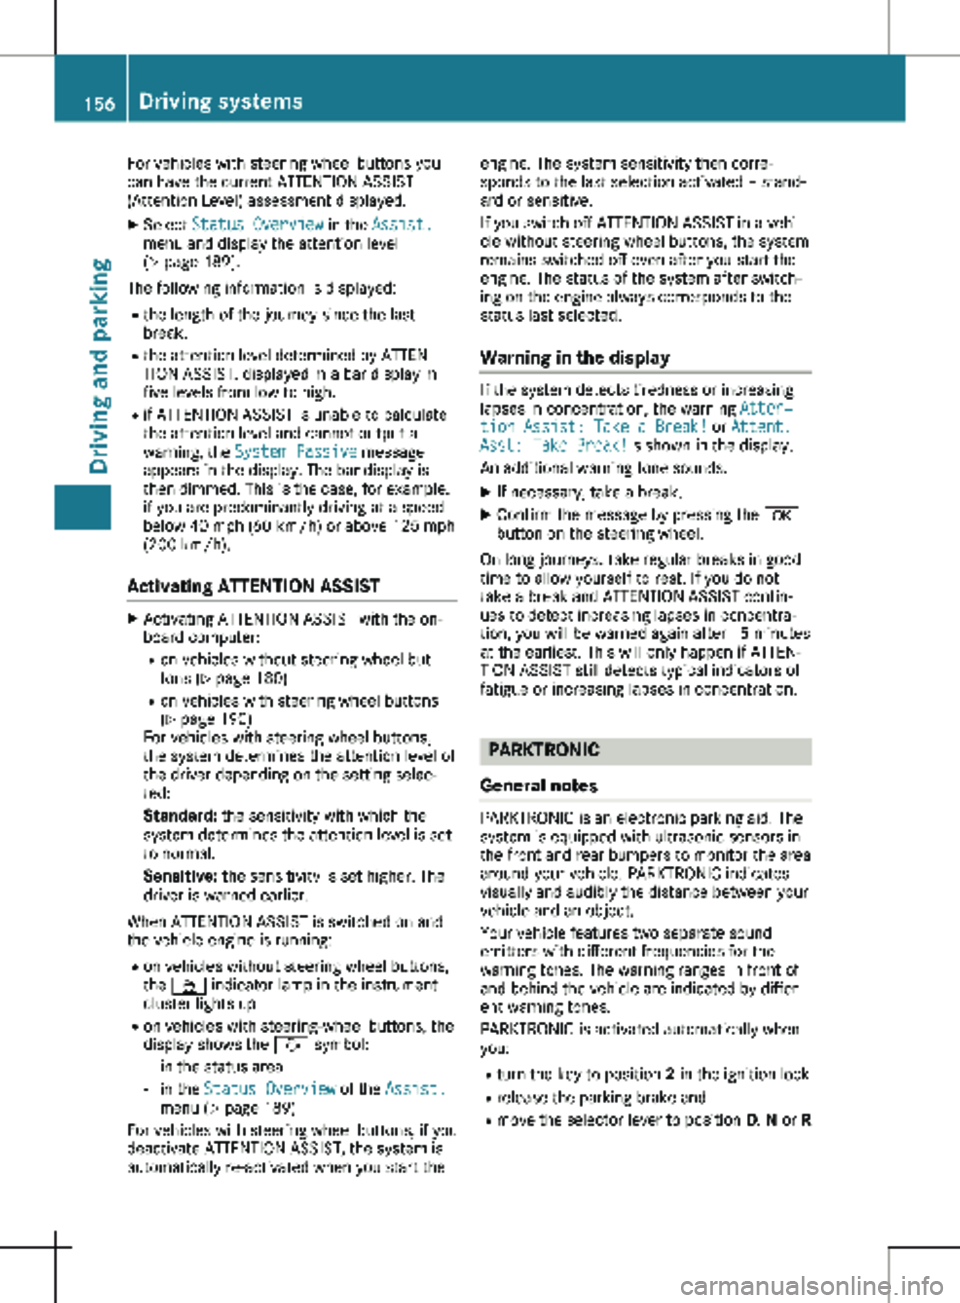
For vehicles with steering wheel buttons you
can have the current ATTENTION ASSIST
(Attention Level) assessment displayed.
X Select Status Overview in the Assist.
menu and display the attention level
(Y page
189).
The following information is displayed: R the length of the journey since the last
break.
R the attention level determined by ATTEN-
TION ASSIST, displayed in a bar display in
five levels from low to high.
R if ATTENTION ASSIST is unable to calculate
the attention level and cannot output a
warning, the System Passive message
appears in the display. The bar display is
then dimmed. This is the case, for example,
if you are predominantly driving at a speed
below
40 mph (60 km/h) or above 125 mph
(200 km/h).
Activating ATTENTION ASSIST X
Activating ATTENTION ASSIST with the on-
board computer:
R on vehicles without steering wheel but-
tons
(Y page 180)
R on vehicles with steering wheel buttons
(Y page 190)
For vehicles with steering wheel buttons,
the system determines the attention level of
the driver depending on the setting selec-
ted:
Standard: the sensitivity with which the
system determines the attention level is set
to normal.
Sensitive: the sensitivity is set higher. The
driver is warned earlier.
When ATTENTION ASSIST is switched on and
the vehicle engine is running: R on vehicles without steering wheel buttons,
the À indicator lamp in the instrument
cluster lights up
R on vehicles with steering-wheel buttons, the
display shows the À symbol:
- in the status area
- in the Status Overview of the Assist.
menu (Y page
189)
For vehicles with steering wheel buttons, if you
deactivate ATTENTION ASSIST, the system is
automatically re-activated when you start the engine. The system sensitivity then corre-
sponds to the last selection activated – stand-
ard or sensitive.
If you switch off ATTENTION ASSIST in a vehi-
cle without steering wheel buttons, the system
remains switched off even after you start the
engine. The status of the system after switch-
ing on the engine always corresponds to the
status last selected.
Warning in the display If the system detects tiredness or increasing
lapses in concentration, the warning
Atten‐
tion Assist: Take a Break! or Attent.
Asst: Take Break!is shown in the display.
An additional warning tone sounds.
X If necessary, take a break.
X Confirm the message by pressing the a
button on the steering wheel.
On long journeys, take regular breaks in good
time to allow yourself to rest. If you do not
take a break and ATTENTION ASSIST contin-
ues to detect increasing lapses in concentra-
tion, you will be warned again after
15 minutes
at the earliest. This will only happen if ATTEN-
TION ASSIST still detects typical indicators of
fatigue or increasing lapses in concentration. PARKTRONIC
General notes PARKTRONIC is an electronic parking aid. The
system is equipped with ultrasonic sensors in
the front and rear bumpers to monitor the area
around your vehicle. PARKTRONIC indicates
visually and audibly the distance between your
vehicle and an object.
Your vehicle features two separate sound
emitters with different frequencies for the
warning tones. The warning ranges in front of
and behind the vehicle are indicated by differ-
ent warning tones.
PARKTRONIC is activated automatically when
you:
R turn the key to position 2 in the ignition lock
R release the parking brake and
R move the selector lever to position D, N or R156
Driving systems
Driving and parking
Page 163 of 320
Active Parking Assist does not assist you park-
ing in spaces at right angles to the direction of
travel if:
R two parking spaces are located directly next
to one another
R the parking space is directly next to a low
obstacle such as a low curb
R you forward park
Active Parking Assist does not assist you park-
ing in spaces that are parallel or at right angles
to the direction of travel if:
R the parking space is on a curb
R the system reads the parking space as being
blocked, for example by foliage or grass
paving blocks
R the area is too small for the vehicle to
maneuver into
R the parking space is bordered by an obsta-
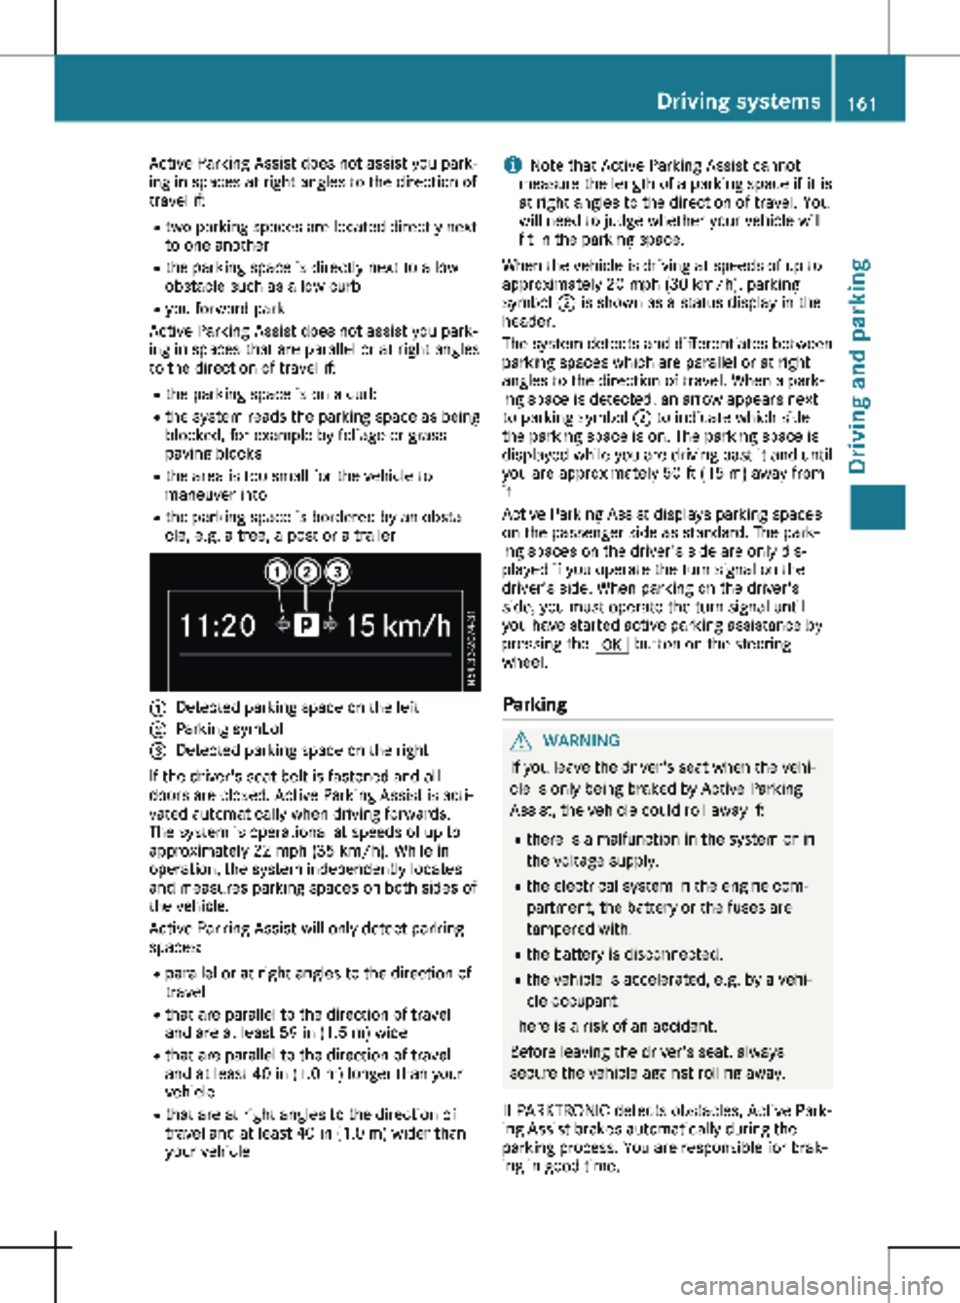
cle, e.g. a tree, a post or a trailer :
Detected parking space on the left
; Parking symbol
= Detected parking space on the right
If the driver's seat belt is fastened and all
doors are closed, Active Parking Assist is acti-
vated automatically when driving forwards.
The system is operational at speeds of up to
approximately
22 mph (35 km/h). While in
operation, the system independently locates
and measures parking spaces on both sides of
the vehicle.
Active Parking Assist will only detect parking
spaces:
R parallel or at right angles to the direction of
travel
R that are parallel to the direction of travel
and are at least 59 in (1.5 m) wide
R that are parallel to the direction of travel
and at least 40 in (1.0 m) longer than your
vehicle
R that are at right angles to the direction of
travel and at least 40 in (1.0 m) wider than
your vehicle i
Note that Active Parking Assist cannot
measure the length of a parking space if it is
at right angles to the direction of travel. You
will need to judge whether your vehicle will
fit in the parking space.
When the vehicle is driving at speeds of up to
approximately
20 mph (30 km/h), parking
symbol ; is shown as a status display in the
header.
The system detects and differentiates between
parking spaces which are parallel or at right
angles to the direction of travel. When a park-
ing space is detected, an arrow appears next
to parking symbol ; to indicate which side
the parking space is on. The parking space is
displayed while you are driving past it and until
you are approximately 50 ft (15 m) away from
it.
Active Parking Assist displays parking spaces
on the passenger side as standard. The park-
ing spaces on the driver's side are only dis-
played if you operate the turn signal on the
driver's side. When parking on the driver's
side, you must operate the turn signal until
you have started active parking assistance by
pressing the a button on the steering
wheel.
Parking G
WARNING
If you leave the driver's seat when the vehi-
cle is only being braked by Active Parking
Assist, the vehicle could roll away if:
R there is a malfunction in the system or in
the voltage supply.
R the electrical system in the engine com-
partment, the battery or the fuses are
tampered with.
R the battery is disconnected.
R the vehicle is accelerated, e.g. by a vehi-
cle occupant.
There is a risk of an accident.
Before leaving the driver's seat, always
secure the vehicle against rolling away.
If PARKTRONIC detects obstacles, Active Park-
ing Assist brakes automatically during the
parking process. You are responsible for brak-
ing in good time. Driving systems
161
Driving and parking Z
Page 165 of 320

X
Start the engine.
X Switch on the turn signal in the direction in
which you are pulling away.
X Shift the transmission to position h or k.
The display shows the message Start
Park Assist? Yes: OK No: %.
X To cancel the process: press the % but-
ton on the steering wheel or drive off.
or
X To exit the parking space using active
parking assistance: press the a button
on the steering wheel.
The display shows the message Park
Assist Active: Accelerate and Brake
Obs. Surroundings.
X Let go of the steering wheel.
X Pull away, being ready to brake at all times.
Exit the parking space slowly and do not
drive faster than
6 mph (10 km/h). Other-
wise parking assistance is canceled and
Active Parking Assist is stopped.
Active Parking Assist brakes the vehicle to a
standstill when the vehicle approaches a
border of the parking space.
X While the vehicle is stationary, shift the
transmission to position h or k as
required or according to the message.
Active Parking Assist immediately steers in
the other direction. The display shows the
message Park Assist Active: Acceler‐
ate and Brake Obs. Surroundings.
i You will achieve the best results by waiting
for the steering procedure to complete
before pulling away.
If you back up after activation, the steering
wheel is moved to the straight-ahead posi-
tion.
X Drive forwards and reverse as prompted by
the PARKTRONIC warning displays, several
times if necessary.
Once you have exited the parking space com-
pletely:
R The display shows the Park Assist Fin‐
ished message.
R A tone sounds.
R The steering wheel is moved to the straight-
ahead position
The parking assistance function of Active Park-
ing Assist is stopped. You will then have to
steer and merge into traffic on your own.
PARKTRONIC is still available. You can take over the steering before the vehi-
cle has exited the parking space completely.
This is useful, for example when you recognize
that it is already possible to pull out of the
parking space.
Canceling active parking assistance X
Stop the movement of the steering wheel or
steer yourself.
or X Press the f button and deactivate
PARKTRONIC
(Y page 158).
Parking assistance is canceled immediately
and Active Parking Assist is stopped. The
display shows the Park Assist Canceled
message.
Active parking assistance is canceled automat-
ically in the following cases:
R you apply the parking brake.
R parking using Active Parking Assist is no
longer possible.
R you are driving faster than
6 mph
(10 km/h).
R a wheel spins and ESP ®
intervenes or fails.
The ÷ warning lamp in the instrument
cluster then lights up.
R you unfasten your seat belt.
R you open a door or the tailgate/rear-end
door.
R you shift the transmission to position j.
A warning tone sounds, the parking symbol in
the display goes out and the Park Assist
Canceled message appears.
Once active Parking Assist has been canceled,
you must steer and brake again yourself.
If a system malfunction occurs, vehicles are
automatically braked down to a standstill. To
continue driving, you must depress the accel-
erator pedal again. Rear view camera
General notes On vehicles with a tailgate, the rear view cam-
era is next to the tailgate handle
(
Y page
267).
On vehicles with rear-end doors, the rear view
camera is in the top of the license plate mold-
ing ( Y page 267). Driving systems
163
Driving and parking Z
Page 166 of 320
The rear view camera is a visual parking aid. It
shows you the area behind the vehicle in the
audio display.
The area behind the vehicle is displayed in a
mirrored fashion, as in the rear-view mirror or
the exterior mirrors. The guide lines displayed
assist you in backing up.
The message displays depend on the language
setting of the audio system. The following rear
view camera displays are examples.
Important safety notes !
Objects that are not at ground level appear
further away than they actually are, for
example:
R the bumper of the vehicle parked behind
R the drawbar of a trailer
R the ball coupling of a trailer tow hitch
R the tail-end of a truck
R slanted posts
Only use the camera guide lines for orienta-
tion. Do not get any closer to objects than
the lowest horizontal guide line. You may
otherwise damage your vehicle and/or the
object.
The rear view camera is only an aid. It cannot
replace your own awareness of the immediate
surroundings. You are responsible for safe
maneuvering and parking. Make sure that
there are no persons, animals or objects in the
maneuvering area while maneuvering and
parking in parking spaces.
The rear view camera may show obstacles in
perspectival distortion, incorrectly or not at all.
The rear view camera cannot display all
objects located very near and/or under the
rear bumper. It does not warn you of a colli-
sion, persons or objects.
Under the following circumstances, the rear
view camera will not function, or will function
in a limited manner:
R if the tailgate or rear-end door is open.
R if it is raining very heavily or snowing, or it is
foggy.
R at night or in very dark places.
R if the camera is exposed to very bright light.
White lines may appear in the camera image
R if the area is lit by fluorescent light, e.g.
from fluorescent lamps or LED lighting.
The camera image may flicker. R
if the camera lens fogs up, e.g. when driving
into a heated garage in winter, causing a
rapid change in temperature.
R the camera lens is dirty or obstructed.
Observe the notes on cleaning.
(Y page
267)
R if the rear of the vehicle is damaged.
In this case, have the camera position and
setting checked at a qualified specialist
workshop.
R the display has pixel errors.
Have the display repaired or replaced if usa-
bility is significantly reduced due to pixel
errors.
Do not use the rear view camera in these sit-
uations. You could otherwise injure others or
damage objects and the vehicle while parking
and maneuvering.
The field of vision and other functions of the
rear view camera may be restricted due to
additional accessories on the rear of the vehi-
cle (e.g. license plate holder, rear-mounted
bicycle rack).
Guide lines are always shown at road level. In
trailer mode, the guide lines are shown at the
level of the trailer coupling.
If you change wheel size, make sure they cor-
respond to the correct wheel size category
( Y page 278). If the category is changed with-
out recoding the control units in the vehicle,
the rear view camera cannot be precisely cali-
brated. The guide lines at road level or at the
level of the trailer tow hitch will not be dis-
played correctly.
In vehicles with a tailgate, the rear view cam-
era is protected from raindrops and dust by
means of a flap. When the rear view camera is
activated, this flap opens.
The flap closes again when:
R you have finished the maneuvering process
R you switch off the engine
For technical reasons, the flap may remain
open briefly after the rear view camera has
been deactivated. 164
Driving systems
Driving and parking
Page 171 of 320
Ensure that the following weights are not
exceeded:
R the permissible noseweight
R the permissible trailer load
R the permissible rear axle load of the towing
vehicle
R the maximum permissible gross vehicle
weight of both the towing vehicle and the
trailer
R the maximum permissible gross weight of
vehicle/trailer combination
The applicable permissible values that may not
be exceeded can be found:
R in your vehicle documents
R on the type plates for the trailer tow hitch
R on the type plates for the trailer
R on the vehicle identification plate
(Y page
304)
Where the values differ, the lowest is valid.
You will find the values approved by the manu-
facturer on the vehicle identification plates
and those for the towing vehicle in the "Tech-
nical data" section (Y page 315).
Your vehicle behaves differently with a trailer
than without one.
The vehicle/trailer combination:
R is heavier
R is restricted in its acceleration and gradient-
climbing capability
R has an increased braking distance
R is more susceptible to strong crosswinds
R requires more sensitive steering
R has a larger turning radius
This may impair the handling characteristics.
When towing a trailer, always adjust your
speed to suit the road and weather conditions.
Drive carefully. Maintain a safe distance.
If you require any further explanation regard-
ing the information contained in the Operating
Instructions, please contact a Mercedes-Benz
Commercial Van Center.
General notes R
Observe the legally permitted maximum
speed for vehicle/trailer combinations in
the relevant country, state or Canadian
province. Before beginning the journey,
check the trailer's documents for the maxi-
mum permitted speed of your trailer. This reduces the risk of accidents.
R Install only an approved trailer coupling on
your vehicle. Only use a ball coupling for
your Metris trailer tow hitch if it has been
approved for your vehicle. More information
on the availability, mounting and installation
of the trailer electrics is available at any
qualified specialist workshop.
R The trailer coupling is one of the most
important vehicle parts with regard to road
safety. Observe the notes on operation, care
and maintenance of the trailer tow hitch
(see the manufacturer's operating instruc-
tions).
R The bumpers of your vehicle are not suitable
for installing detachable trailer couplings.
R Do not attach rented trailer tow hitches or
other detachable trailer tow hitches to the
bumper.
R Minimize the risk of damage to the ball cou-
pling. If you do not require the ball coupling,
remove it from the ball coupling recess.
You will find weight information under "Techni-
cal data"
(Y page 315).
The height of the ball neck changes according
to the load on the vehicle. If this is case, use a
trailer with a height-adjustable trailer drawbar.
Driving tips The maximum permissible speed for vehicle/
trailer combination depends on the type of
trailer. Before beginning the journey, check
the trailer's documents for the maximum per-
mitted speed of your trailer. Observe the
legally permitted maximum speed in the rele-
vant country, state or Canadian province.
When towing a trailer, your vehicle's handling
characteristics will be different in comparison
to when driving without a trailer and it will con-
sume more fuel.
On long and steep downhill gradients, select a
lower gear.
i This also applies if cruise control is activa-
ted.
This enables you to utilize the engine's braking
effect and you do not need to brake so heavily
to keep the correct speed. This relieves the
load on the brake system and prevents the
brakes from overheating and wearing too
quickly. If you need to brake additionally, to Towing a trailer
169
Driving and parking Z