service reset MERCEDES-BENZ ML430 1997 Complete Repair Manual
[x] Cancel search | Manufacturer: MERCEDES-BENZ, Model Year: 1997, Model line: ML430, Model: MERCEDES-BENZ ML430 1997Pages: 4133, PDF Size: 88.89 MB
Page 130 of 4133

80 Instrument cluster
Te ch n ica l
data Instruments
and controlsOperationDrivingInstrument
cluster displayPractical hints Car care Index
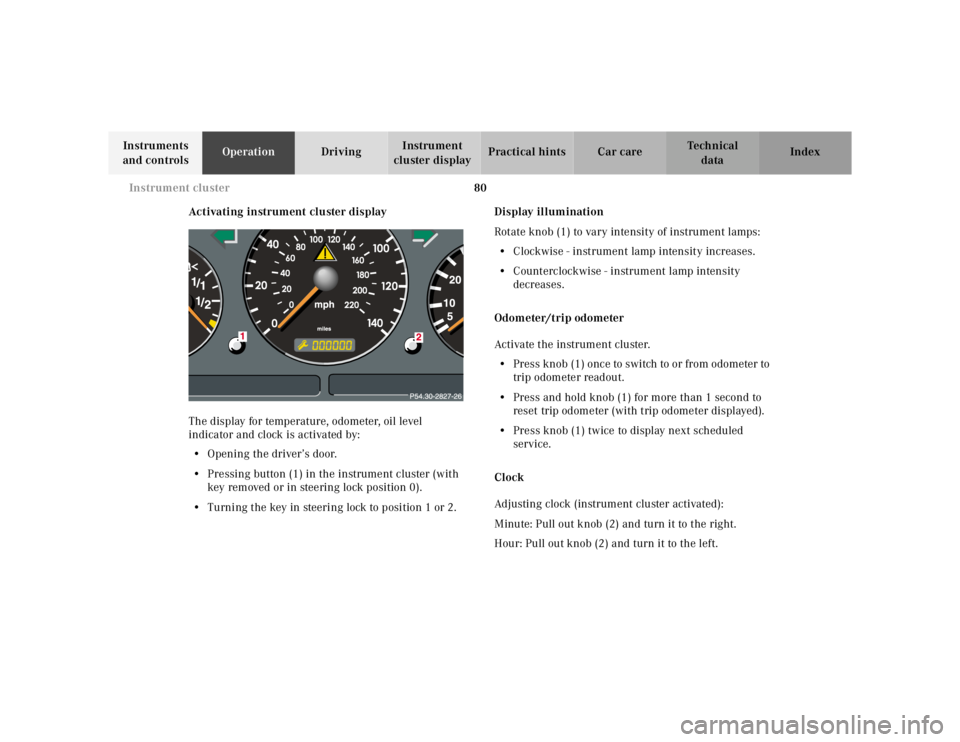
Activating instrument cluster display
The display for temperature, odometer, oil level
indicator and clock is activated by:
•Opening the driver’s door.
•Pressing button (1) in the instrument cluster (with
key removed or in steering lock position 0).
•Turning the key in steering lock to position 1 or 2.Display illumination
Rotate knob (1) to vary intensity of instrument lamps:
•Clockwise - instrument lamp intensity increases.
•Counterclockwise - instrument lamp intensity
decreases.
Odometer/trip odometer
Activate the instrument cluster.
•Press knob (1) once to switch to or from odometer to
trip odometer readout.
•Press and hold knob (1) for more than 1 second to
reset trip odometer (with trip odometer displayed).
•Press knob (1) twice to display next scheduled
service.
Clock
Adjusting clock (instrument cluster activated):
Minute: Pull out knob (2) and turn it to the right.
Hour: Pull out knob (2) and turn it to the left.
Page 138 of 4133
88 Flexible service system
Te ch n ica l
data Instruments
and controlsOperationDrivingInstrument
cluster displayPractical hints Car care Index
Important!
The FSS indicator is not an engine oil level indicator.
See page 89 for engine oil level indicator.
Notes:
When disconnecting vehicle battery for one or more
days at a time, such days will not be counted. Any such
days not counted by the FSS can be added by your
Mercedes-Benz Light Truck Center.
The interval between services is determined by the type
of driving for which the vehicle is used. For example,
driving at extreme speeds, and cold starts combined
with short distance driving in which the engine does not
reach normal operating temperature, reduce the interval
between services.
Following a completed A or B service the Mercedes-
Benz Light Truck Center sets the counter mileage to
10 000 miles (Canada: 15 000 km) and 365 days.
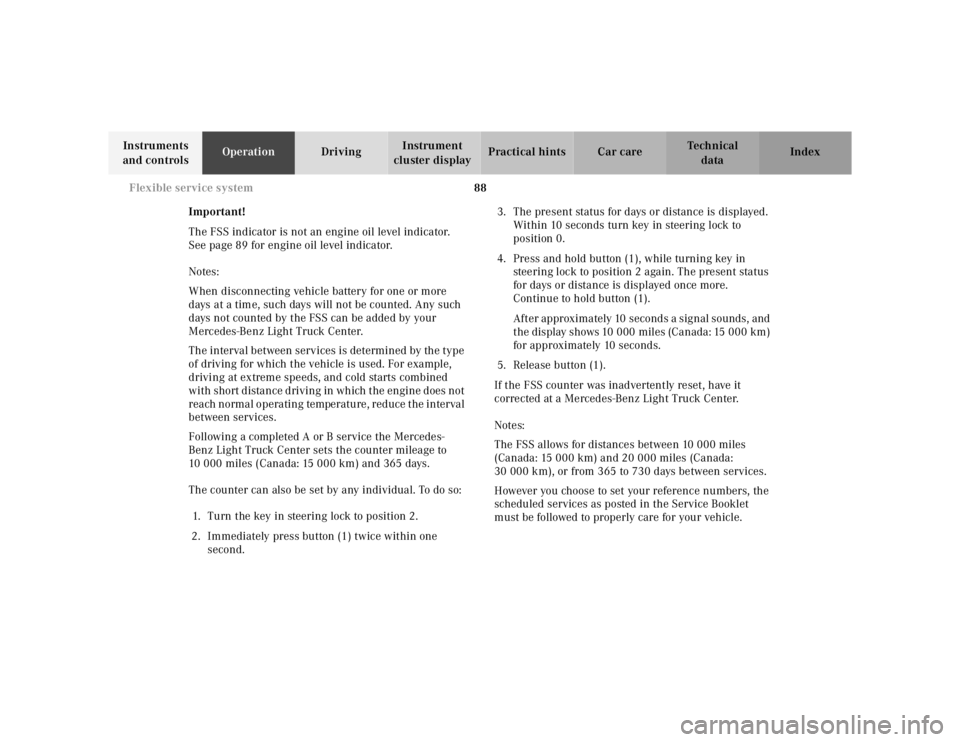
The counter can also be set by any individual. To do so:
1. Turn the key in steering lock to position 2.
2. Immediately press button (1) twice within one
second.3. The present status for days or distance is displayed.
Within 10 seconds turn key in steering lock to
position 0.
4. Press and hold button (1), while turning key in
steering lock to position 2 again. The present status
for days or distance is displayed once more.
Continue to hold button (1).
After approximately 10 seconds a signal sounds, and
the display shows 10 000 miles (Canada: 15 000 km)
for approximately 10 seconds.
5. Release button (1).
If the FSS counter was inadvertently reset, have it
corrected at a Mercedes-Benz Light Truck Center.
Notes:
The FSS allows for distances between 10 000 miles
(Canada: 15 000 km) and 20 000 miles (Canada:
30 000 km), or from 365 to 730 days between services.
However you choose to set your reference numbers, the
scheduled services as posted in the Service Booklet
must be followed to properly care for your vehicle.
Page 190 of 4133
140 Garage door opener
Te ch n ica l
data Instruments
and controlsOperationDrivingInstrument
cluster displayPractical hints Car care Index
Garage door opener
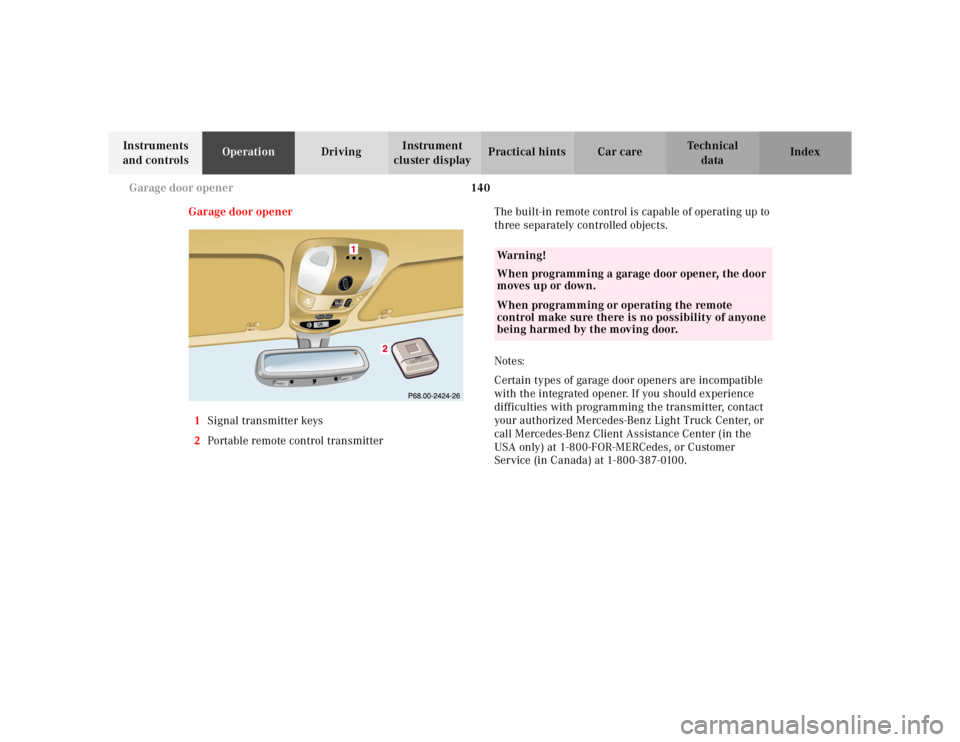
1Signal transmitter keys
2Portable remote control transmitterThe built-in remote control is capable of operating up to
three separately controlled objects.
Notes:
Certain types of garage door openers are incompatible
with the integrated opener. If you should experience
difficulties with programming the transmitter, contact
your authorized Mercedes-Benz Light Truck Center, or
call Mercedes-Benz Client Assistance Center (in the
USA only) at 1-800-FOR-MERCedes, or Customer
Service (in Canada) at 1-800-387-0100.
RESETMODE
Wa r n i n g !
When programming a garage door opener, the door
moves up or down.When programming or operating the remote
control make sure there is no possibility of anyone
being harmed by the moving door.
Page 207 of 4133
157 Tele Aid
Te ch n ica l
data Instruments
and controlsOperationDrivingInstrument
cluster displayPractical hints Car care Index Important!
If the indicator lamp continues to flash or the system
does not reset, contact the Response Center at
1-800-756-9018 (in the USA) or 1-888-923-8367 (in
Canada), or Mercedes-Benz Client Assistance at
1-800-FOR-MERCedes (1-800-367-6372) in the USA or
Customer Service at 1-800-387-0100 in Canada.
Notes:
The indicator lamp for the respective button flashes
until the call is concluded and this can only be
completed by a Response Center or Client Assistance
Center representative, except Roadside assistance and
Information calls, which can also be terminated by
using the End button on the MCS unit.
When a Tele Aid call has been initiated, the MCS system
audio is muted and the selected mode (radio, tape or
CD) pauses. The optional cellular phone (if installed)
switches off. If you must use this phone, the vehicle
must be parked. Disconnect the coiled cord and place
the call. The navigation system (if engaged) will
continue to run. A pop-up window will appear in the
MCS display to indicate that a Tele Aid call is in
progress.Remote door unlock
In the case you have your vehicle locked unintentionally
(e.g. key inside vehicle), and the reserve key is not
handy, contact the Mercedes-Benz Response Center at
1-800-756-9018 (in the USA) or 1-888-923-8367 (in
Canada). You will be asked to provide your password
which you provided when you completed the subscriber
agreement.
Then return to your vehicle and pull outside handle of
liftgate for a minimum of 20 seconds until the “SOS”
button is flashing.
As an alternative, you may unlock the vehicle via
Internet using the ID and password sent to you shortly
after the completion of your Acquaintance Call.
The Response Center will then unlock your vehicle with
the remote door unlocking feature.
Note:
The remote door unlock feature is available if the
relevant cellular phone network is available.
The SOS button will f lash and the message
“EMERGENCY CALL – CALL CONNECTED” will appear
in t he MCS display to indica te receipt of t he d oor unlock
command.
Page 368 of 4133
DISABLING SYSTEM
Before proceeding, see AIR BAG SAFETY PRECAUTIONS . Record radio presets and obtain anti-theft
code. Turn ignition switch to OFF position and remove ignition key. If welding on vehicle, disconnect negative
battery cable and disconnect air bag control module.
ACTIVATING SYSTEM
Ensure ignition is off. Reconnect air bag system co mponents (if disconnected). Reconnect negative battery
cable. Perform See SYSTEM OPERATION CHECK
.
DISPOSAL PROCEDURES
Several situations may arise requiring so me form of disposal action, including:
Scrapping a vehicle containing a deployed air bag module and-or ETR.
Scrapping a vehicle with a live air bag module and-or ETR.
Disposal of a live but electrically faulty air bag module and-or ETR.
Disposal of a deployed air bag module and-or ETR.
DEPLOYED AIR BAG OR ETR
Deployed air bag module and-or ETR unit can be thrown away. None of its components are reusable. Deployed
air bag module is NOT classified as hazardous material.
SCRAPPED VEHICLE
1. Before proceeding, follow service precautions. See AIR BAG SAFETY PRECAUTIONS . Move
vehicle outdoors to a remote area, away from work shop and other personnel. Disconnect and shield
negative battery cable. Open al l vehicle windows and doors.
2. Ensure air bag module is secured to steering wheel, and passenger air bag is secured to dash. Ensure ETR
seat belt assemblies are secured to "B" pillars and all seat belt buckles are latched. Remove loose ob
jects
CAUTION: On CL500, open doors before
disconnecting battery. Opening doors
allows windows to automa tically lower thus preventing roof seal damage.
WARNING: An undeployed air bag module or ET R should never be disposed of
without first being deplo yed. See SCRAPPED VEHICLE
. If deployment is
not possible, contact vehicle manuf acturer for further instructions.
WARNING: An undeployed air bag m odule and-or ETR seat belt CANNOT be disposed
of without first being de ployed. If this is not possible through procedures
outlined below, contact vehicle ma nufacturer for further instructions.
Perform remote deployment outdoors . Keep personnel at least 20 feet
away.
2001 Mercedes-Benz ML320
2000-01 ACCESSORIES/SAFETY EQUIPMENT Merc edes-Benz - Air Bag Restraint Systems
me
Saturday, October 02, 2010 3:44:45 PMPage 4 © 2006 Mitchell Repair Information Company, LLC.
Page 547 of 4133
80
Instrument cluster
Te ch n ica l
data
Instruments
and controls Operation
Driving Instrument
cluster display Practical hints Car care Index
Activating instrument cluster display
The display for temperature, odometer, oil level
indicator and clock is activated by:
• Opening the driver’s door.
• Pressing button (1) in the instrument cluster (with
key removed or in steering lock position 0).
• Turning the key in steering lock to position 1 or 2. Display illumination
Rotate knob (1) to vary intensity of instrument lamps: • Clockwise - instrument lamp intensity increases.
• Counterclockwise - instrument lamp intensity
decreases.
Odometer/trip odometer
Activate the instrument cluster. • Press knob (1) once to switch to or from odometer to
trip odometer readout.
• Press and hold knob (1) for more than 1 second to
reset trip odometer (with trip odometer displayed).
• Press knob (1) twice to display next scheduled
service.
Clock
Adjusting clock (instrument cluster activated):
Minute: Pull out knob (2) and turn it to the right.
Hour: Pull out knob (2) and turn it to the left.
Page 555 of 4133
88
Flexible service system
Te ch n ica l
data
Instruments
and controls Operation
Driving Instrument
cluster display Practical hints Car care Index
Important!
The FSS indicator is not an engine oil level indicator.
See page 89 for engine oil level indicator.
Notes:
When disconnecting vehicle battery for one or more
days at a time, such days will not be counted. Any such
days not counted by the FSS can be added by your
Mercedes-Benz Light Truck Center.
The interval between services is determined by the type
of driving for which the vehicle is used. For example,
driving at extreme speeds, and cold starts combined
with short distance driving in which the engine does not
reach normal operating temperature, reduce the interval
between services.
Following a completed A or B service the Mercedes-
Benz Light Truck Center sets the counter mileage to
10 000 miles (Canada: 15 000 km) and 365 days.
The counter can also be set by any individual. To do so: 1. Turn the key in steering lock to position 2.
2. Immediately press button (1) twice within one second. 3. The present status for days or distance is displayed.
Within 10 seconds turn key in steering lock to
position 0.
4. Press and hold button (1), while turning key in steering lock to position 2 again. The present status
for days or distance is displayed once more.
Continue to hold button (1).
After approximately 10 seconds a signal sounds, and
the display shows 10 000 miles (Canada: 15 000 km)
for approximately 10 seconds.
5. Release button (1).
If the FSS counter was inadvertently reset, have it
corrected at a Mercedes-Benz Light Truck Center.
Notes:
The FSS allows for distances between 10 000 miles
(Canada: 15 000 km) and 20 000 miles (Canada:
30 000 km), or from 365 to 730 days between services.
However you choose to set your reference numbers, the
scheduled services as posted in the Service Booklet
must be followed to properly care for your vehicle.
Page 624 of 4133
157
Tele Aid
Te ch n ica l
data
Instruments
and controls Operation
Driving Instrument
cluster display Practical hints Car care Index
Important!
If the indicator lamp continues to flash or the system
does not reset, contact the Response Center at
1-800-756-9018 (in the USA) or 1-888-923-8367 (in
Canada), or Mercedes-Benz Client Assistance at
1-800-FOR-MERCedes (1-800-367-6372) in the USA or
Customer Service at 1-800-387-0100 in Canada.
Notes:
The indicator lamp for the respective button flashes
until the call is concluded and this can only be
completed by a Response Center or Client Assistance
Center representative, except Roadside assistance and
Information calls, which can also be terminated by
using the End button on the MCS unit.
When a Tele Aid call has been initiated, the MCS system
audio is muted and the selected mode (radio, tape or
CD) pauses. The optional cellular phone (if installed)
switches off. If you must use this phone, the vehicle
must be parked. Disconnect the coiled cord and place
the call. The navigation system (if engaged) will
continue to run. A pop-up window will appear in the
MCS display to indicate that a Tele Aid call is in
progress. Remote door unlock
In the case you have your vehicle locked unintentionally
(e.g. key inside vehicle), and the reserve key is not
handy, contact the Mercedes-Benz Response Center at
1-800-756-9018 (in the USA) or 1-888-923-8367 (in
Canada). You will be asked to provide your password
which you provided when you completed the subscriber
agreement.
Then return to your vehicle and pull outside handle of
liftgate for a minimum of 20 seconds until the “SOS”
button is flashing.
As an alternative, you may unlock the vehicle via
Internet using the ID and password sent to you shortly
after the completion of your Acquaintance Call.
The Response Center will then unlock your vehicle with
the remote door unlocking feature.
Note:
The remote door unlock feature is available if the
relevant cellular phone network is available.
The SOS button will f lash and the message
“EMERGENCY CALL – CALL CONNECTED” will appear
in t he MCS display to indica te receipt of t he d oor unlock
command.
Page 810 of 4133

ContentsOperation......................................... 191
The first 1000 miles (1500 km) ......... 192
Driving instructions ............................ 193
Drive sensibly – save fuel ............. 193
Drinking and driving ..................... 193
Pedals .......................................... 193
Power assistance ......................... 193
Brakes .......................................... 194
Driving off..................................... 195
Parking ......................................... 196
Tires ............................................. 196
Hydroplaning ................................ 197
Tire traction .................................. 197
Tire speed rating .......................... 198
Winter driving instructions ........... 198
Standing water ............................. 200
Off-road driving ............................ 200
Trailer towing ............................... 206
Passenger compartment .............. 211
Driving abroad .............................. 211
Control and operation of
radio transmitters......................... 211
Catalytic converter ....................... 212
Emission control........................... 212
Coolant temperature .................... 213At the gas station .............................. 214
Refueling ...................................... 214
Check regularly and before
a long trip ..................................... 215
Engine compartment ......................... 217
Hood ............................................ 217
Engine oil ..................................... 218
Transmission fluid level ................ 222
Coolant ........................................ 222
Battery ......................................... 223
Windshield washer system and
headlamp cleaning system* ......... 224
Tires and wheels ................................ 226
Important guidelines .................... 226
Life of tire..................................... 227
Direction of rotation ..................... 227
Checking tire inflation pressure ... 227
Rotating wheels ........................... 228
Winter driving .................................... 230
Winter tires .................................. 230
Block heater (Canada only) .......... 231
Snow chains ................................. 231Maintenance...................................... 232
Clearing the service indicator ...... 232
Service term exceeded ................ 233
Calling up the service indicator .... 233
Resetting the service indicator .... 233
Vehicle care....................................... 234
Cleaning and care of the vehicle .. 234
Practical hints................................. 241
What to do if … .................................. 242
Lamps in instrument cluster ........ 242
Additional indicators in the
speedometer display.................... 256
Where will I find ...? ........................... 257
First aid kit ................................... 257
Vehicle tool kit ............................. 257
Spare wheel (space-saver tire) ..... 259
Unlocking / locking in an emergency . 261
Unlocking the vehicle................... 261
Locking the vehicle ...................... 262
Changing batteries in the
remote control ............................. 262
Fuel filler flap ............................... 263
Manually unlocking the
transmission gear selector lever .. 264
Page 829 of 4133
25 At a glance
Instrument cluster
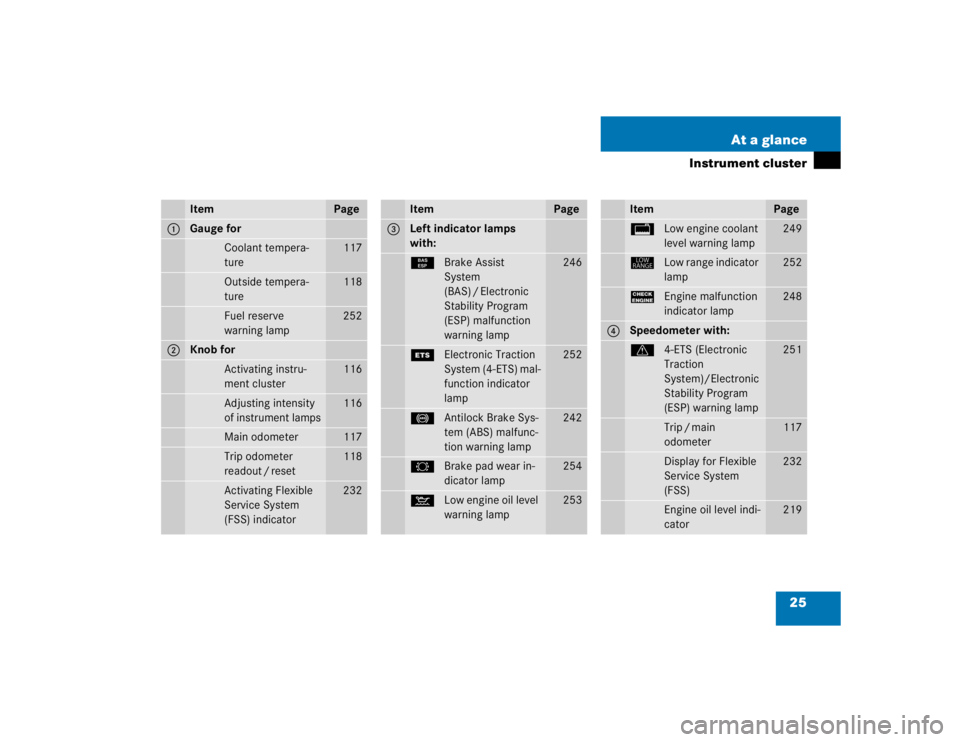
Item
Page
1
Gauge for
Coolant tempera-
ture
117
Outside tempera-
ture
118
Fuel reserve
warning lamp
252
2
Knob for
Activating instru-
ment cluster
116
Adjusting intensity
of instrument lamps
116
Main odometer
117
Trip odometer
readout / reset
118
Activating Flexible
Service System
(FSS) indicator
232
Item
Page
3
Left indicator lamps
with:¿Brake Assist
System
(BAS) / Electronic
Stability Program
(ESP) malfunction
warning lamp
246
{Electronic Traction
System (4-ETS) mal-
function indicator
lamp
252
-Antilock Brake Sys-
tem (ABS) malfunc-
tion warning lamp
242
2Brake pad wear in-
dicator lamp
254
:Low engine oil level
warning lamp
253
Item
Page
/Low engine coolant
level warning lamp
249
êLow range indicator
lamp
252
?Engine malfunction
indicator lamp
248
4
Speedometer with:v4-ETS (Electronic
Traction
System)/Electronic
Stability Program
(ESP) warning lamp
251
Trip / main
odometer
117
Display for Flexible
Service System
(FSS)
232
Engine oil level indi-
cator
219