odometer MERCEDES-BENZ S-Class 2011 W221 Owner's Manual
[x] Cancel search | Manufacturer: MERCEDES-BENZ, Model Year: 2011, Model line: S-Class, Model: MERCEDES-BENZ S-Class 2011 W221Pages: 524, PDF Size: 22.53 MB
Page 17 of 524
O
Occupant Classification System
(OCS) Faults ............................................... 52
Operation ......................................... 48
System self-test ............................... 51
Occupant safety
Children in the vehicle .....................60
System overview .............................. 42
Octane number (fuel) ........................ 512
Odometer ........................................... 368
Off-map .............................................. 171
Off-road .............................................. 171
4MATIC .......................................... 339
Oil
see Engine oil
On-board computer
AMG menu ..................................... 371
Assistance menu ........................... 375
Audio menu ................................... 370
Display messages ..........................380
Important safety notes ..................364
Instrument cluster submenu ..........377
Lighting submenu .......................... 377
Message memory .......................... 380
Navigation menu ............................ 369
Operating video DVD .....................371
Operation ....................................... 365
Overview of menus ........................367
Service menu ................................. 377
Settings menu ............................... 377
Standard display submenu ............368
Telephone menu ............................ 374
Trip menu ...................................... 368
Opening height restriction for
trunk lid .............................................. 261
Operating system see On-board computer
Orientation in direction of travel ..... 181
Outside lighting Delayed switch-off (COMAND) .......259
Outside temperature
Display ........................................... 365
Overhead control panel
Overview .......................................... 36
Override feature
Rear side windows ...........................65P
Paint code number ............................ 509
Paintwork (cleaning instructions) ... 454
Panic alarm .......................................... 66
Panorama roof with power tilt/
sliding panel Opening/closing .............................. 95
Resetting ......................................... 97
Parking ............................................... 316
Parking aid Parking Guidance ........................... 342
PARKTRONIC ................................. 339
Rear view camera .......................... 346
Parking brake
Display message ............................ 389
Electric parking brake ....................317
Parking Guidance .............................. 342
Display message ............................ 405
Parking lamp (display message) ...... 396
Parking position Exterior mirror on the front-
passenger side ............................... 111
Exterior mirrors (COMAND) ...........258
PARKTRONIC
Activating/deactivating .................341
Function/notes ............................. 339
Malfunction .................................... 342
Problem ......................................... 342
Range of the sensors .....................340
Warning display ............................. 341
Passcode
Entering ................................. 147, 194
Pause function ................................... 220
Pedals ................................................. 319
Permanent four-wheel drive see 4MATIC
Phone book
Calling up ....................................... 201
Creating an entry ........................... 203
Deleting an entry ........................... 204
Introduction ................................... 200
Plastic trim (cleaning instructions) . 458
Playback options .............. 224, 229, 234
Point of interest Category ........................................ 161
Entering ......................................... 160
Entering a name ............................. 160Index15
Page 23 of 524
Increased vehicle weight due to
optional equipment (definition) ......500
Kilopascal (kPa) (definition) ...........501
Labeling (overview) ........................495
Load bearing index (definition) ......502
Load index ..................................... 498
Load index (definition) ...................501
Maximum loaded vehicle weight
(definition) ..................................... 501
Maximum load on a tire
(definition) ..................................... 501
Maximum permissible tire
pressure (definition) ....................... 501
Maximum tire load .........................494
Maximum tire load (definition) .......501
Optional equipment weight
(definition) ..................................... 502
PSI (pounds per square inch)
(definition) ..................................... 501
Replacing ....................................... 502
Service life ..................................... 482
Sidewall (definition) .......................502
Speed index (definition) .................500
Storing ........................................... 503
Structure and characteristics
(definition) ..................................... 500
Temperature .................................. 495
TIN (Tire Identification Number)
(definition) ..................................... 502
Tire bead (definition) ......................502
Tire pressure (definition) ................501
Tire pressures (recommended) ......500
Tire size (data) ............................... 503
Tire size designation, load-bearing
capacity, speed index ....................496
Tire tread ....................................... 481
Tire tread (definition) .....................501
Total load limit (definition) .............502
Traction ......................................... 495
Traction (definition) .......................502
Tread wear ..................................... 495
Uniform Tire Quality Grading
Standards ...................................... 494
Uniform Tire Quality Grading
Standards (definition) ....................500
Unladen weight (definition) ............501
Wear indicator (definition) .............502
Wheel rim (definition) ....................500Tires and wheels (important safety
information) ....................................... 480
Toggling .............................................. 198
Tone settings Balance and fader ..........................133
Treble and bass ............................. 133
Top Tether ............................................ 64
Towing Important safety guidelines ...........473
Installing the towing eye ................474
Removing the towing eye ...............474
Track
Selecting ........................................ 248
Track information .............................. 250
Traffic jam function ........................... 168
Traffic Program Switching off .................................. 132
Traffic report
Real-time traffic report ..................174
Traffic report read-aloud function ... 172
Traffic reports .................................... 172
Transfer case ..................................... 313
Transmission position display ......... 308
Transmission positions .................... 309
Treble and bass Adjusting ....................................... 133
Trip computer (on-board
computer) .......................................... 368
Trip odometer Calling up ....................................... 368
Resetting (on-board computer) ......369
True Image™ ...................................... 135
Trunk Automatic opening ..................... 86, 87
Emergency release ..........................88
Important safety guidelines .............85
Limiting the opening angle ............. 261
Locking separately ...........................87
Trunk lid
Display message ............................ 410
Trunk lid opening height
restriction .......................................... 261
trunk load (maximum) ...................... 516
Turn signal (display message) ......... 394
Turn signals ....................................... 274
Type plate see Vehicle identification plate Index21
Page 27 of 524
Information for customers in
California
Under California law you may be entitled to a
replacement of your vehicle or a refund of the
purchase price or lease price, if after a
reasonable number of repair attempts
Mercedes-Benz USA, LLC and/or its
authorized repair or service facilities fail to fix
one or more substantial defects or
malfunctions in the vehicle that are covered
by its express warranty. During the period of
18 months from original delivery of the
vehicle or the accumulation of 18 000 miles
(approximately 29 000 km) on the odometer
of the vehicle, whichever occurs first, a
reasonable number of repair attempts is
presumed for a retail buyer or lessee if one or
more of the following occurs:(1)the same substantial defect or
malfunction results in a condition that is
likely to cause death or serious bodily
injury if the vehicle is driven, that defect
or malfunction has been subject to repair
two or more times, and you have directly
notified Mercedes-Benz USA, LLC in
writing of the need for its repair.(2)the same substantial defect or
malfunction of a less serious nature than
category (1) has been subject to repair
four or more times and you have directly
notified Mercedes-Benz in writing of the
need for its repair.(3)the vehicle is out of service by reason of
repair of the same or different substantial
defects or malfunctions for a cumulative
total of more than 30 calendar days.
Please send your written notice to:
Mercedes-Benz USA, LLC
Customer Assistance Center
One Mercedes Drive
Montvale, NJ 07645-0350
Maintenance
The Service and Warranty Information
Booklet describes all necessary maintenance
work that should be performed at regular
intervals.
Always have the Service and Warranty
Information Booklet with you when you bring
the vehicle to an authorized Mercedes-Benz
Center. The service advisor will record each
service in the Service and Warranty
Information Booklet for you.
Roadside Assistance
The Mercedes-Benz Roadside Assistance
Program provides factory-trained technical
help in the event of a breakdown. Calls to the
toll-free Roadside Assistance number will be
answered by Mercedes-Benz Customer
Assistance Representatives 24 hours a day,
365 days a year.
1-800-FOR-MERCedes(1-800-367-6372)
(USA)
1-800-387-0100 (Canada)
For additional information refer to the
Mercedes-Benz Roadside Assistance
Program brochure (in the USA) or the
Roadside Assistance section of the Service
and Warranty Information Booklet (in
Canada) You will find both in your vehicle
literature portfolio.
Change of address or ownership
In the event of a change of address, be sure
to send in the "Change of Address Notice"
found in the Service and Warranty
Information Booklet, or simply call the
Mercedes-Benz Customer Assistance Center
(in the USA) at 1-800-FOR-MERCedes
(1-800-367-6372) or Customer Service (in
Canada) at 1-800-387-0100. This will assist
us in contacting you in a timely manner
should the need arise.
Introduction25
Page 356 of 524
When Blind Spot Assist is activated, indicator
lamp : in the exterior mirrors lights up in
yellow at speeds of up to 20 mph (30 km/h).
At speeds above 20 mph (30 km/h), the
indicator lamp goes out and Blind Spot Assist
is operational.
If a vehicle is detected within the monitoring
range of Blind Spot Assist at speeds above
20 mph (30 km/h), warning lamp : on the
corresponding side lights up in red. This
warning is always emitted when a vehicle
enters the blind spot monitoring range from
behind or from the side. When you overtake
a vehicle, the warning only occurs if the
difference in speed is less than 7 mph
(12 km/h).
The yellow indicator lamp goes out if reverse
gear is engaged. In this event, Blind Spot
Assist is no longer active.
The brightness of the indicator/warning
lamps is adjusted automatically according to
the ambient light.
GWarning
Blind Spot Assist is not active at speeds under
approximately 20 mph (30 km/h). The
indicator lamps in the exterior mirrors are
yellow. Vehicles in the monitoring range are
then not indicated.
Always pay attention to traffic conditions and
your surroundings. Otherwise, you may fail to
recognize dangers in time, cause an accident
and injure yourself and others.
Collision warning
If a vehicle is detected in the monitoring range
of Blind Spot Assist and you switch on the turn
signal, a double warning tone sounds. Red
warning lamp : flashes. If the turn signal
remains on, detected vehicles are indicated
by the flashing of red warning lamp :. There
are no further warning tones.
Switching on Blind Spot Assist
XMake sure that the radar sensor system
(Y page 378) and Blind Spot Assist
(Y page 376) are activated in the on-board
computer.
XTurn the SmartKey to position 2 in the
ignition lock.
Warning lamps : light up red in the
exterior mirrors for approximately 1.5
seconds and then turn yellow.
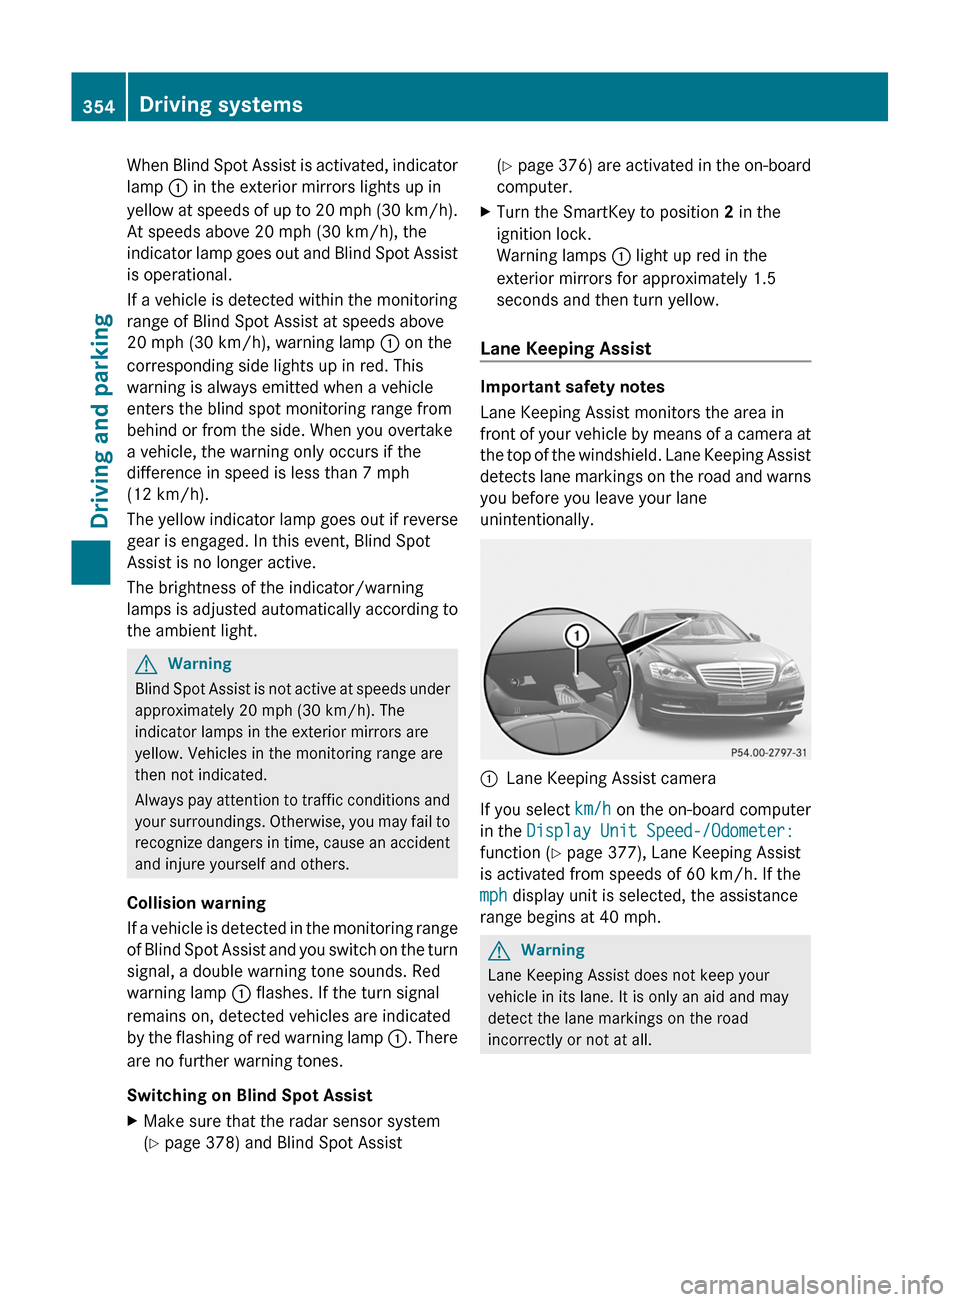
Lane Keeping Assist
Important safety notes
Lane Keeping Assist monitors the area in
front of your vehicle by means of a camera at
the top of the windshield. Lane Keeping Assist
detects lane markings on the road and warns
you before you leave your lane
unintentionally.
:Lane Keeping Assist camera
If you select km/h on the on-board computer
in the Display Unit Speed-/Odometer:
function (Y page 377), Lane Keeping Assist
is activated from speeds of 60 km/h. If the
mph display unit is selected, the assistance
range begins at 40 mph.
GWarning
Lane Keeping Assist does not keep your
vehicle in its lane. It is only an aid and may
detect the lane markings on the road
incorrectly or not at all.
354Driving systemsDriving and parking
Page 361 of 524
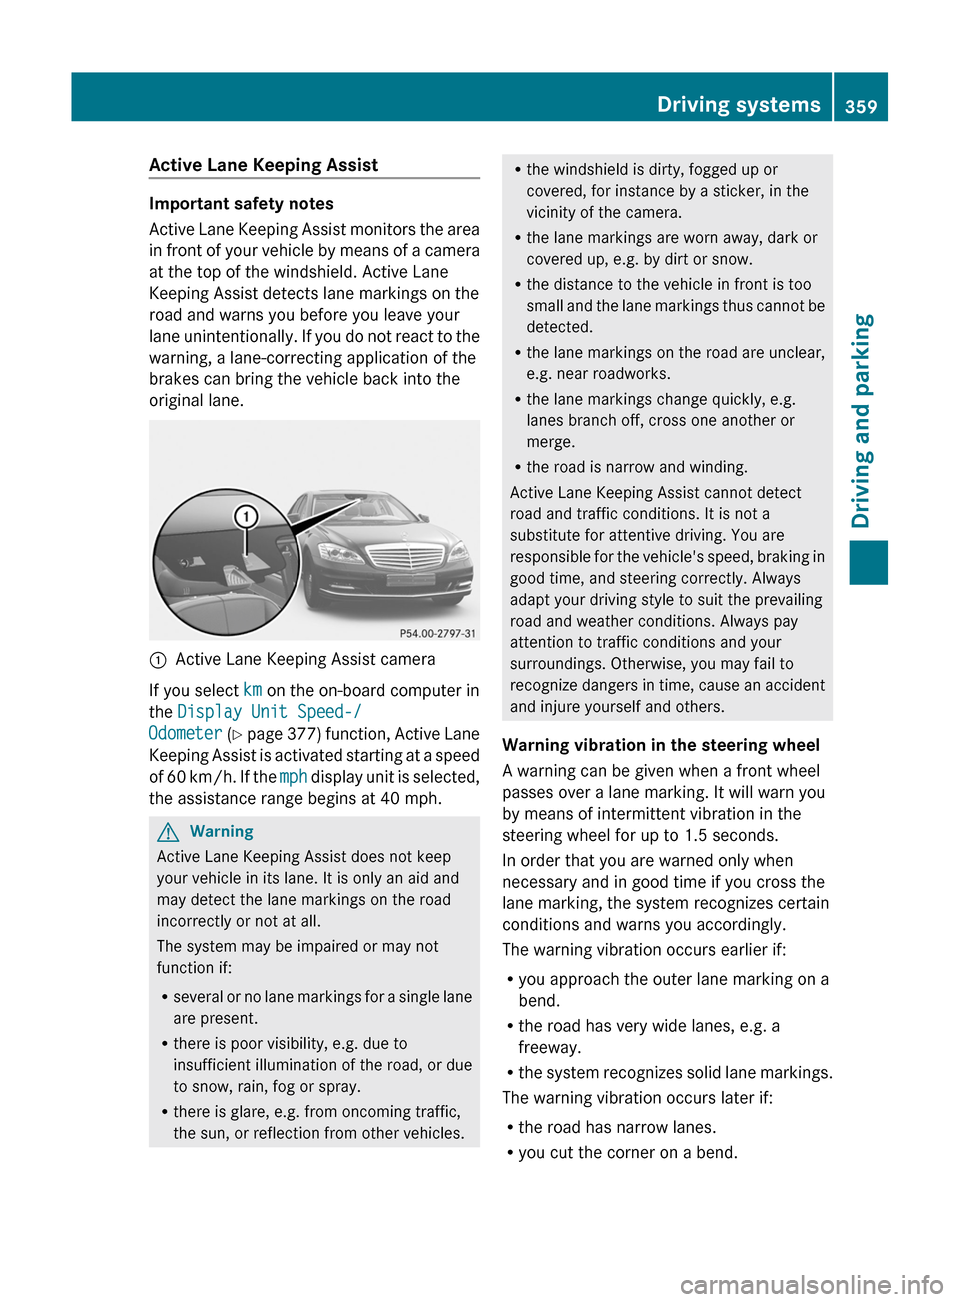
Active Lane Keeping Assist
Important safety notes
Active Lane Keeping Assist monitors the area
in front of your vehicle by means of a camera
at the top of the windshield. Active Lane
Keeping Assist detects lane markings on the
road and warns you before you leave your
lane unintentionally. If you do not react to the
warning, a lane-correcting application of the
brakes can bring the vehicle back into the
original lane.
:Active Lane Keeping Assist camera
If you select km on the on-board computer in
the Display Unit Speed-/
Odometer (Y page 377) function, Active Lane
Keeping Assist is activated starting at a speed
of 60 km/h. If the mph display unit is selected,
the assistance range begins at 40 mph.
GWarning
Active Lane Keeping Assist does not keep
your vehicle in its lane. It is only an aid and
may detect the lane markings on the road
incorrectly or not at all.
The system may be impaired or may not
function if:
Rseveral or no lane markings for a single lane
are present.
Rthere is poor visibility, e.g. due to
insufficient illumination of the road, or due
to snow, rain, fog or spray.
Rthere is glare, e.g. from oncoming traffic,
the sun, or reflection from other vehicles.
Rthe windshield is dirty, fogged up or
covered, for instance by a sticker, in the
vicinity of the camera.
Rthe lane markings are worn away, dark or
covered up, e.g. by dirt or snow.
Rthe distance to the vehicle in front is too
small and the lane markings thus cannot be
detected.
Rthe lane markings on the road are unclear,
e.g. near roadworks.
Rthe lane markings change quickly, e.g.
lanes branch off, cross one another or
merge.
Rthe road is narrow and winding.
Active Lane Keeping Assist cannot detect
road and traffic conditions. It is not a
substitute for attentive driving. You are
responsible for the vehicle's speed, braking in
good time, and steering correctly. Always
adapt your driving style to suit the prevailing
road and weather conditions. Always pay
attention to traffic conditions and your
surroundings. Otherwise, you may fail to
recognize dangers in time, cause an accident
and injure yourself and others.
Warning vibration in the steering wheel
A warning can be given when a front wheel
passes over a lane marking. It will warn you
by means of intermittent vibration in the
steering wheel for up to 1.5 seconds.
In order that you are warned only when
necessary and in good time if you cross the
lane marking, the system recognizes certain
conditions and warns you accordingly.
The warning vibration occurs earlier if:
Ryou approach the outer lane marking on a
bend.
Rthe road has very wide lanes, e.g. a
freeway.
Rthe system recognizes solid lane markings.
The warning vibration occurs later if:
Rthe road has narrow lanes.
Ryou cut the corner on a bend.
Driving systems359Driving and parkingZ
Page 370 of 524
Trip menu
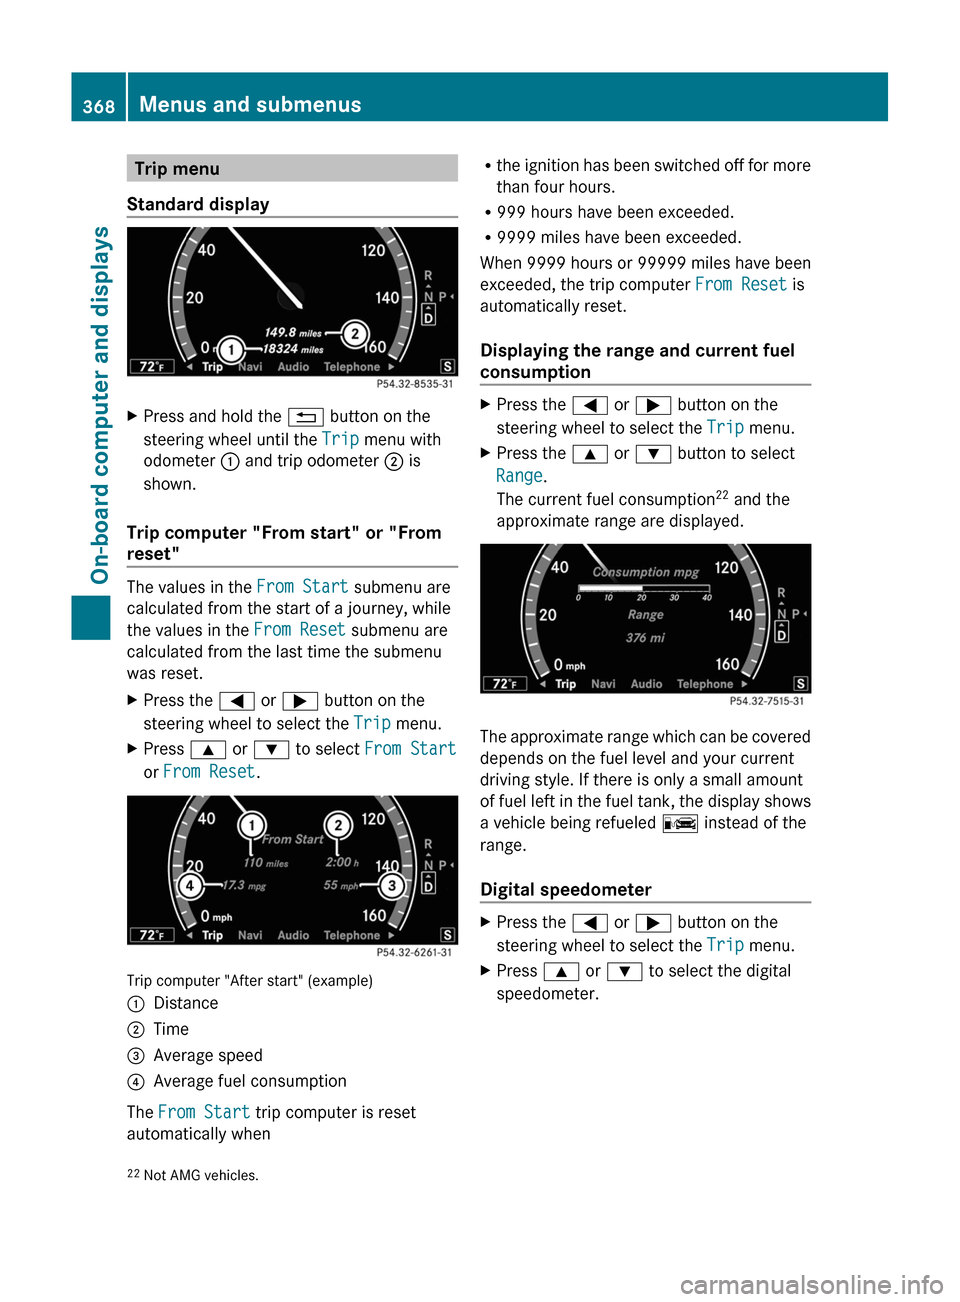
Standard display
XPress and hold the % button on the
steering wheel until the Trip menu with
odometer : and trip odometer ; is
shown.
Trip computer "From start" or "From
reset"
The values in the From Start submenu are
calculated from the start of a journey, while
the values in the From Reset submenu are
calculated from the last time the submenu
was reset.
XPress the = or ; button on the
steering wheel to select the Trip menu.
XPress 9 or : to select From Start
or From Reset.
Trip computer "After start" (example)
:Distance;Time=Average speed?Average fuel consumption
The From Start trip computer is reset
automatically when
Rthe ignition has been switched off for more
than four hours.
R999 hours have been exceeded.
R9999 miles have been exceeded.
When 9999 hours or 99999 miles have been
exceeded, the trip computer From Reset is
automatically reset.
Displaying the range and current fuel
consumption
XPress the = or ; button on the
steering wheel to select the Trip menu.
XPress the 9 or : button to select
Range.
The current fuel consumption22 and the
approximate range are displayed.
The approximate range which can be covered
depends on the fuel level and your current
driving style. If there is only a small amount
of fuel left in the fuel tank, the display shows
a vehicle being refueled C instead of the
range.
Digital speedometer
XPress the = or ; button on the
steering wheel to select the Trip menu.
XPress 9 or : to select the digital
speedometer.22Not AMG vehicles.368Menus and submenusOn-board computer and displays
Page 371 of 524
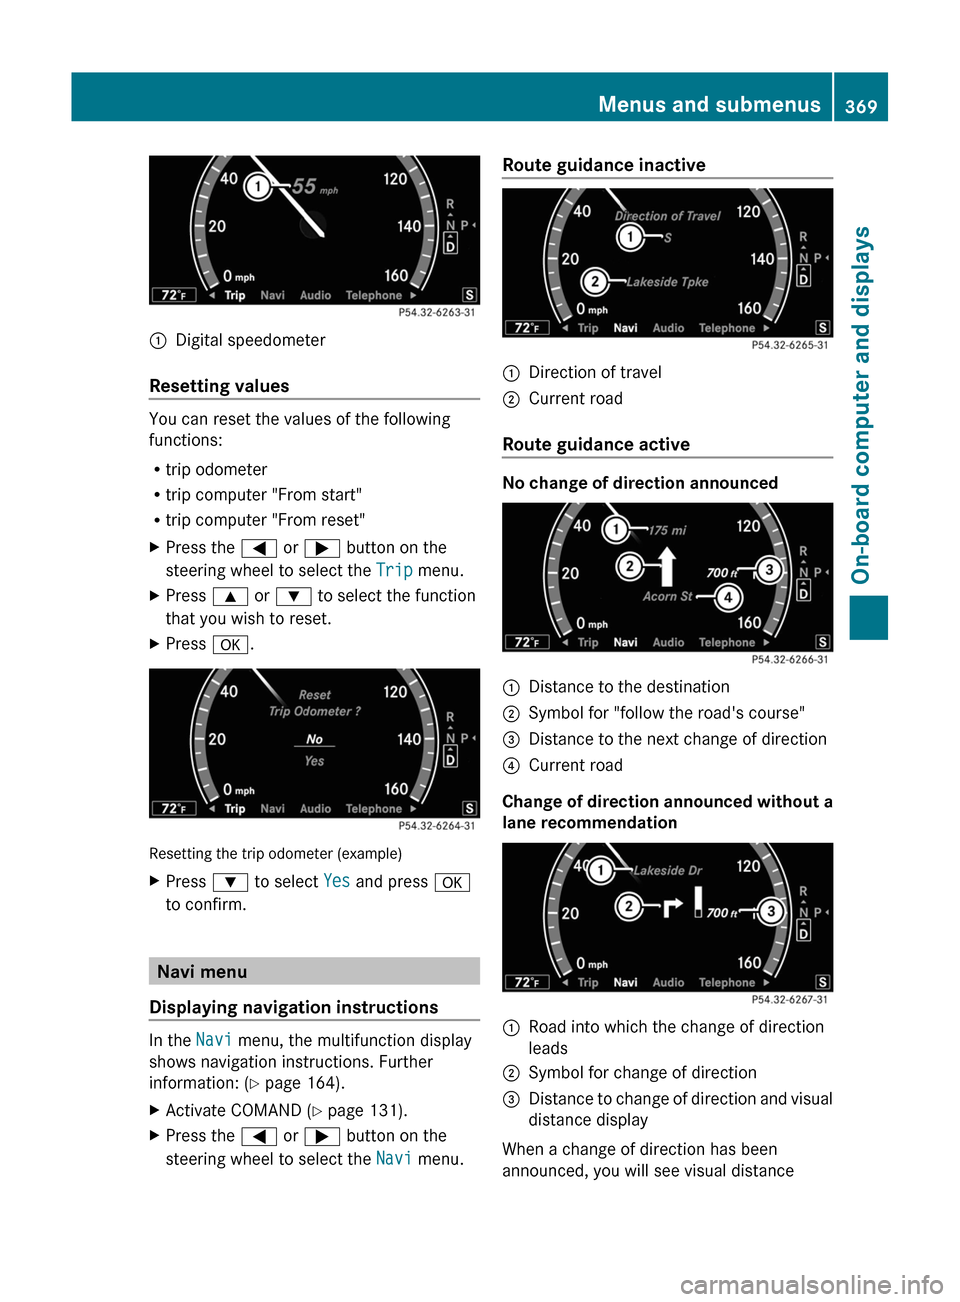
:Digital speedometer
Resetting values
You can reset the values of the following
functions:
Rtrip odometer
Rtrip computer "From start"
Rtrip computer "From reset"
XPress the = or ; button on the
steering wheel to select the Trip menu.
XPress 9 or : to select the function
that you wish to reset.
XPress a.
Resetting the trip odometer (example)
XPress : to select Yes and press a
to confirm.
Navi menu
Displaying navigation instructions
In the Navi menu, the multifunction display
shows navigation instructions. Further
information: (Y page 164).
XActivate COMAND (Y page 131).XPress the = or ; button on the
steering wheel to select the Navi menu.
Route guidance inactive:Direction of travel;Current road
Route guidance active
No change of direction announced
:Distance to the destination;Symbol for "follow the road's course"=Distance to the next change of direction?Current road
Change of direction announced without a
lane recommendation
:Road into which the change of direction
leads
;Symbol for change of direction=Distance to change of direction and visual
distance display
When a change of direction has been
announced, you will see visual distance
Menus and submenus369On-board computer and displaysZ
Page 379 of 524
Maintenance menu
In the Service menu you can:
R call up display messages ( Y page 380)
R check the tire pressure electronically
( Y page 487)
R call up the service due date ( Y page 452)
R check the oil level ( Y page 447)
Menu settings
Introduction
In the Settings menu, you have the following
options:
R switching the daytime running lamps on/
off
R switching Adaptive Highbeam Assist on/
off
R showing or hiding the additional
speedometer
R selecting the units for speed and distance
R switching the belt adjustment on/off
R activating/deactivating the radar sensor
system
Switching the daytime running lamps
on/off
This function is not available in Canada.
If you have activated the Day Running
Lights function and the light switch is set to
$ or c , the daytime running lamps are
switched on automatically when the engine is
running.
In the dark, the following also light up:
R the side lamps
R the tail lamps
R the license plate lamp
R the side marker lamp
If you turn the light switch to a different
position, the corresponding lights are
switched on. If you switch off the daytime
running lamps at night, make sure that the
light switch is set to L or c .
The factory setting is Enabled.XPress the = or ; button on the
steering wheel to select the Settings
menu.XPress the 9 or : button to select
Day Running Lights .XPress the a button to confirm.XTo activate/deactivate: press a
again.
Switching Adaptive Highbeam Assist
on/off
XPress the = or ; button on the
steering wheel to select the Settings
menu.XPress the : or 9 button to select
Adapt. High-beam Asst. .XPress the a button to confirm.XTo activate/deactivate: press a
again.
Switching the additional speedometer
on or off
An additional digital speedometer can be
shown in the multifunction display.
Vehicles with a kilometer speedometer: the
digital speedometer has mph units.
Vehicles with a miles speedometer: the digital
speedometer has km/h units.
XPress the = or ; button on the
steering wheel to select the Settings
menu.XPress 9 or : to select Add.
Speedometer .XPress the a button to confirm.XPress the a button to save the setting.
Selecting the unit of measurement for
distance
The Display Unit Speed-/Odometer
function allows you to choose whether
certain displays appear in km/h or mph.
Menus and submenus377On-board computer and displaysZ
Page 380 of 524
The selected unit of measurement for
distance applies to:
R the analog speedometer
R the digital speedometer in the Trip menu
R the odometer and the trip odometer
R the trip computer
R the navigation instruction in the Navi menu
R DISTRONIC PLUS
R ASSYST PLUS service interval display
The digital speedometer shows alternative
speed units ( Y page 377).XPress the = or ; button on the
steering wheel to select the Settings
menu.XPress 9 or : to select Units.XPress the a button to confirm.XPress the a button to save the setting.
The unit switches km/h and mph.
Switching the belt adjustment on/off
Further information on belt adjustment:
( Y page 58).
XPress = or ; on the steering wheel
to select the Settings menu.XPress the 9 or : button to select
Belt Adjustment .XPress the a button to confirm.XTo activate/deactivate: press a
again.
Activating/deactivating the acoustic
locking confirmation
If you activate the Acoustic Lock Feedb.
function, an audible signal sounds when the
vehicle is locked or unlocked. When
unlocking, the signal sounds once. When
locking, it sounds three times.
XPress the = or ; button on the
steering wheel to select the Settings
menu.XPress 9 or : to select Acoustic
Lock Feedb. .XPress the a button to confirm.XTo activate/deactivate: press a
again.
Activating/deactivating the radar
sensor system
The following systems are switched off when
the radar sensor system is deactivated:
R DISTRONIC PLUS ( Y page 325)
R BAS PLUS ( Y page 68)
R PRE-SAFE ®
Brake ( Y page 71)
R Blind Spot Assist ( Y page 352)
R Active Blind Spot Assist ( Y page 356)
i USA only: This device has been approved
by the FCC as a “Vehicular Radar System”.
The radar sensor is intended for use in an
automotive radar system only. Removal,
tampering, or altering of the device will void
any warranties, and is not permitted by the
FCC. Do not tamper with, alter, or use in
any non-approved way.
Any unauthorized modification to this
device could void the user’s authority to
operate the equipment.
i Canada only:
This device complies with RSS-210 of
Industry Canada. Operation is subject to
the following two conditions:
1. This device may not cause interference,
and
2. This device must accept any interference
received, including interference that may
cause undesired operation of the device.
Any unauthorized modification to this
device could void the user’s authority to
operate the equipment.
378Menus and submenusOn-board computer and displays