spare tire location MERCEDES-BENZ S-Class 2011 W221 Owner's Manual
[x] Cancel search | Manufacturer: MERCEDES-BENZ, Model Year: 2011, Model line: S-Class, Model: MERCEDES-BENZ S-Class 2011 W221Pages: 524, PDF Size: 22.53 MB
Page 13 of 524

F
Favorites (COMAND) ......................... 118
First-aid kit ......................................... 462
First list entry Accepting ...................................... 129
Flat tire
Changing a wheel/mounting the
spare wheel ................................... 463
MOExtended run-flat system .........467
Preparing the vehicle .....................463
Raising the vehicle .........................464
Floormat ............................................. 442
Freeway information ......................... 185
Frequency input Manual ........................................... 209
Front fog lamp (display message) ... 395
Front multicontour seat
(COMAND) .......................................... 266
Front-passenger seat Adjusting from the driver's seat ..... 103
Adjusting from the rear
compartment ................................. 103
Fuel
Additives ........................................ 513
Notes ............................................. 512
Premium-grade unleaded gasoline . 512
Refueling ........................................ 313
Specifications ................................ 512
Tank content/reserve fuel .............511
Troubleshooting ............................. 316
Fuel consumption
Current (on-board computer) .........368
Notes ............................................. 319
Fuel filler cap (display message) ..... 400
Fuel filler flap Opening/closing ....... 314
Fuel level Calling up the range (on-board
computer) ...................................... 368
Fuel tank
Filling capacity ............................... 511
Function buttons (COMAND) ............ 117
Function restrictions Video DVD mode ........................... 237
Fuse allocation chart (vehicle tool
kit) ...................................................... 462Fuses
Dashboard fuse box .......................476
Engine emergency stop .................477
Fuse allocation chart .....................475
Fuse box in the engine
compartment ................................. 476
Fuse box in the rear compartment . 476
Notes ............................................. 475
G
Garage door opener Clearing the memory .....................442
Notes ............................................. 439
Opening/closing the garage door ..441
Programming the remote control ...440
Gear indicator (on-board
computer) .......................................... 371
Gear or selector lever (cleaning
guidelines) ......................................... 458
Genuine Mercedes-Benz parts ......... 508
Genuine wood trim and trim strips
(cleaning instructions) ...................... 458
Glove box ........................................... 422
Gracenote Media Database .............. 222
H
Hands-free microphone Switching on/off ........................... 198
harman/kardon ®
Logic 7 ®
Surround Sound system ................... 134
Hazard warning lamps ...................... 276
HD Radio™ ......................................... 212
Headlamp cleaning system .............. 276
Adding washer fluid .......................450
Notes ............................................. 515
Headlamp mode (daytime driving)
see Daytime running lamps
Headlamps
Cleaning ......................................... 456
Misting up ...................................... 277
Head restraint
NECK-PRO ..................................... 104
NECK-PRO luxury ........................... 104
Index11
Page 345 of 524

GWarning!
The system cannot detect objects located
above the area that the sensors scan. These
objects, e.g. protruding load, overhang, or
truck tail lifts, will be ignored when computing
the parking procedure. The Parking Guidance
might therefore provide untimely steering
instructions. This could cause a collision.
Thus, do not use the Parking Guidance in such
situations.
GWarning!
Make sure no persons or animals are in the
area in which you are maneuvering. You could
otherwise injure them.
! Pay particular attention to low objects or
objects with flat surfaces, such as trailer
drawbars, posts, cross beams and curbs.
These types of objects cannot be detected
by Parking Guidance and may damage the
vehicle.
When PARKTRONIC is deactivated, Parking
Guidance is also unavailable.
Use Parking Guidance for parking spaces:
Rthat are parallel to the direction of travel
Rthat are on straight roads, not bends
Rthat are on the same level as the road, i.e.
not on the pavement, for example. Parking
Guidance may not detect flat curbs
Parking tips:
ROn narrow roads, drive as close to the
parking space as possible.
RParking spaces that are littered, overgrown
or partially occupied by trailer drawbars
might be identified incorrectly or not at all.
RSnowfall or heavy rain may lead to a parking
space being measured inaccurately.
RPay attention to the PARKTRONIC warning
messages during the parking procedure
(Y page 341).
RWhen transporting a load which protrudes
from your vehicle, you must not use Parking
Guidance.
RNever use Parking Guidance with snow
chains or an emergency spare wheel
installed.
RMake sure that the tire pressures are
always correct. This has a direct effect on
the steering instructions.
RThe way your vehicle is positioned in the
parking space after parking is dependent
on various factors. These include the
position and shape of the vehicles parked
in front and behind it and the conditions of
the location. In some cases, Parking
Guidance may guide you too far or not far
enough into a parking space. In some
cases, it may also lead you across or onto
the curb. If necessary, cancel the parking
procedure with Parking Guidance.
! If unavoidable, you should drive over
obstacles such as curbs slowly and not at
a sharp angle. Otherwise, you may damage
the wheels or tires.
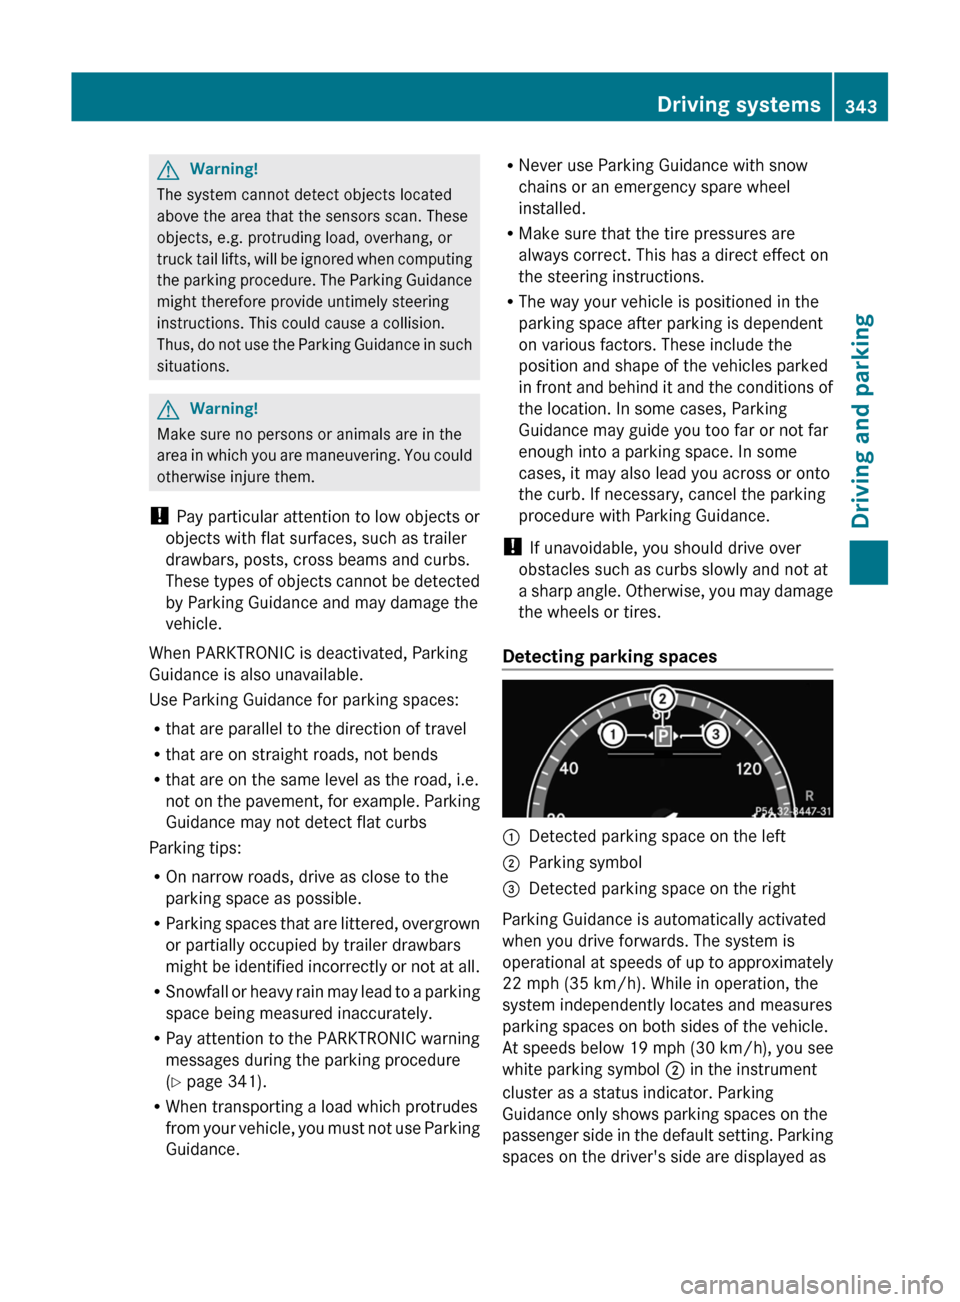
Detecting parking spaces
:Detected parking space on the left;Parking symbol=Detected parking space on the right
Parking Guidance is automatically activated
when you drive forwards. The system is
operational at speeds of up to approximately
22 mph (35 km/h). While in operation, the
system independently locates and measures
parking spaces on both sides of the vehicle.
At speeds below 19 mph (30 km/h), you see
white parking symbol ; in the instrument
cluster as a status indicator. Parking
Guidance only shows parking spaces on the
passenger side in the default setting. Parking
spaces on the driver's side are displayed as
Driving systems343Driving and parkingZ
Page 437 of 524

pressed the SOS button. Carefully leave the
vehicle and move to a safe location. The
Response Center will automatically contact
local emergency officials with the vehicle's
approximate location if they receive an
automatic SOS signal and cannot make voice
contact with the vehicle occupants.
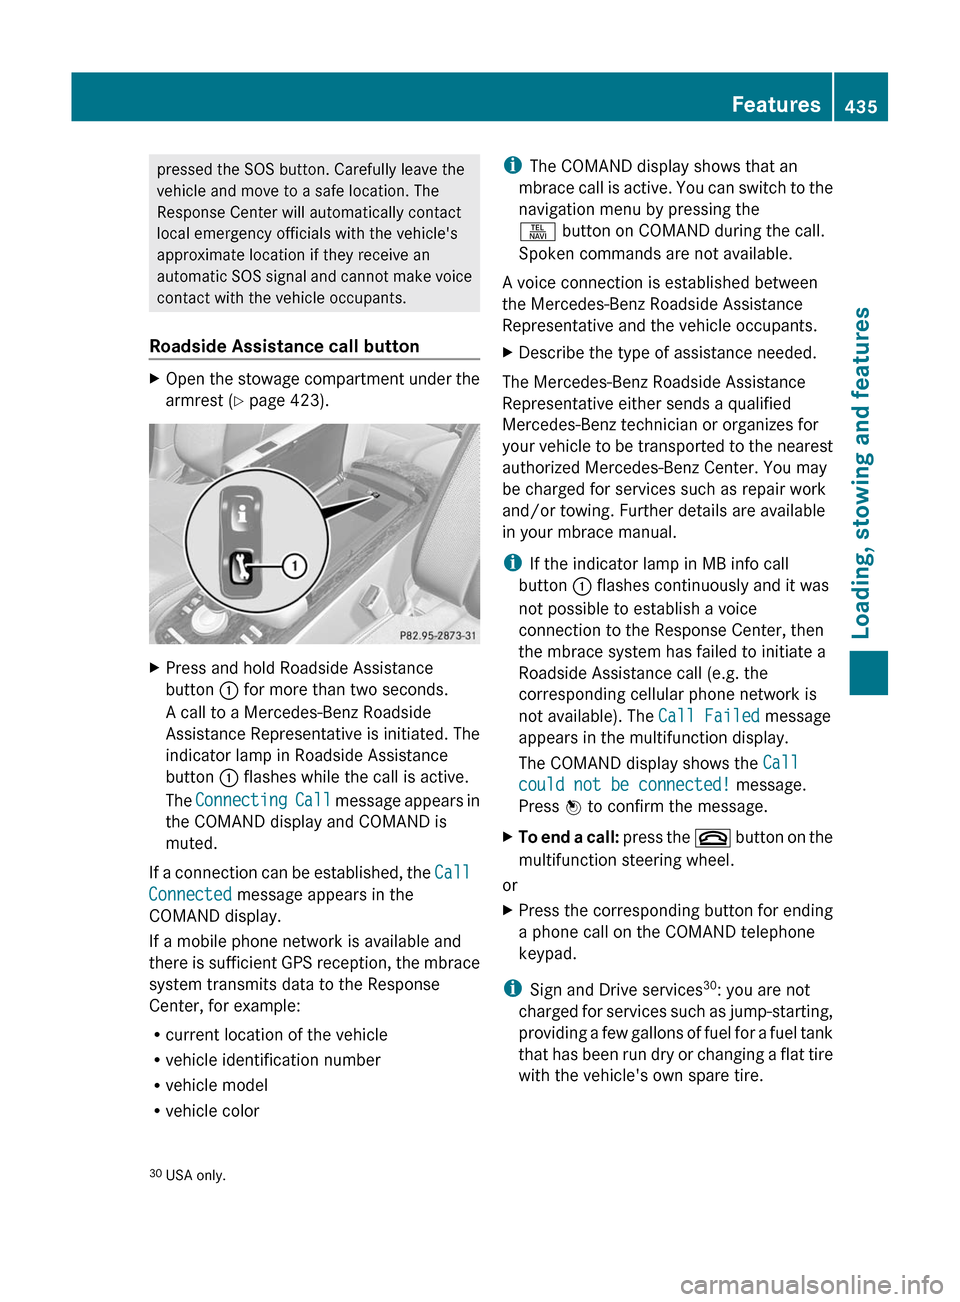
Roadside Assistance call buttonXOpen the stowage compartment under the
armrest ( Y page 423).XPress and hold Roadside Assistance
button : for more than two seconds.
A call to a Mercedes-Benz Roadside
Assistance Representative is initiated. The
indicator lamp in Roadside Assistance
button : flashes while the call is active.
The Connecting Call message appears in
the COMAND display and COMAND is
muted.
If a connection can be established, the Call
Connected message appears in the
COMAND display.
If a mobile phone network is available and
there is sufficient GPS reception, the mbrace
system transmits data to the Response
Center, for example:
R current location of the vehicle
R vehicle identification number
R vehicle model
R vehicle color
i The COMAND display shows that an
mbrace call is active. You can switch to the
navigation menu by pressing the
S button on COMAND during the call.
Spoken commands are not available.
A voice connection is established between
the Mercedes-Benz Roadside Assistance
Representative and the vehicle occupants.XDescribe the type of assistance needed.
The Mercedes-Benz Roadside Assistance
Representative either sends a qualified
Mercedes-Benz technician or organizes for
your vehicle to be transported to the nearest
authorized Mercedes-Benz Center. You may
be charged for services such as repair work
and/or towing. Further details are available
in your mbrace manual.
i If the indicator lamp in MB info call
button : flashes continuously and it was
not possible to establish a voice
connection to the Response Center, then
the mbrace system has failed to initiate a
Roadside Assistance call (e.g. the
corresponding cellular phone network is
not available). The Call Failed message
appears in the multifunction display.
The COMAND display shows the Call
could not be connected! message.
Press W to confirm the message.
XTo end a call: press the ~ button on the
multifunction steering wheel.
or
XPress the corresponding button for ending
a phone call on the COMAND telephone
keypad.
i Sign and Drive services 30
: you are not
charged for services such as jump-starting,
providing a few gallons of fuel for a fuel tank
that has been run dry or changing a flat tire
with the vehicle's own spare tire.
30 USA only.Features435Loading, stowing and featuresZ
Page 491 of 524

XPress the 9 or : button to select
Tire Pressure .XPress the a button.
The current tire pressure for each wheel will
be displayed in the multifunction display.
If the vehicle has been parked for longer than
20 minutes, the Tire Pressures
Displayed After Driving A Few
Minutes message appears in the display.
After a teach-in period, the tire pressure
monitor automatically recognizes new wheels
or new sensors. As long as a clear allocation
of the tire pressure values to the individual
wheels is not possible, the Tire Pressure
Monitor Active message is shown instead
of the tire pressure display. The tire pressures
are already being monitored.
i If a spare wheel/emergency spare wheel
is mounted, the system may continue to
show the tire pressure of the wheel that has
been removed for a few minutes. If this
occurs, note that the value displayed for
the position where the spare wheel is
mounted is not the same as the spare
wheel/emergency spare wheel's current
tire pressure.
TPMS warning messages
If the tire pressure monitor detects a
significant pressure loss on one or more tires,
a warning message is shown in the
multifunction display. A warning tone also
sounds and the tire pressure warning lamp
lights up in the instrument cluster.
For each tire that is affected by a significant
loss of pressure, the tire pressure is shown in
yellow.
If the Correct Tire Pressure message
appears in the multifunction display:
XCheck the tire pressure on all four wheels
and correct it if necessary.
i If the wheel positions on the vehicle are
interchanged, the tire pressures may be
displayed for the wrong positions for a
short time. This is rectified after a few
minutes of driving, and the tire pressures
are displayed for the correct positions.
Restarting the tire pressure monitorGWarning
It is the driver's responsibility to set the tire
inflation pressure to the recommended cold
tire inflation pressure. Underinflated tires
affect the ability to steer or brake the vehicle.
You might lose control over the vehicle.
When you restart the tire pressure monitor,
all existing warning messages are deleted and
the warning lamps go out. The monitor uses
the currently set tire pressures as the
reference values for monitoring.
The TPMS must be restarted when you set the
tire pressure to a new value (as a result of
changed handling or load characteristics, for
example). The TPMS then monitors the new
tire pressure values.
i Canada only: in most cases, the tire
pressure monitor recognizes the new
reference values automatically. However,
you can also define reference values
manually as described here.
Restart the tire pressure monitor after you
have set the tire pressure to the value
recommended for the desired driving
situation ( Y page 483). Only correct tire
pressures on cold tires. Comply with the
recommended tire pressures on the Tire and
Loading Information placard on the B-pillar on
the driver's side Additional tire pressure
values for driving at high speeds or with heavy
loads can be found in the Tire Pressure table
on the inside of the fuel filler flap.
XMake sure that the tire pressure is correct
on all four wheels.XMake sure that the SmartKey is in position
2 in the ignition lock.XPress the = or ; button to select the
Service menu.Tire pressure489Tires and wheelsZ