tires MERCEDES-BENZ S500 2002 W220 User Guide
[x] Cancel search | Manufacturer: MERCEDES-BENZ, Model Year: 2002, Model line: S500, Model: MERCEDES-BENZ S500 2002 W220Pages: 430, PDF Size: 20.81 MB
Page 280 of 430
277 Driving systems
Te ch n i c a l
data Instruments
and controlsOperationDrivingInstrument
cluster displayPractical hints Car care Index Brake assist system (BAS)
The BAS is designed to maximize the vehicle’s braking
capability during emergency braking maneuvers by
having maximum power boost applied to the brakes
more quickly in emergency braking conditions than
might otherwise be afforded solely by the driver’s
braking style. This can help reduce braking distances
over what ordinary driving and braking style might do.
The BAS complements the Antilock Brake System (ABS).Applying the brakes very quickly results in maximum
BAS assistance.
To receive the benefit of the system you must apply
continuous full braking power during the stopping
sequence. Do not reduce brake pedal pressure.
Once the brake pedal is released, the BAS is deactivated.
If the BAS warning message is displayed in the
multifunction display, a malfunction has been detected
in the system. The brake system functions in the usual
manner, but without BAS.
With the ABS malfunctioning, the BAS is also switched
off.
If a BAS warning message is displayed in the
multifunction display, have the BAS checked at your
authorized Mercedes-Benz Center as soon as possible.
Wa r n i n g !
BAS cannot prevent the natural laws of physics
from acting on the vehicle, nor can it increase
braking efficiency beyond that afforded by the
condition of the vehicle brakes and tires or the
traction afforded. The BAS cannot prevent
accidents, including those resulting from excessive
speed in turns, following another vehicle too
closely, or aquaplaning. Only a safe, attentive, and
skillful driver can prevent accidents. The
capabilities of a BAS equipped car must never be
exploited in a reckless or dangerous manner which
could jeopardize the user’s safety or the safety of
others.
Page 282 of 430
279 Driving systems
Te ch n i c a l
data Instruments
and controlsOperationDrivingInstrument
cluster displayPractical hints Car care Index ABS control
The ABS malfunction indicator lamp- in the
instrument cluster comes on with the electronic key in
starter switch position 2 and should go out with the
engine running.
When the ABS malfunction indicator lamp in the
instrument cluster comes on while the engine is
running, it indicates that the ABS has detected a
malfunction and has switched off. In this case, the brake
system functions in the usual manner, but without
antilock assistance.
For ABS malfunction indicator lamp, see page 306.
With the ABS malfunctioning, the BAS and ESP are also
switched off. The ABS malfunction indicator lamp and
the ESP warning lamp come on with the engine
running.
If the charging voltage falls below 10 volts, the
malfunction indicator lamp comes on and the ABS is
switched off. When the voltage is above this value again,
the malfunction indicator lamp should go out and the
ABS is operational.If the ABS malfunction indicator lamp stays illuminated,
have the system checked at your authorized
Mercedes-Benz Center as soon as possible.
Note:
To alert following vehicles to slippery road conditions
you discover, operate your hazard warning flashers as
appropriate.
Wa r n i n g !
ABS cannot prevent the natural laws of physics
from acting on the vehicle, nor can it increase
braking or steering efficiency beyond that afforded
by the condition of the vehicle brakes and tires or
the traction afforded. The ABS cannot prevent
accidents, including those resulting from excessive
speed in turns, following another vehicle too
closely, or aquaplaning. Only a safe, attentive, and
skillful driver can prevent accidents. The
capabilities of a ABS equipped vehicle must never
be exploited in a reckless or dangerous manner
which could jeopardize the user’s safety or the
safety of others.
Page 284 of 430
281 Driving systems
Te ch n i c a l
data Instruments
and controlsOperationDrivingInstrument
cluster displayPractical hints Car care Index Notes:
The yellow ESP warning lampv in the speedometer
dial comes on with the electronic key in starter switch
position 2. It should go out with the engine running.
If the ESP warning message is displayed, a malfunction
has been detected in the system. Only partial engine
output will be available.
Have the ESP checked at your authorized
Mercedes-Benz Center as soon as possible.
For ESP warning message, see page 307.
With the ABS malfunctioning, the ESP is also switched
off.
Driving the vehicle with varied size tires will cause the
wheels to rotate at different speeds, therefore the ESP
may activate (yellow ESP warning lamp in speedometer
dial comes on). For this reason, all wheels, including the
spare wheel, must have the same tire size. When testing the parking brake on a brake test
dynamometer, the engine must be shut off. Otherwise,
the ESP will immediately be engaged and will apply the
rear wheel brakes.
In winter operation, the maximum effectiveness of the
ESP is only achieved with Mercedes-Benz recommended
M+S rated radial-ply tires and / or snow chains.
Synchronizing ESP
If the power supply was interrupted (battery
disconnected or empty), the ESP warning message may
be displayed with the engine running.
Turn steering wheel completely to the left and then to
the right. The ESP warning message should go out.
Page 286 of 430
283 Driving systems
Te ch n i c a l
data Instruments
and controlsOperationDrivingInstrument
cluster displayPractical hints Car care Index Notes:
Avoid spinning of one drive wheel. This may cause
serious damage to the drive train which is not covered
by the Mercedes-Benz Limited Warranty.
The ESP warning lamp, located in the speedometer dial,
starts to flash at any vehicle speed as soon as the tires
lose traction and the wheels begin to spin.
To return to the enhanced vehicle stability offered by
ESP: press lower half (2) of the switch (the ESP warning
lamp in the speedometer dial goes out).
Vehicles with Distronic (DTR):
With the ESP switched off, the Distronic cannot be
switched on. See page 264 for activation of Distronic.Important!
If the ESP warning lamp flashes:
•during take-off, apply as little throttle as possible,
•while driving, ease up on the accelerator.
Wa r n i n g !
ESP should not be switched off during normal
driving other than in circumstances described
above. Disabling of the system will reduce vehicle
stability in standard driving maneuvers.
Page 325 of 430
322 Malfunction and warning messages
Te ch n i c a l
data Instruments
and controlsOperation DrivingInstrument
cluster displayPractical hints Car care Index
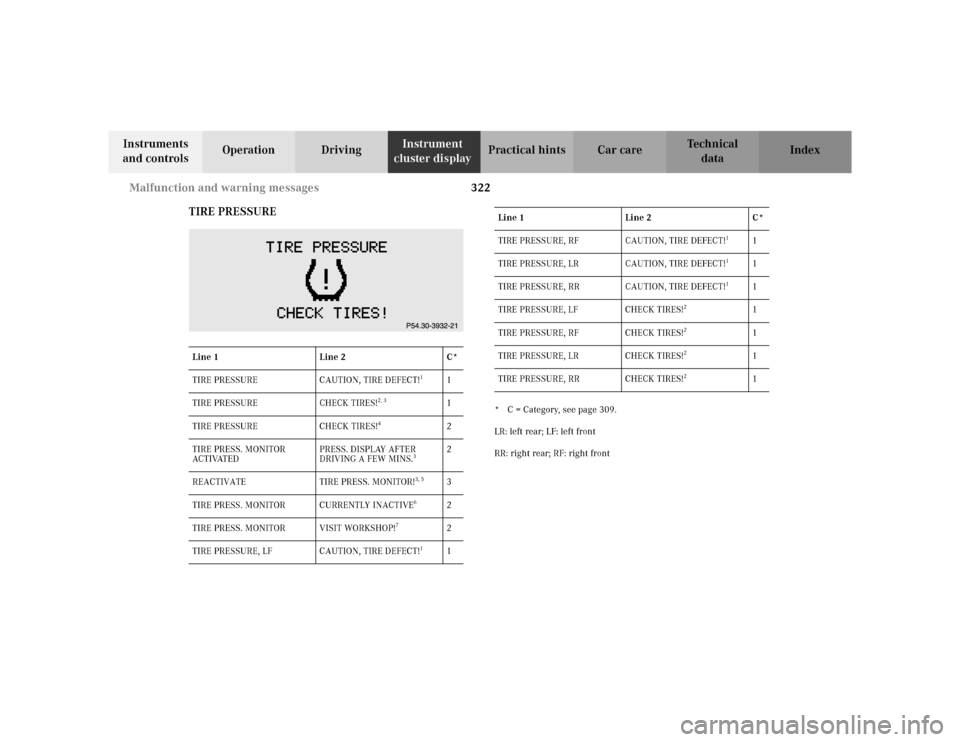
TIRE PRESSURE
* C = Category, see page 309.
LR: left rear; LF: left front
RR: right rear; RF: right front Line 1 Line 2 C*
TIRE PRESSURE CAUTION, TIRE DEFECT!
1
1
TIRE PRESSURE CHECK TIRES!
2, 3
1
TIRE PRESSURE CHECK TIRES!
4
2
TIRE PRESS. MONITOR
ACTIVATEDPRESS. DISPLAY AFTER
DRIVING A FEW MINS.
3
2
REACTIVATE TIRE PRESS. MONITOR!
3, 5
3
TIRE PRESS. MONITOR CURRENTLY INACTIVE
6
2
TIRE PRESS. MONITOR VISIT WORKSHOP!
7
2
TIRE PRESSURE, LF CAUTION, TIRE DEFECT!
1
1
TIRE PRESSURE, RF CAUTION, TIRE DEFECT!
1
1
TIRE PRESSURE, LR CAUTION, TIRE DEFECT!
1
1
TIRE PRESSURE, RR CAUTION, TIRE DEFECT!
1
1
TIRE PRESSURE, LF CHECK TIRES!
2
1
TIRE PRESSURE, RF CHECK TIRES!
2
1
TIRE PRESSURE, LR CHECK TIRES!
2
1
TIRE PRESSURE, RR CHECK TIRES!
2
1 Line 1 Line 2 C*
Page 326 of 430
323 Malfunction and warning messages
Te ch n i c a l
data Instruments
and controlsOperation DrivingInstrument
cluster displayPractical hints Car care Index
1 One or more tires is or has deflated rapidly. Carefully bring the
vehicle to a halt, avoiding abrupt steering and braking maneuvers.
For reference on changing wheels, see page 348.
2 The tire pressure on one or more tires is already below minimum
value. Carefully bring the vehicle to a halt, avoiding abrupt
steering and braking maneuvers. For reference on changing
wheels, see page 351.
3 For tire inflation pressure monitor, see page 152.4 Tire pressure in one or more tires is low. Check and correct tire
pressure according to the label affixed inside the fuel filler flap.
For tire inflation pressure, see page 356.
The tire inf lation pressure monitor must be activated again after
the tire inflation pressure has been corrected, see page 152.
5 When the message appears after starting the engine, the tire
inflation pressure on all road wheels should be checked and
corrected according to the label affixed inside the fuel filler flap.
For tire inflation pressure, see page 356.
The tire inf lation pressure monitor must be activated again after
the tire inflation pressure has been corrected, see page 152.
6 The tire inflation pressure monitor system is unable to monitor the
tire pressure due to the presence of several wheel electronics in
the vehicle (e.g. a deflated road wheel in the trunk), or nearby
radio interference source, or excessive wheel sensor temperatures,
or unrecognized wheel sensors mounted.
7 The tire inflation pressure monitor is defective or a wheel without
proper sensor was installed. Visit your authorized Mercedes-Benz
Center.Wa r n i n g !
Do not drive with a flat tire. A flat tire affects the
ability to steer or brake the vehicle. You may lose
control of the vehicle. Continued driving with a flat
tire will cause excessive heat build-up and possibly
a fire.
Page 351 of 430
348 Tires, Wheels
Te ch n i c a l
data Instruments
and controlsOperation DrivingInstrument
cluster displayPractical hintsCar care Index
Wheels
Replace rims or tires with the same designation,
manufacturer and type as shown on the original part.
See your authorized Mercedes-Benz Center for further
information.
See your authorized Mercedes-Benz Center for
information on tested and recommended rims and tires
for summer and winter operation. They can also offer
advice concerning tire service and purchase.
Tire Replacement
Front and rear tires should be replaced in sets. Rims
and tires must be of the correct size and type. For
dimensions, see “Technical Data”.
We recommend that you break in new tires for
approximately 60 miles (100 km) at moderate speed.It is imperative that the wheel mounting bolts be
fastened to a tightening torque of 110 ft.lb. (150 Nm)
whenever wheels are mounted.
For rim and tire specifications, refer to “Technical Data”.
Wa r n i n g !
Worn, old tires can cause accidents. If the tire tread
is badly worn, or if the tires have sustained
damage, replace them.When replacing rims, use only genuine
Mercedes-Benz wheel bolts specified for the
particular rim type. Failure to do so can result in
the bolts loosening and possibly an accident.
Page 352 of 430
349 Tires, Wheels
Te ch n i c a l
data Instruments
and controlsOperation DrivingInstrument
cluster displayPractical hintsCar care Index Rotating wheels
The wheels can be rotated according to the degree of
tire wear while retaining the same direction of travel.
Rotating, however, should be carried out as
recommended by the tire manufacturer, before the
characteristic tire wear pattern (shoulder wear on front
wheels and tread center wear on rear wheels) becomes
visible, as otherwise the driving properties deteriorate.
Notes:
Thoroughly clean the inner side of the wheels any time
you rotate the wheels or wash the vehicle underside.
The use of retread tires is not recommended. Retread
tires may adversely affect the handling characteristics
and safety of the vehicle.
Dented or bent rims can cause tire pressure loss and
damage to the tire beads. For this reason, check rims for
damage at regular intervals. The rim flanges must be
checked for wear before a tire is mounted. Remove
burrs, if any.
Check and ensure proper tire inflation pressure after
rotating the wheels. For tire inflation pressure see
inside of fuel filler flap and also page 296.Spare wheel
Spare wheel S 430, S 500 and S 600
(except Sport Package)
Important!
The spare wheel rim is mounted with a full size tire of
the same type as on the vehicle, and is fully functional.
However, that spare wheel rim is weight optimized and
has a limited service life of 12 000 miles (20 000 km)
use before a standard wheel rim must replace it.
In the case of a flat tire, you may temporarily use the
spare wheel.
Do not operate vehicle with more than one spare wheel
mounted.
Wa r n i n g !
The spare wheel rim is for temporary use only. Use
for over a total of 12 000 miles (20 000 km)
(aggregate of all uses) may cause wheel rim failure
leading to an accident and possible injuries.
Page 353 of 430
350 Tires, Wheels
Te ch n i c a l
data Instruments
and controlsOperation DrivingInstrument
cluster displayPractical hintsCar care Index
Spare wheel S 55 AMG and Sport Package
S55AMG, S600 with Sport Package:
The spare wheel rim size is 7
1/2 J x 17 H2 with tire size
225 / 60 R17 98H.
S430, S500 with Sport Package:
The spare wheel rim size is 7
1/2 J x 16 H2 with tire size
225 / 60 R16 98H.
In the case of a flat tire or breakdown, you may
temporarily use the spare wheel, while observing the
following restrictions:
•Do not exceed vehicle speed of 50 mph (80 km / h).
•Drive to the nearest repair facility to have the flat
tire repaired or replaced as appropriate.
•Do not operate vehicle with more than one spare
wheel mounted.
For additional information, refer to page 398.
Wa r n i n g !
The spare wheel rim is for temporary use only. Use
for over a total of 12 000 miles (20 000 km) may
cause wheel rim failure leading to an accident and
possible injuries. The dimensions of the spare wheel are different
from those of road wheels. As a result, the vehicle
handling characteristics change when driving with
a mounted spare wheel.The spare wheel should only be used temporarily,
and replaced with a regular road wheel as quickly
as possible.
Page 354 of 430
351 Tires, Wheels
Te ch n i c a l
data Instruments
and controlsOperation DrivingInstrument
cluster displayPractical hintsCar care Index Changing wheelsMove vehicle to a level area which is a safe distance
from the roadway.
1. Set parking brake and turn on hazard warning
flasher.
2. Move selector lever to position “P” and turn off
engine.
3. Prevent vehicle from rolling away by blocking
wheels with wheel chocks (not supplied with
vehicle) or sizable wood block or stone. When
changing a wheel on a hill, place chocks on the
downhill side blocking both wheels of the other
axle. On an level road, place one chock in front of
and one behind the wheel that is diagonally
opposite to the wheel being changed.
Wa r n i n g !
The jack is designed exclusively for jacking up the
vehicle at the jack tubes built into either side of the
vehicle. To help avoid personal injury, use the jack
only to lift the vehicle during a wheel change.
Never get beneath the vehicle while it is supported
by the jack. Keep hands and feet away from the area
under the lifted vehicle. Always firmly set parking
brake and block wheels before raising vehicle with
jack.Do not disengage parking brake while the vehicle is
raised. Be certain that the jack is always vertical
when in use, especially on hills. Always try to use
the jack on level surface. Be sure that the jack arm
is fully inserted in the jack tube. Always lower the
vehicle onto sufficient capacity jackstands before
working under the vehicle.