ESP MERCEDES-BENZ S63AMG 2010 W221 Owner's Guide
[x] Cancel search | Manufacturer: MERCEDES-BENZ, Model Year: 2010, Model line: S63AMG, Model: MERCEDES-BENZ S63AMG 2010 W221Pages: 548, PDF Size: 12.48 MB
Page 80 of 548
Function?T Seat menu button
(Y page 216)
AS Shortcut button for:
RTelephone (Y page 148)
RNavigation (Y page 95)
Bu COMAND on/off button
(Y page 77)
CH Volume control (Y page 88)Dh Favorite button (Y page 94)
COMAND display
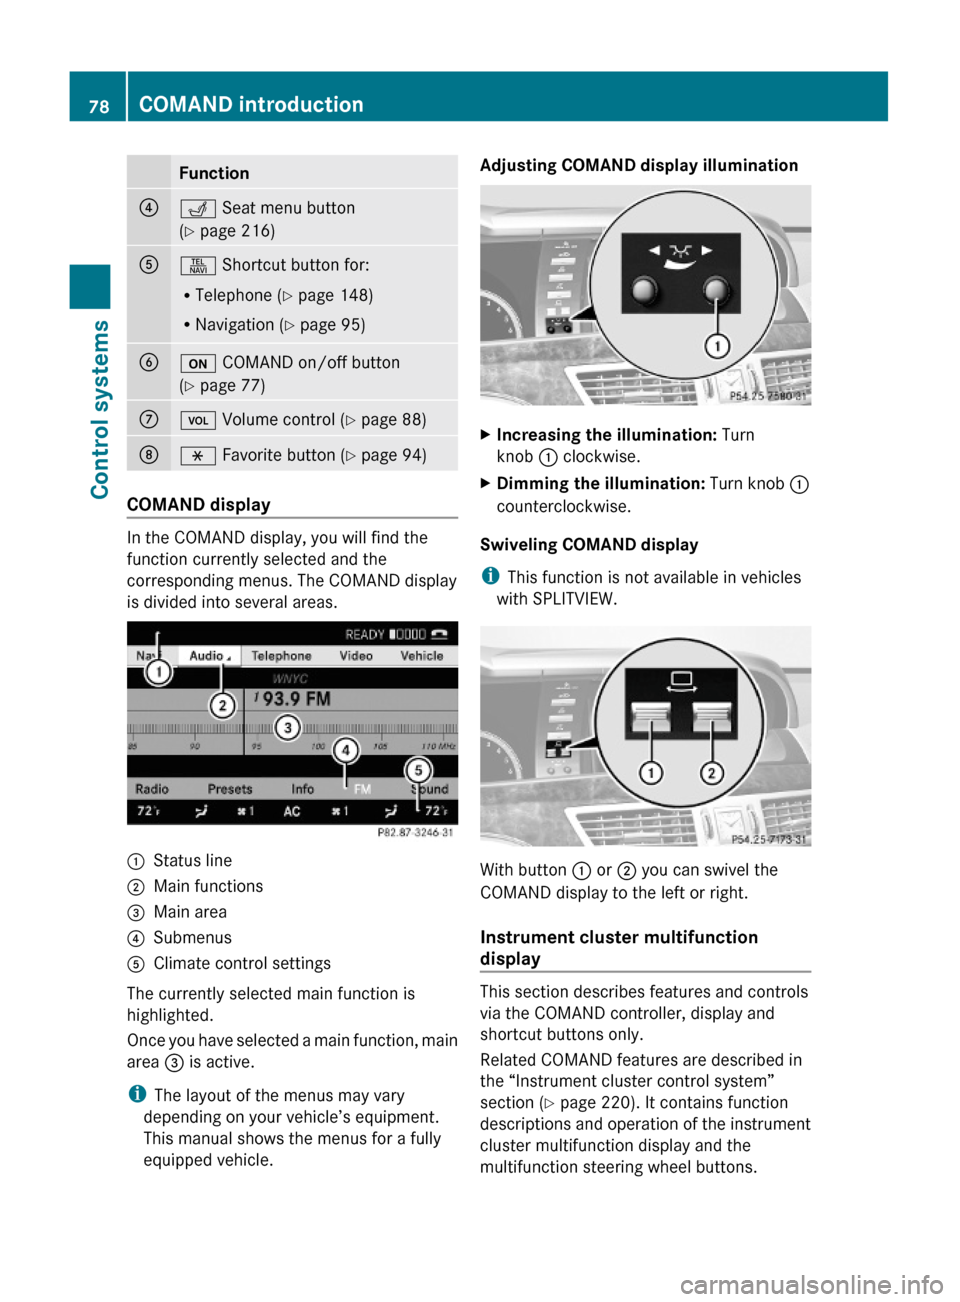
In the COMAND display, you will find the
function currently selected and the
corresponding menus. The COMAND display
is divided into several areas.
:Status line;Main functions=Main area?SubmenusAClimate control settings
The currently selected main function is
highlighted.
Once you have selected a main function, main
area = is active.
iThe layout of the menus may vary
depending on your vehicle’s equipment.
This manual shows the menus for a fully
equipped vehicle.
Adjusting COMAND display illuminationXIncreasing the illumination: Turn
knob : clockwise.
XDimming the illumination: Turn knob :
counterclockwise.
Swiveling COMAND display
iThis function is not available in vehicles
with SPLITVIEW.
With button : or ; you can swivel the
COMAND display to the left or right.
Instrument cluster multifunction
display
This section describes features and controls
via the COMAND controller, display and
shortcut buttons only.
Related COMAND features are described in
the “Instrument cluster control system”
section (Y page 220). It contains function
descriptions and operation of the instrument
cluster multifunction display and the
multifunction steering wheel buttons.
78COMAND introductionControl systems
221_AKB; 6; 20, en-USd2ugruen,Version: 2.11.8.12009-09-24T13:28:17+02:00 - Seite 78
Page 82 of 548
SymbolHow to use the COMAND
controller
ZVÆXSlide
Rto move through vertical
menus
Rto exit horizontal menus
XSlide and hold
Rto move through a navigation
map
XVYXSlide
Rto move through horizontal
menus
Rto exit vertical menus
XSlide and hold
Rfor fast forward or reverse for
audio CD or audio DVD
playback
Rto move through a navigation
map
aVbXSlide and hold
Rto move through a navigation
map
USB socket
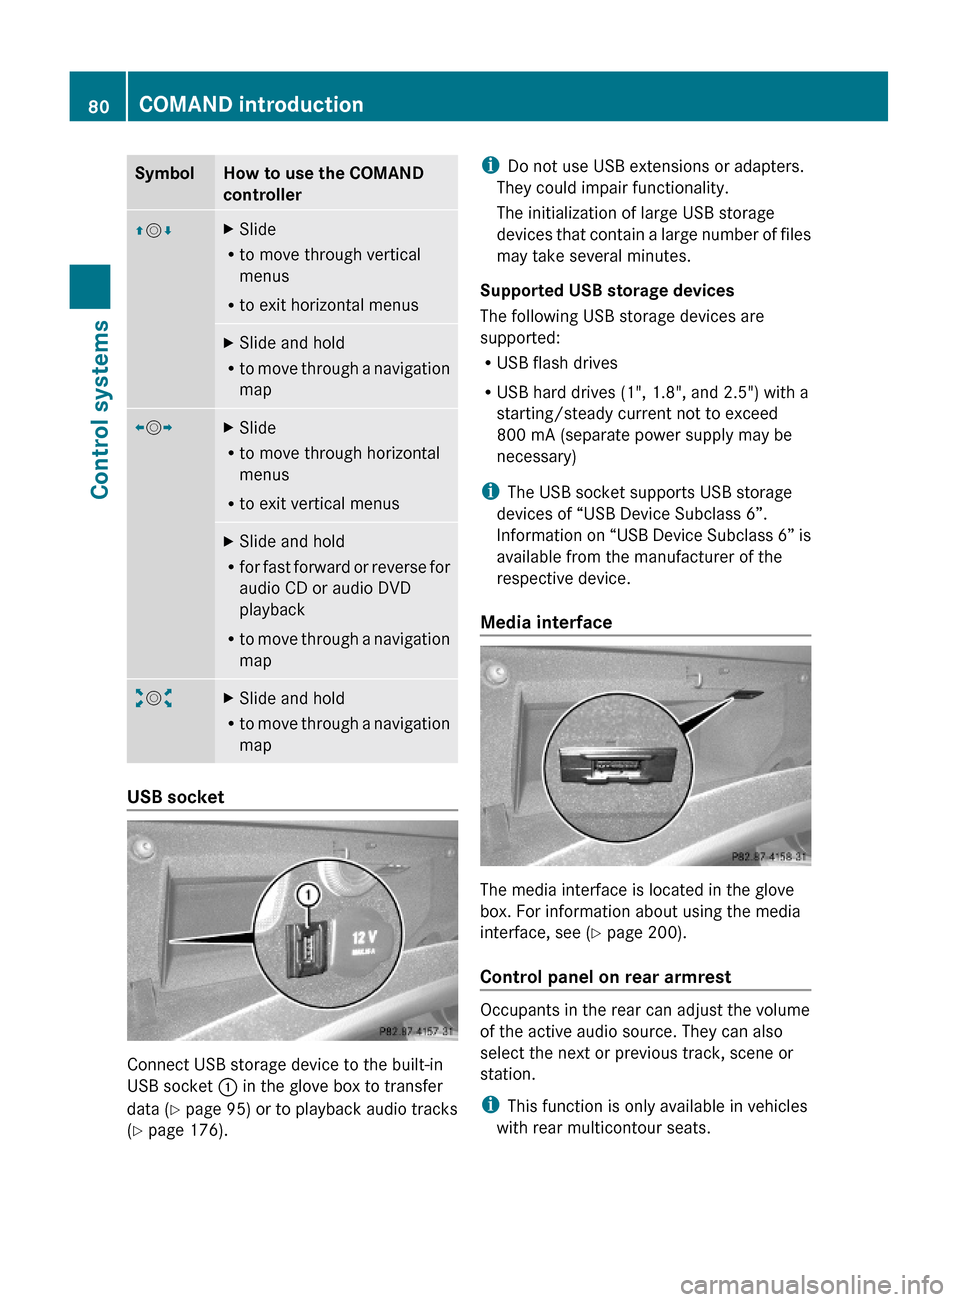
Connect USB storage device to the built-in
USB socket : in the glove box to transfer
data (Y page 95) or to playback audio tracks
(Y page 176).
iDo not use USB extensions or adapters.
They could impair functionality.
The initialization of large USB storage
devices that contain a large number of files
may take several minutes.
Supported USB storage devices
The following USB storage devices are
supported:
RUSB flash drives
RUSB hard drives (1", 1.8", and 2.5") with a
starting/steady current not to exceed
800 mA (separate power supply may be
necessary)
iThe USB socket supports USB storage
devices of “USB Device Subclass 6”.
Information on “USB Device Subclass 6” is
available from the manufacturer of the
respective device.
Media interface
The media interface is located in the glove
box. For information about using the media
interface, see (Y page 200).
Control panel on rear armrest
Occupants in the rear can adjust the volume
of the active audio source. They can also
select the next or previous track, scene or
station.
iThis function is only available in vehicles
with rear multicontour seats.
80COMAND introductionControl systems
221_AKB; 6; 20, en-USd2ugruen,Version: 2.11.8.12009-09-24T13:28:17+02:00 - Seite 80
Page 83 of 548
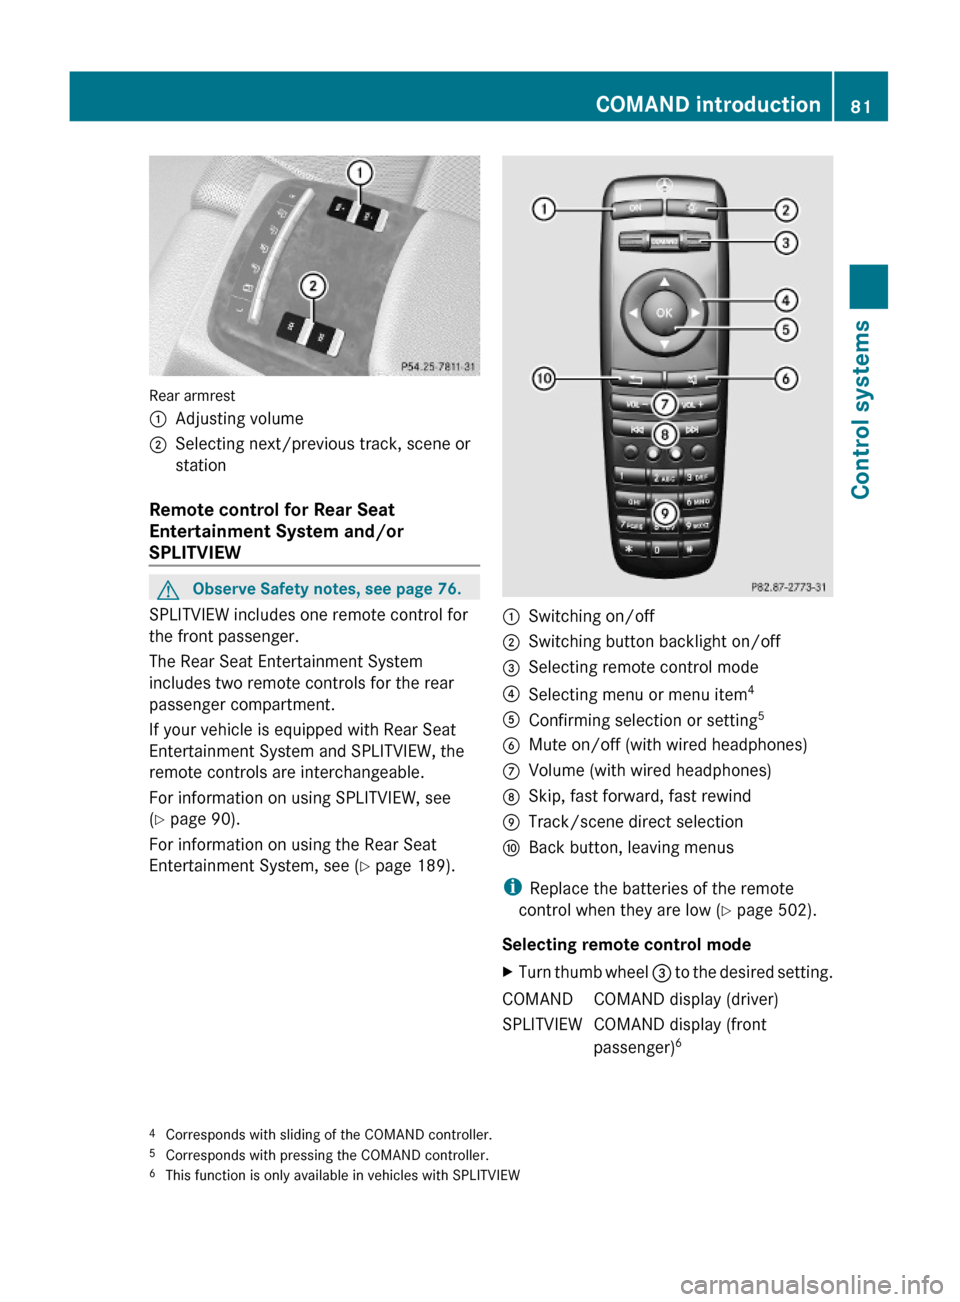
Rear armrest
:Adjusting volume;Selecting next/previous track, scene or
station
Remote control for Rear Seat
Entertainment System and/or
SPLITVIEW
GObserve Safety notes, see page 76.
SPLITVIEW includes one remote control for
the front passenger.
The Rear Seat Entertainment System
includes two remote controls for the rear
passenger compartment.
If your vehicle is equipped with Rear Seat
Entertainment System and SPLITVIEW, the
remote controls are interchangeable.
For information on using SPLITVIEW, see
(Y page 90).
For information on using the Rear Seat
Entertainment System, see (Y page 189).
:Switching on/off;Switching button backlight on/off=Selecting remote control mode?Selecting menu or menu item4AConfirming selection or setting5BMute on/off (with wired headphones)CVolume (with wired headphones)DSkip, fast forward, fast rewindETrack/scene direct selectionFBack button, leaving menus
iReplace the batteries of the remote
control when they are low (Y page 502).
Selecting remote control mode
XTurn thumb wheel = to the desired setting.COMANDCOMAND display (driver)SPLITVIEWCOMAND display (front
passenger)64Corresponds with sliding of the COMAND controller.5Corresponds with pressing the COMAND controller.6This function is only available in vehicles with SPLITVIEW
COMAND introduction81Control systems221_AKB; 6; 20, en-USd2ugruen,Version: 2.11.8.12009-09-24T13:28:17+02:00 - Seite 81Z
Page 84 of 548
REAR LLeft screen7REAR RRight screen 7
i
In position COMAND, you can operate
various COMAND functions via remote
control buttons ? and A.
Switching SPLITVIEW or rear screens on/
off
i When the SmartKey is in starter switch
position 0 or 1 or removed from the starter
switch, the rear screens switch off after 30
minutes automatically. A corresponding
message appears on the screens prior to
switching off.
You can switch the screens back on. Keep
in mind however that this will drain the
vehicle battery.
XSwitching on with the COMAND system
already on: Aim the remote control on the
screen.XPress button :.XSwitching off: Aim the remote control on
the screen.XPress button :.
Switching button backlight on/off
XPress button ;.
i
When you do not use the remote control
for approximately 15 seconds, the button
backlight switches off automatically.
Mute on/off (for wired headphones or
COMAND)
XPress button B.Selecting menu or menu item and
confirming selectionXSelecting menu or menu item: Press
arrow buttons ?.XConfirming selection: Press button A.
Headphone
GWarning!
The driver should not wear a headphone while
operating the vehicle under any
circumstances. The use of a headphone while
driving the vehicle could drastically impair the
ability to react to audible traffic conditions
(e.g. emergency sirens from police/fire/
ambulance, another car’s horn, etc.).
GWarning!
When not in use, headphones or external
video sources should be stored in a safe
location (e.g. one of the vehicle’s storage
compartments) so that they are not loose
within the passenger compartment during
braking, vehicle maneuvers or a traffic
accident. Objects moving within the
passenger compartment could cause serious
personal injury to vehicle occupants.
GWarning!
Due to a potential choking hazard, wired
headphone usage by children should only
occur with adult supervision.
For information on using SPLITVIEW, see
( Y page 90).
For information on using the Rear Seat
Entertainment System, see ( Y page 189).
7
This function is only available in vehicles with Rear Seat Entertainment System82COMAND introductionControl systems
221_AKB; 6; 20, en-USd2ugruen,Version: 2.11.8.12009-09-24T13:28:17+02:00 - Seite 82
Page 90 of 548
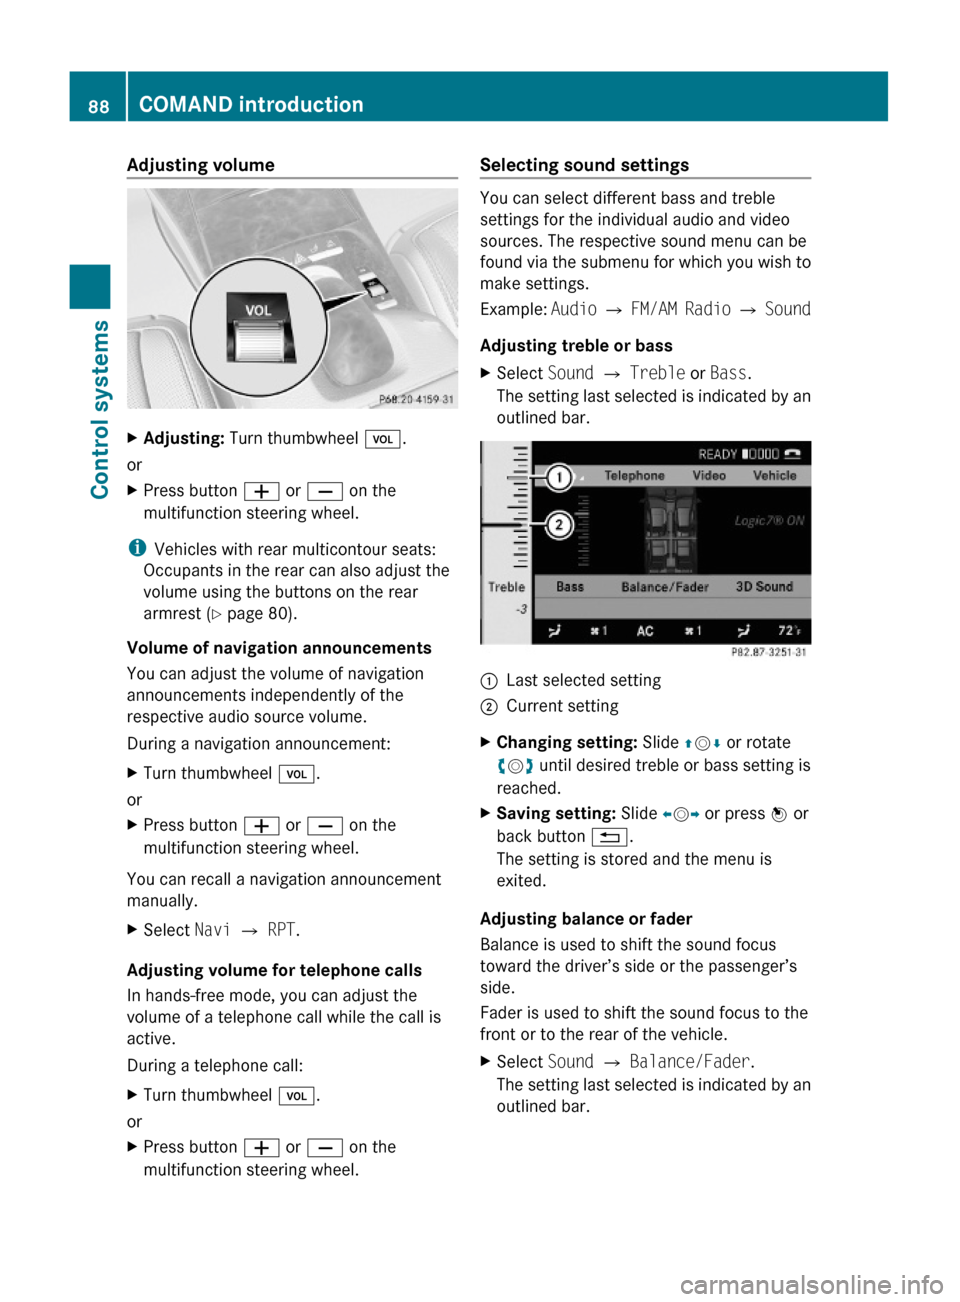
Adjusting volumeXAdjusting: Turn thumbwheel H.
or
XPress button W or X on the
multifunction steering wheel.
iVehicles with rear multicontour seats:
Occupants in the rear can also adjust the
volume using the buttons on the rear
armrest (Y page 80).
Volume of navigation announcements
You can adjust the volume of navigation
announcements independently of the
respective audio source volume.
During a navigation announcement:
XTurn thumbwheel H.
or
XPress button W or X on the
multifunction steering wheel.
You can recall a navigation announcement
manually.
XSelect Navi Q RPT.
Adjusting volume for telephone calls
In hands-free mode, you can adjust the
volume of a telephone call while the call is
active.
During a telephone call:
XTurn thumbwheel H.
or
XPress button W or X on the
multifunction steering wheel.
Selecting sound settings
You can select different bass and treble
settings for the individual audio and video
sources. The respective sound menu can be
found via the submenu for which you wish to
make settings.
Example: Audio Q FM/AM Radio Q Sound
Adjusting treble or bass
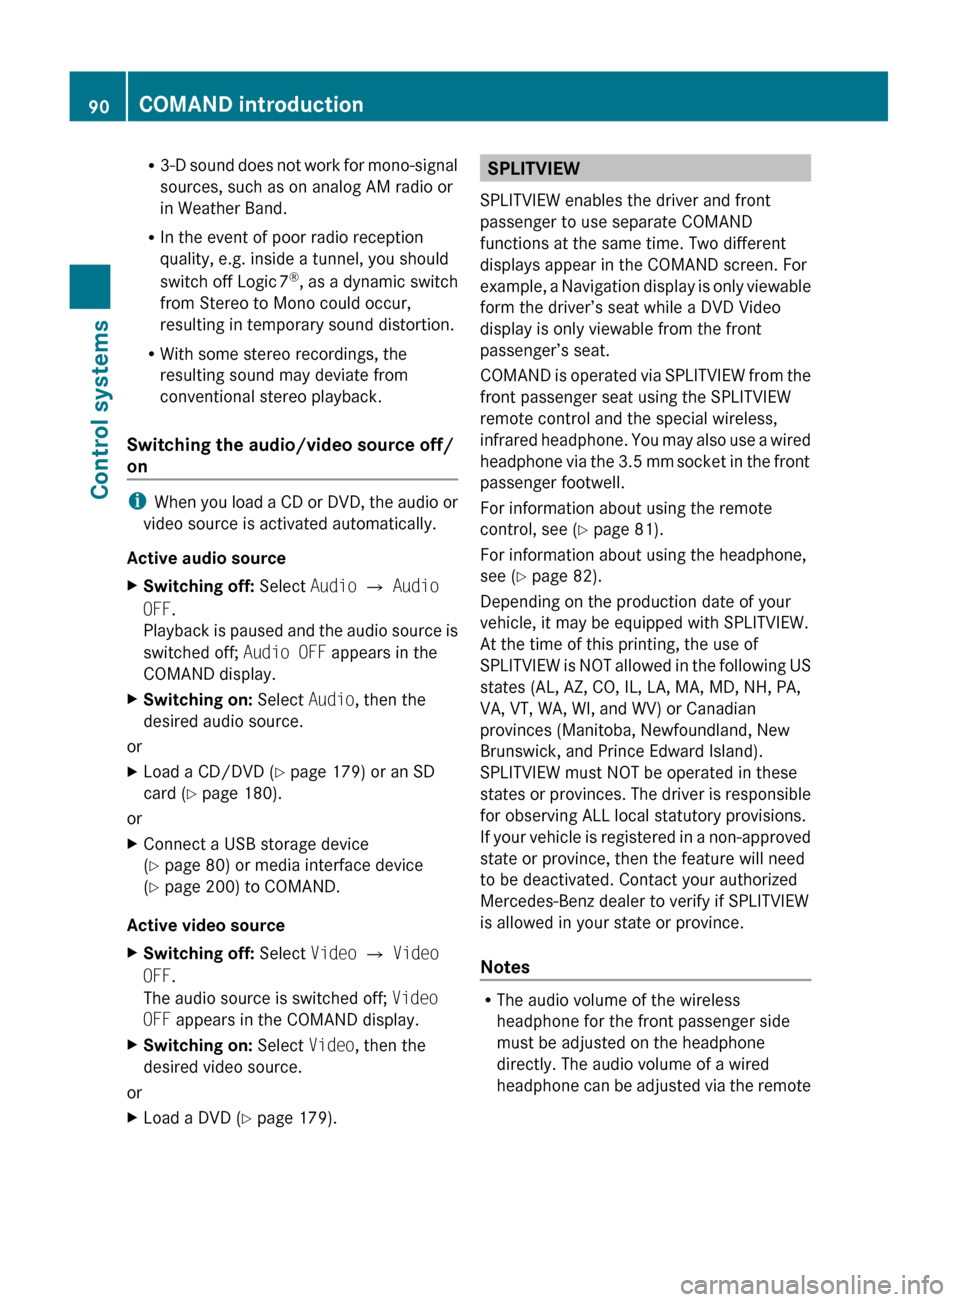
XSelect Sound Q Treble or Bass.
The setting last selected is indicated by an
outlined bar.
:Last selected setting;Current settingXChanging setting: Slide ZVÆ or rotate
cVd until desired treble or bass setting is
reached.
XSaving setting: Slide XVY or press W or
back button %.
The setting is stored and the menu is
exited.
Adjusting balance or fader
Balance is used to shift the sound focus
toward the driver’s side or the passenger’s
side.
Fader is used to shift the sound focus to the
front or to the rear of the vehicle.
XSelect Sound Q Balance/Fader.
The setting last selected is indicated by an
outlined bar.
88COMAND introductionControl systems
221_AKB; 6; 20, en-USd2ugruen,Version: 2.11.8.12009-09-24T13:28:17+02:00 - Seite 88
Page 92 of 548
R3-D sound does not work for mono-signal
sources, such as on analog AM radio or
in Weather Band.
R In the event of poor radio reception
quality, e.g. inside a tunnel, you should
switch off Logic 7 ®
, as a dynamic switch
from Stereo to Mono could occur,
resulting in temporary sound distortion.
R With some stereo recordings, the
resulting sound may deviate from
conventional stereo playback.
Switching the audio/video source off/
on
i When you load a CD or DVD, the audio or
video source is activated automatically.
Active audio source
XSwitching off: Select Audio Q Audio
OFF .
Playback is paused and the audio source is
switched off; Audio OFF appears in the
COMAND display.XSwitching on: Select Audio, then the
desired audio source.
or
XLoad a CD/DVD ( Y page 179) or an SD
card ( Y page 180).
or
XConnect a USB storage device
( Y page 80) or media interface device
( Y page 200) to COMAND.
Active video source
XSwitching off: Select Video Q Video
OFF .
The audio source is switched off; Video
OFF appears in the COMAND display.XSwitching on: Select Video, then the
desired video source.
or
XLoad a DVD ( Y page 179).SPLITVIEW
SPLITVIEW enables the driver and front
passenger to use separate COMAND
functions at the same time. Two different
displays appear in the COMAND screen. For
example, a Navigation display is only viewable
form the driver’s seat while a DVD Video
display is only viewable from the front
passenger’s seat.
COMAND is operated via SPLITVIEW from the
front passenger seat using the SPLITVIEW
remote control and the special wireless,
infrared headphone. You may also use a wired
headphone via the 3.5 mm socket in the front
passenger footwell.
For information about using the remote
control, see ( Y page 81).
For information about using the headphone,
see ( Y page 82).
Depending on the production date of your
vehicle, it may be equipped with SPLITVIEW.
At the time of this printing, the use of
SPLITVIEW is NOT allowed in the following US
states (AL, AZ, CO, IL, LA, MA, MD, NH, PA,
VA, VT, WA, WI, and WV) or Canadian
provinces (Manitoba, Newfoundland, New
Brunswick, and Prince Edward Island).
SPLITVIEW must NOT be operated in these
states or provinces. The driver is responsible
for observing ALL local statutory provisions.
If your vehicle is registered in a non-approved
state or province, then the feature will need
to be deactivated. Contact your authorized
Mercedes-Benz dealer to verify if SPLITVIEW
is allowed in your state or province.
Notes
R The audio volume of the wireless
headphone for the front passenger side
must be adjusted on the headphone
directly. The audio volume of a wired
headphone can be adjusted via the remote
90COMAND introductionControl systems
221_AKB; 6; 20, en-USd2ugruen,Version: 2.11.8.12009-09-24T13:28:17+02:00 - Seite 90
Page 98 of 548
COMAND may give incorrect navigation
commands if the data in the digital map does
not correspond with the actual road or traffic
situation. Maps do not cover all areas nor all
routes within an area. For example, if the
traffic routing has been changed or the
direction of a one-way road has been
reversed.
For this reason, you must always observe
applicable road and traffic rules and
regulations during your journey. Road and
traffic rules and regulations always have
priority over the navigation commands
generated by the system.GWarning!
Navigation announcements are intended to
direct you while driving without diverting your
attention from the road and driving.
Please always use navigation announcements
instead of consulting the map display for
directions. Consulting the symbols or map
display for directions may cause you to divert
your attention from driving and increase your
risk of an accident.
Map software
The digital maps generated by the map
software become outdated in the same way
as conventional road maps. Optimum route
guidance can only be provided by the
navigation system in conjunction with the
latest map software. Information about new
map software versions can be obtained from
an authorized Mercedes-Benz Center.
Displaying installed map version
XNavi Q Map Version
The installed map version is displayed.
For information on installing new map
software see ( Y page 96).
Installing the map software
Your vehicle is factory-equipped with map
software for the USA (including Alaska and
Hawaii), Canada, the U.S. Virgin Islands, and
Puerto Rico.
You can install new map software from one or
more DVDs, depending on the size of the map
software.
Copy protection of map software
COMAND map software is subject to charges.
The map software requires an activation
code. The map software can be used for one
individual vehicle only and is
non-transferrable. The six-digit activation
code is available at any authorized Mercedes-
Benz Center. Contact an authorized
Mercedes-Benz Center in case you have lost
your activation code or when the COMAND
system does not accept the activation code
you have received.
When reinstalling a map software that has
been installed in that vehicle already, an
activation code is not required.
Installation process
i The installation process can take
between 10 and 120 minutes, depending
on the size of the map software. If the radio
is switched on when you start the
installation process, you can still adjust the
volume. During the installation process,
some COMAND functions are suspended.
Still available are the COMAND functions
for automatic air conditioning operation
and canceling the installation process.
If possible, carry out the installation when
the vehicle is stationary. When the vehicle
is stationary, the reading rate of the DVD
drive is higher than in a moving vehicle and
the installation process requires less time.
GObserve Safety notes, see page 76.
i COMAND may switch off during the
installation process automatically in order
96COMAND navigation (introduction)Control systems
221_AKB; 6; 20, en-USd2ugruen,Version: 2.11.8.12009-09-24T13:28:17+02:00 - Seite 96
Page 99 of 548
to protect the battery. This may happen
when the engine is switched off and the
vehicle battery has insufficient power. If
this occurs, restart the installation with the
engine running. Similarly, if the SmartKey
position is unintentionally switched to 0,
restart the installation.GWarning!
Inhalation of exhaust gas is hazardous to your
health. All exhaust gas contains carbon
monoxide (CO), and inhaling it can cause
unconsciousness and lead to death. Do not
run the engine in confined areas (such as a
garage) which are not properly ventilated.
Installing
Notes about handling DVDs ( Y page 179).
XLoad the map software DVD into the DVD
changer ( Y page 179).
The COMAND system verifies the DVD and
a respective message appears in the
COMAND display.
Map software incompatible with
navigation system
A message indicates that installation of the
map software is not possible.
XConfirming message: Press W.
The DVD is ejected.XRemove the DVD from the slot.XInsert a DVD that is compatible with the
navigation system of the vehicle.
Map software incompatible with the
current system software
A message indicates that the system
software and the map software are
incompatible.
XConfirming message: Press W.
The DVD is ejected.XRemove the DVD from the slot.XHave the system software updated at an
authorized Mercedes-Benz Center.
The system software must be updated before
you can install the map software.
Map software compatible with
navigation software and current
system software
The COMAND system verifies whether the
map data on the DVD have been installed
already.
Map data installed already
A message that indicates that the map data
have been installed already appears. Also,
you are being asked if you would like to install
the map software anyhow.
XSelect Yes or No.
When you select Yes, the current map data
will be overwritten.
When you select No, the DVD will be ejected
automatically and the installation process
is cancelled.XRemove the DVD from the slot.
Map data not installed yet
The versions of the map software on the DVD
and of the installed map software appear in
the COMAND display. You are then asked if
you want to install the map software.
XSelect Yes or No.
When you select Yes, the map data will be
installed.
When you select No, the DVD will be ejected
automatically and the installation process
is cancelled.XRemove the DVD from the slot.
When an activation code is required, you will
be prompted to enter it.
COMAND navigation (introduction)97Control systems221_AKB; 6; 20, en-USd2ugruen,Version: 2.11.8.12009-09-24T13:28:17+02:00 - Seite 97Z
Page 100 of 548
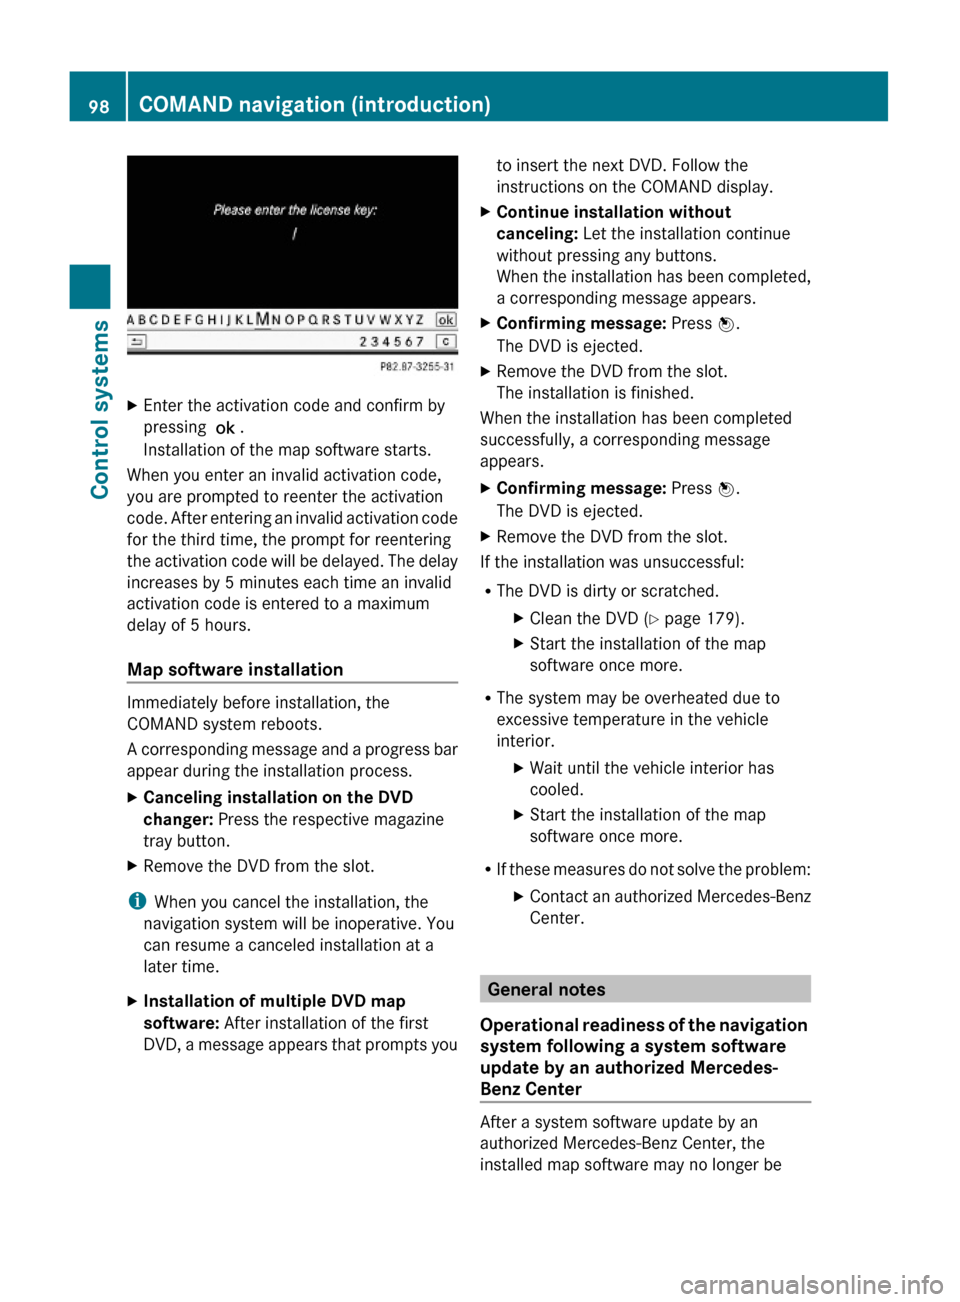
XEnter the activation code and confirm by
pressing !.
Installation of the map software starts.
When you enter an invalid activation code,
you are prompted to reenter the activation
code. After entering an invalid activation code
for the third time, the prompt for reentering
the activation code will be delayed. The delay
increases by 5 minutes each time an invalid
activation code is entered to a maximum
delay of 5 hours.
Map software installation
Immediately before installation, the
COMAND system reboots.
A corresponding message and a progress bar
appear during the installation process.
XCanceling installation on the DVD
changer: Press the respective magazine
tray button.
XRemove the DVD from the slot.
iWhen you cancel the installation, the
navigation system will be inoperative. You
can resume a canceled installation at a
later time.
XInstallation of multiple DVD map
software: After installation of the first
DVD, a message appears that prompts you
to insert the next DVD. Follow the
instructions on the COMAND display.
XContinue installation without
canceling: Let the installation continue
without pressing any buttons.
When the installation has been completed,
a corresponding message appears.
XConfirming message: Press W.
The DVD is ejected.
XRemove the DVD from the slot.
The installation is finished.
When the installation has been completed
successfully, a corresponding message
appears.
XConfirming message: Press W.
The DVD is ejected.
XRemove the DVD from the slot.
If the installation was unsuccessful:
RThe DVD is dirty or scratched.
XClean the DVD (Y page 179).XStart the installation of the map
software once more.
RThe system may be overheated due to
excessive temperature in the vehicle
interior.
XWait until the vehicle interior has
cooled.
XStart the installation of the map
software once more.
RIf these measures do not solve the problem:
XContact an authorized Mercedes-Benz
Center.
General notes
Operational readiness of the navigation
system following a system software
update by an authorized Mercedes-
Benz Center
After a system software update by an
authorized Mercedes-Benz Center, the
installed map software may no longer be
98COMAND navigation (introduction)Control systems
221_AKB; 6; 20, en-USd2ugruen,Version: 2.11.8.12009-09-24T13:28:17+02:00 - Seite 98
Page 106 of 548
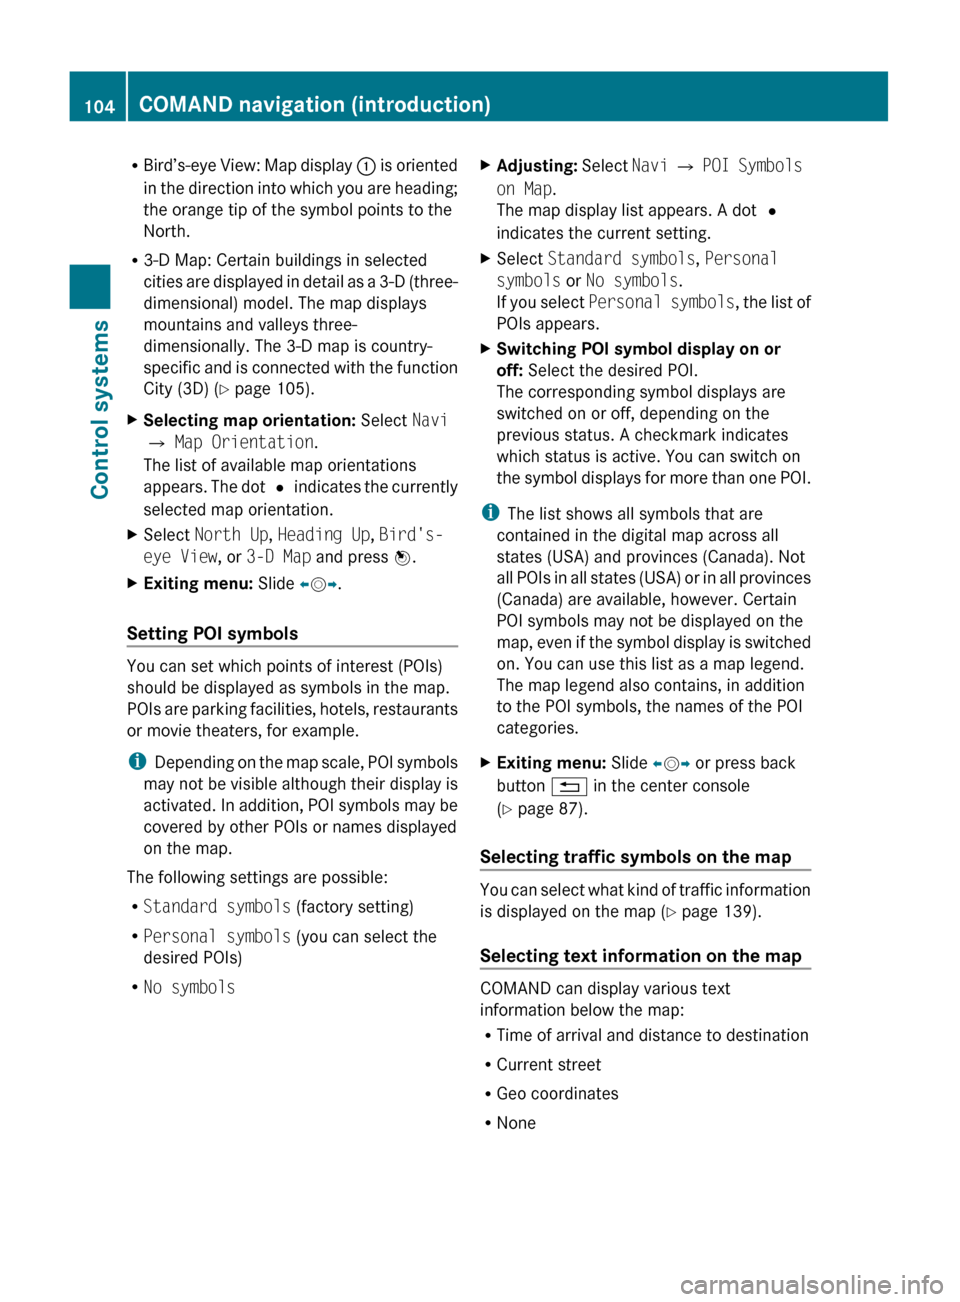
RBird’s-eye View: Map display : is oriented
in the direction into which you are heading;
the orange tip of the symbol points to the
North.
R 3-D Map: Certain buildings in selected
cities are displayed in detail as a 3-D (three-
dimensional) model. The map displays
mountains and valleys three-
dimensionally. The 3-D map is country-
specific and is connected with the function
City (3D) ( Y page 105).XSelecting map orientation: Select Navi
Q Map Orientation .
The list of available map orientations
appears. The dot # indicates the currently
selected map orientation.XSelect North Up , Heading Up , Bird's-
eye View , or 3-D Map and press W.XExiting menu: Slide XV Y.
Setting POI symbols
You can set which points of interest (POIs)
should be displayed as symbols in the map.
POIs are parking facilities, hotels, restaurants
or movie theaters, for example.
i Depending on the map scale, POI symbols
may not be visible although their display is
activated. In addition, POI symbols may be
covered by other POIs or names displayed
on the map.
The following settings are possible:
R Standard symbols (factory setting)
R Personal symbols (you can select the
desired POIs)
R No symbols
XAdjusting: Select Navi Q POI Symbols
on Map .
The map display list appears. A dot #
indicates the current setting.XSelect Standard symbols , Personal
symbols or No symbols .
If you select Personal symbols , the list of
POIs appears.XSwitching POI symbol display on or
off: Select the desired POI.
The corresponding symbol displays are
switched on or off, depending on the
previous status. A checkmark indicates
which status is active. You can switch on
the symbol displays for more than one POI.
i The list shows all symbols that are
contained in the digital map across all
states (USA) and provinces (Canada). Not
all POIs in all states (USA) or in all provinces
(Canada) are available, however. Certain
POI symbols may not be displayed on the
map, even if the symbol display is switched
on. You can use this list as a map legend.
The map legend also contains, in addition
to the POI symbols, the names of the POI
categories.
XExiting menu: Slide XV Y or press back
button % in the center console
( Y page 87).
Selecting traffic symbols on the map
You can select what kind of traffic information
is displayed on the map ( Y page 139).
Selecting text information on the map
COMAND can display various text
information below the map:
R Time of arrival and distance to destination
R Current street
R Geo coordinates
R None
104COMAND navigation (introduction)Control systems
221_AKB; 6; 20, en-USd2ugruen,Version: 2.11.8.12009-09-24T13:28:17+02:00 - Seite 104