ESP MERCEDES-BENZ SL CLASS 2011 Owner's Guide
[x] Cancel search | Manufacturer: MERCEDES-BENZ, Model Year: 2011, Model line: SL CLASS, Model: MERCEDES-BENZ SL CLASS 2011Pages: 316, PDF Size: 6.55 MB
Page 95 of 316
XSwitching on: Press hazard warning
flasher switch \000F.
All turn signal lamps are flashing.
iWith the hazard warning flasher activated
and the combination switch set for either
left or right turn, only the respective left or
right turn signals will operate when the
ignition is switched on.
XSwitching off: Press hazard warning
flasher switch \000F again.
iIf the hazard warning flasher has been
activated automatically, press hazard
warning flasher switch \000F to switch it off.
Headlamp cleaning system
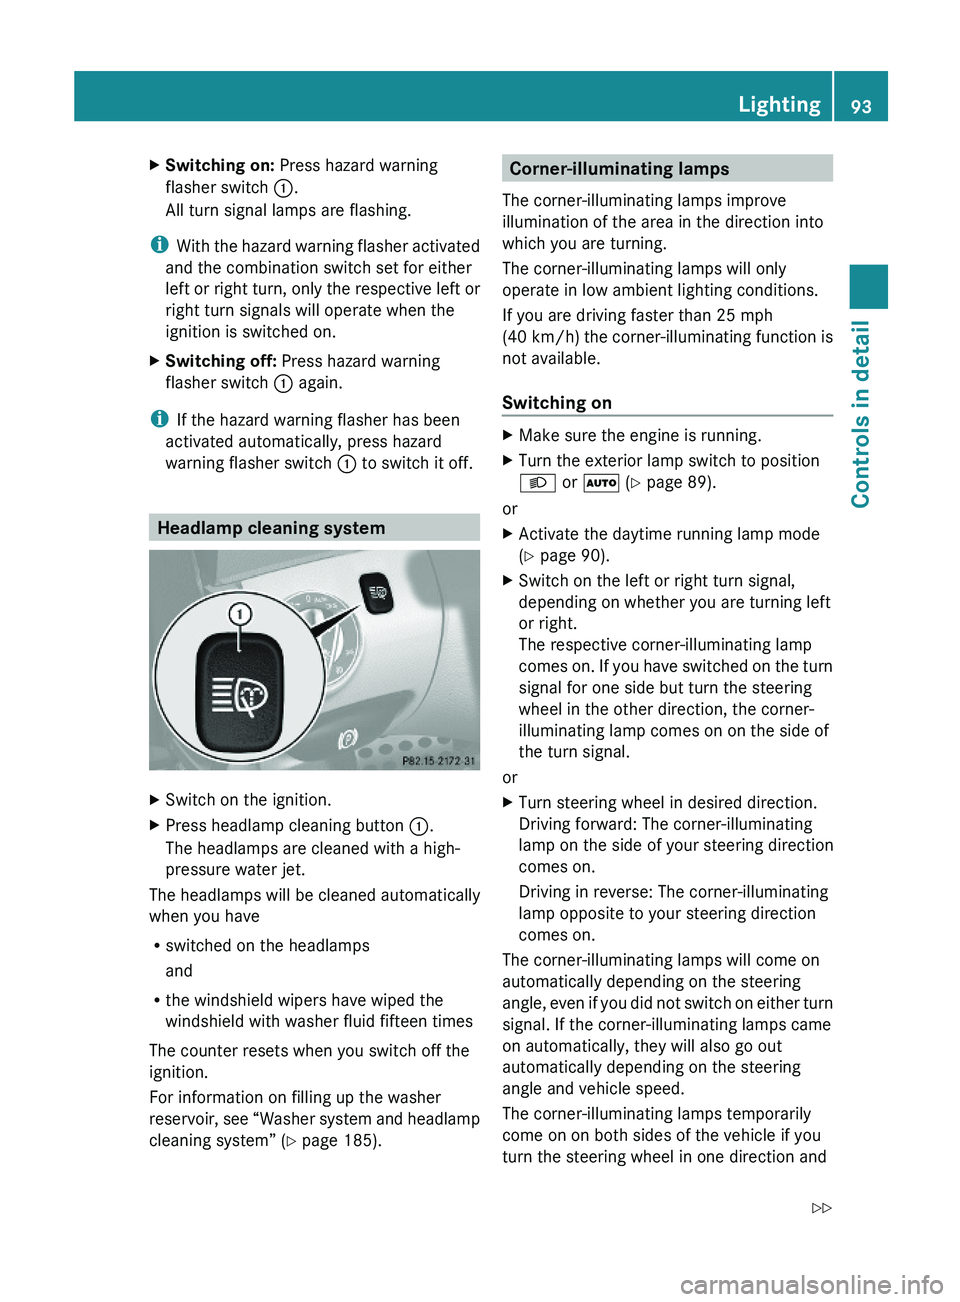
XSwitch on the ignition.XPress headlamp cleaning button \000F.
The headlamps are cleaned with a high-
pressure water jet.
The headlamps will be cleaned automatically
when you have
Rswitched on the headlamps
and
Rthe windshield wipers have wiped the
windshield with washer fluid fifteen times
The counter resets when you switch off the
ignition.
For information on filling up the washer
reservoir, see “Washer system and headlamp
cleaning system” (Y page 185).
Corner-illuminating lamps
The corner-illuminating lamps improve
illumination of the area in the direction into
which you are turning.
The corner-illuminating lamps will only
operate in low ambient lighting conditions.
If you are driving faster than 25 mph
(40 km/h) the corner-illuminating function is
not available.
Switching on
XMake sure the engine is running.XTurn the exterior lamp switch to position
\000d or \000Z (Y page 89).
or
XActivate the daytime running lamp mode
(Y page 90).
XSwitch on the left or right turn signal,
depending on whether you are turning left
or right.
The respective corner-illuminating lamp
comes on. If you have switched on the turn
signal for one side but turn the steering
wheel in the other direction, the corner-
illuminating lamp comes on on the side of
the turn signal.
or
XTurn steering wheel in desired direction.
Driving forward: The corner-illuminating
lamp on the side of your steering direction
comes on.
Driving in reverse: The corner-illuminating
lamp opposite to your steering direction
comes on.
The corner-illuminating lamps will come on
automatically depending on the steering
angle, even if you did not switch on either turn
signal. If the corner-illuminating lamps came
on automatically, they will also go out
automatically depending on the steering
angle and vehicle speed.
The corner-illuminating lamps temporarily
come on on both sides of the vehicle if you
turn the steering wheel in one direction and
Lighting93Controls in detail230_AKB; 6; 22, en-USd2ureepe,Version: 2.11.8.12009-07-28T18:49:58+02:00 - Seite 93Z
Page 98 of 316
Wiping with washer fluidXPress the combination switch in direction
of arrow 0086 past the resistance point.
The windshield wipers operate with washer
fluid.
i To prevent smears on the windshield or
noisy/chattering wiper blades, wipe with
washer fluid every now and then even when
it is raining.
For information on filling up the washer
reservoir, see “Washer system and headlamp
cleaning system” ( Y page 185).
For information on cleaning the headlamps
with washer fluid, see “Headlamp cleaning
system” ( Y page 93).
Problems with wipers
! If anything blocks the windshield wipers
(leaves, snow, etc.), switch them off
immediately.
For safety reasons, do the following before
attempting to remove any blockage:
R Stop the vehicle in a safe location.
R Remove the SmartKey from the starter
switch.
or
R Turn off the engine by pressing the
KEYLESS-GO start/stop button and
open the driver’s door (with the driver’s
door open, starter switch is in position
0 , same as with SmartKey removed from
starter switch).
R Engage the parking brake.
R Remove blockage.
R Turn the windshield wipers on again.
If the windshield wipers fail to function at
all with the combination switch in position
I ,
R set the combination switch to the next
higher wiper speed
R have the windshield wipers checked at
the nearest authorized Mercedes-Benz
Center
Power windows
Opening and closing
The windows are opened and closed
electrically. The switches for all windows are
located on the driver’s door. The switch for
operating the passenger-side windows is
located on the passenger door.
GObserve Safety notes, see page 51.GWarning!
When closing the windows, make sure there
is no danger of anyone being harmed by the
closing procedure.
The door windows are equipped with the
express operation and automatic reversal
function. If in express operation mode a door
window encounters an obstruction that
blocks its path, the automatic reversal
function will stop the door window and open
it slightly.
The door windows operate differently when
the switch is pulled and held. See the “Closing
when a door window is blocked” section for
details.
The closing of the door windows can be
immediately halted by releasing the switch or,
if the switch was pulled past the resistance
point and released, by pressing or pulling the
respective switch.
The closing of the rear side windows can be
immediately halted by releasing the switch.
If a window encounters an obstruction that
blocks its path in a circumstance where you
are closing the windows by pressing and
96Power windowsControls in detail
230_AKB; 6; 22, en-USd2ureepe,Version: 2.11.8.12009-07-28T18:49:58+02:00 - Seite 96
Page 99 of 316
holding button \0007 on the SmartKey or by
pressing and holding the lock button (vehicles
with KEYLESS-GO) on an outside door handle,
the automatic reversal function will not
operate.
iYou can also open or close the windows
using the SmartKey, see “Summer opening
feature” (Y page 156) and “Convenience
closing feature” (Y page 156).
iAfter switching off the ignition or
removing the SmartKey from the starter
switch, you can operate the windows until
you open a door. If no door was opened you
can operate the windows for up to
5 minutes.
Door windows
iWhen you open the door windows while
the hardtop is open, the rear side windows
will also open automatically.
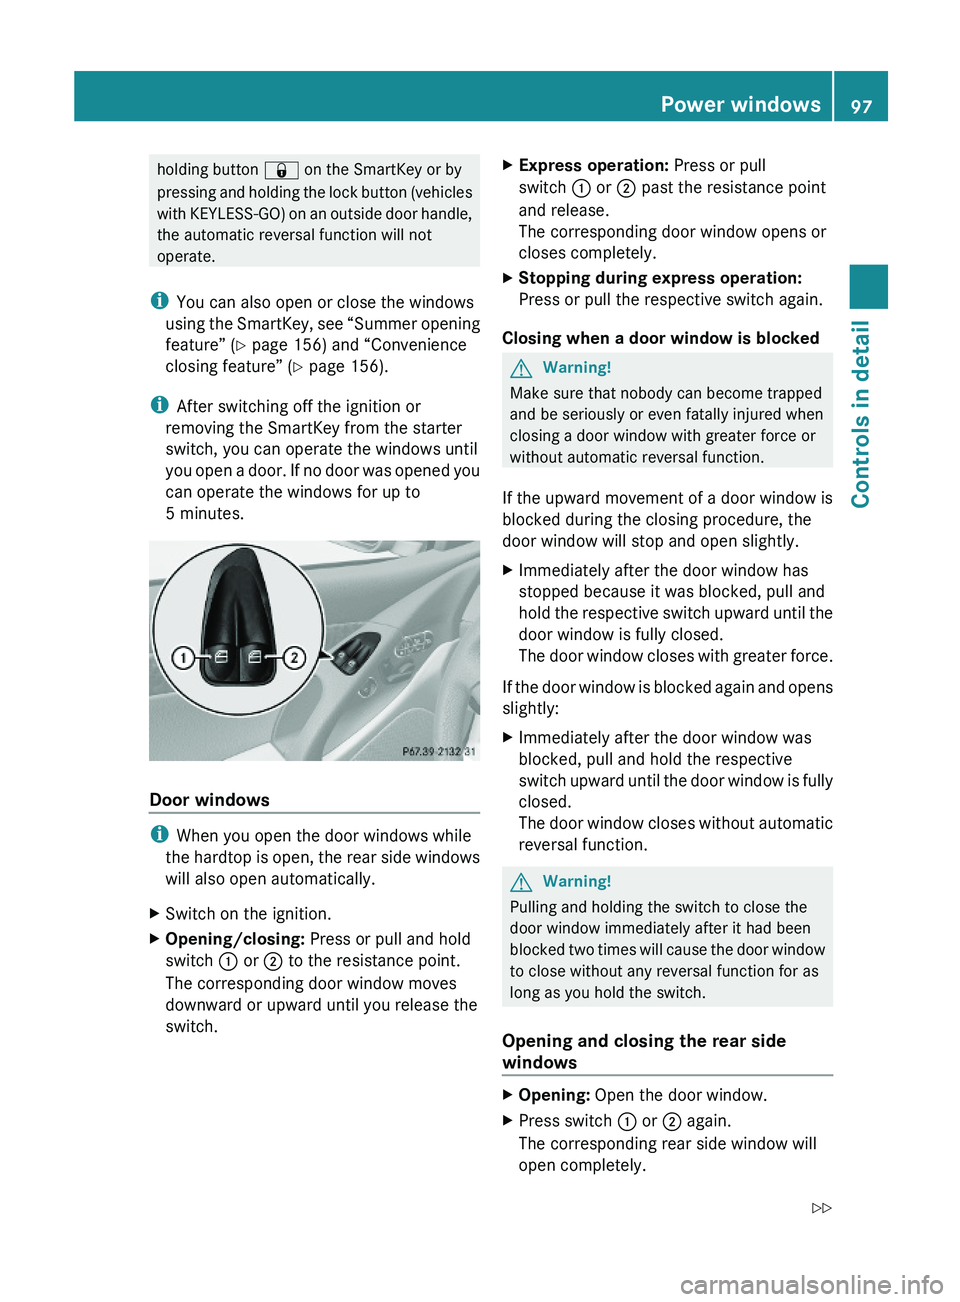
XSwitch on the ignition.XOpening/closing: Press or pull and hold
switch \000F or \000G to the resistance point.
The corresponding door window moves
downward or upward until you release the
switch.
XExpress operation: Press or pull
switch \000F or \000G past the resistance point
and release.
The corresponding door window opens or
closes completely.
XStopping during express operation:
Press or pull the respective switch again.
Closing when a door window is blocked
GWarning!
Make sure that nobody can become trapped
and be seriously or even fatally injured when
closing a door window with greater force or
without automatic reversal function.
If the upward movement of a door window is
blocked during the closing procedure, the
door window will stop and open slightly.
XImmediately after the door window has
stopped because it was blocked, pull and
hold the respective switch upward until the
door window is fully closed.
The door window closes with greater force.
If the door window is blocked again and opens
slightly:
XImmediately after the door window was
blocked, pull and hold the respective
switch upward until the door window is fully
closed.
The door window closes without automatic
reversal function.
GWarning!
Pulling and holding the switch to close the
door window immediately after it had been
blocked two times will cause the door window
to close without any reversal function for as
long as you hold the switch.
Opening and closing the rear side
windows
XOpening: Open the door window.XPress switch \000F or \000G again.
The corresponding rear side window will
open completely.
Power windows97Controls in detail230_AKB; 6; 22, en-USd2ureepe,Version: 2.11.8.12009-07-28T18:49:58+02:00 - Seite 97Z
Page 100 of 316
XClosing: Close the door window.XPull and hold switch 0046 or 0047.
The corresponding rear side window moves
upward until you release the switch.
Closing with KEYLESS-GO
When locking the vehicle, you can
simultaneously close the windows.
XPress and hold the lock button on an
outside door handle ( Y page 71) until the
windows are completely closed.XRelease the lock button on the outside door
handle to interrupt the closing procedure.
Synchronizing power windows
The windows must be synchronized after the
battery has been disconnected or if the
windows cannot be fully closed (express
operation).
Each window must be synchronized
separately.
XClose all doors.XSwitch on the ignition.XPull and hold switch 0046 or 0047 (Y page 97)
until the respective window is closed.
The window opens again slightly.XPull and hold the respective switch once
more immediately until the window is
closed completely.XHold the respective switch for
approximately 1 second.
The window is synchronized.
Driving and parking
Safety notes
GWarning!
Make sure absolutely no objects are
obstructing the pedals’ range of movement.
Keep the driver’s footwell clear of all
obstacles. If there are any floormats or
carpets in the footwell, make sure the pedals
still have sufficient clearance.
During sudden driving or braking maneuvers
the objects could get caught between or
under the pedals. You could then no longer
brake or accelerate. This could lead to
accidents and injury.GWarning!
With the engine not running, there is no power
assistance for the brake and steering
systems. In this case, it is important to keep
in mind that a considerably higher degree of
effort is necessary to brake and steer the
vehicle. Adapt your driving accordingly.
Starting the engine
GWarning!
Inhalation of exhaust gas is hazardous to your
health. All exhaust gas contains carbon
monoxide (CO), and inhaling it can cause
unconsciousness and possible death.
Do not run the engine in confined areas (such
as a garage) which are not properly ventilated.
If you think that exhaust gas fumes are
entering the vehicle while driving, have the
cause determined and corrected
immediately. If you must drive under these
conditions, drive only with at least one
window fully open at all times.
98Driving and parkingControls in detail
230_AKB; 6; 22, en-USd2ureepe,Version: 2.11.8.12009-07-28T18:49:58+02:00 - Seite 98
Page 102 of 316
switch to position 0 and repeat the starting
procedure.XIf you are starting the engine with KEYLESS-
GO: Close any doors that may be open to
allow for better detection of the SmartKey.
or
XStart the engine with the SmartKey as radio
signals from another source may be
interfering with the KEYLESS-GO function.XRepeat the starting procedure.
If the engine does not start after several
starting attempts:
XContact an authorized Mercedes-Benz
Center or call Roadside Assistance.
The engine does not start. You cannot
hear the starter.
The battery may not be charged sufficiently.
XGet a jump start ( Y page 285).
If the engine will not start despite a jump
start:
XContact an authorized Mercedes-Benz
Center or call Roadside Assistance.
The starter has been exposed to excessive
temperatures.
XLet the starter cool for about 2 minutes.XRepeat the starting procedure.
If the engine does not start after several
starting attempts:
XContact an authorized Mercedes-Benz
Center or call Roadside Assistance.
Driving off
GWarning!
On slippery road surfaces, never downshift in
order to obtain braking action. This could
result in drive wheel slip and reduced vehicle
control. Your vehicle’s ABS will not prevent
this type of loss of control.
! Do not run a cold engine at high engine
speeds. Running a cold engine at high
engine speeds may shorten the service life
of the engine. This is not covered by the
Mercedes-Benz Limited Warranty.
SL 63 AMG: At engine temperatures below
68‡ (20†), the engine’s maximum speed
is restricted in order to protect it from
damage. Avoid driving your vehicle at full
speed when the engine is cold to prevent
premature engine wear and/or diminished
comfort.
! If an acoustic warning sounds and the
message Release Parking Brake
appears in the multifunction display when
driving off, you have forgotten to release
the parking brake.
Release the parking brake.
! Avoid spinning of a drive wheel. This may
cause serious damage to the drivetrain
which is not covered by the Mercedes-Benz
Limited Warranty.
! Simultaneously depressing the
accelerator pedal and applying the brakes
reduces engine performance and causes
premature brake and drivetrain wear which
is not covered by the Mercedes-Benz
Limited Warranty.
i Once the vehicle is in motion, the
automatic central locking function engages
and the locking knobs in the doors move
down.
The automatic central locking function can
be switched off ( Y page 126).
Automatic transmissionGWarning!
It is dangerous to shift the automatic
transmission out of park position P or neutral
position N if the engine speed is higher than
idle speed. If your foot is not firmly on the
brake pedal, the vehicle could accelerate
100Driving and parkingControls in detail
230_AKB; 6; 22, en-USd2ureepe,Version: 2.11.8.12009-07-28T18:49:58+02:00 - Seite 100
Page 106 of 316
vehicle is stopped. Otherwise the
automatic transmission could be damaged.
iShifting the automatic transmission out of
park position P is only possible with the
brake pedal depressed.
Only depressing the brake pedal releases
the gear selector lever lock.
iThe current gear selector lever position
corresponds with the current transmission
position.
The current transmission position P, R, N,
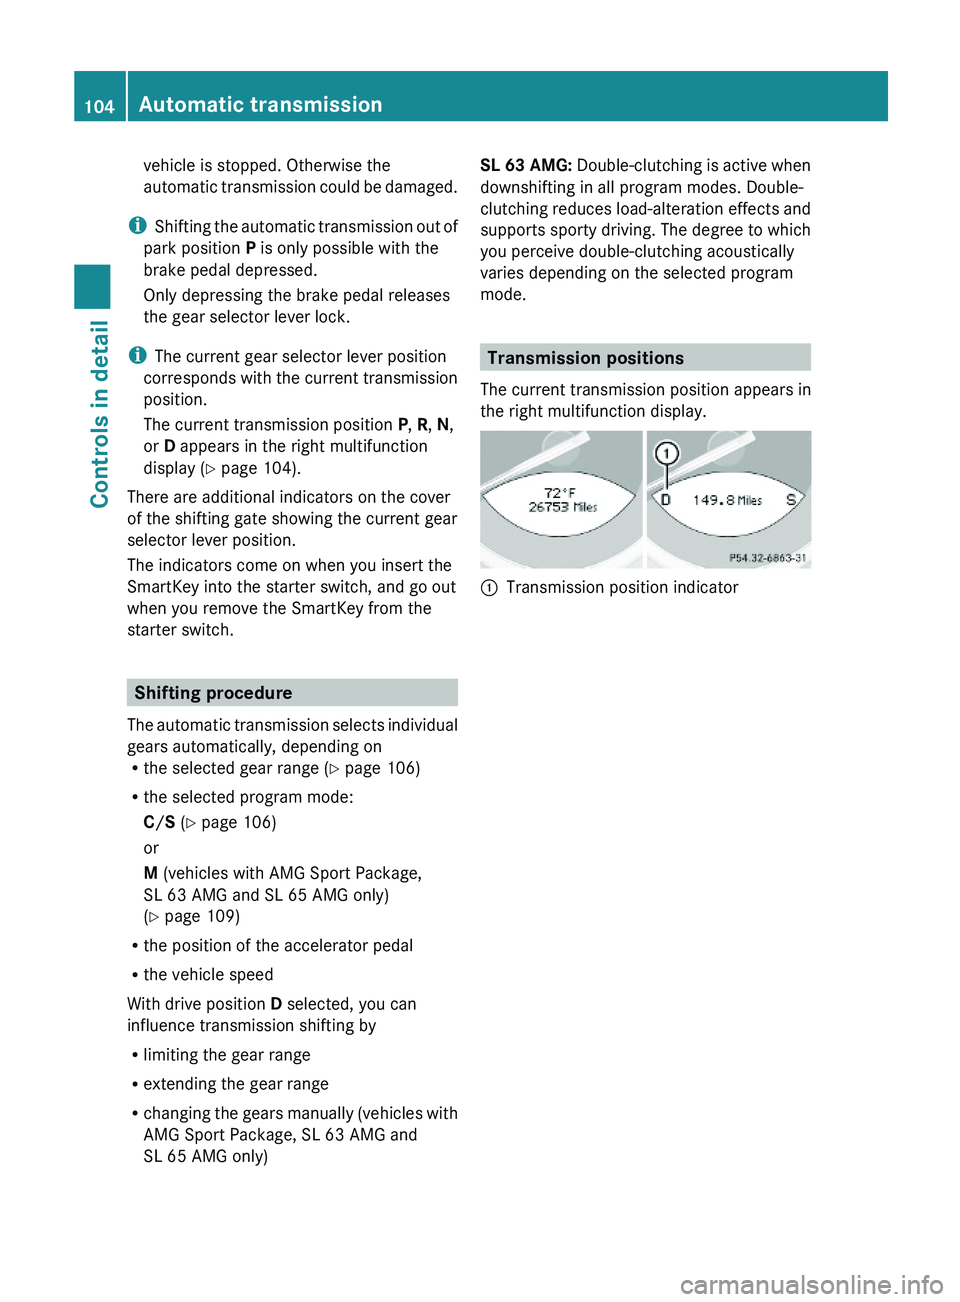
or D appears in the right multifunction
display (Y page 104).
There are additional indicators on the cover
of the shifting gate showing the current gear
selector lever position.
The indicators come on when you insert the
SmartKey into the starter switch, and go out
when you remove the SmartKey from the
starter switch.
Shifting procedure
The automatic transmission selects individual
gears automatically, depending onRthe selected gear range (Y page 106)
Rthe selected program mode:
C/S (Y page 106)
or
M (vehicles with AMG Sport Package,
SL 63 AMG and SL 65 AMG only)
(Y page 109)
Rthe position of the accelerator pedal
Rthe vehicle speed
With drive position D selected, you can
influence transmission shifting by
Rlimiting the gear range
Rextending the gear range
Rchanging the gears manually (vehicles with
AMG Sport Package, SL 63 AMG and
SL 65 AMG only)
SL 63 AMG: Double-clutching is active when
downshifting in all program modes. Double-
clutching reduces load-alteration effects and
supports sporty driving. The degree to which
you perceive double-clutching acoustically
varies depending on the selected program
mode.
Transmission positions
The current transmission position appears in
the right multifunction display.
\000FTransmission position indicator 104Automatic transmissionControls in detail
230_AKB; 6; 22, en-USd2ureepe,Version: 2.11.8.12009-07-28T18:49:58+02:00 - Seite 104
Page 107 of 316
Effect0045Park position
Shift the automatic transmission
into park position P only when the
vehicle is stopped. The park
position is not intended to serve as
a brake when the vehicle is parked.
Rather, the driver should always
engage the parking brake in
addition to shifting the automatic
transmission into park position P to
secure the vehicle.
The SmartKey can only be removed
from the starter switch with the
gear selector lever in park position
P . With the SmartKey removed from
the starter switch, the gear selector
lever is locked in park position P.
If the vehicle’s electrical system is
malfunctioning, the gear selector
lever could remain locked in park
position P.XHave the vehicle’s electrical
system checked at an authorized
Mercedes-Benz Center as soon
as possible.0046Reverse gear
Shift the automatic transmission
into reverse gear R only when the
vehicle is stopped.Effect0044Neutral position
No power is transmitted from the
engine to the drive axle. When the
brakes are released, the vehicle can
be moved freely (pushed or towed).
To avoid damage to the
transmission, never shift the
automatic transmission into neutral
position N while driving.
Exception: If the ESP ®
is switched
off or malfunctioning, shift the
automatic transmission into neutral
position N if the vehicle is in danger
of skidding.
! Coasting the vehicle, or driving
for any other reason with the
automatic transmission in
neutral position N can result in
transmission damage that is not
covered by the Mercedes-Benz
Limited Warranty.003ADrive position
The automatic transmission shifts
automatically. All forward gears are
available.
Driving tips
Kickdown
Use the kickdown when you want maximum
acceleration.
XU.S. vehicles except AMG vehicles:
Fully depress the accelerator pedal.
Depending on the engine speed the
automatic transmission shifts into a lower
gear.XCanada vehicles and AMG vehicles:
Depress the accelerator pedal past the
point of resistance.
Depending on the engine speed the
automatic transmission shifts into a lower
gear.Automatic transmission105Controls in detail230_AKB; 6; 22, en-USd2ureepe,Version: 2.11.8.12009-07-28T18:49:58+02:00 - Seite 105Z
Page 111 of 316

reappears in the right multifunction
display.
or
XPull and hold right gearshift control \000G until
D reappears in the right multifunction
display.
The automatic transmission will shift from
the current gear range directly into drive
position D.
Shifting into optimal gear range
XPress and hold the gear selector lever to
the left in the D- direction.
or
XPull and hold left gearshift control \000F.
The automatic transmission will select the
gear range suited for optimal acceleration
and deceleration automatically. This will
involve shifting down one or more gears.
Manual shift program
The manual shift program is available on
vehicles with AMG Sport Package, SL 63 AMG
and SL 65 AMG only.
Manual program mode M differs with regard
to spontaneity, response time, and shifting
smoothness from automatic program modes
S or S+ (SL 63 AMG only).
In manual program mode M, system-
controlled automatic gearshifting is switched
off. You need to change the gears by manually
upshifting or downshifting using the gear
selector lever or the steering wheel gearshift
control.
Program mode selector dial on SL 63 AMG
C ComfortFor standard drivingS SportFor sporty drivingS+ Sport PlusFor sporty driving with
shorter shift times
M ManualFor manual gearshiftingRS RACE STARTFor optimum
acceleration from a
standing start
iProgram mode RS cannot be selected
while driving. For more information, see
“RACE START (SL 63 AMG)” (Y page 141).
iE 63 AMG: In addition, the currently
selected program mode is indicated in red
on the program mode selector dial.
iSL 63 AMG: In addition, the currently
selected program mode is indicated in red
on the program mode selector dial.
Program mode selector switch on SL 65 AMG
Automatic transmission109Controls in detail230_AKB; 6; 22, en-USd2ureepe,Version: 2.11.8.12009-07-28T18:49:58+02:00 - Seite 109Z
Page 113 of 316

the maximum engine speed for each gear
without overrevving the engine.XShift the automatic transmission from
current gear 0046 into the next higher gear.
The fuel supply will otherwise be
interrupted to prevent the engine from
overrevving.
Downshifting
GWarning!
On slippery road surfaces, never downshift in
order to obtain braking action. This could
result in drive wheel slip and reduced vehicle
control. Your vehicle’s ABS will not prevent
this type of loss of control.
XBriefly press the gear selector lever to the
left in the D- direction.
or
XBriefly pull left gearshift control 0046
( Y page 108).
The automatic transmission shifts into the
next lower gear.
i For maximum acceleration, press and
hold the gear selector lever to the left in the
D- direction or pull and hold the left
gearshift control. Depending on the engine
speed the automatic transmission selects
the optimal gear for maximum
acceleration.
i When you brake or stop, the automatic
transmission shifts down into a gear from
which you can easily accelerate or take off.
Kickdown
Using the kickdown while driving in manual
program mode M is not possible.
Deactivating manual shift program
XAll models except SL 63 AMG: Press the
program mode selector switch repeatedly
until C or S appears in the right
multifunction display.XSL 63 AMG: Turn the program mode
selector dial until C or S appears in the right
multifunction display.
or
XRestart the engine.
The automatic transmission will go to
automatic program mode C.
Manual program mode M is not stored.
Emergency operation (limp-home
mode)
If vehicle acceleration becomes less
responsive or sluggish or the automatic
transmission no longer shifts, the automatic
transmission is most likely operating in limp-
home (emergency operation) mode. In this
mode only second gear and reverse gear R
can be selected.
XStop the vehicle in a safe location.XShift the automatic transmission into park
position P.XTurn off the engine.XWait at least 10 seconds before restarting.XRestart the engine.XShift the automatic transmission into drive
position D (for second gear) or reverse gear
R .XHave the automatic transmission checked
at an authorized Mercedes-Benz Center as
soon as possible.
Instrument cluster
Introduction
For a full view illustration of the instrument
cluster, see “Instrument cluster”
( Y page 30).
GWarning!
No messages will be displayed if either the
instrument cluster or the multifunction
display is inoperative.
Instrument cluster111Controls in detail230_AKB; 6; 22, en-USd2ureepe,Version: 2.11.8.12009-07-28T18:49:58+02:00 - Seite 111Z
Page 119 of 316
The engine oil temperature flashes if the
engine oil temperature has not yet reached
80†. During this time, avoid driving at full
engine speed.
If the engine reaches the overspeed range in
the manual shift program, the menu will be
shown in red. In addition, you will see UP next
to gear indicator \000G as a reminder to upshift.
Use buttons \000\) or \000- to select the
following functions in the AMG menu:
RSETUP (Y page 117)
RRACETIMER (Y page 117)
ROverall analysis (Y page 118)
RLap analysis (Y page 118)
SETUP
XPress button \000Y or \000X repeatedly until
the AMG menu appears in the
multifunction display.
XPress button \000\) repeatedly until the
SETUP appears in the multifunction
display.
or
XTap the AMG button on the center console
(SL 63 AMG only) (Y page 144).
iYou can store and call up automatic
transmission program mode and
suspension style settings with the AMG
button on the center console (SL 63 AMG
only). For more information, see
(Y page 144).
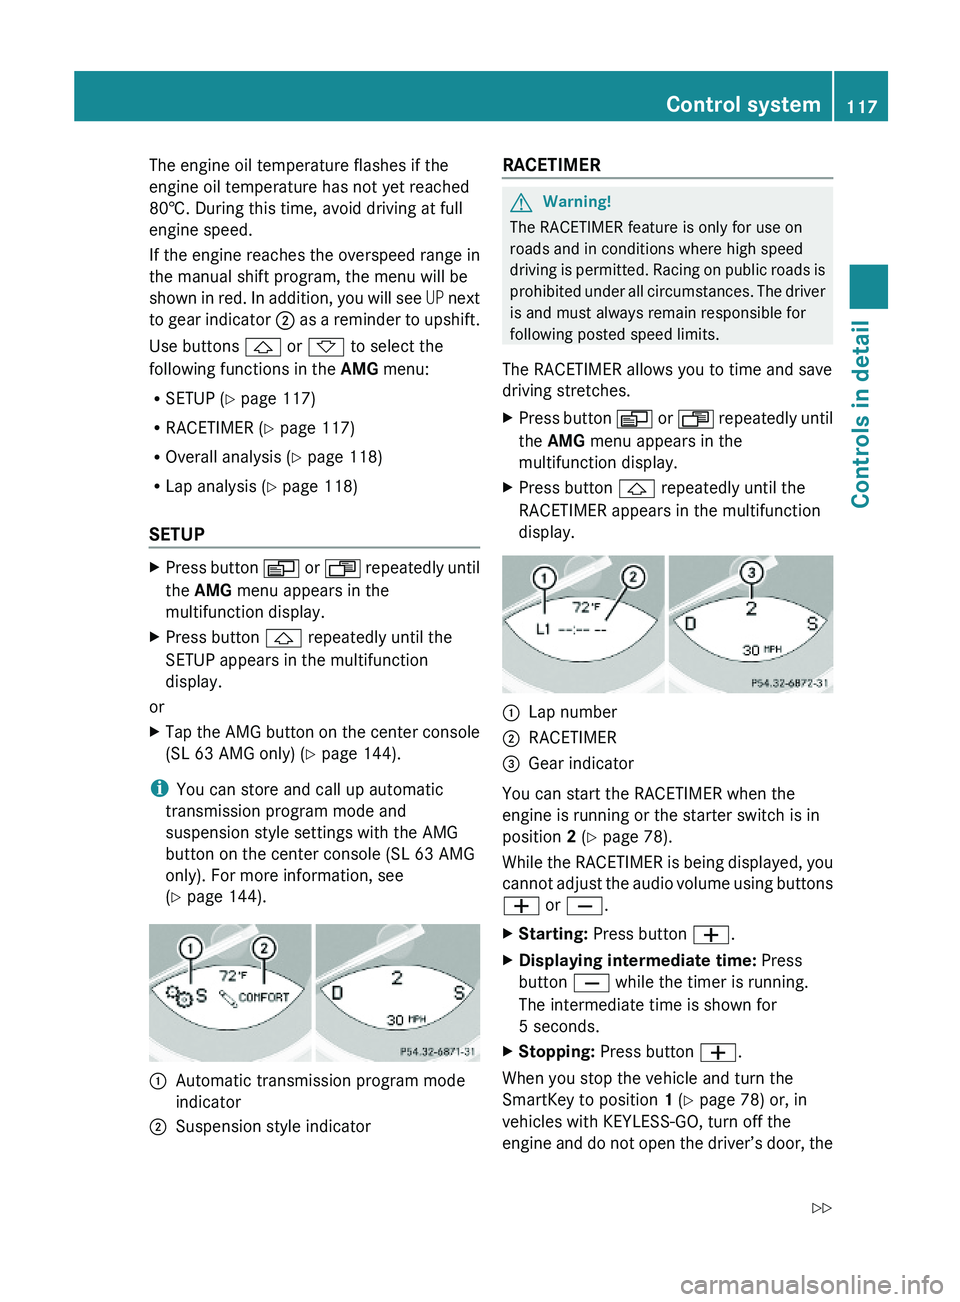
\000FAutomatic transmission program mode
indicator
\000GSuspension style indicatorRACETIMER GWarning!
The RACETIMER feature is only for use on
roads and in conditions where high speed
driving is permitted. Racing on public roads is
prohibited under all circumstances. The driver
is and must always remain responsible for
following posted speed limits.
The RACETIMER allows you to time and save
driving stretches.
XPress button \000Y or \000X repeatedly until
the AMG menu appears in the
multifunction display.
XPress button \000\) repeatedly until the
RACETIMER appears in the multifunction
display.
\000FLap number\000GRACETIMER\000