fuel type MERCEDES-BENZ SL-Class 2015 R131 Owner's Manual
[x] Cancel search | Manufacturer: MERCEDES-BENZ, Model Year: 2015, Model line: SL-Class, Model: MERCEDES-BENZ SL-Class 2015 R131Pages: 610, PDF Size: 12.21 MB
Page 171 of 610
!
Do not use diesel to refuel vehicles with a
gasoline engine. Do not switch on the igni- tion if you accidentally refuel with the
wrong fuel. Otherwise, the fuel will enter
the fuel system. Even small amounts of the
wrong fuel could result in damage to the
fuel system and the engine. Notify a quali-
fied specialist workshop and have the fuel
tank and fuel lines drained completely.
! Overfilling the fuel tank could damage the
fuel system.
! Take care not to spill any fuel on painted
surfaces. You could otherwise damage the paintwork.
! Use a filter when refueling from a fuel can.
Otherwise, the fuel lines and/or injection
system could be blocked by particles from
the fuel can.
Do not get into the vehicle again during the
refueling process. Otherwise, electrostatic
charge could build up again.
If you overfill the fuel tank, fuel could spray
out when the fuel pump nozzle is removed.
For further information on fuel and fuel quality
(Y page 602). Refueling
General information The fuel filler flap is unlocked or locked auto-
matically when you open or close the vehicle with the SmartKey or with KEYLESS-GO.
The position of the fuel filler cap is displayed
00B6 in the instrument cluster. The arrow
next to the filling pump indicates the side of
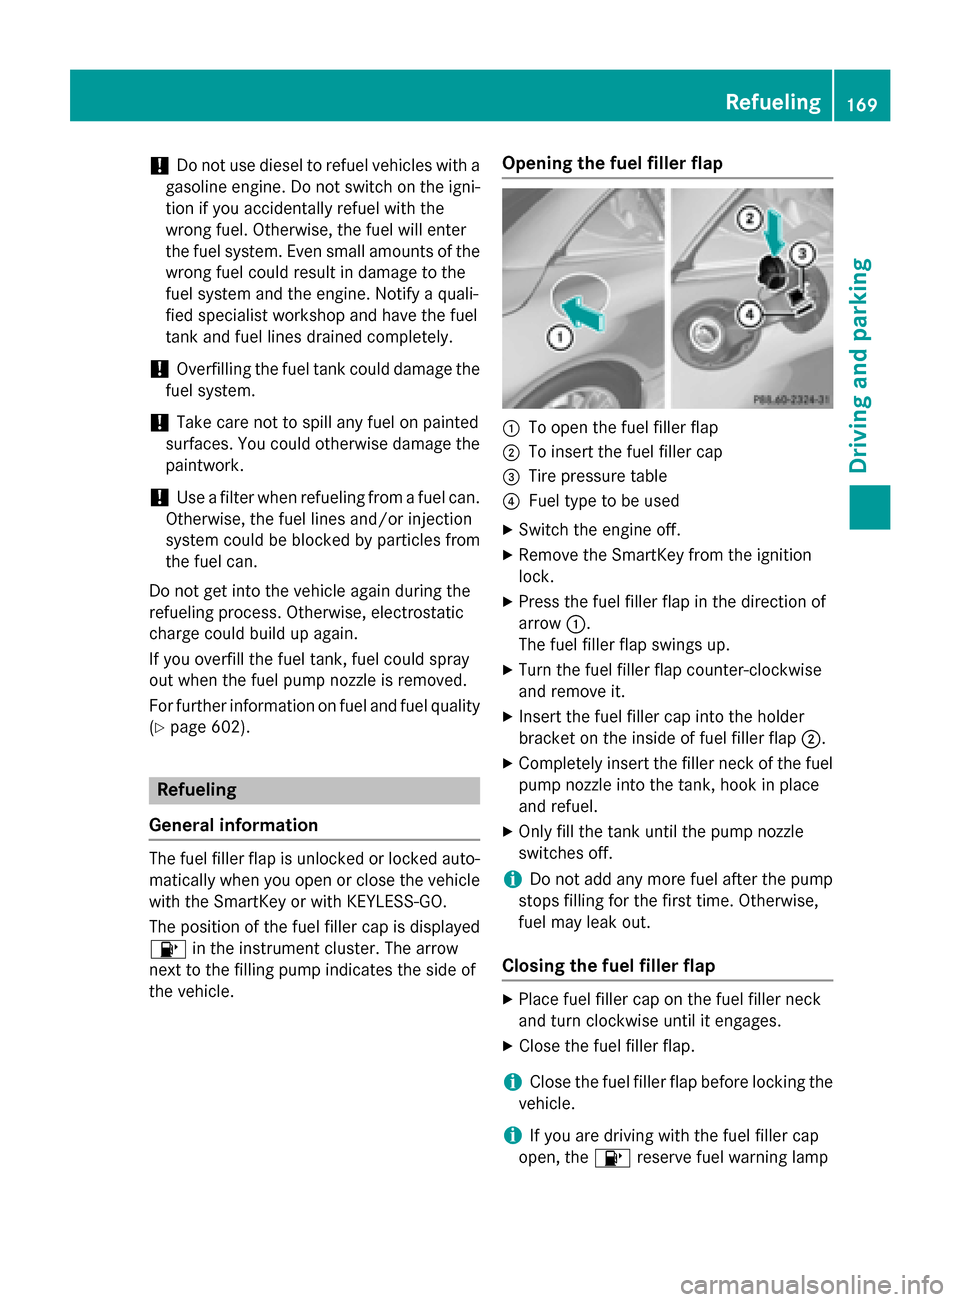
the vehicle. Opening the fuel filler flap 0043
To open the fuel filler flap
0044 To insert the fuel filler cap
0087 Tire pressure table
0085 Fuel type to be used
X Switch the engine off.
X Remove the SmartKey from the ignition
lock.
X Press the fuel filler flap in the direction of
arrow 0043.
The fuel filler flap swings up.
X Turn the fuel filler flap counter-clockwise
and remove it.
X Insert the fuel filler cap into the holder
bracket on the inside of fuel filler flap 0044.
X Completely insert the filler neck of the fuel
pump nozzle into the tank, hook in place
and refuel.
X Only fill the tank until the pump nozzle
switches off.
i Do not add any more fuel after the pump
stops filling for the first time. Otherwise,
fuel may leak out.
Closing the fuel filler flap X
Place fuel filler cap on the fuel filler neck
and turn clockwise until it engages.
X Close the fuel filler flap.
i Close the fuel filler flap before locking the
vehicle.
i If you are driving with the fuel filler cap
open, the 00B6reserve fuel warning lamp Refueling
169Driving and parking Z
Page 316 of 610
Details on the displays:
R for all vehicles except AMG vehicles, see
the separate vehicle Operator's Manual
R for AMG vehicles, see the separate vehicle
Operator's Manual.
Exiting the display X
Slide 009500520096 the COMAND controller until
the desired display (clock or fuel consump-
tion) is shown. Seat functions
Overview Using the
0050button next to the COMAND
controller or the Seat menu item in the sys-
tem menu, you can call up different setting
functions. The following settings depend on
the type of seat and the vehicle model series:
R Seat cushion length
R Backrest side bolsters
R Lumbar
R Balance
R Seat cushion side bolsters
R Dynamics
R Massage
i You can also store and recall the current
seat function settings using the memory
button and the corresponding memory
position switch; see the separate vehicle
Operator's Manual.
The massage function cannot be started or
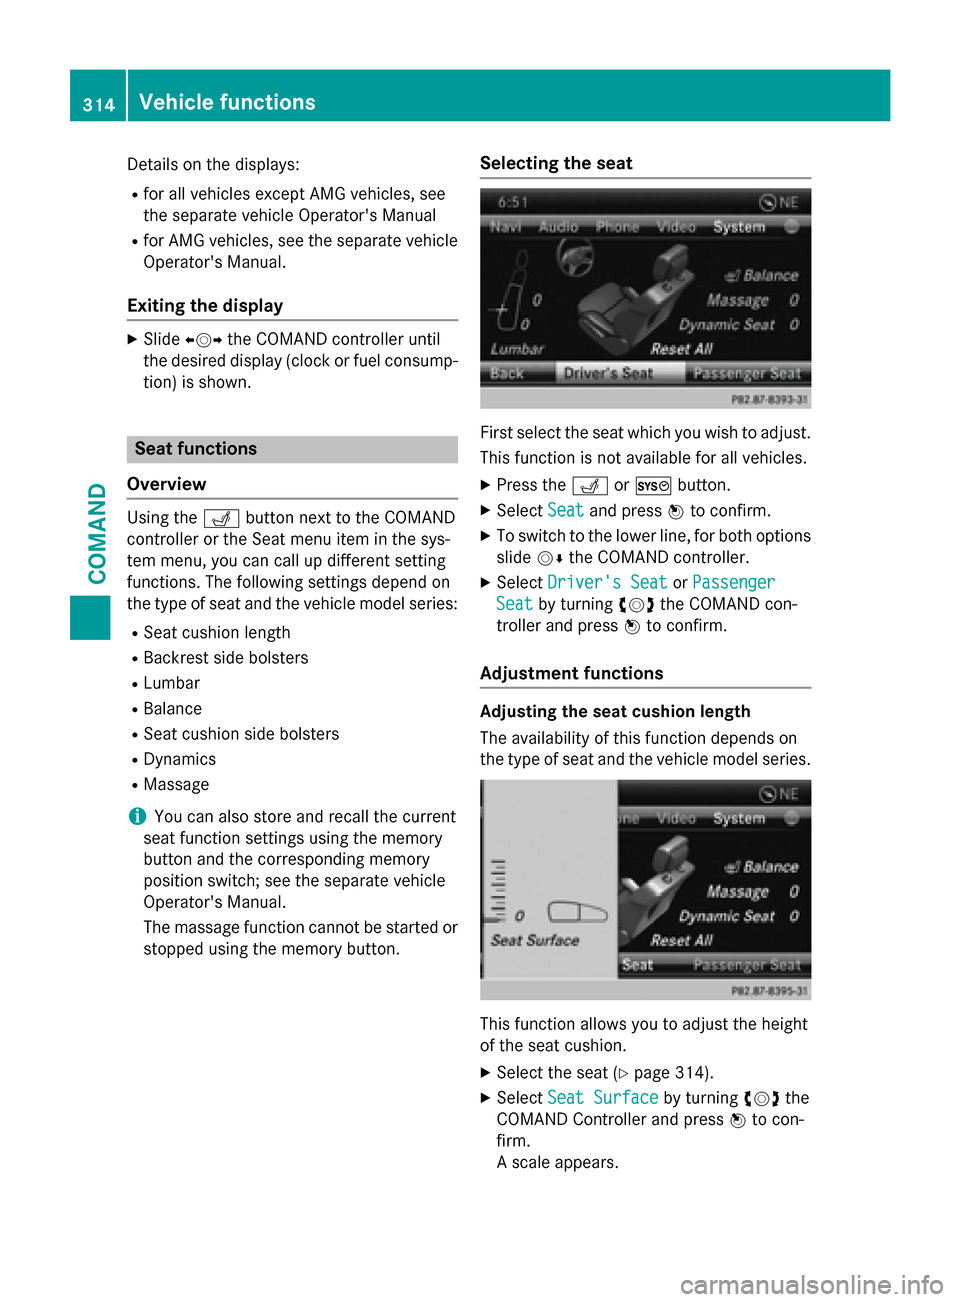
stopped using the memory button. Selecting the seat First select the seat which you wish to adjust.
This function is not available for all vehicles.
X Press the 0050or0066 button.
X Select Seat Seatand press 0098to confirm.
X To switch to the lower line, for both options
slide 00520064the COMAND controller.
X Select Driver's Seat
Driver's Seat orPassenger
Passenger
Seat
Seat by turning 00790052007Athe COMAND con-
troller and press 0098to confirm.
Adjustment functions Adjusting the seat cushion length
The availability of this function depends on
the type of seat and the vehicle model series. This function allows you to adjust the height
of the seat cushion.
X Select the seat (Y page 314).
X Select Seat Surface Seat Surface by turning00790052007Athe
COMAND Controller and press 0098to con-
firm.
A scale appears. 314
Vehicle functionsCOMAND
Page 323 of 610
You can select the following route types:
R Fast Route
Fast Route: COMAND calculates a route
with the shortest (minimized) journey time.
R Dynamic Traffic Route Dynamic Traffic Route: is the same
route type as Fast Route Fast Route. In addition,
COMAND takes into account any relevant
traffic reports received during route guid-
ance. The navigation system can help you
avoid a traffic jam, for example, by recal-
culating the route.
R Dynamic TRF. Route Only After
Dynamic TRF. Route Only After
Request Request: is the same route type as
Dynamic Traffic Route Dynamic Traffic Route. After recalcu-
lating the route, COMAND asks you
whether you want to adopt the new route or
whether you want to continue along the
original route.
R Eco Route
Eco Route: the Eco Route Eco Route(economical
route) is a variant of the Fast Route
Fast Routetype.
COMAND will attempt to minimize the jour-
ney distance at the expense of a slightly
increased journey time.
R Short
Short Route
Route: COMAND calculates a route
with the shortest possible (minimized)
route distance.
i The route calculated may, for example,
include ferry connections, even if the
Avoid Ferries Avoid Ferries route option is switched
on.
In some cases, COMAND may not be able
to take all the selected route options into
account, e.g. when calculating particularly
long routes.
X To exit the menu: slide009500520096 the COMAND
controller.
Setting the number of persons in the
vehicle for the use of carpool lanes For route calculation, you can take HOV or
carpool lanes into account.
If you use HOV or carpool lanes, please
observe the applicable laws as well as the
local and time limitation conditions. Carpool lanes may only be used under certain
conditions. They can normally be used when
there are two people in the vehicle. However, there are also carpool lanes which can only be
used when there are three or more people in
the vehicle. In California, lone drivers can use
a carpool lane if their vehicle's emission level or fuel consumption is below a fixed thresh-
old.
Carpool lanes may be reserved for specific
times (e.g. during the peak period).
Carpool lanes are identified by HOV symbols
on special road signs and by markings on the road. The road signs may also include the
designation CARPOOL CARPOOL. The lanes are arranged
as a separate lane next to the others or are
built as a physically separate lane.
Depending on the setting under Number of Number of
Occupants
Occupants in
inVehicle
Vehicle, COMAND uses car-
pool lanes when calculating the route.
COMAND then guides you in and out of car-
pool lanes using visual and acoustic driving
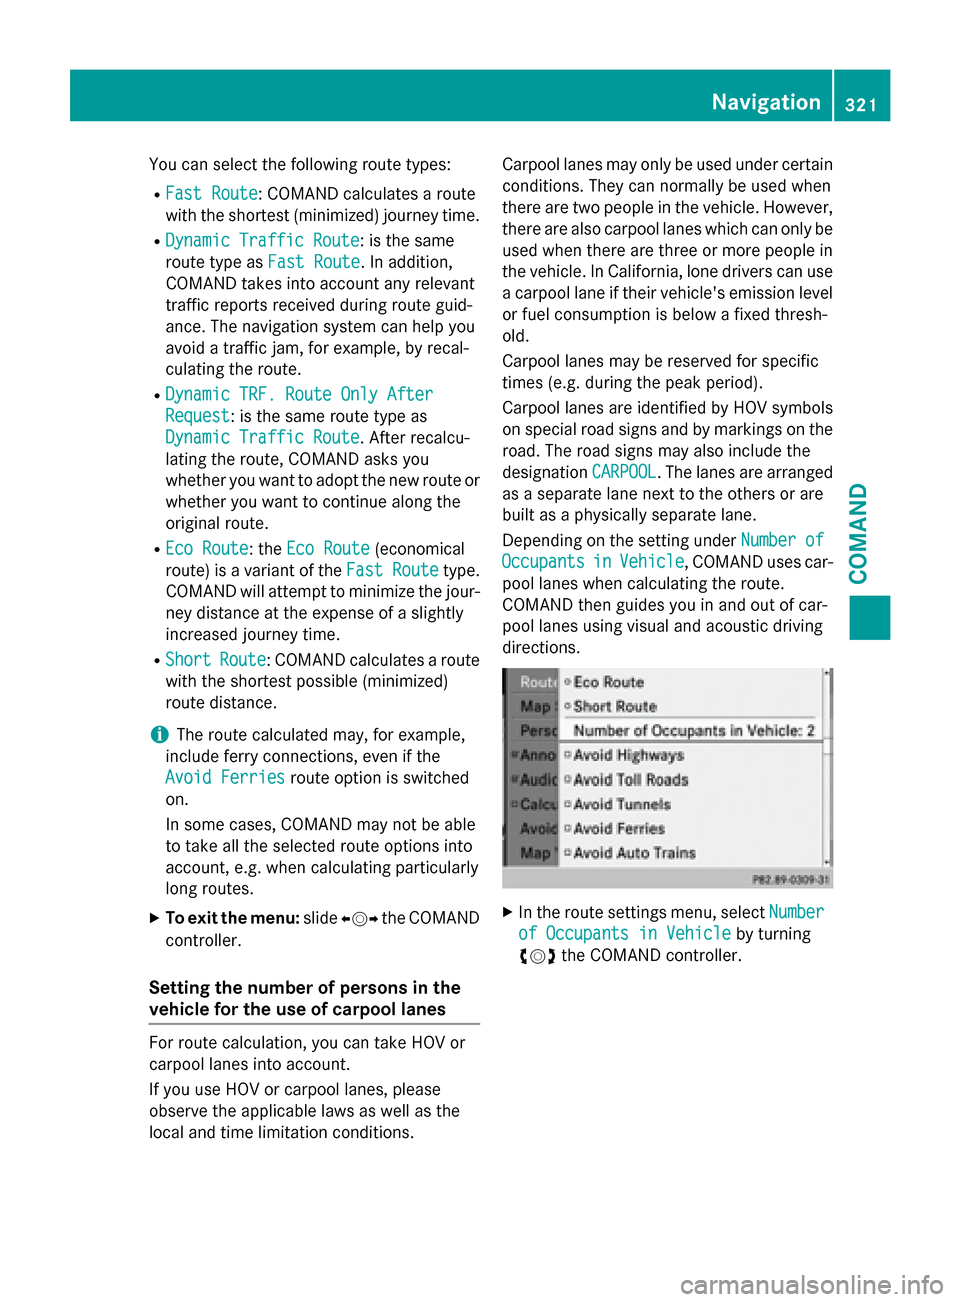
directions. X
In the route settings menu, select Number Number
of Occupants in Vehicle
of Occupants in Vehicle by turning
00790052007A the COMAND controller. Navigation
321COMAND Z
Page 570 of 610
Useful information
i This Operator's manual describes all
models and all standard and optional equip- ment of your vehicle available at the time of
publication of the Operator's manual.
Country-specific differences are possible.
Please note that your vehicle may not be
equipped with all features described. This
also applies to safety-related systems and
functions.
i Read the information on qualified special-
ist workshops (Y page 35). Important safety notes
G
WARNING
If wheels and tires of the wrong size are used, the wheel brakes or suspension components
may be damaged. There is a risk of an acci-
dent.
Always replace wheels and tires with those
that fulfill the specifications of the original
part.
When replacing wheels, make sure to use the
correct:
R designation
R model
When replacing tires, make sure to use the
correct:
R designation
R manufacturer
R model G
WARNING
A flat tire severely impairs the driving, steer-
ing and braking characteristics of the vehicle.
There is a risk of accident.
Tires without run-flat characteristics:
R do not drive with a flat tire.
R immediately replace the flat tire with your
emergency spare wheel or spare wheel, or
consult a qualified specialist workshop. Tires with run-flat characteristics:
R pay attention to the information and warn-
ing notices on MOExtended tires (tires with
run-flat characteristics).
Accessories that are not approved for your
vehicle by Mercedes-Benz or are not being
used correctly can impair operating safety.
Before purchasing and using non-approved
accessories, visit a qualified specialist work-
shop and inquire about:
R suitability
R legal stipulations
R factory recommendations
Information on dimensions and types of
wheels and tires for your vehicle can be found (Y page 593).
Information on air pressure for the tires on
your vehicle can be found:
R on the vehicle's Tire and Loading Informa-
tion placard on the B-pillar (Y page 578)
R on the tire pressure label on the fuel filler
flap (Y page 169)
R in the "Tire pressure" section Operation
Information on driving
If the vehicle is heavily loaded, check the tire pressures and correct them if necessary.
While driving, pay attention to vibrations,
noises and unusual handling characteristics,
e.g. pulling to one side. This may indicate that
the wheels or tires are damaged. If you sus-
pect that a tire is defective, reduce your
speed immediately. Stop the vehicle as soon
as possible to check the wheels and tires for
damage. Hidden tire damage could also be
causing the unusual handling characteristics. If you find no signs of damage, have the tires
and wheels checked at a qualified specialist
workshop.
When parking your vehicle, make sure that
the tires do not get deformed by the curb or 568
OperationWheels and tires
Page 580 of 610
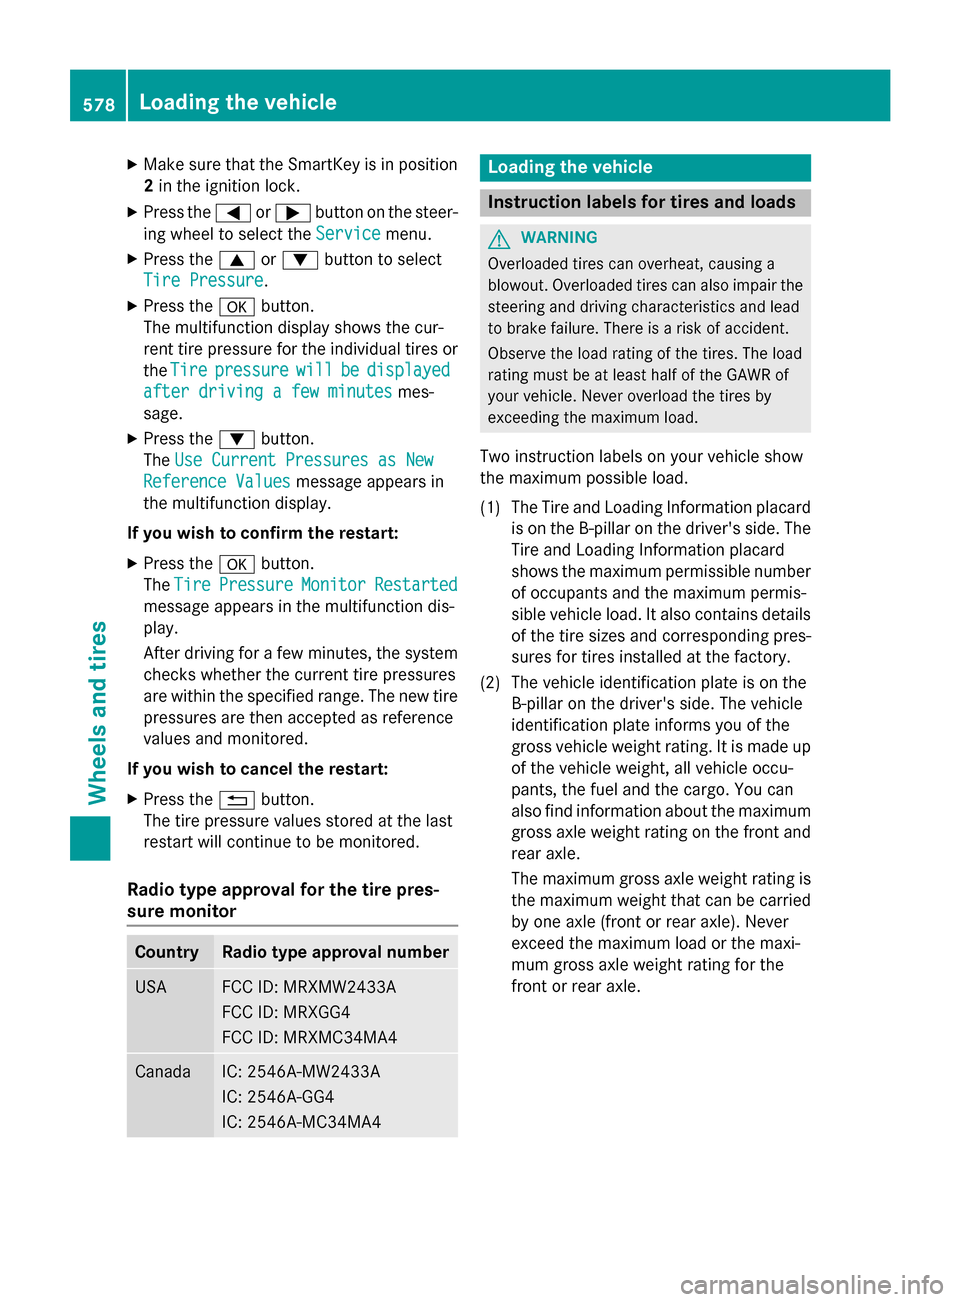
X
Make sure that the SmartKey is in position
2 in the ignition lock.
X Press the 0059or0065 button on the steer-
ing wheel to select the Service
Service menu.
X Press the 0063or0064 button to select
Tire Pressure
Tire Pressure.
X Press the 0076button.
The multifunction display shows the cur-
rent tire pressure for the individual tires or
the Tire
Tire pressure
pressure will
willbe
bedisplayed
displayed
after driving a few minutes
after driving a few minutes mes-
sage.
X Press the 0064button.
The Use Current Pressures as New
Use Current Pressures as New
Reference Values
Reference Values message appears in
the multifunction display.
If you wish to confirm the restart: X Press the 0076button.
The Tire
Tire Pressure
Pressure Monitor
MonitorRestarted
Restarted
message appears in the multifunction dis-
play.
After driving for a few minutes, the system checks whether the current tire pressures
are within the specified range. The new tire
pressures are then accepted as reference
values and monitored.
If you wish to cancel the restart:
X Press the 0038button.
The tire pressure values stored at the last
restart will continue to be monitored.
Radio type approval for the tire pres-
sure monitor Country Radio type approval number
USA FCC ID: MRXMW2433A
FCC ID: MRXGG4
FCC ID: MRXMC34MA4
Canada IC: 2546A-MW2433A
IC: 2546A-GG4
IC: 2546A-MC34MA4 Loading the vehicle
Instruction labels for tires and loads
G
WARNING
Overloaded tires can overheat, causing a
blowout. Overloaded tires can also impair the steering and driving characteristics and lead
to brake failure. There is a risk of accident.
Observe the load rating of the tires. The load
rating must be at least half of the GAWR of
your vehicle. Never overload the tires by
exceeding the maximum load.
Two instruction labels on your vehicle show
the maximum possible load.
(1) The Tire and Loading Information placard is on the B-pillar on the driver's side. The
Tire and Loading Information placard
shows the maximum permissible number
of occupants and the maximum permis-
sible vehicle load. It also contains details
of the tire sizes and corresponding pres-
sures for tires installed at the factory.
(2) The vehicle identification plate is on the B-pillar on the driver's side. The vehicle
identification plate informs you of the
gross vehicle weight rating. It is made up
of the vehicle weight, all vehicle occu-
pants, the fuel and the cargo. You can
also find information about the maximum gross axle weight rating on the front and
rear axle.
The maximum gross axle weight rating is the maximum weight that can be carried
by one axle (front or rear axle). Never
exceed the maximum load or the maxi-
mum gross axle weight rating for the
front or rear axle. 578
Loading the vehicleWheels and tires
Page 596 of 610
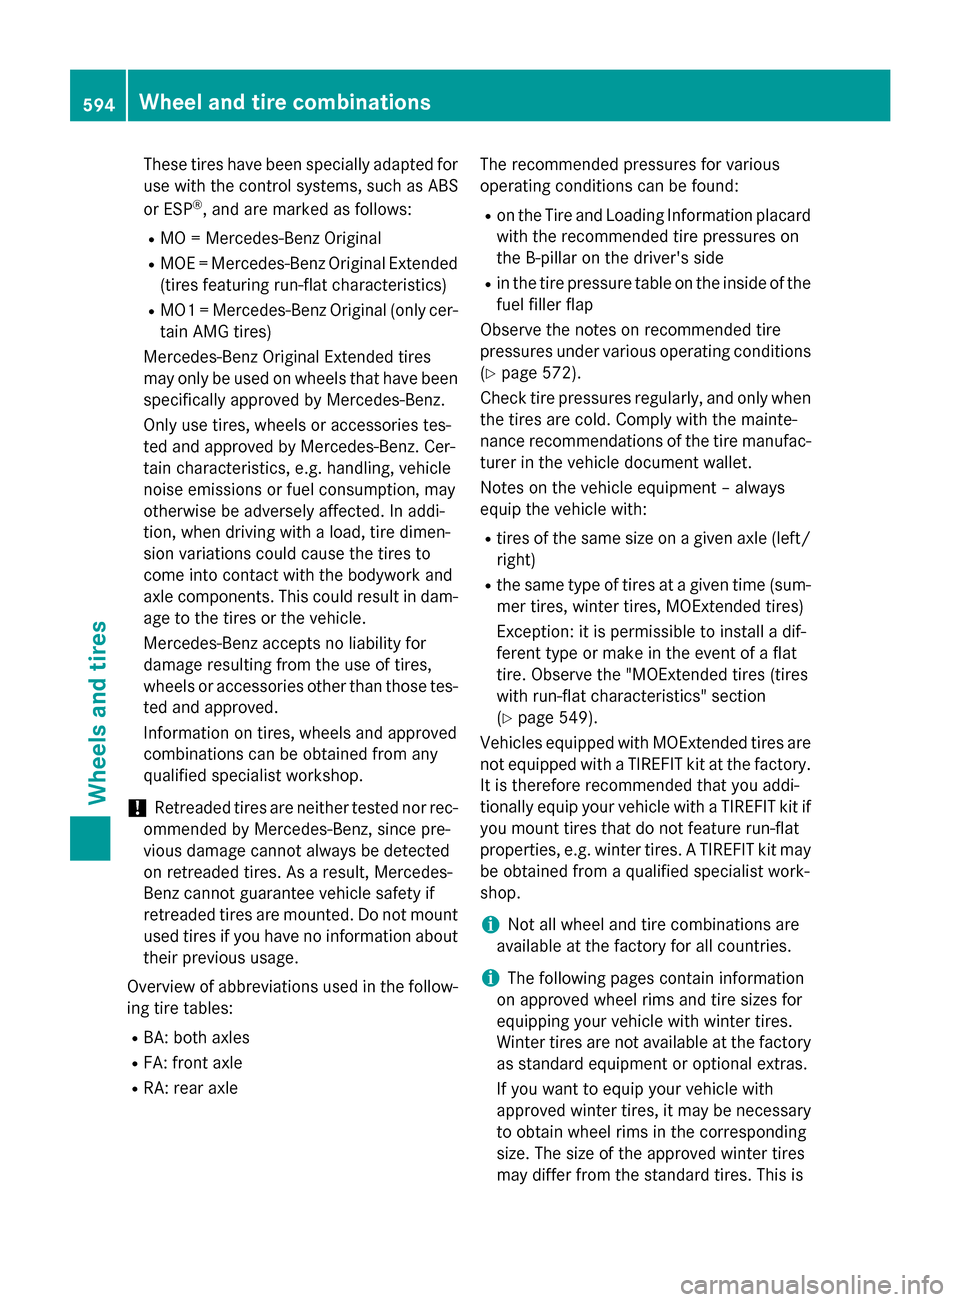
These tires have been specially adapted for
use with the control systems, such as ABS
or ESP ®
, and are marked as follows:
R MO = Mercedes-Benz Original
R MOE = Mercedes-Benz Original Extended
(tires featuring run-flat characteristics)
R MO1 = Mercedes-Benz Original (only cer-
tain AMG tires)
Mercedes-Benz Original Extended tires
may only be used on wheels that have been
specifically approved by Mercedes-Benz.
Only use tires, wheels or accessories tes-
ted and approved by Mercedes-Benz. Cer-
tain characteristics, e.g. handling, vehicle
noise emissions or fuel consumption, may
otherwise be adversely affected. In addi-
tion, when driving with a load, tire dimen-
sion variations could cause the tires to
come into contact with the bodywork and
axle components. This could result in dam- age to the tires or the vehicle.
Mercedes-Benz accepts no liability for
damage resulting from the use of tires,
wheels or accessories other than those tes-
ted and approved.
Information on tires, wheels and approved
combinations can be obtained from any
qualified specialist workshop.
! Retreaded tires are neither tested nor rec-
ommended by Mercedes-Benz, since pre-
vious damage cannot always be detected
on retreaded tires. As a result, Mercedes-
Benz cannot guarantee vehicle safety if
retreaded tires are mounted. Do not mount used tires if you have no information about
their previous usage.
Overview of abbreviations used in the follow-
ing tire tables:
R BA: both axles
R FA: front axle
R RA: rear axle The recommended pressures for various
operating conditions can be found:
R on the Tire and Loading Information placard
with the recommended tire pressures on
the B-pillar on the driver's side
R in the tire pressure table on the inside of the
fuel filler flap
Observe the notes on recommended tire
pressures under various operating conditions (Y page 572).
Check tire pressures regularly, and only when the tires are cold. Comply with the mainte-
nance recommendations of the tire manufac-
turer in the vehicle document wallet.
Notes on the vehicle equipment – always
equip the vehicle with:
R tires of the same size on a given axle (left/
right)
R the same type of tires at a given time (sum-
mer tires, winter tires, MOExtended tires)
Exception: it is permissible to install a dif-
ferent type or make in the event of a flat
tire. Observe the "MOExtended tires (tires
with run-flat characteristics" section
(Y page 549).
Vehicles equipped with MOExtended tires are
not equipped with a TIREFIT kit at the factory. It is therefore recommended that you addi-
tionally equip your vehicle with a TIREFIT kit if
you mount tires that do not feature run-flat
properties, e.g. winter tires. A TIREFIT kit may
be obtained from a qualified specialist work-
shop.
i Not all wheel and tire combinations are
available at the factory for all countries.
i The following pages contain information
on approved wheel rims and tire sizes for
equipping your vehicle with winter tires.
Winter tires are not available at the factory as standard equipment or optional extras.
If you want to equip your vehicle with
approved winter tires, it may be necessary
to obtain wheel rims in the corresponding
size. The size of the approved winter tires
may differ from the standard tires. This is 594
Wheel and tire combinationsWheels and tires