MERCEDES-BENZ SL-Class 2016 R231 Owner's Manual
Manufacturer: MERCEDES-BENZ, Model Year: 2016, Model line: SL-Class, Model: MERCEDES-BENZ SL-Class 2016 R231Pages: 614, PDF Size: 15.67 MB
Page 311 of 614
XSelectFormatand press Wto confirm.
The #symbols show the current settings.
XSet the format by turning cVdthe
COMAND controller and press Wto con-
firm.
AbbreviationMeaning
DD. MM. YYDay . Month . Year
(date format, two digits)
MM/ DD/ YYYYMonth/Day/Year
date format, year (all
four digits)
YY/MM/ DDYear/Month/Day
date format, year (two
digits)
HH:MM
(24 hrs)
Hours : Minutes
(24 hour time format)
HH:MM(AM/PM)Hours : Minutes
(AM/PM time format)
Adjusting the time zone and switching
to Daylight Savings Time (Summer)
XPress W.
XSelect Timeby turning cVdthe COMAND
controller and press Wto confirm.
XSelect TimeZoneand press Wto confirm.
A list of countries or time zones appears.
The #dot indicates the current setting.
XSelect the country or time zone by turning
cVd the COMAND controller and press W
to confirm.
A time zone list may also be displayed,
depending on the country selected.
XSelect the time zone and press Wto con-
firm.
The entry for the Automatic Time Set‐
tingsis accepted.
Subsequent operation depends on whether
the automatic changeover function to sum-
mer time is available.
XTo change manually: selectONorOFFand
press Wto confirm.
XTo change to automatic time: select
Automatic
and press Wto confirm.
The entry for the Automatic Time Set‐
tingsis accepted.
XTo switch the automatic time setting
off/on:press the Wbutton.
XSelect Timeby turning cVdthe COMAND
controller and press Wto confirm.
XPress Wto confirm the AutomaticTime
Settings.
Switch the automatic time setting off ªor
on again O.
To switch on: the menu item is switched
on as the default setting. If the Automatic
Time Settingsis switched off and you
switch it on again, the last settings for the
time zone and summer time changeover
are selected.
To switch off: the time zone is deselected
and the summer time is switched off. If
Automatic
is set for the summer time
changeover, a prompt will appear asking
whether this should be maintained.
XSelect YesorNoand press Wto confirm.
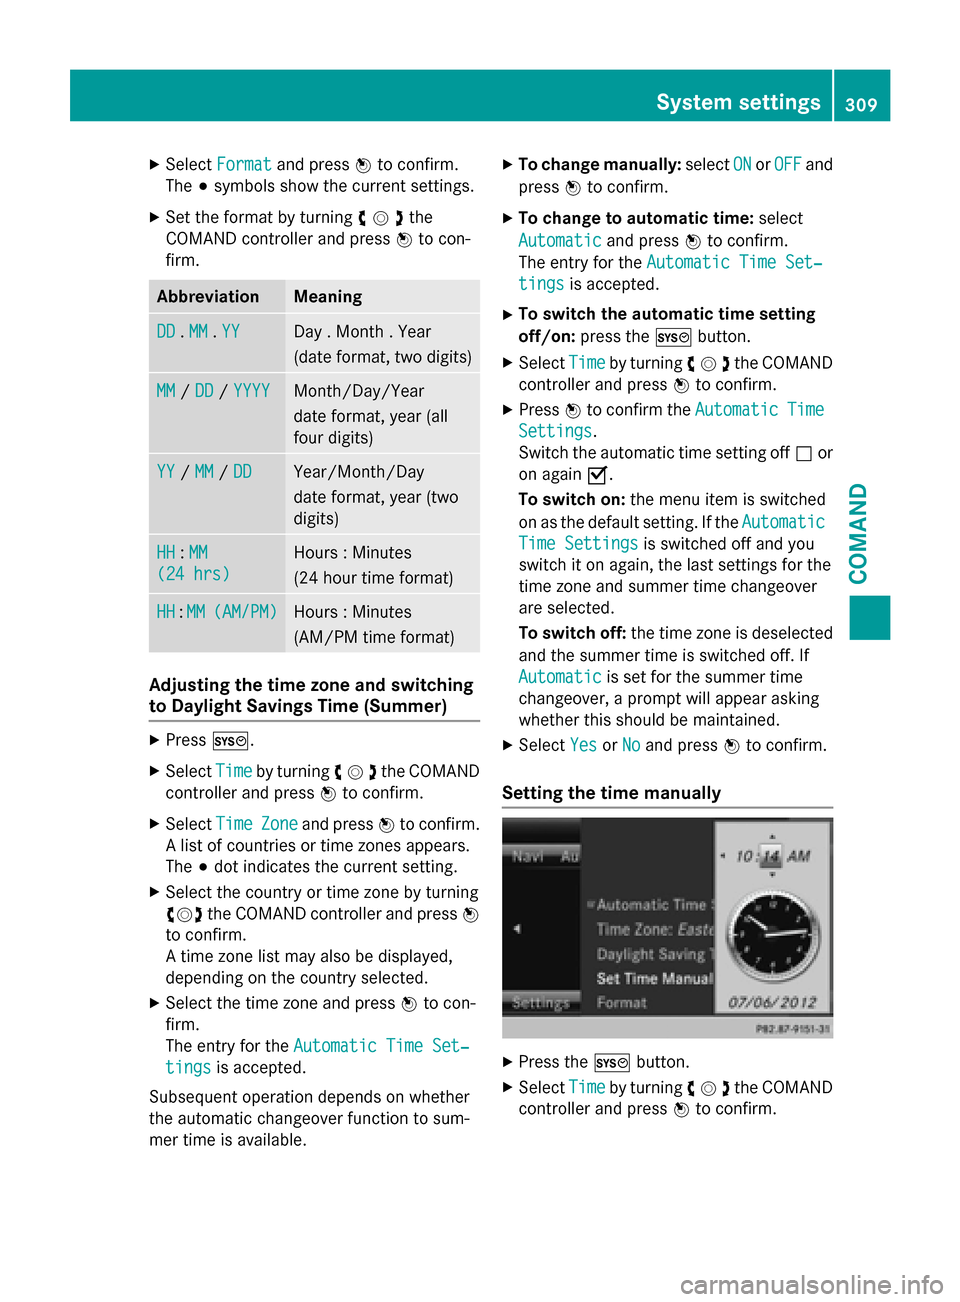
Setting the time manually
XPress the Wbutton.
XSelect Timeby turning cVdthe COMAND
controller and press Wto confirm.
System settings309
COMAND
Z
Page 312 of 614
XSelectSet Time Manuallyand press W
to confirm.
XSet the time by turning cVdthe COMAND
controller and press Wto confirm.
The time is accepted.
Text reader settings
XPress the Wbutton.
XSelect Systemby turning cVdthe
COMAND controller and press Wto con-
firm.
XSelect Text Reader Speedand press W
to confirm.
A list appears. The #dot indicates the cur-
rent setting.
XSelect a setting by turning cVdthe
COMAND controller and press Wto con-
firm.
Voice Control System settings
Opening/closing the help window
The help window provides information in addi-
tion to the audible instructions during indi-
vidualization and during the subsequent voice
control.
XPress W.
XSelect Systemby turning cVdthe
COMAND controller and press Wto con-
firm.
XSelect Voice Controland press Wto
confirm.
XSelect Help Windowand press Wto con-
firm.
You have switched the help window on O
or off ª.
Individualization
Using individualization, you can fine-tune the
Voice Control System to your own voice and thus improve voice recognition. See the sep-
arate operating instructions.
Bluetooth®settings
General information about Bluetooth
®
Bluetooth®-capable devices, e.g. mobile
phones, have to comply with a certain profile
in order to be connected to COMAND. Every
Bluetooth
®device has its own specific Blue-
tooth®name.
Bluetooth
®technology is a standard for
short-range wireless data transmissions up to
approximately 10 meters. Bluetooth
®allows,
for example, the exchange of vCards.
Bluetooth®is a registered trademark of Blue-
tooth Special Interest Group (SIG) Inc.
Activating/deactivating Bluetooth®
XPress W.
The system menu appears.
XSelect Settingsby turning cVdthe
COMAND controller and press Wto con-
firm.
XSelect ActivateBluetoothand press W
to confirm.
This switches Bluetooth
®on O or off ª.
Setting the system language
This function allows you to determine the lan-
guage for the menu displays and the naviga-
tion announcements. The selected language
affects the characters available for entry.
The navigation announcements are not avail-
able in all languages. If a language is not avail-
310System settings
COMAND
Page 313 of 614
able, the navigation announcements will be in
English.
When you set the system language, the lan-
guage of the Voice Control System will
change accordingly. If the selected language
is not supported by the Voice Control System,
English will be selected.
XPress theWbutton.
XSelect Systemby turning cVdthe
COMAND controller and press Wto con-
firm.
XSelect Languageand press Wto confirm.
The list of languages appears. The #dot
indicates the current setting.
XSelect the language by turning cVdthe
COMAND controller and press Wto con-
firm.
COMAND loads the selected language and
sets it.
Assigning a favorites button
XTo assign a favorites button: press the
W button.
XSelect Systemby turning cVdthe
COMAND controller and press Wto con-
firm.
XSelect AssignasFavoriteand press W
to confirm.
The list of predefined functions appears.
The dot #indicates the currently selected
function.
XSelect the function by turning cVdthe
COMAND controller and press Wto con-
firm.
The favorites button is assigned the selec-
ted function.
XExample: to call up a favorite: press the
g favorites button.
This calls up the predefined function. You can select the following predefined func-
tions in a menu:
RSplitView on/off: you can switch the
screen view for the front passenger on or
off.
RDisplay On/Off: you can switch the dis-
play off or on.
RFull Screen: 'Clock': you can call up
the full screen with the clock.
R® Menu: you can call up the online and
Internet functions.
R360°Camera: you can call up the picture of
the 360° camera.
RFull screen: 'Map': you can call up the
full screen with the map.
RSpoken Driving Tip: you can call up the
current driving recommendation.
RDisplayTrafficMessages: you can call
up traffic reports.
RNavigate Home: you can start route guid-
ance to your home address if you have
already entered and saved the address
(
Ypage 329).
RDetour Menu: you can call up the Detour
menu and then block a section of the route
and recalculate the route (
Ypage 351).
RCompassScreen: you can call up the com-
pass.
Importing/exporting data
General notes
!Never remove the stick or card when writ-
ing data to the USB stick or the memory
card. You may otherwise lose data.
System settings311
COMAND
Z
Page 314 of 614
Using this function, you can:
Rtransfer your personal COMAND data from
one system/vehicle to another.
Rmake a backup copy of your personal data
(export data) and load it again (import
data).
Rprotect your data from unwanted export by
activating a pin prompt (presetting: deacti-
vated ª).
You can either use an SD memory card or a
USB storage device (e.g. a USB stick) as tem-
porary storage.
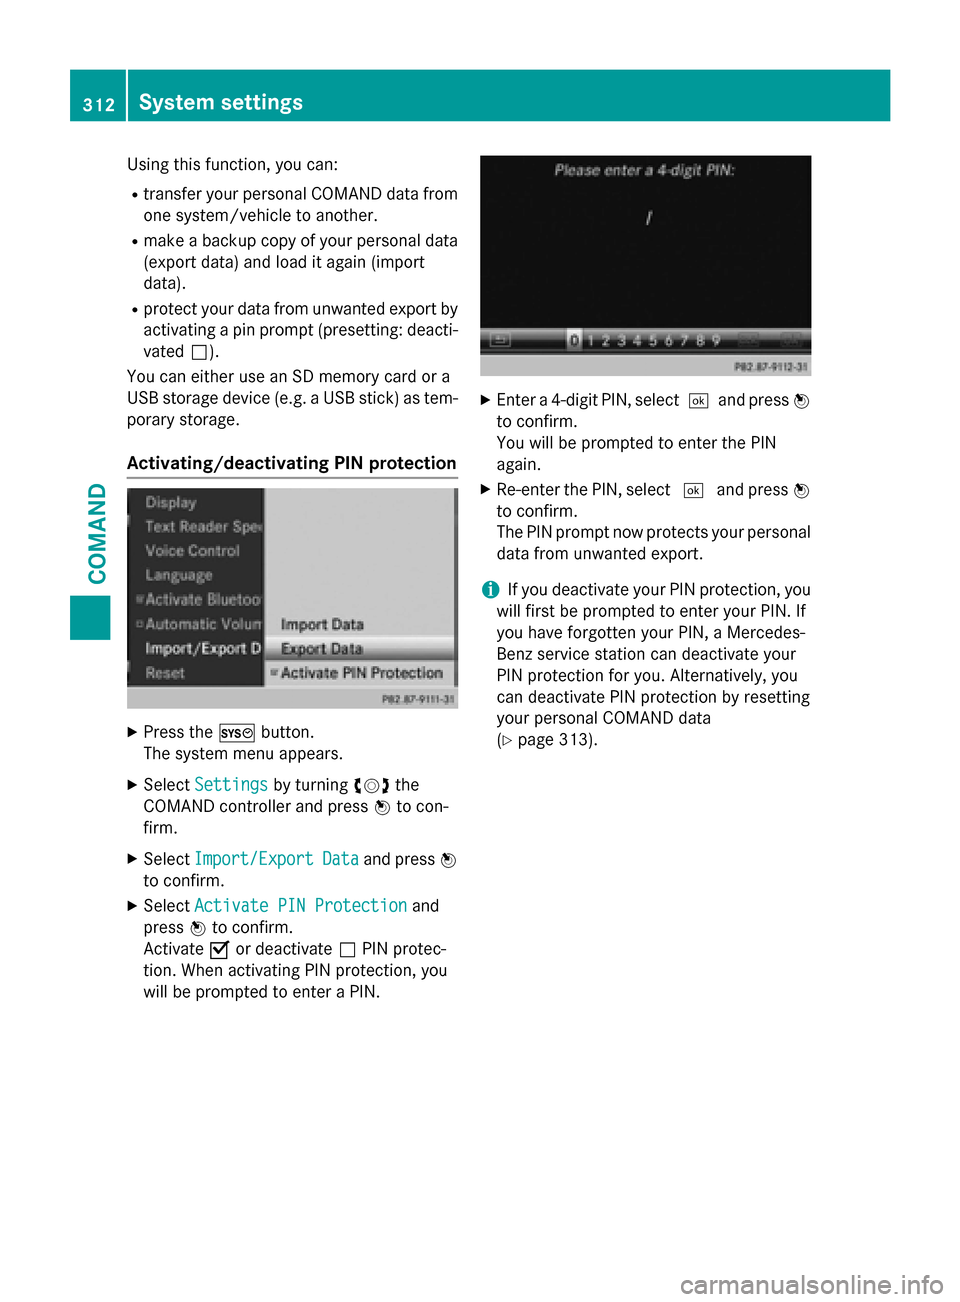
Activating/deactivating PIN protection
XPress the Wbutton.
The system menu appears.
XSelect Settingsby turning cVdthe
COMAND controller and press Wto con-
firm.
XSelect Import/ExportDataand press W
to confirm.
XSelect Activate PIN Protectionand
press Wto confirm.
Activate Oor deactivate ªPIN protec-
tion. When activating PIN protection, you
will be prompted to enter a PIN.
XEnter a 4-digit PIN, select ¬and pressW
to confirm.
You will be prompted to enter the PIN
again.
XRe-enter the PIN, select ¬and press W
to confirm.
The PIN prompt now protects your personal
data from unwanted export.
iIf you deactivate your PIN protection, you
will first be prompted to enter your PIN. If
you have forgotten your PIN, a Mercedes-
Benz service station can deactivate your
PIN protection for you. Alternatively, you
can deactivate PIN protection by resetting
your personal COMAND data
(
Ypage 313).
312System settings
COMAND
Page 315 of 614
Importing/exporting data
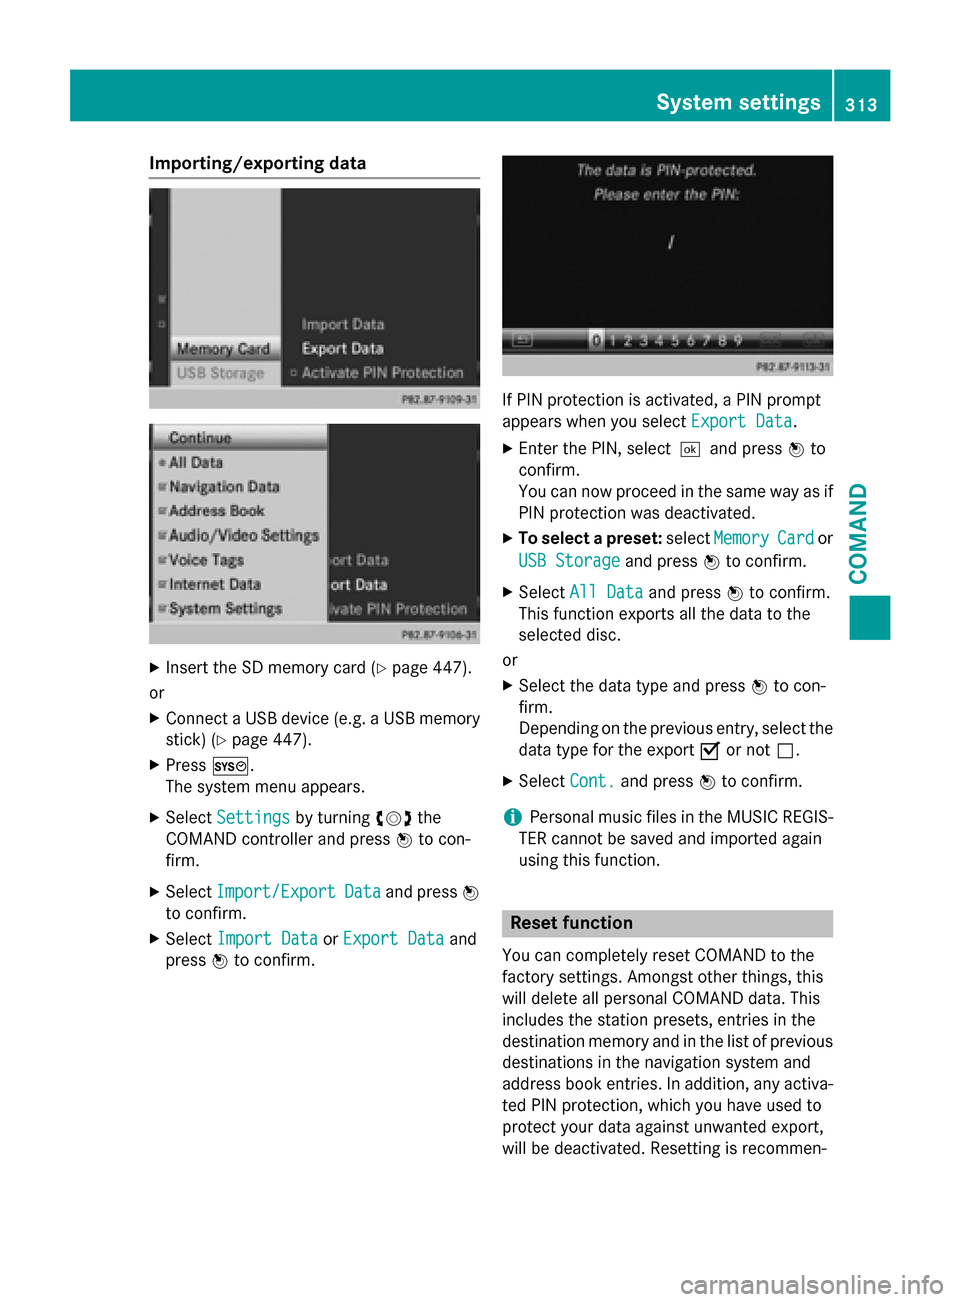
XInsert the SDmemory card (Ypage 447).
or
XConnect a USB device (e.g. a USB memory
stick) (
Ypage 447).
XPress W.
The system menu appears.
XSe lect Settingsbyturning cVdthe
COMAND controller and press Wto con-
firm.
XSe lect Import/ExportDataand press W
to confirm.
XSe lect Import DataorExport Dataand
press Wto confirm.
IfPIN protection isact ivat ed, a PIN prompt
appears when you select Export Data
.
XEnter the PIN, select¬and press Wto
confirm.
You can now proceed inthe same way as if
PIN protection was deactivated.
XTo select a preset: selectMemoryCardor
USB Storage
and press Wto confirm.
XSelect All Dataand press Wto confirm.
This function exports all the data to the
selected disc.
or
XSe lect the data type and press Wto con-
firm.
Depending on the previo us entry, select the
data type for the export Oor not ª.
XSelect Cont.and press Wto confirm.
iPersonal music files inthe MUSIC REGIS-
TER cannot besaved and imported again
using th isfunction.
Reset function
You can complete lyreset COMAND to the
factory settings. Amongst other things, th is
will delete all personal COMAND data. This
includes the station presets, entries inthe
destination memory and inthe listof pre vious
destinations inthe navigation system and
address book entries. Inaddition, any act iva-
ted PIN protection, which you have used to
protect your data against unwanted export,
will be deactivated. Resetting isrecommen-
System settings313
COMAND
Z
Page 316 of 614
ded before selling or transferring ownership
of your vehicle, for example.
Data on the internal hard drive, e.g. music
files in the MUSIC REGISTER, will be deleted.
You can also delete music files from the
MUSIC REGISTER using the "Delete all music
files" function (
Ypage 459).
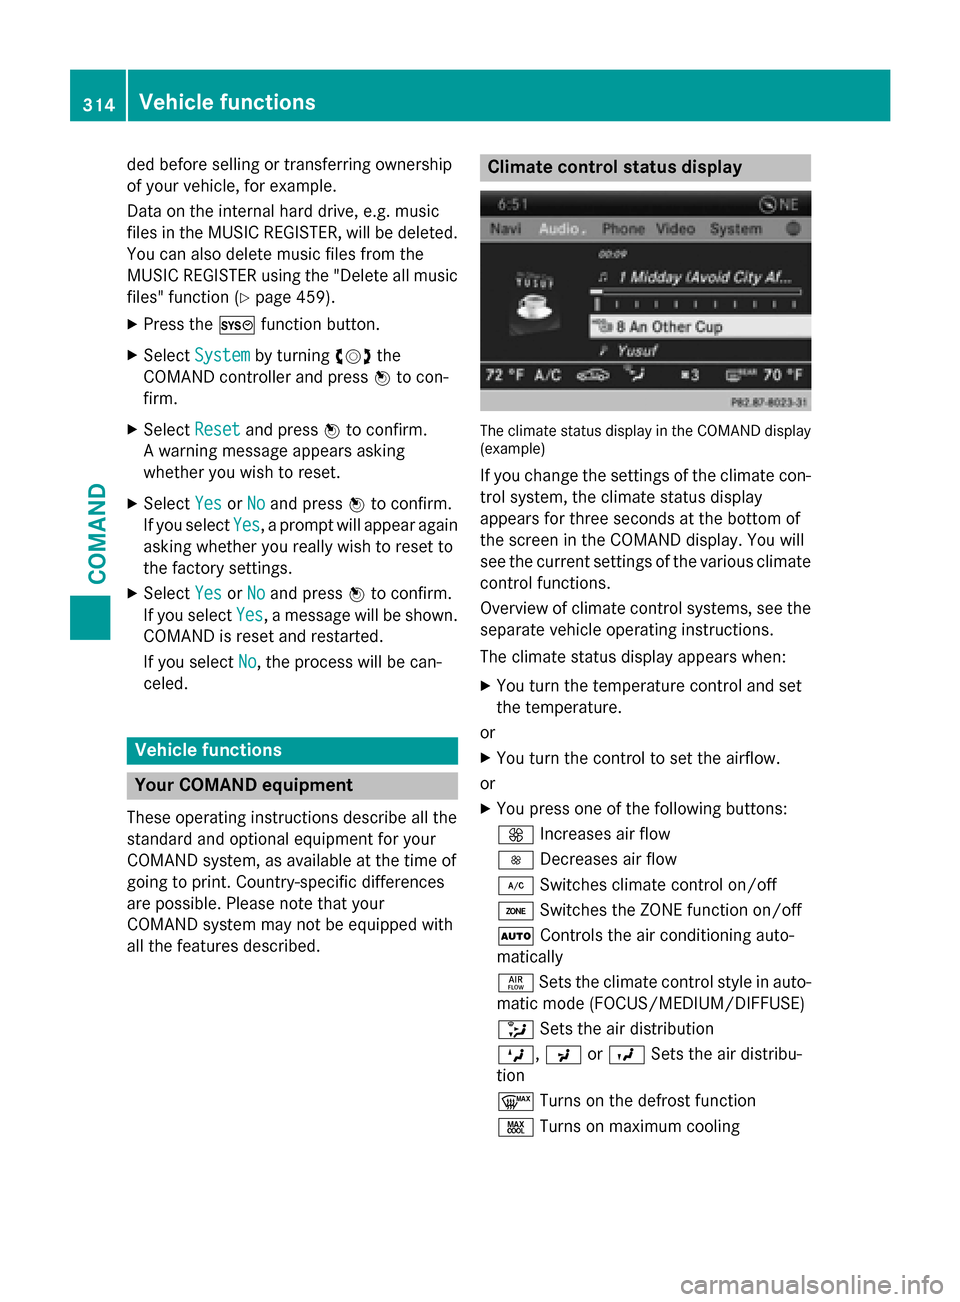
XPress theWfunction button.
XSelect Systemby turning cVdthe
COMAND controller and press Wto con-
firm.
XSelect Resetand press Wto confirm.
A warning message appears asking
whether you wish to reset.
XSelect YesorNoand press Wto confirm.
If you select Yes
, a prompt will appear again
asking whether you really wish to reset to
the factory settings.
XSelect YesorNoand press Wto confirm.
If you select Yes
, a message will be shown.
COMAND is reset and restarted.
If you select No
, the process will be can-
celed.
Vehicle functions
Your COMAND equipment
These operating instructions describe all the
standard and optional equipment for your
COMAND system, as available at the time of
going to print. Country-specific differences
are possible. Please note that your
COMAND system may not be equipped with
all the features described.
Climate control status display
The climate status display in the COMAND display
(example)
If you change the settings of the climate con-
trol system, the climate status display
appears for three seconds at the bottom of
the screen in the COMAND display. You will
see the current settings of the various climate
control functions.
Overview of climate control systems, see the
separate vehicle operating instructions.
The climate status display appears when:
XYou turn the temperature control and set
the temperature.
or
XYou turn the control to set the airflow.
or
XYou press one of the following buttons:
K Increases air flow
I Decreases air flow
¿ Switches climate control on/off
á Switches the ZONE function on/off
à Controls the air conditioning auto-
matically
ñ Sets the climate control style in auto-
matic mode (FOCUS/MEDIUM/DIFFUSE)
_ Sets the air distribution
M, PorO Sets the air distribu-
tion
¬ Turns on the defrost function
Ù Turns on maximum cooling
314Vehicle functions
COMAND
Page 317 of 614
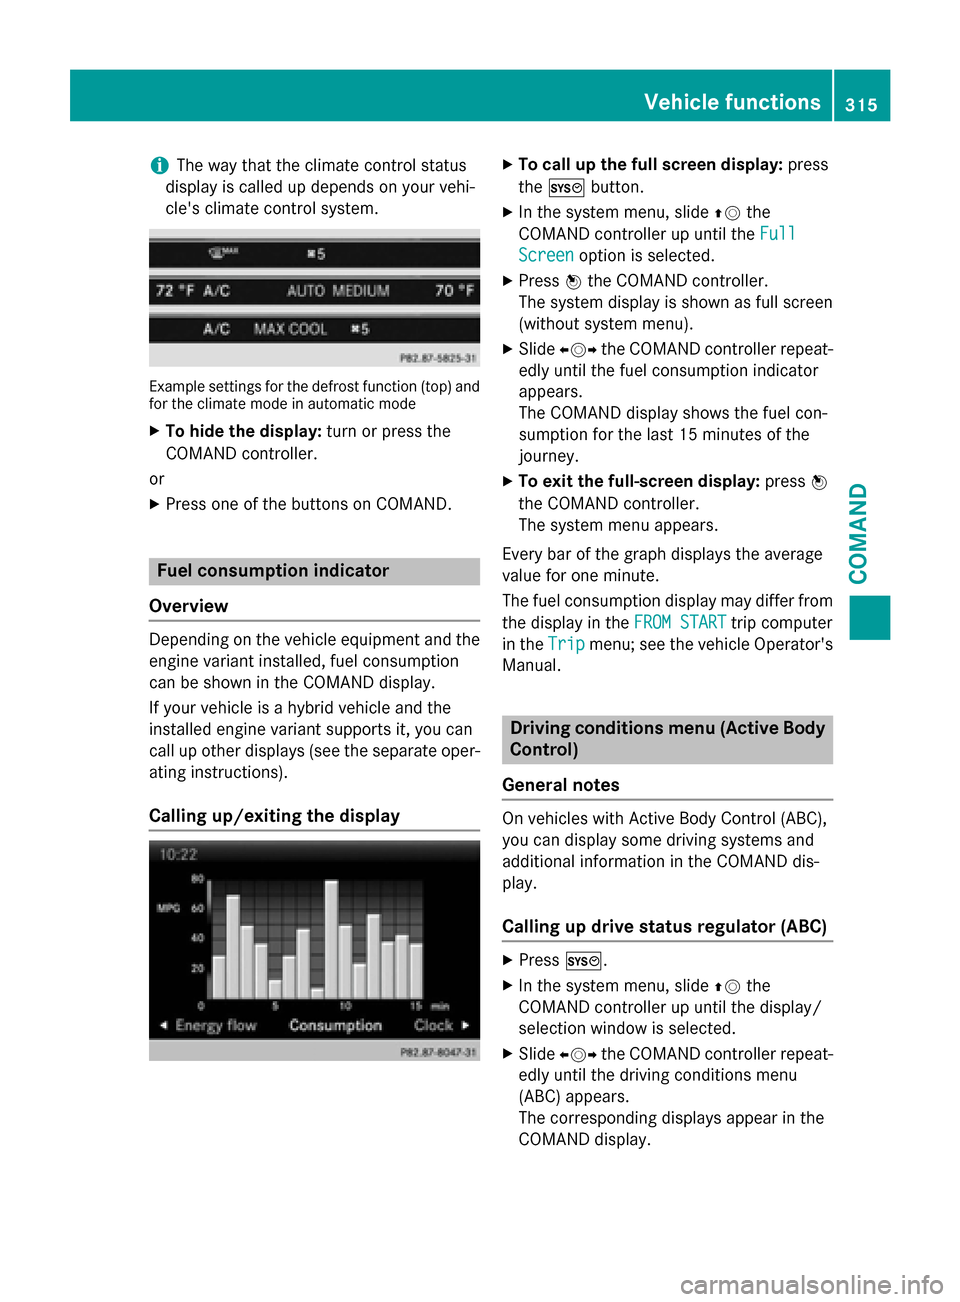
iThe way that the climate control status
display is called up depends on your vehi-
cle's climate control system.
Example settings for the defrost function (top) and
for the climate mode in automatic mode
XTo hide the display: turn or press the
COMAND controller.
or
XPress one of the buttons on COMAND.
Fuel consumption indicator
Overview
Depending on the vehicle equipment and the
engine variant installed, fuel consumption
can be shown in the COMAND display.
If your vehicle is a hybrid vehicle and the
installed engine variant supports it, you can
call up other displays (see the separate oper-
ating instructions).
Calling up/exiting the display
XTo call up the full screen display: press
the W button.
XIn the system menu, slide ZVthe
COMAND controller up until the Full
Screenoption is selected.
XPressWthe COMAND controller.
The system display is shown as full screen
(without system menu).
XSlide XVY the COMAND controller repeat-
edly until the fuel consumption indicator
appears.
The COMAND display shows the fuel con-
sumption for the last 15 minutes of the
journey.
XTo exit the full-screen display: pressW
the COMAND controller.
The system menu appears.
Every bar of the graph displays the average
value for one minute.
The fuel consumption display may differ from
the display in the FROM START
trip computer
in the Trip
menu; see the vehicle Operator's
Manual.
Driving conditions menu (Active Body
Control)
General notes
On vehicles with Active Body Control (ABC),
you can display some driving systems and
additional information in the COMAND dis-
play.
Calling up drive status regulator (ABC)
XPress W.
XIn the system menu, slide ZVthe
COMAND controller up until the display/
selection window is selected.
XSlide XVY the COMAND controller repeat-
edly until the driving conditions menu
(ABC) appears.
The corresponding displays appear in the
COMAND display.
Vehicle functions315
COMAND
Z
Page 318 of 614
Details on the displays:
Rfor all vehicles except AMG vehicles (see
the separate vehicle Operator's Manual)
Rfor AMG vehicles, see the separate vehicleOperator's Manual.
Exiting the display
XSlide XVY the COMAND controller until
the desired display (clock or fuel consump-
tion) is shown.
Seat functions
Overview
Using the Tbutton next to the COMAND
controller or the Seat menu item in the sys-
tem menu, you can call up different setting
functions. The following settings depend on
the type of seat and the vehicle model series:
RSeat cushion length
RBackrest side bolsters
RLumbar
RBalance
RSeat cushion side bolsters
RDynamics
RMassage
iYou can also store and recall the current
seat function settings using the memory
button and the corresponding memory
position switch; see the separate vehicle
Operator's Manual.
The massage function cannot be started or
stopped using the memory button.
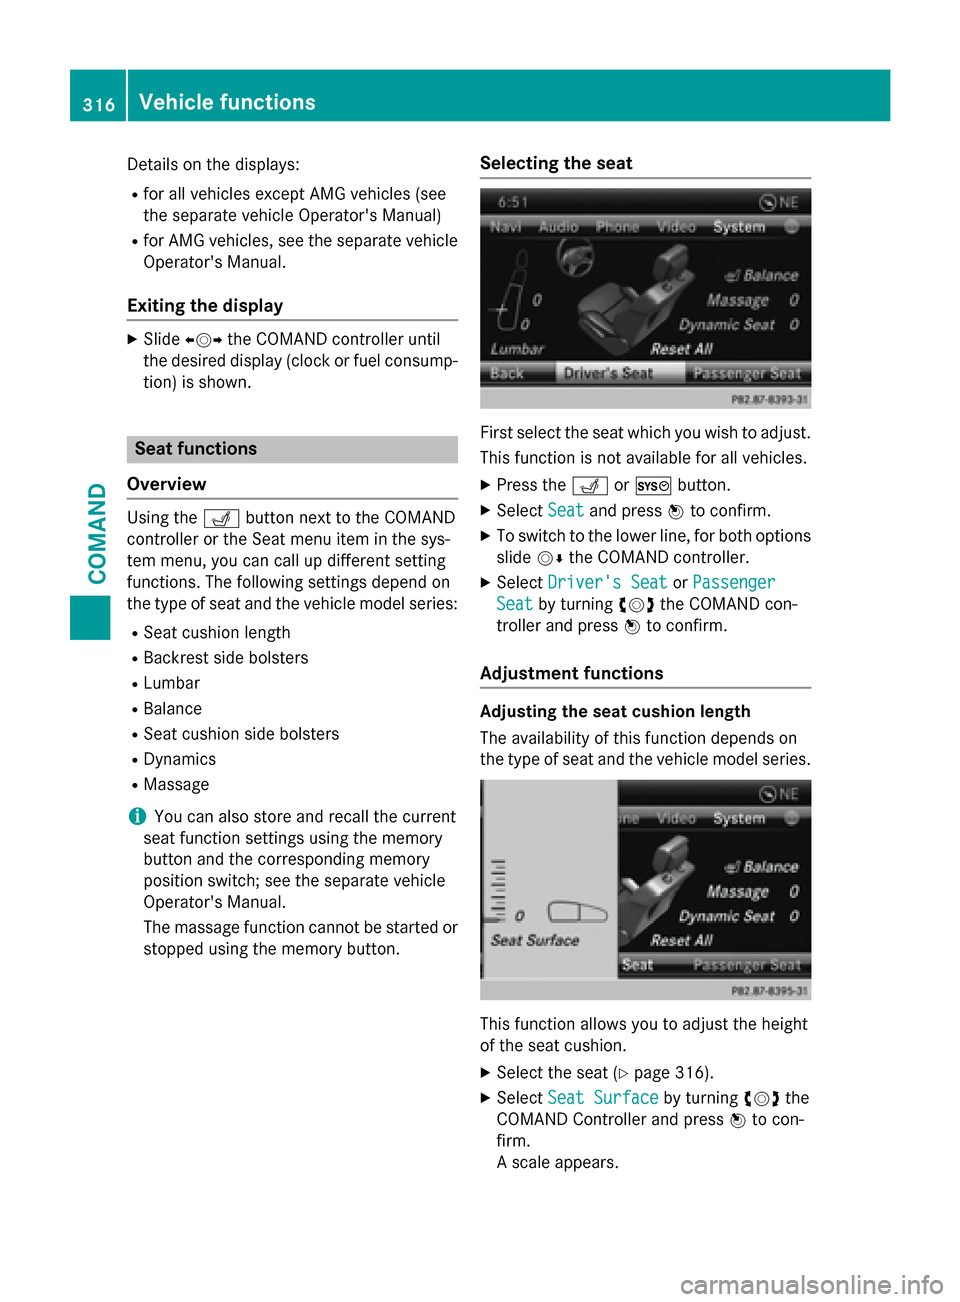
Selecting the seat
First select the seat which you wish to adjust.
This function is not available for all vehicles.
XPress the TorW button.
XSelect Seatand press Wto confirm.
XTo switch to the lower line, for both options
slide VÆthe COMAND controller.
XSelect Driver's SeatorPassenger
Seatby turning cVdthe COMAND con-
troller and press Wto confirm.
Adjustment functions
Adjusting the seat cushion length
The availability of this function depends on
the type of seat and the vehicle model series.
This function allows you to adjust the height
of the seat cushion.
XSelect the seat (Ypage 316).
XSelect Seat Surfaceby turning cVdthe
COMAND Controller and press Wto con-
firm.
A scale appears.
316Vehicle functions
COMAND
Page 319 of 614
XTurncVd or slide ZVÆthe COMAND con-
troller and press Wto confirm.
XTo exit the menu: press thekback
button.
Adjusting the seat contour in the lumbar
region of the seat backrest
The availability of this function depends on
the type of seat and the vehicle model series.
This function allows you to adjust the air
cushions in the lumbar region of the backrest
(4-way lumbar support).
XSelect the seat (Ypage 316).
XSelect Lumbarby turning cVdthe
COMAND controller and press Wto con-
firm.
A crosshair appears. You can make two
settings:
RVertical: to move the point of greatest
lumbar support up or down
RHorizontal: to adjust the amount of sup-
port
XSlide ZVÆ orXVY the COMAND controller
and press Wto confirm.
XTo exit the menu: press thekback
button.
Adjusting the sides of the seat backrest
(backrest side bolsters)
The availability of this function depends on
the type of seat and the vehicle model series.
XSelect the seat (Ypage 316).
XSelect Seatb. Sidesby turning cVdthe
COMAND controller and press Wto con-
firm.
A scale appears.
XTurn cVd or slide ZVÆthe COMAND con-
troller and press Wto confirm.
XTo exit the menu: press thekback
button.
iFor vehicle model series with a dynamic
multicontour seat: if the driving dynamics
are activated and respond to a change of
direction (e.g. when cornering), the back-
rest side bolsters cannot be temporarily
adjusted.
Adjusting the seat side bolsters
The availability of this function depends on
the type of seat and the vehicle model series.
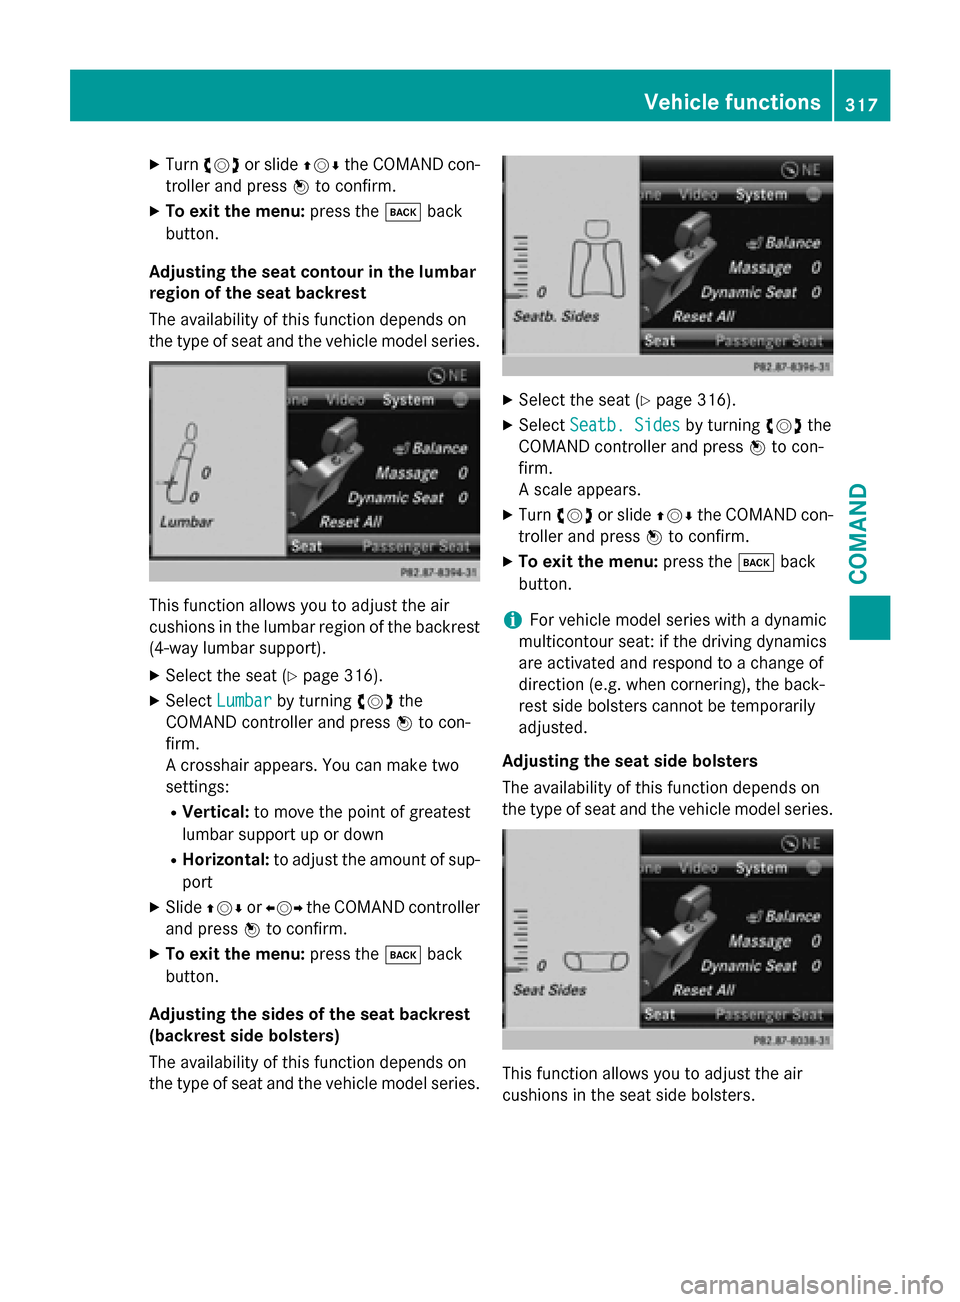
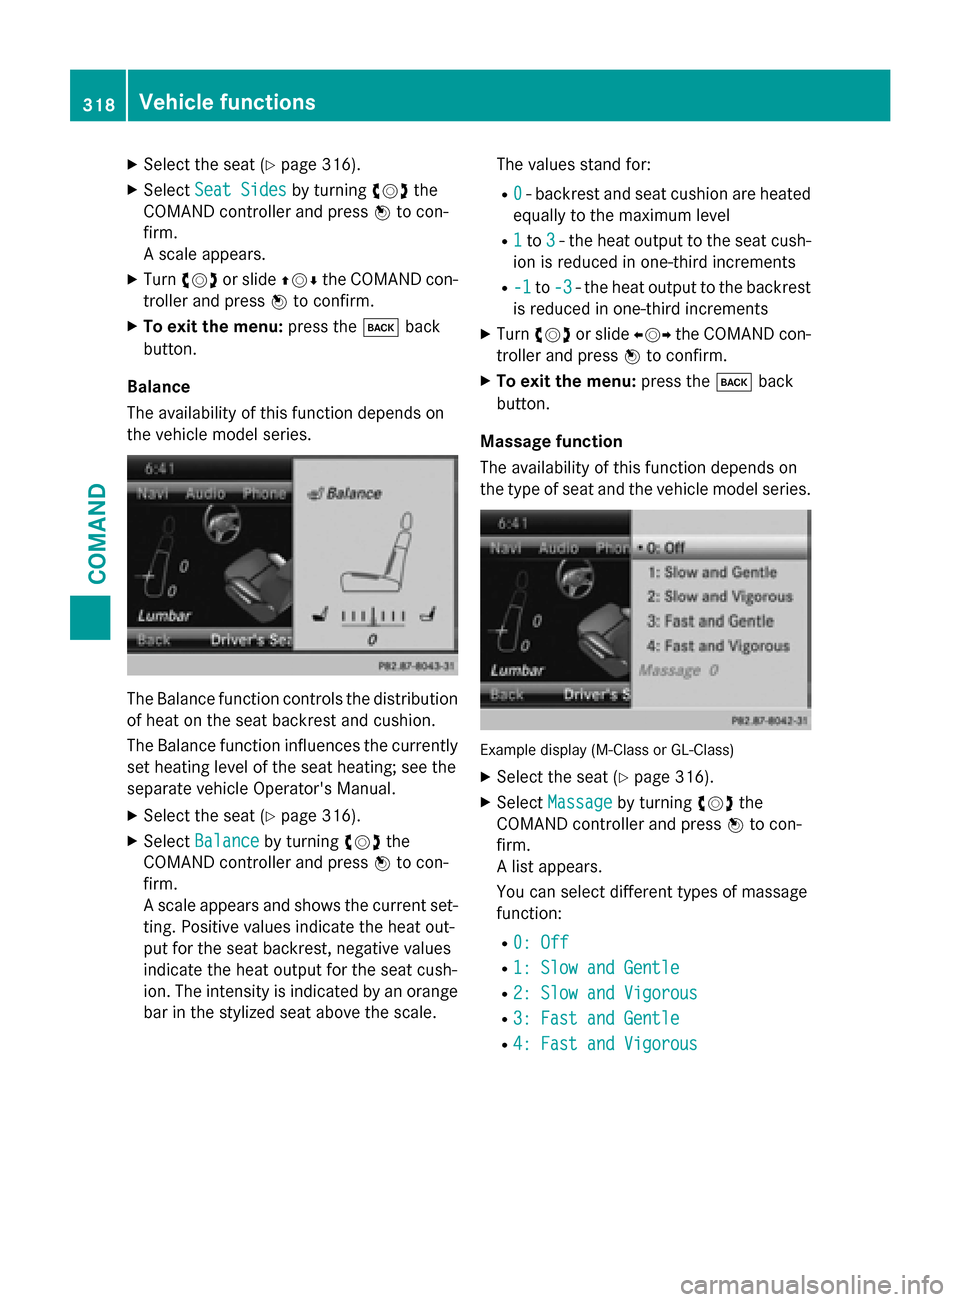
This function allows you to adjust the air
cushions in the seat side bolsters.
Vehicle functions317
COMAND
Z
Page 320 of 614
XSelect the seat (Ypage 316).
XSelectSeat Sidesby turning cVdthe
COMAND controller and press Wto con-
firm.
A scale appears.
XTurn cVd or slide ZVÆthe COMAND con-
troller and press Wto confirm.
XTo exit the menu: press thekback
button.
Balance
The availability of this function depends on
the vehicle model series.
The Balance function controls the distribution
of heat on the seat backrest and cushion.
The Balance function influences the currently
set heating level of the seat heating; see the
separate vehicle Operator's Manual.
XSelect the seat (Ypage 316).
XSelect Balanceby turning cVdthe
COMAND controller and press Wto con-
firm.
A scale appears and shows the current set-
ting. Positive values indicate the heat out-
put for the seat backrest, negative values
indicate the heat output for the seat cush-
ion. The intensity is indicated by an orange
bar in the stylized seat above the scale. The values stand for:
R0- backrest and seat cushion are heated
equally to the maximum level
R1to 3- the heat output to the seat cush-
ion is reduced in one-third increments
R-1to -3- the heat output to the backrest
is reduced in one-third increments
XTurn cVd or slide XVYthe COMAND con-
troller and press Wto confirm.
XTo exit the menu: press thekback
button.
Massage function
The availability of this function depends on
the type of seat and the vehicle model series.
Example display (M-Class or GL-Class)
XSelect the seat (Ypage 316).
XSelect Massageby turning cVdthe
COMAND controller and press Wto con-
firm.
A list appears.
You can select different types of massage
function:
R0: Off
R1: Slow and Gentle
R2: Slow and Vigorous
R3: Fast and Gentle
R4: Fast and Vigorous
318Vehicle functions
COMAND