audio MERCEDES-BENZ SL-CLASS ROADSTER 2013 Owner's Manual
[x] Cancel search | Manufacturer: MERCEDES-BENZ, Model Year: 2013, Model line: SL-CLASS ROADSTER, Model: MERCEDES-BENZ SL-CLASS ROADSTER 2013Pages: 572, PDF Size: 9.23 MB
Page 279 of 572
X
Select Rear View Camera and press W to
confirm.
X Select Activation by R gear and press
W to confirm.
The function is switched on O or off ª,
depending on the previous status.
Switching the sound on or off Audio/video source sound
X
Press the 8 button on COMAND or on
the multifunction steering wheel.
The sound from the respective audio or
video source is switched on or off.
i When the sound is off, the system
displays the , icon in the status line.
When you change the audio or video
source, or adjust the volume, sound
automatically switches on again.
i Even if
the sound is switched off, you will
still hear navigation system
announcements.
Switching off navigation announcements
X Navigation announcements: press the
8 button during the announcement.
Switching navigation announcements
back on
X Press the 8 button again.
The navigation announcements are active
again:
R
if COMAND is switched off/on with the
q control knob.
R or after starting route guidance Adjusting the volume Adjusting the volume for the audio or
video source
X
Turn the q control knob
or
X Press the W or X button on the
multifunction steering wheel.
The volume
of the currently selected audio
or video source changes.
You can also adjust the volume for the
following:
R navigation announcements
R phone calls
R voice output of the Voice Control System
(see the separate operating instructions)
Adjusting the volume for navigation
announcements
During a navigation announcement:
X Turn the q control knob
or
X Press the W or X button on the
multifunction steering wheel.
Adjusting the volume for phone calls
You can adjust the volume for hands-free
mode during a telephone call.
X Turn the q control knob
or
X Press the W or X button on the
multifunction steering wheel. At a glance
277
COMAND Z
Page 280 of 572
Adjusting the sound settings
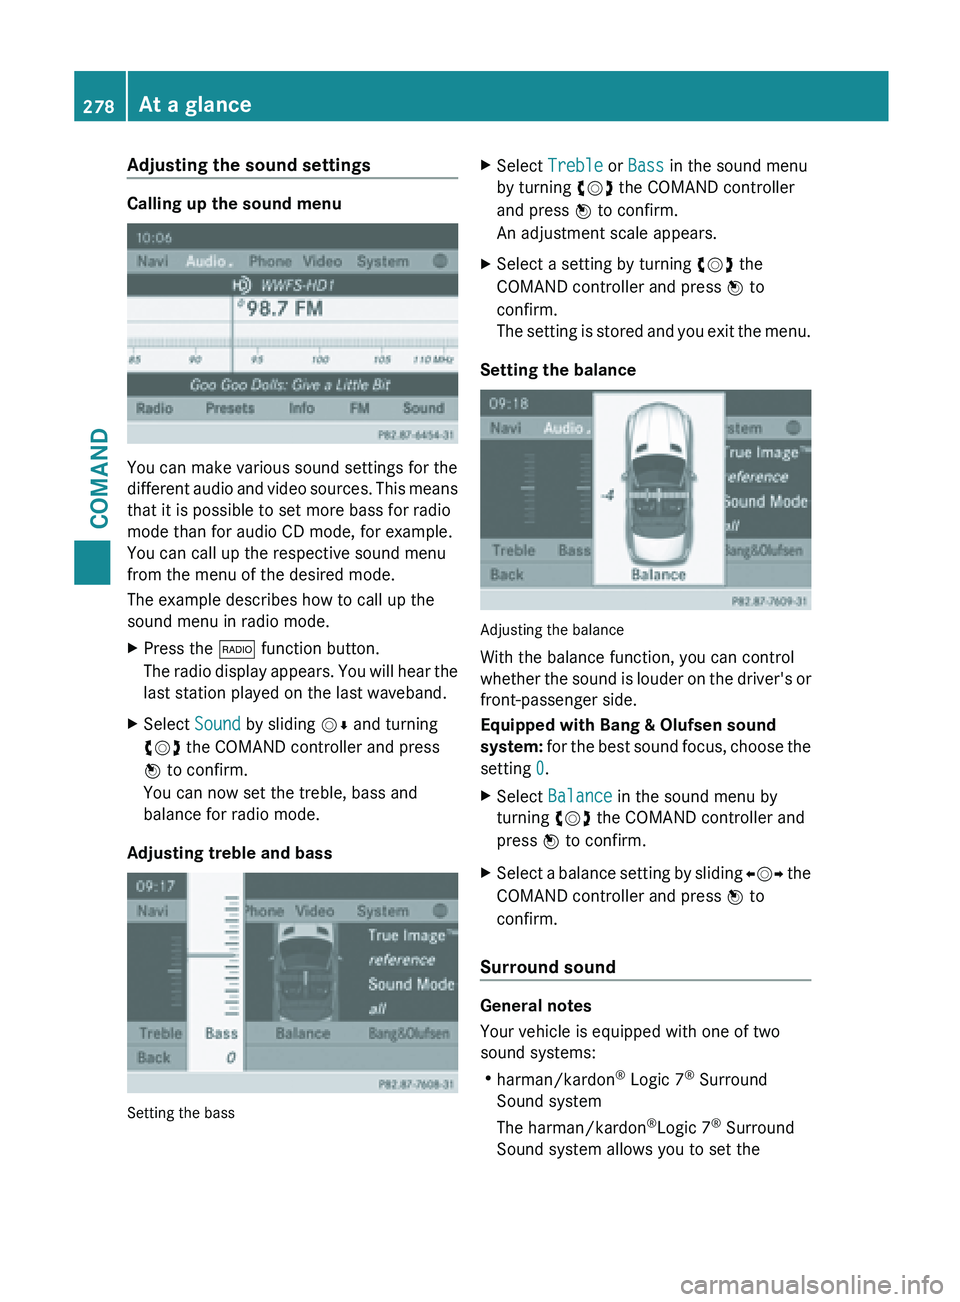
Calling up the sound menu
You can make various sound settings for the
different
audio
and video sources. This means
that it is possible to set more bass for radio
mode than for audio CD mode, for example.
You can call up the respective sound menu
from the menu of the desired mode.
The example describes how to call up the
sound menu in radio mode.
X Press the $ function button.
The radio
display appears. You will hear the
last station played on the last waveband.
X Select Sound by sliding VÆ and turning
cVd the COMAND controller and press
W to confirm.
You can now set the treble, bass and
balance for radio mode.
Adjusting treble and bass Setting the bass X
Select Treble or Bass in the sound menu
by turning cVd the COMAND controller
and press W to confirm.
An adjustment scale appears.
X Select a setting by turning cVd the
COMAND controller and press W to
confirm.
The setting
is stored and you exit the menu.
Setting the balance Adjusting the balance
With the balance function, you can control
whether
the
sound is louder on the driver's or
front-passenger side.
Equipped with Bang & Olufsen sound
system: for the best sound focus, choose the
setting 0.
X Select Balance in the sound menu by
turning cVd the COMAND controller and
press W to confirm.
X Select a balance setting by sliding XVY the
COMAND controller and press W
to
confirm.
Surround sound General notes
Your vehicle is equipped with one of two
sound systems:
R
harman/kardon ®
Logic 7 ®
Surround
Sound system
The harman/kardon ®
Logic 7 ®
Surround
Sound system allows you to set the 278
At a glance
COMAND
Page 281 of 572
optimum surround sound in the vehicle
interior (Y page 279).
R Bang & Olufsen sound system
(Y page 280)
Both sound systems are available for the
following operating modes:
R radio (FM only)
R satellite radio
R audio CD
R audio DVD (MLP, dts, PCM and Dolby
Digital audio formats)
R MP3 (including SD memory card and USB
storage device)
R Media Interface
R Bluetooth ®
audio mode
R video DVD (PCM, dts and Dolby Digital
audio formats)
R AUX
Because some
DVDs contain both stereo and
multichannel audio formats, it may be
necessary to set the audio format
(Y page 430).
Discs which support the audio formats
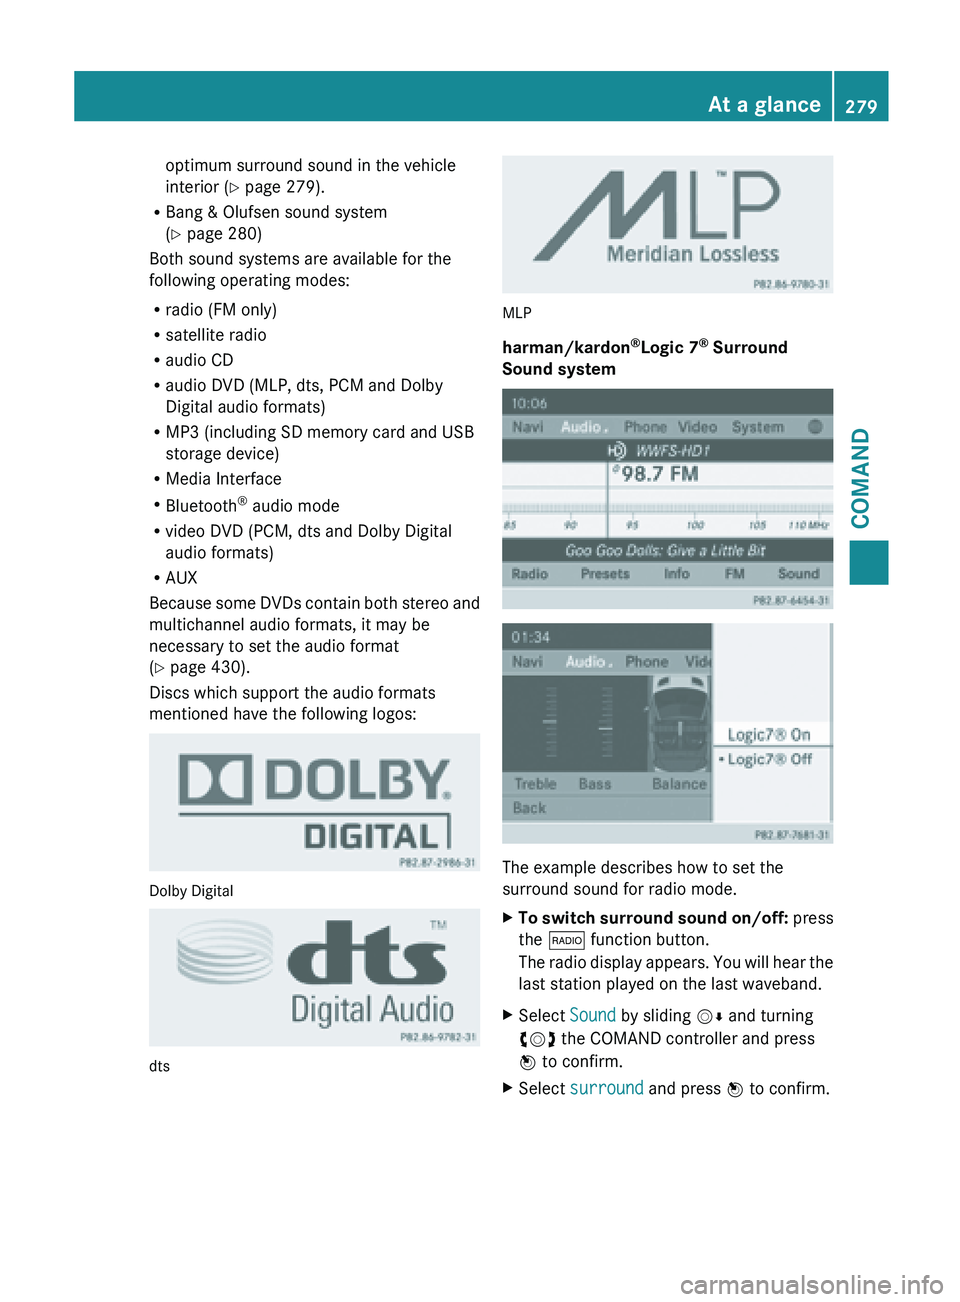
mentioned have the following logos: Dolby Digital
dts MLP
harman/kardon
®
Logic 7 ®
Surround
Sound system The example describes how to set the
surround sound for radio mode.
X
To switch surround sound on/off: press
the $ function button.
The radio
display appears. You will hear the
last station played on the last waveband.
X Select Sound by sliding VÆ and turning
cVd the COMAND controller and press
W to confirm.
X Select surround and press W to confirm. At a glance
279
COMAND Z
Page 282 of 572
X
Select Logic7 ®
On or Logic7 ®
Off by
turning cVd the COMAND controller and
press W to confirm.
Depending on your selection, surround
sound is switched on or off and the menu
is exited.
X To exit the menu without saving: press
the % back button or slide XVY the
COMAND controller.
i Please note the following: for the
optimum audio experience for all
passengers when Logic7 ®
is switched on,
the balance should be set to the center of
the vehicle interior.
You will achieve the best sound results by
playing high-quality
audio and video DVDs.
MP3 tracks should have a bit rate of at least
128 kbit/s.
Surround sound playback does not
function for mono signal sources, such as
for AM radio mode.
If radio reception is poor, e.g. in a tunnel,
you should switch off Logic7 ®
, since it may
otherwise switch dynamically between
stereo and mono and cause temporary
sound distortions.
On some stereo recordings, the sound
characteristics may differ from
conventional stereo playback.
i The Logic7 ®
On function creates a
surround sound experience for every
passenger when playing stereo recordings,
for example. It enables optimum playback
of music and films on CD, audio DVD or
video DVD with multichannel audio
formats, such as MLP, dts or Dolby Digital.
This results in sound characteristics like
those intended by the sound engineer
when the original was recorded.
i If you select Logic7®
Off , all permissible
formats are played as stored on the
medium. Due to the design of the
passenger compartment, an optimum
audio experience cannot be guaranteed for
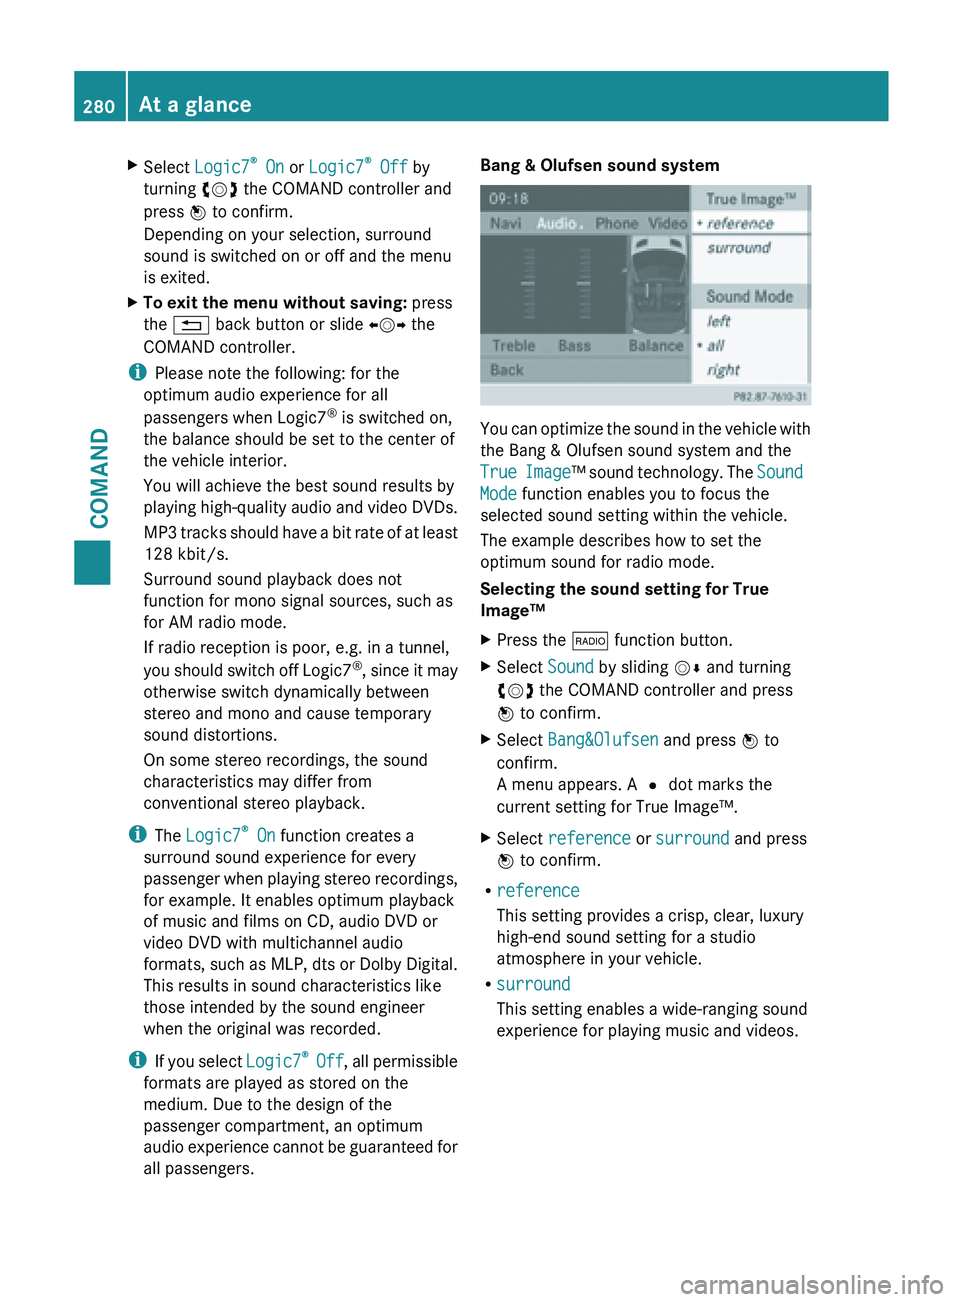
all passengers. Bang & Olufsen sound system
You can optimize the sound in the vehicle with
the Bang & Olufsen sound system and the
True
Image
™ sound technology. The Sound
Mode function enables you to focus the
selected sound setting within the vehicle.
The example describes how to set the
optimum sound for radio mode.
Selecting the sound setting for True
Image™
X Press the $ function button.
X Select Sound by sliding VÆ and turning
cVd the COMAND controller and press
W to confirm.
X Select Bang&Olufsen and press W to
confirm.
A menu appears. A # dot marks the
current setting for True Image™.
X Select reference or surround and press
W to confirm.
R reference
This setting provides a crisp, clear, luxury
high-end sound setting for a studio
atmosphere in your vehicle.
R surround
This setting enables a wide-ranging sound
experience for playing music and videos.280
At a glance
COMAND
Page 283 of 572
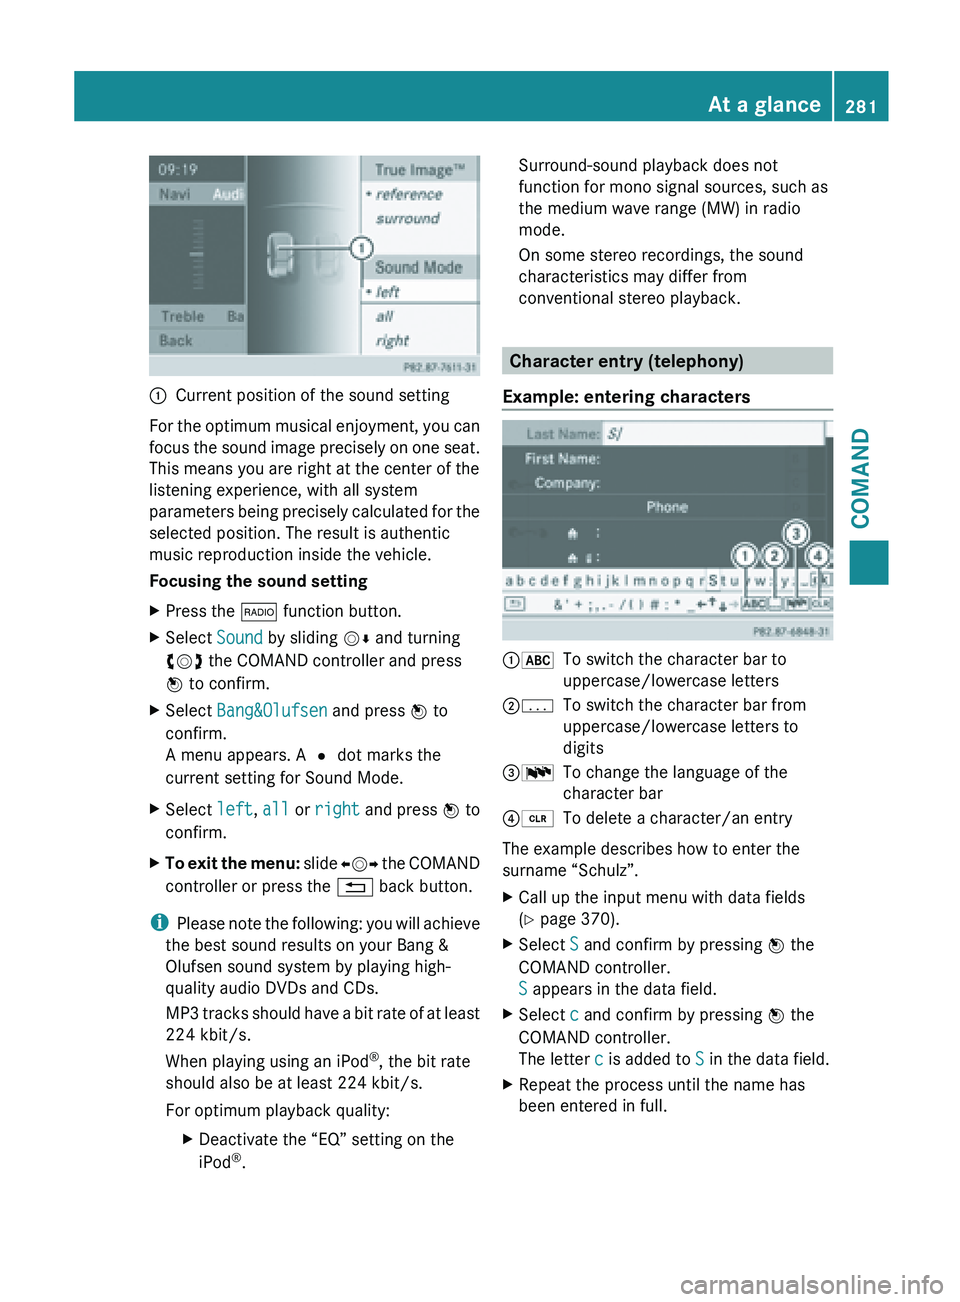
:
Current position of the sound setting
For the optimum musical enjoyment, you can
focus the
sound image precisely on one seat.
This means you are right at the center of the
listening experience, with all system
parameters being precisely calculated for the
selected position. The result is authentic
music reproduction inside the vehicle.
Focusing the sound setting
X Press the $ function button.
X Select Sound by sliding VÆ and turning
cVd the COMAND controller and press
W to confirm.
X Select Bang&Olufsen and press W to
confirm.
A menu appears. A # dot marks the
current setting for Sound Mode.
X Select left, all or right and
press W to
confirm.
X To exit the menu: slide XVY
the COMAND
controller or press the % back button.
i Please note
the following: you will achieve
the best sound results on your Bang &
Olufsen sound system by playing high-
quality audio DVDs and CDs.
MP3 tracks should have a bit rate of at least
224 kbit/s.
When playing using an iPod ®
, the bit rate
should also be at least 224 kbit/s.
For optimum playback quality:
XDeactivate the “EQ” setting on the
iPod ®
. Surround-sound playback does not
function for mono signal sources, such as
the medium wave range (MW) in radio
mode.
On some stereo recordings, the sound
characteristics may differ from
conventional stereo playback.
Character entry (telephony)
Example: entering characters :*
To switch the character bar to
uppercase/lowercase letters
;p To switch the character bar from
uppercase/lowercase letters to
digits
=B To change the language of the
character bar
?2 To delete a character/an entry
The example describes how to enter the
surname “Schulz”.
X Call up the input menu with data fields
(Y page 370).
X Select S and confirm by pressing W the
COMAND controller.
S appears in the data field.
X Select c and confirm by pressing W the
COMAND controller.
The letter c is added to S in the data field.
X Repeat the process until the name has
been entered in full. At a glance
281
COMAND Z
Page 327 of 572
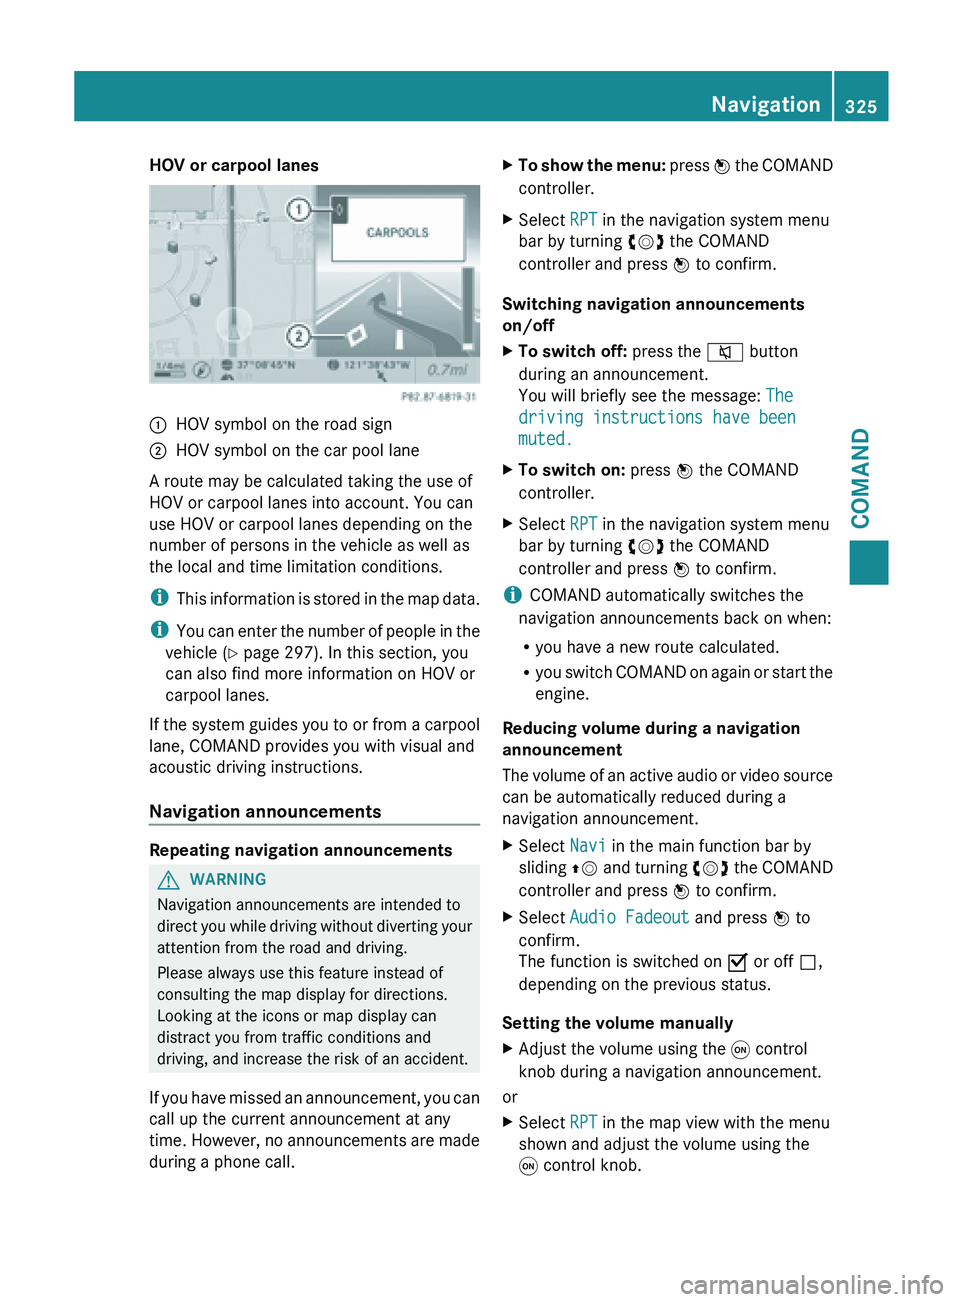
HOV or carpool lanes
:
HOV symbol on the road sign
; HOV symbol on the car pool lane
A route may be calculated taking the use of
HOV or carpool lanes into account. You can
use HOV or carpool lanes depending on the
number of persons in the vehicle as well as
the local and time limitation conditions.
i This information
is stored in the map data.
i You can enter the number of people in the
vehicle ( Y page 297). In this section, you
can also find more information on HOV or
carpool lanes.
If the system guides you to or from a carpool
lane, COMAND provides you with visual and
acoustic driving instructions.
Navigation announcements Repeating navigation announcements
G
WARNING
Navigation announcements are intended to
direct you
while driving without diverting your
attention from the road and driving.
Please always use this feature instead of
consulting the map display for directions.
Looking at the icons or map display can
distract you from traffic conditions and
driving, and increase the risk of an accident.
If you have missed an announcement, you can
call up the current announcement at any
time. However, no announcements are made
during a phone call. X
To show the menu: press W
the COMAND
controller.
X Select RPT in the navigation system menu
bar by turning cVd the COMAND
controller and press W to confirm.
Switching navigation announcements
on/off
X To switch off: press the 8 button
during an announcement.
You will briefly see the message: The
driving instructions have been
muted.
X To switch on: press W the COMAND
controller.
X Select RPT in the navigation system menu
bar by turning cVd the COMAND
controller and press W to confirm.
i COMAND automatically switches the
navigation announcements back on when:
R you have a new route calculated.
R you switch
COMAND on again or start the
engine.
Reducing volume during a navigation
announcement
The volume of an active audio or video source
can be automatically reduced during a
navigation announcement.
X Select Navi in the main function bar by
sliding ZV and
turning cVd the COMAND
controller and press W to confirm.
X Select Audio Fadeout and press W to
confirm.
The function is switched on O or off ª,
depending on the previous status.
Setting the volume manually
X Adjust the volume using the q control
knob during a navigation announcement.
or
X Select RPT in the map view with the menu
shown and adjust the volume using the
q control knob. Navigation
325
COMAND Z
Page 363 of 572
i
Mercedes-Benz recommends de-
authorization in COMAND and on the
mobile phone ( Y page 362). Subsequent
authorization may otherwise fail.
X To enter a passkey in COMAND: press
the number keys in turn.
or
X Select the digits in the digit bar one by one
by turning cVd the COMAND controller
and pressing W to confirm.
¬ is highlighted after the first number
has been entered.
X In both cases, select ¬ and press W to
confirm.
X To enter the passkey on the mobile
phone: if the Bluetooth ®
connection is
successful, you will be requested to enter
the passkey
(access code, passkey; see the
mobile phone operating instructions).
X Enter the same passkey in the mobile
phone as the one already entered in
COMAND.
The message Connecting Bluetooth
Profiles... appears.
The Authorization successful
message appears once authorization is
completed.
The mobile phone is authorized and
connected to COMAND. You can now make
phone calls using the COMAND hands-free
system.
i After entering the passkey, you may also
need to
enter a confirmation in your mobile
phone to connect calls. Please check your
mobile phone display. On some mobile
phones, this confirmation can be saved. In
this case, you do not need to enter it again.
If the COMAND display shows the
Authorization failed message, you
may have exceeded the prescribed time
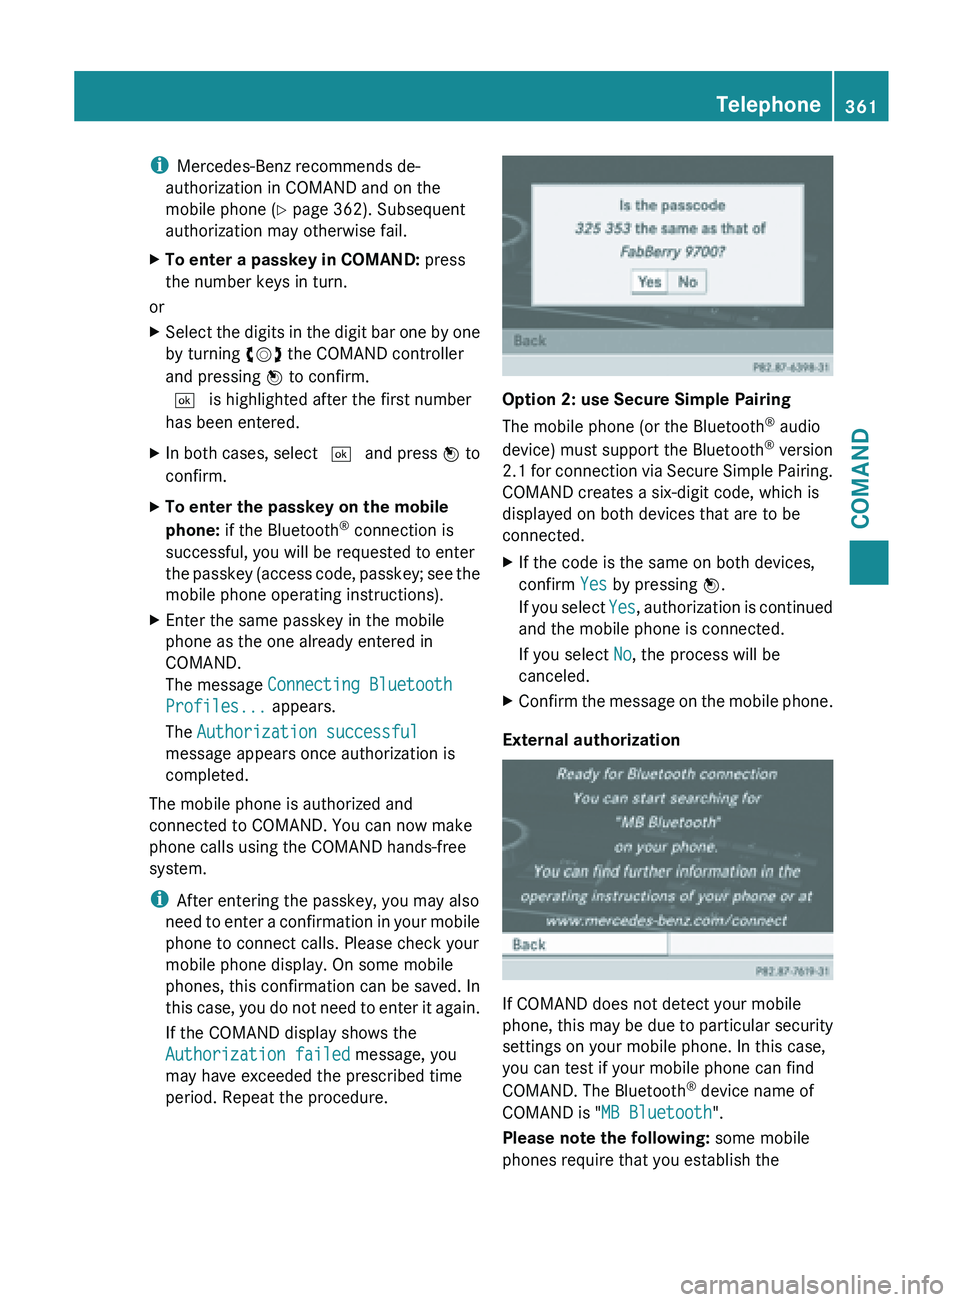
period. Repeat the procedure. Option 2: use Secure Simple Pairing
The mobile phone (or the Bluetooth
®
audio
device) must support the Bluetooth ®
version
2.1 for
connection via Secure Simple Pairing.
COMAND creates a six-digit code, which is
displayed on both devices that are to be
connected.
X If the code is the same on both devices,
confirm Yes by pressing W.
If you
select Yes, authorization is continued
and the mobile phone is connected.
If you select No, the process will be
canceled.
X Confirm the message on the mobile phone.
External authorization If COMAND does not detect your mobile
phone,
this
may be due to particular security
settings on your mobile phone. In this case,
you can test if your mobile phone can find
COMAND. The Bluetooth ®
device name of
COMAND is "MB Bluetooth".
Please note the following: some mobile
phones require that you establish the Telephone
361
COMAND Z
Page 413 of 572
COMAND controller and press
W to
confirm.
X Select a setting using the COMAND
controller and press W to confirm.
i If you change the settings, the websites
may not be displayed correctly.
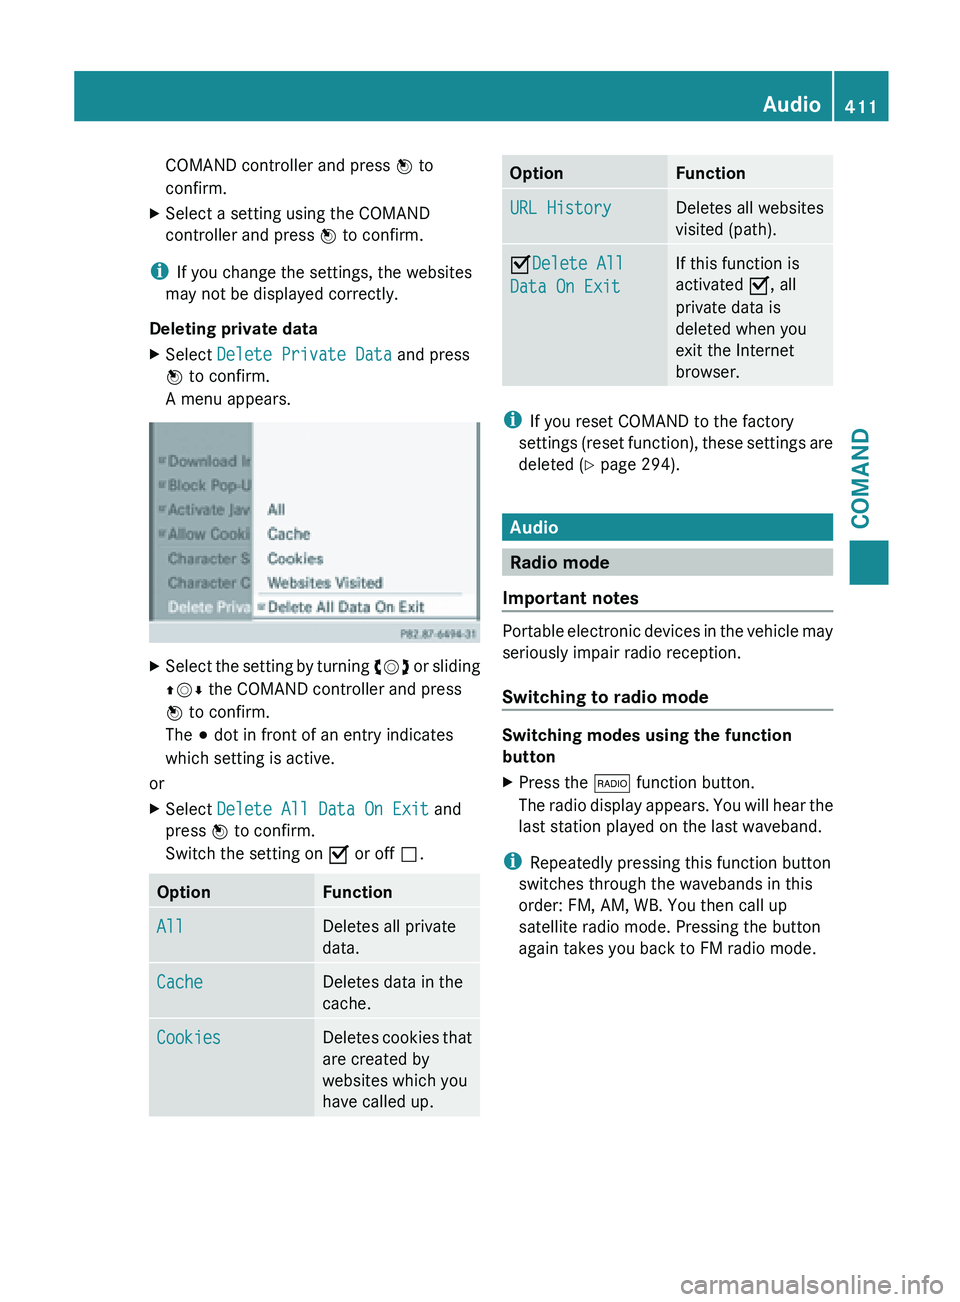
Deleting private data
X Select Delete Private Data and press
W to confirm.
A menu appears. X
Select the setting by turning cVd or sliding
ZVÆ the COMAND controller and press
W to confirm.
The # dot in front of an entry indicates
which setting is active.
or
X Select Delete All Data On Exit and
press W to confirm.
Switch the setting on O or off ª.Option Function
All Deletes all private
data.
Cache Deletes data in the
cache.
Cookies Deletes cookies that
are created by
websites which you
have called up. Option Function
URL History Deletes all websites
visited (path).
ODelete All
Data On Exit If this function is
activated O, all
private data is
deleted when you
exit the Internet
browser.
i
If you reset COMAND to the factory
settings (reset
function), these settings are
deleted ( Y page 294). Audio
Radio mode
Important notes Portable electronic devices in the vehicle may
seriously impair radio reception.
Switching to radio mode
Switching modes using the function
button
X
Press the $ function button.
The radio
display appears. You will hear the
last station played on the last waveband.
i Repeatedly pressing this function button
switches through the wavebands in this
order: FM, AM, WB. You then call up
satellite radio mode. Pressing the button
again takes you back to FM radio mode. Audio
411
COMAND Z
Page 414 of 572
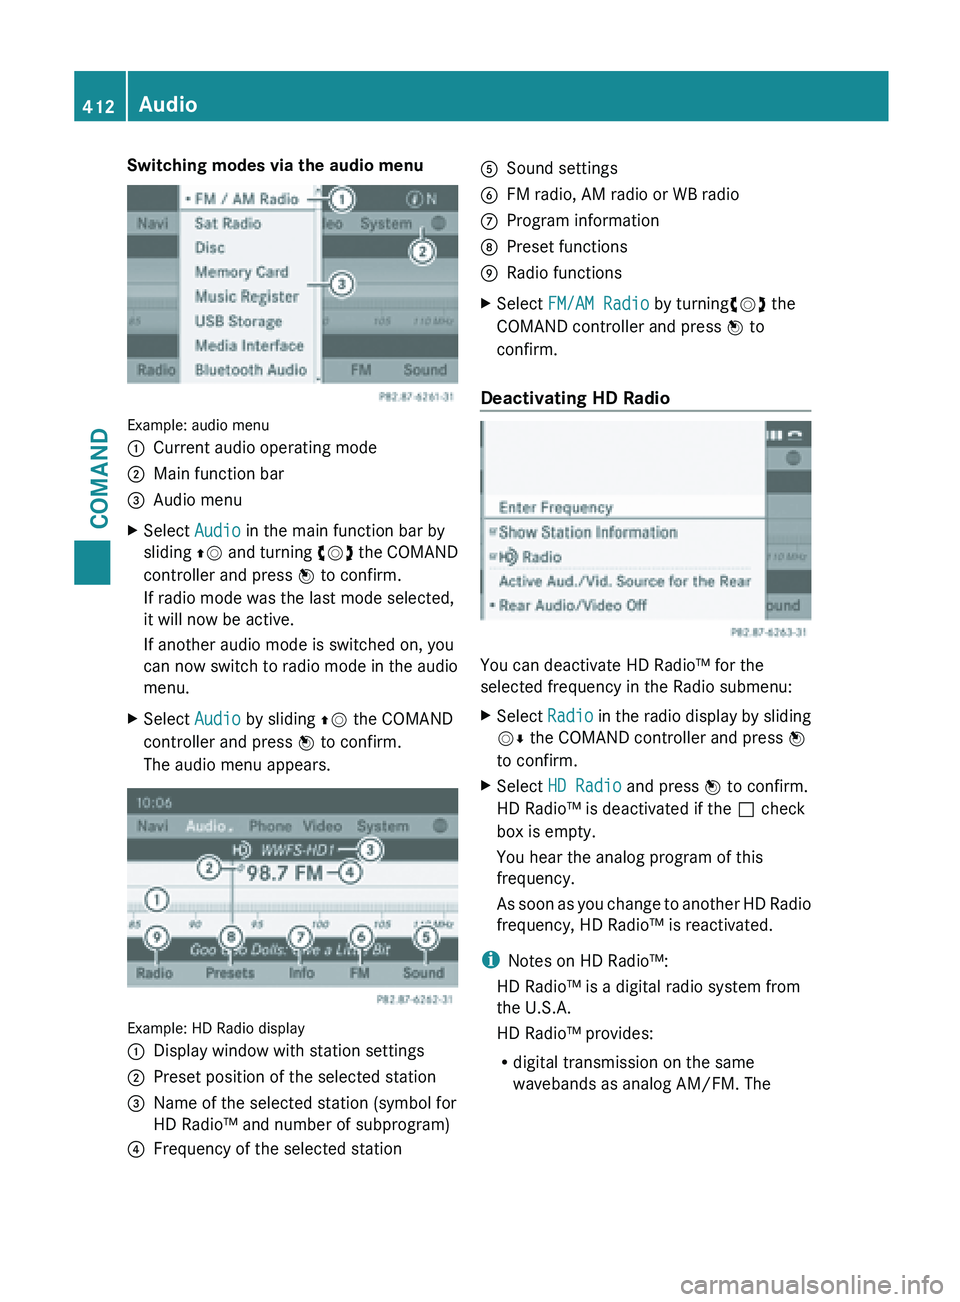
Switching modes via the audio menu
Example: audio menu
:
Current audio operating mode
; Main function bar
= Audio menu
X Select Audio in the main function bar by
sliding ZV and
turning cVd the COMAND
controller and press W to confirm.
If radio mode was the last mode selected,
it will now be active.
If another audio mode is switched on, you
can now switch to radio mode in the audio
menu.
X Select Audio by sliding ZV the COMAND
controller and press W to confirm.
The audio menu appears. Example: HD Radio display
:
Display window with station settings
; Preset position of the selected station
= Name of the selected station (symbol for
HD Radio™ and number of subprogram)
? Frequency of the selected station A
Sound settings
B FM radio, AM radio or WB radio
C Program information
D Preset functions
E Radio functions
X Select FM/AM Radio by turningcVd the
COMAND controller and press W to
confirm.
Deactivating HD Radio You can deactivate HD Radio™ for the
selected frequency in the Radio submenu:
X
Select Radio in
the radio display by sliding
VÆ the COMAND controller and press W
to confirm.
X Select HD Radio and press W to confirm.
HD Radio™ is deactivated if the ª check
box is empty.
You hear the analog program of this
frequency.
As soon
as you change to another HD Radio
frequency, HD Radio™ is reactivated.
i Notes on HD Radio™:
HD Radio™ is a digital radio system from
the U.S.A.
HD Radio™ provides:
R digital transmission on the same
wavebands as analog AM/FM. The412
Audio
COMAND
Page 415 of 572
analog AM/FM stations remain in the
same position when selecting a station.
R broadcasting of
several program streams
over a single FM frequency (e.g. HD1,
HD2, etc.).
R clear, interference free reception
R FM: CD quality sound
AM: analog FM station sound quality
R the display of text-based information
(e.g. artist, track name) in the display
For further information on HD Radio™, visit
http://www.hdradio.com .
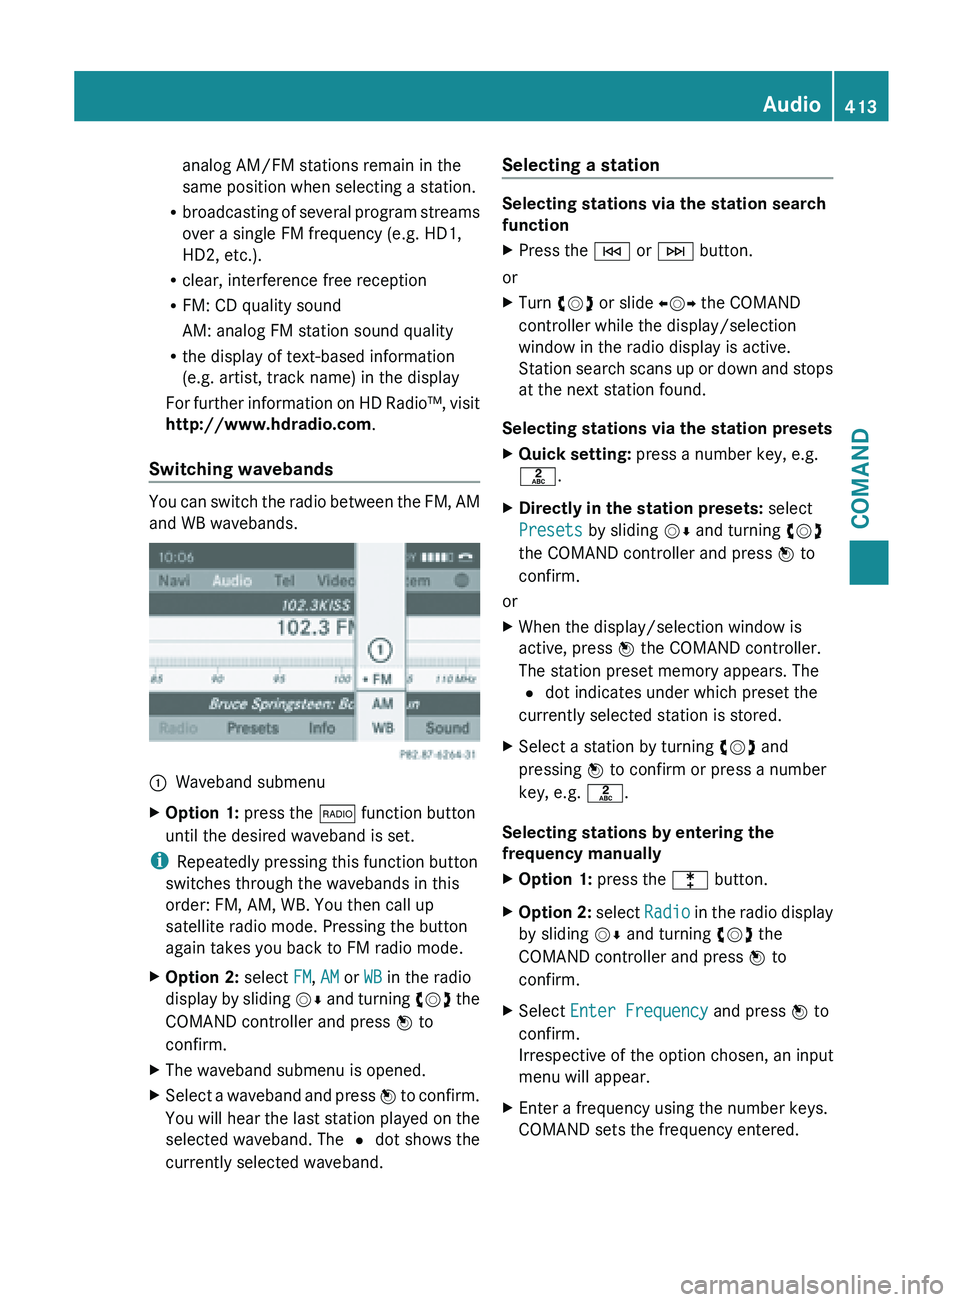
Switching wavebands You can switch the radio between the FM, AM
and WB wavebands.
:
Waveband submenu
X Option 1: press the $ function button
until the desired waveband is set.
i Repeatedly pressing this function button
switches through the wavebands in this
order: FM, AM, WB. You then call up
satellite radio mode. Pressing the button
again takes you back to FM radio mode.
X Option 2: select FM, AM or WB in the radio
display by
sliding VÆ and turning cVd the
COMAND controller and press W to
confirm.
X The waveband submenu is opened.
X Select a waveband and press W to
confirm.
You will hear the last station played on the
selected waveband. The # dot shows the
currently selected waveband. Selecting a station Selecting stations via the station search
function
X
Press the E or F button.
or
X Turn cVd or slide XVY the COMAND
controller while the display/selection
window in the radio display is active.
Station search
scans up or down and stops
at the next station found.
Selecting stations via the station presets
X Quick setting: press a number key, e.g.
l.
X Directly in the station presets: select
Presets by sliding VÆ and turning cVd
the COMAND controller and press W to
confirm.
or
X When the display/selection window is
active, press W the COMAND controller.
The station preset memory appears. The
# dot indicates under which preset the
currently selected station is stored.
X Select a station by turning cVd and
pressing W to confirm or press a number
key, e.g. l.
Selecting stations by entering the
frequency manually
X Option 1: press the l button.
X Option 2: select
Radio
in the radio display
by sliding VÆ and turning cVd the
COMAND controller and press W to
confirm.
X Select Enter Frequency and press W to
confirm.
Irrespective of the option chosen, an input
menu will appear.
X Enter a frequency using the number keys.
COMAND sets the frequency entered. Audio
413
COMAND Z