phone MERCEDES-BENZ SLC ROADSTER 2018 Owner's Guide
[x] Cancel search | Manufacturer: MERCEDES-BENZ, Model Year: 2018, Model line: SLC ROADSTER, Model: MERCEDES-BENZ SLC ROADSTER 2018Pages: 298, PDF Size: 5.26 MB
Page 171 of 298
the presetlistors tationlistint he desired
frequency range is shown.
XTo select astation: brieflypress 9
or :.
SIRIUS XM
®satellite radi oacts like anormal
radio.
For mor einformation on radi ooperation, see
"Satellite radio" in the Digita lOperator' sMan-
ual.
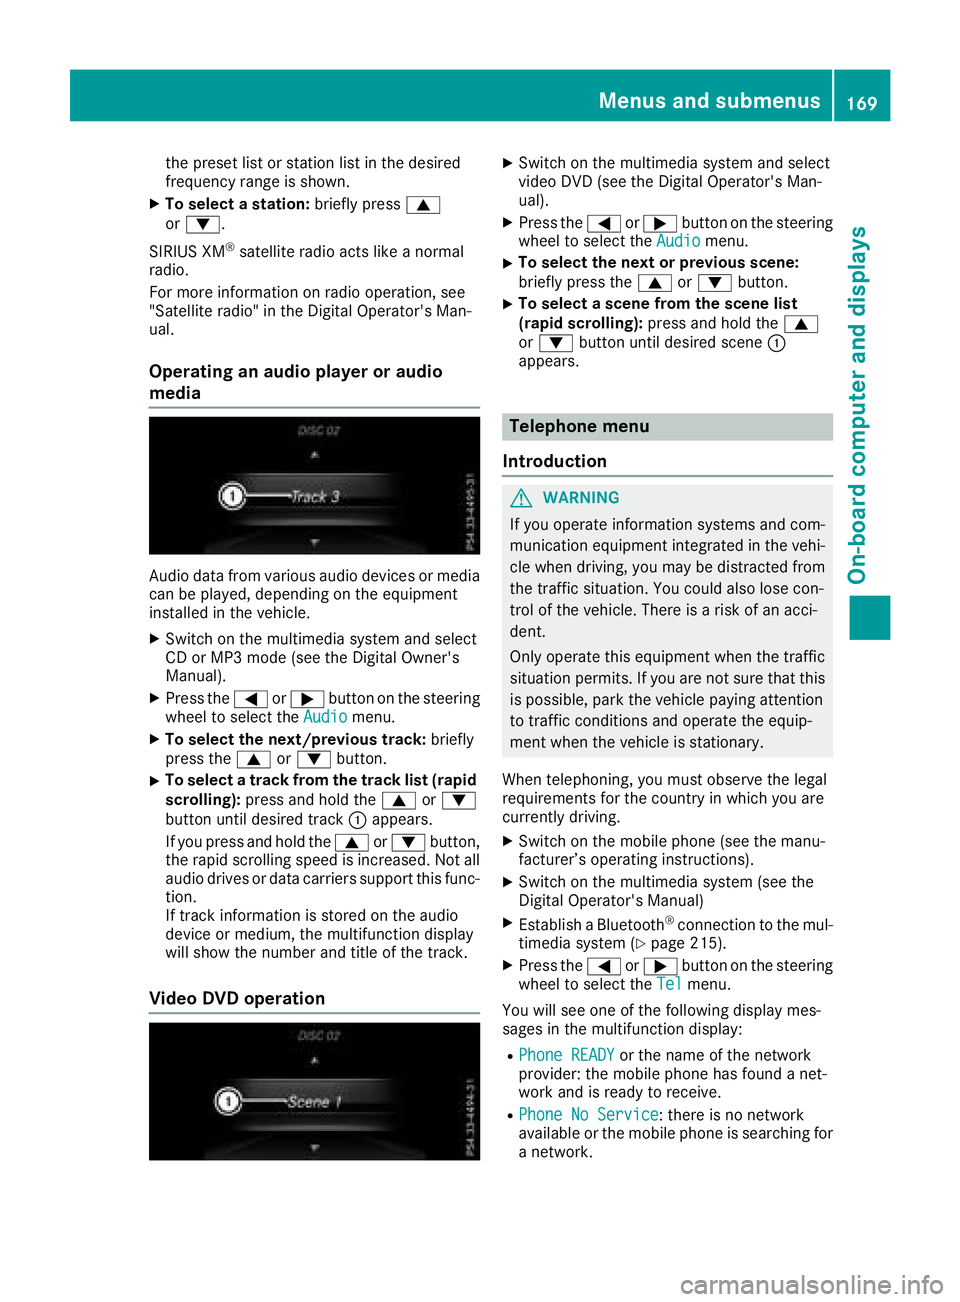
Operatin ganaudiop layer or audio
media
Audio data fromv arious audi odevices or media
can be played ,depen ding on the equipment
installe dinthe vehicle.
XSwitch on the multimedia systema nd select
CD or MP3m ode( seet he Digita lOwn er's
Manual).
XPress the =or; button on the steering
whee ltoselect theAudiomenu.
XTo select the next/previous track: briefly
press the 9or: button.
XTo select atrackf romthe trackl ist( rapid
scrolling): press and hol dthe 9 or:
button unti ldesir ed track :appears.
If yo upress and hol dthe 9 or: button,
the rapi dscrolling spee disincreased. Not all
audi odrives or data carriers support thisf unc-
tion.
If track information is stored on the audio
devic eorm edium, the multifunctio ndisplay
will sho wthe numbe rand titl eofthe track.
VideoDVD operation
XSwitch on the multimedia systema nd select
video DVD (see the Digita lOperator' sMan-
ual).
XPress the =or; button on the steering
whee ltoselect theAudiomenu.
XTo select the next or previous scene:
briefl ypress the 9or: button.
XTo select ascene fromt he scen elist
(rapid scrolling): press and holdthe 9
or : button unti ldesir ed scene :
appears.
Telephon emenu
Introduction
GWARNING
If yo uoperate information systems and com-
municatio nequipment integrated in the vehi-
cle when driving, yo umaybe distracted from
the traffics ituation. Yo ucould also lose con-
trol of the vehicle. There is ariskofana cci-
dent.
Onlyo perate thise quipmentwhen the traffic
situatio npermits. If yo uarenot sure thatt his
is possible, park the vehicl epayin gattention
to trafficc onditions and operate the equip-
ment when the vehicl eisstationary.
When telephoning ,you must observe the legal
requirements for the country in which yo uare
currentl ydriving.
XSwitch on the mobil ephone (see the manu-
facturer’ soperating instructions).
XSwitch on the multimedia system( seet he
Digita lOperator' sManual)
XEstablis haBluetooth®connectio ntothe mul-
timedia system(Ypage 215).
XPress the =or; button on the steering
whee ltoselect theTelmenu.
Yo uw ills ee one of the following displa ymes-
sage sint he multifunctio ndisplay :
RPhone READYor the nam eofthe network
provider: the mobil ephone hasf oundanet-
work and is ready to receive.
RPhone No Service:t here is no network
availabl eorthe mobil ephone is searching for
an etwork.
Menus and submenus169
On-board computer and displays
Z
Page 172 of 298
Acceptingacall
If someon ecallsy ou when you are in th eTelmenu, adisplay message appear sinthemulti-
function display.
You can accept acall at any time regardless of
th em enus elected.
XPress th e6 buttonont hesteering whee l
to accept an incoming call .
Rejectsorendsac all
XPress the~ buttonont hesteering whee l
to rejec torendacall.
Selecting an entry in thephone book
XPress th e= or; buttononthesteering
whee ltos elect th eTelmenu.
XPress th e9, :ora buttonto
switch to th ephone book .
XAuthorizeaccess to th ephone book on th e
phone .
XPress:or9 to select th enames on e
after th eother.
or
XTo star trap id scrolling: press and hold
th e: or9 buttonfor longer than on e
second.
The names in th ephone book are displayed
quickl yone after th eother.
Rapid scrollin gstops when you release th e
butto norr eachthe endoft helist.
XIf only one telephone number is store dfor
an ame: press th e6 ora buttonto
start dialing.
or
XIf there is mor ethano ne number for a
particular name: press the6 ora
butto ntod isplay th enumbers.
XPress th e9 or: buttontos elect th e
number you want to dial.
XPress th e6 ora buttontostart dialing.
or
XTo exit th etelephone book :press th e~
or % button.
Redialing
The on-board computer saves th elast names or
number sdialed in th eredial memory.
XPress th e= or; buttononthesteering
whee ltos elect th eTelmenu.
XPress th e6 buttontos witch to th eredial
memory.
XPress th e9 or: buttontos elect th e
desired nam eornumber .
XPress th e6 ora buttontostart dialing.
or
XTo exit th eredial memory :press th e~
or % button.
Assistance menu
Introd uction
Dependin gonyour vehicle's equipment, in th e
DriveAssistmenu, you hav ethe followin g
options:
RDisplaying th eassistanc egraphic
(Ypage 170)
RActivating/deactivating Active Brake Assis t
(Ypage 171)
RActivating/deactivating ATTENTION ASSIST
(Ypage 171)
RActivating/deactivating Blind Spot Assis t
(Ypage 171)
RActivating/deactivating Lan eKeepin gAssist
(Ypage 171)
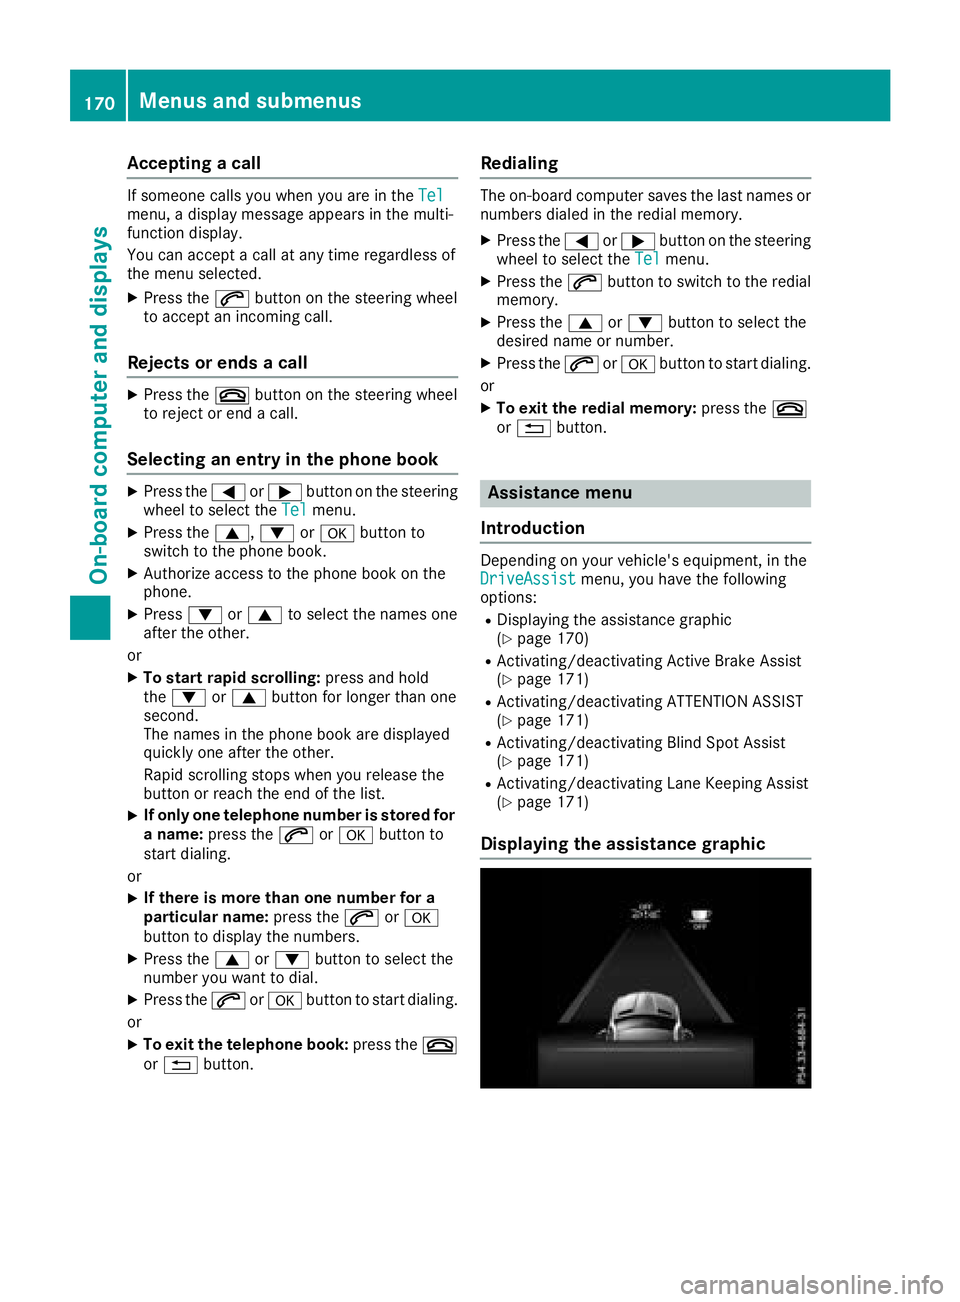
Displaying th eassistance graphic
170Menusa nd submenus
On-boardc omputer andd isplays
Page 202 of 298
Display messagesPossible causes/consequences andMSolutions
NThe trunk lid is open.
XClosethe trunk lid.
MThe hoo disopen.
GWARNIN G
The open hoo dmay bloc kyour vie wwhen th evehicl eisinm otion.
There is ariskofana ccident.
XPull overand stop th evehicl esafely as soo naspossible, payin g
attention to roa dand traffic conditions.
XSecur ethe vehicl eagainst rollin gaway (Ypage 131).
XClosethe hood.
CAt least on edoor is open .Awarning tone also sounds.
XCloseall th edoors.
Ð
Power Steering Mal ‐function See Opera‐tor's Manual
The powersteering is malfunctioning .
Aw arning tone also sounds.
GWARNIN G
You will need to use mor eforce to steer .
There is ariskofana ccident.
XCheckwhether you are able to apply th eextra force required.
XIf you ar eabletos teer safely: carefully drive on to aqualified
specialist workshop .
XIf you areunable to steer safely: do notdrive on .Contac tthe
neares tqualified specialist workshop .
J
TrunkPartitionOpen
The trunk partition is open or th etrunk is loade dtoo high .
XStow th eload suc hthatthe trunk partition can close unhindere d
and is no tpushed upwards.
XClos ethe trunk partition (Ypage 80).
Phone No Servic eYour vehicleisoutside th enetwork provider' stransmitter/receiver
range.
XWait until th emobile phone operational readiness symbol appear s
in th emultifunction display.
K
Decrease Speed
You wante dtoopen th eroofw hile th evehicl ewas in motion .
XPull overand stop th evehicl esafely as soo naspossible, payin g
attention to roa dand traffic conditions.
XOpe nthe roo f(Ypage 78).
K
Vario-Roo fLowering
The roo fisnotfull yopened or closed .The hydraulic sare depressur-
ized.
XFull yopen or close th eroof(Ypage 78).
200Display messages
On-boardc omputer andd isplays
Page 216 of 298
Traffic reports on the route for the route guid-
ance are taken into account (not availablein
all countries).
RDynamic TRF. Route After Request
You can decide whether or not current traffic reports should be included in the route cal-
culation (not availableina ll countries).
RCalculate Alternative Routes
Different routes are being calculated. In order
to do so, instead of Start,select the menu
item Continue.
XTo avoid/use rout eoptions: selectAvoid
Options.
XSelect aroute option.
Notes for route options:
RUse Toll Roads
The route calculation includes roads which
require you to pay ausage fee (toll).
RNumber of Occupants in the Vehicle:(only availableint he USA)
Prerequisite: your vehicle meets the access
conditions for carpool lanes.
Carpool lanes will be included if the carpool
lanes option is activated.
Entering an address
Multimedia system:
XSelect NaviQNavigation.
The map shows the vehicle's current position.
XSlide 6the controller.
XSelect DestinationQAddress Entry.
Enter an address, e.g. as follows:
Rcity or ZIP code, street ,house number
Rstate/province, city or ZIP code
Rcity or ZIP code, center
Rstreet ,city or ZIP code, intersection
XSelect City.
The city in which the vehicle is currently loca-
ted (current vehicle position) is at the top.
Below this, you will see locations for which
route guidance has already been carried out.
XEnter the city.
The Gsymbol: the location is contained on
the digital map multiple times.
XTo switch to the list: slide5the control-
ler.
XSelect the location.
If available, the ZIP code is shown. If there are
different ZIP codes availablef or the location,
the corresponding digits are displayed with an
X
.
XEnter the street and house number.
The address is in the menu.
Further options for destination entry:
Rsearch for akeyword
The keyword search finds destinations using
fragmentsofw ords.
Rselect the last destination
Rselectacontact
Rselect aPOI
You can search for aPOI by location, name or
telephone number.
Rselect destination on the map
Renter intermediate destination
You can map the route to the destination
yourself with up to four intermediate destina-
tions.
Rselect destinations from Mercedes-Benz
Apps
Rselect geo-coordinates
Calculating the route
Prerequisite: the address has been entered and
is in the menu.
XSelect StartorContinue.
The route is calculated with the selected route
type and the selected route options.
If route guidance has already been activated,
ap rompt will appear asking whether you wish
to end the current route guidance.
XSelect Cancel Active Route Guidanceor
Set as IntermediateD estination.
Cancel Active Route Guidancecancels
the current route guidance and start sroute
calculation to the new destination.
Set as IntermediateD estination
adds
the new destination in addition to the existing
destination and opens the intermediate des-
tinations list.
214Operating system
Multimedia system
Page 217 of 298

Connectingamobile phone
(COMAND)
Requirements
For telephony via th eBluetooth®interface, you
require aBluetooth®-capable mobile phone. The
mobile phonem ust support Hands-Free Profile
1. 0ora bove.
Multimedia system:
XSelect VehicleQSystem Set‐tingsQActivate Bluetooth.
XActivate Bluetooth®O.
Mobilep hone:
XActivate Bluetooth®and,ifn ecessary, Blue-
tooth®visibilityf or other devices (see the
manufacturer'so peratinginstructions).
The Bluetooth
®device names for all of onem an-
ufacturer'sp roductsmightbei dentical. To
mak eitp ossible to clearly identif yyour mobile
phone, chang ethe device nam e(see th eman-
ufacturer'so peratinginstructions).
If th emobile phones upportsthe PBA P(Phone
B oo kAccess Profile) and MAP( Message
Acc ess Profile )Bluetooth
®profiles, th efollow-
ing informatio nwill be transmitte dafter you
connect:
RPhoneb ook
RCall lists
RTextmessages and e-mail
iFurther informatio nonsuitable mobile
phones can be foun dat:http://
www.mercedes-benz.com/connect
iIn th eUSA,you can get in touch witht he
Mercedes-Ben zCustome rAssistanc eCenter
on 1-800-FOR-MERCedes (1-800-367-6372 ).
In Canada, you can get in touch with the Cus-
tomer Relations Center on 1-800-387-0100.
Searchin gfor and authorizing (connect-
ing) amobile phone
Before using you rmobilep hone with the multi-
media system for the first time, you willn eed to
search for the phone and then authorize (con-
nect) it. Depending on the mobilep hone, author-
ization either takes place by means of Secure
Simple Pairing or by entering apasskey.T he
multimedia system automatically makes the procedure that is relevant for you
rmobilep hone
available. The mobilep hone is always connec-
ted automatically after authorization. Further
information on using amobilep hone with the
multimedia system (see the Digital Operator's
Manual).
If the multimedia system does not detect your
mobilep hone, this may be due to particular
security settings on you rmobilep hone (see the
manufacturer's operating instructions).
Only one mobilep hone can be connected to the
multimedia system at any one time.
Searchin gfor am obile phone
Multimedia system:
XSelect Tel/®QConn.DeviceQSearc hfor PhonesQStartSearch.
The available mobilep hones are displayed.
Symbols in the devicel ist
Sym-
bolExplanation
ÏNew mobilephone found, not yet
authorized.
ÑMobilep hone is authorized, but is
not connected.
Connecting amobile phone
Authorization using Secure Simple Pairing:
XSelect mobilep hone.
Ac ode is displaye dinthe multimedia system
and on the mobilep hone.
XIf codesmatch: select Yeson the multimedia
system.
XConfirm code on the mobilep hone. Depend-
ing on the mobilep hone used,confirm the
connection to the multimedia system and for
the PBAP and MAP Bluetooth
®profiles. The
prompt to confirm may take up to two
minutes to be displaye d(see the manufactur-
er's operating instructions).
XIf the code sare different: selectNoon the
multimedia system.
The process is canceled.
Repeat authorization.
Operating system215
Multimedia system
Z
Page 218 of 298

Authorization by enteringapasskey( passcode):
XSelect the Bluetooth®nameoft he mobile
phone.
The input menu for the passkeyisd isplayed.
XChoos eaone to sixteen-digitn umbercombi-
nation as apasskey.
XEnter the passkeyont he multimedia system.
XPress¬to confirm.
XEnter and confirm the passkeyont he mobile
phone. Depending on the mobil ephone used,
confirm the connectio ntothe multimedia sys-
tem and for the PBAP and MAP Bluetooth
®
profiles. The prompt to confirm mayt ake up
to two minutes to be displayed (se ethe man-
ufacturer's operating instructions).
Connectin gamobilephon e(Au dio 20)
Requirements
For telephony via the Bluetooth®interface, you
require at leas tone Bluetooth®-capable mobile
phone depending on us eofone-telephone
mode ortwo-telephon emode.The mobile
phone must support Hands-FreeP rofile1.0 or
above.
In two-telephon emode youc an us eallthe
functions of the multimedia system with the
main telephone .Witht he additional tele-
phone ,you can receive incoming calls.
Multimedia system:
XSelect VehicleQSystem Set‐tingsQActivate Bluetooth.
XActivate Bluetooth®O.
Mobil ephone:
XActivate Bluetooth®and ,ifn ecessary,B lue-
tooth®visibility for othe rdevice s(seet he
manufacturer's operating instructions).
The Bluetooth
®device names for al lofone man-
ufacturer's products might be identical .To
make it possibl etoclearly identify your mobile
phone, change the device nam e(seet he man-
ufacturer's operating instructions). If the mobil
ephone supports the PBAP ( Phone
Book Access Profile )and MAP ( Message
A ccess Profile) Bluetooth
®profiles, the follow-
ing informatio nist ransmitte dafteryou connect
the main telephone:
RPhone book
RCall lists
RText messages and e-mail
iFurther informatio nonsuitabl emobile
phones can be found at: http://
www.mercedes-benz.com/connect
iIn the USA, yo ucan getint ouch with the
Mercedes-Benz Customer Assistance Center
on 1-800-FOR-MERCedes (1-800-367-6372).
In Canada, yo ucan getint ouch with the Cus-
tomerR elations Center on 1-800-387-0100.
Searching for and authorizing (connect-
ing) amobile phone
Before using your mobile phone with the multi-
media system for the first time, you will need to
search for the phone and then authorize (con-
nect)i t. Depending on the mobile phone, author-
ization either takes place by means of Secure
Simple Pairing or by enteringap asskey. The
multimedia system automatically makes the
procedure that is relevant for your mobile phone
available. The mobile phone is always connec-
ted automatically after authorization. Further
information on using amobile phone with the
multimedia system (see the Digital Operator's
Manual).
If the multimedia system does not detect your
mobile phone, this may be due to particular
security settings on your mobile phone (see the
manufacturer's operating instructions).
Searching for amobile phone
Multimedia system:
XSelect Tel/®QConn. DeviceQCon‐nect New Device.
XSelectConnect via Vehicle.
XSelect mobile phone.
Connecting amobile phone
XOne-telephone mode: selectConnect as
New Main Phone.
XTwo-telephone mode: selectConnect as
Additional Phonewhenamobile phone is
already connected.
216Operating system
Multimedia system
Page 219 of 298
XAuthorizationusingS ecur eSimple Pai r-
ing:
Ac odeisd isplayed inthem ultimedia system
and on th emobile phone.
XConfir mcodeont hemob ilephone. Depend-
ing on th emobile phoneu sed, confirm the
connection to th emultimedia system and for
th eP BAPa nd MAPB luetooth
®profiles. The
prompt to confirm may tak euptotwo
minute stobed isplayed (see th emanufactur-
er' so peratin ginstructions).
XIfth ec odes are different :select Noon the
multimedia system.
The proces siscanceled.
Repeat authorization.
or
XAuthorizatio nbyentering apasskey
(passcode): enterany one- to sixteen-digit
number sequenc ewhichy ou have chosen
yourself int othe passke yinput menu.
XPress ¬to confirm.
XEnterand confirm th epasske yonthe mob ile
phone. Dependin gonthemob ilephoneu sed,
confirm th econnectio ntothemultimedia sys-
te ma nd for th ePBAPa nd MAPB luetooth
®
profiles. The prompt to confirm may tak eup
to two minute stobedisplayed (see th eman-
ufacturer' soperatin ginstructions).
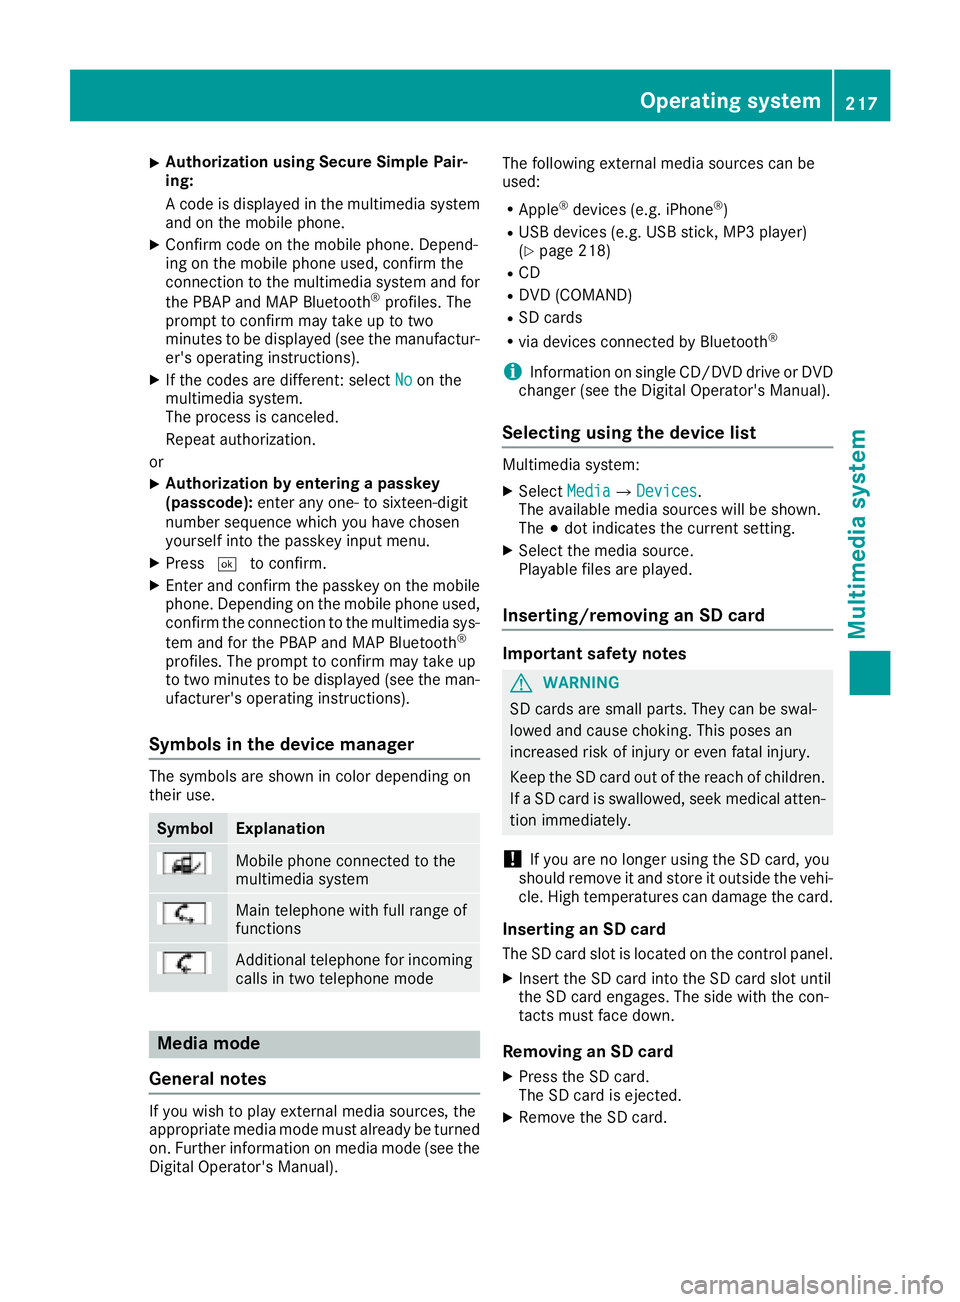
Symbols in th edevice manager
The symbols are shown in color dependingon
their use.
SymbolExplanation
Mobile phonec onnected to the
multimedia system
Main telephone withfull range of
functions
Ad ditional telephone for incoming
calls intwo telephone mode
Media mode
General notes
If you wish toplay external medi asources ,the
appropriat emediam odem ust alread ybeturned
on.F urther informatio nonmediam ode(see the
Digital Operator's Manual). The followinge
xternalmediasources can be
used:
RApple®device s(e.g. iPhone®)
RUSBd evices(e.g. USBs tick ,M P3 player)
(Ypage 218)
RCD
RDV D(COMAND)
RSD cards
Rvia device sconnected byBluetooth®
iInformation on single CD/DV DdriveorD VD
changer (see th eDigital Operator's Manual).
Selecting usin gthe device list
Multimedia system:
XSelectMediaQDevices.
The available medi asources willbe shown.
The #dot indicates th ecurren tsetting.
XSelect th emediasource.
Playable filesare played.
Inserting/removing an SD card
Important safety notes
GWARNING
SD cardsare smal lparts. They can beswal-
lowed and caus echoking. This posesa n
increased ris kofinjury or eve nfatal injury.
Keep th eSDc ardo ut of th ereac hofc hildren.
If aS Dc ardiss wallowed, seek medical atten-
tio nimmediately.
!If you are no longer usingt heSD card,you
should remove it and store itoutside thev ehi-
cle .Hight em peratures can damag ethe card.
Insertin ganSDc ard
TheSDcardslot islocate donthecontrol panel.
XInsertt heSD cardintot he SD cardslot until
th eS Dc arde ngages.T he side withthe con-
tacts must fac edown.
Removing an SD card
XPress th eSDc ard.
The SD car disejected.
XRemo vetheS Dc ard.
Operatin gsystem217
Multimedia system
Z
Page 221 of 298
Stowage areas
Stowage spaces
Important safety notes
GWARNING
If object sinthe passenger compartmenta re
stowed incorrectly, they can slide or be
thrown around and hit vehicle occupants. In
addition, cup holders, open stowage spaces
and mobile phone brackets cannot always
retain all object sthey contain. There is arisk
of injury, particularly in the event of sudden
braking or asudden change in direction.
RAlways stow object ssothat they cannot be
thrown around in such situations.
RAlways make sure that object sdonot pro-
trude from stowage spaces, parcel nets or
stowage nets.
RClose the lockable stowage spaces before
startin gajourney.
RAlways stow and secure heavy, hard, poin-
ted, sharp-edged, fragile or bulky object sin
the trunk.
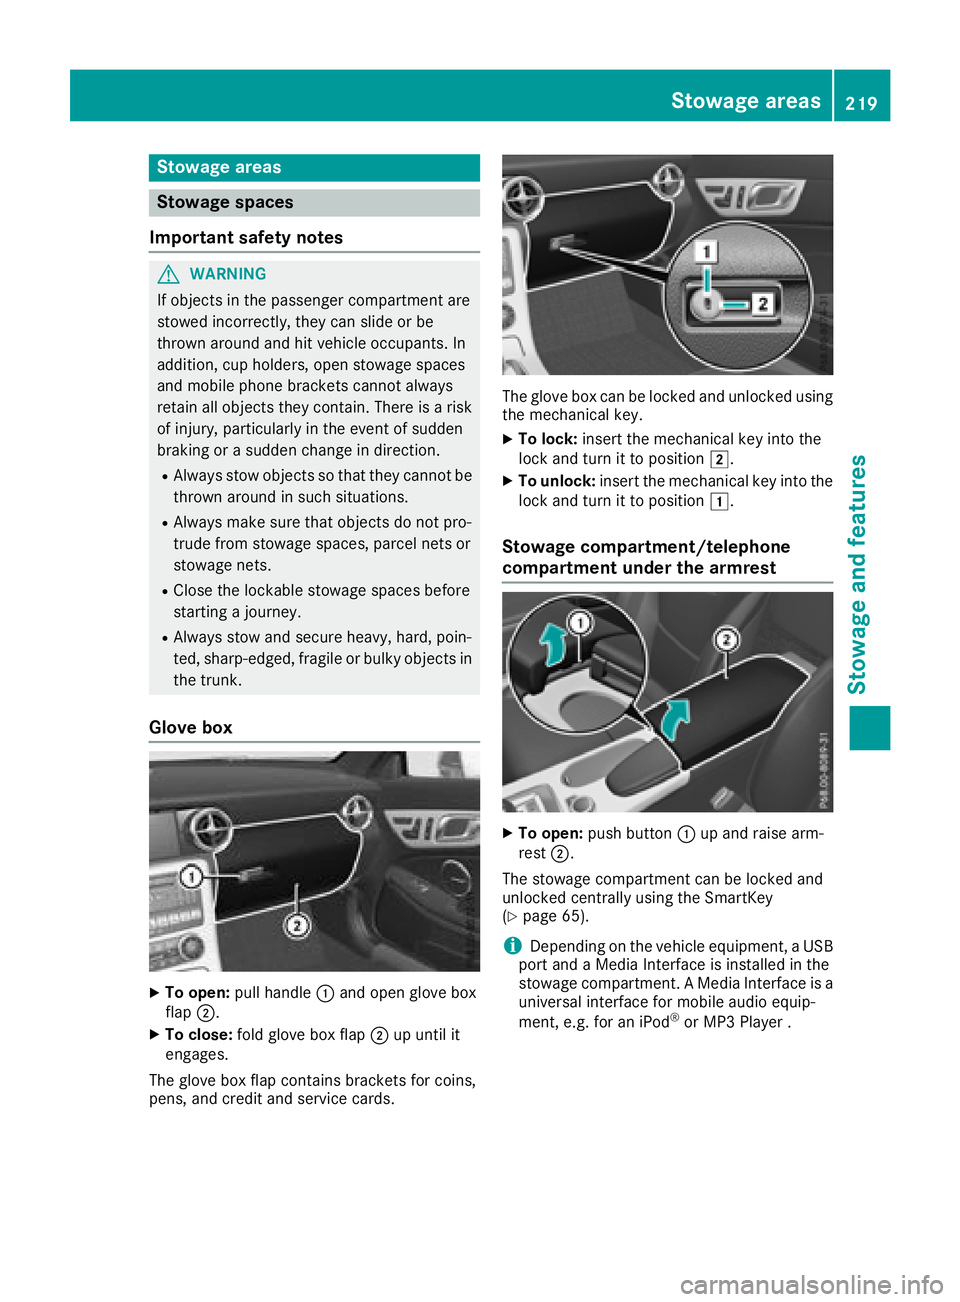
Glove box
XTo open: pull handle :and open glove box
flap ;.
XTo close: fold glove box flap ;up until it
engages.
The glove box flap contains brackets for coins,
pens, and credit and service cards.
The glove box can be locked and unlocked using
the mechanical key.
XTo lock: insert the mechanical key into the
lock and turn it to position 2.
XTo unlock:insert the mechanical key into the
lock and turn it to position 1.
Stowage compartment/telephone
compartment under the armrest
XTo open:push button :up and raise arm-
rest ;.
The stowage compartmentc an be locked and
unlocked centrally using the SmartKey
(
Ypage 65).
iDepending on the vehicle equipment, aUSB
port and aMedia Interface is installed in the
stowage compartment. AMedia Interface is a
universal interface for mobile audio equip-
ment,e .g. for an iPod
®or MP3 Player.
Stowage areas219
Stowage and features
Z
Page 223 of 298
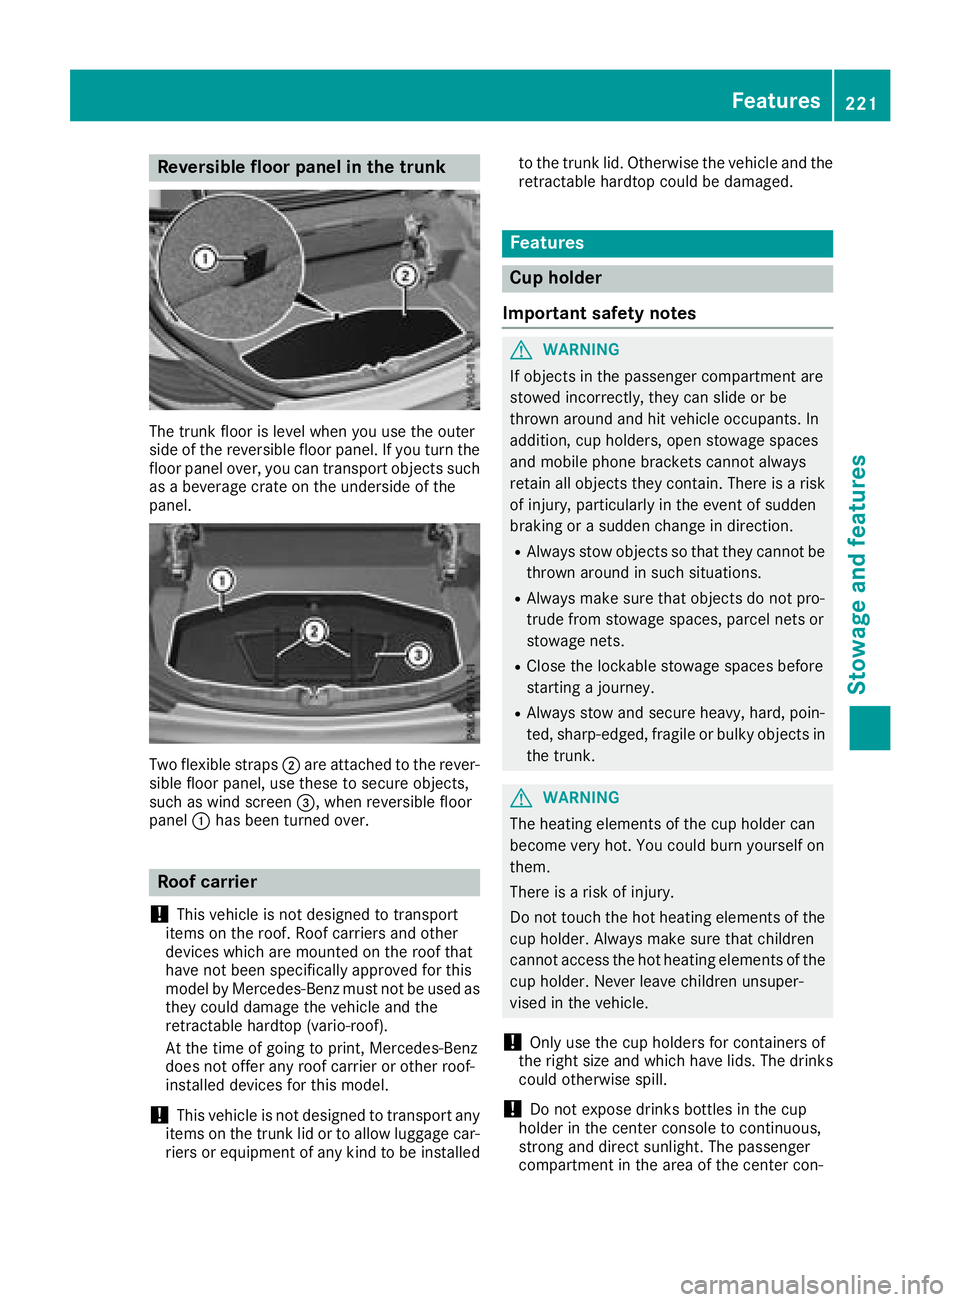
Reversible floor panelinthe trunk
The trunk floor is level when yo uusethe outer
sid eoft he reversibl efloor panel.Ify outurn the
floor panel over, yo ucan transpor tobjects such
as ab everage crate on the undersid eofthe
panel.
Twof lexible straps ;are attached to the rever-
sible floor panel,u sethesetos ecure objects,
such as wind screen =,whenr eversibl efloor
panel :hasb eent urne dover.
Roo fcarrier
!
Thisv ehicleisn ot designed to transport
item sont he roof. Roof carriers and other
device swhich are mounted on the rooft hat
have not bee nspecifically approved for this
model by Mercedes-Benz mus tnot be used as
they could damag ethe vehicl eand the
retractable hardto p(vario-roof).
At the time of going to print, Mercedes-Benz
doe snot offera ny roofcarrieroro therr oof-
installed device sfor this model.
!Thisv ehicleisn ot designed to transpor tany
item sont he trunk li dortoallowluggage car-
riers or equipment of any kind to be installed to the trunk lid. Otherwise the vehicl
eand the
retractable hardto pcould be damaged.
Features
Cup holder
Important safety notes
GWARNING
If objects in the passenger compartment are
stowed incorrectly, they can slide or be
throwna round and hit vehicl eoccupants. In
addition, cup holders, ope nstowag espaces
and mobil ephone brackets canno talway s
retain al lobjects they contain. There is arisk
of injury, particularly in the event of sudden
braking or asudde nchange in direction.
RAlway sstow objects so that they canno tbe
throwna round in such situations.
RAlwaysmake sure that objects do not pro-
trud efrom stowag espaces, parcel nets or
stowag enets.
RClose the lockable stowag espaces before
starting ajourney.
RAlway sstow and secure heavy, hard, poin-
ted, sharp-edged, fragile or bulky objects in
the trunk.
GWARNING
The heating elements of the cup holder can
become very hot. Yo ucould burn yourselfo n
them.
There is ariskofi njury.
Do not touch the hot heating elements of the
cup holder .Alway smake sure that children
canno taccess the hot heating elements of the
cup holder .Neverl eave children unsuper-
vised in the vehicle.
!Only us ethe cup holder sfor containers of
the right size and which have lids. The drinks could otherwise spill.
!Do not expose drinks bottles in the cup
holder in the center console to continuous,
strong and direct sunlight. The passenger
compartment in the are aofthe center con-
Features221
Stowage and features
Z
Page 225 of 298
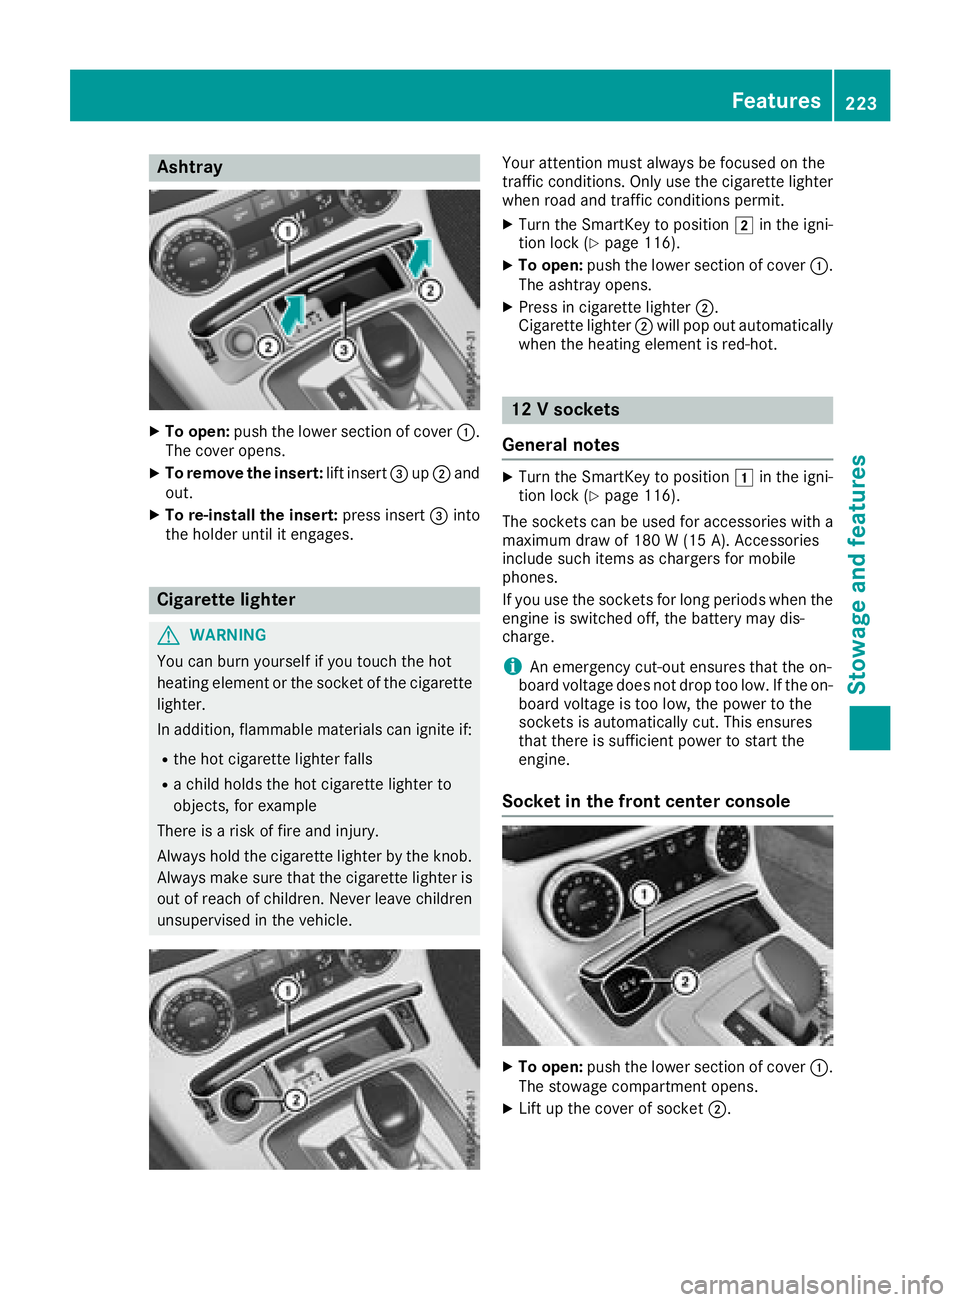
Ashtray
XTo open :push th elower section of cover :.
The cover opens.
XTo remove th einsert: lift insert =up; and
out .
XTo re-install th einsert: press insert =into
th eh older until it engages.
Cigarette lighter
GWARNIN G
You can burn yourself if you touch th ehot
heating elemen torthesocke tofthecigarette
lighter.
In addition ,flammabl ematerials can ignit eif:
Rtheh ot cigarette lighte rfall s
Rac hild hold sthe hot cigarette lighte rto
objects ,for exampl e
There is ariskoff irea nd injury.
Always hold th ecigarette lighte rbytheknob.
Always mak esuret hatthe cigarette lighte ris
out of reac hofchildren .Never leav echildren
unsupervised in th evehicle.
Your attention mus talways be focused on th e
traffic conditions. Only use th ecigarette lighte r
when road and traffic condition spermit .
XTurn th eSmartKey to position 2in th eigni-
tion loc k(Ypage 116).
XTo open :push th elower section of cover :.
The ashtray opens.
XPress in cigarette lighte r;.
Cigarette lighte r; will pop out automatically
when th eheating elemen tisred-hot .
12Vsocke ts
Gene raln otes
XTurn th eSmartKey to position 1in th eigni-
tion loc k(Ypage 116).
The sockets can be used for accessories wit ha
maximum draw of 18 0W(15 A) .Acces sorie s
include suc hitems as chargers for mobile
phones.
If you use th esockets for lon gperiods when th e
engin eisswitched off ,the battery may dis-
charge .
iAn emergenc ycut-out ensures that th eon-
boar dvoltag edoes no tdropt oo low. If th eon-
boar dvoltag eistoolow, th epowe rtot he
sockets is automatically cut .This ensures
that there is sufficien tpowe rtos tart th e
engine.
Socket in th efront center console
XTo open :push th elower section of cover :.
The stowage compartmen topens.
XLiftupt hecover of socke t;.
Features223
Stowage and features
Z