snow chains MERCEDES-BENZ SLC ROADSTER 2018 Owner's Manual
[x] Cancel search | Manufacturer: MERCEDES-BENZ, Model Year: 2018, Model line: SLC ROADSTER, Model: MERCEDES-BENZ SLC ROADSTER 2018Pages: 298, PDF Size: 5.26 MB
Page 6 of 298
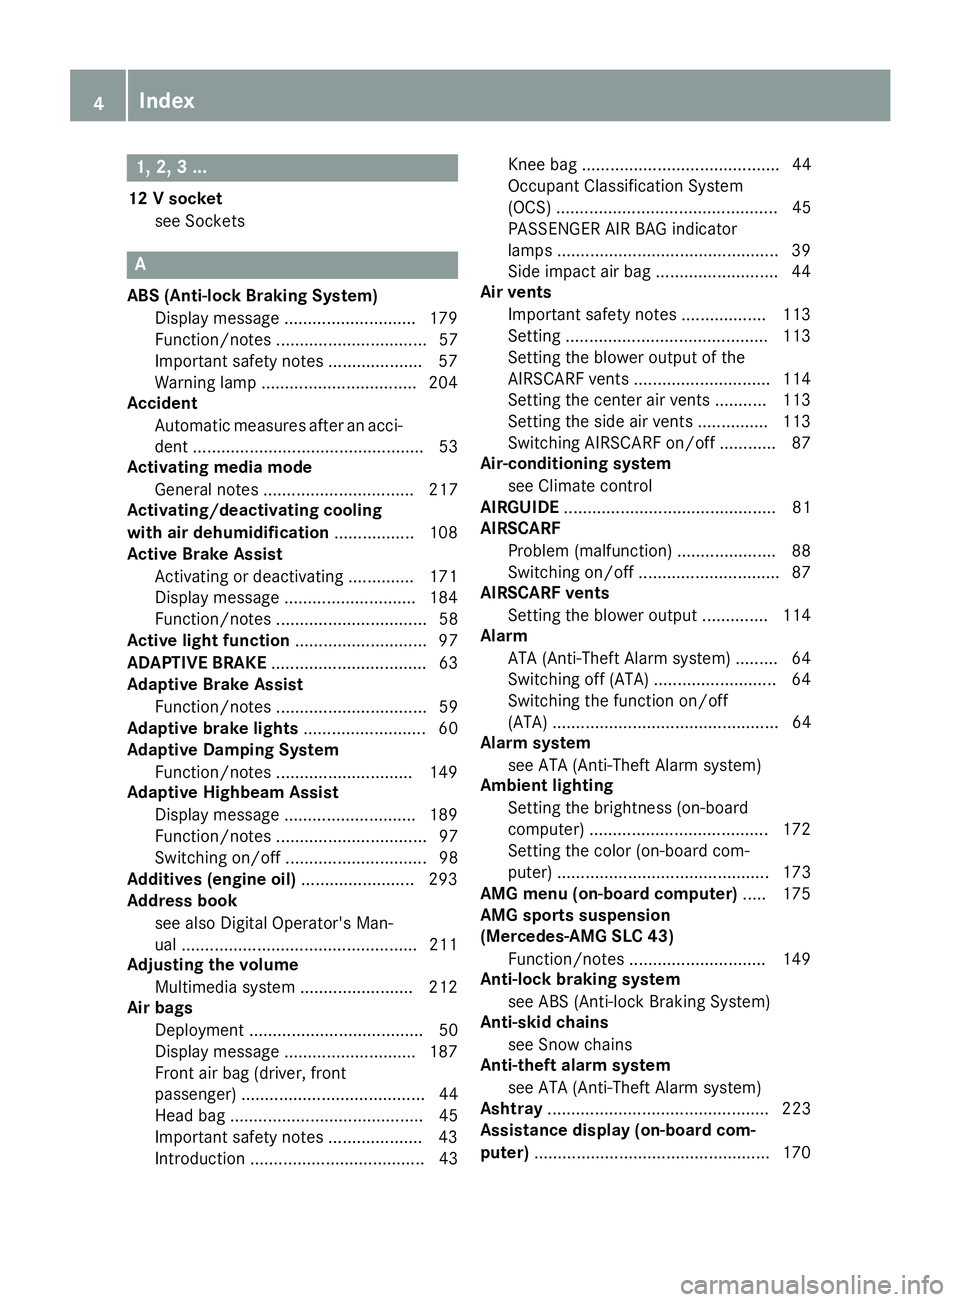
1, 2,3...
12 Vsocket
see Sockets
A
ABS (Anti-lock Braking System) Display message ............................ 179
Function/notes ................................ 57
Important safety notes .................... 57
Warnin glamp .................................2 04
Accident
Automatic measure safter an acci-
dent ................................................. 53
Activatingm edia mode
General notes ................................ 217
Activating/deactivating cooling
with air dehumidification ................. 108
Active Brake Assist
Activating or deactivating .............. 171
Display message ............................ 184
Function/notes ................................ 58
Active light function ............................ 97
ADAPTIVE BRAKE ................................. 63
Adaptive Brake Assist
Function/notes ................................ 59
Adaptive brake lights .......................... 60
Adaptive Dampin gSystem
Function/notes .............................1 49
Adaptive Highbeam Assist
Display message ............................ 189
Function/notes ................................ 97
Switching on/off .............................. 98
Additives (engine oil) ........................ 293
Address book
see also Digita lOperator's Man-
ua l..................................................2 11
Adjustin gthe volume
Multimedias ystem ........................ 212
Ai rb ags
Deployment ..................................... 50
Display message ............................ 187
Front ai rbag (driver, front
passenger). ...................................... 44
Head bag ......................................... 45
Important safety notes .................... 43
Introduction ..................................... 43 Knee bag .......................................... 44
Occupant Classification System
(OCS) ............................................... 45
PASSENGER AIR BAG indicator
lamps ...............................................
39
Si
de impact ai rbag .......................... 44
Ai rv ents
Important safety notes .................. 113
Setting ...........................................1 13
Setting the blower output of the
AIRSCAR Fvents .............................1 14
Setting the center ai rvents ........... 113
Setting the sidea irvents ...............1 13
Switching AIRSCAR Fon/off ............ 87
Air-conditionings ystem
see Climate control
AIRGUIDE ............................................. 81
AIRSCARF
Problem (malfunction) ..................... 88
Switching on/off .............................. 87
AIRSCARF vents
Setting the blower output .............. 114
Alarm
ATA (Anti-Theft Alarm system) ......... 64
Switching off (ATA) .......................... 64
Switching the function on/off
(ATA) ................................................ 64
Alarm system
see ATA (Anti-Theft Alarm system)
Ambient lighting
Setting the brightness (on-board
computer) ...................................... 172
Setting the color (on-board com-
puter) ............................................. 173
AMG menu (on-board computer) ..... 175
AMG sports suspension
(Mercedes-AMG SLC 43)
Function/notes .............................1 49
Anti-loc kbraking system
see ABS (Anti-lock Braking System)
Anti-skid chains
see Snow chains
Anti-theft alarm system
see ATA (Anti-Theft Alarm system)
Ashtray ............................................... 223
Assistanced isplay (on-board com-
puter) ..................................................1 70
4Index
Page 11 of 298
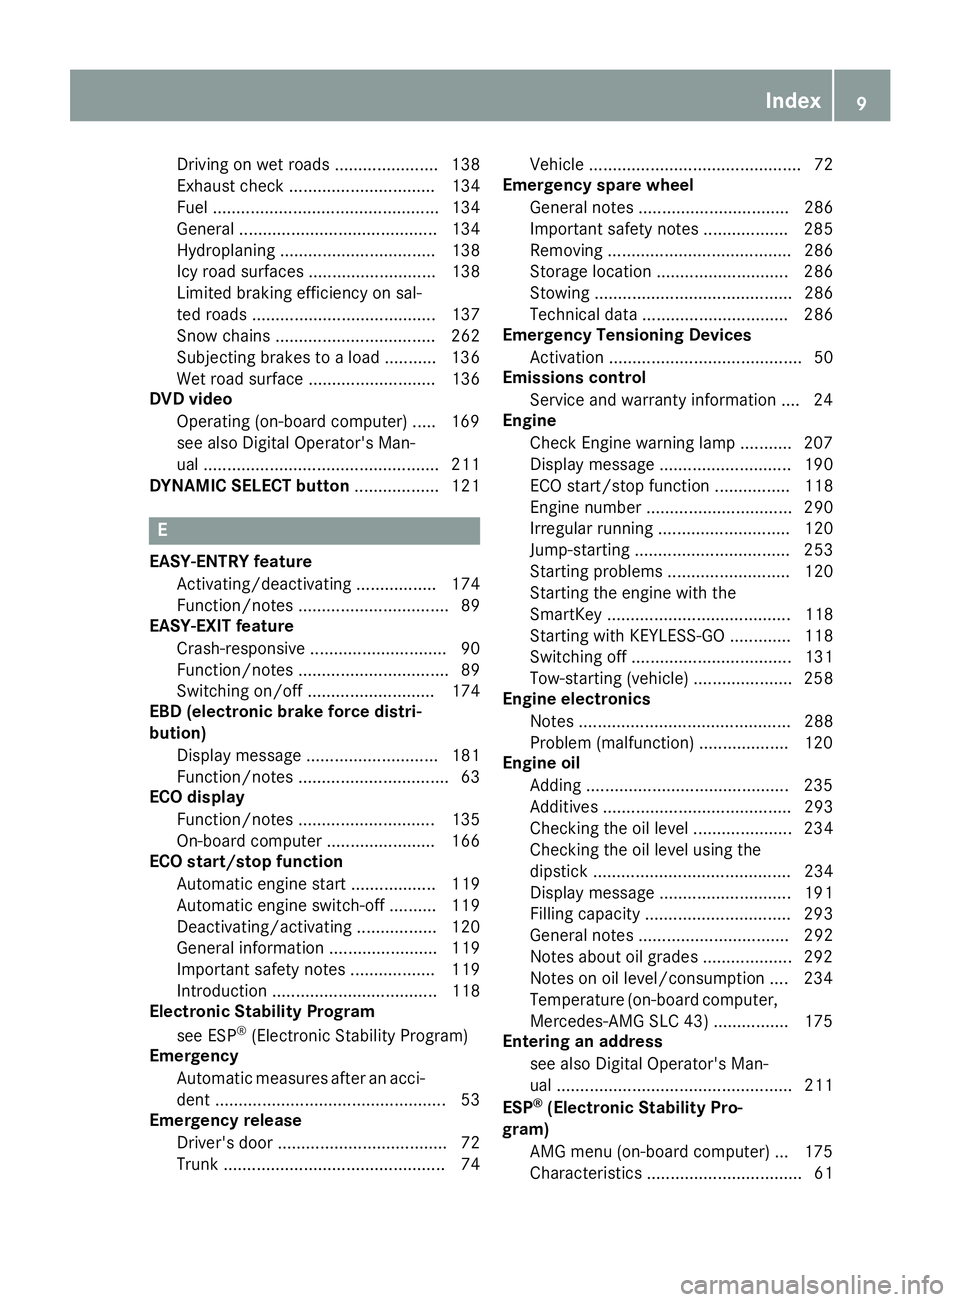
Driving on wetroads ...................... 138
Exhaus tcheck ............................... 134
Fuel ................................................ 134
Genera l.......................................... 134
Hydroplaning ................................. 138
Icy roa dsurfaces ........................... 138
Limited braking efficiency on sal-
ted roads ....................................... 137
Snow chains .................................. 262
Subjecting brakes to aloa d. .......... 136
We troa ds urface ........................... 136
DVD video
Operating (on-boar dcomputer) ..... 169
seea lsoD igita lOperator'sM an-
ua l.................................................. 211
DYNAMIC SELECT button .................. 121
E
EASY-ENTRY feature
Activating/deactivating ................. 174
Function/note s................................ 89
EASY-EXIT feature
Crash-responsiv e............................. 90
Function/note s................................ 89
Switching on/off. .......................... 174
EBD (electronicb rake forcedistri-
bution)
Displa ymessage ............................ 181
Function/note s................................ 63
EC Od isplay
Function/note s............................. 135
On-board compute r....................... 166
EC Os tart/stopf unction
Automati cengine start .................. 119
Automati cengine switch-off .......... 119
Deactivating/activating ................. 120
Genera linformation ....................... 119
Important safety notes .................. 119
Introduction ................................... 118
Electronic Stability Program
see ESP
®(Electronic Stability Program)
Emergency
Automati cmeasures afte ranacci-
dent ................................................. 53
Emergencyr elease
Driver's doo r.................................... 72
Trunk ............................................... 74 Vehicl
e............................................. 72
Emergencys pare wheel
Genera lnotes ................................ 286
Important safety notes .................. 285
Removing ....................................... 286
Storage location ............................ 286
Stowing .......................................... 286
Technical data ............................... 286
EmergencyT ensioningDevices
Activation ......................................... 50
Emission scontrol
Service and warranty information .... 24
Engine
Check Engine warning lamp ........... 207
Displa ymessage ............................ 190
ECO start/stop function ................ 118
Engine number ............................... 290
Irregula rrunning ............................ 120
Jump-starting ................................. 253
Starting problems .......................... 120
Starting the engine with the
SmartKey ....................................... 118
Starting with KEYLESS-GO ............. 118
Switching off .................................. 131
Tow-starting (vehicle )..................... 258
Engine electronics
Notes. ............................................ 288
Problem (malfunction) ................... 120
Engine oil
Adding ........................................... 235
Ad
ditives ........................................ 293
Checking the oill evel ..................... 234
Checking the oill evel using the
dipstick .......................................... 234
Displa ymessage ............................ 191
Filling capacity ............................... 293
Generaln otes ................................ 292
Notesa boutoilgrade s................... 292
Notesono illevel/consumption .... 234
Temperature (on-board computer,
Mercedes-AMGS LC 43) ................ 175
Entering an address
see also Digital Operator's Man-
ual.................................................. 211
ESP
®(ElectronicS tability Pro-
gram)
AMG menu (on-board computer) ... 175
Characteristics ................................. 61
Index9
Page 23 of 298
Removingawheel.......................... 283
Storing ........................................... 281
Tightening torque ........................... 284
Wheel size/tire size ....................... 284
Win dscreen
Inserting and removing .................... 80
Preparing for installation .................. 80
see AIRGUIDE
Windows
see Sid ewindows
Windshield
Defrosting ...................................... 110
Windshiel dwasher fluid
see Windshield washers ystem
Windshiel dwasher system
Adding washerf luid ....................... 236
Important safety notes .................. 294
Windshiel dwipers
Displa ymessage ............................ 201
Problem (malfunction) ................... 103
Replacing the wipe rblade s............ 101
Switching on/off. .......................... 101
Winter driving
Important safety notes .................. 262
Slippery roads urfaces ................... 138
Snow chains .................................. 262
Winter operation
Overview ........................................ 262
Winter tires
M+S tire s....................................... 262
Wipe rblades
Cleaning ......................................... 241
Important safety notes .................. 101
Replacing ....................................... 101
Workshop
see Qualifie dspecialist workshop
Z
ZONE function
Switching on/off. .......................... 110
Index21
Page 63 of 298
When towing the vehicle with the rear axle
raised, observe the notes on ESP®
(Ypage 257).
If the å ESP®OFF warning lamp lights up
continuously, then ESP®is deactivated.
If the ÷ ESP®warning lamp and the å
ESP®OFF warning lamp are lit continuously,
ESP®is not available due to amalfunction.
Observe the information on warning lamps
(
Ypage 205) and display messages which may
be shown in the instrument cluster
(
Ypage 179).
iOnly use wheels with the recommended tire
sizes. Only then will ESP®function properly.
Characteristics of ESP®
General information
If the ÷ ESP®warning lamp goes out before
beginnin gthe journey, ESP®is automatically
active.
If ESP
®intervenes, the ÷ESP®warning lamp
flashes in the instrument cluster.
If ESP
®intervenes:
XDo not deactivat eESP®under any circum-
stances.
XOnly depress the accelerator pedal as far as
necessary when pulling away.
XAdapt your driving style to suit the prevailing
road and weather conditions.
ECO start/stop function
The ECO start/stop function switches the
engine off automatically when the vehicle stops
moving. The engine start sautomatically when
the driver wants to pull away again. ESP
®
remains in its previously selected status, e.g. if
ESP®was deactivated before the engine was
automatically switched off.
Activating/deactivating ESP®(except
Mercedes-AMG SLC 43)
Important safety notes
iObserve the "Important safety notes" sec-
tion (Ypage 56). You can select between the following states of
ESP
®:
RESP®is activated
RESP®is deactivated
GWARNING
If you deactivat eESP
®,ESP®no longer sta-
bilizes the vehicle. There is an increased risk
of skidding and an accident.
Only deactivat eESP
®in the situation sdescri-
bed in the following.
It may be best to deactivat eESP
®in the follow-
ing situations:
Rwhen using snow chains
Rin deep snow
Ron sand or gravel
Spinning the wheels results in acutting action
which provides better grip.
iActivate ESP®as soon as the situations
described above no longer apply. ESP®will
otherwise not be able to stabilize the vehicle if
the vehicle start stoskid or awheel start sto
spin.
!Avoid spinnin gthe driven wheels for an
extended period with ESP®deactivated. You
could otherwise damage the drivetrain.
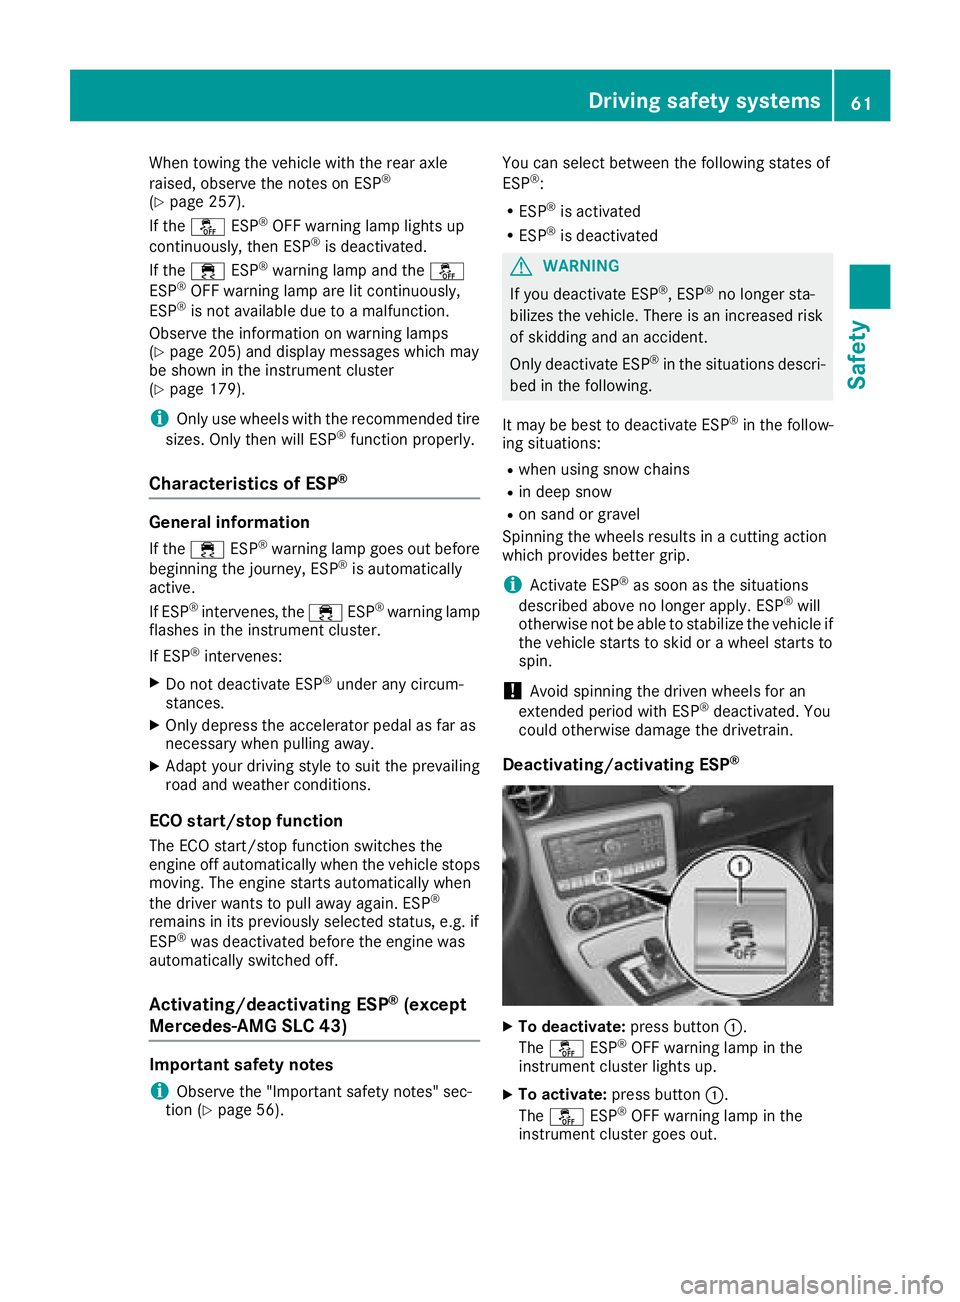
Deactivating/activating ESP®
XTo deactivate: press button:.
The å ESP®OFF warning lamp in the
instrument cluster lights up.
XTo activate: press button :.
The å ESP®OFF warning lamp in the
instrument cluster goes out.
Driving safety systems61
Safety
Z
Page 140 of 298
Drivingonw et road s
Hydroplaning
If water has accumulated to acertai ndept hon
th er oads urface, there is adanger of hydro-
planin goccurring.
Fo rthisr eason ,intheevent of heav yrain or in
condition sinwhichh ydroplaning may occur ,
you mus tdrive in th efollowin gmanner:
Rlowe ryour speed
Ravoid rut s
Ravoid sudden steerin gmovements
Rbrake carefully
Drivin gonflooded road s
!Do notdrive through floode dareas. Chec k
th ed ept hofa ny water befor edrivin gthrou gh
it .D rive slowly through standin gwater. Oth-
erwise ,water could ente rthe vehicle interio r
or engin ecom partment. It can then damage
th ee ngine's or automatic transmission' s
electronic components. It can also be sucke d
in by th eengine's air intake connection and
cause engin edamage.
Winte rdrivin g
GWARNING
If you shift down on aslipper yroads urfac ein
an attempt to increase th eengine's braking
effect ,the drive wheels could los etheir grip.
There is an increase ddanger of skidding and
accidents .
Do no tshift down fo radditional engin ebrak-
in gonas lipperyroads urface.
GDANGER
If th eexhaus tpipe is blocke doradequat e
ventilation is no tpossible, poisonous gases
suc hasc arbon monoxide (CO) may ente rthe
vehicle. Thi sisthecase, e.g. if th evehicle
becomes trappe dinsnow. There is arisko f
fatal injury.
If you leav ethe engin eortheauxiliar yheatin g
running ,makes uret he exhaus tpipe and are a
around th evehicle are clear of snow. To
ensur eana dequat esupply of fresh air, ope na
window on thesideoft hevehicle that is no t
facin gintot he wind.
Hav eyour vehicle winter-proofed at aqualified
specialis tworkshop at th eonset of winter.
Drive particularly carefully on slipper yroads ur-
faces. Avoid sudden acceleration ,steerin gand
braking maneuvers .Donotuse cruise control.
If th evehicle threatens to skid or canno tbe
stopped when movin gatlow speed:
XShift th etransmissio ntoposition i.
The outsid etem perature indicator is no t
designed to serve as an ice-warnin gdevic eand
is therefore unsuitable fo rtha tp urpose.
Changes in th eoutsid etem perature are dis -
playe dafter ashort delay.
Indicated temperature sjusta bov ethe freezin g
poin tdon otguarantee that th eroads urfac eis
free of ice. The road may still be icy, especially in
wooded areas or on bridges. The vehicle could
skid if you fail to adapt your drivin gstyle. Always
adapt your drivin gstyle and drive at aspeed to
suit th eprevailin gweather conditions.
You should pay special attention to road condi-
tion swhen temperature sare around freezin g
point.
Fo rm orei nformat ion on drivin gwiths now
chains, see (
Ypage 262).
Fo rm orei nfor mati
on on drivin gwiths ummer
tires ,see (Ypage 262).
Observ ethe note sint he"Winte roperation "sec-
tion (
Ypage 262).
Drivin gsystems
Cruis econtro l
General notes
Cruise contro lmaintain saconstan troa ds peed
fo ry ou. It brake sautomatically in order to avoid
exceedin gthe set speed. On lon gand steep
downhill gradients, especially if th evehicle is
laden, you mus tselec talowe rgear in goo dtim e.
By doin gso, you will mak euse of th ebraking
effect of th eengine. Thi srelieves th eload on th e
brake syste mand prevents th ebrake sfrom
overheatin gand wearin gtoo quickly.
Use cruise contro lonlyifr oada nd traffic con-
dition smakeita ppropriat etomaintain asteady
138Driving systems
Driving an dparking
Page 155 of 298
Parking tips:
Ron narrow roads, drive as closely as possible
past the parking space
Rparking spaces that are littered or overgrown
might be identified or measured incorrectly
Rparking spaces that are partially occupied by
trailer drawbars might not be identified as
such or be measured incorrectly
Rsnowfall or heavy rain may lead to aparking
space being measured inaccurately
Rpay attention to the Active Parking Assist
PARKTRONIC warning messages during the
parking procedure (
Ypage 151)
Rwhen transportin gaload which protrudes
from your vehicle, you should not use Parking
Guidance
Rnever use Parking Guidance with snow chains
or an emergencys pare wheel fitted
Rmake sure that the tire pressures are always
correct. This hasadirect effect on the steer-
ing instructions
Rthe way your vehicle is positioned in the park-
ing space after parking is dependent on vari-
ous factors. These include the position and
shape of the vehicles parked in fronta nd
behind it and the conditions of the location. In
some cases, Parking Guidance may guide you
too far or not far enough into aparking space.
In some cases, it may also lead you across or
ont othe curb. If necessary, cancel the park-
ing procedure with Parking Guidance.
Detecting parking spaces
:Detected parking space on the left
;Parking symbol
=Detected parking space on the right
Parking Guidance is automatically activated
when you drive forwards. The system is opera-
tional at speeds of up to approximately 22 mph (3 5k m/ h).W hile in operation, the system inde-
pendently locate sand measures parking spaces
on both sides of the vehicle. Whend riving at
speeds below 19 mph (30 km/h), yo uwills ee parking symbol
;asastatu sindicator in the
instrument cluster.
Whenap arking space hasb eend etected, an
arrow towards the right =or the left :also
appears. Parking Guidance only display spark-
ing spaces on the front-passenger sid easstand-
ard .Parking spaces on the driver'ss idea re dis-
played as soona sthe turn signal on the driver's
sid eisa ctivated. To park on the driver'ss ide,
yo um ustlea ve the driver'ss idet urn signal
switched on unti lyou have engaged reverse
gear.
Parking Guidance will only detect parking
spaces:
Rthat are paralle ltothe direction of travel
Rthat are at leas t5ft(1.5 m) wid e
Rthatareat leas t4.3 ft (1.3 m) longer thany our
vehicle
Ap arking space is displayed whil eyou are driv-
ing past it, and unti lyou are approximately5 0ft
(15 m) away from it.
Parking
Movin gthe vehicle into the stopp osition
XStop the vehiclewhent he parking space sym-
bo lshows the desired parking space in the
instrument cluster.
XVehicles with manua ltransmission: shift to
reverse gear.
Vehicles with automatic transmission: shift
the transmission to position k.
The multifunctio ndisplay shows the Be
AwareofObstaclesNeartheVehiclePress 'OK'toC onfirmmessage.
XPress theabutton on the multifunction
steering whee ltoconfirm.
The multifunctio ndisplay switches to Parking
Guidance.
Driving systems153
Driving an dparking
Z
Page 264 of 298
MOExtended tires (tires with run-flat
characteristics)
With MOExtended tires (tires with run flat char-
acteristics), you can continue to drive you rvehi-
cle even if there is atotal loss of pressure in one
or more tires.
MOExtended tires may only be use dinconjunc-
tion with an active tire pressure loss warning
system or with an active tire pressure monitor
and on wheels specifically tested by Mercedes-
Benz.
Notes on driving with MOExtended tires with a
flat tire (
Ypage2 47).
Vehicles equipped with MOExtended tires are
not equipped with aTIREFIT kit at the factory. It
is therefore recommendedt hat you additionally
equip you rvehiclew ithaTIREFIT kit if you mount
tires that do not feature run-fla tcharacteristics,
e.g. winter tires. ATIREFIT kit can be obtained
from aqualified specialist workshop.
Winter operation
General notes
Have you rvehiclew inter-proofed at aqualified
specialist workshopatt he onset of winter.
Observe the notes in the "Changing awheel"
section (
Ypage2 80).
Driving with summer tires
At temperatures below 45 ‡(+7 †), summer
tires lose elasticity and therefore traction and
braking power. Change the tires on you rvehicle
to M+S tires .Using summe rtires at very cold
temperatures coul dcaus ecracks to form,
thereby damaging the tires permanently.
Mercedes-Benz cannot accept responsibility for
this type of damage.
GWARNING
Damaged tires can caus etire inflation pres-
sure loss. As aresult, you coul dlose control of
you rvehicle. There is arisk of accident.
Check the tires regularl yfor signs of damage
and replace any damaged tires immediately.
M+S tires
GWARNING
M+S tires with atire tread depth of less than
ã in (4 mm) are not suitable for use in winter
and do not provide sufficient traction. There is
ar isk of an accident.
M+S tires with atread depth of less than ãin
(4 mm) must be replaced immediately.
At temperatures below 45 ‡(+7 †), use winter
tires or all-season tires. Both type softire are
identified by the M+S marking.
Only winter tires bearing the isnowflake
symbol in addition to the M+S marking provide
the best possibleg rip in wintry road conditions.
Only these tires wil lallow driving safety systems
such as ABS and ESP
®to function optimally in
winter. Theset ires have beend eveloped specif-
ically for driving in snow.
Use M+S tires of the same make and tread on all
wheels to maintain safe handling characteris-
tics.
Always observe the maximu mpermissible
speeds pecified for the M+S tires you have
mounted.
When you have mounted the M+S tires:
XCheck the tire pressures (Ypag e266).
XVehicles for Canada: restart the tire pres-
sure loss warning system (Ypag e267).
XRestart the tire pressure monitor
(Ypag e267).
Information about driving with an emergency
spare wheel (
Ypag e285).
Snowc hains
GWARNING
If snow chains are installed to the front
wheels, they may drag against the vehicle
body or chassis components. This could
cause damage to the vehicle or the tires.
There is arisk of an accident.
262Wintero peration
Wheels and tires
Page 265 of 298
To avoid hazardous situations:
Rnever install snow chains to the front
wheels
Ralwaysinstall snow chains in pairs to the
rear wheels.
For safety reasons, Mercedes-Benz recom-
mends that you only use snow chains that have
been specially approved for your vehicle by
Mercedes-Benz,ora re ofacorresponding
standard of quality. For more information,
please contact aqualified specialist workshop.
If you inten dtomount snow chains, please bear
the following points in mind:
RSnow chains may not be mounted on all
wheel/tire combinations. Permissible wheel-
tire combinations (
Ypage 284).
ROnly use snow chains when driving on roads
completely covered by snow. Remove the
snow chains as soon as possible when you
come to aroad that is not snow-covered.
RLocal regulations may restrict the use of snow
chains. Observe the appropriate regulations if
you wish to mount snow chains.
RDo not exceed the maximum permissible
speed of 30 mph (50 km/h).
You may wish to deactivate ESP
®when pulling
away with snow chains installed (Ypage 60).
You can thereby allow the wheels to spin in a
controlled manner ,achieving an increased driv-
ing force (cutting action).
Information about driving with an emergency
spare wheel (
Ypage 285).
Tire pressure
Tire pressur especifications
Important safety notes
GWARNING
Underinflated or overinflated tires pose the
following risks:
Rthe tires may burst, especially as the load
and vehicle speed increase.
Rthe tires may wear excessively and/or
unevenly, which may greatly impair tire
traction.
Rthe driving characteristics, as well as steer-
ing and braking, may be greatly impaired.
There is arisk of an accident.
Follow recommended tire inflation pressures
and check the pressure of all the tires includ-
ing the spare wheel:
Rmonthly, at least
Rif the load changes
Rbefore beginning along journey
Runder different operating conditions, e.g.
off-road driving
If necessary, correctt he tire pressure.
The data on the Tire and Loading Information
placard and tire pressure table shown here are
examples. Tire pressure specification sare vehi-
cle-specific and may deviate from the data
shown here. The tire pressure specifications
that are valid for your vehicle can be found on
the Tire and Loading Information placard and
tire pressure table on the vehicle.
General notes
The recommended tire pressures for the tires
mounted at the factor ycan be found on the
labels described here.
Operation with an emergency sparew heel:
information on operation with an emergency
spare wheel can be found in the general notes in
the "Emergency spare wheel" section
(
Ypage 286).
Further information on tire pressures can be
obtained at aqualified specialist workshop.
Tirep ressure263
Wheels and tires
Z
Page 288 of 298
Snow chains mustnot be mounted on emer-
gency spare wheels.
General notes
You can as kfor information regarding permitted
emergency spare wheel satanauthorized
Mercedes-Benz Center.
You shoul dregularl ycheck the pressure of the
emergency spare wheel ,particularly prior to
long trips, and correct the pressure as neces-
sary (
Ypage 263). The value on the wheel is
valid.
An emergency spare wheel may also be moun-
ted against the direction of rotation. Observe
the time restriction on us easwellast he speed
limitation specified on the emergency spare
wheel.
Replace the tire saftersix years at the latest,
regardless of wear. Thisa lsoa pplies to the
emergency spare wheel.
Wheny ouare driving with the collapsibl espare
wheel mounted, the tire pressure loss warning
system or the tire pressure monitor canno tfunc-
tion reliably. Only restart the tire pressure loss
warning system or tire pressure monitor when
the defectiv ewheel hasb eenr eplaced with a
new wheel.
Vehicles with tire pressure monitor: after
mounting an emergency spare wheel ,the sys-
tem may stil ldisplay the tire pressure of the
removed wheel for afew minutes. The value dis-
played for the mounted emergency spare wheel
is not the same as the current tire pressure of
the emergency spare wheel.
Removin gthe emergencys pare wheel
Vehicles with acolla psibles pare wheel
The collapsibl espare wheel can be found in the
stowag ewellu nder the trunk floor (Ypage 221).
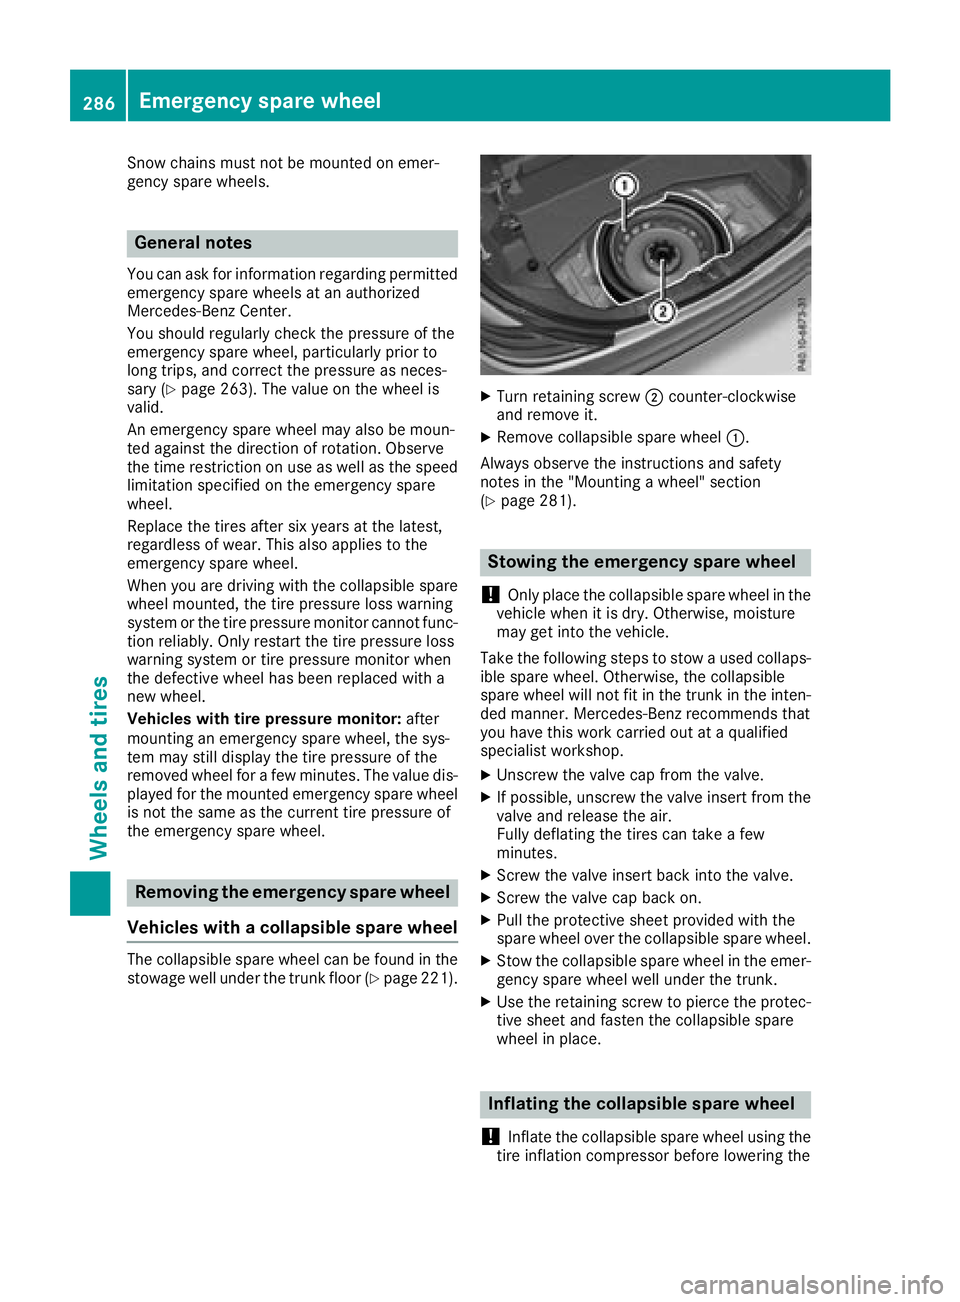
XTurn retaining screw ;counter-clockwise
and remove it.
XRemove collapsibl espare wheel :.
Alway sobserve the instructions and safety
notes in the "Mounting awheel"s ection
(
Ypage 281).
Stowin gthe emergencys pare wheel
!
Only place the collapsibl espare wheel in the
vehicl ewhenitisd ry.O therwise, moisture
may get into the vehicle.
Take the following stepstos towausedc ollaps-
ible spare wheel .Otherwise, the collapsible
spare wheel will not fit in the trunk in the inten-
ded manner. Mercedes-Benz recommendst hat
yo uh avet his work carrie doutataq uali fied
specialist workshop.
XUnscrewt he valve cap from the valve.
XIf possible ,unscrew the valve insert from the
valve and release the air.
Fully deflating the tire scan take afew
minutes.
XScrew the valve insert back into the valve.
XScrew the valve cap back on.
XPull the protectiv esheet provided with the
spare wheel overt he collapsiblespare wheel.
XStow the collapsibl espare wheel in the emer-
gency spare wheel well under the trunk.
XUse the retaining screwtop ierce the protec-
tive sheet and fasten the collapsibl espare
wheel in place.
Inflating the collapsibles pare wheel
!
Inflate the collapsibl espare wheel using the
tire inflation compressor before lowering the
286Emergencys pare wheel
Wheels and tires