lock MERCEDES-BENZ SLK-Class 2016 R172 Repair Manual
[x] Cancel search | Manufacturer: MERCEDES-BENZ, Model Year: 2016, Model line: SLK-Class, Model: MERCEDES-BENZ SLK-Class 2016 R172Pages: 358, PDF Size: 7.24 MB
Page 118 of 358
Low-beam headlamps (halogen head-
lamps)
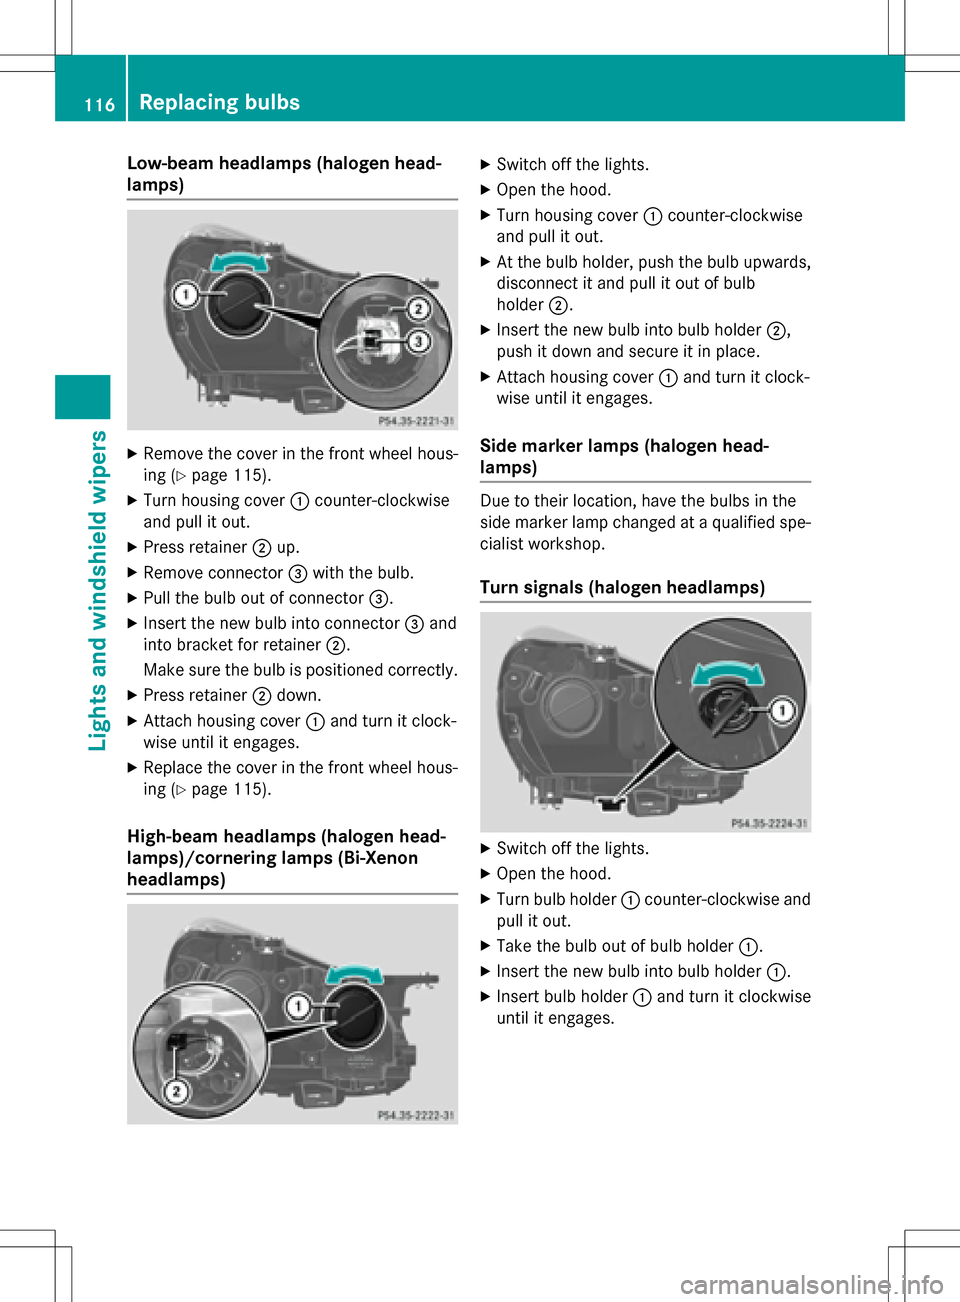
XRemove the cover in the front wheel hous-
ing (
Ypage 115).
XTurn housing cover:counter-clockwise
and pull it out.
XPress retainer ;up.
XRemove connector =with the bulb.
XPull the bulb out of connector =.
XInsert the new bulb into connector =and
into bracket for retainer ;.
Make sure the bulb is positioned correctly.
XPress retainer ;down.
XAttach housing cover :and turn it clock-
wise until it engages.
XReplace the cover in the front wheel hous-
ing (
Ypage 115).
High-beam headlamps (halogen head-
lamps)/cornering lamps (Bi-Xenon
headlamps)
XSwitch off the lights.
XOpen the hood.
XTurn housing cover :counter-clockwise
and pull it out.
XAt the bulb holder, push the bulb upwards,
disconnect it and pull it out of bulb
holder ;.
XInsert the new bulb into bulb holder ;,
push it down and secure it in place.
XAttach housing cover :and turn it clock-
wise until it engages.
Side marker lamps (halogen head-
lamps)
Due to their location, have the bulbs in the
side marker lamp changed at a qualified spe-
cialist workshop.
Turn signals (halogen headlamps)
XSwitch off the lights.
XOpen the hood.
XTurn bulb holder :counter-clockwise and
pull it out.
XTake the bulb out of bulb holder :.
XInsert the new bulb into bulb holder :.
XInsert bulb holder:and turn it clockwise
until it engages.
116Replacing bulbs
Lights and windshield wipers
Page 120 of 358
3ÅIntermittent wipe, high (rain sensor
set to high sensitivity)
4° Continuous wipe, slow
5¯Continuous wipe, fast
BíSingle wipe/î Wipes the wind-
shield using washer fluid
XSwitch on the ignition.
XTurn the combination switch to the corre-
sponding position.
In the ÄorÅ position, the appropriate
wiping frequency is set automatically accord-
ing to the intensity of the rain. In the Å
position, the rain sensor is more sensitive
than in the Äposition, causing the wind-
shield wiper to wipe more frequently.
If the wiper blades are worn, the windshield
will no longer be wiped properly. This could
prevent you from observing the traffic condi-
tions.
Replacing the wiper blades
Important safety notes
GWARNING
If the windshield wipers begin to move while
you are changing the wiper blades, you could be trapped by the wiper arm. There is a risk of
injury.
Always switch off the windshield wipers and
ignition before changing the wiper blades.
!To avoid damaging the wiper blades,
make sure that you touch only the wiper
arm of the wiper.
!Never open the hood if a windshield wiper
arm has been folded away from the wind-
shield.
Never fold a windshield wiper arm without a
wiper blade back onto the windshield.
Hold the windshield wiper arm firmly when
you change the wiper blade. If you release
the windshield wiper arm without a wiper
blade and it falls onto the windshield, the windshield may be damaged by the force of
the impact.
Mercedes-Benz recommends that you have
the wiper blades changed at a qualified
specialist workshop.
!Always position the windshield wiper
arms vertically before folding them away
from the windshield. By doing so, you will
avoid damage to the hood.
Replacing the wiper blades
Removing the wiper blades
XTurn the SmartKey to position 1or 2in the
ignition lock (
Ypage 139).
XSet the windshield wiper to position °.
XWhen the wiper arms have reached the ver-
tical position, turn the SmartKey to position
0 and remove it from the ignition lock
(
Ypage 139).
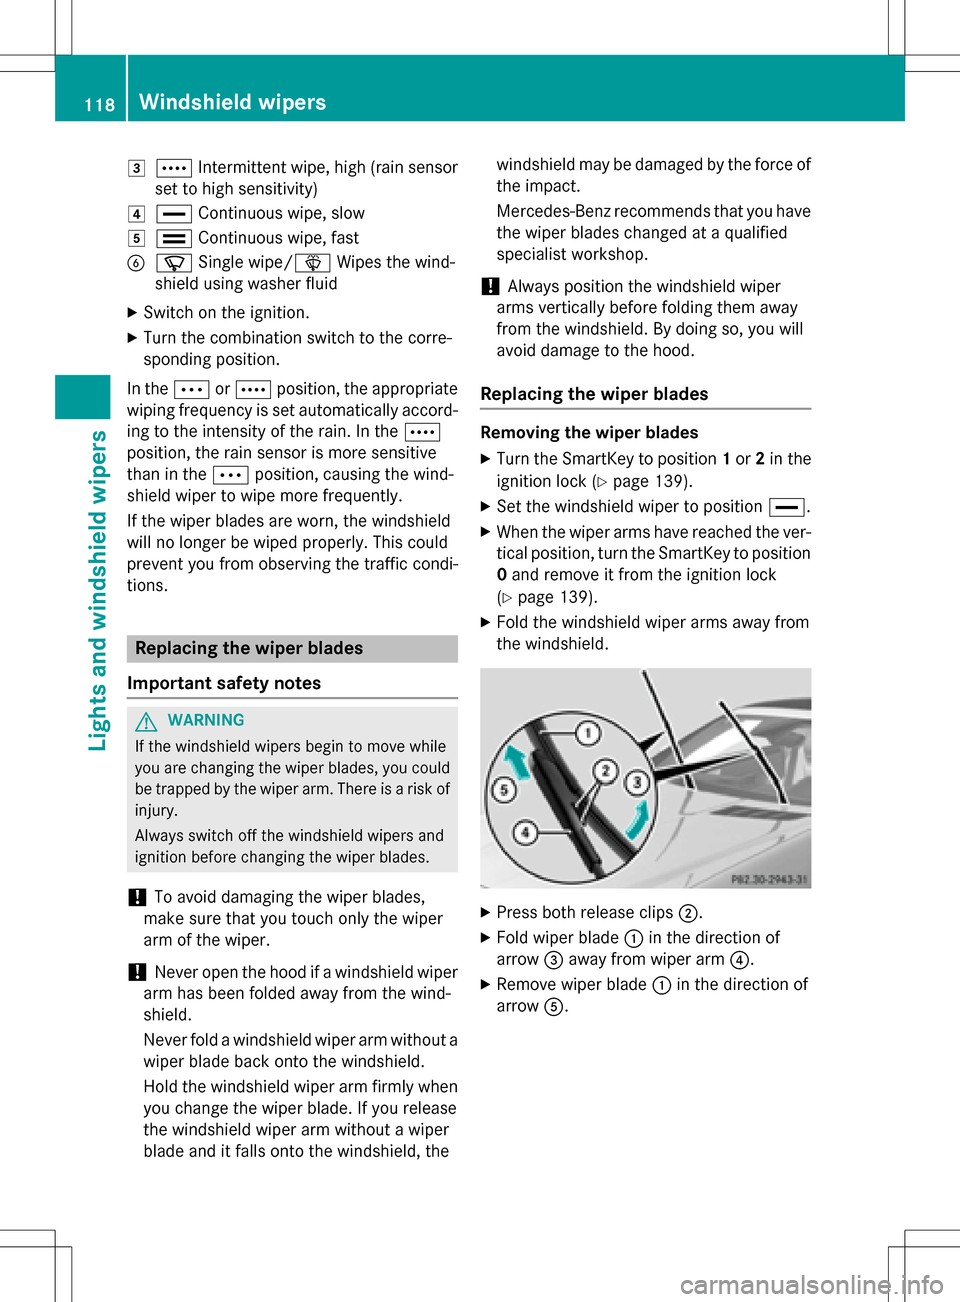
XFold the windshield wiper arms away from
the windshield.
XPress both release clips ;.
XFold wiper blade:in the direction of
arrow =away from wiper arm ?.
XRemove wiper blade:in the direction of
arrow A.
118Windshield wipers
Lights and windshield wipers
Page 122 of 358
Problems with the windshield wipers
ProblemPossible causes/consequences andMSolutions
The windshield wipers
are jammed.Leaves or snow, for example, may be obstructing the windshield
wiper movement. The wiper motor has been deactivated.
XFor safety reasons, you should remove the SmartKey from the
ignition lock.
or
XSwitch off the engine using the Start/Stop button and open the driver's door.
XRemove the cause of the obstruction.
XSwitch the windshield wipers back on.
The windshield wipers
fail completely.The windshield wiper drive is malfunctioning.
XSelect another wiper speed on the combination switch.
XHave the windshield wipers checked at a qualified specialist
workshop.
The windshield washer
fluid from the spray
nozzles no longer hits
the center of the wind-
shield.The spray nozzles are misaligned.
XHave the spray nozzles adjusted at a qualified specialist work-
shop.
120Windshield wipers
Lights and windshield wipers
Page 129 of 358
heat function can only be activated or deac-tivated with the ignition switched off.
ECO start/stop function
During automatic engine switch-off, the cli-
mate control only operates at a reduced capa-
city. If you require full climate control capa-
city, the ECO start/stop function can be
deactivated by pressing the ECO button
(
Ypage 145).
Operating the climate control sys-
tems
Activating/deactivating climate con-
trol
General notes
When the climate control is switched off, the
air supply and air circulation are also
switched off. The windows could fog up.
Therefore, switch off climate control only
briefly
iActivate climate control primarily using
the à button (
Ypage 129).
Air-conditioning system
XTurn the SmartKey to position 2in the igni-
tion lock (
Ypage 139).
XTo switch on: turn airflow control C
clockwise to the desired position (except
position 0) (
Ypage 123).
XTo switch off: turn airflow control C
counter-clockwise to position 0
(
Ypage 123).
Dual-zone automatic climate control
XTurn the SmartKey to position 2in the igni-
tion lock (
Ypage 139).
XTo switch on: press theÃbutton.
The indicator lamp in the Ãbutton lights
up. Airflow and air distribution are set to
automatic mode.
or
XPress the ^button.
The indicator lamp in the ^button goes
out. The previously selected settings are
restored.
XTo switch off: press the^button.
The indicator lamp in the ^button lights
up.
Switching cooling with air dehumidi-
fication on/off
General notes
If you deactivate the "Cooling with air-dehu-
midification" function, the air inside the vehi- cle will not be cooled. The air inside the vehi-
cle will also not be dehumidified. The win-
dows can fog up more quickly. Therefore,
deactivate the cooling with air-dehumidifica-
tion function only briefly.
The "Cooling with air dehumidification" func-
tion is only available when the engine is run-
ning. The air inside the vehicle is cooled and
dehumidified according to the temperature
selected.
Condensation may drip from the underside of
the vehicle when it is in cooling mode. This is
normal and not a sign that there is a malfunc-
tion.
Operating the climate control systems127
Climate control
Page 131 of 358
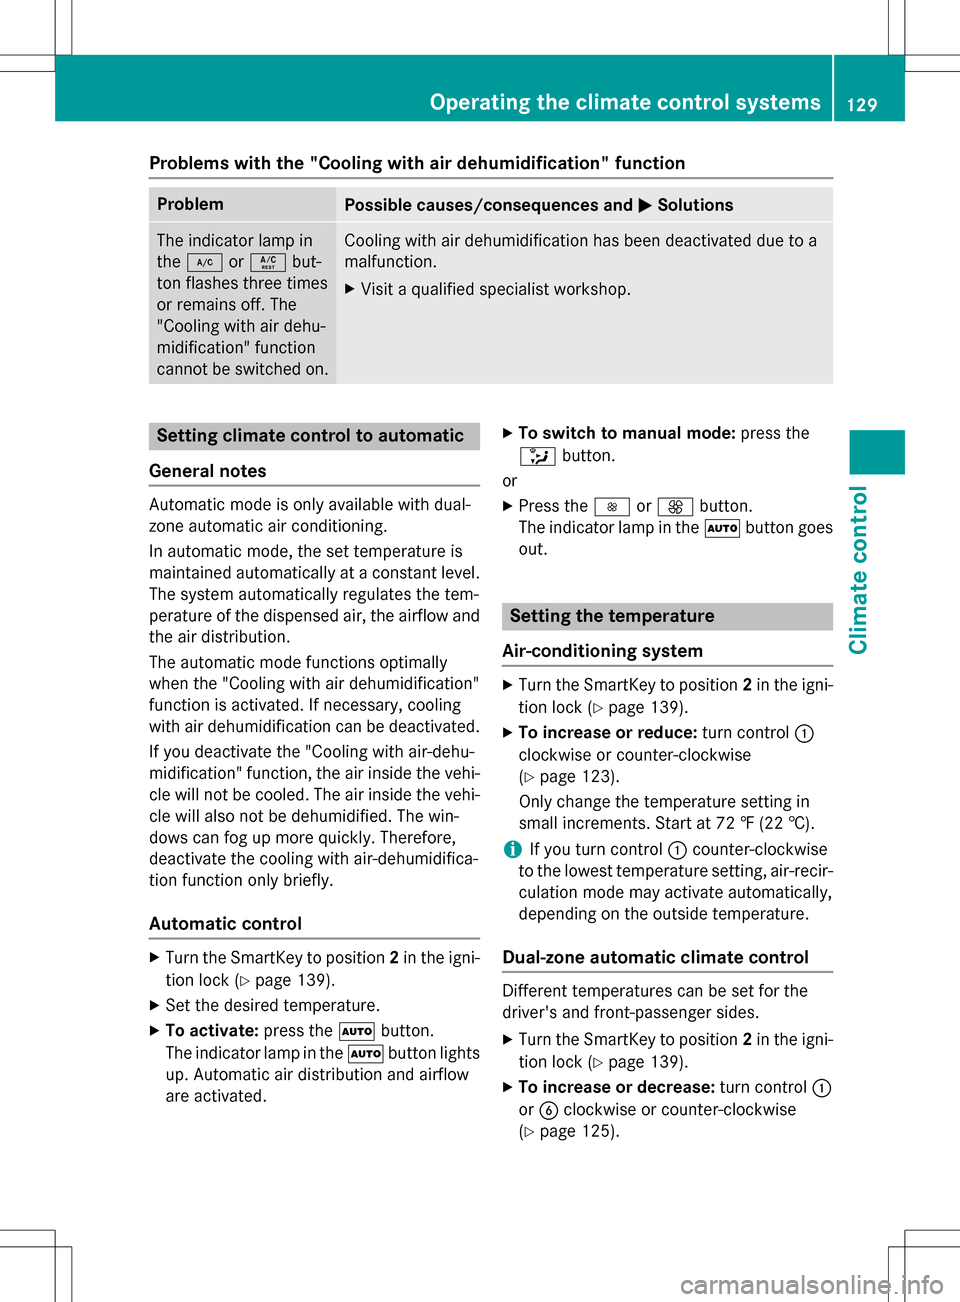
Problems with the "Cooling with air dehumidification" function
ProblemPossible causes/consequences andMSolutions
The indicator lamp in
the¿ orÁ but-
ton flashes three times
or remains off. The
"Cooling with air dehu-
midification" function
cannot be switched on.Cooling with air dehumidification has been deactivated due to a
malfunction.
XVisit a qualified specialist workshop.
Setting climate control to automatic
General notes
Automatic mode is only available with dual-
zone automatic air conditioning.
In automatic mode, the set temperature is
maintained automatically at a constant level.
The system automatically regulates the tem-
perature of the dispensed air, the airflow and
the air distribution.
The automatic mode functions optimally
when the "Cooling with air dehumidification"
function is activated. If necessary, cooling
with air dehumidification can be deactivated.
If you deactivate the "Cooling with air-dehu-
midification" function, the air inside the vehi-
cle will not be cooled. The air inside the vehi-
cle will also not be dehumidified. The win-
dows can fog up more quickly. Therefore,
deactivate the cooling with air-dehumidifica-
tion function only briefly.
Automatic control
XTurn the SmartKey to position 2in the igni-
tion lock (
Ypage 139).
XSet the desired temperature.
XTo activate: press theÃbutton.
The indicator lamp in the Ãbutton lights
up. Automatic air distribution and airflow
are activated.
XTo switch to manual mode: press the
_ button.
or
XPress the IorK button.
The indicator lamp in the Ãbutton goes
out.
Setting the temperature
Air-conditioning system
XTurn the SmartKey to position 2in the igni-
tion lock (
Ypage 139).
XTo increase or reduce: turn control:
clockwise or counter-clockwise
(
Ypage 123).
Only change the temperature setting in
small increments. Start at 72 ‡ (22 †).
iIf you turn control :counter-clockwise
to the lowest temperature setting, air-recir-
culation mode may activate automatically,
depending on the outside temperature.
Dual-zone automatic climate control
Different temperatures can be set for the
driver's and front-passenger sides.
XTurn the SmartKey to position 2in the igni-
tion lock (
Ypage 139).
XTo increase or decrease: turn control:
or B clockwise or counter-clockwise
(
Ypage 125).
Operating the climate control systems129
Climate control
Page 132 of 358
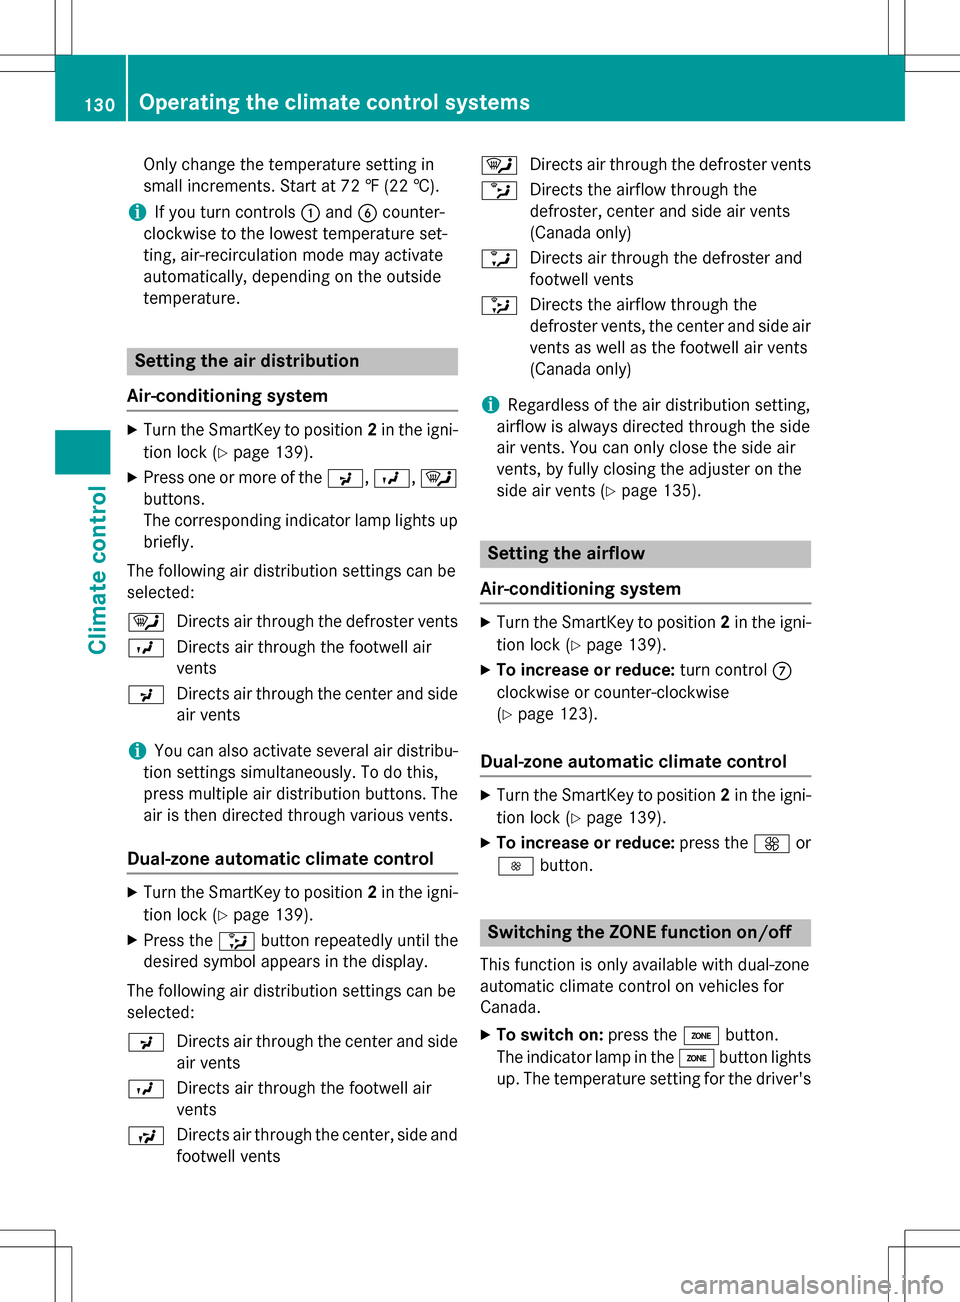
Only change the temperature setting in
small increments. Start at 72 ‡ (22 †).
iIf you turn controls:and Bcounter-
clockwise to the lowest temperature set-
ting, air-recirculation mode may activate
automatically, depending on the outside
temperature.
Setting the air distribution
Air-conditioning system
XTurn the SmartKey to position 2in the igni-
tion lock (
Ypage 139).
XPress one or more of the P,O,¯
buttons.
The corresponding indicator lamp lights up
briefly.
The following air distribution settings can be
selected:
¯ Directs air through the defroster vents
O Directs air through the footwell air
vents
P Directs air through the center and side
air vents
iYou can also activate several air distribu-
tion settings simultaneously. To do this,
press multiple air distribution buttons. The
air is then directed through various vents.
Dual-zone automatic climate control
XTurn the SmartKey to position 2in the igni-
tion lock (
Ypage 139).
XPress the _button repeatedly until the
desired symbol appears in the display.
The following air distribution settings can be
selected:
P Directs air through the center and side
air vents
O Directs air through the footwell air
vents
S Directs air through the center, side and
footwell vents ¯
Directs air through the defroster vents
b Directs the airflow through the
defroster, center and side air vents
(Canada only)
a Directs air through the defroster and
footwell vents
_ Directs the airflow through the
defroster vents, the center and side air
vents as well as the footwell air vents
(Canada only)
iRegardless of the air distribution setting,
airflow is always directed through the side
air vents. You can only close the side air
vents, by fully closing the adjuster on the
side air vents (
Ypage 135).
Setting the airflow
Air-conditioning system
XTurn the SmartKey to position 2in the igni-
tion lock (
Ypage 139).
XTo increase or reduce: turn controlC
clockwise or counter-clockwise
(
Ypage 123).
Dual-zone automatic climate control
XTurn the SmartKey to position 2in the igni-
tion lock (
Ypage 139).
XTo increase or reduce: press theKor
I button.
Switching the ZONE function on/off
This function is only available with dual-zone
automatic climate control on vehicles for
Canada.
XTo switch on: press theábutton.
The indicator lamp in the ábutton lights
up. The temperature setting for the driver's
130Operating the climate control systems
Climate control
Page 133 of 358
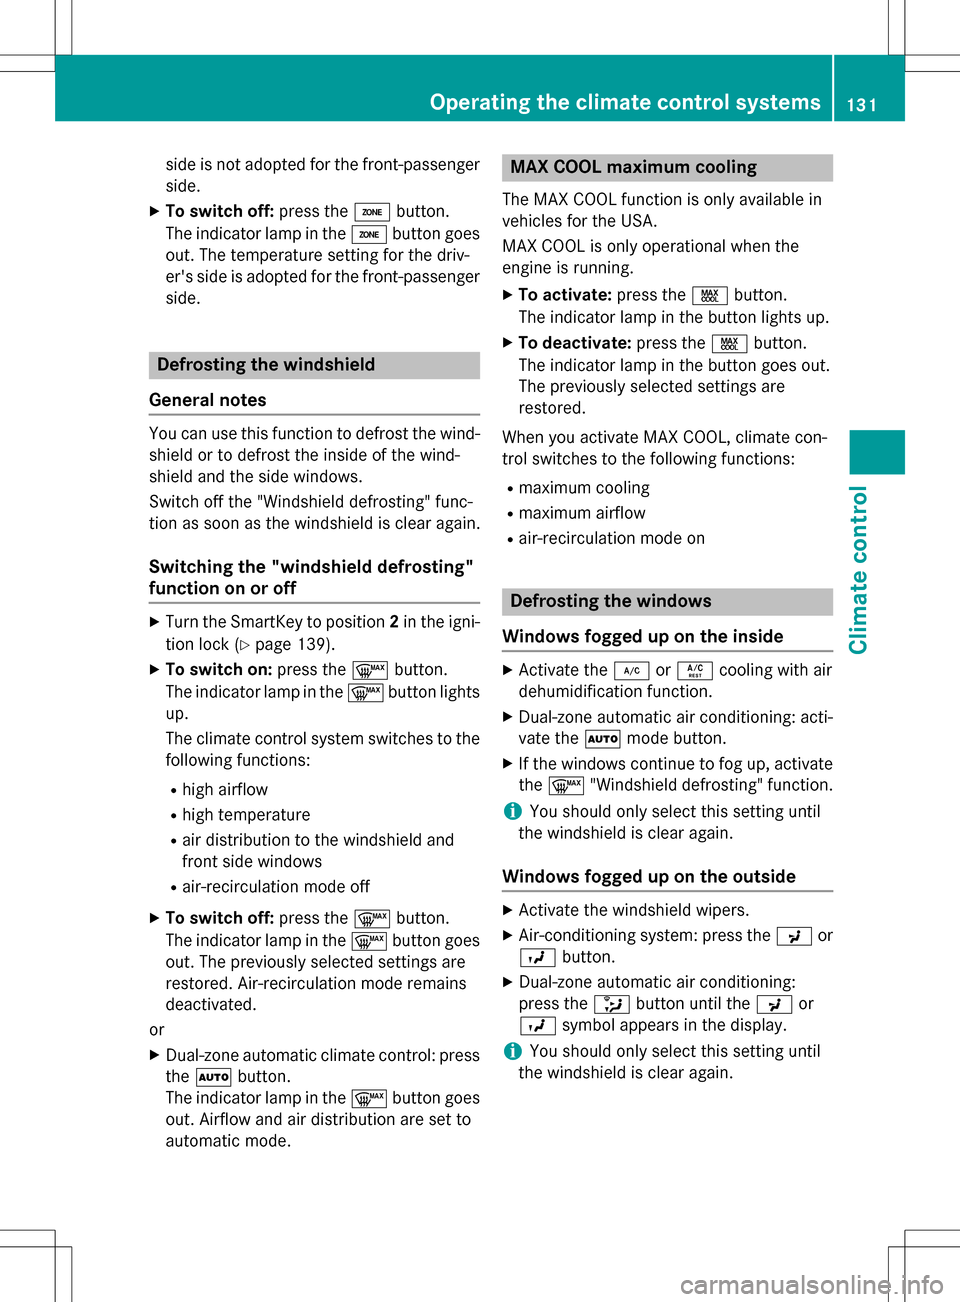
side is not adopted for the front-passenger
side.
XTo switch off:press theábutton.
The indicator lamp in the ábutton goes
out. The temperature setting for the driv-
er's side is adopted for the front-passenger
side.
Defrosting the windshield
General notes
You can use this function to defrost the wind-
shield or to defrost the inside of the wind-
shield and the side windows.
Switch off the "Windshield defrosting" func-
tion as soon as the windshield is clear again.
Switching the "windshield defrosting"
function on or off
XTurn the SmartKey to position 2in the igni-
tion lock (
Ypage 139).
XTo switch on: press the¬button.
The indicator lamp in the ¬button lights
up.
The climate control system switches to the
following functions:
Rhigh airflow
Rhigh temperature
Rair distribution to the windshield and
front side windows
Rair-recirculation mode off
XTo switch off: press the¬button.
The indicator lamp in the ¬button goes
out. The previously selected settings are
restored. Air-recirculation mode remains
deactivated.
or
XDual-zone automatic climate control: press
the à button.
The indicator lamp in the ¬button goes
out. Airflow and air distribution are set to
automatic mode.
MAX COOL maximum cooling
The MAX COOL function is only available in
vehicles for the USA.
MAX COOL is only operational when the
engine is running.
XTo activate: press theÙbutton.
The indicator lamp in the button lights up.
XTo deactivate: press theÙbutton.
The indicator lamp in the button goes out.
The previously selected settings are
restored.
When you activate MAX COOL, climate con-
trol switches to the following functions:
Rmaximum cooling
Rmaximum airflow
Rair-recirculation mode on
Defrosting the windows
Windows fogged up on the inside
XActivate the ¿orÁ cooling with air
dehumidification function.
XDual-zone automatic air conditioning: acti-
vate the Ãmode button.
XIf the windows continue to fog up, activate
the ¬ "Windshield defrosting" function.
iYou should only select this setting until
the windshield is clear again.
Windows fogged up on the outside
XActivate the windshield wipers.
XAir-conditioning system: press the Por
O button.
XDual-zone automatic air conditioning:
press the _button until the Por
O symbol appears in the display.
iYou should only select this setting until
the windshield is clear again.
Operating the climate control systems131
Climate control
Page 134 of 358
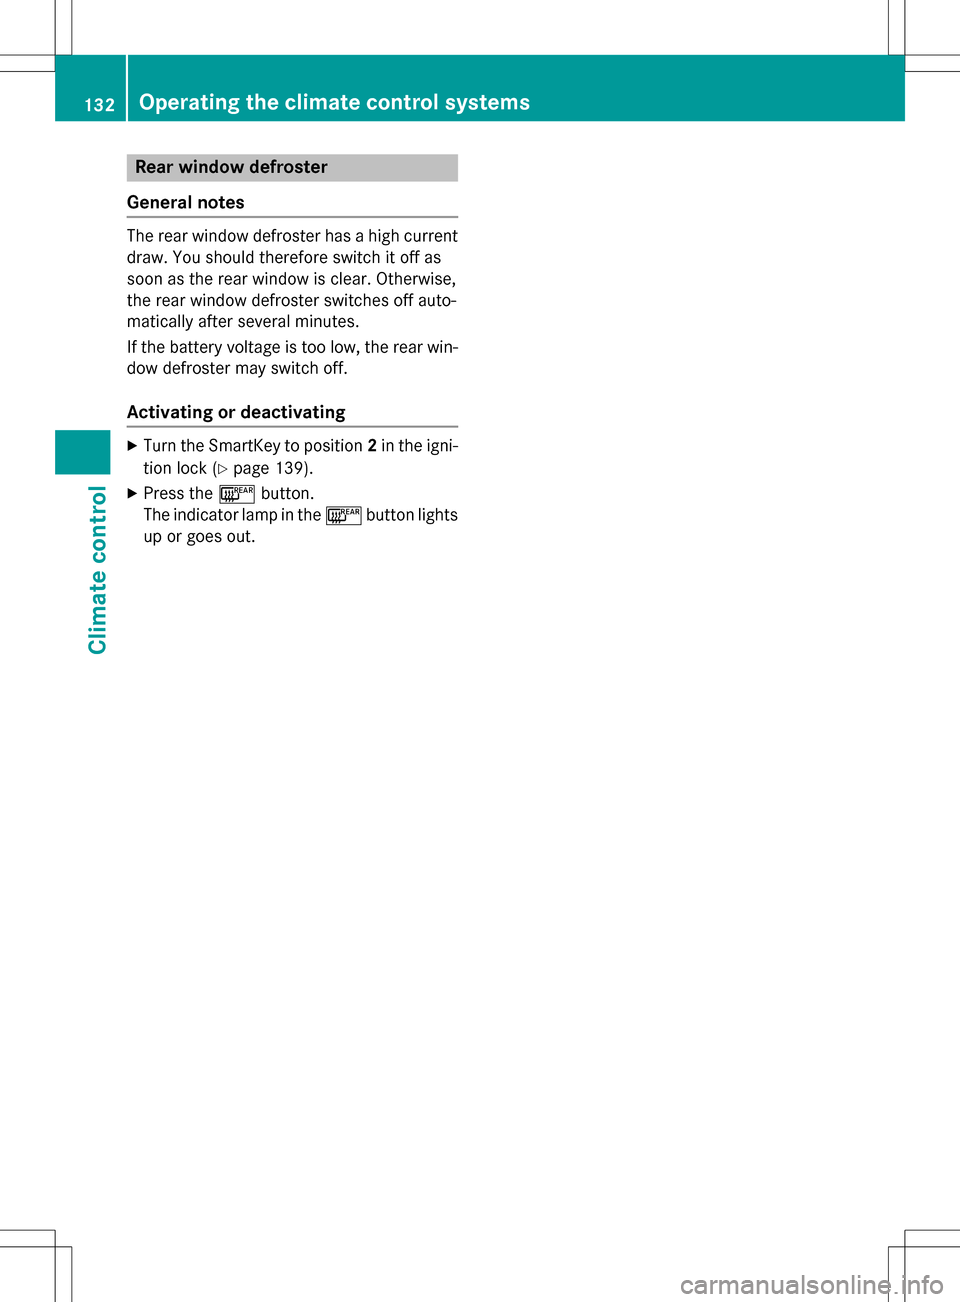
Rear window defroster
General notes
The rear window defroster has a high current draw. You should therefore switch it off as
soon as the rear window is clear. Otherwise,
the rear window defroster switches off auto-
matically after several minutes.
If the battery voltage is too low, the rear win-
dow defroster may switch off.
Activating or deactivating
XTurn the SmartKey to position 2in the igni-
tion lock (
Ypage 139).
XPress the ¤button.
The indicator lamp in the ¤button lights
up or goes out.
132Operating the climate control systems
Climate control
Page 135 of 358
Problems with the rear window defroster
ProblemPossible causes/consequences andMSolutions
The indicator lamp on
the¤ button
flashes. The rear win-
dow defroster has
deactivated prema-
turely or cannot be acti-
vated.The on-board voltage is too low because too many electrical con-
sumers are switched on.
XSwitch off any consumers that are not required, e.g. reading
lamps, interior lighting or the seat heating.
When the battery is sufficiently charged, the rear window
defroster can be activated again.
The roof is open.
XClose the roof.
When the roof is closed, the rear window defroster can be acti-
vated again.
Switching air-recirculation mode
on/off
General notes
If you switch on air-recirculation mode, the
windows can fog up more quickly, in particu-
lar at low temperatures. Only use air-recircu-
lation mode briefly to prevent the windows
from fogging up.
Activating or deactivating
XTurn the SmartKey to position 2in the igni-
tion lock (
Ypage 139).
XTo activate: press thegbutton.
The indicator lamp in the gbutton lights
up.
iAir-recirculation mode is automatically
activated at high levels of pollution (dual-
zone automatic climate control only) or at
high outside temperatures. When air-recir-
culation mode is activated automatically,
the indicator lamp in the gbutton is not
lit. Outside air is added after about
30 minutes.
XTo deactivate: press thegbutton.
The indicator lamp in the gbutton goes
out.
iAir-recirculation mode deactivates auto-
matically:
Rafter approximately five minutes at out-
side temperatures below approximately
41 ‡ (5 †)
Rafter approximately five minutes if cool-
ing with air dehumidification is deactiva-
ted
Rafter approximately 30 minutes at out-
side temperatures above approximately
41 ‡ (5 †) if the "Cooling with air dehu-
midification" function is activated
Switching the residual heat on or off
General notes
The residual heat function is only available on
vehicles for Canada.
It is possible to make use of the residual heat
of the engine to continue heating the station-
ary vehicle for up to 30 minutesafter the
engine has been switched off. The heating
time depends on the set interior temperature.
Operating the climate control systems133
Climate control
Page 136 of 358
Activatingordeactivating
XTurn th eSmartKey to position 0in th eigni-
tion loc kor remove it (
Ypage 139).
XTo activate:press th eÌ orÁ but-
ton.
The indicator lamp in th eÌ orÁ
butto nlights up.
iThe blowe rwill run at alow spee dregard-
less of th eairflow setting .
iIf you activateth eresidual heat function
at high temperatures ,only th eventilation
will be activated. The blowe rrun sat
medium speed.
XTo deacti vate:press th eÌ orÁ
button.
The indicator lamp in th eÌ orÁ
butto ngoes out .
Residual heat is deactivated automatically:
Rafter approximately 30 minute s
Rwhen theignition is switched on
Rif th ebattery voltag edrops
Setting the air vents
Import ant safety notes
GWARNIN G
Ver yhot or ver ycold air can flo wfrom th eair
vents .This could result in burn sor frostbit ein
th eimmediat evicinity of th eair vents .There
is aris kof injury.
Mak esur ethat all vehicl eoccupant salways
maintai n asufficien tdistanc eto th eair out -
lets. If necessary, redirect th eairflow to
another area of th evehicl einterior.
GWARNIN G
When AIRSCARF is switched on ,ver yhot air
can flo wfrom th events in th ehead restraints .
This could result in burn sin th eimmediat e
vicinity of th eair vents .There is aris kof injury.
Reduc eth eheater output before it become s
to ohot .
In order to en surethedirect flo wof fresh air
throug hth eair vents int oth evehicl einterior,
pleas eobserv eth efollowin gnote s:
Rkeep th eair inlet grille on th ehoo dand in
th eengin ecompartmen ton th efront-
passenger side free of blockages, suchas
ice ,snow or leaves.
Rnever cover th eair vents or air intake grilles
in th evehicl einterior.
iYou can mov eth eadjusters for th eair
vents verticall yor horizontally to setthe
direction of th eairflow.
iFo roptimal climat econtrol in th evehicle,
open th eair vents completely and set th e
adj usters to th ecentral position .
Setting the center air vents
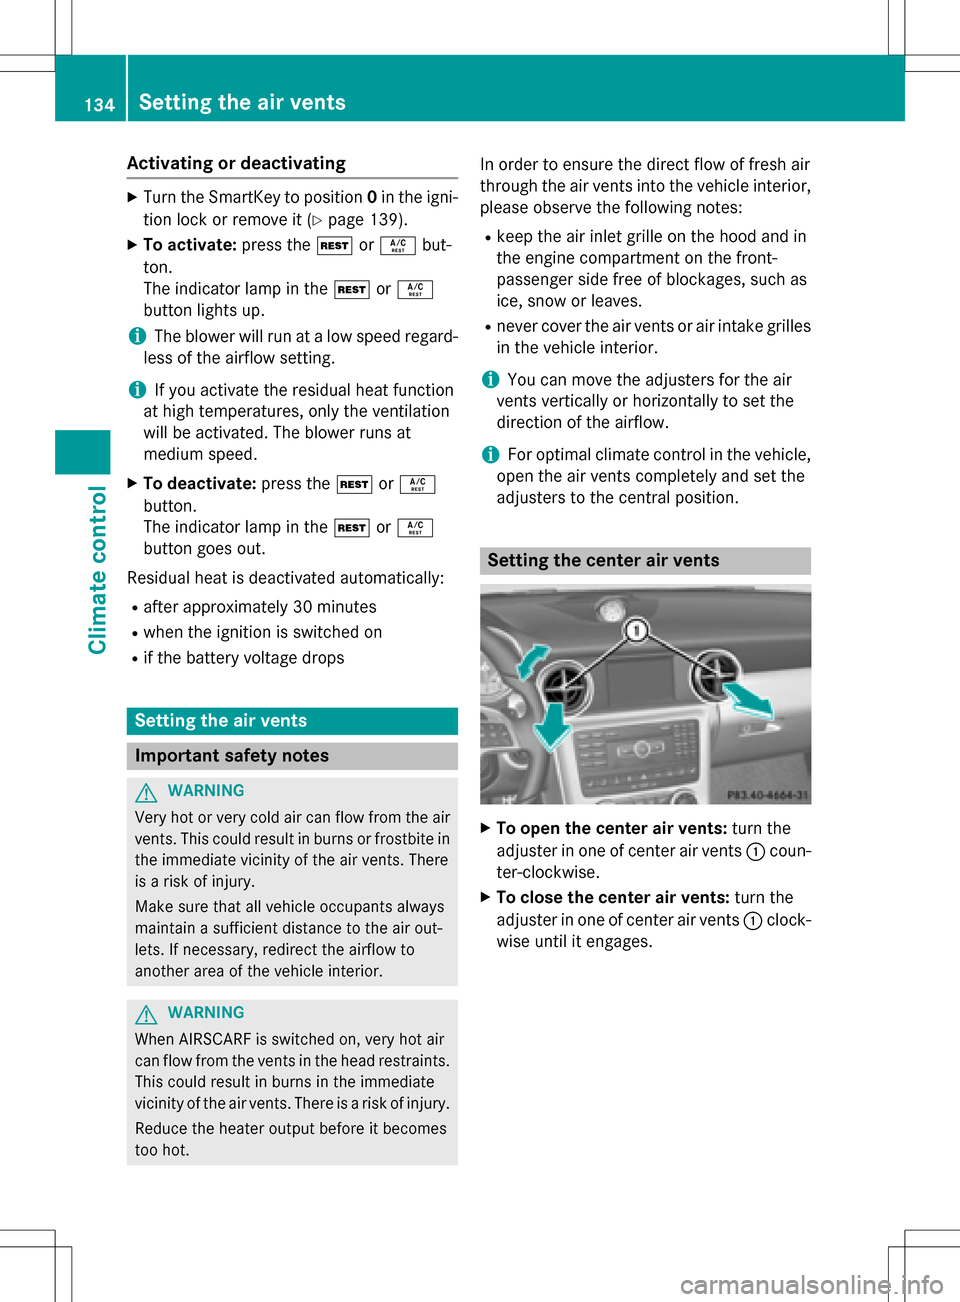
XTo open thecenter air vents: turnth e
adj uster in on eof center air vents :coun-
ter-clockwise.
XTo close th ecenter air vents: turnth e
adjuster in on eof center air vents :clock -
wise until it engages.
134Setting the air vents
Climate control