MERCEDES-BENZ SLK-CLASS ROADSTER 2014 Owners Manual
Manufacturer: MERCEDES-BENZ, Model Year: 2014, Model line: SLK-CLASS ROADSTER, Model: MERCEDES-BENZ SLK-CLASS ROADSTER 2014Pages: 356, PDF Size: 48.94 MB
Page 201 of 356
audio drives or data carriers support this
function.
If track information is stored on the audio
device or medium, the multifunction display
will show the number and title of the track.
The current track does not appear in audio
AUX mode (Aux iliary audio mode: external
audio source connected).
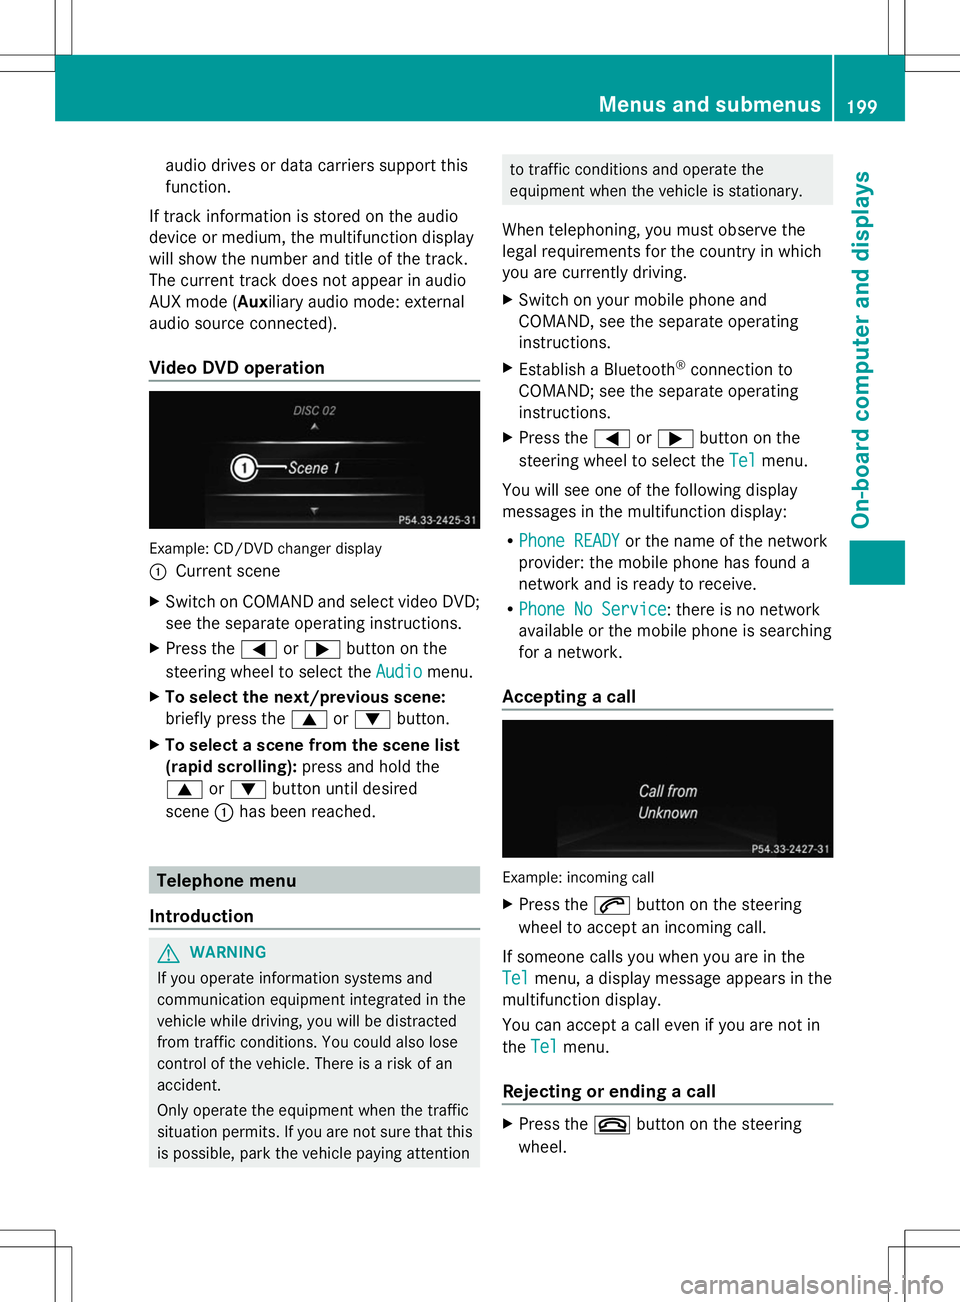
Video DVD operation Example: CD/DVD changer display
:
Current scene
X Switch on COMAND and select video DVD;
see the separate operating instructions.
X Press the =or; button on the
steering wheel to select the Audio Audiomenu.
X To select the next/previous scene:
briefly press the 9or: button.
X To select a scene from the scene list
(rapid scrolling): press and hold the
9 or: button until desired
scene :has been reached. Telephone menu
Introduction G
WARNING
If you operate information systems and
communication equipment integrated in the
vehicle while driving, you will be distracted
from traffic conditions. You could also lose
control of the vehicle. There is a risk of an
accident.
Only operate the equipment when the traffic
situation permits. If you are not sure that this
is possible, park the vehicle paying attention to traffic conditions and operate the
equipment when the vehicle is stationary.
When telephoning, you must observe the
legal requirements for the country in which
you are currently driving.
X Switch on your mobile phone and
COMAND, see the separate operating
instructions.
X Establish a Bluetooth ®
connection to
COMAND; see the separate operating
instructions.
X Press the =or; button on the
steering wheel to select the Tel Telmenu.
You will see one of the following display
messages in the multifunction display:
R Phone READY Phone READY or the name of the network
provider: the mobile phone has found a
network and is ready to receive.
R Phone No Service Phone No Service: there is no network
available or the mobile phone is searching
for a network.
Accepting a call Example: incoming call
X
Press the 6button on the steering
wheel to accept an incoming call.
If someone calls you when you are in the
Tel Tel menu, a display message appears in the
multifunction display.
You can accept a call even if you are not in
the Tel Tel menu.
Rejecting or ending a call X
Press the ~button on the steering
wheel. Menus and submenus
199On-board computer and displays Z
Page 202 of 356
You can end or reject a call even if you are not
in the Tel
Tel menu.
Dialing a number from the phone book X
Press the =or; button on the
steering wheel to select the Tel
Tel menu.
X Press the 9,:ora button to
switch to the phone book.
X Press the 9or: button to select the
desired name.
or
X To begin rapid scrolling: press and hold
the 9 or: button for longer than
one second.
Rapid scrolling stops when you release the
button or reach the end of the list.
X If only one telephone number is stored
for a name: press the6ora button
to start dialing.
or
X If there is more than one number for a
particular name: press the6ora
button to display the numbers.
X Press the 9or: button to select the
number you want to dial.
X Press the 6ora button to start
dialing.
or
X To exit the phone book: press the~
or % button.
Redialing The on-board computer saves the last names
or numbers dialed in the redial memory.
X Press the =or; button on the
steering wheel to select the Tel
Tel menu.
X Press the 6button to switch to the
redial memory.
X Press the 9or: button to select the
desired name or number. X
Press the 6ora button to start
dialing.
or
X To exit the redial memory: press the
~ or% button. Assistance menu
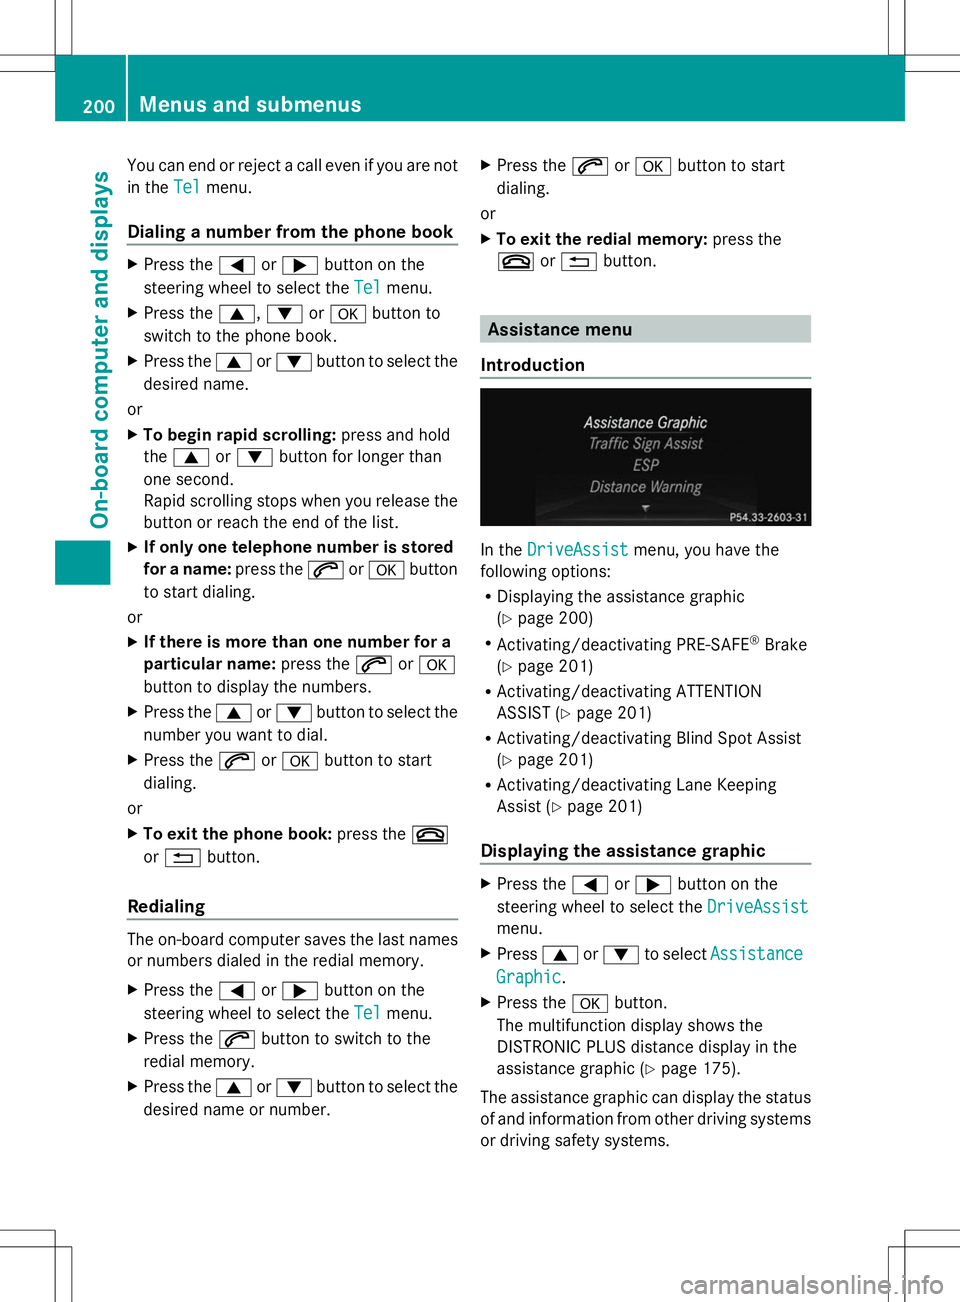
Introduction In the
DriveAssist DriveAssist menu, you have the
following options:
R Displaying the assistance graphic
(Y page 200)
R Activating/deactivating PRE-SAFE ®
Brake
(Y page 201)
R Activating/deactivating ATTENTION
ASSIST (Y page 201)
R Activating/deactivating Blind Spot Assist
(Y page 201)
R Activating/deactivating Lane Keeping
Assist (Y page 201)
Displaying the assistance graphic X
Press the =or; button on the
steering wheel to select the DriveAssist DriveAssist
menu.
X Press 9or: to select Assistance
Assistance
Graphic
Graphic .
X Press the abutton.
The multifunction display shows the
DISTRONIC PLUS distance display in the
assistance graphic (Y page 175).
The assistance graphic can display the status
of and information from other driving systems
or driving safety systems. 200
Menus and submenusOn-board computer and displays
Page 203 of 356
The assistance graphic shows:
R
the é symbol when ATTENTION ASSIST
(Y page 186) is deactivated.
R the lane markings as bright lines when Lane
Keeping Assist (Y page 188) is activated.
R the æ symbol when PRE-SAFE ®
Brake
(Y page 65) is deactivated.
Activating/deactivating PRE-SAFE ®
Brake PRE-SAFE
®
Brake is only available in vehicles
with DISTRONIC PLUS.
X Press =or; on the steering wheel
to select the DriveAssist
DriveAssist menu.
X Press the 9or: button to select
PRE-SAFE Brake PRE-SAFE Brake .
X Press the abutton.
The current selection is displayed.
X To activate/deactivate: press thea
button again.
When PRE-SAFE ®
Brake is deactivated, the
æ symbol appears in the assistance
graphic in the multifunction display.
For more information on PRE-SAFE ®
Brake,
see (Y page 65).
Activating/deactivating ATTENTION
ASSIST X
Press =or; on the steering wheel
to select the DriveAssist DriveAssist menu.
X Press the 9or: button to select
ATTENTION ASSIST
ATTENTION ASSIST .
X Press the abutton.
The current selection is displayed.
X To activate/deactivate: press thea
button again.
When ATTENTION ASSIST is deactivated,
the é symbol appears in the
multifunction display in the assistance
graphics display.
For further information about ATTENTION
ASSIST, see (Y page 186). Activating/deactivating Blind Spot
Assist X
Press the =or; button on the
steering wheel to select the DriveAssist
DriveAssist
menu.
X Press the 9or: button to select
Blind Spot Assist Blind Spot Assist .
X Press the abutton.
The current selection is displayed.
X To activate/deactivate: press thea
button again.
Further information about Blind Spot Assist
(Y page 187)
Activating/deactivating Lane Keeping
Assist X
Press the =or; button on the
steering wheel to select the DriveAssist
DriveAssist
menu.
X Press 9or: to select Lane Lane
Keeping Assist
Keeping Assist .
X Press the abutton.
The current selection is displayed.
X Press ato confirm.
X Press :or9 to set Off
Off, Standard
Standard
or Adaptive
Adaptive .
X Press the abutton to save the setting.
When Lane Keeping Assist is activated, the
multifunction display shows the lane
markings as bright lines in the assistance
graphic.
For further information about Lane Keeping
Assist, see (Y page 188). Maintenance menu Menus and submenus
201On-board computer and displays Z
Page 204 of 356
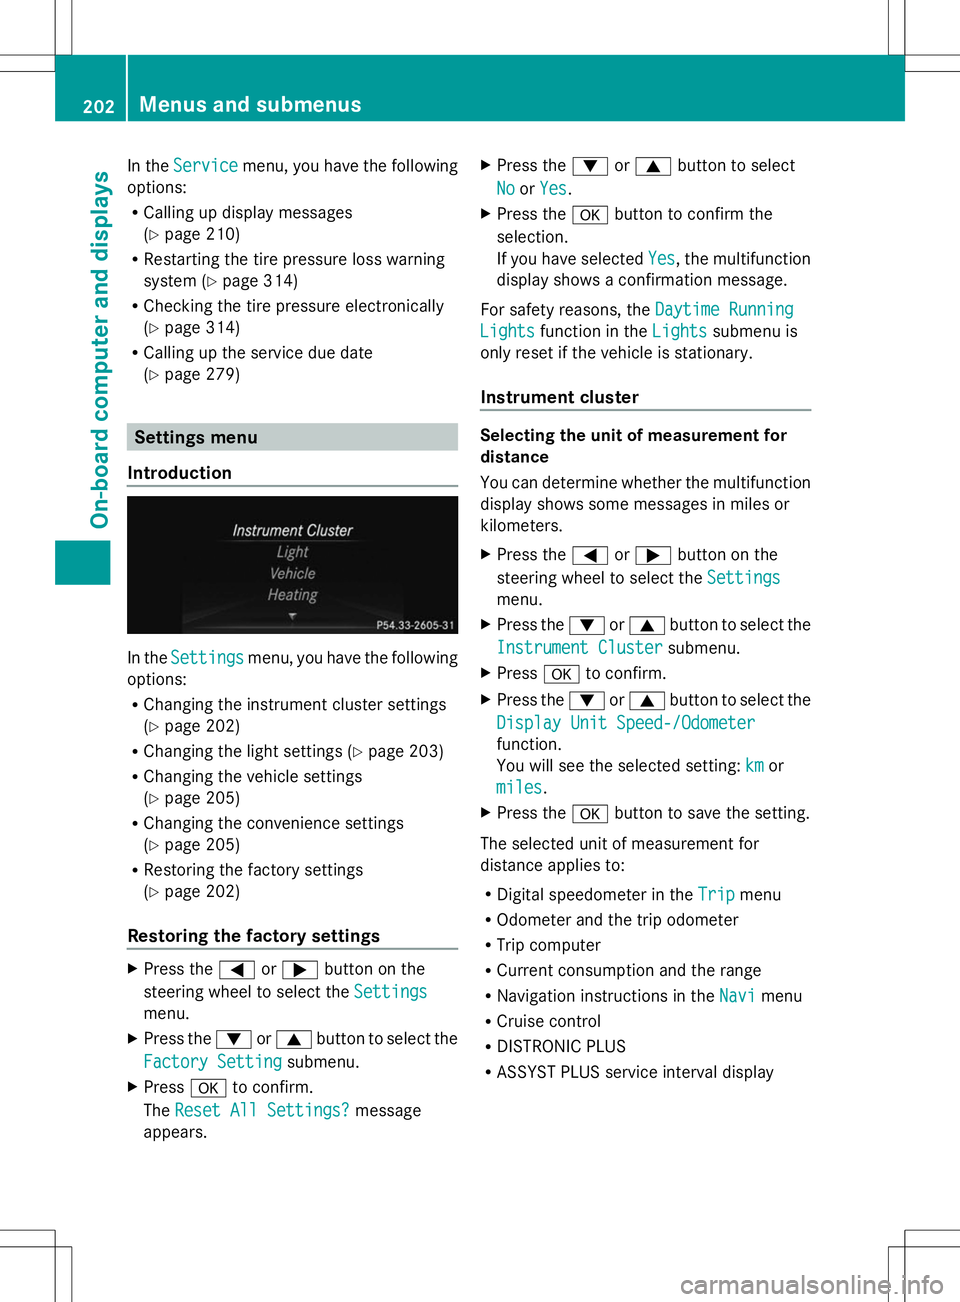
In the
Service
Service menu, you have the following
options:
R Calling up display messages
(Y page 210)
R Restarting the tire pressure loss warning
system (Y page 314)
R Checking the tire pressure electronically
(Y page 314)
R Calling up the service due date
(Y page 279) Settings menu
Introduction In the
Settings Settings menu, you have the following
options:
R Changing the instrument cluster settings
(Y page 202)
R Changing the light settings (Y page 203)
R Changing the vehicle settings
(Y page 205)
R Changing the convenience settings
(Y page 205)
R Restoring the factory settings
(Y page 202)
Restoring the factory settings X
Press the =or; button on the
steering wheel to select the Settings
Settings
menu.
X Press the :or9 button to select the
Factory Setting
Factory Setting submenu.
X Press ato confirm.
The Reset All Settings? Reset All Settings? message
appears. X
Press the :or9 button to select
No
No orYes
Yes.
X Press the abutton to confirm the
selection.
If you have selected Yes Yes, the multifunction
display shows a confirmation message.
For safety reasons, the Daytime Running Daytime Running
Lights Lights function in the Lights
Lightssubmenu is
only reset if the vehicle is stationary.
Instrument cluster Selecting the unit of measurement for
distance
You can determine whether the multifunction
display shows some messages in miles or
kilometers.
X
Press the =or; button on the
steering wheel to select the Settings Settings
menu.
X Press the :or9 button to select the
Instrument Cluster
Instrument Cluster submenu.
X Press ato confirm.
X Press the :or9 button to select the
Display Unit Speed-/Odometer
Display Unit Speed-/Odometer
function.
You will see the selected setting: km
km or
miles miles.
X Press the abutton to save the setting.
The selected unit of measurement for
distance applies to:
R Digital speedometer in the Trip Tripmenu
R Odometer and the trip odometer
R Trip computer
R Current consumption and the range
R Navigation instructions in the Navi
Navimenu
R Cruise control
R DISTRONIC PLUS
R ASSYST PLUS service interval display 202
Menus and submenusOn-board computer and displays
Page 205 of 356
Switching the additional speedometer
on/off
Only vehicles with manual transmission have
this function.
X Press the =or; button on the
steering wheel to select the Settings
Settings
menu.
X Press the :or9 button to select the
Instrument Cluster
Instrument Cluster submenu.
X Press ato confirm.
X Press the :or9 button to select the
Additional Speedometer [mph]
Additional Speedometer [mph]
function.
You will see the selected setting: On Onor
Off
Off.
X Press the abutton to save the setting.
i Speed is displayed in mph.
The Additional Speedometer [mph]
Additional Speedometer [mph]
function allows you to choose whether the
status area in the multifunction display
always shows the speed in mph
mph instead of the
outside temperature.
Selecting the permanent display function
You can determine whether the multifunction
display permanently shows your speed or the
outside temperature.
X Press the =or; button on the
steering wheel to select the Settings
Settings
menu.
X Press the :or9 button to select the
Instrument Cluster
Instrument Cluster submenu.
X Press ato confirm.
X Press the :or9 button to select the
Permanent Display
Permanent Display function.
You will see the selected setting Outside Outside
Temperature
Temperature orAdditional
Additional
Speedometer [km/h]
Speedometer [km/h]/Additional Additional
Speedometer [mph]
Speedometer [mph].
X Press the abutton to save the setting.
i The speed is displayed in km/h/mph. Lights Setting the daytime running lamps
i
This function is not available in Canada.
X Press the =or; button on the
steering wheel to select the Sett
Sett menu.
X Press the :or9 button to select the
Lights Lights submenu.
X Press ato confirm.
X Press the :or9 button to select the
Daytime Running Lights
Daytime Running Lights function.
If the Daytime Running Lights
Daytime Running Lights function
has been switched on, the cone of light and
the W symbol in the multifunction
display are shown in orange.
X Press the abutton to save the setting.
Further information on daytime running
lamps (Y page 109).
Switching Adaptive Highbeam Assist on/
off
X Press the =or; button on the
steering wheel to select the Sett
Sett menu.
X Press the :or9 button to select the
Lights Lights submenu.
X Press ato confirm.
X Press the :or9 button to select the
Adaptive Highbeam
Adaptive Highbeam function.
If the Adaptive Highbeam
Adaptive Highbeam function has
been switched on, the cone of light and the
_ symbol in the multifunction display
are shown in orange.
X Press the abutton to save the setting.
For further information about Adaptive
Highbeam Assist, see (Y page 113).
Setting the brightness of the ambient
lighting
X Press the =or; button on the
steering wheel to select the Settings
Settings
menu.
X Press the :or9 button to select the
Lights Lights submenu.
X Press ato confirm. Menus and submenus
203On-board computer and displays Z
Page 206 of 356
X
Press the :or9 button to select the
Amb. Light +/-
Amb. Light +/- function.
You will see the selected setting.
X Press ato confirm.
X Press the :or9 button to adjust the
brightness to any level from Off
Off toLevel
Level
5
5 (bright).
X Press the aor% button to save the
setting.
Setting the ambient lighting color
X Press the =or; button on the
steering wheel to select the Settings
Settings
menu.
X Press the :or9 button to select the
Lights
Lights submenu.
X Press ato confirm.
X Press the :or9 button to select the
Ambient Light Color
Ambient Light Color function.
X Press ato confirm.
X Press the :or9 button to set the
color to SOLAR SOLAR,SOLAR orange
SOLAR orange orSOLAR
SOLAR
red
red.
X Press the aor% button to save the
setting.
Activating/deactivating surround
lighting and exterior lighting delayed
switch-off
X Press the =or; button on the
steering wheel to select the Sett
Sett menu.
X Press the :or9 button to select the
Lights
Lights submenu.
X Press ato confirm.
X Press the :or9 button to select the
Surround Lighting
Surround Lighting function.
When the Surround Lighting Surround Lighting function is
activated, the light cone and the area
around the vehicle are displayed in orange
in the multifunction display.
X Press the abutton to save the setting. Deactivating delayed switch-off of the
exterior lighting temporarily:
X
Before leaving the vehicle, turn the
SmartKey to position 0in the ignition lock.
X Turn the SmartKey to position 2in the
ignition lock.
The exterior lighting delayed switch-off is
deactivated.
Delayed switch-off of the exterior lighting is
reactivated the next time you start the
engine.
If you have activated the Surround
Surround
Lighting Lighting function and the light switch is set
to Ã, the following functions are activated
when it is dark:
R surround lighting: the exterior lighting
remains lit for 40 seconds after unlocking
with the SmartKey. If you start the engine,
the surround lighting is switched off and
automatic headlamp mode is activated
(Y page 109).
R exterior lighting delayed switch-off: the
exterior lighting remains lit for
60 seconds after the engine is switched off.
If you close all the doors and the trunk lid,
the exterior lighting goes off after
15 seconds.
i Depending on your vehicle's equipment,
when the surround lighting and delayed
switch-off exterior lighting are on, the
following light up:
R Parking lamps
R Front fog lamps
R Low-beam headlamps
R Daytime running lamps
R Side marker lamps
R Surround lighting in the exterior mirrors
Activating/deactivating the interior
lighting delayed switch-off
If you activate the Interior Lighting Interior Lighting
Delay
Delay function, the interior lighting remains
on for 20 seconds after you remove the
SmartKey from the ignition lock. 204
Menus and submenusOn-board computer and displays
Page 207 of 356
X
Press the =or; button on the
steering wheel to select the Sett
Settmenu.
X Press the :or9 button to select the
Lights
Lights submenu.
X Press ato confirm.
X Press the :or9 button to select the
Interior Lighting Delay
Interior Lighting Delay function.
If the Interior
Interior Lighting
LightingDelay
Delayfunction
has been switched on, the vehicle interior
is displayed in orange in the multifunction
display.
X Press the abutton to save the setting.
Vehicle Activating/deactivating the automatic
door locking mechanism
X Press the =or; button on the
steering wheel to select the Sett
Sett menu.
X Press the :or9 button to select the
Vehicle Vehicle submenu.
X Press ato confirm.
X Press the :or9 button to select the
Automatic Door Lock
Automatic Door Lock function.
When the Automatic
Automatic Door
DoorLock
Lockfunction
is activated, the left-hand vehicle door is
displayed in orange in the multifunction
display.
X Press the abutton to save the setting.
If you activate the Automatic Door Lock Automatic Door Lock
function, the vehicle is centrally locked above
a speed of around 9 mph (15 km/h).
For further information on the automatic
locking feature, see (Y page 78).
Activating/deactivating the acoustic
locking verification signal
If you switch on the Acoustic AcousticLock
Lockfunction,
an acoustic signal sounds when you lock the
vehicle.
X Press the =or; button on the
steering wheel to select the Sett
Sett menu.
X Press the :or9 button to select the
Vehicle Vehicle submenu. X
Press ato confirm.
X Press the :or9 button to select the
Acoustic Lock Acoustic Lock function.
If the Acoustic Acoustic Lock
Lockfunction is activated,
the & symbol in the multifunction
display lights up orange.
X Press the abutton to save the setting.
Activating/deactivating the radar sensor
system
X Press the =or; button on the
steering wheel to select the Settings
Settings
menu.
X Press the :or9 button to select the
Vehicle Vehicle submenu.
X Press ato confirm.
X Press the 9or: button to select
Radar Sensor (See Oper. Manual):
Radar Sensor (See Oper. Manual): .
You will see the selected setting: Enabled
Enabled
or Disabled
Disabled .
X Press the abutton to save the setting.
The following systems are switched off when
the radar sensor system is deactivated:
R DISTRONIC PLUS (Y page 169)
R BAS PLUS (Y page 60)
R PRE-SAFE ®
Brake (Y page 65)
Convenience Activating/deactivating the EASY-
ENTRY/EXIT feature
G
WARNING
When the EASY-ENTRY/EXIT feature adjusts
the steering wheel, you and other vehicle
occupants – particularly children – could
become trapped. There is a risk of injury.
While the EASY-ENTRY/EXIT feature is
making adjustments, make sure that no one
has any body parts in the sweep of the
steering wheel. Menus and submenus
205On-board computer and displays
Z
Page 208 of 356
If somebody becomes trapped:
R
press one of the memory function position
buttons, or
R move the switch for steering wheel
adjustment in the opposite direction to that
in which the steering wheel is moving.
The adjustment process is stopped.
X Press the =or; button on the
steering wheel to select the Sett
Sett menu.
X Press the :or9 button to select the
Convenience
Convenience submenu.
X Press ato confirm.
X Press the :or9 button to select the
Easy Entry/Exit
Easy Entry/Exit function.
If the Easy Entry/Exit Easy Entry/Exit function is
activated, the vehicle steering wheel is
displayed in orange in the multifunction
display.
X Press the abutton to save the setting.
Further information on the EASY-ENTRY/EXIT
feature (Y page 101).
Switching the belt adjustment on/off
X Press the =or; button on the
steering wheel to select the Sett
Sett menu.
X Press the :or9 button to select the
Convenience
Convenience submenu.
X Press ato confirm.
X Press the :or9 button to select the
Belt Adjustment
Belt Adjustment function.
When the Belt Adjustment Belt Adjustment function is
activated, the vehicle seat belt is displayed
in orange in the multifunction display.
X Press the abutton to save the setting.
For further information on belt adjustment,
see (Y page 53).
Switching the fold-in mirrors with the
locking feature on/off
This function is only available on vehicles with
the memory function (Y page 105).When you activate the
Auto. Mirror
Auto. Mirror
Folding Folding function, the exterior mirrors are
folded in when the vehicle is locked.
If you unlock the vehicle and then open a
door, the exterior mirrors fold out again.
If you have switched on the Auto. Mirror
Auto. Mirror
Folding Folding function and you fold in the exterior
mirrors using the button on the door
(Y page 104), they will not fold out
automatically. The exterior mirrors can then
only be folded out using the button on the
door.
X Press the =or; button on the
steering wheel to select the Sett
Sett menu.
X Press the :or9 button to select the
Convenience Convenience submenu.
X Press ato confirm.
X Press :or9 to select the Auto.
Auto.
Mirror Folding
Mirror Folding function.
If the Auto. Mirror Folding
Auto. Mirror Folding function is
activated, the vehicle's exterior mirror is
displayed in orange in the multifunction
display.
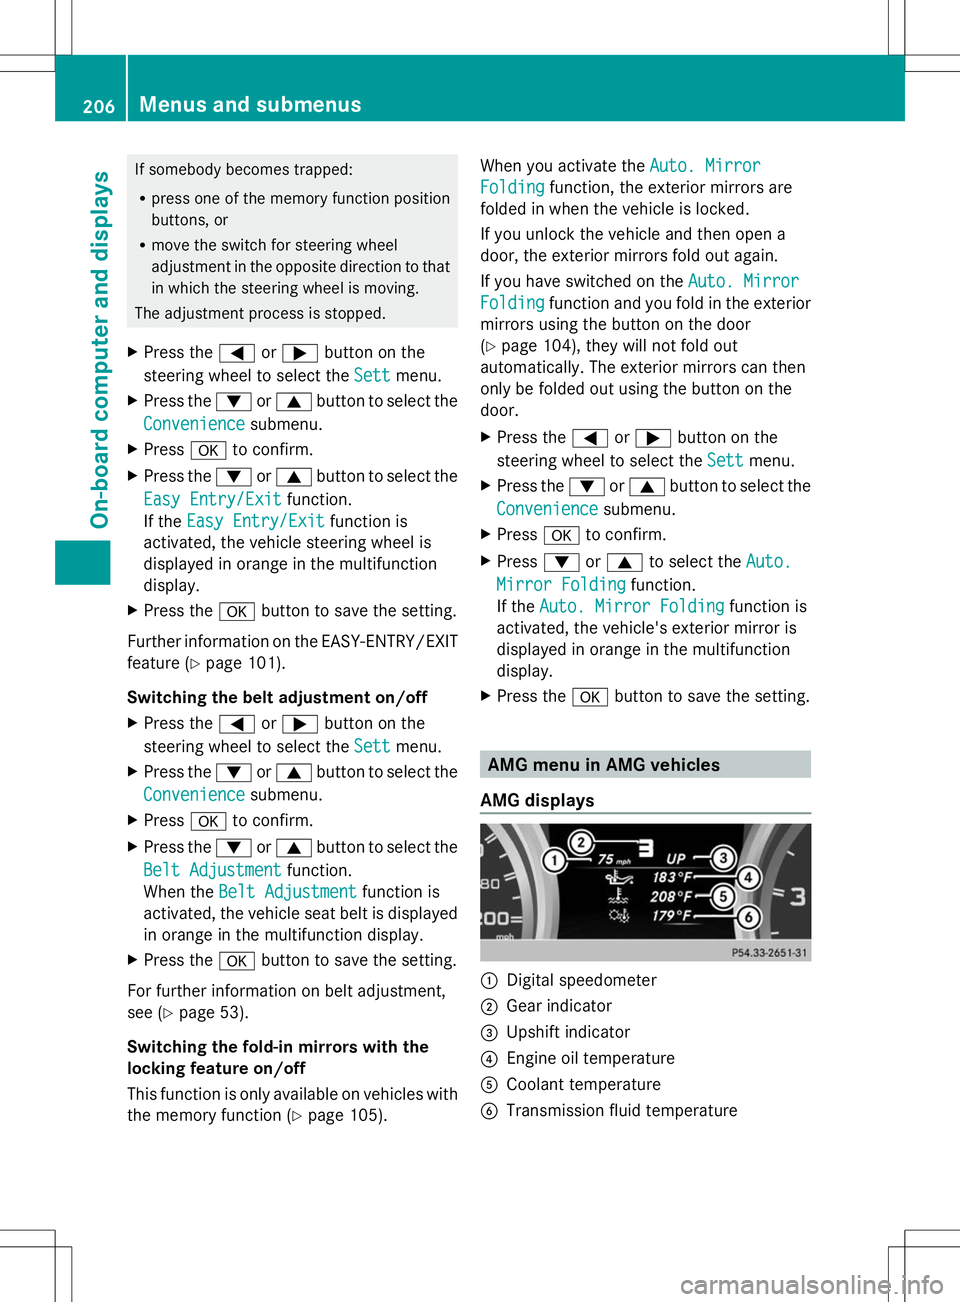
X Press the abutton to save the setting. AMG menu in AMG vehicles
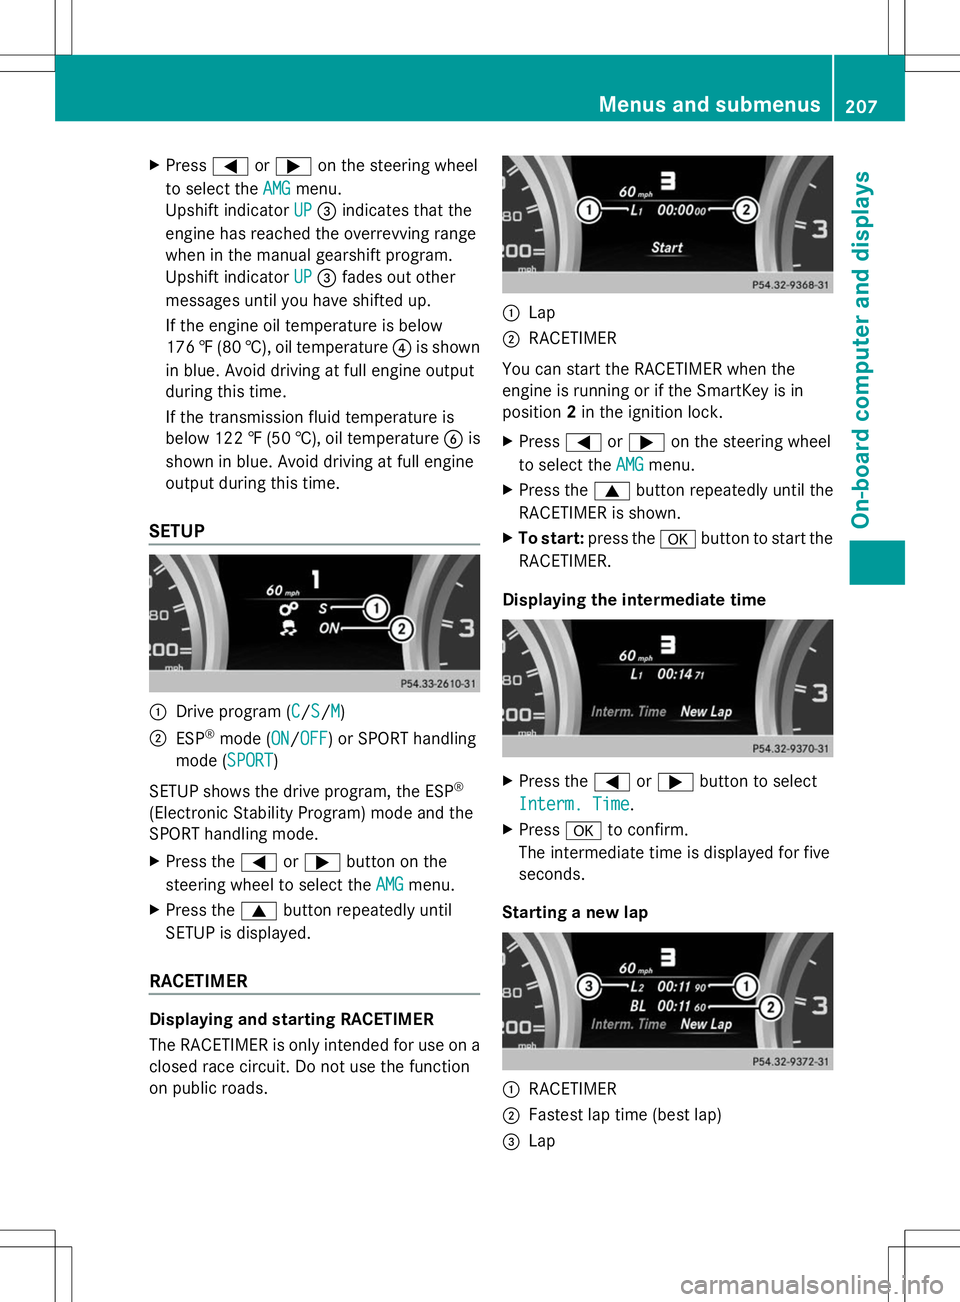
AMG displays :
Digital speedometer
; Gear indicator
= Upshift indicator
? Engine oil temperature
A Coolant temperature
B Transmission fluid temperature 206
Menus and submenusOn-board computer and displays
Page 209 of 356
X
Press =or; on the steering wheel
to select the AMG
AMGmenu.
Upshift indicator UP
UP= indicates that the
engine has reached the overrevving range
when in the manual gearshift program.
Upshift indicator UP UP= fades out other
messages until you have shifted up.
If the engine oil temperature is below
176 ‡(80 †), oil temperature ?is shown
in blue. Avoid driving at full engine output
during this time.
If the transmission fluid temperature is
below 122 ‡ (50†) , oil temperature Bis
shown in blue. Avoid driving at full engine
output during this time.
SETUP :
Drive program (C C/SS/MM)
; ESP ®
mode (ON ON/OFFOFF) or SPORT handling
mode (SPORT SPORT)
SETUP shows the drive program, the ESP ®
(Electronic Stability Program) mode and the
SPORT handling mode.
X Press the =or; button on the
steering wheel to select the AMG
AMG menu.
X Press the 9button repeatedly until
SETUP is displayed.
RACETIMER Displaying and starting RACETIMER
The RACETIMER is only intended for use on a
closed race circuit. Do not use the function
on public roads. :
Lap
; RACETIMER
You can start the RACETIMER when the
engine is running or if the SmartKey is in
position 2in the ignition lock.
X Press =or; on the steering wheel
to select the AMG
AMG menu.
X Press the 9button repeatedly until the
RACETIMER is shown.
X To start: press the abutton to start the
RACETIMER.
Displaying the intermediate time X
Press the =or; button to select
Interm. Time Interm. Time .
X Press ato confirm.
The intermediate time is displayed for five
seconds.
Starting a new lap :
RACETIMER
; Fastest lap time (best lap)
= Lap Menus and submenus
207On-board computer and displays Z
Page 210 of 356
X
Press ato confirm New Lap
New Lap.
i It is possible to store a maximum of
sixteen laps. The 16th lap can only be
completed with Finish Lap
Finish Lap.
Stopping the RACETIMER X
Press the %button on the steering
wheel.
X Press ato confirm Yes
Yes.
The RACETIMER interrupts timing when you
stop the vehicle and turn the SmartKey to
position 1in the ignition lock. If you turn the
SmartKey to position 2or 3and then press
a to confirm Start
Start , timing is continued.
Resetting the current lap
X Stop the RACETIMER.
X Press the =or; button to select
Reset Lap
Reset Lap.
X Press ato reset the lap time to "0".
Deleting all laps If you switch off the engine, the RACETIMER
is reset to "0" after 30 seconds. All laps are
deleted.
You cannot delete individual stored laps. If
you have stopped 16 laps, the current lap
does not have to be reset. X
Reset the current lap.
X Press ato confirm Reset
Reset .
Reset Race Timer? Reset Race Timer? appears in the
multifunction display.
X Press the :button to select Yes
Yes and
press the abutton to confirm.
All laps are deleted.
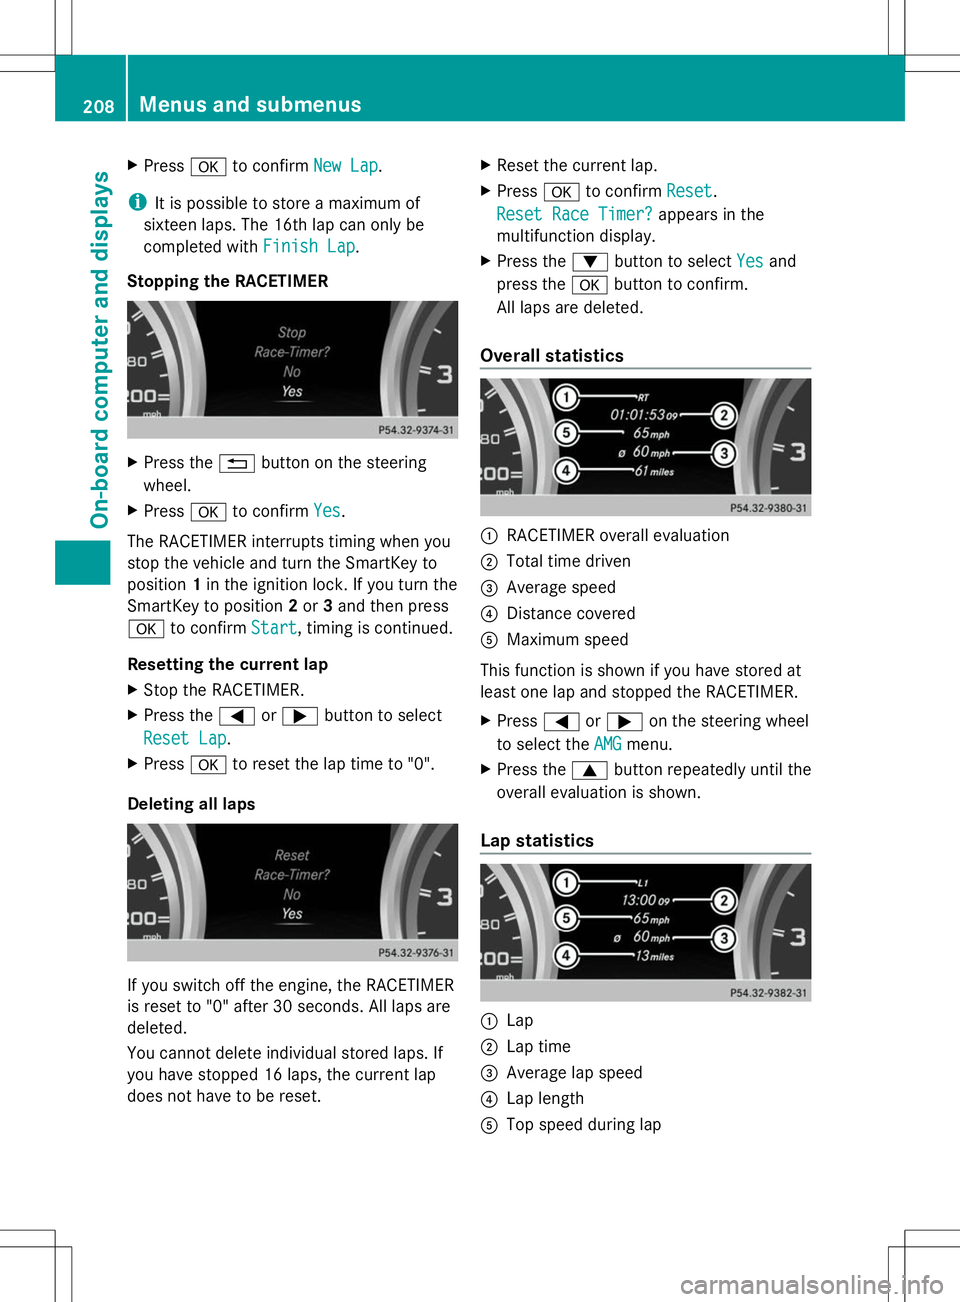
Overall statistics :
RACETIMER overall evaluation
; Total time driven
= Average speed
? Distance covered
A Maximum speed
This function is shown if you have stored at
least one lap and stopped the RACETIMER.
X Press =or; on the steering wheel
to select the AMG AMGmenu.
X Press the 9button repeatedly until the
overall evaluation is shown.
Lap statistics :
Lap
; Lap time
= Average lap speed
? Lap length
A Top speed during lap 208
Menus and submenusOn-board computer and displays