tow MERCEDES-BENZ SLK ROADSTER 2008 Owner's Manual
[x] Cancel search | Manufacturer: MERCEDES-BENZ, Model Year: 2008, Model line: SLK ROADSTER, Model: MERCEDES-BENZ SLK ROADSTER 2008Pages: 273, PDF Size: 4.42 MB
Page 87 of 273
Transmission
84
X
To apply :pull handbrake 2up firmly.
The 3 indicator lamp in the instrumen t
cluster lights up if the engine is running.
i On steep slopes, turn the front wheels
towards the kerb. Stopping the engine
G
Risk of accident
If the engine is not running, there is no
power assistance for the steering and
brakes. Steering and braking then take s
much more effort.
As a result, you might lose control of the
vehicle, cause an accident and injure your-
self and others.
Do not switch off the engine while driving.
Vehicles with manual transmissio nX
Shift to either first or reverse gear.
X Turn the key to position 0(Y page 59) in
the ignition lock and remove it.
The immobiliser is activated. Vehicles with automatic transmission* X
Move the selector lever to P.
X Turn the key to position 0(Y page 59) in
the ignition lock and remove it.
The immobiliser is activated. Transmission
Introduction to the transmission
G
Risk of accident
The movement of the pedals must not be
impaired in any way. Do not keep any
objects in the driver's footwell. Make sure
that floormats or carpets are correctly
secured and that there is sufficient clear-
ance for the pedals. G
Risk of accident
Do not change down for additional engine
braking on a slippery road surface. Thi s
could cause the drive wheels to lose thei r
grip and the vehicle could skid. This could
cause you to lose control of your vehicle
and cause an accident .Cont
rols
* optional
171_AKB; 3; 4, en-GB
vpfaff7,
2007-11-13T10:50:25+01:00 - Seite 84
Page 89 of 273
Transmission
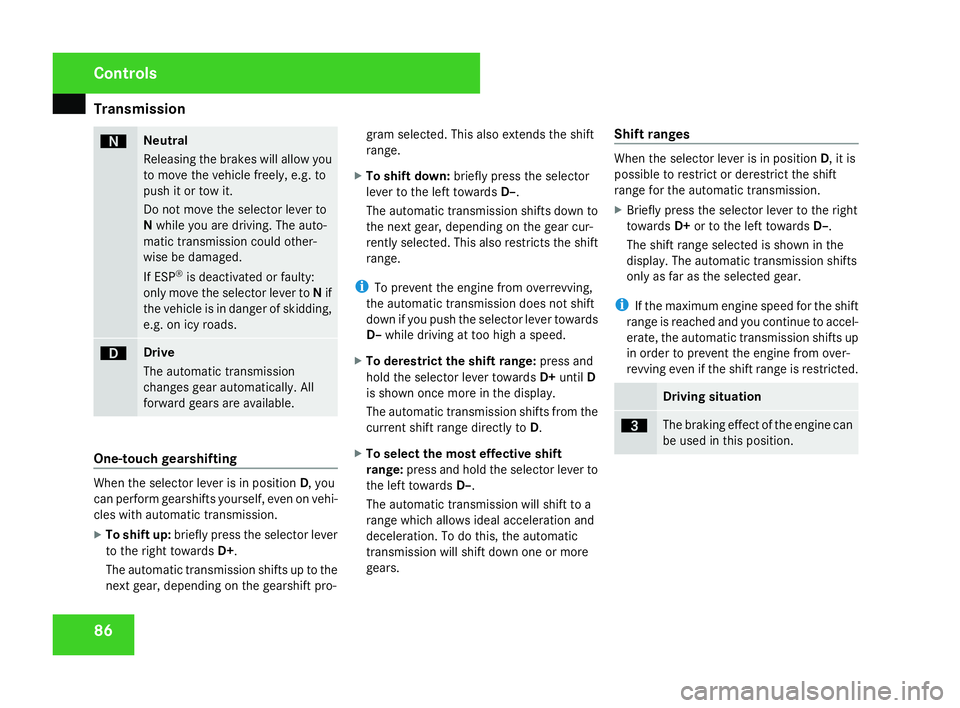
86 ë Neutral
Releasing the brakes will allow yo
u
to move the vehicle freely, e.g. to
push it or tow it.
Do not move the selector lever to
N while you are driving. The auto-
matic transmission could other-
wise be damaged .
If ESP ®
is deactivated or faulty:
only move the selector lever to Nif
the vehicle is in danger of skidding,
e.g. on icy roads. ê Drive
The automatic transmissio
n
changes gear automatically. All
forward gears are available .One-touch gearshifting
When the selector lever is in position
D, you
can perform gearshifts yourself, even on vehi-
cles with automatic transmission.
X To shift up: briefly press the selector lever
to the right towards D+.
The automatic transmission shifts up to the
next gear, depending on the gearshift pro- gram selected. This also extends the shift
range.
X To shift down: briefly press the selecto r
lever to the left towards D–.
The automatic transmission shifts down to
the next gear, depending on the gear cur-
rently selected. This also restricts the shift
range.
i To prevent the engine from overrevving,
the automatic transmission does not shift
down if you push the selector lever towards
D– while driving at too high a speed.
X To derestrict the shift range: press and
hold the selector lever towards D+until D
is shown once more in the display.
The automatic transmission shifts from the
current shift range directly to D.
X To select the most effective shift
range: press and hold the selector lever to
the left towards D–.
The automatic transmission will shift to a
range which allows ideal acceleration and
deceleration. To do this, the automatic
transmission will shift down one or more
gears. Shift ranges When the selector lever is in position
D, it is
possible to restrict or derestrict the shift
range for the automatic transmission .
X Briefly press the selector lever to the right
towards D+or to the left towards D–.
The shift range selected is shown in the
display. The automatic transmission shifts
only as far as the selected gear.
i If the maximum engine speed for the shift
range is reached and you continue to accel-
erate, the automatic transmission shifts up
in order to prevent the engine from over-
revving even if the shift range is restricted. Driving situation
è The braking effect of the engine can
be used in this position.Controls
171_AKB; 3; 4, en-GB
vpfaff7,
2007-11-13T10:50:25+01:00 - Seite 86
Page 92 of 273
Transmission
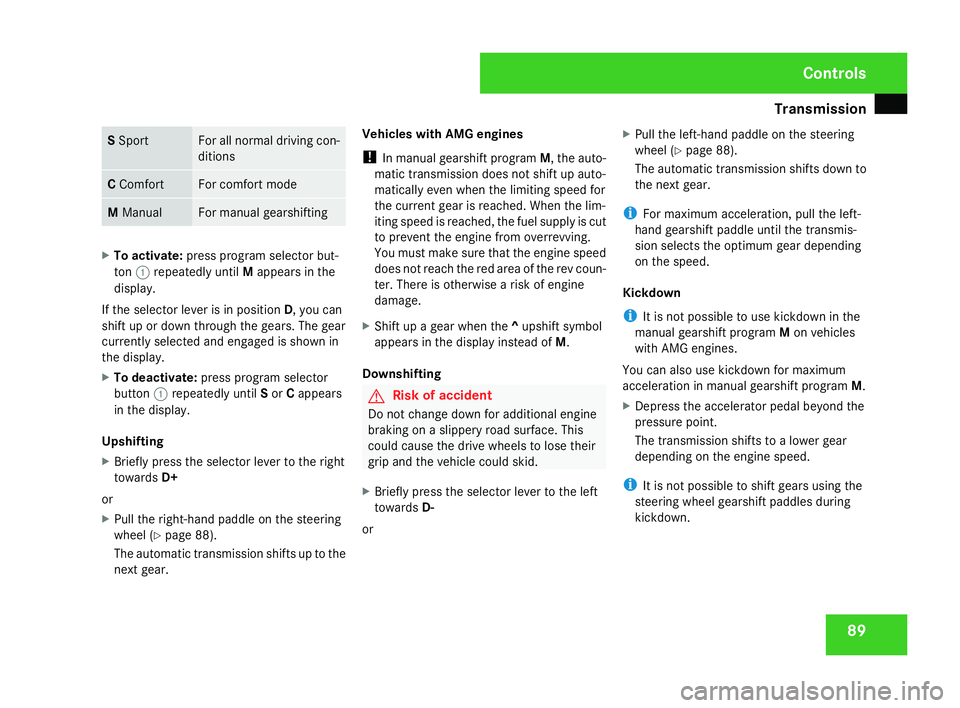
89S
Spor t For all normal driving con-
ditions
C
Comfort For comfort mod
e M
Manual For manual gearshifting
X
To activate :press program selector but-
ton 1repeatedly until Mappears in th e
display.
If the selector lever is in position D, you can
shift up or down through the gears. The gear
currently selected and engaged is shown in
the display.
X To deactivate :press program selector
button 1repeatedly until Sor Cappear s
in the display.
Upshifting
X Briefly press the selector lever to the right
towards D+
or
X Pull the right-hand paddle on the steerin g
wheel (Y page 88).
The automatic transmission shifts up to the
next gear. Vehicles with AMG engines
!
In manual gearshift program M, the auto-
matic transmission does not shift up auto-
matically even when the limiting speed for
the current gear is reached. When the lim-
iting speed is reached, the fuel supply is cut
to prevent the engine from overrevving.
You must make sure that the engine speed
does not reach the red area of the rev coun -
ter. There is otherwise a risk of engine
damage .
X Shift up a gear when the ^upshift symbol
appears in the display instead of M.
Downshifting G
Risk of accident
Do not change down for additional engine
braking on a slippery road surface. Thi s
could cause the drive wheels to lose thei r
grip and the vehicle could skid.
X Briefly press the selector lever to the left
towards D-
or X
Pull the left-hand paddle on the steerin g
wheel (Y page 88).
The automatic transmission shifts down to
the next gear.
i For maximum acceleration, pull the left-
hand gearshift paddle until the transmis-
sion selects the optimum gear depending
on the speed.
Kickdown
i It is not possible to use kickdown in the
manual gearshift program Mon vehicles
with AMG engines.
You can also use kickdown for maximum
acceleration in manual gearshift program M.
X Depress the accelerator pedal beyond the
pressure point.
The transmission shifts to a lower gear
depending on the engine speed.
i It is not possible to shift gears using the
steering wheel gearshift paddles during
kickdown. Controls
171_AKB; 3; 4, en-GB
vpfaff7,
2007-11-13T10:50:25+01:00 - Seite 89
Page 114 of 273
Driving sys
tems 11
1 G
Risk of injury
Cruise control brakes automatically in
order to avoid exceeding the set speed. As
it does so, the brake pedal is depressed. Do
not place your foot under the brake pedal
as it could become trapped .
Storing and maintaining the current
speed You can store the current speed if you are
driving faster than 30 km/h.
X Accelerate the vehicle to the desired
speed.
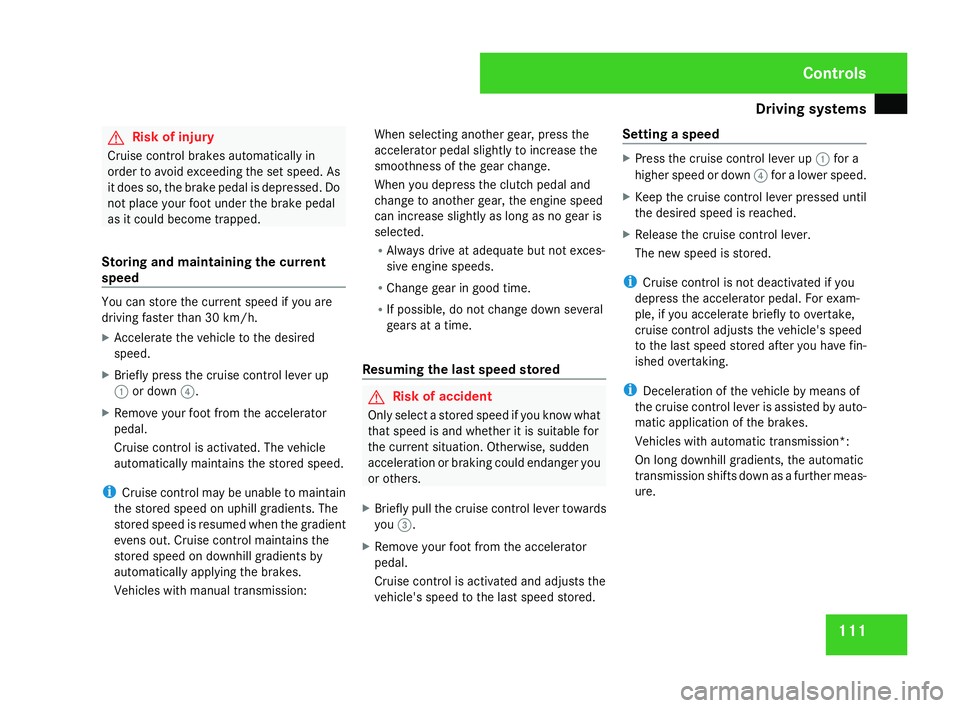
X Briefly press the cruise control lever up
1 or down 4.
X Remove your foot from the accelerato r
pedal.
Cruise control is activated. The vehicle
automatically maintains the stored speed.
i Cruise control may be unable to maintai n
the stored speed on uphill gradients. Th e
stored speed is resumed when the gradient
evens out. Cruise control maintains the
stored speed on downhill gradients by
automatically applying the brakes.
Vehicles with manual transmission: When selecting another gear, press the
accelerator pedal slightly to increase the
smoothness of the gear change.
When you depress the clutch pedal and
change to another gear, the engine speed
can increase slightly as long as no gear is
selected.
R
Always drive at adequate but not exces-
sive engine speeds .
R Change gear in good time.
R If possible, do not change down several
gears at a time.
Resuming the last speed stored G
Risk of accident
Only select a stored speed if you know what
that speed is and whether it is suitable for
the current situation. Otherwise, sudden
acceleration or braking could endanger yo u
or others.
X Briefly pull the cruise control lever towards
you 3.
X Remove your foot from the accelerato r
pedal.
Cruise control is activated and adjusts the
vehicle's speed to the last speed stored. Setting a speed X
Press the cruise control lever up 1for a
higher speed or down 4for a lower speed.
X Keep the cruise control lever pressed until
the desired speed is reached .
X Release the cruise control lever.
The new speed is stored.
i Cruise control is not deactivated if you
depress the accelerator pedal. For exam-
ple, if you accelerate briefly to overtake ,
cruise control adjusts the vehicle's speed
to the last speed stored after you have fin-
ished overtaking.
i Deceleration of the vehicle by means of
the cruise control lever is assisted by auto-
matic application of the brakes .
Vehicles with automatic transmission*:
On long downhill gradients, the automatic
transmission shifts down as a further meas-
ure. Controls
171_AKB; 3; 4, en-GB
vpfaff7,
2007-11-13T10:50:25+01:00 - Seite 111
Page 117 of 273
Driving sys
tems 11
4
Storing the current speed You can use the cruise control lever to limit
the speed to any speed above 30 km/hw
hile
the engine is running.
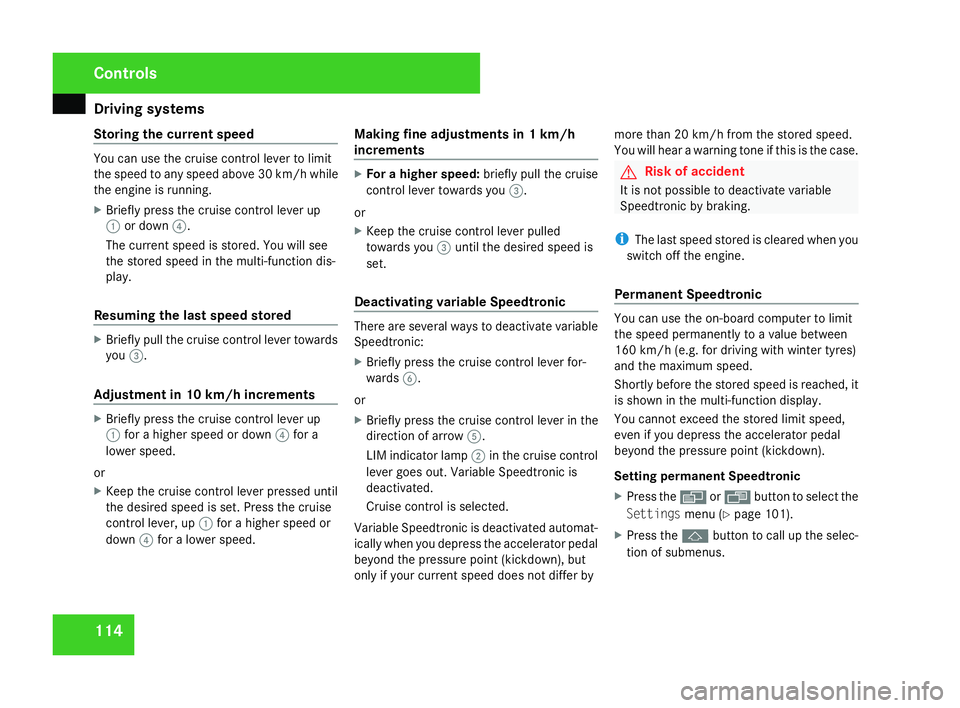
X Briefly press the cruise control lever up
1 or down 4.
The current speed is stored. You will see
the stored speed in the multi-function dis-
play.
Resuming the last speed stored X
Briefly pull the cruise control lever towards
you 3.
Adjustment in 10 km/h increment sX
Briefly press the cruise control lever up
1 for a higher speed or down 4for a
lower speed.
or
X Keep the cruise control lever pressed until
the desired speed is set. Press the cruise
control lever, up 1for a higher speed or
down 4for a lower speed. Making fine adjustments in 1 km/h
increments X
For a higher speed: briefly pull the cruise
control lever towards you 3.
or
X Keep the cruise control lever pulled
towards you 3until the desired speed is
set .
Deactivating variable Speedtronic There are several ways to deactivate variable
Speedtronic:
X
Briefly press the cruise control lever for-
wards 6.
or
X Briefly press the cruise control lever in the
direction of arrow 5.
LIM indicator lamp 2in the cruise control
lever goes out. Variable Speedtronic is
deactivated.
Cruise control is selected.
Variable Speedtronic is deactivated automat-
ically when you depress the accelerator pedal
beyond the pressure point (kickdown), but
only if your current speed does not differ by more than 20 km/h from the stored speed.
You will hear a warning tone if this is the case. G
Risk of accident
It is not possible to deactivate variabl e
Speedtronic by braking.
i The last speed stored is cleared when you
switch off the engine.
Permanent Speedtronic You can use the on-board computer to limit
the speed permanently to a value between
160 km/h (e.g. for driving with winter tyres)
and the maximum speed.
Shortly before the stored speed is reached, it
is shown in the multi-function display .
You cannot exceed the stored limit speed,
even if you depress the accelerator pedal
beyond the pressure point (kickdown).
Setting permanent Speedtronic
X Press the èor· button to select the
Settings menu(Y page 101).
X Press the jbutton to call up the selec-
tion of submenus. Controls
171_AKB; 3; 4, en-GB
vpfaff7,
2007-11-13T10:50:25+01:00 - Seite 114
Page 119 of 273
Driving sys
tems 11
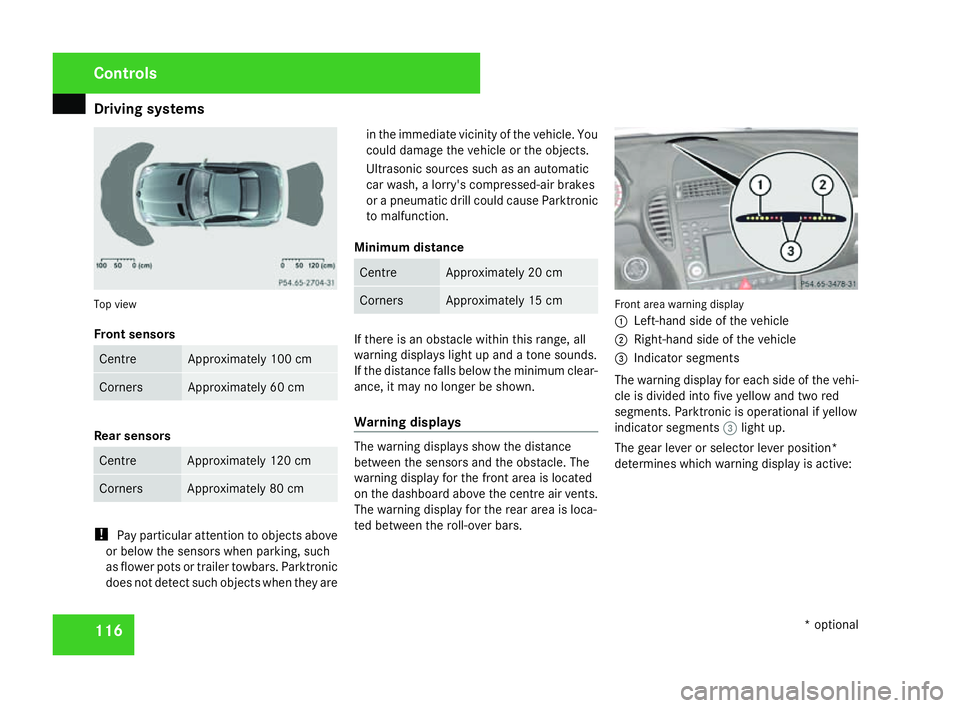
6 Top view
Front sensors
Centre Approximately 100 cm
Corners Approximately 60 cm
Rear sensors
Centre Approximately 120 cm
Corners Approximately 80 cm
!
Pay particular attention to objects above
or below the sensors when parking, such
as flower pots or trailer towbars. Parktronic
does not detect such objects when they are in the immediate vicinity of the vehicle. You
could damage the vehicle or the objects.
Ultrasonic sources such as an automatic
car wash, a lorry's compressed-air brakes
or a pneumatic drill could cause Parktronic
to malfunction.
Minimum distance Centre Approximately 20 cm
Corners Approximately 15 cm
If there is an obstacle within this range, all
warning displays light up and a tone sounds.
If the distance falls below the minimum clear-
ance, it may no longer be shown.
Warning displays
The warning displays show the distance
between the sensors and the obstacle. The
warning display for the front area is located
on the dashboard above the centre air vents.
The warning display for the rear area is loca-
ted between the roll-over bars. Front area warning display
1
Left-hand side of the vehicle
2 Right-hand side of the vehicle
3 Indicator segments
The warning display for each side of the vehi -
cle is divided into five yellow and two red
segments. Parktronic is operational if yellow
indicator segments 3light up.
The gear lever or selector lever position *
determines which warning display is active: Controls
* optional
171_AKB; 3; 4, en-GB
vpfaff7, 2007-11-13T10:50:25+01:00 - Seite 116
Page 138 of 273
Opening/closing the roof
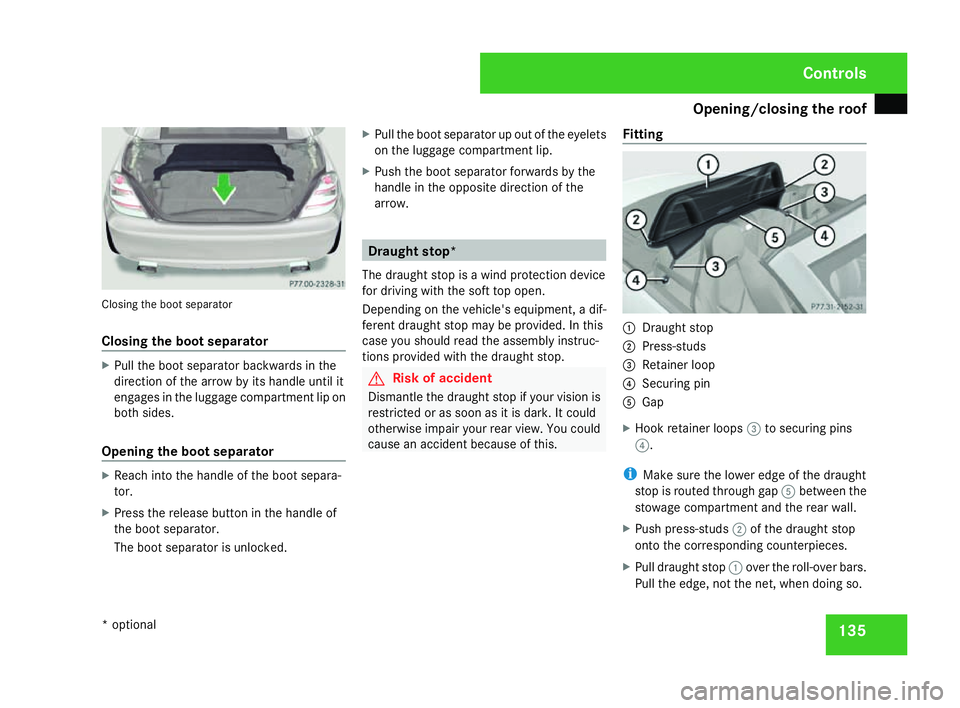
135Closing the boot separator
Closing the boot separator
X
Pull the boot separator backwards in the
direction of the arrow by its handle until it
engages in the luggage compartment lip on
both sides.
Opening the boot separator X
Reach into the handle of the boot separa-
tor.
X Press the release button in the handle of
the boot separator.
The boot separator is unlocked. X
Pull the boot separator up out of the eyelets
on the luggage compartment lip.
X Push the boot separator forwards by the
handle in the opposite direction of the
arrow. Draught stop*
The draught stop is a wind protection device
for driving with the soft top open.
Depending on the vehicle's equipment, a dif-
ferent draught stop may be provided. In this
case you should read the assembly instruc-
tions provided with the draught stop. G
Risk of acciden
t
Dismantle the draught stop if your vision is
restricted or as soon as it is dark. It could
otherwise impair your rear view. You could
cause an accident because of this. Fittin
g 1
Draught sto p
2 Press-studs
3 Retainer loop
4 Securing pi n
5 Gap
X Hook retainer loops 3to securing pins
4 .
i Make sure the lower edge of the draught
stop is routed through gap 5between the
stowage compartment and the rear wall.
X Push press-studs 2of the draught stop
onto the corresponding counterpieces.
X Pull draught stop 1over the roll-over bars.
Pull the edge, not the net, when doing so. Controls
* optional
171_AKB; 3; 4, en-GB
vpfaff7,
2007-11-13T10:50:25+01:00 - Seite 135
Page 139 of 273
Loading and stowing
136
Removing X
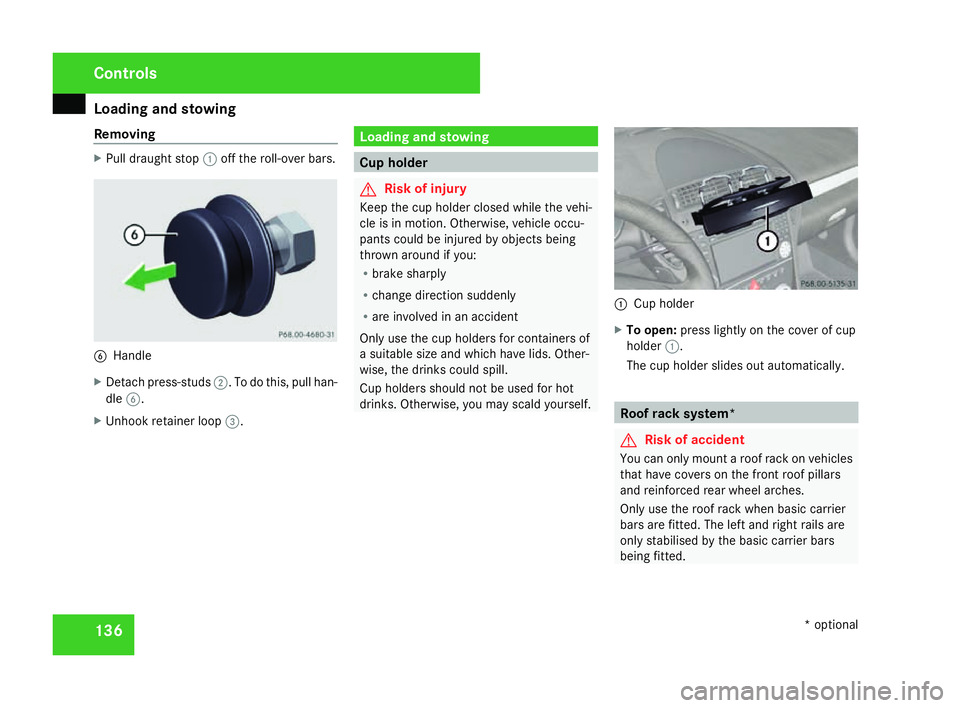
Pull draught stop 1off the roll-over bars. 6
Handl e
X Detach press-studs 2. To do this, pull han-
dle 6.
X Unhook retainer loop 3. Loading and stowin
g Cup holder
G
Risk of injury
Keep the cup holder closed while the vehi-
cle is in motion. Otherwise, vehicle occu -
pants could be injured by objects being
thrown around if you:
R brake sharply
R change direction suddenly
R are involved in an acciden t
Only use the cup holders for containers of
a suitable size and which have lids. Other-
wise, the drinks could spill.
Cup holders should not be used for hot
drinks. Otherwise, you may scald yourself. 1
Cup holder
X To open: press lightly on the cover of cup
holder 1.
The cup holder slides out automatically. Roof rack system*
G
Risk of accident
You can only mount a roof rack on vehicles
that have covers on the front roof pillars
and reinforced rear wheel arches.
Only use the roof rack when basic carrie r
bars are fitted. The left and right rails are
only stabilised by the basic carrier bars
being fitted. Controls
* optional
171_AKB; 3; 4, en-GB
vpfaff7,
2007-11-13T10:50:25+01:00 - Seite 136
Page 140 of 273
Loading and stowing
137An incorrectly secured roof rack or load
could work loose from the vehicle and
thereby cause an accident. Follow the roo
f
rack manufacturer's installation instruc-
tions and special instructions for use.
The roof load raises the vehicle's centre of
gravity, thereby affecting vehicle handling.
You must observe the maximum roof load
of 50 kg. Always adapt your driving style to
the prevailing road, traffic and weather con-
ditions and drive with particular care if the
roof is laden.
! Mercedes-Benz recommends that you
only use roof rack systems which have
been tested and approved for Mercedes-
Benz vehicles. This helps to prevent dam-
age to the vehicle.
Position the load on the roof rack in such a
way that the vehicle will not sustain dam-
age even when it is in motion .
Do not open the roof if a roof rack is fitted.
You will otherwise damage the roof.
Leave the boot separator in the boot open
for protection.
Make sure that you can open the boot li d
completely . 1
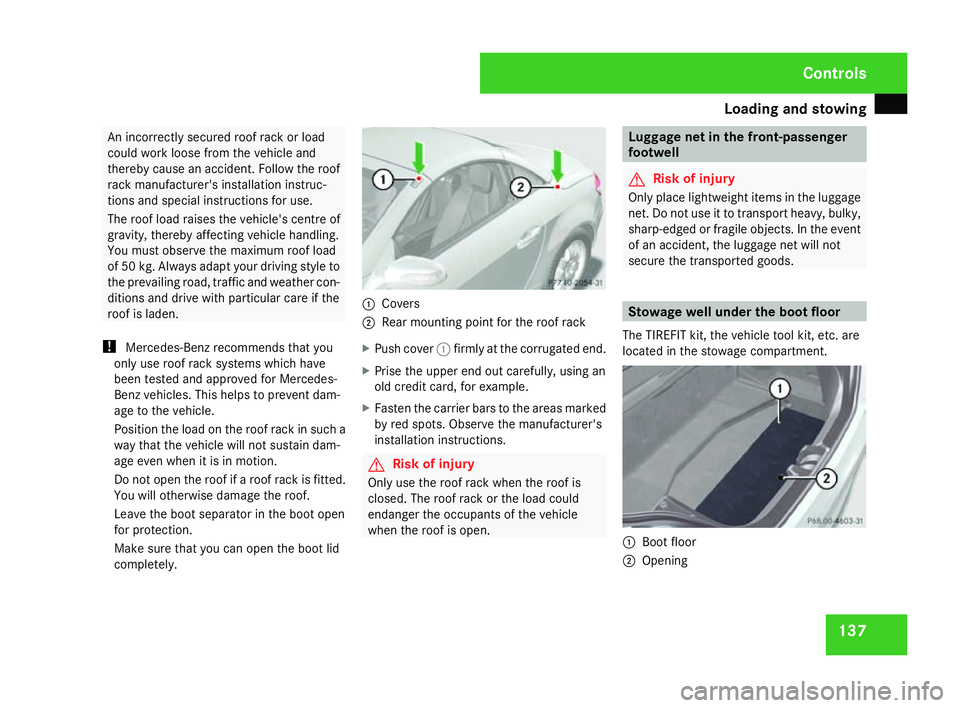
Cover s
2 Rear mounting point for the roof rac k
X Push cover 1firmly at the corrugated end.
X Prise the upper end out carefully, using an
old credit card, for example.
X Fasten the carrier bars to the areas marked
by red spots. Observe the manufacturer's
installation instructions. G
Risk of injury
Only use the roof rack when the roof is
closed. The roof rack or the load could
endanger the occupants of the vehicl e
when the roof is open. Luggage net in the front-passenger
footwell
G
Risk of injury
Only place lightweight items in the luggag e
net. Do not use it to transport heavy, bulky ,
sharp-edged or fragile objects. In the event
of an accident, the luggage net will not
secure the transported goods . Stowage well under the boot floor
The TIREFIT kit, the vehicle tool kit, etc. are
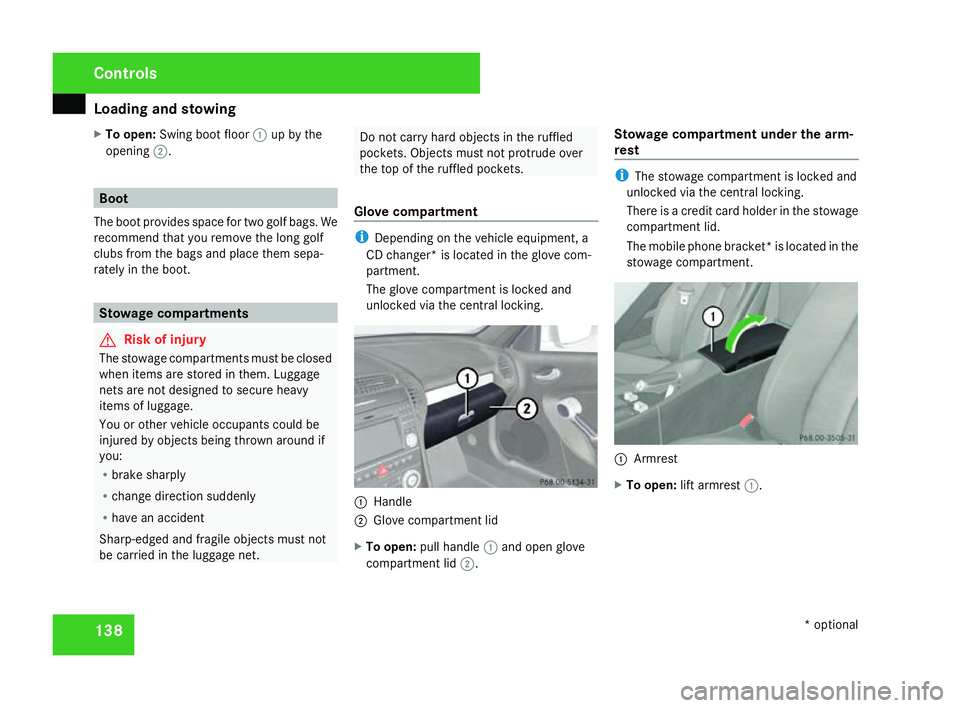
located in the stowage compartment. 1
Boot floor
2 Opening Controls
171_AKB; 3; 4, en-GB
vpfaff7,
2007-11-13T10:50:25+01:00 - Seite 137
Page 141 of 273
Loading and stowing
138
X
To open: Swing boot floor 1up by th e
opening 2. Boo
t
The boot provides space for two golf bags. We
recommend that you remove the long golf
clubs from the bags and place them sepa-
rately in the boot. Stowage compartments
G
Risk of injury
The stowage compartments must be closed
when items are stored in them. Luggage
nets are not designed to secure heavy
items of luggage.
You or other vehicle occupants could be
injured by objects being thrown around if
you:
R brake sharply
R change direction suddenly
R have an accident
Sharp-edged and fragile objects must not
be carried in the luggage net. Do not carry hard objects in the ruffled
pockets. Objects must not protrude over
the top of the ruffled pockets.
Glove compartment i
Depending on the vehicle equipment, a
CD changer* is located in the glove com-
partment.
The glove compartment is locked and
unlocked via the central locking. 1
Handl e
2 Glove compartment lid
X To open: pull handle 1and open glov e
compartment lid 2. Stowage compartment under the arm-
res t i
The stowage compartment is locked and
unlocked via the central locking.
There is a credit card holder in the stowage
compartment lid.
The mobile phone bracket* is located in the
stowage compartment. 1
Armrest
X To open: lift armrest 1. Cont
rols
* optional
171_AKB; 3; 4, en-GB
vpfaff7,
2007-11-13T10:50:25+01:00 - Seite 138