air conditioning MERCEDES-BENZ SLK ROADSTER 2014 Owners Manual
[x] Cancel search | Manufacturer: MERCEDES-BENZ, Model Year: 2014, Model line: SLK ROADSTER, Model: MERCEDES-BENZ SLK ROADSTER 2014Pages: 357, PDF Size: 10.22 MB
Page 7 of 357
1, 2, 3 ...
12 V socket see Sockets A
ABS (Anti-lock Braking System) Display message ............................ 223
Function/notes ................................ 60
Important safety notes .................... 60
Warning lamp .................................2 52
Accident
Automatic measures after an acci-
dent ................................................. 51
Activating/deactivating air-recir-
culation mode ................................... .134
Activating/deactivating cooling
with air dehumidification ................. 129
Active light function ......................... 114
ADAPTIVE BRAKE ................................. 66
Adaptive brake lights .......................... 62
Adaptive Highbeam Assist
Display message ............................ 234
Function/notes ............................ .115
Switching on/off ........................... 116
Additional speedometer ................... 213
Additives (engine oil) ........................ 347
Adjusting the headlamp range ......... 112
Air conditioning
General notes ................................ 126
Air filter (white display message) .... 237
Air pressure
see Tyre pressure
Air vents
Important safety notes .................. 135
Setting .......................................... .135
Setting the blower output of the
AIRSCARF vents ............................ .136
Setting the centre air vents ........... 136
Setting the side air vents .............. .136
Switching AIRSCARF on/off .......... 100
Air-conditioning system
see Climate control
Airbag
Headbag .......................................... 47
Introduction ..................................... 45 PASSENGER AIR BAG OFF indica-
tor lamp ..........................................
.41
Airbags
Front airbag (driver, front
passenger ) ....................................... 46
Important safety gu idelines ............ .45
Sidebag ............................................ 47
Triggering ......................................... 47
AIRGUIDE ............................................. 91
AIRSCARF
Problem (malfunction) ................... 100
Switching on/of f........................... 100
AIRSCARF vents
Setting the blower output .............. 136
Alarm
ATA (Anti-Theft Alarm system )......... 68
Switching off (ATA) .......................... 68
Switching the function on/off
(ATA) ................................................ 68
Alarm system
see ATA (Anti-Theft Alarm system)
Ambient lighting
Setting the brightness (on-board
computer) ...................................... 215
AMG menu (on-board computer) ..... 219
Anti-glare film .................................... 277
Anti-lock braking system
see ABS (Anti-lock Braking System)
Anti-Theft Alarm system
see ATA (Anti-Theft Alarm system)
Aquaplaning ....................................... 167
Ashtray ............................................... 268
Assistance display (on-board com-
puter) .................................................. 210
Assistance menu (on-board com-
puter) .................................................. 210
ASSYST PLUS
Displaying a service message ........ 285
Hiding a service message .............. 285
Resetting the service interval dis-
play ................................................ 285
Service message ............................ 285
Special service requirements ......... 286
ATA (Anti-Theft Alarm system)
Activating/deactivating ................... 68
Function ........................................... 68
Switching off the alarm .................... 68 4
Index
Page 9 of 357
Brake fluid
Display message ............................ 229
Notes ............................................. 348
Brake force distribution, elec-
tronic
see EBD (electronic brake force
distribution)
Brake lamps
Adaptive ........................................... 62
Display message ............................ 232
Brakes
ABS .................................................. 60
BAS .................................................. 61
BAS PLUS ........................................ 61
Brake fluid (notes) ......................... 348
Display message ............................ 223
Driving tips .................................... 166
High-performance brake system .... 167
Important safety notes .................. 166
Parking brake ................................ 163
Warning lamp ................................. 252
Breakdown
see Flat tyre
see Towing away
Brightness control (instrument
cluster lighting) ................................... 30
Bulbs
see Replacing bulbs C
Calling up a fault see Display messages
Capacities (technical data) ............... 342
Car
see Vehicle
Car key
see Key
Car wash (care) ................................. 286
Care
Automatic car wash ....................... 286
Carpets .......................................... 292
Display ........................................... 290
Exhaust pipe .................................. 290
Exterior lighting ............................. 289
Gear or selector lever .................... 291
High-pressure cleaner .................... 287
Interior ........................................... 290 Matt paintwork .............................. 288
Note
s............................................. 286
Paint .............................................. 288
Plastic trim .................................... 290
Roof lining ...................................... 292
Seat belt ........................................ 292
Seat cove r..................................... 291
Sensors ......................................... 290
Steering wheel ............................... 291
Trim pieces .................................... 291
Washing by hand ........................... 287
Wheels ........................................... 288
Windows ........................................ 289
Wiper blades .................................. 289
Wooden trim .................................. 291
CD player/CD changer(on-board
computer) .......................................... 207
Central locking
Automatic locking (on-board com-puter) ............................................. 216
Locking/unlocking (key) .................. 73
Centre console
Lower section .................................. 35
Upper section .................................. 34
Changing bulbs
Dipped-beam headlamp s............... 119
Main-beam headlamp s................... 119
Parking lamps (front) ..................... 119
Reversing lamps ............................ 120
Standing lamps .............................. 119
Turn signals (front) ......................... 120
Child seat
Automatic recognition ..................... 52
Forward-facing restraint system ...... 55
On the front-passenger seat ............ 54
Problem (malfunction) ..................... 56
Rearward-facing restraint system .... 55
Recommendations ........................... 58
Suitable positions ............................ 57
Children
Restraint systems ............................ 52
Cigarette lighter ................................ 268
Cleaning
Mirror turn signal ........................... 289
Climate control
Air conditioning ............................. 127
Controlling automaticall y............... 131 6
Index
Page 130 of 357
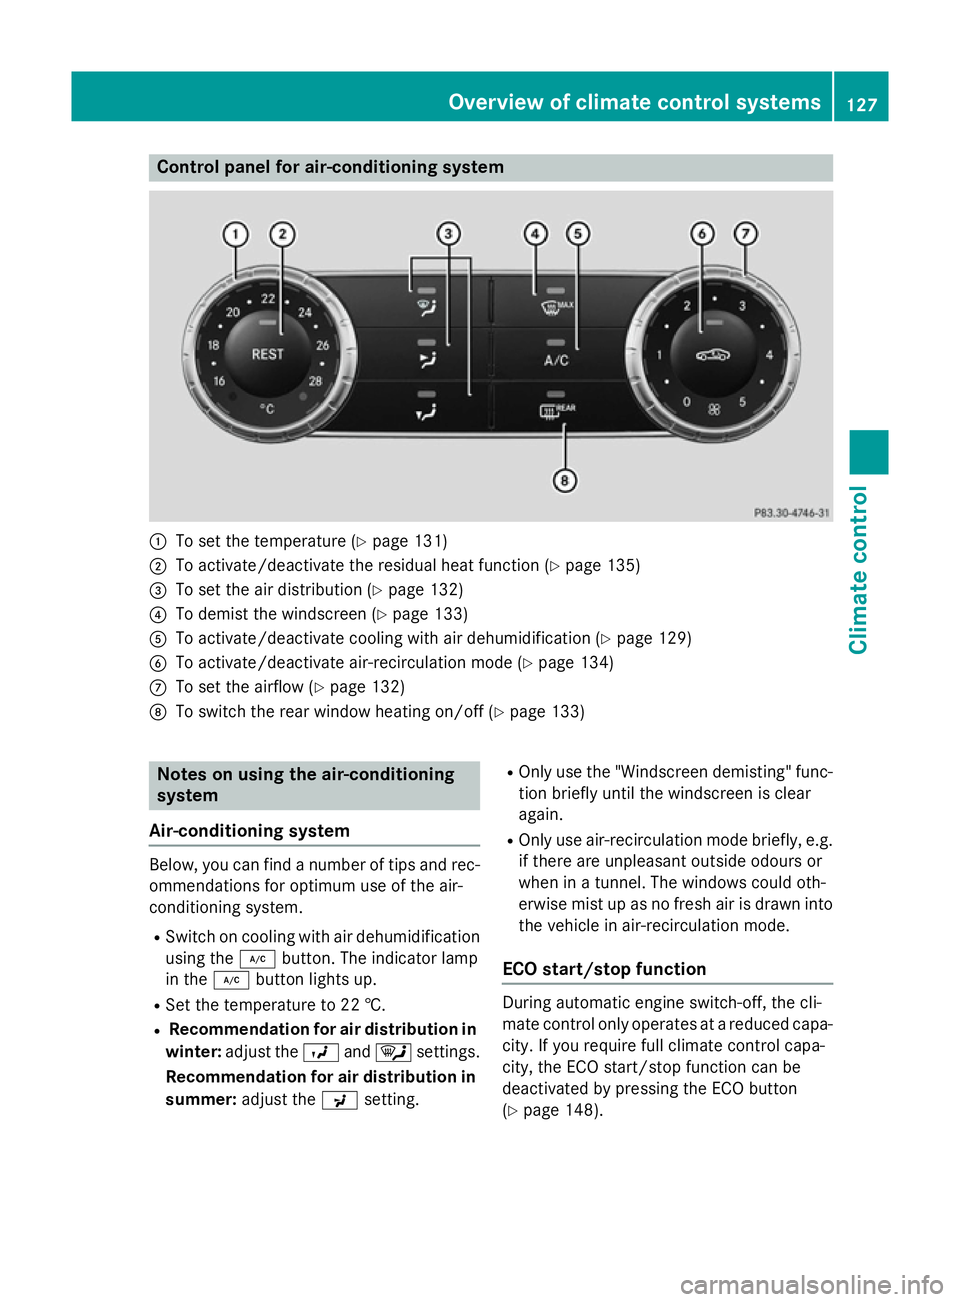
Control panel for air-conditioning system
:
To set the temperature (Y page 131)
; To activate/deactivate the residual heat function (Y page 135)
= To set the air distribution (Y page 132)
? To demist the windscreen (Y page 133)
A To activate/deactivate cooling with air dehumidification (Y page 129)
B To activate/deactivate air-recirculation mode (Y page 134)
C To set the airflow (Y page 132)
D To switch the rear window heating on/off (Y page 133)Notes on using the air-conditioning
system
Air-conditioning system Below, you can find a number of tips and rec-
ommendations for optimum use of the air-
conditioning system.
R Switch on cooling with air dehumidification
using the ¿button. The indicator lamp
in the ¿button lights up.
R Set the temperature to 22 †.
R Recommendation for air distribution in
winter: adjust the Oand¯ settings.
Recommendation for air distribution in summer: adjust the Psetting. R
Only use the "Windscreen demisting" func-
tion briefly until the windscreen is clear
again.
R Only use air-recirculation mode briefly, e.g.
if there are unpleasant outside odours or
when in a tunnel. The windows could oth-
erwise mist up as no fresh air is drawn into
the vehicle in air-recirculation mode.
ECO start/stop function During automatic engine switch-off, the cli-
mate control only operates at a reduced capa-
city. If you require full climate control capa-
city, the ECO start/stop function can be
deactivated by pressing the ECO button
(Y page 148). Overview of climate control systems
127Climate control
Page 132 of 357
the front-passenger side as well. The indi-
cator lamp in the ábutton goes out.
R Use the residual heat function if you want to
heat or ventilate the vehicle interior when
the ignition is switched off. The residual
heat function can only be activated or deac-
tivated with the ignition switched off.
ECO start/stop function During automatic engine switch-off, the cli-
mate control only operates at a reduced capa- city. If you require full climate control capa-
city, the ECO start/stop function can be
deactivated by pressing the ECO button
(Y page 148). Operating the climate control system
Switching climate control on/off
General notes When the climate control is switched off, the
air supply and air circulation are also
switched off. The windows could mist up.
Therefore, only switch off climate control
briefly.
i Activate climate control primarily using
the à button (Y page 131).
Air-conditioning system X
Turn the key to position 2in the ignition
lock (Y page 141).
X To switch on: turn airflow control C
clockwise to the desired position (except
position 0) (Ypage 127).
X To switch off: turn airflow control Canti-
clockwise to position 0(Ypage 127). THERMOTRONIC automatic climate
control X
Turn the key to position 2in the ignition
lock (Y page 141).
X To switch on: press theÃbutton.
The indicator lamp in the Ãbutton lights
up. Airflow and air distribution are set to
automatic mode.
or
X Press the ^button.
The indicator lamp in the ^button goes
out. The previous settings are reactivated.
X To switch off: press the^button.
The indicator lamp in the ^button lights
up. Activating/deactivating the cooling
with air dehumidification function
General notes If you deactivate the "Cooling with air-dehu-
midification" function, the air inside the vehi-
cle will not be cooled. The air inside the vehi-
cle will also not be dehumidified. The win-
dows can mist up more quickly. Therefore,
only switch off cooling with air dehumidifica-
tion for a short period.
The "Cooling with air dehumidification" func-
tion is only available when the engine is run-
ning. The air inside the vehicle is cooled and
dehumidified according to the temperature
selected.
Condensation may drip from the underside of the vehicle when cooling mode is active. Thisis normal and not a sign that there is a mal-
function. Operating the climate control system
129Climate control
Page 134 of 357
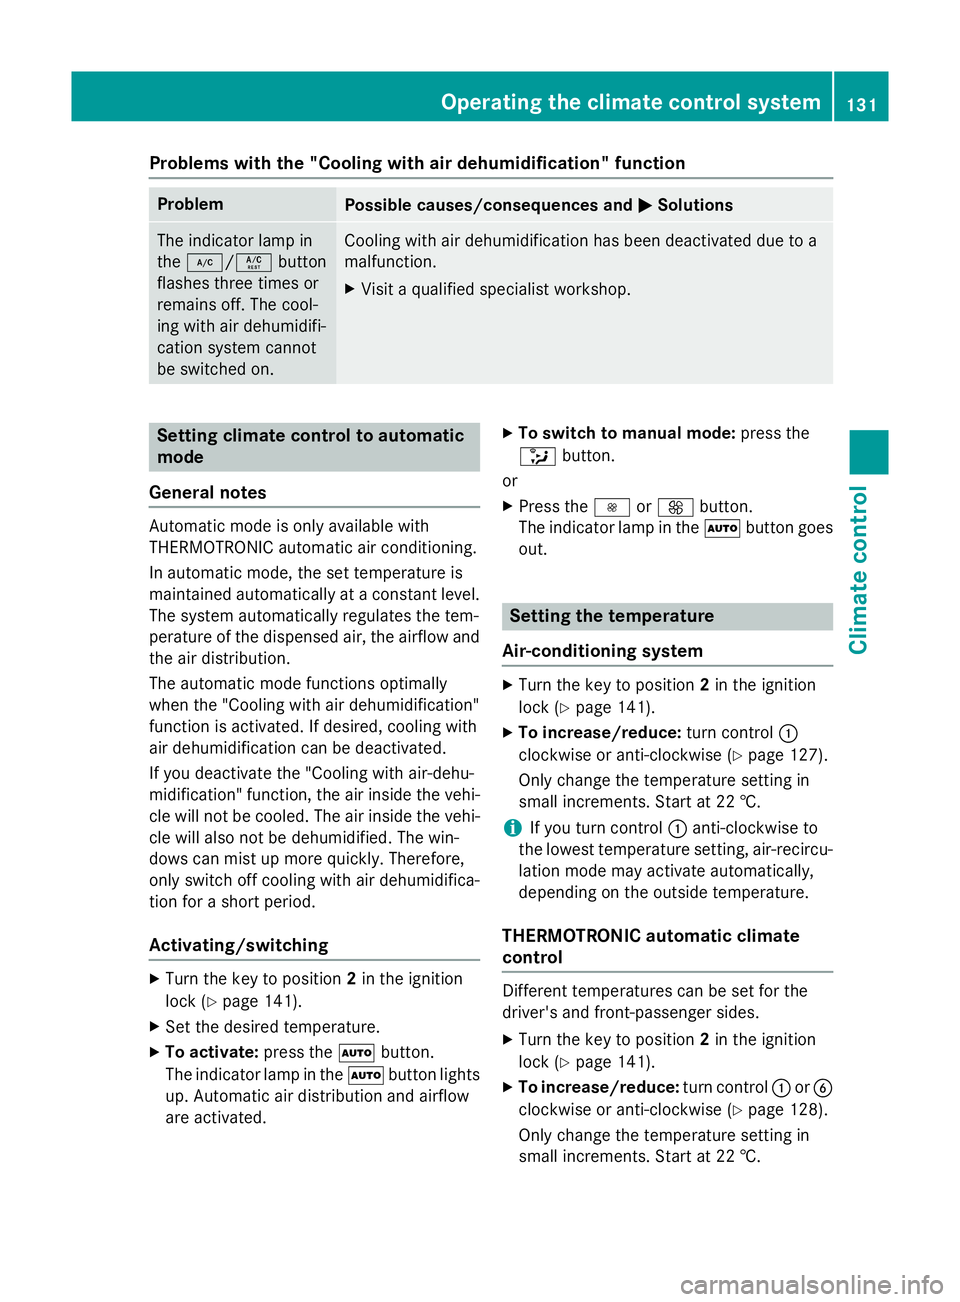
Problems with the "Cooling with air dehumidification" function
Problem
Possible causes/consequences and
M
MSolutions The indicator lamp in
the
¿/Á button
flashes three times or
remains off. The cool-
ing with air dehumidifi-
cation system cannot
be switched on. Cooling with air dehumidification has been deactivated due to a
malfunction.
X Visit a qualified specialist workshop. Setting climate control to automatic
mode
General notes Automatic mode is only available with
THERMOTRONIC automatic air conditioning.
In automatic mode, the set temperature is
maintained automatically at a constant level. The system automatically regulates the tem-
perature of the dispensed air, the airflow and
the air distribution.
The automatic mode functions optimally
when the "Cooling with air dehumidification"
function is activated. If desired, cooling with
air dehumidification can be deactivated.
If you deactivate the "Cooling with air-dehu-
midification" function, the air inside the vehi-
cle will not be cooled. The air inside the vehi- cle will also not be dehumidified. The win-
dows can mist up more quickly. Therefore,
only switch off cooling with air dehumidifica-
tion for a short period.
Activating/switching X
Turn the key to position 2in the ignition
lock (Y page 141).
X Set the desired temperature.
X To activate: press theÃbutton.
The indicator lamp in the Ãbutton lights
up. Automatic air distribution and airflow
are activated. X
To switch to manual mode: press the
_ button.
or X Press the IorK button.
The indicator lamp in the Ãbutton goes
out. Setting the temperature
Air-conditioning system X
Turn the key to position 2in the ignition
lock (Y page 141).
X To increase/reduce: turn control:
clockwise or anti-clockwise (Y page 127).
Only change the temperature setting in
small increments. Start at 22 †.
i If you turn control
:anti-clockwise to
the lowest temperature setting, air-recircu- lation mode may activate automatically,
depending on the outside temperature.
THERMOTRONIC automatic climate
control Different temperatures can be set for the
driver's and front-passenger sides.
X Turn the key to position 2in the ignition
lock (Y page 141).
X To increase/reduce: turn control:orB
clockwise or anti-clockwise (Y page 128).
Only change the temperature setting in
small increments. Start at 22 †. Operating the climate control system
131Climate control
Page 135 of 357
i
If you turn controls
:and Banti-clock-
wise to the lowest temperature setting, air- recirculation mode may activate automati-
cally, depending on the outside tempera-
ture. Setting the air distribution
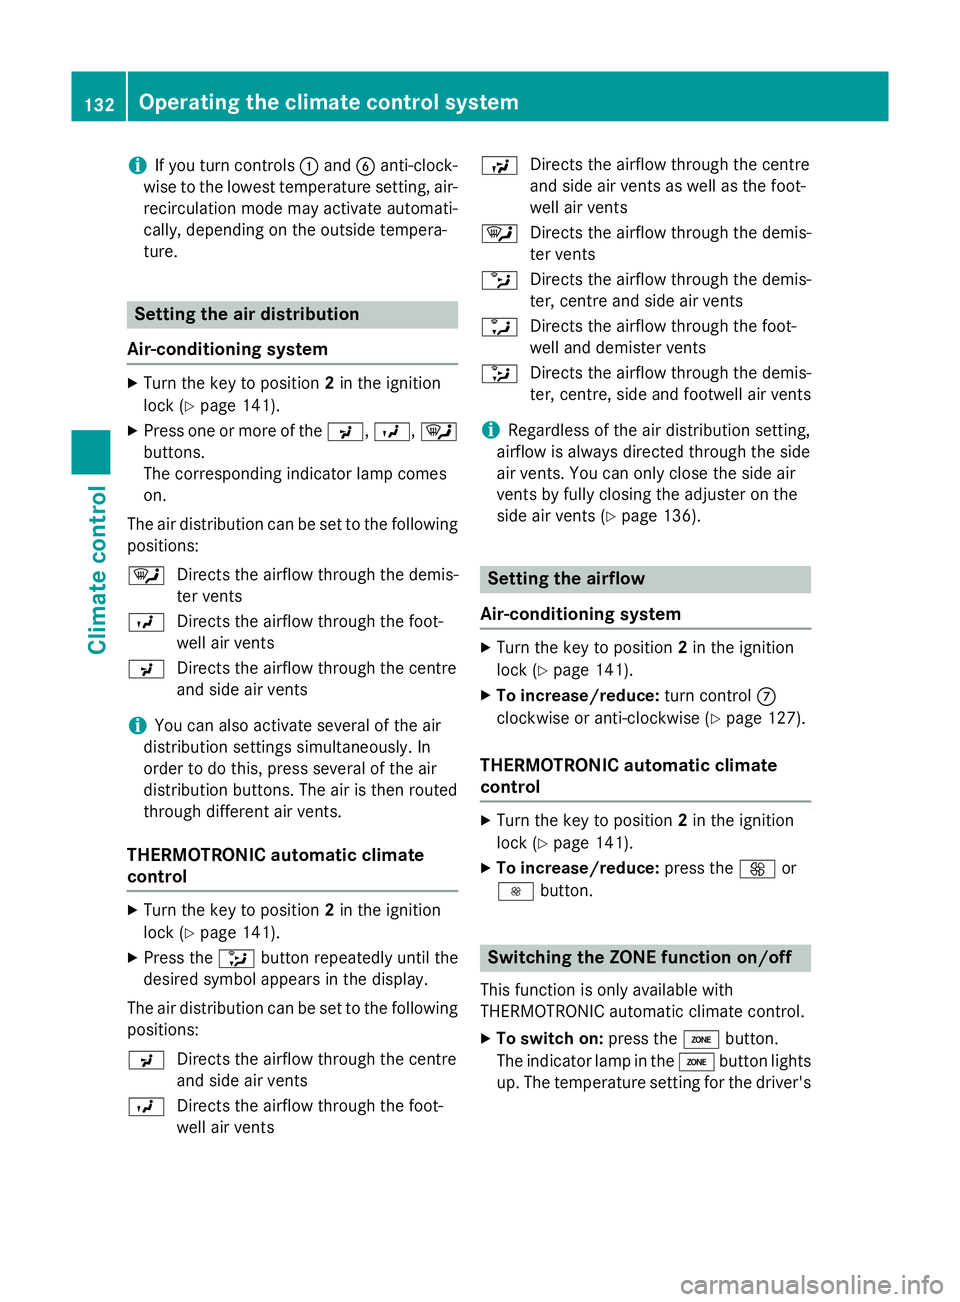
Air-conditioning system X
Turn the key to position 2in the ignition
lock (Y page 141).
X Press one or more of the P,O,¯
buttons.
The corresponding indicator lamp comes
on.
The air distribution can be set to the following positions:
¯ Directs the airflow through the demis-
ter vents
O Directs the airflow through the foot-
well air vents
P Directs the airflow through the centre
and side air vents
i You can also activate several of the air
distribution settings simultaneously. In
order to do this, press several of the air
distribution buttons. The air is then routed
through different air vents.
THERMOTRONIC automatic climate
control X
Turn the key to position 2in the ignition
lock (Y page 141).
X Press the _button repeatedly until the
desired symbol appears in the display.
The air distribution can be set to the following positions:
P Directs the airflow through the centre
and side air vents
O Directs the airflow through the foot-
well air vents S
Directs the airflow through the centre
and side air vents as well as the foot-
well air vents
¯ Directs the airflow through the demis-
ter vents
b Directs the airflow through the demis-
ter, centre and side air vents
a Directs the airflow through the foot-
well and demister vents
_ Directs the airflow through the demis-
ter, centre, side and footwell air vents
i Regardless of the air distribution setting,
airflow is always directed through the side
air vents. You can only close the side air
vents by fully closing the adjuster on the
side air vents (Y page 136). Setting the airflow
Air-conditioning system X
Turn the key to position 2in the ignition
lock (Y page 141).
X To increase/reduce: turn controlC
clockwise or anti-clockwise (Y page 127).
THERMOTRONIC automatic climate
control X
Turn the key to position 2in the ignition
lock (Y page 141).
X To increase/reduce: press theKor
I button. Switching the ZONE function on/off
This function is only available with
THERMOTRONIC automatic climate control.
X To switch on: press theábutton.
The indicator lamp in the ábutton lights
up. The temperature setting for the driver's 132
Operating the climate control systemClimate control
Page 136 of 357
side is not adopted for the front-passenger
side.
X To switch off: press theábutton.
The indicator lamp in the ábutton goes
out. The temperature setting for the driv-
er's side is adopted for the front-passenger
side. Demisting the windscreen
General notes You can use this function to defrost the wind-
screen or to demist the inside of the wind-
screen and the side windows.
Switch off the "Windscreen demisting" func-
tion as soon as the windscreen is clear again.
Switching the "Demisting windscreen"
on/off X
Turn the key to position 2in the ignition
lock (Y page 141).
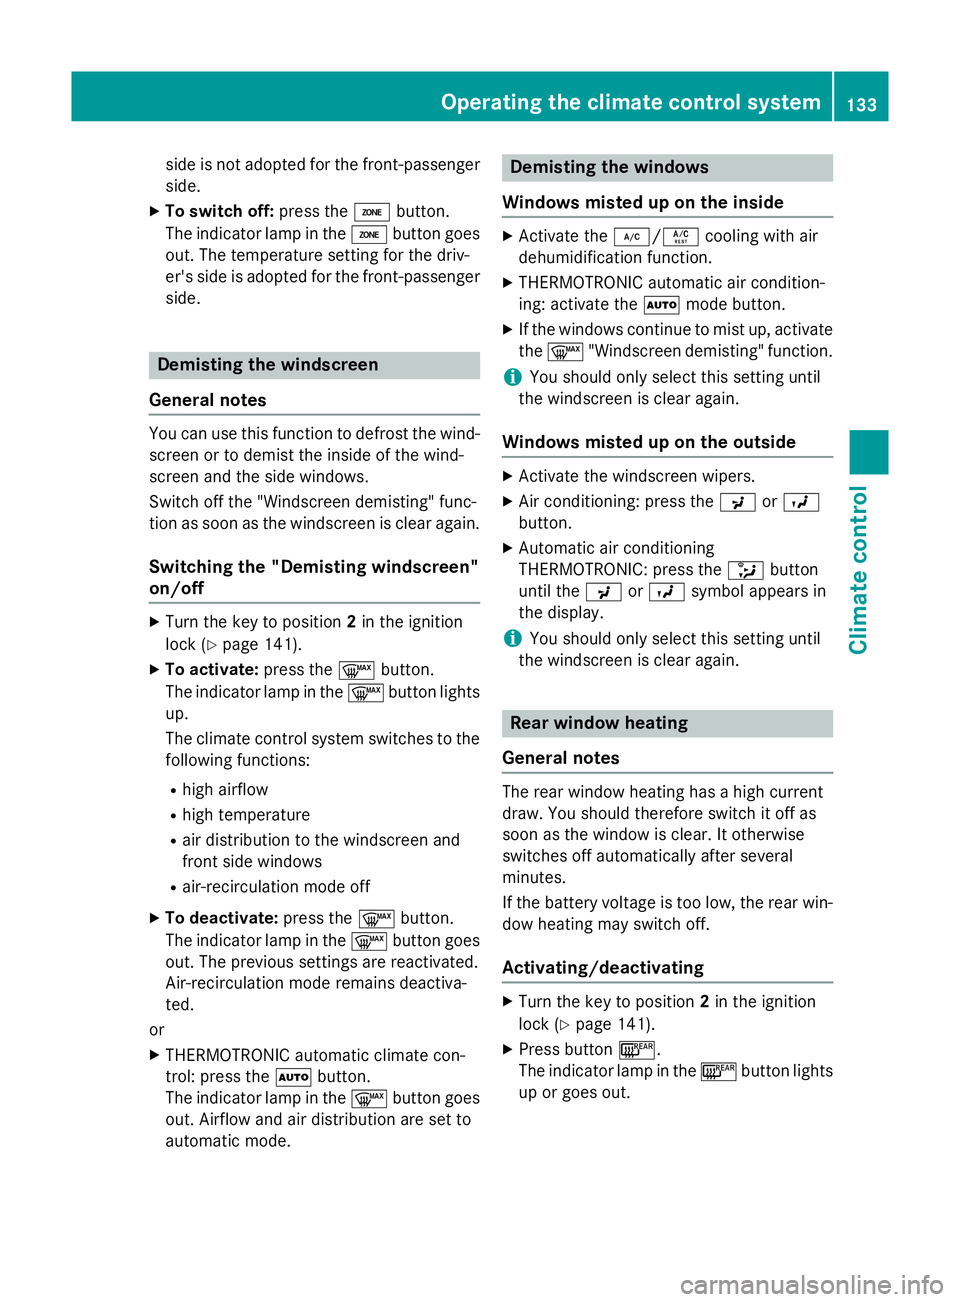
X To activate: press the¬button.
The indicator lamp in the ¬button lights
up.
The climate control system switches to the
following functions:
R high airflow
R high temperature
R air distribution to the windscreen and
front side windows
R air-recirculation mode off
X To deactivate: press the¬button.
The indicator lamp in the ¬button goes
out. The previous settings are reactivated.
Air-recirculation mode remains deactiva-
ted.
or
X THERMOTRONIC automatic climate con-
trol: press the Ãbutton.
The indicator lamp in the ¬button goes
out. Airflow and air distribution are set to
automatic mode. Demisting the windows
Windows misted up on the inside X
Activate the ¿/Ácooling with air
dehumidification function.
X THERMOTRONIC automatic air condition-
ing: activate the Ãmode button.
X If the windows continue to mist up, activate
the ¬ "Windscreen demisting" function.
i You should only select this setting until
the windscreen is clear again.
Windows misted up on the outside X
Activate the windscreen wipers.
X Air conditioning: press the PorO
button.
X Automatic air conditioning
THERMOTRONIC: press the _button
until the PorO symbol appears in
the display.
i You should only select this setting until
the windscreen is clear again. Rear window heating
General notes The rear window heating has a high current
draw. You should therefore switch it off as
soon as the window is clear. It otherwise
switches off automatically after several
minutes.
If the battery voltage is too low, the rear win-
dow heating may switch off.
Activating/deactivating X
Turn the key to position 2in the ignition
lock (Y page 141).
X Press button ¤.
The indicator lamp in the ¤button lights
up or goes out. Operating the climate control system
133Climate control
Page 149 of 357
General notes
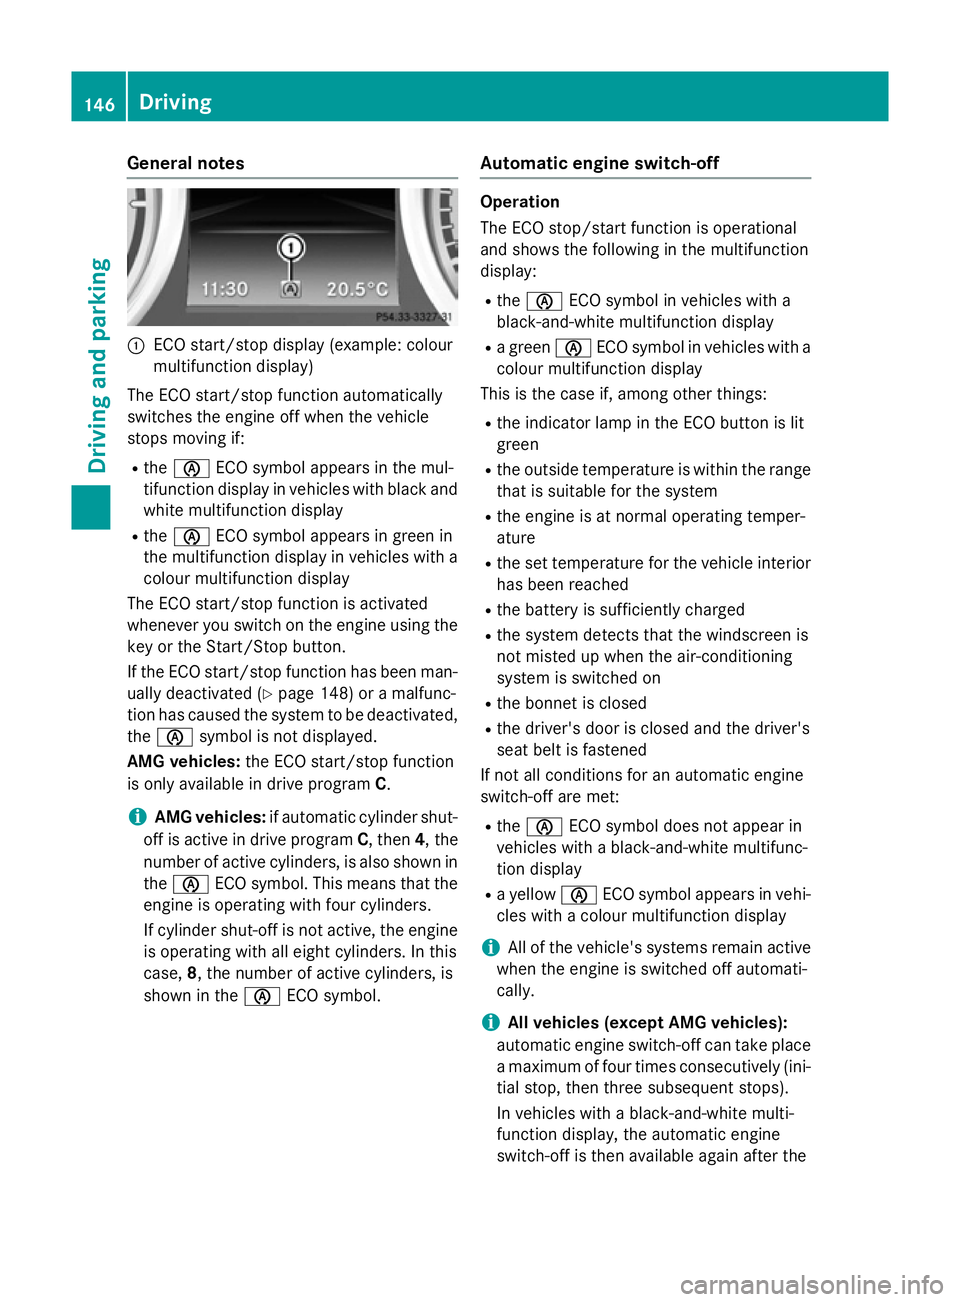
:
ECO start/stop display (example: colour
multifunction display)
The ECO start/stop function automatically
switches the engine off when the vehicle
stops moving if:
R the è ECO symbol appears in the mul-
tifunction display in vehicles with black and white multifunction display
R the è ECO symbol appears in green in
the multifunction display in vehicles with a colour multifunction display
The ECO start/stop function is activated
whenever you switch on the engine using the key or the Start/Stop button.
If the ECO start/stop function has been man-
ually deactivated (Y page 148) or a malfunc-
tion has caused the system to be deactivated, the è symbol is not displayed.
AMG vehicles: the ECO start/stop function
is only available in drive program C.
i AMG vehicles:
if automatic cylinder shut-
off is active in drive program C, then4, the
number of active cylinders, is also shown in
the è ECO symbol. This means that the
engine is operating with four cylinders.
If cylinder shut-off is not active, the engine
is operating with all eight cylinders. In this
case, 8, the number of active cylinders, is
shown in the èECO symbol. Automatic engine switch-off Operation
The ECO stop/start function is operational
and shows the following in the multifunction
display:
R the è ECO symbol in vehicles with a
black-and-white multifunction display
R a green èECO symbol in vehicles with a
colour multifunction display
This is the case if, among other things:
R the indicator lamp in the ECO button is lit
green
R the outside temperature is within the range
that is suitable for the system
R the engine is at normal operating temper-
ature
R the set temperature for the vehicle interior
has been reached
R the battery is sufficiently charged
R the system detects that the windscreen is
not misted up when the air-conditioning
system is switched on
R the bonnet is closed
R the driver's door is closed and the driver's
seat belt is fastened
If not all conditions for an automatic engine
switch-off are met:
R the è ECO symbol does not appear in
vehicles with a black-and-white multifunc-
tion display
R a yellow èECO symbol appears in vehi-
cles with a colour multifunction display
i All of the vehicle's systems remain active
when the engine is switched off automati-
cally.
i All vehicles (except AMG vehicles):
automatic engine switch-off can take place a maximum of four times consecutively (ini-
tial stop, then three subsequent stops).
In vehicles with a black-and-white multi-
function display, the automatic engine
switch-off is then available again after the 146
DrivingDriving and parking
Page 150 of 357
ECO symbol appears in the multifunction
display.
In vehicles with a colour multifunction dis-
play, the èECO symbol appears in yel-
low in the multifunction display after the
fourth automatic engine start. When the
è ECO symbol is shown in green in the
multifunction display, automatic engine
switch-off is again possible.
i AMG vehicles:
the number of consecu-
tive automatic engine stops is unlimited.
i The HOLD function can be activated if the
engine has been switched off automati-
cally. It is then not necessary to continue
applying the brakes during the automatic
stop phase. When you depress the accel-
erator pedal, the engine starts automati-
cally and the braking effect of the HOLD
function is deactivated.
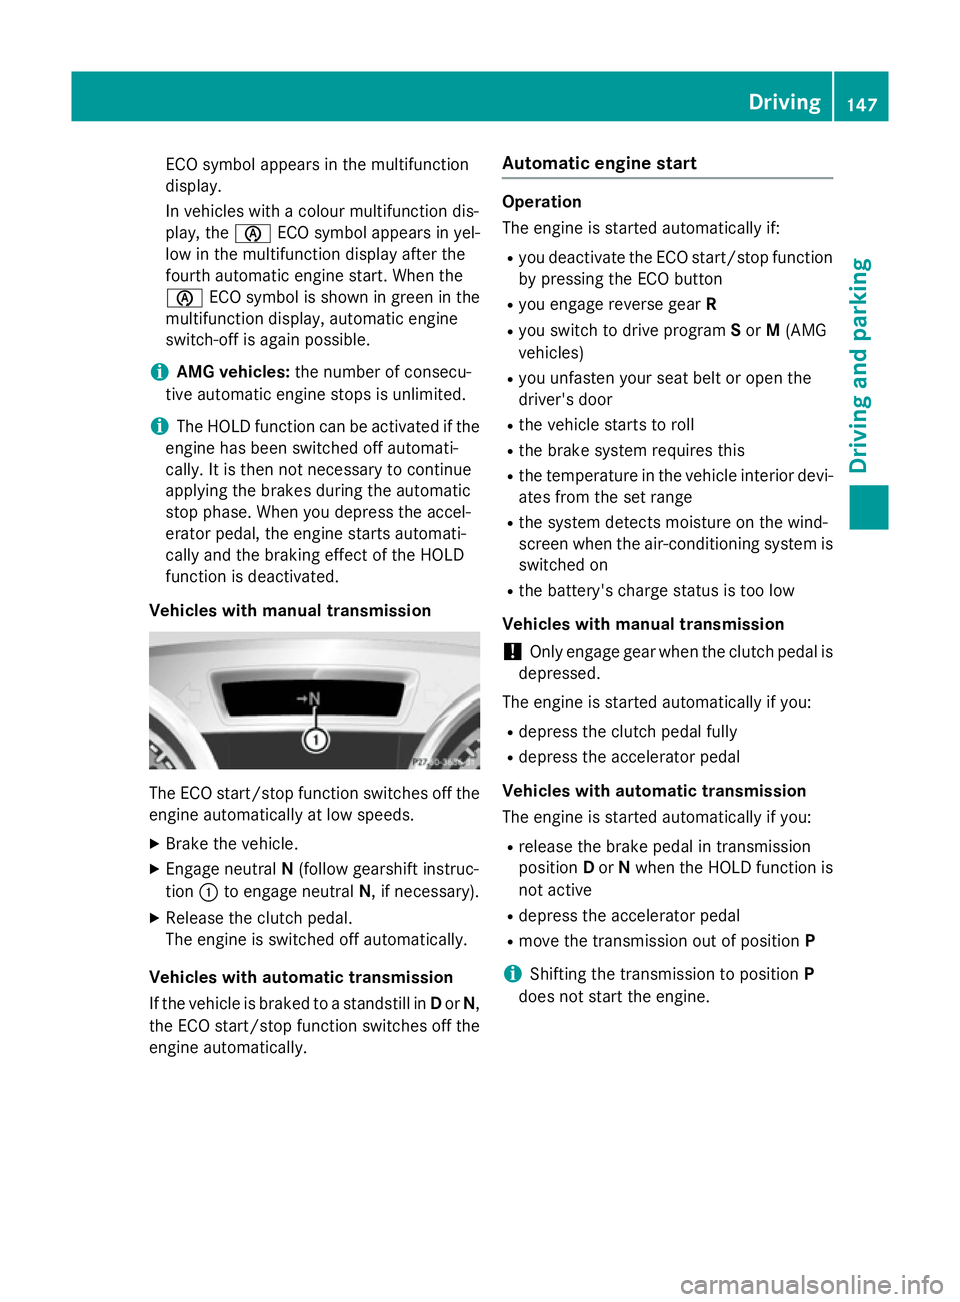
Vehicles with manual transmission The ECO start/stop function switches off the
engine automatically at low speeds.
X Brake the vehicle.
X Engage neutral N(follow gearshift instruc-
tion :to engage neutral N, if necessary).
X Release the clutch pedal.
The engine is switched off automatically.
Vehicles with automatic transmission
If the vehicle is braked to a standstill in Dor N,
the ECO start/stop function switches off the engine automatically. Automatic engine start Operation
The engine is started automatically if:
R
you deactivate the ECO start/stop function
by pressing the ECO button
R you engage reverse gear R
R you switch to drive program Sor M(AMG
vehicles)
R you unfasten your seat belt or open the
driver's door
R the vehicle starts to roll
R the brake system requires this
R the temperature in the vehicle interior devi-
ates from the set range
R the system detects moisture on the wind-
screen when the air-conditioning system is
switched on
R the battery's charge status is too low
Vehicles with manual transmission
! Only engage gear when the clutch pedal is
depressed.
The engine is started automatically if you:
R depress the clutch pedal fully
R depress the accelerator pedal
Vehicles with automatic transmission
The engine is started automatically if you: R release the brake pedal in transmission
position Dor Nwhen the HOLD function is
not active
R depress the accelerator pedal
R move the transmission out of position P
i Shifting the transmission to position
P
does not start the engine. Driving
147Driving an d parking Z