change time MERCEDES-BENZ SLK ROADSTER 2014 Owners Manual
[x] Cancel search | Manufacturer: MERCEDES-BENZ, Model Year: 2014, Model line: SLK ROADSTER, Model: MERCEDES-BENZ SLK ROADSTER 2014Pages: 357, PDF Size: 10.22 MB
Page 4 of 357
Thank you for buying Mercedes-Benz
Before you first drive off, read this Owner's
Manual carefully and familiarise yourself with
your vehicle. For your own safety and a longer
vehicle life, follow the instructions and warn-
ing notices in this manual. Disregarding them may lead to damage to the vehicle or personal
injury.
The equipment or model designation of your
vehicle may vary according to:
R model
R order
R country variant
R availability
The illustrations in this manual show a left-
hand-drive vehicle. On right-hand-drive vehi-
cles, the layout of components and controls
differs accordingly.
Mercedes-Benz is constantly updating its
vehicles to the state of the art.
Mercedes-Benz therefore reserves the right
to introduce changes in the following areas:
R design
R equipment
R technical features
The equipment in your vehicle may therefore
differ from that shown in the descriptions and
illustrations.
The following are integral components of the vehicle:
R Owner's Manual
R Service Booklet
R equipment-dependent supplements
Keep these documents in the vehicle at all
times. If you sell the vehicle, always pass all
documents on to the new owner.
i You can get to know the important fea-
tures of your vehicle in the interactive Own- er's Manual on the Internet at:
http://www.mercedes-benz.de/
betriebsanleitung The technical documentation team at
Daimler AG wishes you safe and pleasant
motoring.
1725844400Z102 É1725844400Z102rËÍ
Page 24 of 357
Protection of the environment
General notes
H
Environmental note
Daimler's declared policy is one of compre-
hensive environmental protection.
Our objectives are to use the natural resour-
ces which form the basis of our existence on
this planet sparingly and in a manner which
takes the requirements of both nature and
humanity into consideration.
You too can help to protect the environment
by operating your vehicle in an environmen-
tally-responsible manner.
Fuel consumption and the rate of engine,
transmission, brake and tyre wear depend on
the following factors:
R operating conditions of your vehicle
R your personal driving style
You can influence both factors. Therefore,
please bear the following in mind:
Operating conditions:
R avoid short trips, as these increase fuel
consumption.
R observe the correct tyre pressure.
R do not carry any unnecessary weight in the
vehicle.
R remove the roof rack once you no longer
need it.
R a regularly serviced vehicle will contribute
to environmental protection. You should
therefore adhere to the service intervals.
R all maintenance work should be carried out
at a qualified specialist workshop.
Personal driving style:
R do not depress the accelerator pedal when
starting the engine.
R do not warm up the engine when the vehicle
is stationary.
R drive carefully and maintain a safe distance
from the vehicle in front.
R avoid frequent, sudden acceleration and
braking. R
change gear in good time and use each gear
only up to Ôof its maximum engine speed.
R switch off the engine in stationary traffic.
R monitor the vehicle's fuel consumption. Returning an end-of-life vehicle
EU countries only:
Mercedes-Benz will take back your old vehicle to dispose of it in an environmentally-respon-sible manner in accordance with the Euro-
pean Union (EU) End of Life Vehicles Direc-
tive.
There is a network of return points and dis-
assembly plants available. You can return
your vehicle to these plants free of charge.
This makes a valuable contribution to the
recycling process and the conservation of
resources.
For further information on recycling old vehi- cles, recovery and the terms of the policy,
visit the Mercedes-Benz homepage. Genuine Mercedes-Benz parts
H
Environmental note
Daimler AG also supplies reconditioned
assemblies and parts which are of the same
quality as new parts. For these, the same war-
ranty applies as for new parts.
! Airbags and seat belt tensioners, as well
as control units and sensors for these
restraint systems, may be installed in the
following areas of your vehicle:
R doors
R door pillars
R door sills
R seats
R dashboard
R instrument cluster
R centre console Introduction
21 Z
Page 25 of 357
Do not install accessories such as audio
systems in these areas. Do not carry out
repairs or welding. You could impair the
operating efficiency of the restraint sys-
tems.
Have accessories retrofitted at a qualified
specialist workshop.
You could jeopardise the operating safety of
your vehicle if you use parts, tyres and wheels
as well as accessories relevant to safety
which have not been approved by Mercedes. This could lead to malfunctions in safety-rel-
evant systems, e.g. the brake system. Use
only genuine Mercedes-Benz parts or parts of
equal quality. Only use tyres, wheels and
accessories that have been specifically
approved for your vehicle.
Mercedes-Benz tests genuine parts and con-
version parts and accessories that have been specifically approved for your vehicle for their
reliability, safety and suitability. Despite
ongoing market research, Mercedes-Benz is
unable to assess other parts. Mercedes-Benz therefore accepts no responsibility for the
use of such parts in Mercedes-Benz vehicles, even if they have been officially approved or
independently approved by a testing centre.
In Germany, certain parts are only officially
approved for installation or modification if
they comply with legal requirements. This
also applies to some other countries. All gen-
uine Mercedes-Benz parts meet the approval
requirements. The use of non-approved parts may invalidate the vehicle's general operating
permit.
This is the case:
R if they cause a change of the vehicle type
from that for which the vehicle's general
operating permit was granted
R if other road users could be endangered
R if the emission or noise levels are adversely
affected
Always specify the vehicle identification num- ber (VIN) when ordering genuine Mercedes-
Benz parts (Y page 342). Owner's Manual
Vehicle equipment
This Owner's Manual describes all models
and all standard and optional equipment
available for your vehicle at the time of pub-
lication of the Owner's Manual. Country-spe- cific differences are possible. Note that your
vehicle may not be fitted with all features
described. This is also the case for systems
and functions relevant to safety. Therefore,
the equipment on your vehicle may differ from
that in the descriptions and illustrations.
The original purchase contract documenta-
tion for your vehicle contains a list of all of the
systems in your vehicle.
Should you have any questions concerning
equipment and operation, please consult a
Mercedes-Benz Service Centre.
The Owner's Manual and Service Booklet are important documents and should kept in the
vehicle. Operating safety
Important safety notes
G
WARNING
If you do not have the prescribed service/
maintenance work or necessary repairs car-
ried out, this could result in malfunctions or
system failures. There is a risk of an accident.
Always have the prescribed service/mainte-
nance work as well as necessary repairs car-
ried out at a qualified specialist workshop. G
WARNING
If you switch off the ignition while driving,
safety-relevant functions are only available
with limitations, or not at all. This could affect, for example, the power steering and the brake
boosting effect. You will require considerably
more effort to steer and brake. There is a risk of an accident.
Do not switch off the ignition while driving. 22
Introduction
Page 90 of 357
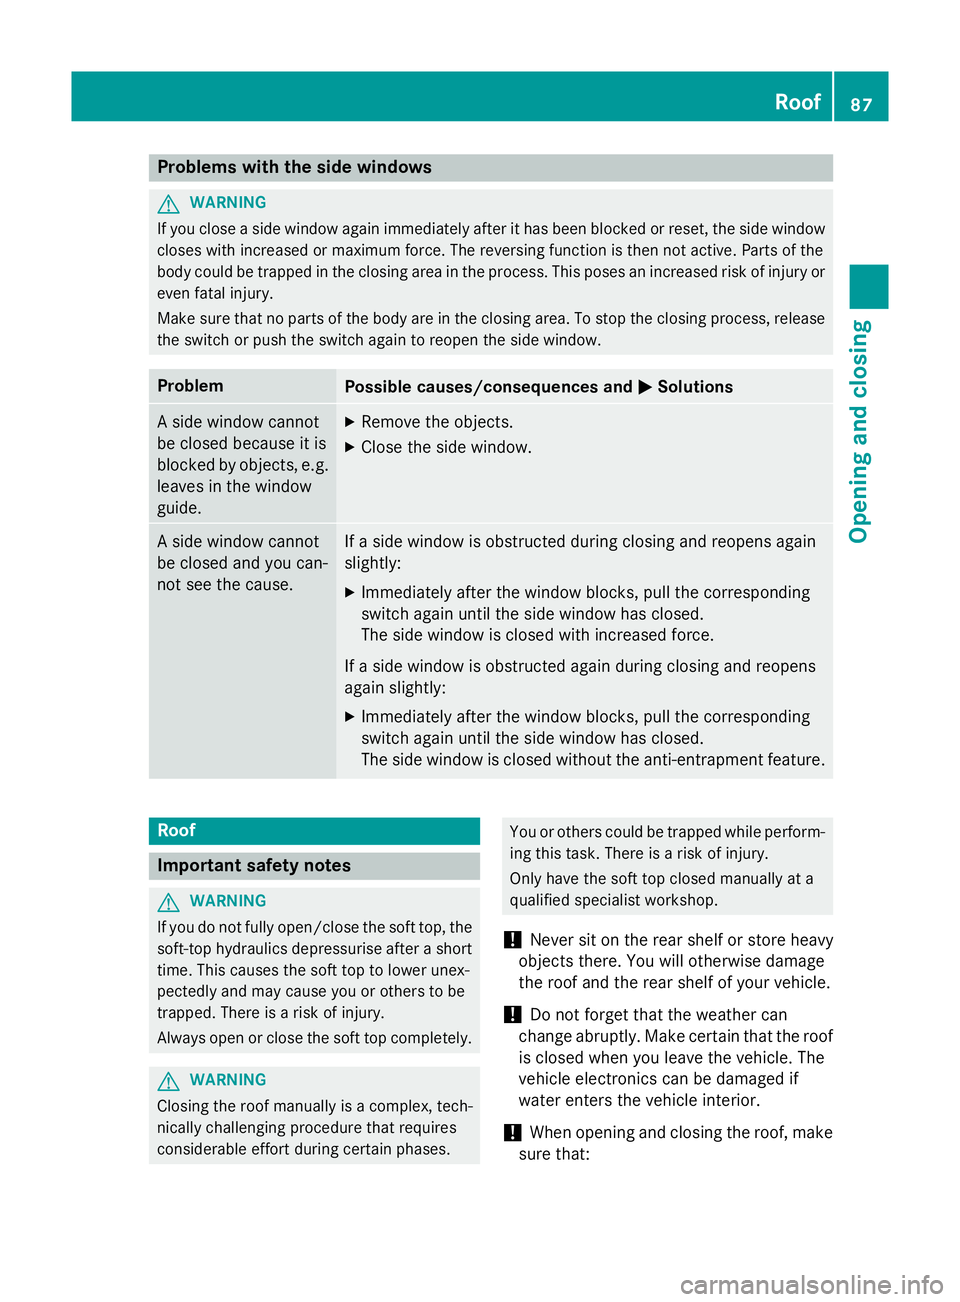
Problems with the side windows
G
WARNING
If you close a side window again immediately after it has been blocked or reset, the side window
closes with increased or maximum force. The reversing function is then not active. Parts of the
body could be trapped in the closing area in the process. This poses an increased risk of injury or even fatal injury.
Make sure that no parts of the body are in the closing area. To stop the closing process, releasethe switch or push the switch again to reopen the side window. Problem
Possible causes/consequences and
M MSolutions A side window cannot
be closed because it is
blocked by objects, e.g.
leaves in the window
guide. X
Remove the objects.
X Close the side window. A side window cannot
be closed and you can-
not see the cause. If a side window is obstructed during closing and reopens again
slightly:
X Immediately after the window blocks, pull the corresponding
switch again until the side window has closed.
The side window is closed with increased force.
If a side window is obstructed again during closing and reopens
again slightly: X Immediately after the window blocks, pull the corresponding
switch again until the side window has closed.
The side window is closed without the anti-entrapment feature. Roof
Important safety notes
G
WARNING
If you do not fully open/close the soft top, the soft-top hydraulics depressurise after a short time. This causes the soft top to lower unex-
pectedly and may cause you or others to be
trapped. There is a risk of injury.
Always open or close the soft top completely. G
WARNING
Closing the roof manually is a complex, tech-
nically challenging procedure that requires
considerable effort during certain phases. You or others could be trapped while perform-
ing this task. There is a risk of injury.
Only have the soft top closed manually at a
qualified specialist workshop.
! Never sit on the rear shelf or store heavy
objects there. You will otherwise damage
the roof and the rear shelf of your vehicle.
! Do not forget that the weather can
change abruptly. Make certain that the roof
is closed when you leave the vehicle. The
vehicle electronics can be damaged if
water enters the vehicle interior.
! When opening and closing the roof, make
sure that: Roof
87Opening and closing Z
Page 96 of 357
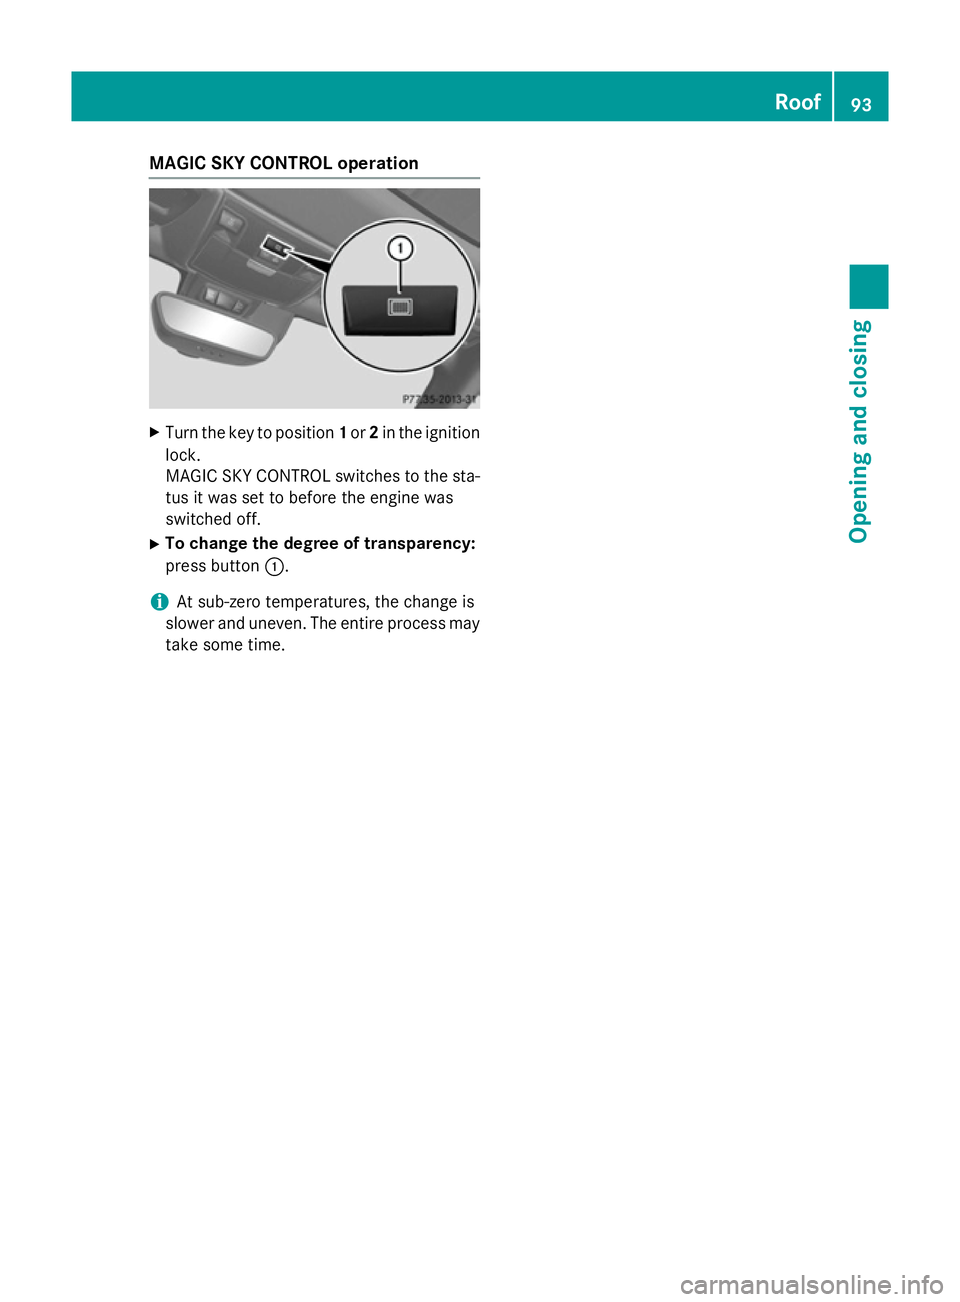
MAGIC SKY CONTROL operation
X
Turn the key to position 1or 2in the ignition
lock.
MAGIC SKY CONTROL switches to the sta-
tus it was set to before the engine was
switched off.
X To change the degree of transparency:
press button :.
i At sub-zero temperatures, the change is
slower and uneven. The entire process may
take some time. Roof
93Opening and closing Z
Page 134 of 357
Problems with the "Cooling with air dehumidification" function
Problem
Possible causes/consequences and
M
MSolutions The indicator lamp in
the
¿/Á button
flashes three times or
remains off. The cool-
ing with air dehumidifi-
cation system cannot
be switched on. Cooling with air dehumidification has been deactivated due to a
malfunction.
X Visit a qualified specialist workshop. Setting climate control to automatic
mode
General notes Automatic mode is only available with
THERMOTRONIC automatic air conditioning.
In automatic mode, the set temperature is
maintained automatically at a constant level. The system automatically regulates the tem-
perature of the dispensed air, the airflow and
the air distribution.
The automatic mode functions optimally
when the "Cooling with air dehumidification"
function is activated. If desired, cooling with
air dehumidification can be deactivated.
If you deactivate the "Cooling with air-dehu-
midification" function, the air inside the vehi-
cle will not be cooled. The air inside the vehi- cle will also not be dehumidified. The win-
dows can mist up more quickly. Therefore,
only switch off cooling with air dehumidifica-
tion for a short period.
Activating/switching X
Turn the key to position 2in the ignition
lock (Y page 141).
X Set the desired temperature.
X To activate: press theÃbutton.
The indicator lamp in the Ãbutton lights
up. Automatic air distribution and airflow
are activated. X
To switch to manual mode: press the
_ button.
or X Press the IorK button.
The indicator lamp in the Ãbutton goes
out. Setting the temperature
Air-conditioning system X
Turn the key to position 2in the ignition
lock (Y page 141).
X To increase/reduce: turn control:
clockwise or anti-clockwise (Y page 127).
Only change the temperature setting in
small increments. Start at 22 †.
i If you turn control
:anti-clockwise to
the lowest temperature setting, air-recircu- lation mode may activate automatically,
depending on the outside temperature.
THERMOTRONIC automatic climate
control Different temperatures can be set for the
driver's and front-passenger sides.
X Turn the key to position 2in the ignition
lock (Y page 141).
X To increase/reduce: turn control:orB
clockwise or anti-clockwise (Y page 128).
Only change the temperature setting in
small increments. Start at 22 †. Operating the climate control system
131Climate control
Page 143 of 357
Useful information
i This Owner's Manual describes all mod-
els, series and optional equipment for your
vehicle that were available at the time of
going to press. National variations are pos- sible. Note that your vehicle may not be
equipped with all of the functions descri-
bed. This is also the case for systems and
functions relevant to safety.
i Read the information on qualified special-
ist workshops: (Y page 24). Running-in notes
Important safety notes
In certain driving and driving safety systems,
the sensors adjust automatically while a cer-
tain distance is being driven after the vehicle has been delivered or after repairs. Full sys-
tem effectiveness is not reached until the end
of this teach-in procedure.
Brake pads/linings and discs that are either
new or have been replaced only achieve opti- mum braking effect after several hundred kil-
ometres of driving. Compensate for the
reduced braking effect by applying greater
force to the brake pedal. The first 1500 km
If you treat the engine with sufficient care
from the very start, you will be rewarded with excellent performance for the remainder of
the engine's life.
R Drive at varying vehicle speeds and engine
speeds for the first 1500 km.
R Avoid overstraining the vehicle during this
period, e.g. driving at full throttle.
R Change gear in good time, before the rev
counter needle is Ôof the way to the red
area of the rev counter. R
Do not shift down a gear manually in order
to brake.
R Vehicles with automatic transmission:
try to avoid depressing the accelerator
pedal beyond the point of resistance (kick- down).
After 1500 km, you may gradually bring the
vehicle up to full road and engine speeds.
Additional running-in notes for AMG vehicles:
R Do not drive at speeds above 140 km/ hfor
the first 1500 km.
R Only briefly allow the engine to reach a
maximum engine speed of 4500 rpm.
i You should also observe these notes on
running-in if the engine or parts of the drive train on your vehicle have been replaced. AMG vehicles with self-locking rear
axle differential
Your vehicle is equipped with a self-locking
differential on the rear axle. Change the oil
after a running-in period of 3000 km to
improve protection of the rear axle differen-
tial. This oil change prolongs the service life of
the differential. Have the oil change carried
out at a qualified specialist workshop. Driving
Important safety notes
G
WARNING
Objects in the driver's footwell may restrict
the clearance around the pedals or block a
depressed pedal. This jeopardises the oper-
ating and road safety of the vehicle. There is a risk of an accident.
Stow all objects securely in the vehicle so that
they do not get into the driver's footwell.
Always fit the floormats securely and as pre-
scribed in order to ensure that there is always sufficient room for the pedals. Do not use
loose floormats and do not place several floor-mats on top of one another. 140
DrivingDriving and parking
Page 147 of 357
Manual transmission
X
Depress the brake pedal and keep it
depressed.
X Fully depress the clutch pedal.
X Shift to neutral N.
i You can only start the engine when the
clutch pedal is fully depressed.
Automatic transmission X
Shift the transmission to position P.
The transmission position indicator in the
multifunction display shows P.
i You can also start the engine when the
transmission is in position N.
Starting procedure with the key X
To start a petrol engine: turn the key to
position 3in the ignition lock (Y page 141)
and release it as soon as the engine is run-
ning.
X To start a diesel engine: turn the key to
position 2in the ignition lock (Y page 141).
The % preglow indicator lamp in the
instrument cluster lights up.
X When the %preglow indicator lamp
goes out, turn the key to position 3
(Y page 141) and release it as soon as the
engine is running.
i To start the engine using the key instead
of KEYLESS-GO, pull the Start/Stop button
out of the ignition lock.
i You can start the engine without preglow
if the engine is warm.
Using KEYLESS-GO to start the engine i
The Start/Stop button can be used to
start the vehicle manually without inserting
the key into the ignition lock. The key must
be in the vehicle and the Start/Stop button must be inserted in the ignition lock. This
mode for starting the engine operates inde- pendently of the ECO start/stop automatic
engine start function.
X Depress the brake pedal and keep it
depressed.
X To start a petrol engine: press the Start/
Stop button once (Y page 141).
The engine starts.
X To start a diesel engine: press the Start/
Stop button once (Y page 141).
Preglow is activated and the engine starts. Pulling away
Manual transmission !
Change gear in good time and avoid spin-
ning the wheels. Otherwise, you could dam- age the vehicle.
X Depress the brake pedal and keep it
depressed.
X Depress the clutch pedal fully.
X Shift to either first gear or reverse gear R.
X Release the electric parking brake
(Y page 163).
X Release the brake pedal.
X Slowly release the clutch pedal and gently
depress the accelerator pedal.
i Follow the shift recommendations in the
multifunction display for an economical
driving style (Y page 152).
i The vehicle locks centrally once you have
pulled away. The locking knobs in the doors
drop down.
You can open the doors from the inside at
any time.
You can also deactivate the automatic lock- ing feature (Y page 216).
Automatic transmission G
WARNING
If the engine speed is above the idling speed
and you engage transmission position Dor R, 144
DrivingDriving and parking
Page 157 of 357
Program selector button
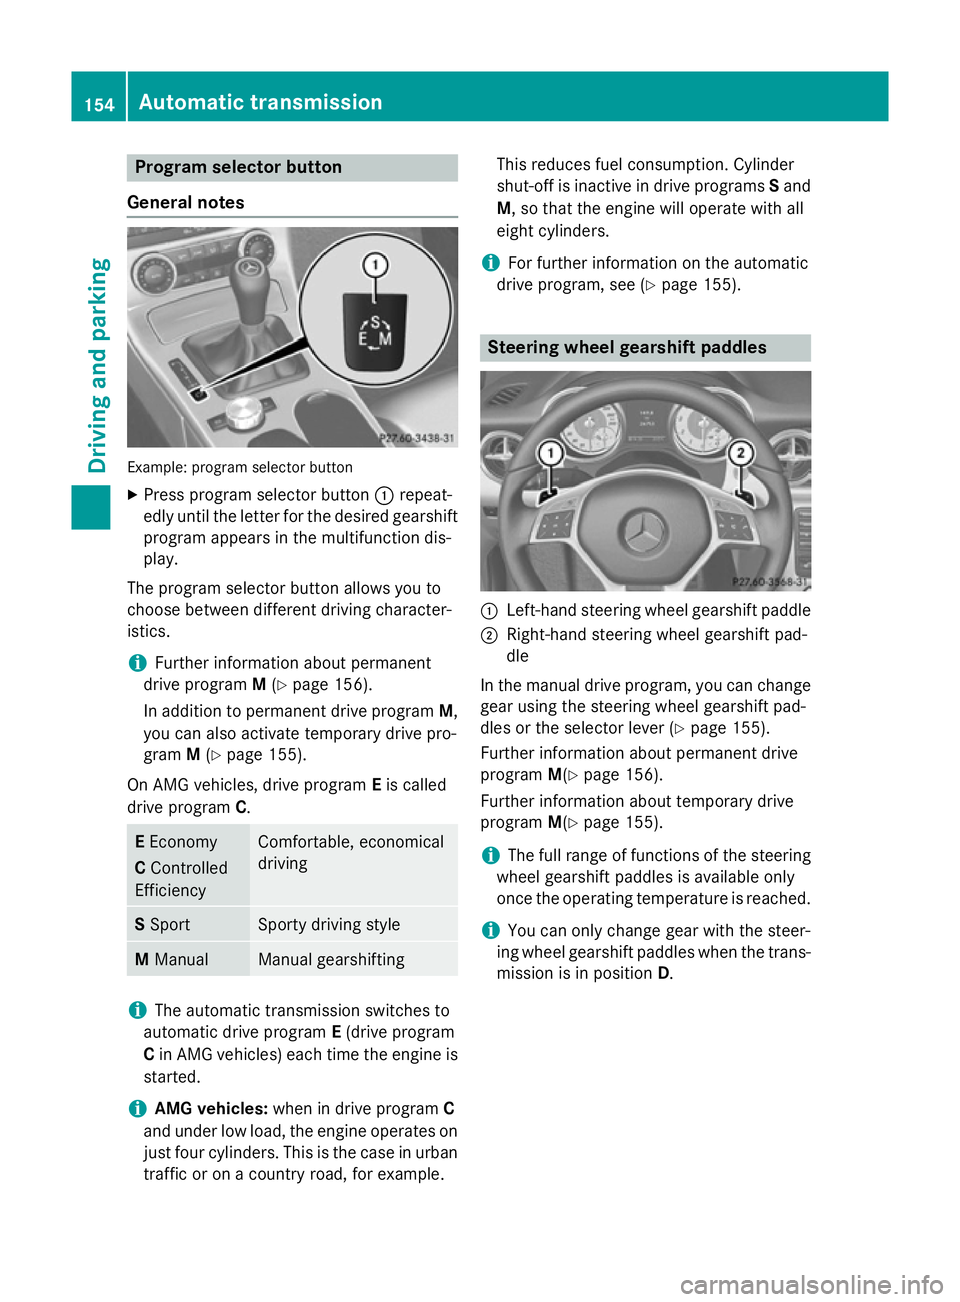
General notes Example: program selector button
X Press program selector button :repeat-
edly until the letter for the desired gearshift program appears in the multifunction dis-
play.
The program selector button allows you to
choose between different driving character-
istics.
i Further information about permanent
drive program M(Y page 156).
In addition to permanent drive program M,
you can also activate temporary drive pro-
gram M(Y page 155).
On AMG vehicles, drive program Eis called
drive program C. E
Economy
C Controlled
Efficiency Comfortable, economical
driving
S
Sport Sporty driving style
M
Manual Manual gearshifting
i
The automatic transmission switches to
automatic drive program E(drive program
C in AMG vehicles) each time the engine is
started.
i AMG vehicles:
when in drive program C
and under low load, the engine operates on
just four cylinders. This is the case in urban
traffic or on a country road, for example. This reduces fuel consumption. Cylinder
shut-off is inactive in drive programs
Sand
M, so that the engine will operate with all
eight cylinders.
i For further information on the automatic
drive program, see (Y page 155). Steering wheel gearshift paddles
:
Left-hand steering wheel gearshift paddle
; Right-hand steering wheel gearshift pad-
dle
In the manual drive program, you can change
gear using the steering wheel gearshift pad-
dles or the selector lever (Y page 155).
Further information about permanent drive
program M(Ypage 156).
Further information about temporary drive
program M(Ypage 155).
i The full range of functions of the steering
wheel gearshift paddles is available only
once the operating temperature is reached.
i You can only change gear with the steer-
ing wheel gearshift paddles when the trans-
mission is in position D.154
Automatic transmissionDriving and parking
Page 159 of 357
Downshifting
X Briefly press the selector lever to the left
towards D–.
or X Pull the left-hand steering wheel gearshift
paddle (Y page 154).
In cases where it is permissible, the auto-
matic transmission shifts down to the next gear.
i If you desire maximum acceleration, push
the selector lever to the left or pull and hold the left-hand steering wheel gearshift pad-
dle until the transmission shifts to the opti-
mal gear for the current speed.
i If the engine exceeds the maximum
engine speed when shifting down, the auto-
matic transmission protects against engine damage by not shifting down.
i Automatic downshifting occurs when
coasting.
Deactivating
If you have activated manual drive program
M, it will remain active for a certain amount of time. Under certain conditions the minimum
amount of time is extended, e.g. in the case of lateral acceleration, during an overrun phase
or when driving on steep terrain.
If manual drive program Mhas been deacti-
vated, the automatic transmission shifts into
the automatic drive program that was last
selected, i.e. Eor S.
You can also deactivate manual drive pro-
gram Myourself:
X Pull on the right-hand steering wheel gear-
shift paddle and hold it in place
(Y page 154).
or
X Use the lever to switch the transmission
position. or
X Use the program selector button to change
the drive program (Y page 154).
Manual drive program Mis deactivated.
The automatic transmission switches into
the automatic drive program that was last
selected, i.e. Eor S. Manual drive program
General notes In this drive program, you can permanently
change gear yourself by using the steering
wheel gearshift paddles. The transmission
must be in position D.
i In addition to permanent drive program
M, you can also activate temporary drive
program M(Y page 155).
Activating the manual drive program Manual drive program
Mdiffers from drive
program Swith regard to spontaneity,
responsiveness and the smoothness of the
gear changes.
You can select manual drive program Mwith
the program selector button. You can change gear using the steering wheel gearshift pad-
dles or the selector lever in manual drive pro-
gram Mif the transmission is in position D.
The selected gear appears in the multifunc-
tion display.
X Press the program selector button
(Y page 154) until Mappears in the multi-
function display.
Upshifting X
Briefly press the selector lever to the right
towards D+.
or X Pull the right-hand steering wheel gearshift
paddle (Y page 154).
The automatic transmission shifts up to the next gear. 156
Automatic transmissionDriving and pa
rking