MERCEDES-BENZ SLK55AMG 2011 R170 Owner's Manual
Manufacturer: MERCEDES-BENZ, Model Year: 2011, Model line: SLK55AMG, Model: MERCEDES-BENZ SLK55AMG 2011 R170Pages: 312, PDF Size: 5.64 MB
Page 111 of 312
X
Move the selection marker with button
W or X to the Convenience
submenu.
X Press button & or * repeatedly until
the message Easy-entry Function
appears in the multifunction display.
The selection marker is on the current
setting. X
Press button W or X to activate ( On)
or deactivate (Off) the easy-entry/exit
feature. Trip computer menu
Use the Trip computer menu to call up
statistical data on your vehicle.
The following information is available:
R Fuel consumption statistics since start
(Y page 109)
R Fuel consumption statistics since last reset
(Y page 109)
R Resetting fuel consumption statistics
(Y page 110)
R Distance to empty ( Y page 110)
Fuel consumption statistics since start X
Press button U or V repeatedly until
the message From Start appears in the
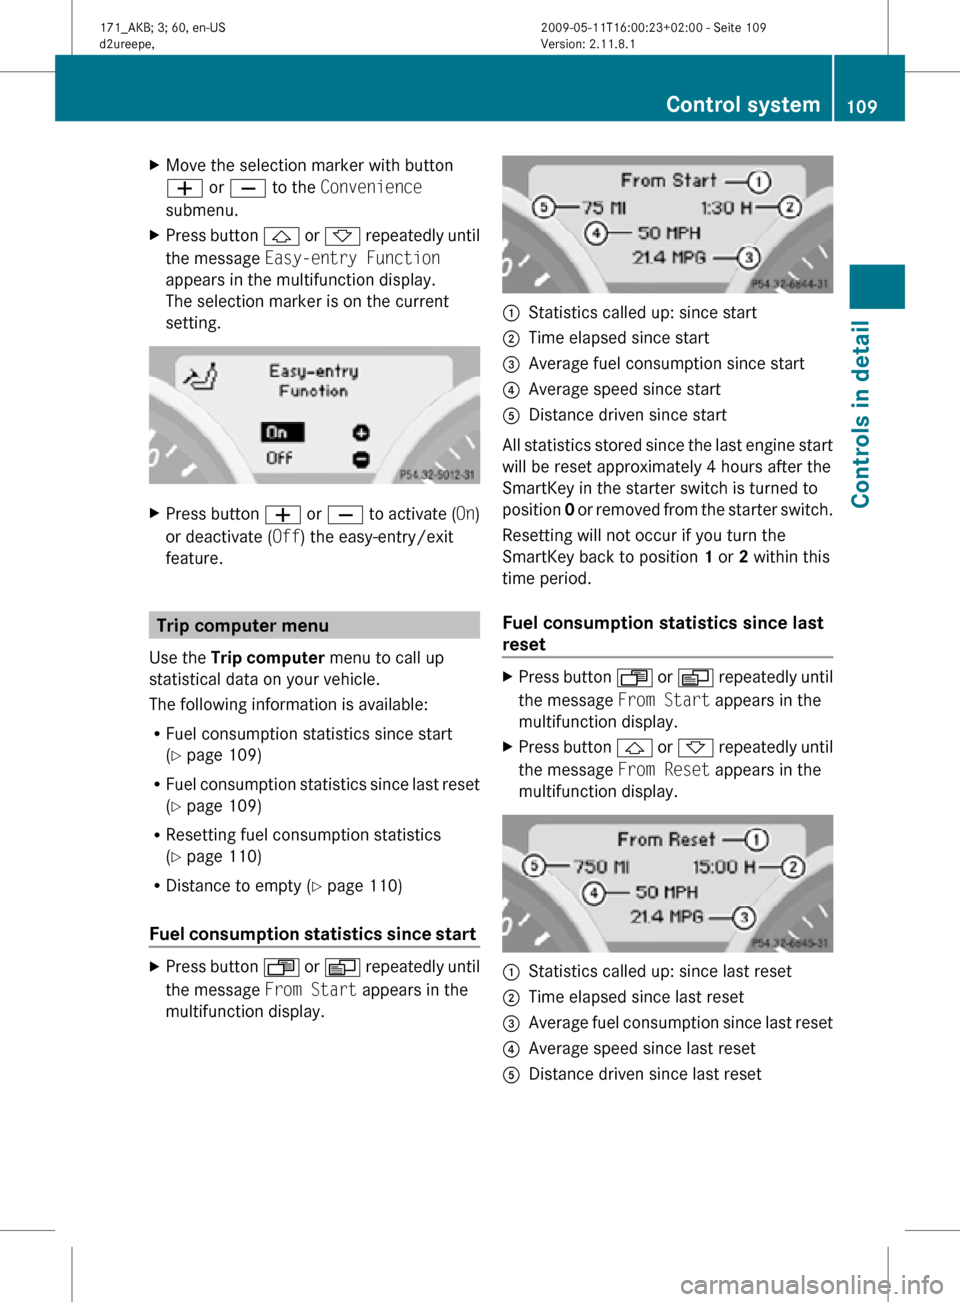
multifunction display. :
Statistics called up: since start
; Time elapsed since start
= Average fuel consumption since start
? Average speed since start
A Distance driven since start
All statistics stored since the last engine start
will be reset approximately 4 hours after the
SmartKey in the starter switch is turned to
position 0 or removed from the starter switch.
Resetting will not occur if you turn the
SmartKey back to position 1 or 2 within this
time period.
Fuel consumption statistics since last
reset X
Press button U or V repeatedly until
the message From Start appears in the
multifunction display.
X Press button & or * repeatedly until
the message From Reset appears in the
multifunction display. :
Statistics called up: since last reset
; Time elapsed since last reset
= Average fuel consumption since last reset
? Average speed since last reset
A Distance driven since last reset Control system
109Controls in detail
171_AKB; 3; 60, en-US
d2ureepe, Version: 2.11.8.1 2009-05-11T16:00:23+02:00 - Seite 109 Z
Page 112 of 312
Resetting fuel consumption statistics
X
Press button U or V repeatedly until
the message From Start appears in the
multifunction display.
X Press button & or * repeatedly until
the reading that you want to reset appears
in the multifunction display.
X Press and hold the reset button . in the
instrument cluster until the respective
values are reset to 0.
The fuel consumption statistics reset
automatically to 0 after 99 999 miles or
9 999 hours, whichever occurs first.
Distance to empty X
Press button U or V repeatedly until
the message From Start appears in the
multifunction display.
X Press button & or * repeatedly until
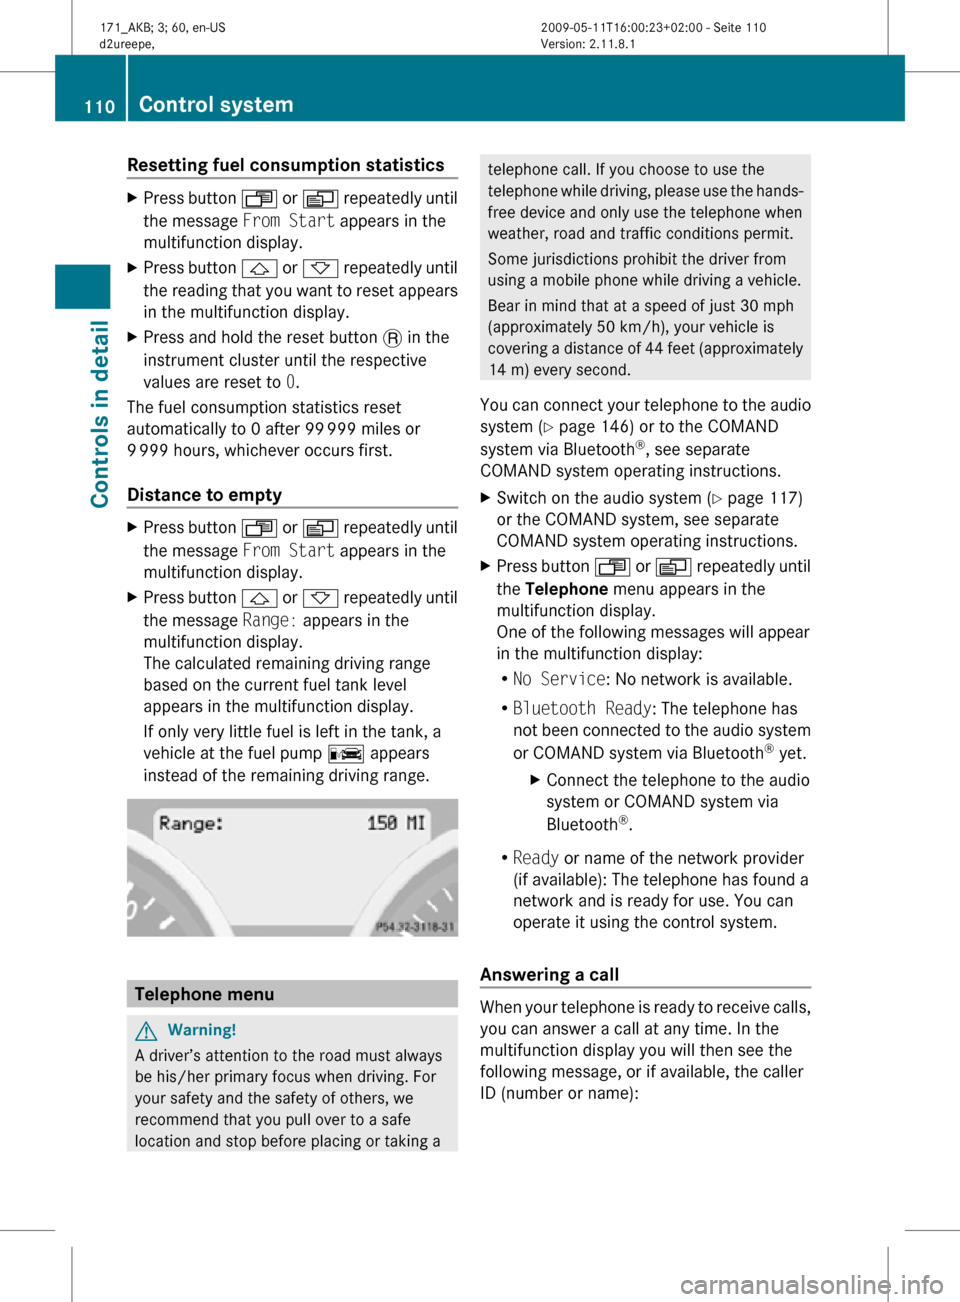
the message Range: appears in the
multifunction display.
The calculated remaining driving range
based on the current fuel tank level
appears in the multifunction display.
If only very little fuel is left in the tank, a
vehicle at the fuel pump C appears
instead of the remaining driving range. Telephone menu
G
Warning!
A driver’s attention to the road must always
be his/her primary focus when driving. For
your safety and the safety of others, we
recommend that you pull over to a safe
location and stop before placing or taking a telephone call. If you choose to use the
telephone while driving, please use the hands-
free device and only use the telephone when
weather, road and traffic conditions permit.
Some jurisdictions prohibit the driver from
using a mobile phone while driving a vehicle.
Bear in mind that at a speed of just 30 mph
(approximately 50 km/h), your vehicle is
covering a distance of 44 feet (approximately
14 m) every second.
You can connect your telephone to the audio
system (Y page 146) or to the COMAND
system via Bluetooth ®
, see separate
COMAND system operating instructions.
X Switch on the audio system ( Y page 117)
or the COMAND system, see separate
COMAND system operating instructions.
X Press button U or V repeatedly until
the Telephone menu appears in the
multifunction display.
One of the following messages will appear
in the multifunction display:
R No Service: No network is available.
R Bluetooth Ready: The telephone has
not been connected to the audio system
or COMAND system via Bluetooth ®
yet.
X Connect the telephone to the audio
system or COMAND system via
Bluetooth ®
.
R Ready or name of the network provider
(if available): The telephone has found a
network and is ready for use. You can
operate it using the control system.
Answering a call When your telephone is ready to receive calls,
you can answer a call at any time. In the
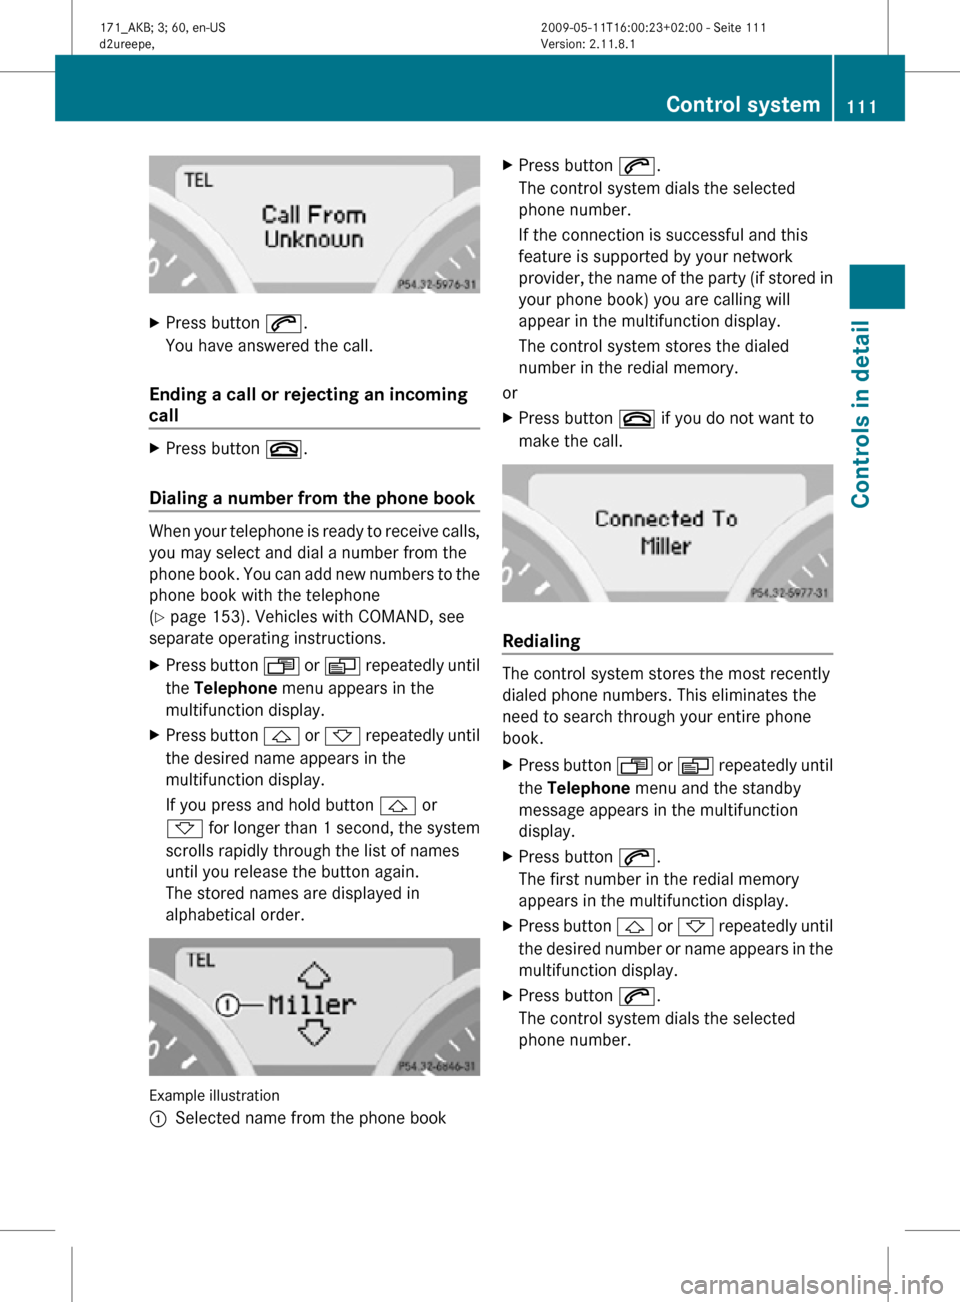
multifunction display you will then see the
following message, or if available, the caller
ID (number or name):110
Control systemControls in detail
171_AKB; 3; 60, en-US
d2ureepe,
Version: 2.11.8.1 2009-05-11T16:00:23+02:00 - Seite 110
Page 113 of 312
X
Press button 6.
You have answered the call.
Ending a call or rejecting an incoming
call X
Press button ~.
Dialing a number from the phone book When your telephone is ready to receive calls,
you may select and dial a number from the
phone book. You can add new numbers to the
phone book with the telephone
(Y page 153). Vehicles with COMAND, see
separate operating instructions.
X
Press button U or V repeatedly until
the Telephone menu appears in the
multifunction display.
X Press button & or * repeatedly until
the desired name appears in the
multifunction display.
If you press and hold button & or
* for longer than 1 second, the system
scrolls rapidly through the list of names
until you release the button again.
The stored names are displayed in
alphabetical order. Example illustration
:
Selected name from the phone book X
Press button 6.
The control system dials the selected
phone number.
If the connection is successful and this
feature is supported by your network
provider, the name of the party (if stored in
your phone book) you are calling will
appear in the multifunction display.
The control system stores the dialed
number in the redial memory.
or
X Press button ~ if you do not want to
make the call. Redialing
The control system stores the most recently
dialed phone numbers. This eliminates the
need to search through your entire phone
book.
X
Press button U or V repeatedly until
the Telephone menu and the standby
message appears in the multifunction
display.
X Press button 6.
The first number in the redial memory
appears in the multifunction display.
X Press button & or * repeatedly until
the desired number or name appears in the
multifunction display.
X Press button 6.
The control system dials the selected
phone number. Control system
111Controls in detail
171_AKB; 3; 60, en-US
d2ureepe, Version: 2.11.8.1 2009-05-11T16:00:23+02:00 - Seite 111 Z
Page 114 of 312
Audio system
Audio and telephone operation
These instructions are intended to help you
become familiar with your Mercedes-Benz
audio system. They contain useful tips and a
detailed description of the user functions. G
Warning!
In order to avoid distraction which could lead
to an accident, the driver should enter system
settings with the vehicle at a standstill and
operate the system only when road and traffic
conditions permit. Always pay full attention to
traffic conditions first before operating
system controls while driving.
Bear in mind that at a speed of just 30 mph
(approximately 50 km/h), your vehicle is
covering a distance of 44 feet (approximately
14 m) every second. Operating safety
G
Warning!
Any alterations made to electronic
components can cause malfunctions.
The radio, amplifier, CD changer, satellite
radio, and telephone are interconnected.
When one of the components is not
operational or has not been removed/
replaced properly, the function of other
components may be impaired.
This condition might seriously impair the
operating safety of your vehicle. We recommend that you have any service
work
on electronic components carried out at
an authorized Mercedes-Benz Center. Audio system components
With the audio system you can operate the
following main functions:
R Audio function with the radio, Satellite
radio,
disc (CD audio or MP3 mode), Audio
AUX and external audio devices
R the mobile phone with the phone book
R various system settings
In addition, the audio system can also be
operated with the multifunction steering
wheel (Y page 94).
In these instructions, the keypad (right side
of audio control unit) and the function buttons
are referred to as “buttons”.
Audio control unit With the audio control unit you can
R
switch the audio system on/off
R adjust the volume
R select the operating modes
R enter telephone numbers and accept,
reject, initiate and end telephone calls
R load and eject CDs 112
Audio system
Controls in detail
171_AKB; 3; 60, en-US
d2ureepe,
Version: 2.11.8.1 2009-05-11T16:00:23+02:00 - Seite 112
Page 115 of 312
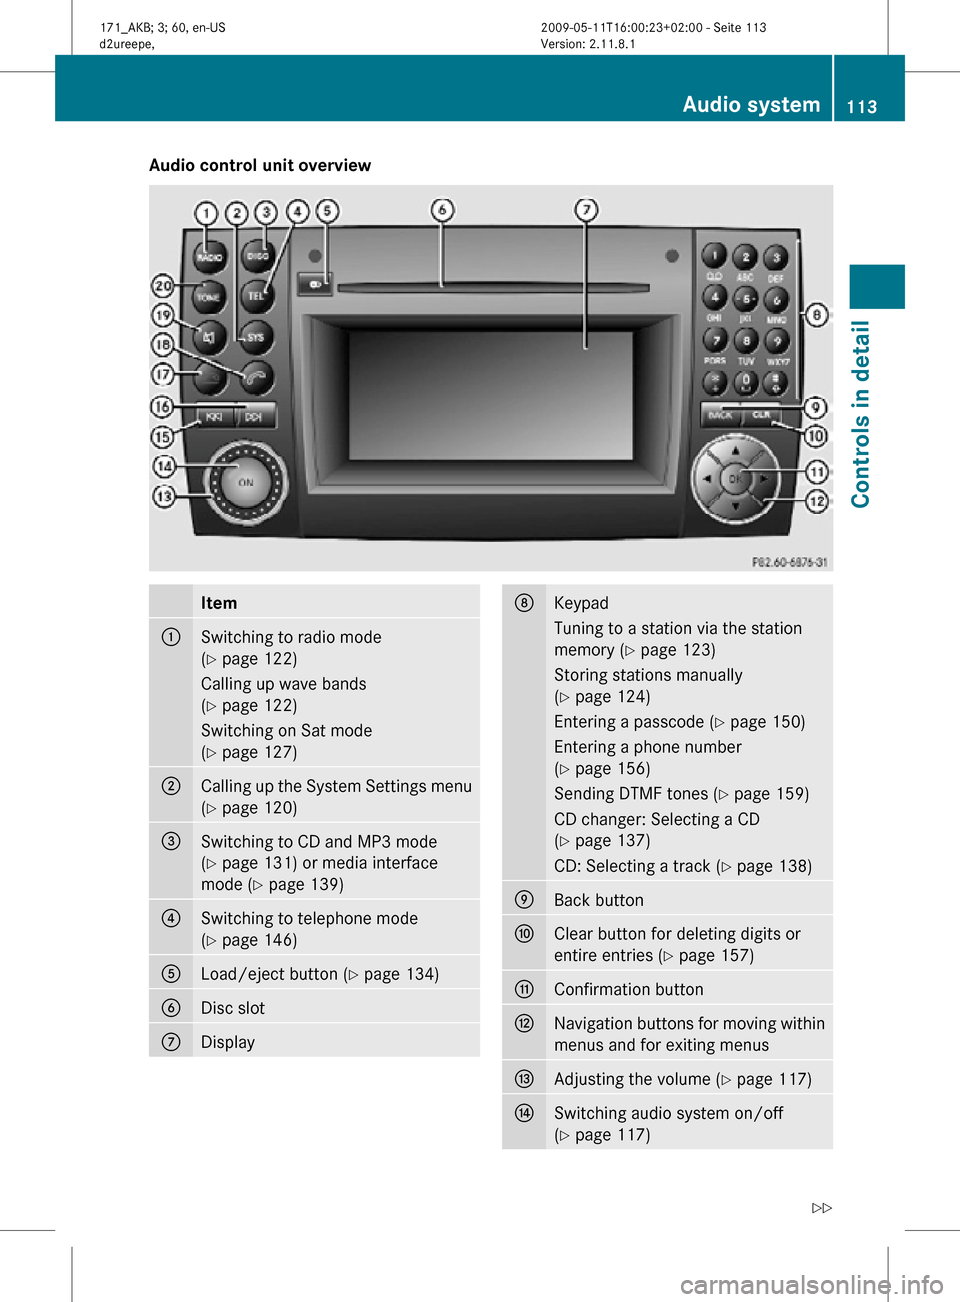
Audio control unit overview
Item
:
Switching to radio mode
(Y page 122)
Calling up wave bands
(Y page 122)
Switching on Sat mode
(Y page 127)
;
Calling up the System Settings menu
(Y page 120)
=
Switching to CD and MP3 mode
(Y page 131) or media interface
mode (
Y page 139) ?
Switching to telephone mode
(Y page 146)
A
Load/eject button (Y page 134)
B
Disc slot
C
Display D
Keypad
Tuning to a station via the station
memory (
Y page 123)
Storing stations manually
(Y page 124)
Entering a passcode (Y page 150)
Entering a phone number
(Y page 156)
Sending DTMF tones ( Y page 159)
CD changer: Selecting a CD
(Y page 137)
CD: Selecting a track (Y page 138) E
Back button
F
Clear button for deleting digits or
entire entries (
Y page 157) G
Confirmation button
H
Navigation buttons for moving within
menus and for exiting menus
I
Adjusting the volume (Y page 117)
J
Switching audio system on/off
(Y page 117) Audio system
113Controls in detail
171_AKB; 3; 60, en-US
d2ureepe, Version: 2.11.8.1 2009-05-11T16:00:23+02:00 - Seite 113 Z
Page 116 of 312
K
Tuning to a station via station search
(Y page 123)
Fast rewind (Y page 138)
Skipping backwards to a track
(Y page 138) L
Tuning to a station via station search
(Y page 123)
Fast forward (
Y page 138)
Skipping forwards to a track
(Y page 138) M
Rejecting a call (
Y page 158)
Ending an active call (Y page 158) N
Confirming a passcode
(Y page 150)
Accepting a call (Y page 158)
Initiating a call (
Y page 156)
Redial ( Y page 157) O
Switching sound on/off
(Y page 118)
Switching hands-free microphone
on/off (
Y page 158) P
Sound settings (
Y page 118) Audio display
!
Avoid touching the audio display at all
times. The display has a very sensitive high-
gloss surface, there is a risk of it being
scratched. Do not press directly in the
display face. Otherwise, the audio display
will be damaged.
i For information about cleaning and care
of the audio display, see “Audio or
COMAND display” ( Y page 231).
Display
The currently selected mode and the
associated menus are shown on the audio
display. The audio display is divided into
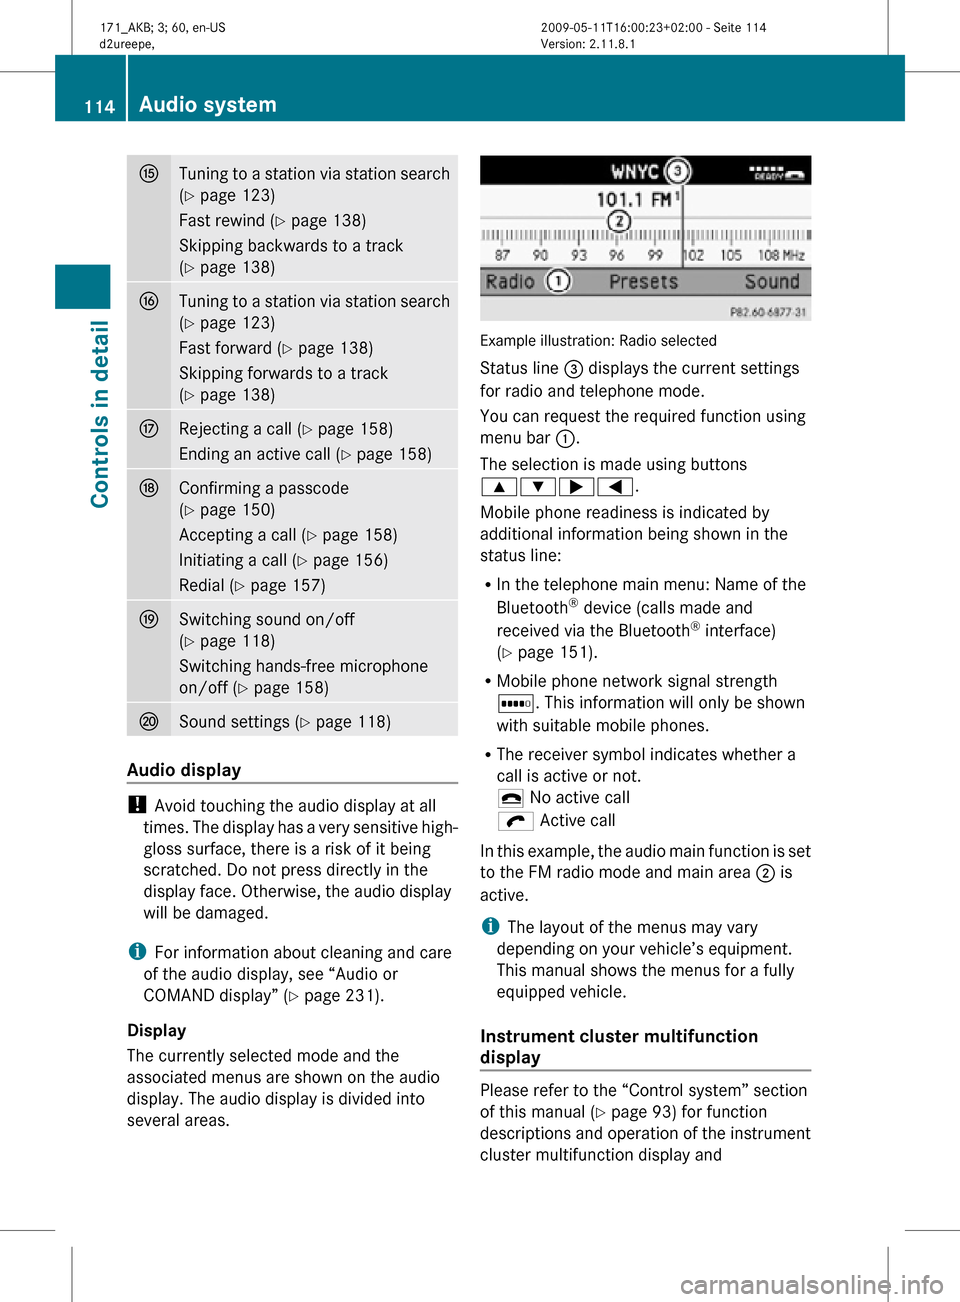
several areas. Example illustration: Radio selected
Status line = displays the current settings
for radio and telephone mode.
You can request the required function using
menu bar
:.
The selection is made using buttons
9:;=.
Mobile phone readiness is indicated by
additional information being shown in the
status line:
R In the telephone main menu: Name of the
Bluetooth ®
device (calls made and
received via the Bluetooth ®
interface)
(Y page 151).
R Mobile phone network signal strength
r. This information will only be shown
with suitable mobile phones.
R The receiver symbol indicates whether a
call is active or not.
¢ No active call
ö Active call
In this example, the audio main function is set
to the FM radio mode and main area ; is
active.
i The layout of the menus may vary
depending on your vehicle’s equipment.
This manual shows the menus for a fully
equipped vehicle.
Instrument cluster multifunction
display Please refer to the “Control system” section
of this manual (
Y page 93) for function
descriptions and operation of the instrument
cluster multifunction display and 114
Audio systemControls in detail
171_AKB; 3; 60, en-US
d2ureepe,
Version: 2.11.8.1 2009-05-11T16:00:23+02:00 - Seite 114
Page 117 of 312
multifunction steering wheel buttons as they
relate to audio functions described in this
section.
Menu
The table below shows the structure of the
modes and their menus. Each mode has a
basic menu. Each menu item in turn has
several submenu items. Button Mode/Menu
$
Radio mode
Radio (FM/AM) (Y page 121)
Weather Band (
Y page 121) Satellite radio (
Y page 125) h
Disc mode
CD/MP3 mode (Y page 131)
Media interface operation
(Y page 139)
Audio AUX mode (
Y page 145) %
Telephone mode
Telephone mode (Y page 146)
i
System menu
System settings (Y page 119)
Display on/off (
Y page 120) Calling up an operating mode
X
Press the respective button ( $, h,
%, or i) on the audio control unit.
The basic menu of the selected mode
appears in the audio display. The main area
is active. The active area is highlighted.
i The following screens show the audio
display’s day design. The appearance of the
highlighted items in the menu will vary
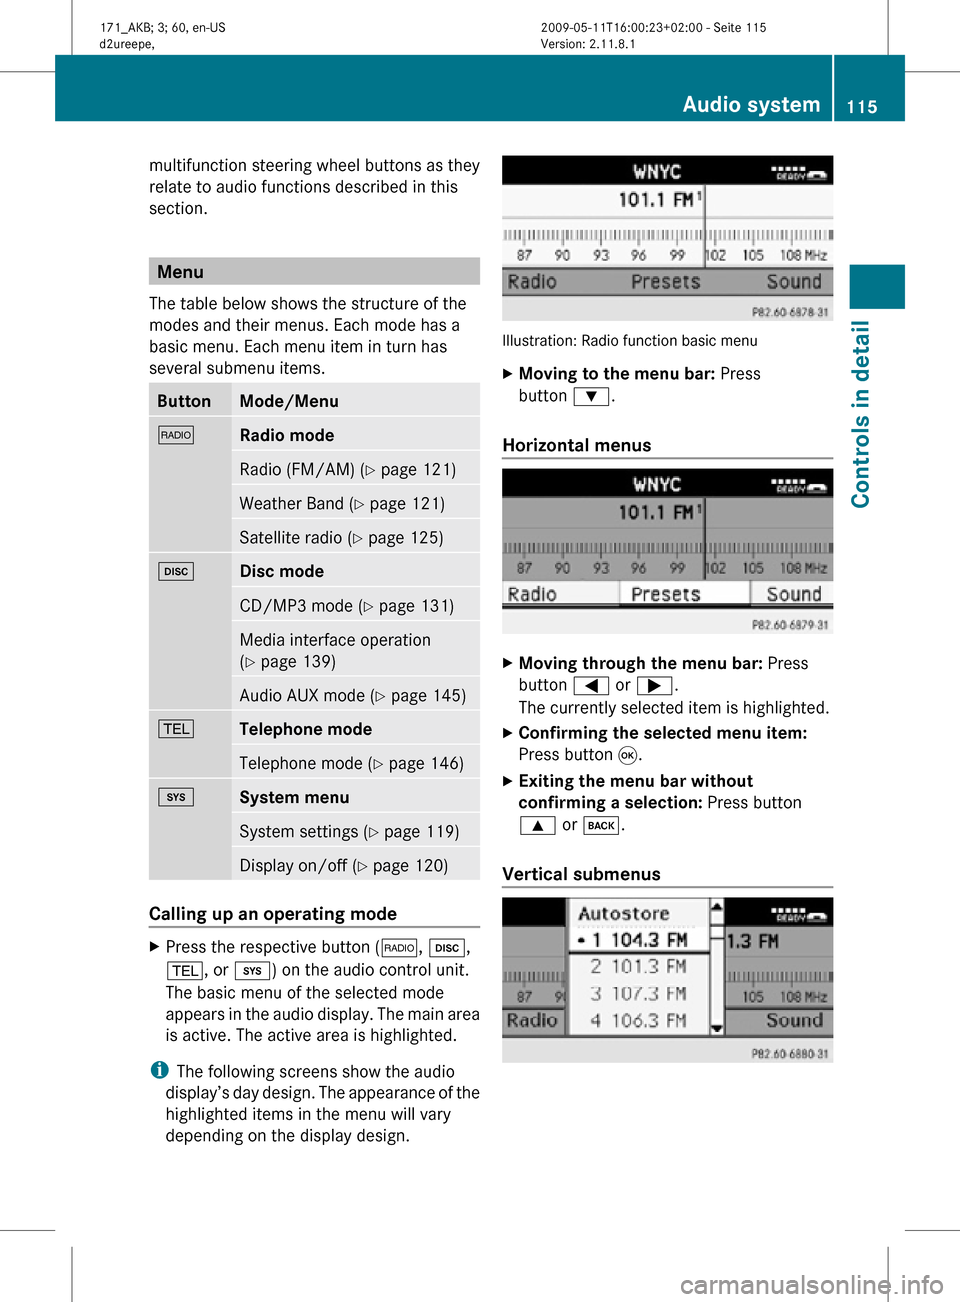
depending on the display design. Illustration: Radio function basic menu
X
Moving to the menu bar: Press
button :.
Horizontal menus X
Moving through the menu bar: Press
button = or ;.
The currently selected item is highlighted.
X Confirming the selected menu item:
Press button 9.
X Exiting the menu bar without
confirming a selection: Press button
9 or k.
Vertical submenus Audio system
115Controls in detail
171_AKB; 3; 60, en-US
d2ureepe, Version: 2.11.8.1 2009-05-11T16:00:23+02:00 - Seite 115 Z
Page 118 of 312
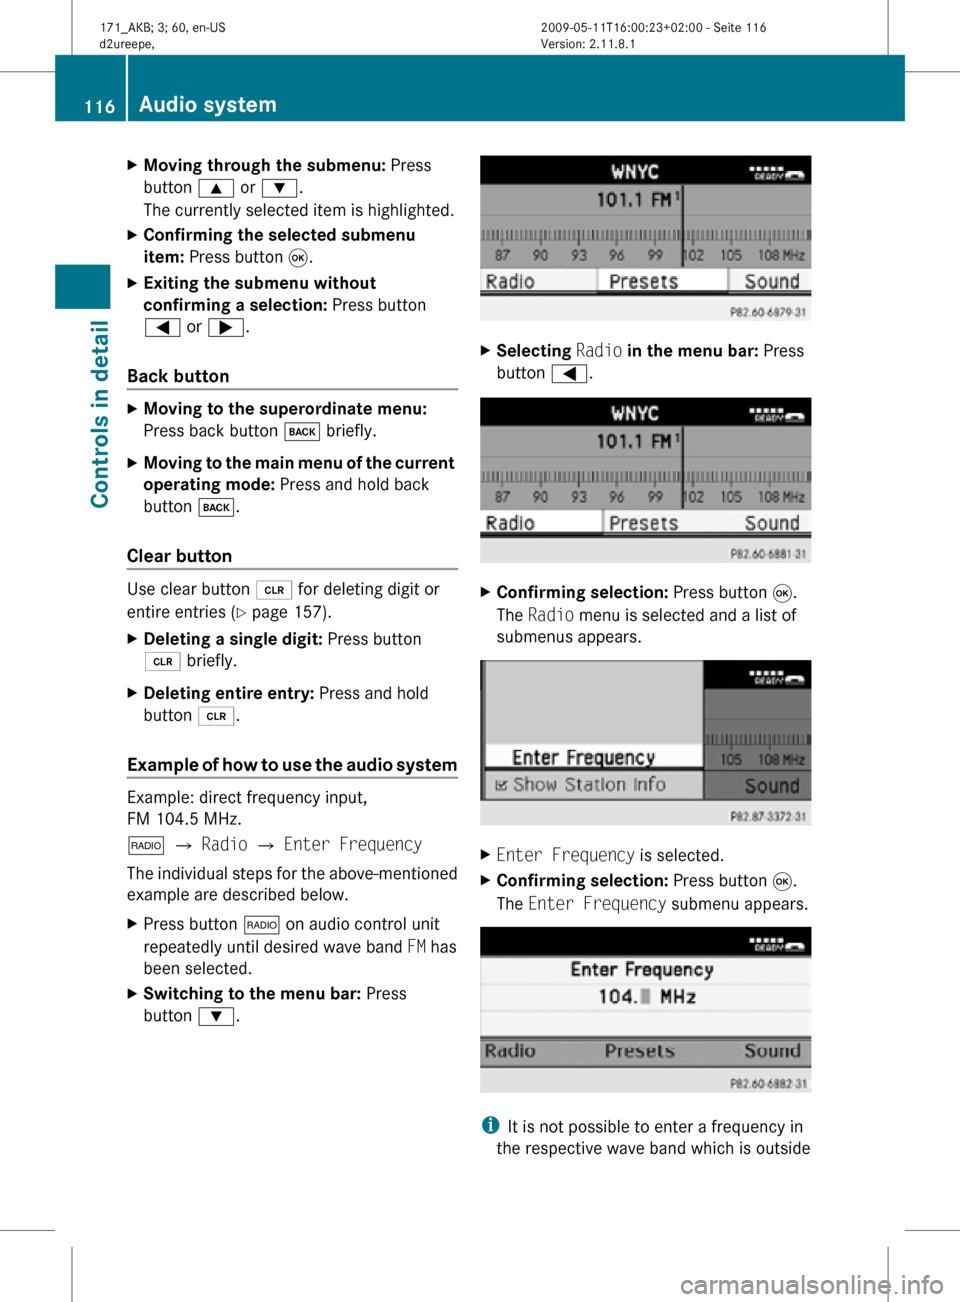
X
Moving through the submenu: Press
button 9 or :.
The currently selected item is highlighted.
X Confirming the selected submenu
item: Press button 9.
X Exiting the submenu without
confirming a selection: Press button
= or ;.
Back button X
Moving to the superordinate menu:
Press back button k briefly.
X Moving to the main menu of the current
operating mode: Press and hold back
button k.
Clear button Use clear button 2 for deleting digit or
entire entries ( Y page 157).
X Deleting a single digit: Press button
2 briefly.
X Deleting entire entry: Press and hold
button 2.
Example of how to use the audio system Example: direct frequency input,
FM 104.5 MHz.
$ Q Radio Q Enter Frequency
The individual steps for the above-mentioned
example are described below.
X Press button $ on audio control unit
repeatedly until desired wave band FM has
been selected.
X Switching to the menu bar: Press
button :. X
Selecting Radio in the menu bar: Press
button =. X
Confirming selection: Press button 9.
The Radio menu is selected and a list of
submenus appears. X
Enter Frequency is selected.
X Confirming selection: Press button 9.
The Enter Frequency submenu appears. i
It is not possible to enter a frequency in
the respective wave band which is outside 116
Audio systemControls in detail
171_AKB; 3; 60, en-US
d2ureepe,
Version: 2.11.8.1 2009-05-11T16:00:23+02:00 - Seite 116
Page 119 of 312
the frequency range. Frequencies within
the current frequency range, but outside
the current frequency step width are
rounded to the next lower allowed
frequency.
X Enter 1045 with the keypad on the audio
control unit.
The audio system tunes in to the frequency
entered. Operation
In the following description, an operation step
is described as in the example below.
X $ Q Radio Q Enter Frequency
is the short for
X Press button $ on audio control unit
repeatedly until desired wave band has
been selected.
X Press button :.
X Press button = to select Radio.
X Press button 9.
The Radio menu is selected and a list of
submenus appears.
X Enter Frequency is selected. If it is not
selected, press button 9 to select
Enter Frequency.
X Press button 9.
The Enter Frequency submenu appears
in the audio display.
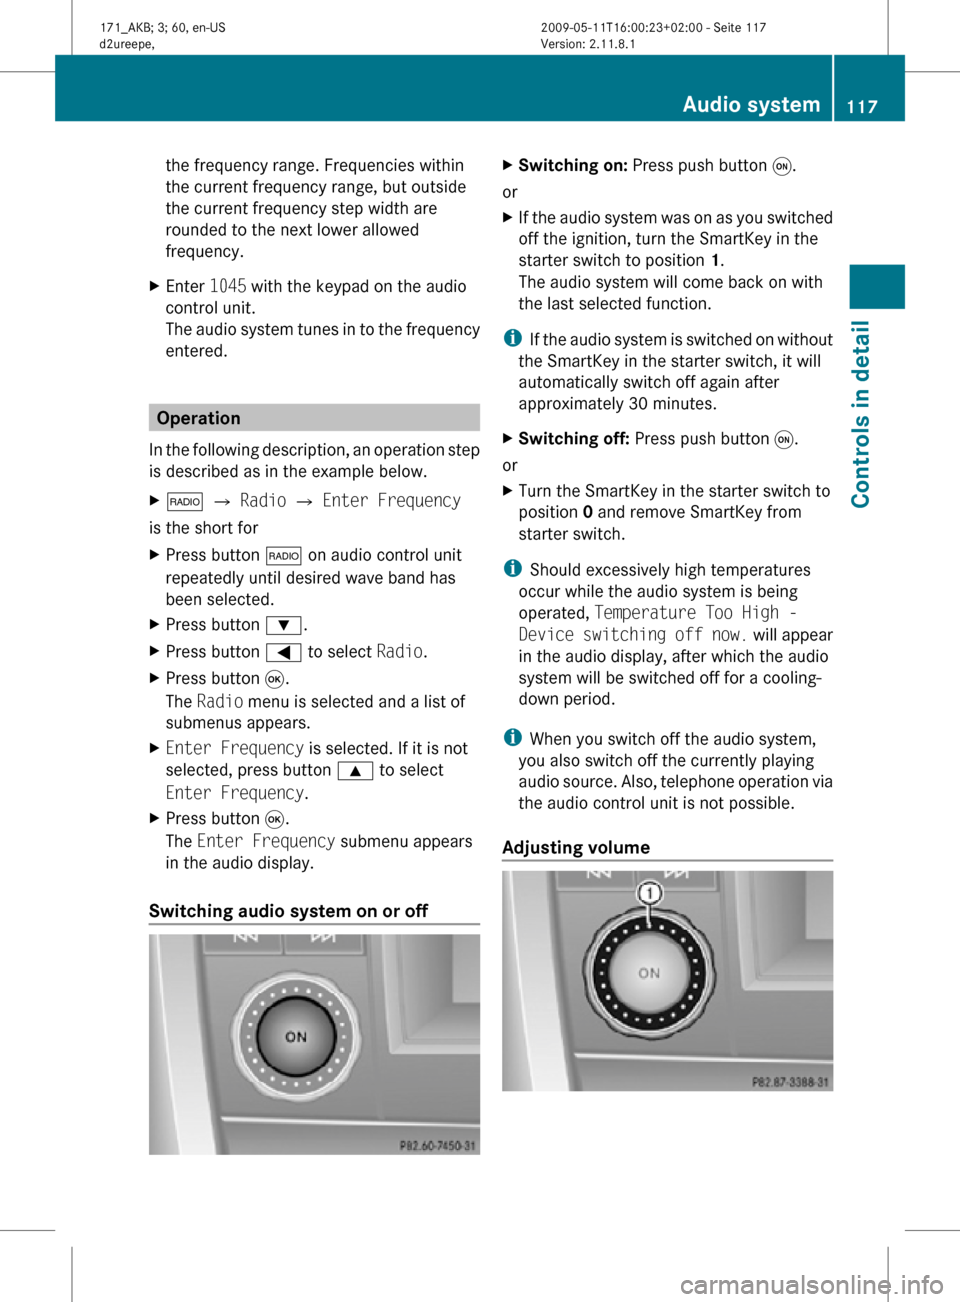
Switching audio system on or off X
Switching on: Press push button q.
or
X If the audio system was on as you switched
off the ignition, turn the SmartKey in the
starter switch to position 1.
The audio system will come back on with
the last selected function.
i If the audio system is switched on without
the SmartKey in the starter switch, it will
automatically switch off again after
approximately 30 minutes.
X Switching off: Press push button q.
or
X Turn the SmartKey in the starter switch to
position 0 and remove SmartKey from
starter switch.
i Should excessively high temperatures
occur while the audio system is being
operated, Temperature Too High -
Device switching off now. will appear
in the audio display, after which the audio
system will be switched off for a cooling-
down period.
i When you switch off the audio system,
you also switch off the currently playing
audio source. Also, telephone operation via
the audio control unit is not possible.
Adjusting volume Audio system
117Controls in detail
171_AKB; 3; 60, en-US
d2ureepe, Version: 2.11.8.1 2009-05-11T16:00:23+02:00 - Seite 117 Z
Page 120 of 312
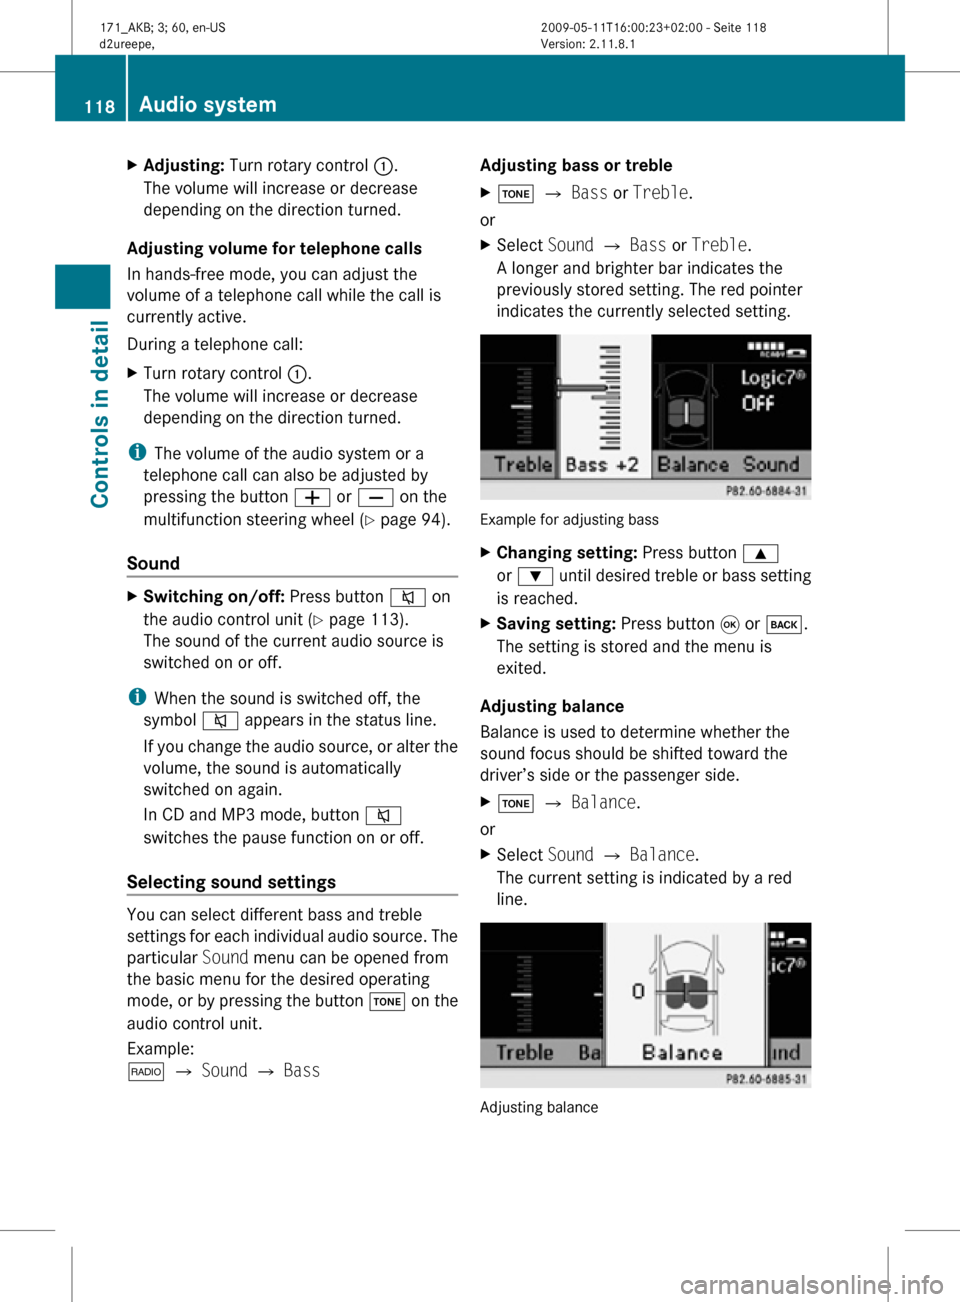
X
Adjusting: Turn rotary control :.
The volume will increase or decrease
depending on the direction turned.
Adjusting volume for telephone calls
In hands-free mode, you can adjust the
volume of a telephone call while the call is
currently active.
During a telephone call:
X Turn rotary control :.
The volume will increase or decrease
depending on the direction turned.
i The volume of the audio system or a
telephone call can also be adjusted by
pressing the button W or X on the
multifunction steering wheel ( Y page 94).
Sound X
Switching on/off: Press button 8 on
the audio control unit (Y page 113).
The sound of the current audio source is
switched on or off.
i When the sound is switched off, the
symbol 8 appears in the status line.
If you change the audio source, or alter the
volume, the sound is automatically
switched on again.
In CD and MP3 mode, button 8
switches the pause function on or off.
Selecting sound settings You can select different bass and treble
settings for each individual audio source. The
particular
Sound menu can be opened from
the basic menu for the desired operating
mode, or by pressing the button J on the
audio control unit.
Example:
$ Q Sound Q Bass Adjusting bass or treble
X
J Q Bass or Treble.
or
X Select Sound Q Bass or Treble.
A longer and brighter bar indicates the
previously stored setting. The red pointer
indicates the currently selected setting. Example for adjusting bass
X
Changing setting: Press button 9
or : until desired treble or bass setting
is reached.
X Saving setting: Press button 9 or k.
The setting is stored and the menu is
exited.
Adjusting balance
Balance is used to determine whether the
sound focus should be shifted toward the
driver’s side or the passenger side.
X J Q Balance.
or
X Select Sound Q Balance.
The current setting is indicated by a red
line. Adjusting balance118
Audio systemControls in detail
171_AKB; 3; 60, en-US
d2ureepe,
Version: 2.11.8.1 2009-05-11T16:00:23+02:00 - Seite 118