transmission MERCEDES-BENZ SPRINTER 2010 MY10 Operator’s Manual
[x] Cancel search | Manufacturer: MERCEDES-BENZ, Model Year: 2010, Model line: SPRINTER, Model: MERCEDES-BENZ SPRINTER 2010Pages: 292, PDF Size: 6.75 MB
Page 88 of 292
Calling up the range
Using the steering wheel buttons
X
Press the 0059 or 0058 button repeatedly
until the display shows the After start
message.
X Press the 0029 or 002D button repeatedly
until the Range message appears.
The approximate distance which can be
covered with the tank's current contents
and your current style of driving is shown.
i If the fuel tank is almost empty, the
00B7 Please refuel message is shown
instead of the range.
Resetting the consumption statistics Using the steering wheel buttons
X
Press the 0059 or 0058 button repeatedly
until the display shows the After start
message.
X Press 0029 or 002D to select the function
you would like to reset.
X Press and hold the 0048 reset
button until the
values are reset to "0".
i The consumption statistics After
start are automatically reset after 999
hours or 9,999 miles (kilometers).
The consumption statistics After Reset
are automatically reset after 9,999 hours
or 99,999 miles (kilometers). Telephone menu
You can operate the mobile phone using the
functions in the TEL menu, provided it is
connected to the
Sprinter hands-free system.G
Warning
A driver's attention to the road must always
be his/her primary focus when driving. For
your safety and the safety of others, we
recommend that you pull over to a safe
location and stop before placing or taking a
telephone call. If you choose to use the telephone while driving, please use the hands-
free device and only use the telephone when
weather, road and traffic conditions permit.
Some jurisdictions prohibit the driver from
using a mobile phone while driving a vehicle.
Bear in mind that at a speed of just 30 mph
(approximately 50 km/h
), your vehicle is
covering
a distance of 44 feet (approximately
14 m) every second.
Switching the mobile phone on Using the steering wheel buttons
X
Switch on the mobile phone and the audio
system; see the separate operating
instructions.
X Press the 0059 or 0058 button repeatedly
until the TEL menu appears in the display.
The information in the display depends on
the status of the mobile phone:
R
Mobile phone off:
the display shows the
TEL off (Audio 20) message.
R PIN not entered: the display shows the
TEL PIN (Audio 20) message.
X Enter the PIN code using the mobile phone
or audio system.
The mobile phone searches for a network.
The display
remains
blank during this time.
You will see the operational readiness
display as soon as the mobile phone has
found a network.
Once the operational readiness symbol is
shown, you can operate the mobile phone
using the steering wheel buttons.
i If the operational readiness symbol goes
out, your vehicle is outside the
transmission/reception range.
Accepting a call You can accept a call at any time, provided
the mobile phone is ready to receive calls.
You will see the following message in the
display:86
On-board computer with steering wheel buttons
Controls
Page 95 of 292
lights on/off separately, depending on the
position of the central control switch.
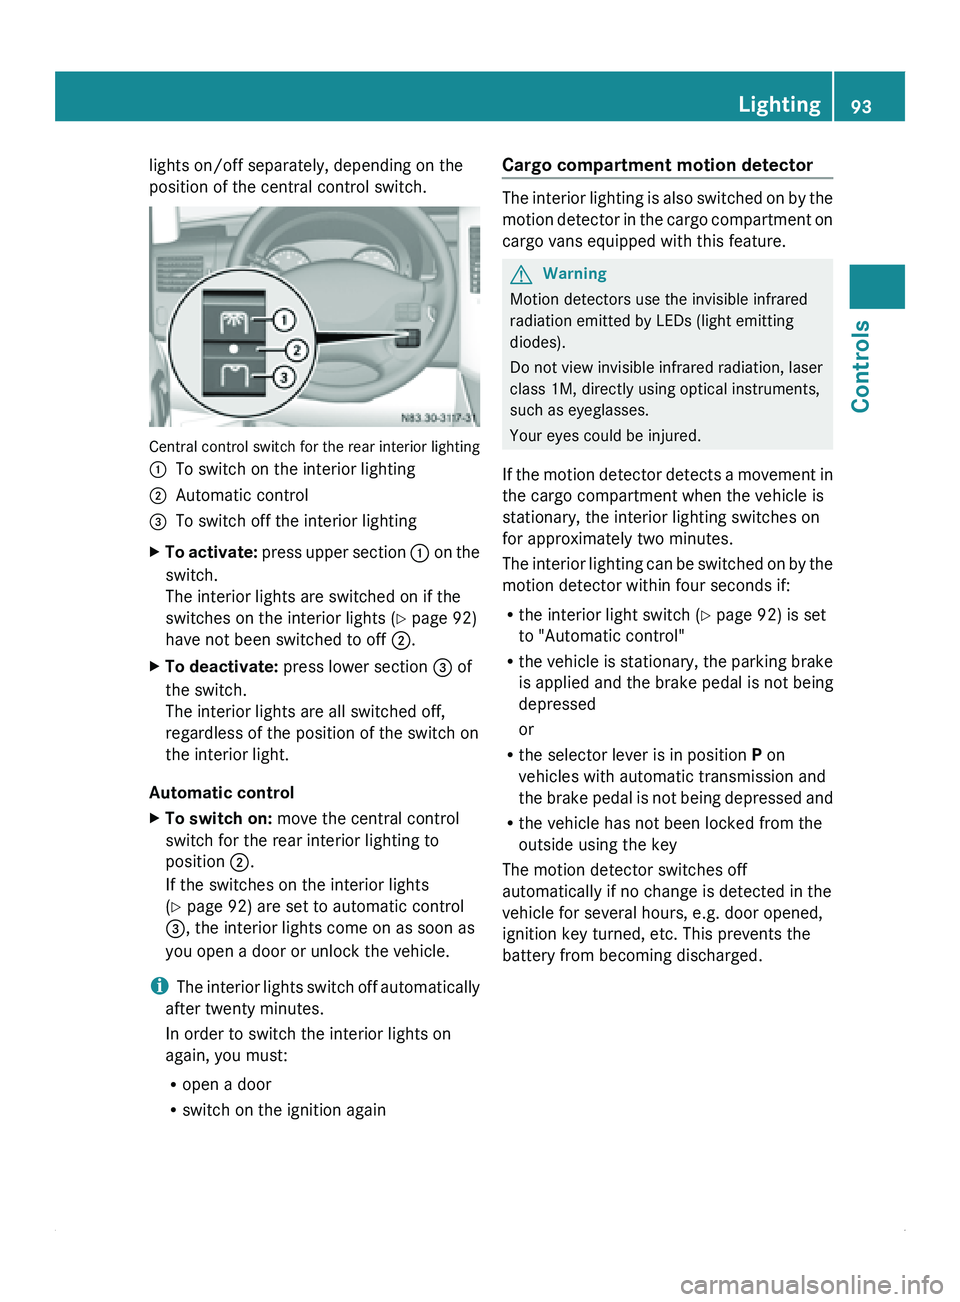
Central control switch for the rear interior lighting
0046
To switch on the interior lighting
0047 Automatic control
008A To switch off the interior lighting
X To activate: press
upper section 0046 on the
switch.
The interior lights are switched on if the
switches on the interior lights (Y page 92)
have not been switched to off 0047.
X To deactivate: press lower section 008A of
the switch.
The interior lights are all switched off,
regardless of the position of the switch on
the interior light.
Automatic control
X To switch on: move the central control
switch for the rear interior lighting to
position 0047.
If the switches on the interior lights
(Y page 92) are set to automatic control
008A, the interior lights come on as soon as
you open a door or unlock the vehicle.
i The interior
lights
switch off automatically
after twenty minutes.
In order to switch the interior lights on
again, you must:
R open a door
R switch on the ignition again Cargo compartment motion detector The interior lighting is also switched on by the
motion detector
in
the cargo compartment on
cargo vans equipped with this feature. G
Warning
Motion detectors use the invisible infrared
radiation emitted by LEDs (light emitting
diodes).
Do not view invisible infrared radiation, laser
class 1M, directly using optical instruments,
such as eyeglasses.
Your eyes could be injured.
If
the motion detector detects a movement in
the cargo compartment when the vehicle is
stationary, the interior lighting switches on
for approximately two minutes.
The interior lighting can be switched on by the
motion detector within four seconds if:
R the interior light switch (Y page 92) is set
to "Automatic control"
R the vehicle is stationary, the parking brake
is applied and the brake pedal is not being
depressed
or
R the selector lever is in position P on
vehicles with automatic transmission and
the brake pedal is not being depressed and
R the vehicle has not been locked from the
outside using the key
The motion detector switches off
automatically if no change is detected in the
vehicle for several hours, e.g. door opened,
ignition key turned, etc. This prevents the
battery from becoming discharged. Lighting
93
Controls Z
Page 111 of 292
slip or obstruct the pedals. Do not place
floormats on top of one another.
R Do not put any objects in the driver's
footwell.
R Stow and secure
all loose objects in such a
way that they cannot get into the driver's
footwell while the vehicle is in motion. G
Warning
If they are not properly closed, the doors
could open while
the vehicle is in motion. This
may, for example, cause you to lose your load
and injure passengers or endanger other road
users.
For this reason, please make sure that all the
doors are properly closed and can be locked
before starting your journey.
X Close all doors.
X Secure the load according to the loading
guidelines ( Y page 144).
X Make sure that the floormats and carpets
are properly secured so that they cannot
slip and obstruct the pedals. Starting the engine
G
Warning
Do not place any objects in the driver's
footwell. If you
use a floormat or carpet in the
driver's footwell, make sure that it is correctly
secured and that there is sufficient clearance
for the pedals.
Do not place several floormats on top of one
another.
Loose objects or the floormats could
otherwise get caught between the pedals if
you accelerate or brake suddenly. You will
then not be able to brake or accelerate as
intended. This could lead to accidents and
injury. G
Warning
Never leave the engine running in enclosed
spaces. The exhaust gases contain toxic carbon monoxide.
Breathing in exhaust fumes
is a health hazard and can lead to
unconsciousness or death.
! Do not depress the accelerator pedal
when starting the engine.
i If you depress the brake pedal when
starting the engine,
the pedal travel is short
and the pedal resistance is high.
Pedal travel and resistance return to
normal when you depress the brake pedal
again.
X Before starting the engine, make sure that:
R
all the doors are closed.
R all the vehicle occupants are wearing
their seat belts correctly.
R the parking brake is applied.
R the selector lever is in position P.
i You can also start the engine in neutral
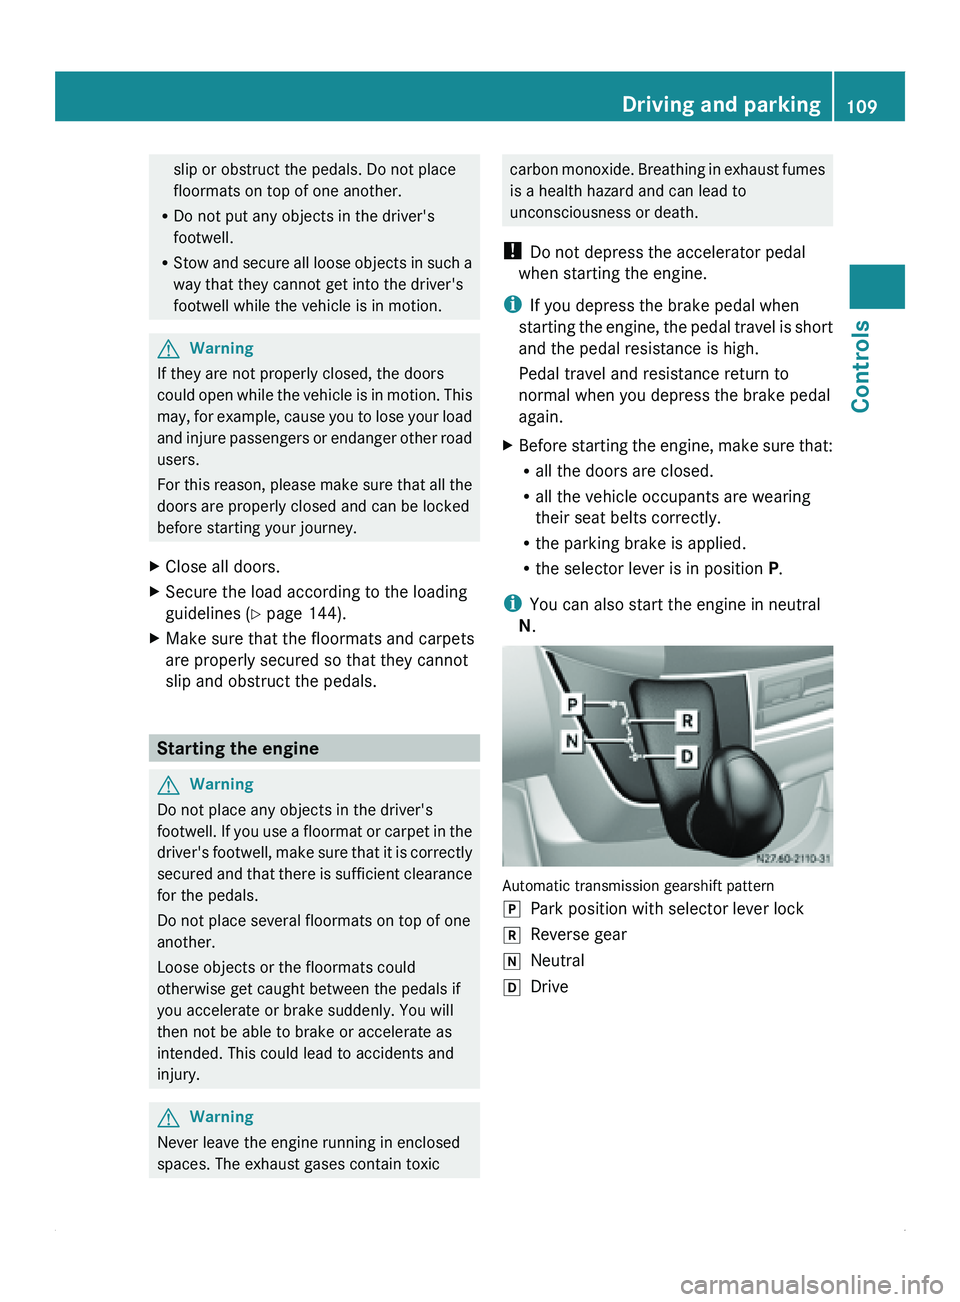
N. Automatic transmission gearshift pattern
0060
Park position with selector lever lock
0061 Reverse gear
005F Neutral
005E Drive Driving and parking
109
Controls Z
Page 112 of 292
Starting the engine
X
Turn the key to position 2 in the ignition
lock.
The 0028 preglow indicator lamp in the
instrument cluster lights up.
X When the 0028 preglow indicator lamp
goes out, turn the key to position 3 in the
ignition lock and release it as soon as the
engine is running.
i You can start
the engine without preglow
when the engine is warm.
i Depending on the equipment installed,
the vehicle either automatically locks
centrally after switching on the ignition or
after pulling away. The locking knobs in the
doors drop down.
You can open the doors from the inside at
any time.
Automatic door locking can be deactivated
(Y page 55). Driving off
G
Warning
Do not downshift for additional engine
braking on a
slippery road surface. This could
cause the drive wheels to lose their grip and
the vehicle could skid. You could lose control
of the vehicle and cause an accident.
i After pulling away or switching on the
ignition, the vehicle automatically locks
centrally. The locking knobs in the doors
drop down.
You can open the doors from the inside at
any time.
Automatic door locking can be deactivated
(Y page 55). X
Depress the brake pedal and keep it
depressed.
The selector lever lock is released.
X Release the parking brake ( Y page 112).
The 0066 indicator lamp in the instrument
cluster goes out.
X Move the selector lever to position D or R.
i On vehicles with a reverse warning
feature, a warning signal sounds when
reverse gear is
engaged to alert other road
users.
! Only shift into reverse gear when the
vehicle is stationary. You could otherwise
damage the transmission.
X Release the brake pedal.
X Carefully depress the accelerator pedal. General driving tips
Steering G
Warning
Do not switch off the engine while the vehicle
is in motion.
There is no
power assistance for the steering
or the service brake when the engine is not
running.
Steering and braking require significantly
more effort and you could lose control of the
vehicle and cause an accident as a result.
! Do not hold the steering wheel at full
steering angle for a long time, e.g. when
turning or maneuvering.
The hydraulic pump could be damaged if
the hydraulic fluid temperature increases.
Overrun cut-off If you take your foot off the accelerator pedal,
the diesel fuel supply is cut off in overrun
mode when the
engine speed is out of the idle
speed control range. 110
Driving and parking
Controls
Page 113 of 292
Driving in wet conditions
G
Warning
There is a danger of hydroplaning occurring,
even if you are driving slowly and your tires
have sufficient tread
depth, depending on the
depth of water on the road.
For this reason, avoid tire ruts and brake
carefully.
Driving on flooded roads If you have to drive on stretches of road on
which water has collected, the water level
must not rise above the bottom edge of the
bumper. The maximum speed at which you
may drive is walking speed.
!
Note that vehicles in front or oncoming
vehicles create waves. This could mean
that the maximum permitted water depth
is exceeded.
You must observe these notes. Otherwise,
damage may
occur
to the engine, electrics
or transmission.
Driving in winter Drive particularly carefully on slippery roads
in winter.
Avoid
sudden acceleration, steering
and braking maneuvers. G
Warning
Do not downshift for additional engine
braking on a
slippery road surface. This could
cause the drive wheels to lose their grip and
the vehicle could skid. You could lose control
of the vehicle and cause an accident.
If the vehicle threatens to skid or cannot be
stopped when moving at low speed, shift to
the neutral position N. Try to maintain control
of the vehicle using corrective steering
! Vehicles with automatic transmission
may roll only briefly in the neutral position
N. Prolonged rolling of the wheels, e.g.
when being towed, will result in
transmission damage. Road salt may adversely affect braking
performance.
Consequently, you
may need to
depress the brake pedal more forcefully in
order to achieve normal braking force. Apply
the brakes regularly when driving for longer
periods on gritted or salted roads. This will
restore the brakes to their normal level of
performance.
When stopping the vehicle after traveling on
roads that have been salted, make sure that
the brakes are fully functional before
proceeding further.
i Fit snow chains to the outside rear wheels
(driven axle) in good time for driving on
snow, slush or ice. Comply with the
manufacturer's fitting instructions.
You will find information about winter tires
and about driving with snow chains in the
"Operation" section .
Tire grip Whereas the vehicle can be fully controlled at
a certain speed on a dry road surface, you
must reduce your speed on a wet or icy
surface to maintain the same degree of
safety.
Pay particular attention to the road
conditions at temperatures around freezing
point. When ice forms on the road surface
(e.g. due to fog), applying the brakes can
cause a
thin
layer of water to form rapidly on
the ice and tire grip will be greatly reduced.
Drive with particular care in such weather
conditions. Stopping the vehicle and switching
off the engine
G
Warning
Always switch off the engine and apply the
parking brake before leaving the vehicle.
Otherwise, the vehicle could roll away if it is
not secured. Driving and parking
111
Controls
Z
Page 114 of 292
On gradients steeper than 15%:
R
secure an unladen
vehicle at the front axle,
e.g. using a wheel chock or similar object.
R additionally, secure a laden vehicle at the
rear axle, e.g. using a wheel chock or similar
object. G
Warning
Make sure that the exhaust system does not
under any circumstances come into contact
with easily ignitable
material such as dry grass
or gasoline. Do not park the vehicle on dry
grassland or harvested grain fields.
Otherwise, the flammable material may ignite
and set the vehicle on fire. G
Warning
Only remove the key from the ignition lock
when the vehicle is stationary, since you
cannot steer the vehicle with the key
removed.
Never leave children unsupervised in the
vehicle. They could
release the parking brake.
This could lead to a serious or fatal accident.
! When the vehicle is parked, always
remove the key to prevent the battery from
becoming discharged.
On vehicles with a battery isolating switch,
switch off the power supply if the vehicle is
to be out of use for a longer period of time. G
Warning
You must use the parking lamps to enable
your vehicle to
be recognized on public roads
when it is dark. You can also use reflective
night parking signs in built-up areas.
Observe legal requirements.
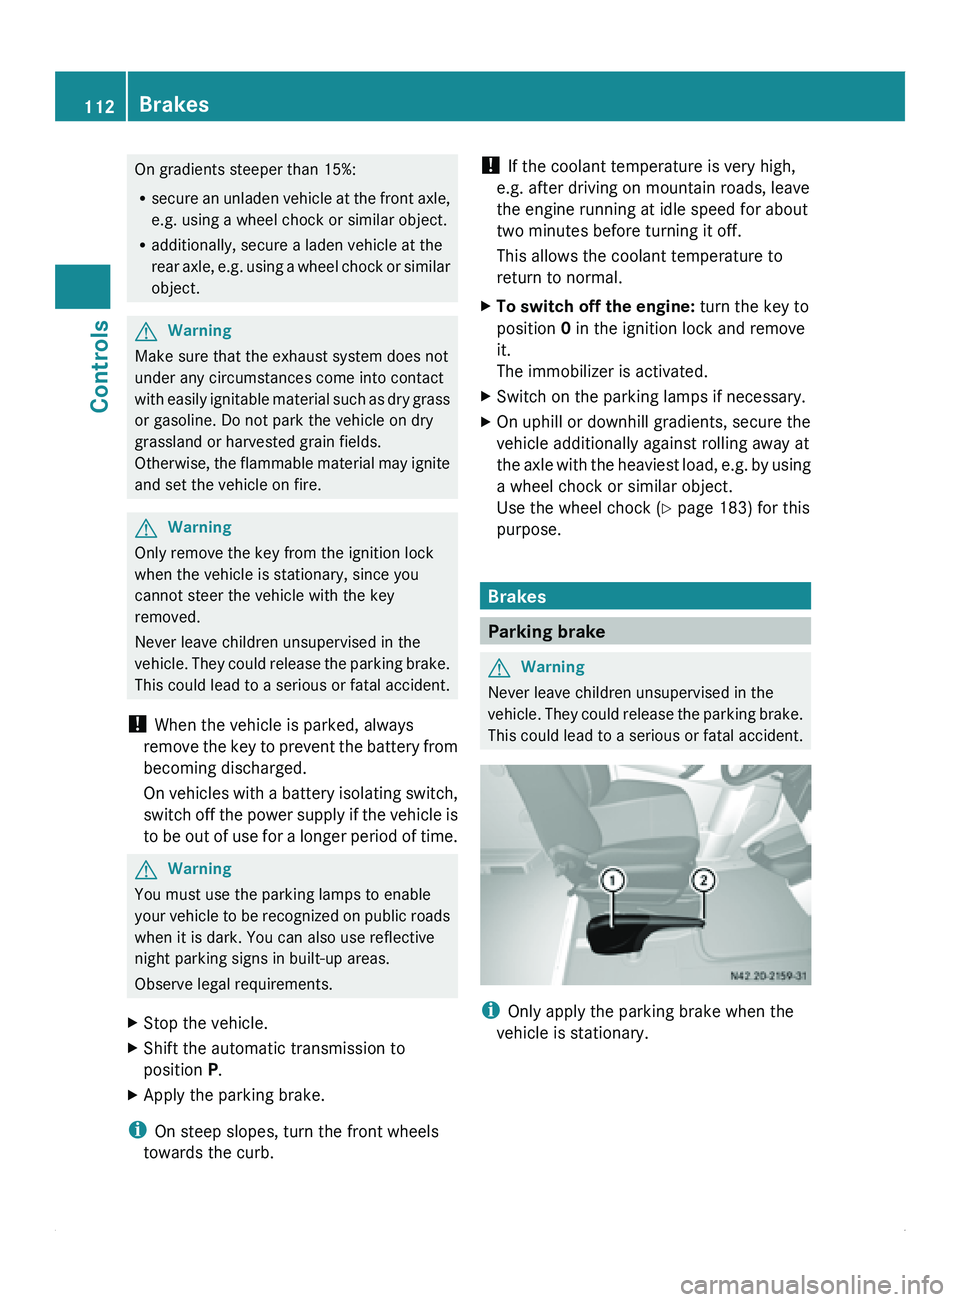
X Stop the vehicle.
X Shift the automatic transmission to
position P.
X Apply the parking brake.
i On steep slopes, turn the front wheels
towards the curb. !
If the coolant temperature is very high,
e.g. after driving on mountain roads, leave
the engine running at idle speed for about
two minutes before turning it off.
This allows the coolant temperature to
return to normal.
X To switch off the engine: turn the key to
position 0 in the ignition lock and remove
it.
The immobilizer is activated.
X Switch on the parking lamps if necessary.
X On uphill or downhill gradients, secure the
vehicle additionally against rolling away at
the axle with
the heaviest load, e.g. by using
a wheel chock or similar object.
Use the wheel chock (Y page 183) for this
purpose. Brakes
Parking brake
G
Warning
Never leave children unsupervised in the
vehicle. They could
release the parking brake.
This could lead to a serious or fatal accident. i
Only apply the parking brake when the
vehicle is stationary. 112
Brakes
Controls
Page 115 of 292
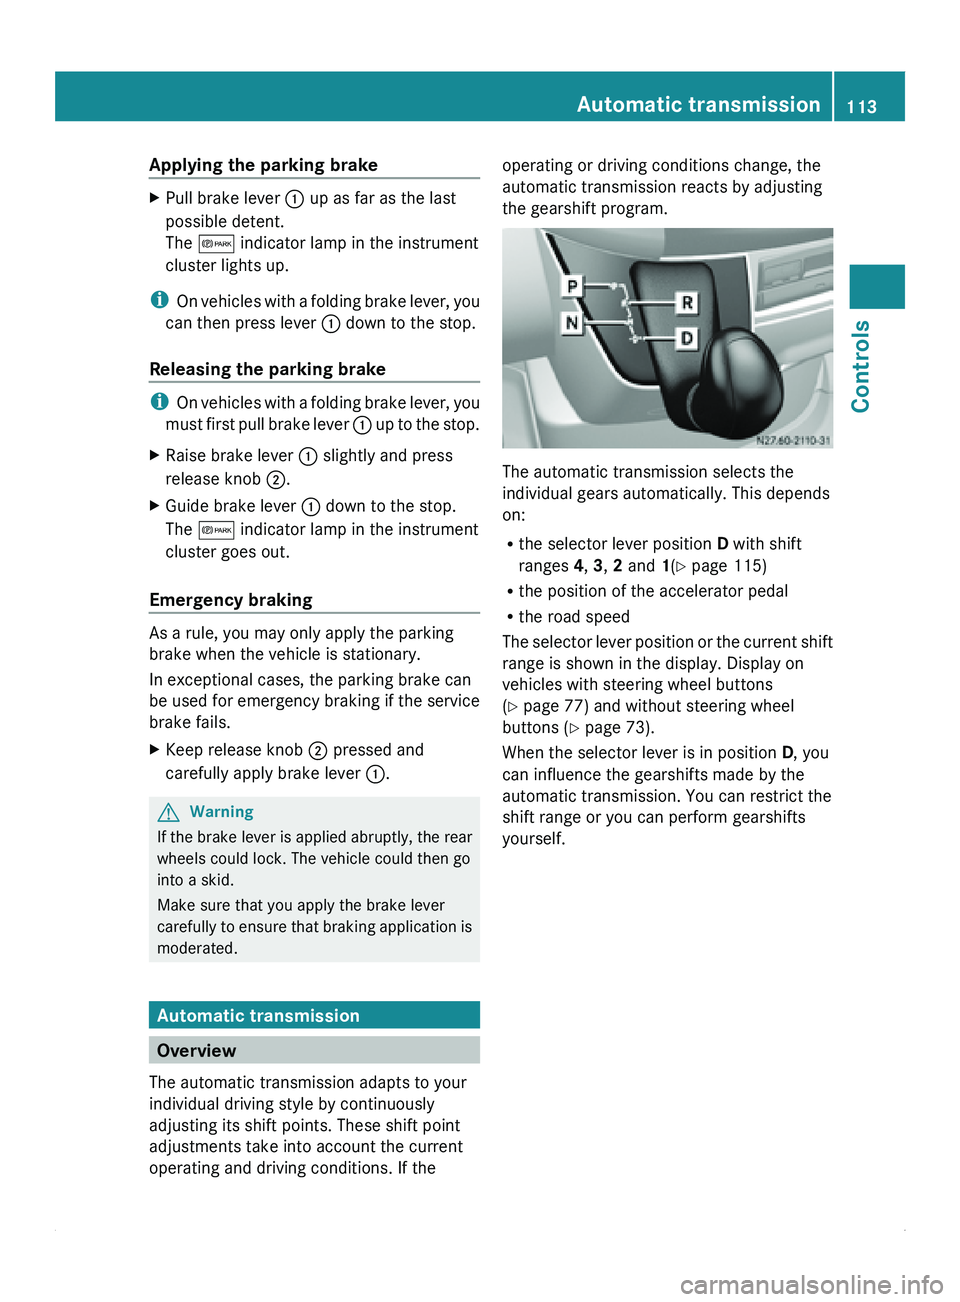
Applying the parking brake
X
Pull brake lever 0046 up as far as the last
possible detent.
The 0066 indicator lamp in the instrument
cluster lights up.
i On vehicles with
a folding brake lever, you
can then press lever 0046 down to the stop.
Releasing the parking brake i
On vehicles with
a folding brake lever, you
must first pull brake lever 0046 up to the stop.
X Raise brake lever 0046 slightly and press
release knob 0047.
X Guide brake lever 0046 down to the stop.
The 0066 indicator lamp in the instrument
cluster goes out.
Emergency braking As a rule, you may only apply the parking
brake when the vehicle is stationary.
In exceptional cases, the parking brake can
be used for emergency braking if the service
brake fails.
X
Keep release knob 0047 pressed and
carefully apply brake lever 0046.G
Warning
If the brake lever is applied abruptly, the rear
wheels could lock. The vehicle could then go
into a skid.
Make sure that you apply the brake lever
carefully to ensure
that braking application is
moderated. Automatic transmission
Overview
The automatic transmission adapts to your
individual driving style by continuously
adjusting its shift points. These shift point
adjustments take into account the current
operating and driving conditions. If the operating or driving conditions change, the
automatic transmission reacts by adjusting
the gearshift program.
The automatic transmission selects the
individual gears automatically. This depends
on:
R
the selector lever position D with shift
ranges 4, 3, 2 and 1(Y page 115)
R the position of the accelerator pedal
R the road speed
The selector lever
position or the current shift
range is shown in the display. Display on
vehicles with steering wheel buttons
(Y page 77) and without steering wheel
buttons ( Y page 73).
When the selector lever is in position D, you
can influence the gearshifts made by the
automatic transmission. You can restrict the
shift range or you can perform gearshifts
yourself. Automatic transmission
113
Controls Z
Page 116 of 292
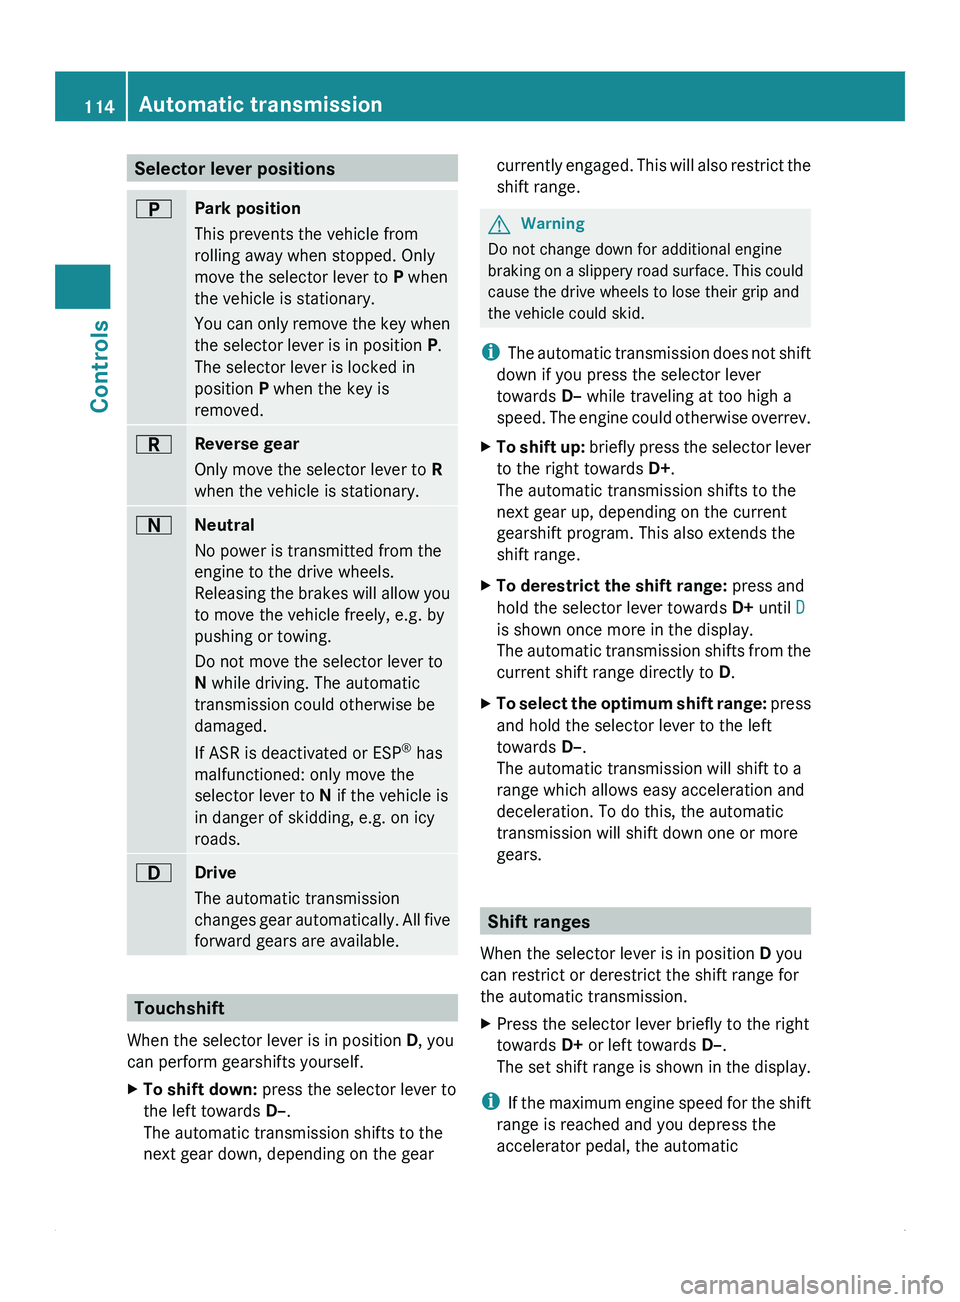
Selector lever positions
0045
Park position
This prevents the vehicle from
rolling away when stopped. Only
move the selector lever to
P when
the vehicle is stationary.
You can only
remove the key when
the selector lever is in position P.
The selector lever is locked in
position P when the key is
removed. 0046
Reverse gear
Only move the selector lever to R
when the vehicle is stationary. 0044
Neutral
No power is transmitted from the
engine to the drive wheels.
Releasing the
brakes
will allow you
to move the vehicle freely, e.g. by
pushing or towing.
Do not move the selector lever to
N while driving. The automatic
transmission could otherwise be
damaged.
If ASR is deactivated or ESP ®
has
malfunctioned: only move the
selector lever to N if the vehicle is
in danger of skidding, e.g. on icy
roads. 003A
Drive
The automatic transmission
changes gear
automatically.
All five
forward gears are available. Touchshift
When the selector lever is in position D
, you
can perform gearshifts yourself.
X To shift down: press the selector lever to
the left towards D–.
The automatic transmission shifts to the
next gear down, depending on the gear currently engaged. This will also restrict the
shift range. G
Warning
Do not change down for additional engine
braking on a
slippery road surface. This could
cause the drive wheels to lose their grip and
the vehicle could skid.
i The automatic transmission does not shift
down if you press the selector lever
towards D– while traveling at too high a
speed. The engine could otherwise overrev.
X To shift up:
briefly press
the selector lever
to the right towards D+.
The automatic transmission shifts to the
next gear up, depending on the current
gearshift program. This also extends the
shift range.
X To derestrict the shift range: press and
hold the selector lever towards D+ until D
is shown once more in the display.
The automatic transmission
shifts from the
current shift range directly to D.
X To select the optimum shift range: press
and hold the selector lever to the left
towards D–
.
The automatic transmission will shift to a
range which allows easy acceleration and
deceleration. To do this, the automatic
transmission will shift down one or more
gears. Shift ranges
When the selector lever is in position D
you
can restrict or derestrict the shift range for
the automatic transmission.
X Press the selector lever briefly to the right
towards D+ or left towards D–.
The set shift
range is shown in the display.
i If the maximum
engine speed for the shift
range is reached and you depress the
accelerator pedal, the automatic 114
Automatic transmission
Controls
Page 117 of 292
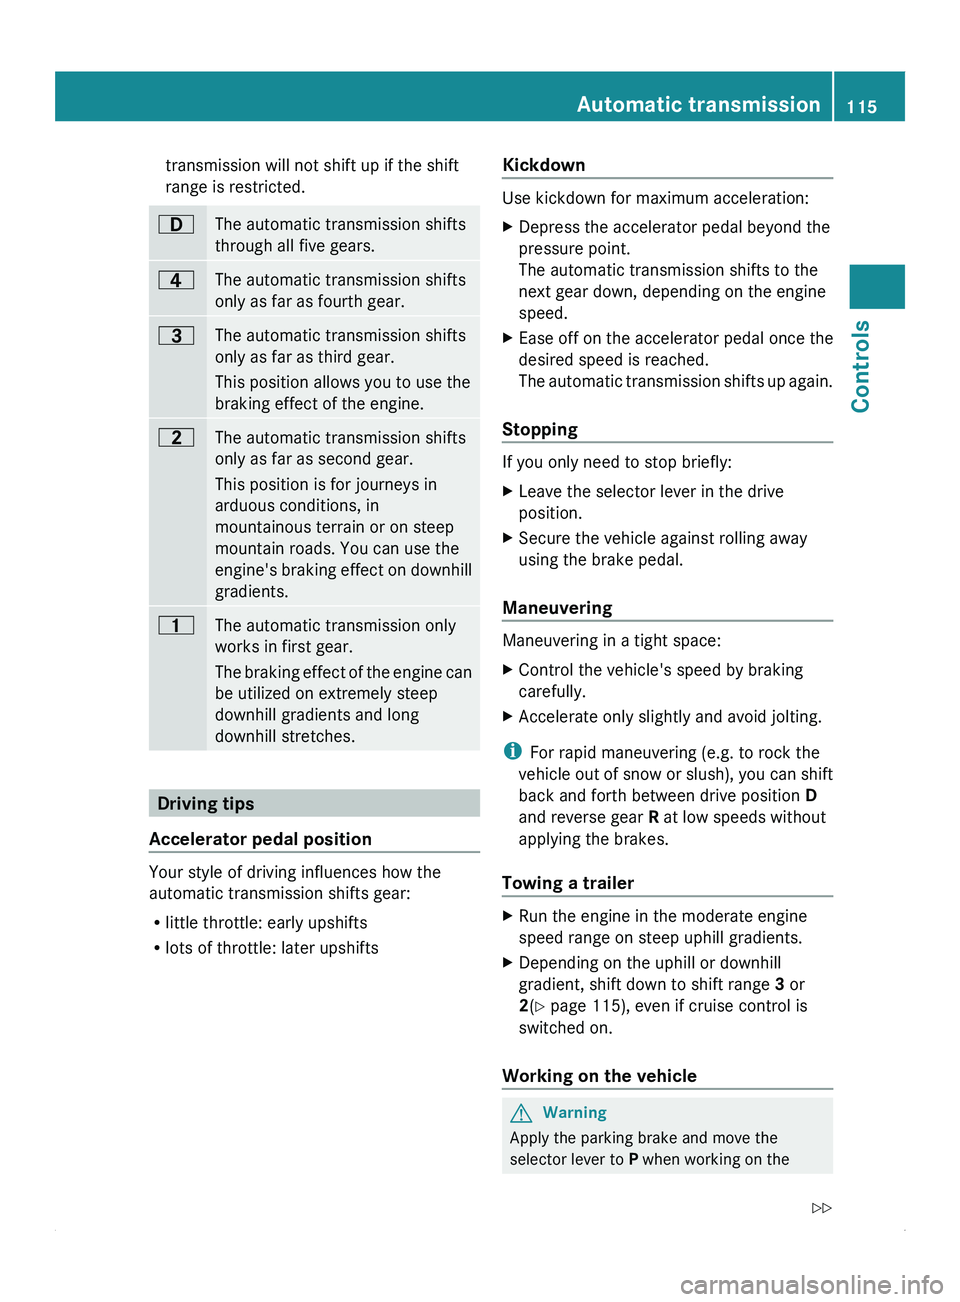
transmission will not shift up if the shift
range is restricted.
003A
The automatic transmission shifts
through all five gears.
0042
The automatic transmission shifts
only as far as fourth gear.
0040
The automatic transmission shifts
only as far as third gear.
This position allows you to use the
braking effect of the engine.
0038
The automatic transmission shifts
only as far as second gear.
This position is for journeys in
arduous conditions, in
mountainous terrain or on steep
mountain roads. You can use the
engine's braking
effect
on downhill
gradients. 0037
The automatic transmission only
works in first gear.
The braking
effect
of the engine can
be utilized on extremely steep
downhill gradients and long
downhill stretches. Driving tips
Accelerator pedal position Your style of driving influences how the
automatic transmission shifts gear:
R
little throttle: early upshifts
R lots of throttle: later upshifts Kickdown Use kickdown for maximum acceleration:
X
Depress the accelerator pedal beyond the
pressure point.
The automatic transmission shifts to the
next gear down, depending on the engine
speed.
X Ease off on the accelerator pedal once the
desired speed is reached.
The automatic transmission
shifts up again.
Stopping If you only need to stop briefly:
X
Leave the selector lever in the drive
position.
X Secure the vehicle against rolling away
using the brake pedal.
Maneuvering Maneuvering in a tight space:
X
Control the vehicle's speed by braking
carefully.
X Accelerate only slightly and avoid jolting.
i For rapid maneuvering (e.g. to rock the
vehicle out of
snow or slush), you can shift
back and forth between drive position D
and reverse gear R at low speeds without
applying the brakes.
Towing a trailer X
Run the engine in the moderate engine
speed range on steep uphill gradients.
X Depending on the uphill or downhill
gradient, shift down to shift range 3 or
2(Y page 115), even if cruise control is
switched on.
Working on the vehicle G
Warning
Apply the parking brake and move the
selector lever to P when working on the Automatic transmission
115
Controls
Z
Page 121 of 292
Resuming the stored speed
G
Warning
Only select a stored speed if you know what
that speed is
and whether it is suitable for the
current driving and traffic situation. You can
otherwise endanger yourself and others by
unintentionally triggering sudden
acceleration or braking.
X Briefly pull the cruise control lever in the
direction of arrow 0047.
X Release the accelerator pedal.
Cruise control is
activated and resumes the
vehicle's speed to the last speed stored.
i When you first move the cruise control
lever in the direction of arrow 0047 after
starting the engine, cruise control is
activated and the current road speed is
stored.
Setting the speed G
Warning
The rate at which you increase the speed in
increments of 1 mph (1 km/h) may be faster
than your vehicle is able to accelerate. Your
vehicle may
then continue to accelerate up to
the newly set speed even after you have
released the cruise control lever.
Only increase the speed as the prevailing
conditions permit. Sudden acceleration could
otherwise endanger you and others.
X Briefly push the cruise control lever
upwards 0046 to increase the speed or
downwards 008A to reduce the speed.
The last speed stored is increased/
reduced in increments of 1 mph
(1 km/h
).
or
X Press and hold the cruise control lever
up 0046 or down 008A until the desired speed
has been reached.
X Release the cruise control lever.
The current speed is stored. i
Cruise control is not deactivated if you
depress the accelerator pedal. If you
accelerate briefly, e.g. to overtake, and
then ease off the accelerator pedal again,
cruise control adjusts the vehicle's speed
to the last speed stored.
Deactivating cruise control There are various ways to deactivate cruise
control:
X
Briefly push the cruise control lever
forwards 0088.
or
X Apply the brakes.
The last speed set remains stored.
i The last speed set is deleted when you
switch off the engine.
i Cruise control is deactivated
automatically when:
R you apply the brakes.
R you apply the parking brake and the
0066 indicator lamp in the instrument
cluster lights up.
R you are driving slower than 20 mph
(30 km/h).
R ESP ®
or ASR intervenes.
R you shift the automatic transmission to
neutral position N while the vehicle is in
motion.
R there is a malfunction in the ESP ®
, ASR
or ABS system. PARKTRONIC
General notes G
Warning
PARKTRONIC is only an aid and may not
detect all obstacles. It is not a substitute for
attentive driving.
You are always responsible for safety and
must continue to pay attention to your Driving systems
119
Controls
Z