headlamp MERCEDES-BENZ SPRINTER 2012 MY12 Operator’s Manual
[x] Cancel search | Manufacturer: MERCEDES-BENZ, Model Year: 2012, Model line: SPRINTER, Model: MERCEDES-BENZ SPRINTER 2012Pages: 292, PDF Size: 6.75 MB
Page 84 of 292
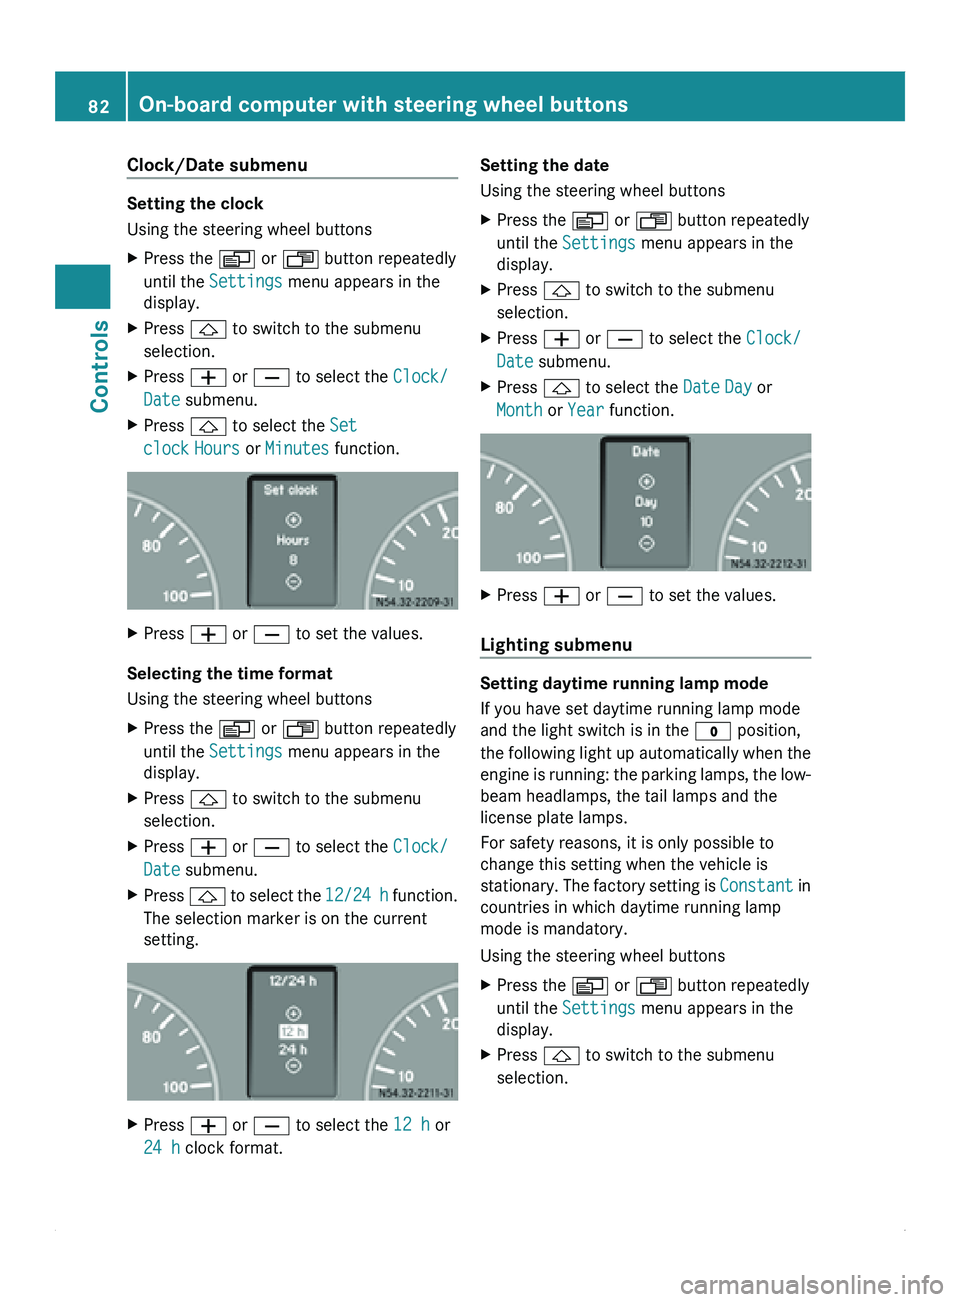
Clock/Date submenu
Setting the clock
Using the steering wheel buttons
X
Press the 0059 or 0058 button repeatedly
until the Settings menu appears in the
display.
X Press 0029 to switch to the submenu
selection.
X Press 005A or 005B to select the Clock/
Date submenu.
X Press 0029 to select the Set
clock Hours or Minutes function. X
Press 005A or 005B to set the values.
Selecting the time format
Using the steering wheel buttons
X Press the 0059 or 0058 button repeatedly
until the Settings menu appears in the
display.
X Press 0029 to switch to the submenu
selection.
X Press 005A or 005B to select the Clock/
Date submenu.
X Press 0029 to select the
12/24 h function.
The selection marker is on the current
setting. X
Press 005A or 005B to select the 12 h or
24 h clock format. Setting the date
Using the steering wheel buttons
X
Press the 0059 or 0058 button repeatedly
until the Settings menu appears in the
display.
X Press 0029 to switch to the submenu
selection.
X Press 005A or 005B to select the Clock/
Date submenu.
X Press 0029 to select the Date Day or
Month or Year function. X
Press 005A or 005B to set the values.
Lighting submenu Setting daytime running lamp mode
If you have set daytime running lamp mode
and the light switch is in the 0027 position,
the following
light
up automatically when the
engine is running: the parking lamps, the low-
beam headlamps, the tail lamps and the
license plate lamps.
For safety reasons, it is only possible to
change this setting when the vehicle is
stationary. The factory setting is Constant in
countries in which daytime running lamp
mode is mandatory.
Using the steering wheel buttons
X Press the 0059 or 0058 button repeatedly
until the Settings menu appears in the
display.
X Press 0029 to switch to the submenu
selection.82
On-board computer with steering wheel buttons
Controls
Page 85 of 292
X
Press 005A or 005B to select the
Lighting submenu.
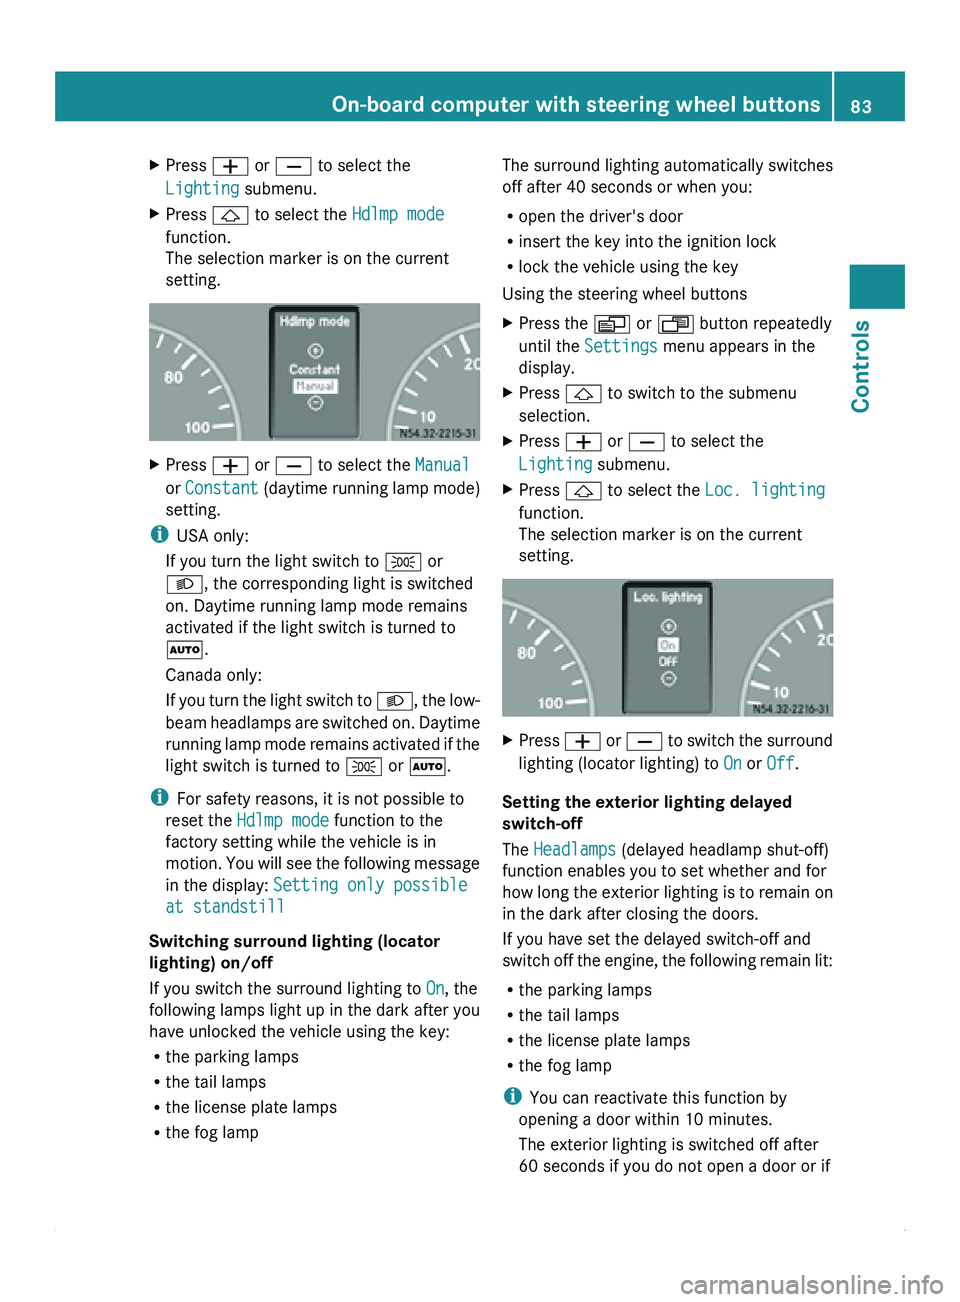
X Press 0029 to select the Hdlmp mode
function.
The selection marker is on the current
setting. X
Press 005A or 005B to select the Manual
or Constant (daytime running
lamp mode)
setting.
i USA only:
If you turn the light switch to 006C or
0064, the corresponding light is switched
on. Daytime running lamp mode remains
activated if the light switch is turned to
005A.
Canada only:
If you turn
the light switch to 0064, the low-
beam headlamps are switched on. Daytime
running lamp mode remains activated if the
light switch is turned to 006C or 005A.
i For safety reasons, it is not possible to
reset the Hdlmp mode function to the
factory setting while the vehicle is in
motion. You will see the following message
in the display: Setting only possible
at standstill
Switching surround lighting (locator
lighting) on/off
If you switch the surround lighting to On, the
following lamps light up in the dark after you
have unlocked the vehicle using the key:
R the parking lamps
R the tail lamps
R the license plate lamps
R the fog lamp The surround lighting automatically switches
off after 40 seconds or when you:
R
open the driver's door
R insert the key into the ignition lock
R lock the vehicle using the key
Using the steering wheel buttons
X Press the 0059 or 0058 button repeatedly
until the Settings menu appears in the
display.
X Press 0029 to switch to the submenu
selection.
X Press 005A or 005B to select the
Lighting submenu.
X Press 0029 to select the Loc. lighting
function.
The selection marker is on the current
setting. X
Press 005A
or 005B
to switch the surround
lighting (locator lighting) to On or Off.
Setting the exterior lighting delayed
switch-off
The Headlamps (delayed headlamp shut-off)
function enables you to set whether and for
how long
the
exterior lighting is to remain on
in the dark after closing the doors.
If you have set the delayed switch-off and
switch off the engine, the following remain lit:
R the parking lamps
R the tail lamps
R the license plate lamps
R the fog lamp
i You can reactivate this function by
opening a door within 10 minutes.
The exterior lighting is switched off after
60 seconds if you do not open a door or if On-board computer with steering wheel buttons
83
Controls Z
Page 86 of 292
you do not close an opened door after the
engine has been switched off.
Using the steering wheel buttons
X Press the 0059 or 0058 button repeatedly
until the Settings menu appears in the
display.
X Press 0029 to switch to the submenu
selection.
X Press 005A or 005B to select the
Lighting submenu.
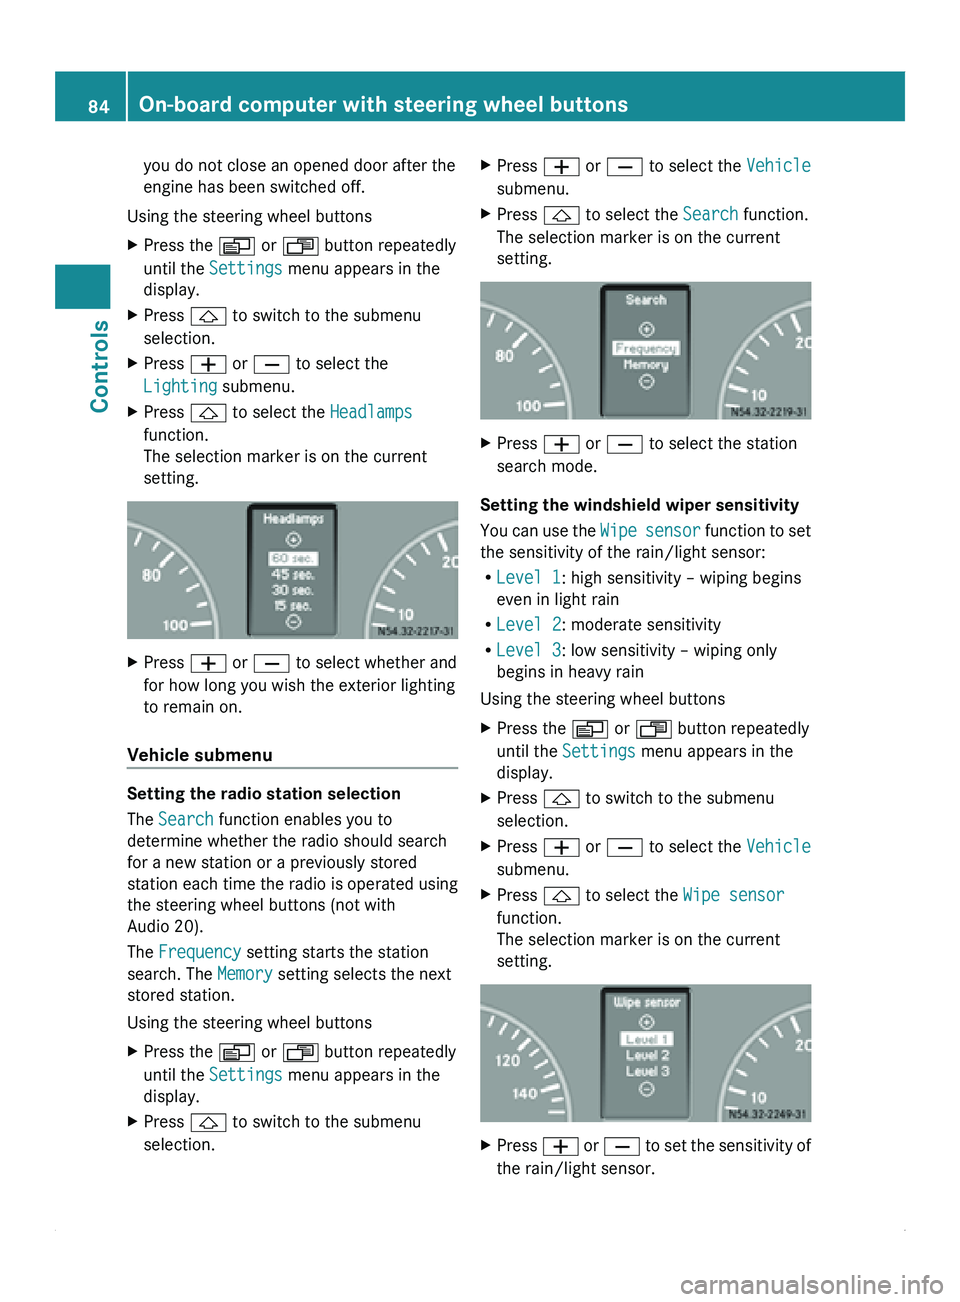
X Press 0029 to select the Headlamps
function.
The selection marker is on the current
setting. X
Press 005A or 005B to select whether and
for how long you wish the exterior lighting
to remain on.
Vehicle submenu Setting the radio station selection
The Search function enables you to
determine whether the radio should search
for a new station or a previously stored
station each
time
the radio is operated using
the steering wheel buttons (not with
Audio 20).
The Frequency setting starts the station
search. The Memory setting selects the next
stored station.
Using the steering wheel buttons
X Press the 0059 or 0058 button repeatedly
until the Settings menu appears in the
display.
X Press 0029 to switch to the submenu
selection. X
Press 005A or 005B to select the Vehicle
submenu.
X Press 0029 to select the Search function.
The selection marker is on the current
setting. X
Press 005A or 005B to select the station
search mode.
Setting the windshield wiper sensitivity
You can use
the Wipe sensor function to set
the sensitivity of the rain/light sensor:
R Level 1: high sensitivity – wiping begins
even in light rain
R Level 2: moderate sensitivity
R Level 3: low sensitivity – wiping only
begins in heavy rain
Using the steering wheel buttons
X Press the 0059 or 0058 button repeatedly
until the Settings menu appears in the
display.
X Press 0029 to switch to the submenu
selection.
X Press 005A or 005B to select the Vehicle
submenu.
X Press 0029 to select the Wipe sensor
function.
The selection marker is on the current
setting. X
Press 005A or 005B
to set the sensitivity of
the rain/light sensor. 84
On-board computer with steering wheel buttons
Controls
Page 90 of 292
then is the electrical system fully
disconnected from the power supply.
i Only disconnect the vehicle electrical
system from the power supply using the
battery isolating switch if the vehicle is to
be parked up for a long period or if it is
absolutely necessary. After the power
supply has been activated, you must reset
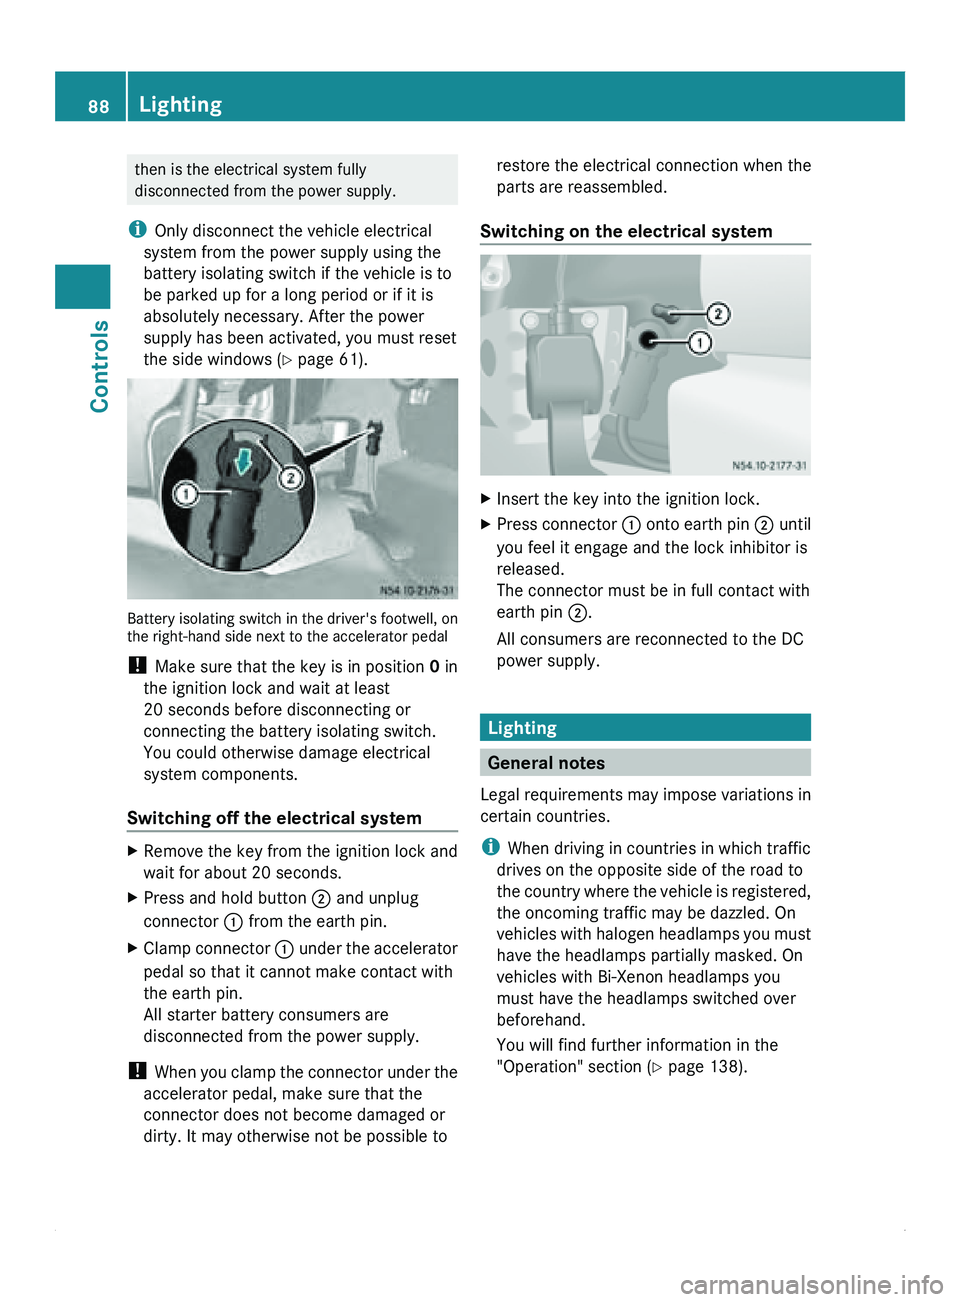
the side windows ( Y page 61). Battery isolating switch in the driver's footwell, on
the right-hand side next to the accelerator pedal
! Make sure that the key is in position 0 in
the ignition lock and wait at least
20 seconds before disconnecting or
connecting the battery isolating switch.
You could otherwise damage electrical
system components.
Switching off the electrical system X
Remove the key from the ignition lock and
wait for about 20 seconds.
X Press and hold button 0047 and unplug
connector 0046 from the earth pin.
X Clamp connector 0046 under
the
accelerator
pedal so that it cannot make contact with
the earth pin.
All starter battery consumers are
disconnected from the power supply.
! When you
clamp
the connector under the
accelerator pedal, make sure that the
connector does not become damaged or
dirty. It may otherwise not be possible to restore the electrical connection when the
parts are reassembled.
Switching on the electrical system X
Insert the key into the ignition lock.
X Press connector 0046
onto
earth
pin 0047 until
you feel it engage and the lock inhibitor is
released.
The connector must be in full contact with
earth pin 0047.
All consumers are reconnected to the DC
power supply. Lighting
General notes
Legal requirements may
impose variations in
certain countries.
i When driving in countries in which traffic
drives on the opposite side of the road to
the country where the vehicle is registered,
the oncoming traffic may be dazzled. On
vehicles with halogen headlamps you must
have the headlamps partially masked. On
vehicles with Bi-Xenon headlamps you
must have the headlamps switched over
beforehand.
You will find further information in the
"Operation" section ( Y page 138).88
Lighting
Controls
Page 91 of 292
Lamp failure indicator
The bulb failure indicator monitors all lamps
of the exterior lighting with the exception of
the front position lamps and the trailer
lighting. If a bulb fails, either the
0055( Y page
197)
indicator lamp lights up or
a corresponding message is shown in the
display ( Y page 209).
i Depending on the equipment, the bulb
failure indicator can be omitted for all
lamps with the exception of the turn signal
lamps. G
Warning
The bulb failure indicator is only an aid. You
are responsible for the proper functioning of
the vehicle lighting. Insufficient or non-
functioning vehicle lighting
puts the operating
safety of the vehicle at risk. You could cause
an accident and injure yourself or others.
Therefore, check the lighting equipment of
the vehicle before each journey and, if
necessary, check the operation and condition
of the trailer lighting equipment. Light switch
Configuration You can switch the vehicle lighting on or off
using the light switch.
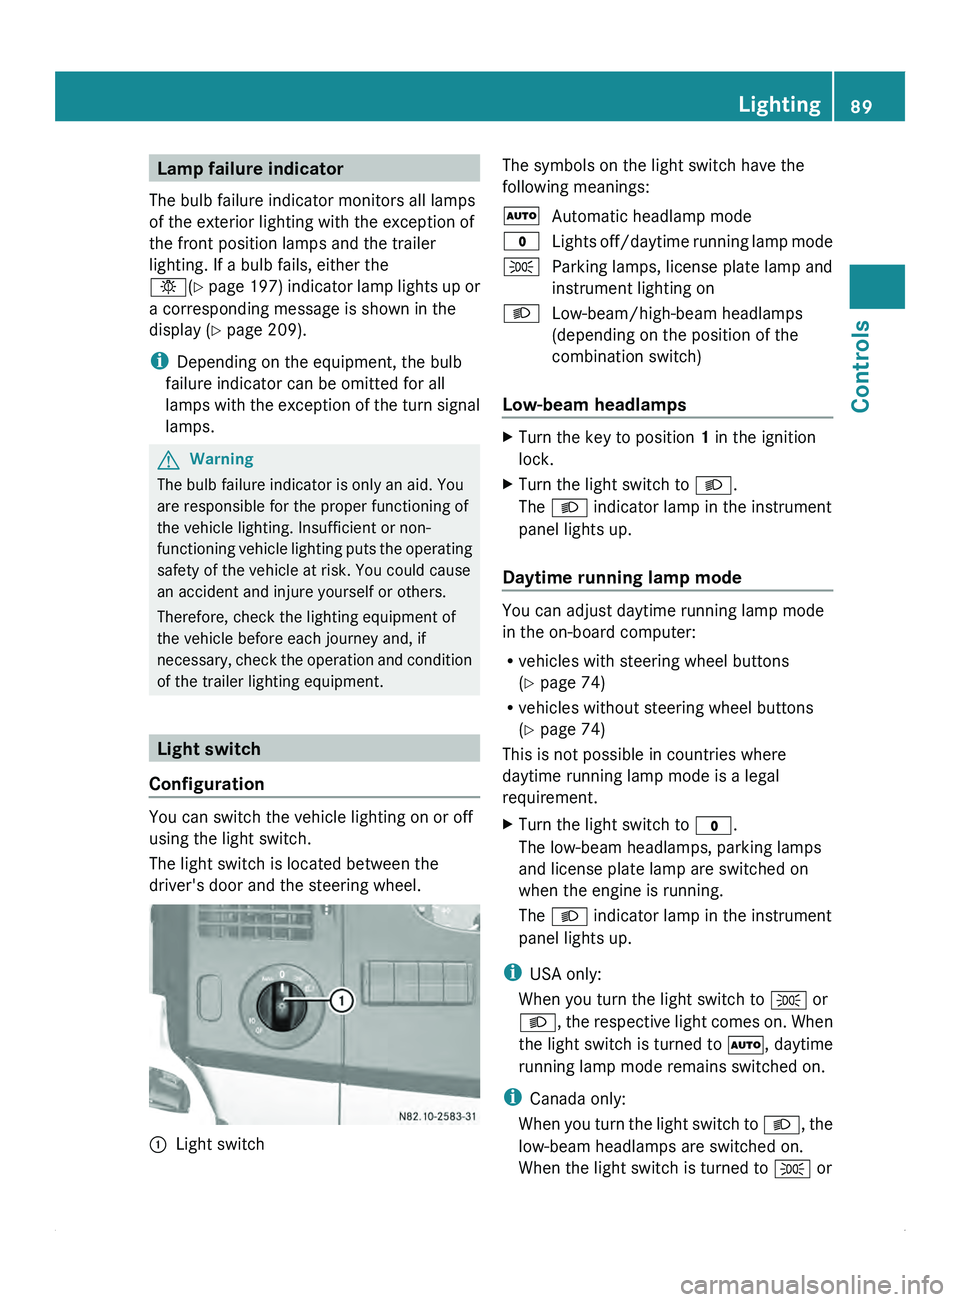
The light switch is located between the
driver's door and the steering wheel.
0046
Light switch The symbols on the light switch have the
following meanings:
005A
Automatic headlamp mode
0027 Lights off/daytime
running lamp mode
006C Parking lamps, license plate lamp and
instrument lighting on
0064 Low-beam/high-beam headlamps
(depending on the position of the
combination switch)
Low-beam headlamps X
Turn the key to position 1 in the ignition
lock.
X Turn the light switch to 0064.
The 0064 indicator lamp in the instrument
panel lights up.
Daytime running lamp mode You can adjust daytime running lamp mode
in the on-board computer:
R
vehicles with steering wheel buttons
(Y page 74)
R vehicles without steering wheel buttons
(Y page 74)
This is not possible in countries where
daytime running lamp mode is a legal
requirement.
X Turn the light switch to 0027.
The low-beam headlamps, parking lamps
and license plate lamp are switched on
when the engine is running.
The 0064 indicator lamp in the instrument
panel lights up.
i USA only:
When you turn the light switch to 006C or
0064, the respective
light comes on. When
the light switch is turned to 005A, daytime
running lamp mode remains switched on.
i Canada only:
When you turn the light switch to 0064, the
low-beam headlamps are switched on.
When the light switch is turned to 006C or Lighting
89
Controls Z
Page 92 of 292
005A, daytime running lamp mode remains
switched on.
Automatic headlamp mode Parking lamps, low-beam headlamps and the
license plate lamp are switched on
automatically depending on the ambient
light.
G
Warning!
If the light switch is set to 005A,
the low-beam
headlamps will not come on automatically if
it is foggy. This could endanger you and
others. Therefore, turn the light switch to
0064
in fog.
The automatic headlamp feature is only an
aid. The driver is responsible for the vehicle's
lighting at all times.
X Turn the light switch to 005A.
The parking lamps are switched on/off
automatically when the key is in position
1 in the ignition lock.
Parking lamps, low-beam headlamps and
the license plate
lamp are switched on/off
automatically, depending on ambient light
conditions, when the engine is running.
Front fog lamps/rear fog lamp X
Turn light switch 0046 to 0064 or 006C.
i If your vehicle is only equipped with rear
fog lamps, you
must turn the light switch to
0064.
X Front fog lamps: pull light switch 0046 out
to the first stop.
The green 0067 indicator lamp next to the
light switch lights up.
X Rear fog lamp: pull light switch 0046 out to
the second stop.
The yellow 006A
indicator lamp next to the
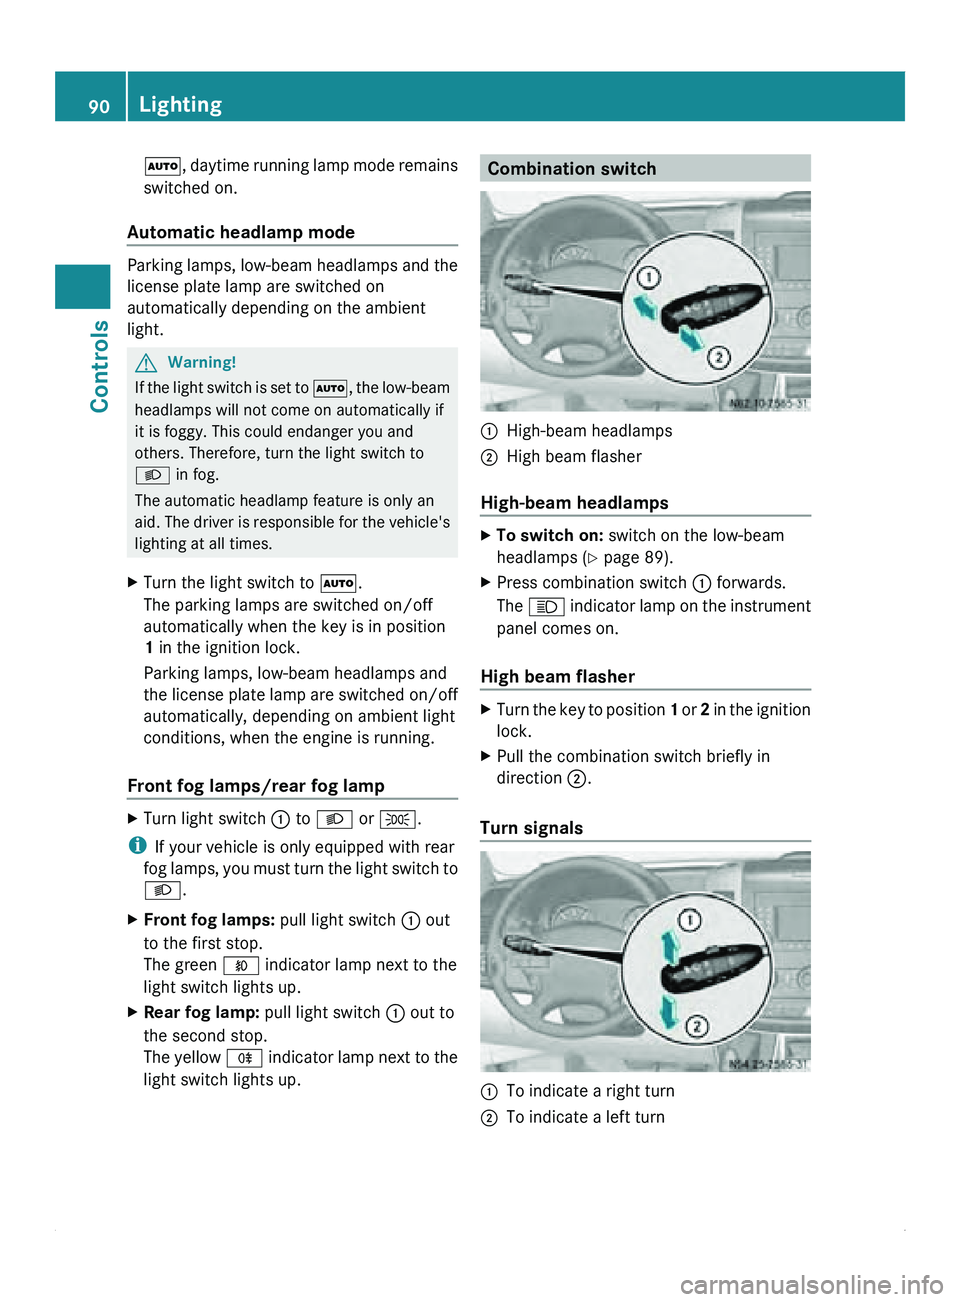
light switch lights up. Combination switch
0046
High-beam headlamps
0047 High beam flasher
High-beam headlamps X
To switch on: switch on the low-beam
headlamps ( Y page 89).
X Press combination switch
0046 forwards.
The 0063 indicator lamp
on the instrument
panel comes on.
High beam flasher X
Turn the key to position 1 or 2
in the ignition
lock.
X Pull the combination switch briefly in
direction 0047.
Turn signals 0046
To indicate a right turn
0047 To indicate a left turn90
Lighting
Controls
Page 93 of 292
X
To indicate: press the combination switch
in desired direction 0046 or 0047, until it
engages.
The combination switch automatically
returns to its original position after large
steering movements.
X To indicate briefly: press the
combination
switch briefly in desired direction 0046
or 0047.
The corresponding turn signal flashes three
times. Cornering light function (vehicles
with Bi-Xenon headlamps)
When the low-beam
headlamps are switched
on, the cornering light function improves the
illumination of the road in the direction you
are turning.
The cornering light function switches on
automatically, if:
R you are traveling at a speed of less than
25 mph (40 km/h) and you switch on the
indicator lamp or turn the steering wheel.
R you are traveling at a speed of between
25 mph (40 km/h) and 43 mph
(70 km/h) and you turn the steering wheel.
The cornering light may continue to be lit for
a short time, but is deactivated automatically
after a maximum of three minutes. Hazard warning lamps
The hazard warning lamps work even when
the ignition is
switched off. They are activated
automatically when an air bag is deployed or
after heavy brake application from a speed of
more than 43 mph (70 km/h) that brings the
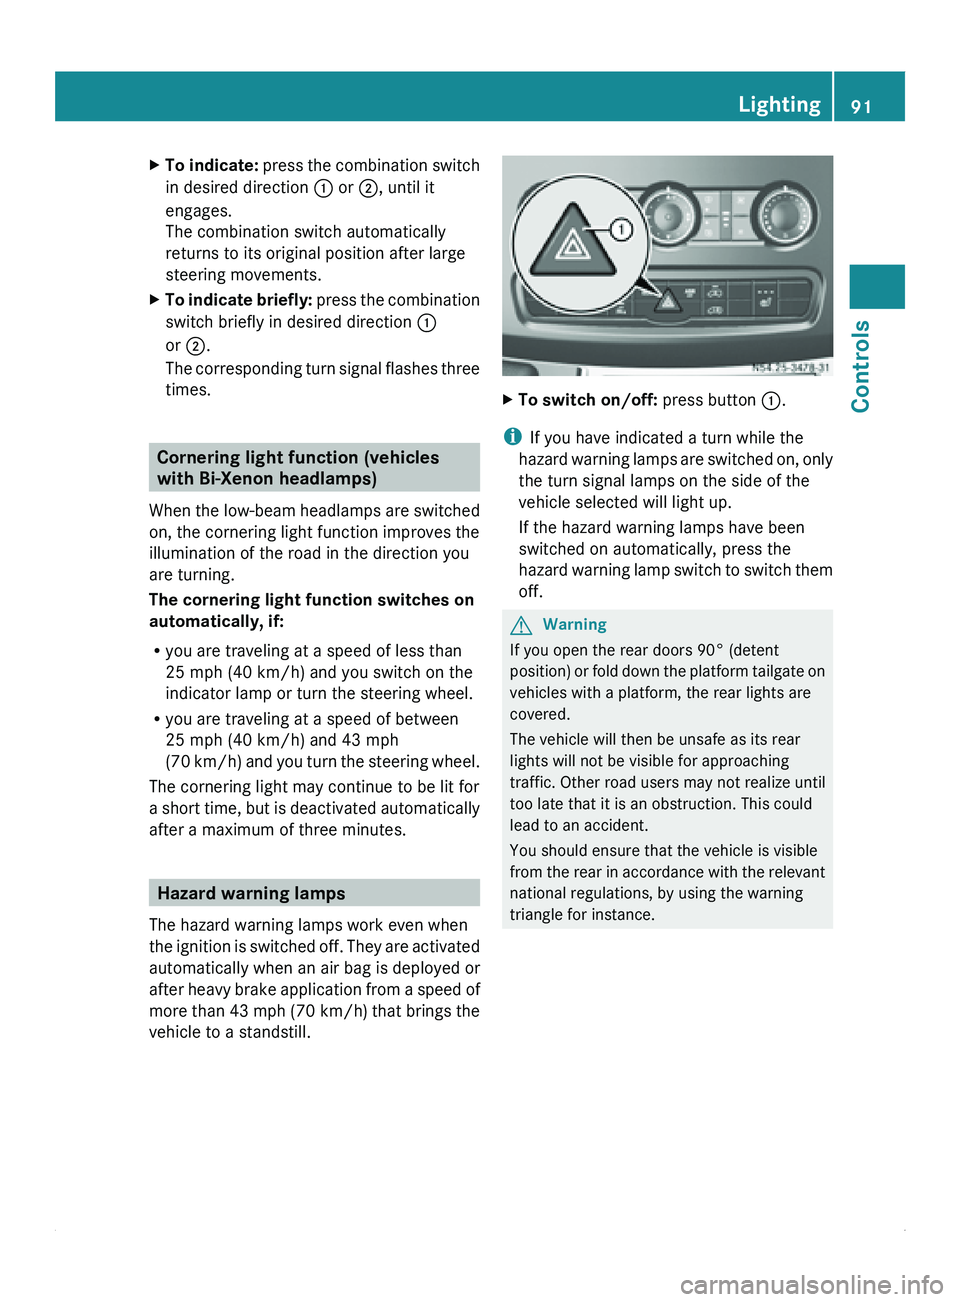
vehicle to a standstill. X
To switch on/off: press button 0046.
i If you have indicated a turn while the
hazard warning lamps
are switched on, only
the turn signal lamps on the side of the
vehicle selected will light up.
If the hazard warning lamps have been
switched on automatically, press the
hazard warning lamp switch to switch them
off. G
Warning
If you open the rear doors 90° (detent
position) or fold
down the platform tailgate on
vehicles with a platform, the rear lights are
covered.
The vehicle will then be unsafe as its rear
lights will not be visible for approaching
traffic. Other road users may not realize until
too late that it is an obstruction. This could
lead to an accident.
You should ensure that the vehicle is visible
from the rear in accordance with the relevant
national regulations, by using the warning
triangle for instance. Lighting
91
Controls Z
Page 97 of 292
i
Use washer fluid
to wipe the rear window
even when it is raining. This prevents the
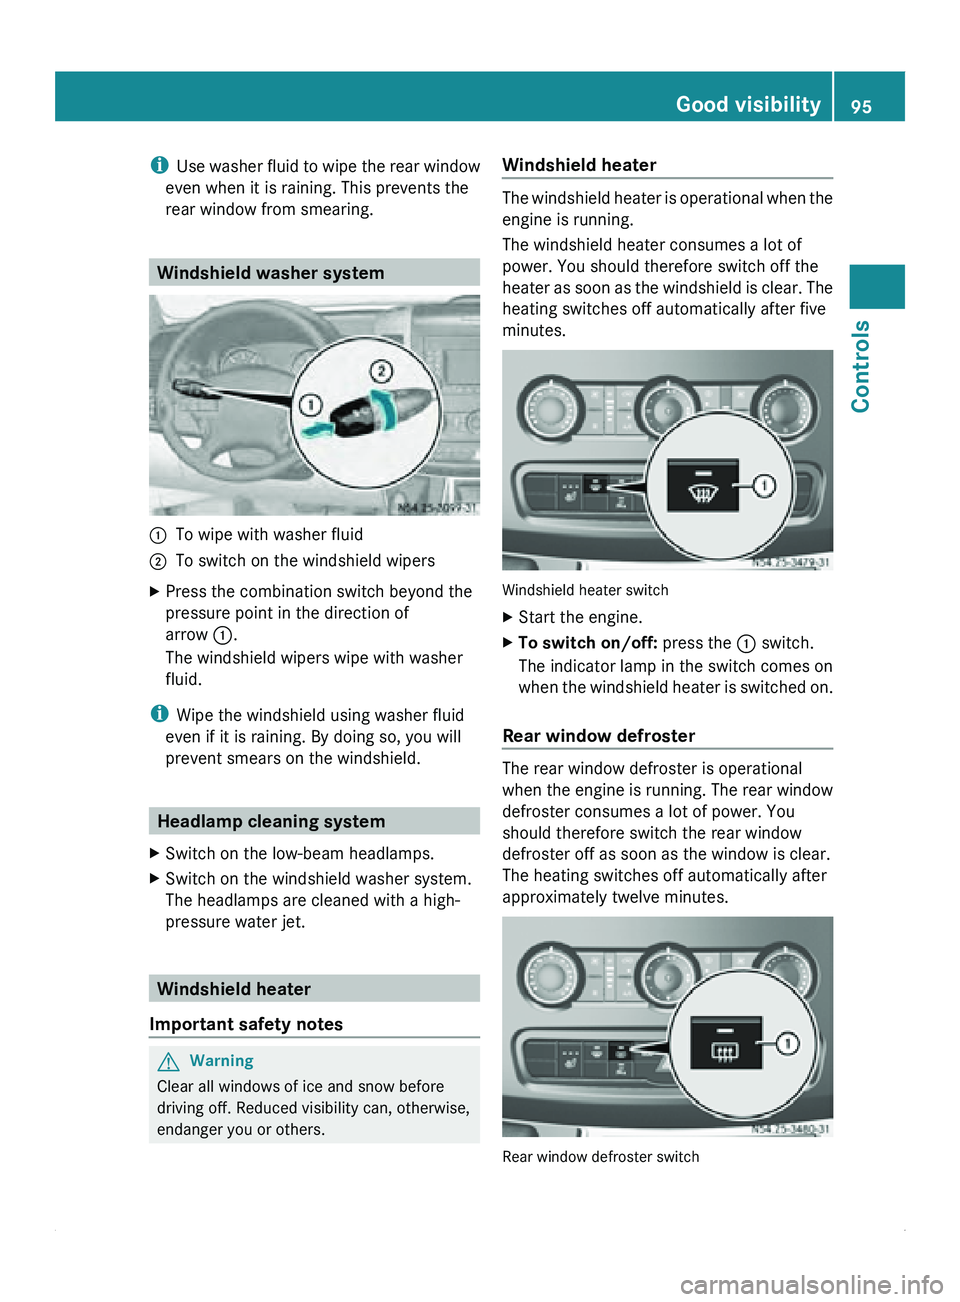
rear window from smearing. Windshield washer system
0046
To wipe with washer fluid
0047 To switch on the windshield wipers
X Press the combination switch beyond the
pressure point in the direction of
arrow 0046.
The windshield wipers wipe with washer
fluid.
i Wipe the windshield using washer fluid
even if it is raining. By doing so, you will
prevent smears on the windshield. Headlamp cleaning system
X Switch on the low-beam headlamps.
X Switch on the windshield washer system.
The headlamps are cleaned with a high-
pressure water jet. Windshield heater
Important safety notes G
Warning
Clear all windows of ice and snow before
driving off. Reduced visibility can, otherwise,
endanger you or others. Windshield heater The windshield heater is operational when the
engine is running.
The windshield heater consumes a lot of
power. You should therefore switch off the
heater as
soon
as the windshield is clear. The
heating switches off automatically after five
minutes. Windshield heater switch
X
Start the engine.
X To switch on/off: press the 0046 switch.
The indicator lamp in the switch comes on
when the windshield
heater is switched on.
Rear window defroster The rear window defroster is operational
when the engine
is running. The rear window
defroster consumes a lot of power. You
should therefore switch the rear window
defroster off as soon as the window is clear.
The heating switches off automatically after
approximately twelve minutes. Rear window defroster switch Good visibility
95
Controls Z
Page 140 of 292
Vehicle equipment
i Diese Betriebsanleitung beschreibt alle
Modelle, Serien- und
Sonderausstattungen
Ihres Fahrzeugs, die zum Zeitpunkt des
Redaktionsschlusses dieser
Betriebsanleitung erhältlich waren.
Länderspezifische Abweichungen sind
möglich. Beachten Sie, dass Ihr Fahrzeug
nicht mit allen beschriebenen Funktionen
ausgestattet sein könnte. Dies betrifft auch
sicherheitsrelevante Systeme und
Funktionen. Driving tips
Breaking-in
It is of decisive importance for the operating
life, reliability and
economy of the vehicle that
the engine is not subjected to its full rated
load during the breaking-in period.
Up to 1000 miles (1500 km)
R Run the vehicle in carefully. Drive at varying
road and engine speeds.
R Avoid heavy loads (driving at full throttle)
and high engine speeds. Do not exceed ¾
of the maximum speed for each gear.
R Do not change down a gear manually in
order to brake.
R Avoid depressing the accelerator pedal
beyond the pressure point (kickdown) and
only engage gear 4, 3, 2 or 1 while driving
slowly.
After 1000 miles (1500 km)
R Gradually bring the vehicle up to full road
and engine speeds.
i These instructions must also be observed
if you have the engine, the transmission, or
the rear axle differential of your vehicle
replaced. Driving abroad
An extensive network of authorized Sprinter
Dealers is also
at your disposal when you are
traveling abroad. The respective workshop
directories are available from any authorized
Sprinter Dealer.
In some countries, only fuels with a lower
octane rating or a higher sulfur content are
available.
You will find information about fuel in the
"Service products" section (Y page 153).
If you are traveling in countries where
vehicles are driven on the opposite side of the
road to that in which the vehicle is registered,
you must have the headlamps:
R partially masked (halogen headlamps)
R switched over (Bi-Xenon headlamps) G
Warning
Masking the headlamps incorrectly can
impair your visibility when driving with the
headlamps switched on. You could also
impede other road users. Oncoming traffic
may be dazzled.
Always have the headlamps masked/
switched over at a qualified specialist
workshop which has
the necessary specialist
knowledge and tools to carry out the work
required.
For this we recommend an authorized
Sprinter Dealer. All work relevant to safety or
on safety-related systems must be carried out
at a qualified specialist workshop. Driving off-road
When driving the vehicle, particularly on
rough terrain, ensure that the driven wheels
always have sufficient traction.
Avoid letting the drive wheels spin. Spinning
drive wheels can damage the differential.
! Always observe the ground clearance of
the vehicle and avoid obstacles, e.g. deep
ruts. 138
Driving tips
Operation
Page 155 of 292
Verify compliance with weight limitations on
a weighbridge.
Trailer power supply
Your vehicle may be equipped with various
electrical fittings for trailer towing.
Depending on your trailer, you may need an
adapter to allow your trailer to be connected
to the vehicle. Information about your
vehicle's electrical equipment is available
from any authorized Sprinter Dealer.
!
Faulty wiring of the connector plug could
in certain circumstances cause other
electronic systems to
malfunction. For this
reason, we recommend having the wiring
of the connector plug performed at an
authorized Sprinter Dealer. Operation in winter
General notes
Have your vehicle winterized at a qualified
specialist workshop, e.g. an authorized
Sprinter Dealer, at the onset of winter.
This service includes the following:
R oil change, if the engine oil currently used
does not have adequate low temperature
characteristics or if these are no longer
sufficient due to aging
R the antifreeze/anticorrosion
concentration in the coolant is checked.
R the addition of a concentrated cleaning
agent to the water in the windshield
washer/headlamp cleaning system
R battery check
R a tire change
Prior to the
onset of winter, ensure that snow
chains are available in the vehicle.
Do not cover the surface of the radiator or the
radiator grill, even in winter. Doing so could
cause the engine diagnostics to record false
or incorrect data. Recording of engine
diagnostic data is legally prescribed and must therefore be correct, clear and
comprehensible at all times.
You
will find
information about diesel fuel for
use at low outside temperatures in the
"Operation" section ( Y page 154).
Please also observe the information about
winter driving (Y page 111).
You will find information about winter tires
and about driving with snow chains in the
"Wheel and tires" section (Y page 153). Service products
Fuel
G
Warning
Fuel is highly flammable. Fire, naked flames
and smoking as well as the use of auxiliary
heaters (sparks) are therefore prohibited
when handling fuel.
Switch off the
engine and the auxiliary heating
before refueling. G
Warning
Avoid any contact with fuels.
You can damage your health if your skin
comes into direct contact with fuel or if you
inhale fuel vapors.
! Filter the fuel
before transferring it to the
vehicle if you are refueling the vehicle from
barrels or containers.
This will prevent malfunctions in the fuel
system due to contaminated fuel.
! Refuel only with commercially available
vehicle diesel fuel, ULTRA-LOW SULFUR
DIESEL with a sulfur content no greater
than 15 ppm. Fuels such as fatty acid
methyl ester FAME (bio-diesel fuels),
marine diesel, heating oil etc. may not be
used as a diesel fuel mixture.
Refuel with B5 bio-diesel only if it fulfills the
requirements listed under "Fuel quality". Service products
153
Operation Z