MERCEDES-BENZ SPRINTER 2019 MY19 with 7” screen
Manufacturer: MERCEDES-BENZ, Model Year: 2019, Model line: SPRINTER, Model: MERCEDES-BENZ SPRINTER 2019Pages: 354, PDF Size: 6.15 MB
Page 201 of 354
Ad
justing the volume On
the multifunction steering wheel #
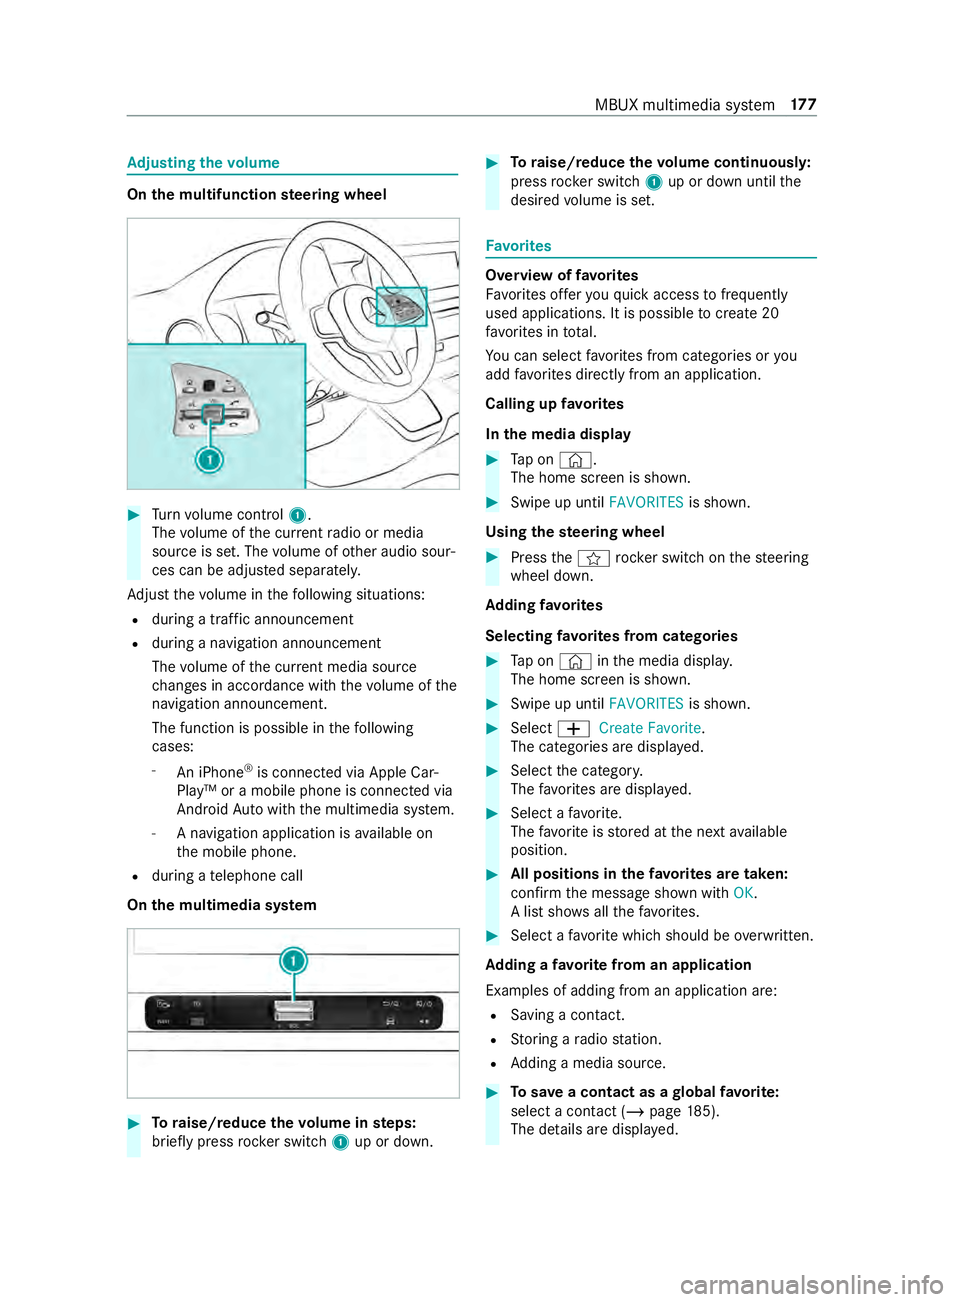
Turn volume control 1.
The volume of the cur rent radio or media
source is set. The volume of other audio sour‐
ces can be adjus ted separately.
Ad just thevo lume in thefo llowing situations:
R during a traf fic announcement
R during a navigation announcement
The volume of the cur rent media sou rce
ch anges in accordance with thevo lume of the
navigation announcement.
The function is possible in thefo llowing
cases:
- An iPhone ®
is connec ted via Apple Car‐
Play™ or a mobile phone is connected via
Android Autowith the multimedia sy stem.
- A navigation application is available on
th e mobile phone.
R during a telephone call
On the multimedia sy stem #
Toraise/reduce thevo lume in steps:
brief lypress rocker switch 1up or down. #
Toraise/reduce thevo lume continuousl y:
press rocker switch 1up or down until the
desired volume is set. Favo
rites Overview of
favo rites
Favo rite s of feryo uqu ick access tofrequently
used applications. It is possible tocrea te20
fa vo rite s in tota l.
Yo u can select favo rite s from categories or you
add favo rite s directly from an application.
Calling up favo rites
In the media display #
Tap on ©.
The home screen is shown. #
Swipe up until FAVORITESis shown.
Using thest eering wheel #
Press the004B rocker switch on thesteering
wheel down.
Ad ding favo rites
Selecting favo rite s from categories #
Tap on © inthe media displa y.
The home screen is shown. #
Swipe up until FAVORITESis shown. #
Select 0081Create Favorite .
The categories are displa yed. #
Select the categor y.
The favo rite s are displa yed. #
Select a favo rite.
The favo rite isstored at the next available
position. #
All positions in thefa vo rite s are taken:
confirm the message shown with OK.
A list sho wsallthefa vo rite s. #
Select a favo rite which should be overwritten.
Ad ding a favo rite from an application
Examples of adding from an application are: R Saving a contact.
R Storing a radio station.
R Adding a media source. #
Tosave a contact as a global favo rite :
select a contact (/ page 185).
The de tails are displa yed. MBUX multimedia sy
stem 17 7
Page 202 of 354
#
Press on a phone number until theOPTIONS
menu is shown. #
Select Save as Favorite.
The contact is added as a favo rite. #
Tosto reara dio station as a global favo r‐
ite: set a radio station (/ page193). #
Press on thera dio station until theOPTIONS
menu is shown. #
Select Save as Favorite.
The radio station is added as a favo rite.
Re naming favo rites #
Tap on © inthe media displa y.
The home screen is shown. #
Swipe up until FAVORITESis shown. #
Press on a favo rite until theOPTIONS menu is
shown. #
Select Rename . #
Ente rth e name. #
Select OK.
Moving favo rites
Moving favo rite s in thefa vo rite s menu #
Tap on © inthe media displa y.
The home screen is shown. #
Swipe up until FAVORITESis shown. #
Press on a favo rite until theOPTIONS menu is
shown. #
Select Move. #
Movethefa vo rite to the new position. #
Tap on 00FB.
Deleting favo rites #
Tap on © inthe media displa y.
The home screen is shown. #
Swipe up until FAVORITESis shown. #
Press on a favo rite until theOPTIONS menu is
shown. #
Select Delete. #
Select Yes. Entering
characters Using
thech aracter input function &
WARNING Risk of distraction from infor‐
mation sy stems and communications
equipment
If yo u operate information and communica‐
tion equipment integ rated in theve hicle when
driving, you will be distracted from the tra ffic
situation. This could also cause youto lose
control of theve hicle. #
Only operate this equipment when the
traf fic situation permits. #
Ifyo u cannot be sure of this, stop the
ve hicle whilst paying attention toroad
and traf fic conditions and ope rate the
equipment with theve hicle stationar y. Yo
u must obse rveth e legal requirements forthe
country in whi chyou are cur rently driving when
ope rating the multimedia sy stem.
Character entry can be carried out with these
cont rol elements:
R Touch Control
R Touchsc reen (media display)
Character entry take s place bycursor control
when using theTo uch Control.
Character input can be star ted with a control ele‐
ment and resumed with ano ther. #
When theke yboard is shown, en terth ech ar‐
acters on the cont rol element byswiping and
pressing or bytapping (touchscreen).
or #
Write thech aracter on theto uchsc reen.
Examples of character ent ry:
R Renaming a favo rite
R Enter a telephone number 17 8
MBUX multimedia sy stem
Page 203 of 354
Entering
characters on theto uchscreen
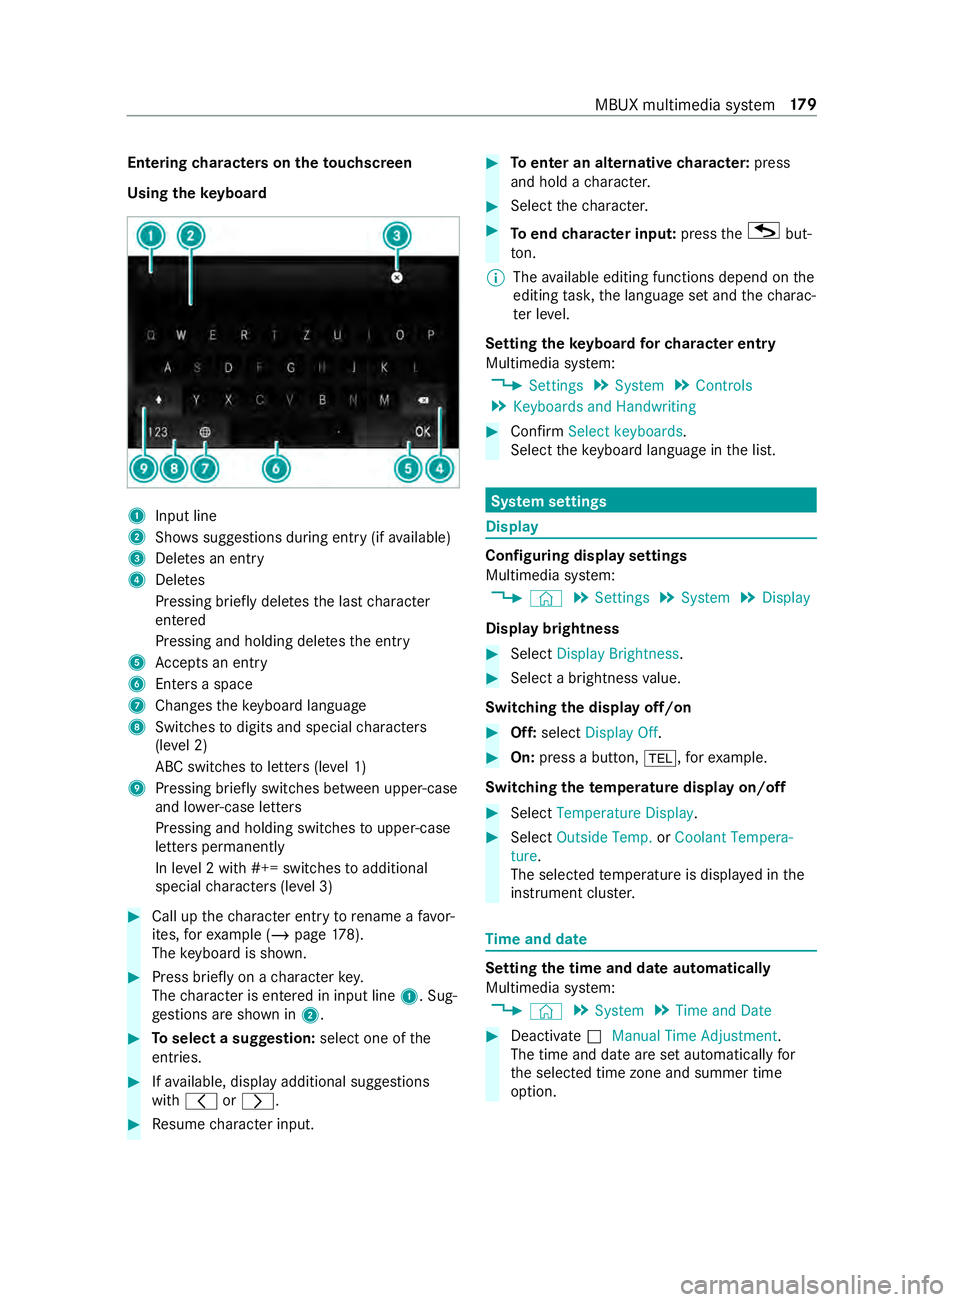
Using theke yboard 1
Input line
2 Showssuggestions during entry (if available)
3 Deletes an entry
4 Deletes
Pressing brief lydele testh e last character
entered
Pressing and holding dele testh e entry
5 Accepts an entry
6 Enters a space
7 Changes theke yboard language
8 Switches todigits and special characters
(le vel 2)
ABC switches toletters (le vel 1)
9 Pressing brief lyswitches between upper-case
and lo wer-case letters
Pressing and holding switches toupper-case
letters permanent ly
In le vel 2 with #+= switches toadditional
special characters (le vel 3) #
Call up thech aracter ent ryto rename a favo r‐
ites, forex ample (/ page178).
The keyboard is shown. #
Press brief lyon a character key.
The character is entered in input line 1. Sug‐
ge stions are shown in 2. #
Toselect a suggestion: select one ofthe
entri es. #
Ifav ailable, display additional suggestions
with 0047 or0048. #
Resume character input. #
Toenter an alternative character: press
and hold a character. #
Select thech aracter. #
Toend character input: presstheG but‐
to n.
% The
available editing functions depend on the
editing task, the language set and thech arac‐
te r le vel.
Setting theke yboard forch aracter entry
Multimedia sy stem:
4 Settings 5
System 5
Controls
5 Keyboards and Handwriting #
Confirm Select keyboards.
Select theke yboard language in the list. Sy
stem settings Display
Configuring display settings
Multimedia sy
stem:
4 © 5
Settings 5
System 5
Display
Display brightness #
Select Display Brightness . #
Select a brightness value.
Switching the display off/on #
Off: select Display Off . #
On: press a button, 002B,forex ample.
Swit ching thetemp erature display on/off #
Select Temperature Display . #
Select Outside Temp. orCoolant Tempera-
ture.
The selec tedte mp erature is displa yed in the
instrument clus ter. Time
and date Setting
the time and da teautomatical ly
Multimedia sy stem:
4 © 5
System 5
Time and Date #
Deactivate 0053Manual Time Adjustment.
The time and date are set automatically for
th e selected time zone and summer time
option. MBUX multimedia sy
stem 17 9
Page 204 of 354
%
The cor rect time is requ ired forth efo llowing
functions:
R Route guidance with time-dependent traf‐
fi c guidance.
R Calculation of expected time of ar riva l.
Setting the time zone
Multimedia sy stem:
4 © 5
Settings 5
System
5 Time and Date
Setting the time zone manually #
Select Time Zone: .
The list of countries is displa yed.
% If
th ere are se veral time zones available in a
countr y,these will be shown af terth e coun‐
try is selected. #
Select a count ryand, if requ ired, a time zone.
The time zone set is displa yed af terTime
Zone:.
Setting the time zone automatically #
Activate Automatic Time Zone.
Setting the time and date form at
Multimedia sy stem:
4 © 5
Settings 5
System
5 Time and Date 5
Set Format #
Set the date and time form at003B.
Setting the time and da temanually
Re quirements:
R The Manual Time Adjustment function is
switched on.
R For setting the date manuall y:no GPS is
ins talled in theve hicle.
Multimedia sy stem:
4 © 5
Settings 5
System
5 Time and Date
Setting the time (without time zone) #
Select Set Time. #
Set a time.
Setting the time (with time zone) #
Select Set Time.
If a time zone is set the time is set automatically
using the time zone. The time can be adjus tedby
a maximum of plus or minus 60 minutes. #
Adjust the time using the slide cont rol.
Setting the da te #
Select Set Date . #
Set a da te.
% In
vehicles with GPS, a date cannot be set
eve n wi thactive manual time adjustments.
The date is then set automatically thro ugh
th e selected time zone. Blue
tooth ® Information about Blu
etoo th®
Bl ue tooth ®
tech nology is a standard for short-
ra nge wi reless data transfer up toappr oximately
32.8 ft(10 m).
Yo u can use Blue tooth®
to connect your mobile
phone tothe multimedia sy stem and use thefo l‐
lowing functions, forex ample:
R Hands-free sy stem with access tothefo llow‐
ing options:
- Call lists (/ page185)
R Inte rn et connection
R Listening tomusic via Blue tooth®
audio
R Trans ferring business cards (vCards) into the
ve hicle
Blue tooth ®
is a regis tere d trademark of Blue tooth
Special Interest Group (SIG) Inc.
% Internet connection via Blu etoo th®
is not
av ailable in all countries.
Ac tivating/deactivating Blue tooth ®
Multimedia sy stem:
4 © 5
Settings 5
System
5 Wi-Fi & Bluetooth #
Toswitch on Blue tooth ®
:select Connect
via Bluetooth. #
Activate Bluetooth. #
Toswitch off Blue tooth ®
:select Settings . #
Deactivate Bluetooth. Wi
-Fi Wi
-Fi connection overview
The Wi-Fi network in your vehicle ser ves only for
th e use of Apple ®
CarPla y.Yo u can on lyconnect
wi th th e network using this application.
Fu rther information about Apple ®
CarPlay
(/ page 186). 18 0
MBUX multimedia sy stem
Page 205 of 354
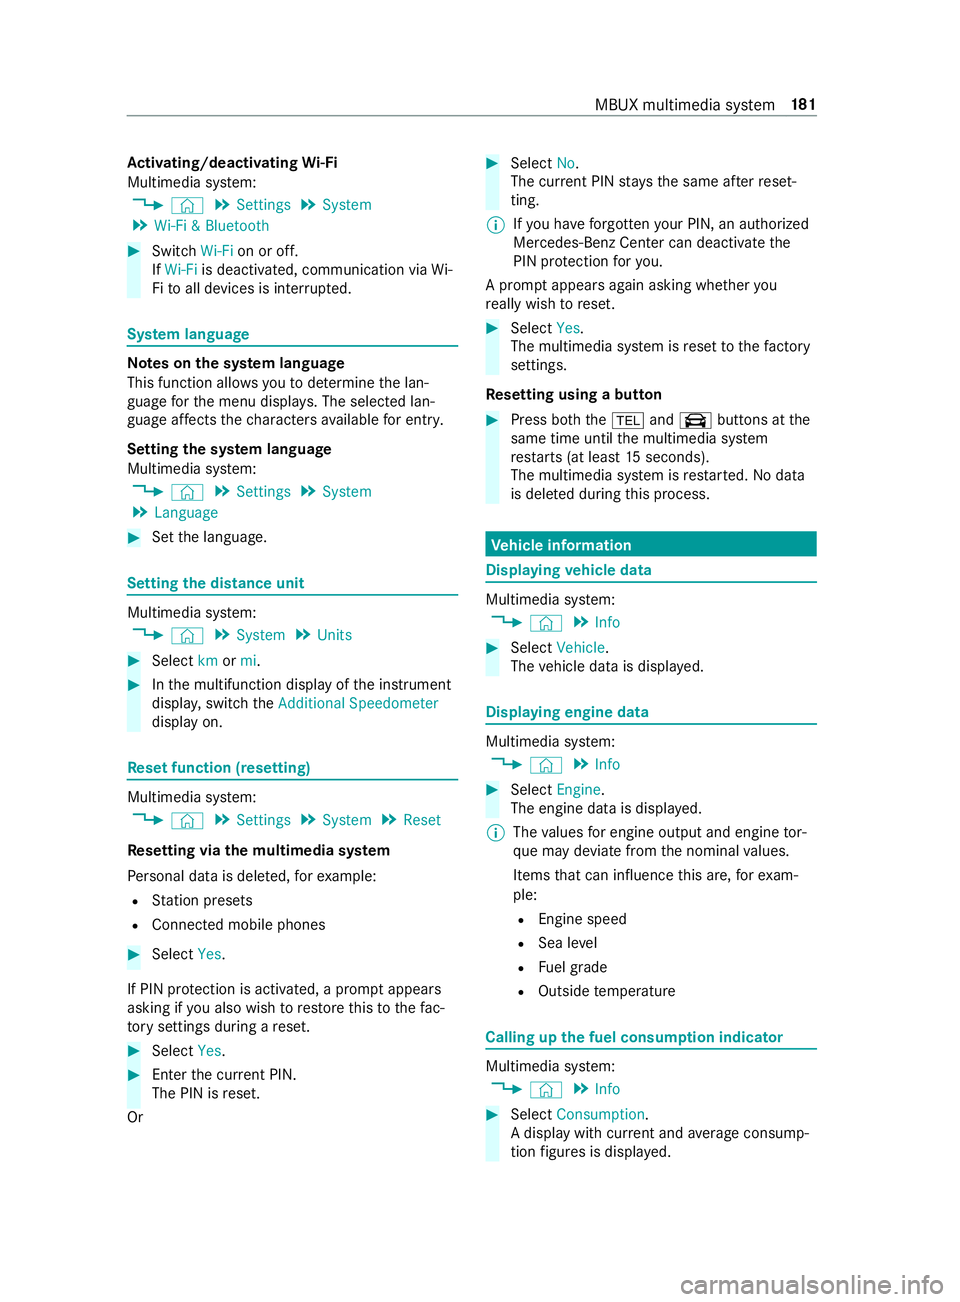
Ac
tivating/deactivating Wi-Fi
Multimedia sy stem:
4 © 5
Settings 5
System
5 Wi-Fi & Bluetooth #
Switch Wi-Fion or off.
If Wi-Fi is deactivated, communication via Wi-
Fi to all devices is inter rupte d. Sy
stem language Note
s onthe sy stem language
This function allo wsyouto determ ine the lan‐
guage forth e menu displa ys. The selected lan‐
guage af fects thech aracters available for entr y.
Setting the sy stem language
Multimedia sy stem:
4 © 5
Settings 5
System
5 Language #
Set the language. Setting
the distance unit Multimedia sy
stem:
4 © 5
System 5
Units #
Select kmormi. #
Inthe multifunction display of the instrument
displa y,switch theAdditional Speedometer
display on. Re
set function (resetting) Multimedia sy
stem:
4 © 5
Settings 5
System 5
Reset
Re setting via the multimedia sy stem
Pe rsonal data is dele ted, forex ample:
R Station presets
R Connected mobile phones #
Select Yes.
If PIN pr otection is activated, a prom ptappears
asking if you also wish torestore this to thefa c‐
to ry settings during a reset. #
Select Yes. #
Enter the cur rent PIN.
The PIN is reset.
Or #
Select No.
The cur rent PIN stay sth e same af terre set‐
ting.
% If
yo u ha veforg ottenyo ur PIN, an authorized
Mercedes-Benz Center can deactivate the
PIN pr otection foryo u.
A prom ptappears again asking whe ther you
re ally wish toreset. #
Select Yes.
The multimedia sy stem is reset tothefa ctory
settings.
Re setting using a button #
Press bo th the002B and\ buttons at the
same time until the multimedia sy stem
re starts (at least 15seconds).
The multimedia sy stem is restar ted. No data
is dele ted during this process. Ve
hicle information Displaying
vehicle data Multimedia sy
stem:
4 © 5
Info #
Select Vehicle .
The vehicle data is displa yed. Displaying engine data
Multimedia sy
stem:
4 © 5
Info #
Select Engine.
The engine data is displa yed.
% The
values for engine output and engine tor‐
qu e may deviate from the nominal values.
Items that can influence this are, forex am‐
ple:
R Engine speed
R Sea le vel
R Fuel grade
R Outside temp erature Calling up
the fuel consum ption indicator Multimedia sy
stem:
4 © 5
Info #
Select Consumption .
A display with cur rent and average consu mp‐
tion figures is displa yed. MBUX multimedia sy
stem 181
Page 206 of 354
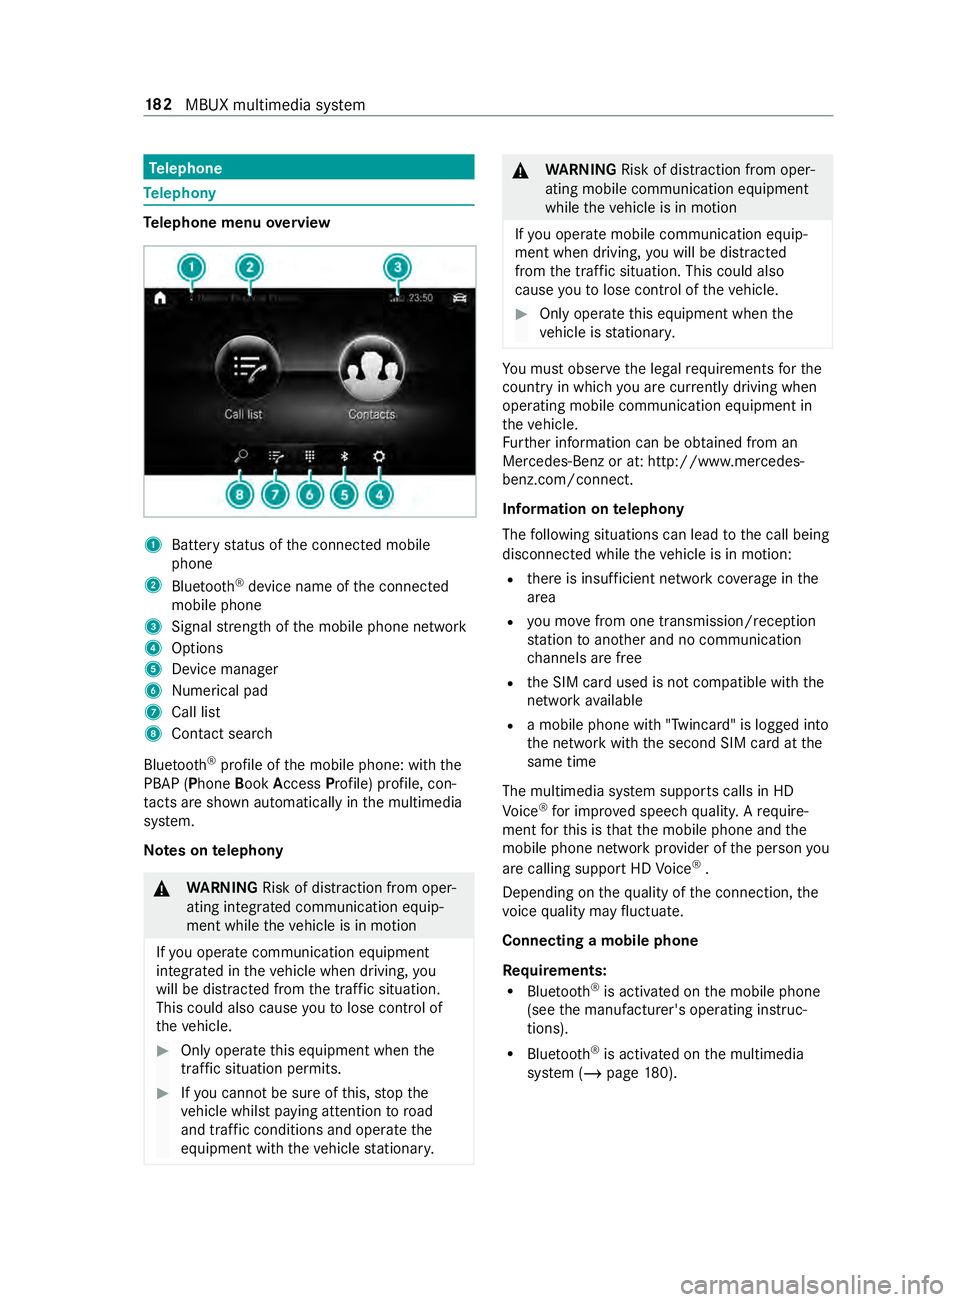
Te
lephone Te
lephony Te
lephone menu overview 1
Battery status of the connected mobile
phone
2 Blue tooth ®
device name of the connected
mobile phone
3 Signal stre ngth of the mobile phone network
4 Options
5 Device manager
6 Nume rical pad
7 Call li st
8 Contact sea rch
Blu etoo th®
profile of the mobile phone: with the
PBAP (Phone BookAccess Profile) profile, con‐
ta cts are shown au tomatically in the multimedia
sy stem.
Note s ontelephony &
WARNING Risk of distraction from oper‐
ating integrated communication equip‐
ment while theve hicle is in motion
If yo u operate communication equipment
integ rated in theve hicle when driving, you
will be distracted from the tra ffic situation.
This could also cause youto lose control of
th eve hicle. #
Only operate this equipment when the
traf fic situation permits. #
Ifyo u cannot be sure of this, stop the
ve hicle whilst paying attention toroad
and traf fic conditions and ope rate the
equipment with theve hicle stationar y. &
WARNING Risk of distraction from oper‐
ating mobile communication equipment
while theve hicle is in motion
If yo u operate mobile communication equip‐
ment when driving, you will be distracted
from the traf fic situation. This could also
cause youto lose control of theve hicle. #
Only operate this equipment when the
ve hicle is stationar y. Yo
u must obse rveth e legal requirements forthe
country in whi chyou are cur rently driving when
ope rating mobile communication equipment in
th eve hicle.
Fu rther information can be obtained from an
Mercedes-Benz or at: http://www.mercedes-
benz.com/connect.
Information on telephony
The following situations can lead tothe call being
disconnected while theve hicle is in motion:
R there is insuf ficient network co verage inthe
area
R you mo vefrom one transmission/reception
st ation toano ther and no communication
ch annels are free
R the SIM card used is not compatible with the
network available
R a mobile phone with "Twincard" is logged into
the network with the second SIM card at the
same time
The multimedia sy stem supports calls in HD
Vo ice ®
for impr oved speech quality. A require‐
ment forth is is that the mobile phone and the
mobile phone network pr ovider of the person you
are calling support HD Voice ®
.
Depending on thequ ality of the connection, the
vo ice quality may fluctuate.
Connecting a mobile phone
Re quirements:
R Blue tooth ®
is activated on the mobile phone
(see the manufacturer's operating instruc‐
tions).
R Blue tooth ®
is activated on the multimedia
sy stem (/ page180). 18 2
MBUX multimedia sy stem
Page 207 of 354
Multimedia sy
stem:
4 © 5
Phone 5
00A5
Sear ching for a mobile phone #
Select Connect New Device.
Connecting a mobile phone (authorization
using Secure Si mplePa iring) #
Select a mobile phone. #
A code is displa yed in the multimedia sy stem
and on the mobile phone. #
Ifth e codes match: confirm the code on the
mobile phone.
% Fo
r older mobile phone models, enter a one
to sixteen-digit number code on the mobile
phone and on the multimedia sy stem for
authorization.
% Up
to15 mobile phones can be authorized on
th e multimedia sy stem.
Auth orized mobile phones are reconnected
au tomatical ly.
% The connected mobile phone can also be
used as Blue tooth®
audio equipment
(/ page 190).
Re placing a mobile phone
Multimedia sy stem:
4 Phone 5
00A5 #
Noauthorized mobile phone available:
select Connect New Device .#
Select a mobile phone. #
Newly authorized mobile phone: confirm
th e number code on the mobile phone.
Switching mobile phones #
Select an authorized mobile phone.
The selected mobile phone is connected to
th e multimedia sy stem.
% For iPhone ®
:yo u can swit chbetween the
Apple CarPl ay™ and Blu etoo th®
equipment
connection variants.
De-authorizing a mobile phone
Multimedia sy stem:
4 © 5
Phone 5
00A5 #
Select 0062inthe line of the mobile phone. #
Select Deauthorize . Information on
NearField Communication
(NFC)
NFC enables short- range wi reless data transfer
or (re)connection of a mobile phone with the mul‐
timedia sy stem.
Fu rther information can be obtained at: http://
www.mercedes-benz.com/connect
Using the mobile phone with NearField Com‐
munication (NFC)
Re quirements:
R NFC is activated on the mobile phone (see
th e manufacturer's operating instructions)
R The mobile phone's screen is switched on
and unloc ked (see the manufacturer's operat‐
ing instructions) #
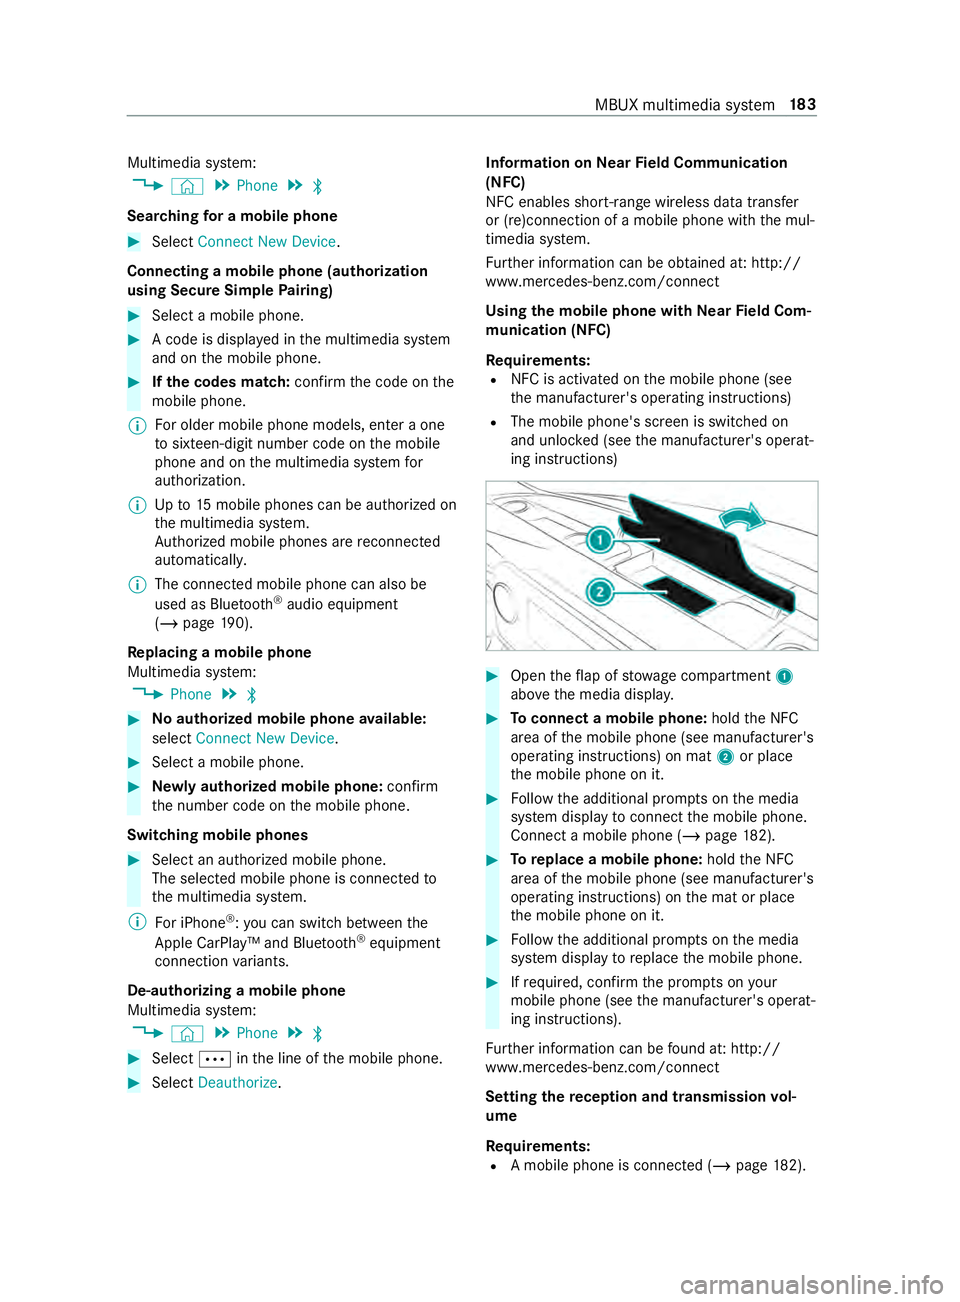
Open theflap of stowage compartment 1
abo vethe media displa y. #
Toconnect a mobile phone: holdthe NFC
area of the mobile phone (see manufacturer's
operating instructions) on mat 2or place
th e mobile phone on it. #
Follow the additional prom pts on the media
sy stem display toconnect the mobile phone.
Connect a mobile phone (/ page182). #
Toreplace a mobile phone: holdthe NFC
area of the mobile phone (see manufacturer's
operating instructions) on the mat or place
th e mobile phone on it. #
Follow the additional prom pts on the media
sy stem display toreplace the mobile phone. #
Ifre qu ired, con firm the prom pts on your
mobile phone (see the manufacturer's operat‐
ing instructions).
Fu rther information can be found at: http://
www.mercedes-benz.com/connect
Setting there ception and transmission vol‐
ume
Re quirements:
R A mobile phone is connec ted (/ page182). MBUX multimedia sy
stem 18 3
Page 208 of 354
Multimedia sy
stem:
4 © 5
Phone 5
00A5
This function ensures optimal language quality. #
Select 0062inthe line of the mobile phone. #
Select Reception Volume andTransmission
Volume. #
Set thevo lume.
Fu rther information on there commended recep‐
tion and transmission volume: http://
www.me rcedes-benz.com/connect
St arting/ stopping mobile phone voice recog‐
nition
Re quirements:
R The mobile phone in thefo re ground is con‐
nected with the multimedia sy stem
(/ page 182).
St arting mobile phone voice recognition #
Press and hold the£ button on the multi‐
function steering wheel for more than one
second.
Yo u can use mobile phone voice recognition.
St opping mobile phone voice recognition #
Press the0063 or0076 button on the multi‐
function steering wheel.
% If a mobile phone is connected via Smart‐
phone Integration, thevo ice recognition of
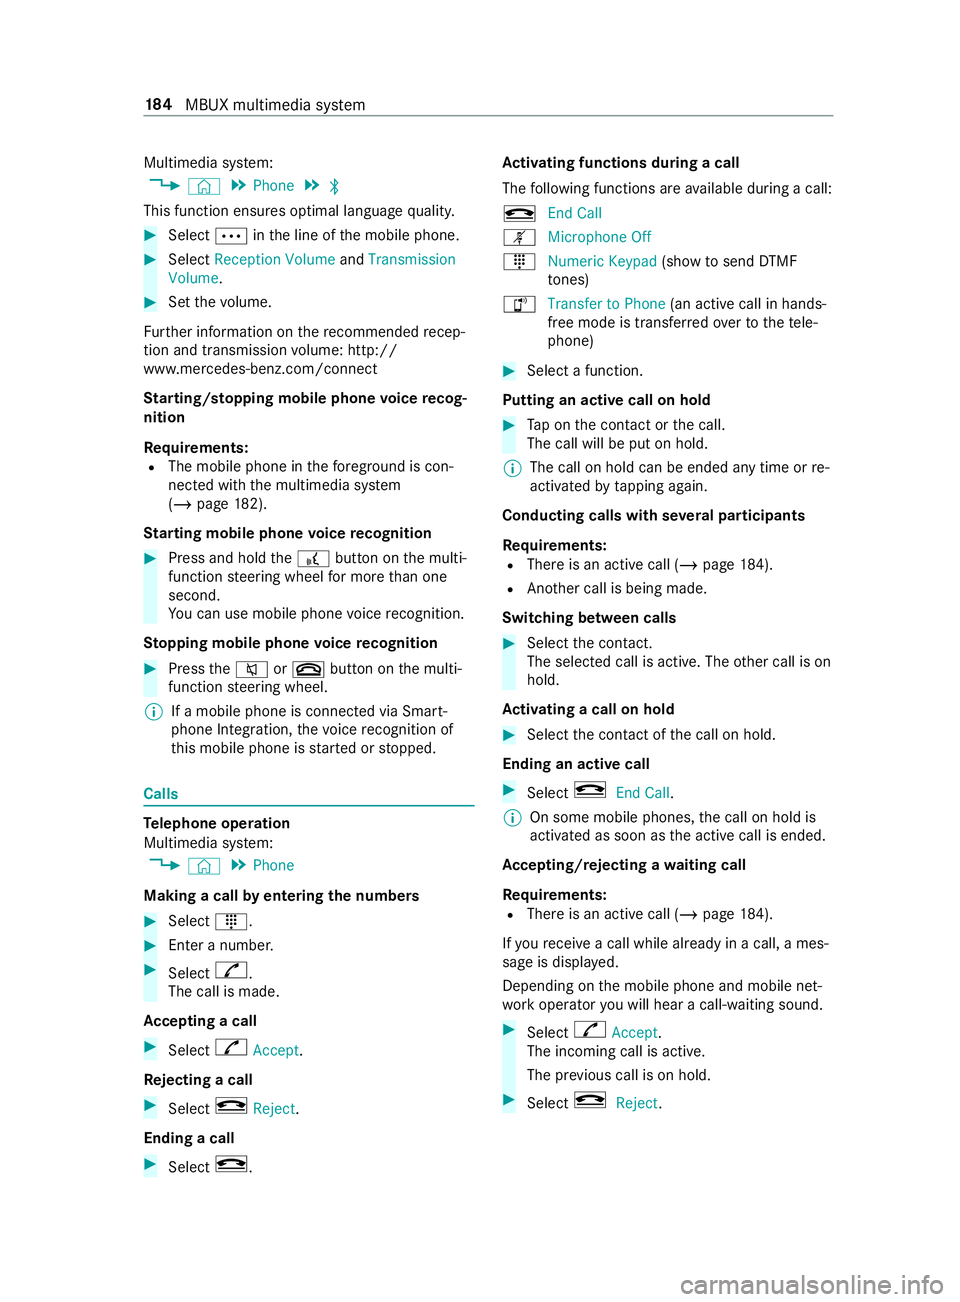
th is mobile phone is star ted or stopped. Calls
Te
lephone operation
Multimedia sy stem:
4 © 5
Phone
Making a call byentering the numbers #
Select _. #
Enter a number. #
Select R.
The call is made.
Ac cepting a call #
Select RAccept.
Re jecting a call #
Select kReject.
Ending a call #
Select k. Ac
tivating functions during a call
The following functions are available during a call:
k End Call
m Microphone Off
_ Numeric Keypad (showtosend DTMF
to nes)
h Transfer to Phone
(an activecall in hands-
free mode is transfer redove rto thete le‐
phone) #
Select a function.
Putting an active call on hold #
Tap on the contact or the call.
The call will be put on hold.
% The call on hold can be ended any time or
re-
activated bytapping again.
Conducting calls with se veral participants
Re quirements:
R There is an active call (/ page184).
R Ano ther call is being made.
Switching between calls #
Select the contact.
The selected call is active. The other call is on
hold.
Ac tivating a call on hold #
Select the contact of the call on hold.
Ending an active call #
Select kEnd Call.
% On some mobile phones,
the call on hold is
activated as soon as the active call is ended.
Ac cepting/rejecting a waiting call
Re quirements:
R There is an active call (/ page184).
If yo ure ceive a call while al ready in a call, a mes‐
sage is displa yed.
Depending on the mobile phone and mobile net‐
wo rkoperator you will hear a call- waiting sound. #
Select RAccept.
The incoming call is active.
The pr evious call is on hold. #
Select kReject. 184
MBUX multimedia sy stem
Page 209 of 354
%
This function and behavior depends on
your
mobile phone network pr ovider and the
mobile phone (see the manufacturer's oper‐
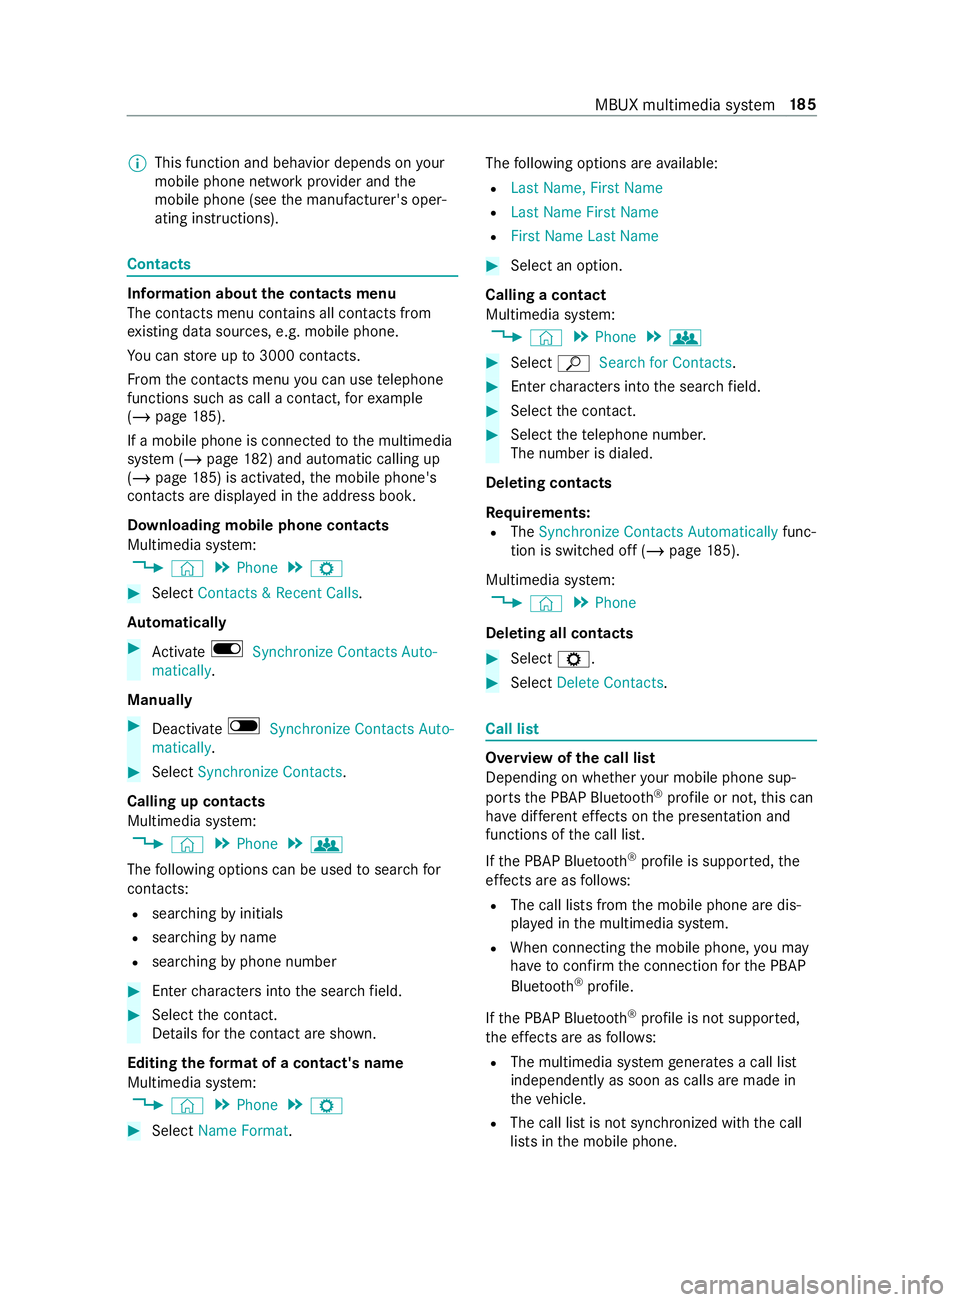
ating instructions). Contacts
Information about
the contacts menu
The con tacts menu contains all contacts from
ex isting data sources, e.g. mobile phone.
Yo u can store up to3000 contacts.
Fr om the contacts menu you can use telephone
functions such as call a con tact, forex ample
(/ page 185).
If a mobile phone is connected tothe multimedia
sy stem (/ page182) and automatic calli ng up
(/ page 185) is activated, the mobile phone's
contacts are displa yed in the address book.
Downloading mobile phone contacts
Multimedia sy stem:
4 © 5
Phone 5
Z #
Select Contacts & Recent Calls.
Au tomatically #
Activate D Synchronize Contacts Auto-
matically.
Manual ly #
Deactivate ESynchronize Contacts Auto-
matically. #
Select Synchronize Contacts .
Calling up contacts
Multimedia sy stem:
4 © 5
Phone 5
g
The following options can be used tosear chfor
contacts:
R searching byinitials
R sear ching byname
R searching byphone number #
Ente rch aracters into the sear chfield. #
Select the contact.
De tails forth e contact are shown.
Editing thefo rm at of a contact's name
Multimedia sy stem:
4 © 5
Phone 5
Z #
Select Name Format . The
following options are available:
R Last Name, First Name
R Last Name First Name
R First Name Last Name #
Select an option.
Calling a contact
Multimedia sy stem:
4 © 5
Phone 5
g #
Select ªSearch for Contacts. #
Ente rch aracters into the sear chfield. #
Select the contact. #
Select thete lephone numbe r.
The number is dialed.
Deleting contacts
Re quirements:
R The Synchronize Contacts Automatically func‐
tion is switched off (/ page185).
Mul timedia sy stem:
4 © 5
Phone
Deleting all contacts #
Select Z. #
Select Delete Contacts. Call list
Overview of
the call list
Depending on whe ther your mobile phone sup‐
ports the PBAP Blue tooth®
profile or not, this can
ha ve differe nt ef fects on the presentation and
functions of the call list.
If th e PBAP Blue tooth ®
profile is suppor ted, the
ef fects are as follo ws:
R The call lists from the mobile phone are dis‐
pla yed in the multimedia sy stem.
R When connecting the mobile phone, you may
ha ve toconfirm the connection forth e PBAP
Blue tooth ®
profile.
If th e PBAP Blue tooth ®
profile is not suppor ted,
th e ef fects are as follo ws:
R The multimedia sy stem generates a call li st
independently as soon as calls are made in
th eve hicle.
R The call list is not synchronized with the call
lists in the mobile phone. MBUX multimedia sy
stem 18 5
Page 210 of 354
Making a call from
the call list
Multimedia sy stem:
4 © 5
Phone #
Select +Recent Calls. #
Select an entry.
The call is made.
Calling up additional options in the call list
Multimedia sy stem:
4 © 5
Phone #
Select +Recent Calls. #
For pr eviously stored contacts: select 0048in
th e line of an entry.
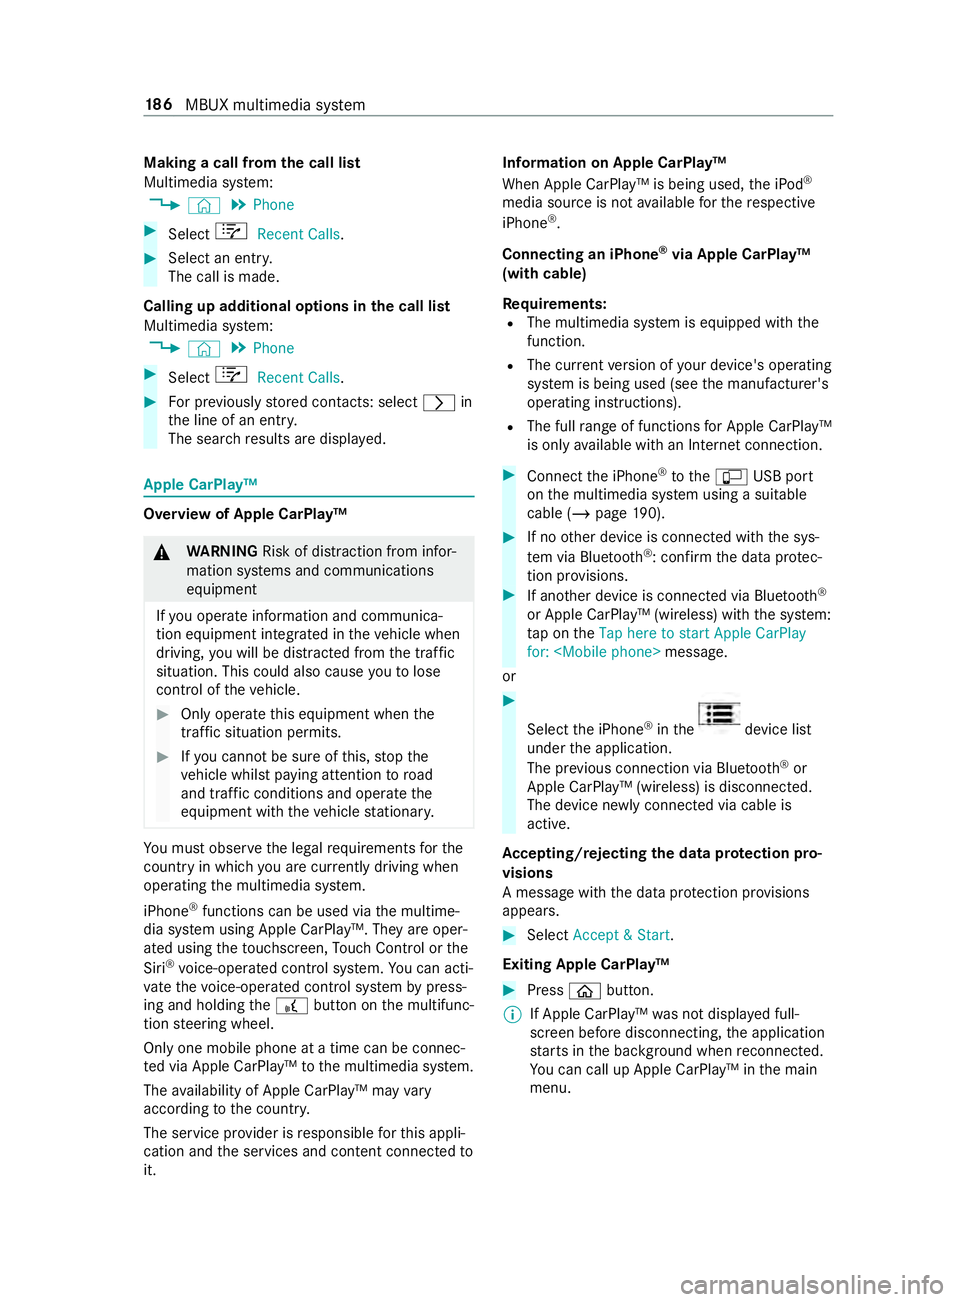
The sear chresults are displa yed. Apple CarPlay™
Overview of Apple CarPlay™
&
WARNING Risk of distraction from infor‐
mation sy stems and communications
equipment
If yo u operate information and communica‐
tion equipment integ rated in theve hicle when
driving, you will be distracted from the tra ffic
situation. This could also cause youto lose
control of theve hicle. #
Only operate this equipment when the
traf fic situation permits. #
Ifyo u cannot be sure of this, stop the
ve hicle whilst paying attention toroad
and traf fic conditions and ope rate the
equipment with theve hicle stationar y. Yo
u must obse rveth e legal requirements forthe
country in whi chyou are cur rently driving when
ope rating the multimedia sy stem.
iPhone ®
functions can be used via the multime‐
dia sy stem using Apple CarPlay™. They are oper‐
ated using theto uchsc reen, Touch Control or the
Siri ®
vo ice-operated control sy stem. You can acti‐
va te thevo ice-opera ted control sy stem bypress‐
ing and holding the£ button on the multifunc‐
tion steering wheel.
Only one mobile phone at a time can be connec‐
te d via Apple CarPlay™ tothe multimedia sy stem.
The availability of Apple CarPlay™ may vary
according tothe count ry.
The service pr ovider is responsible forth is appli‐
cation and the services and content connected to
it. Information on Apple CarPlay™
When Apple CarPlay™ is being used,
the iPod ®
media source is not available forth ere spective
iPhone ®
.
Connecting an iPhone ®
via Apple CarPlay™
(with cable)
Re quirements:
R The multimedia sy stem is equipped with the
function.
R The cur rent version of your device's operating
sy stem is being used (see the manufacturer's
operating instructions).
R The full range of functions for Apple CarPlay™
is only available with an In tern et connection. #
Connect the iPhone ®
to the00C2 USB port
on the multimedia sy stem using a suitable
cable (/ page190). #
Ifno other device is connected with the sys‐
te m via Blue tooth®
: confirm the data pr otec‐
tion pr ovisions. #
If ano ther device is connected via Blue tooth®
or Apple CarPlay™ (wireless) with the sy stem:
ta p on theTap here to start Apple CarPlay
for:
or #
Select the iPhone ®
in the device list
under the application.
The pr evious connection via Blue tooth®
or
Apple CarPlay™ (wireless) is disconnected.
The device newly connected via cable is
active.
Ac cepting/rejecting the data pr otection pro‐
visions
A message with the data pr otection pr ovisions
appears. #
Select Accept & Start.
Exiting Apple CarPlay™ #
Press 00E2button.
% If Apple CarPlay™
was not displa yed full-
screen before disconnecting, the application
st arts in the bac kground when reconnected.
Yo u can call up Apple CarPlay™ in the main
menu. 18 6
MBUX multimedia sy stem