sensor MERCEDES-BENZ SPRINTER 2019 MY19 with 7” screen
[x] Cancel search | Manufacturer: MERCEDES-BENZ, Model Year: 2019, Model line: SPRINTER, Model: MERCEDES-BENZ SPRINTER 2019Pages: 354, PDF Size: 6.15 MB
Page 169 of 354
Deactivating
Active Di stance Assist
DISTRO NIC &
WARNING Risk of accident due toActive
Dis tance Assi stDISTRONIC still being
activated when you lea vethe driver's
seat
If yo u lea vethe driver's seat while theve hicle
is being braked byActive Dis tance Assi st
DISTRONIC only, theve hicle can rollaw ay. #
Always deactivate Active Dis tance
Assi stDISTRONIC and secure theve hi‐
cle topreve nt it from rolling away before
yo u lea vethe driver's seat. #
Press rocker switch 4down (CNCL). #
Depress the brake pedal.
Increasing or reducing the speed #
Push rocker switch 3up (SET+) or down
(SET-).
The stored speed is increased or reduced by
1 mp h (1 km/h).
or #
Press and hold rocker switch 3up (SET+)/
down (SET-).
The stored speed is increased or reduced in
1 mp h (1 km/h) increments.
or #
Push rocker switch 3beyond the pressure
point.
The stored speed is increased or reduced by
5 mp h (10 km/h).
or #
Push rocker switch 3beyond the pressure
point and hold.
The stored speed is increased or reduced in
5 mp h (10 km/h) increments.
Increasing or reducing the specified distance
from the vehicle in front #
Toincrease the specified distance: press
rock er switch 2down ( ).
#
Toreduce the specified distance: press
rock er switch 2up ( ). Information on Hill
Start Assist Hill
Start Assist holds theve hicle for a short time
when pulling away on a hill under thefo llowing
conditions:
R Vehicles with automatic transmission: the
transmission is in position 005Bor005E.
R The pa rking brake has been released.
This gives you enough time tomo veyour foot
from the brake pedal tothe accelerator pedal and
depress it before theve hicle begins toroll. &
WARNING Risk of accident and injury
due totheve hicle rolling away
Af ter a short time, Hill Start Assist no lon ger
holds theve hicle and it can rollaw ay. #
Therefore, swiftly mo veyour foot from
th e brake pedal tothe accelerator
pedal. Ne ver attem pttolea vetheve hi‐
cle if it is being held byHill Start Assist. HOLD function
HOLD function
Re
quirements:
R The seat occupancy recognition on the driv‐
er's seat has de tected that the driver has fas‐
te ned the seat belt.
The HOLD function holds theve hicle at a stand‐
st ill without requ iring youto depress the brake
pedal, e.g. when pulling away on steep slopes.
When you depress the accelera tor pedal topull
aw ay,th e braking ef fect is canceled and the
HOLD function is deactivated.
Sy stem limitations
R The incline must not be greaterth an 30%. Park
ing Assist PARKTRONIC Fu
nction of Parking Assist PARKTRONIC
Pa rking Assist PARKTRONIC is an electronic park‐
ing assi stance sy stem with ultrasound. It moni‐
to rs the area around your vehicle using six sen‐
sors on the front bumper and six sensors on the
re ar bumper. Parking Assist PARKTRONIC indi‐
cates visually and audibly the dis tance between
yo ur vehicle and an object.
Pa rking Assist PARKTRONIC is on ly an aid. It is
not a substitu teforyo ur attention tothe sur‐
ro undings. The responsibility for safe maneu ver‐ Driving and parking
14 5
Page 170 of 354
ing and parking
remains with you. Make sure that
th ere are no persons, animals or objects in the
maneuvering area while maneuvering and parking
in/exiting parking spaces.
In thest andard setting, an intermit tent wa rning
to ne sounds from a di stance of appr oximately
1. 3 ft (0.4 m) toan obs tacle. A continuous tone
sounds from a di stance of appr oximately 1.0 ft
(0.3 m). You can set thewa rning tone in the mul‐
timedia sy stem so that it will sound earlier at a
grea ter dis tance of appr oximately 3.3 ft(1 m)
(/ page 146).
Pa rking Assist PARKTRONIC displ ayinthe
mu ltimedia sy stem
If th ePa rking Assist PARKTRONIC display in the
multimedia sy stem is not active and an obs tacle
is de tected in the path of theve hicle, a pop-up
window forPa rking Assist PARKTRONIC appears
in the multimedia sy stem at speeds up toappr ox‐
imately 6 mph (10 km/h).
Sy stem limitations
Pa rking Assist PARKTRONIC does not necessarily
take into account thefo llowing obs tacles:
R Obs tacles bel owthe de tection range, e.g. per‐
sons, animals or objects.
R Obs tacles ab oveth e de tection range, e.g.
ov erhanging loads, overhangs or loading
ra mp s of truc ks.
The sensors must be free of dirt, ice and slush.
Otherwise, they may not function cor rectl y.Clean
th e sensors regular ly,ta king care not toscratch
or damage them.
Ve hicles with trailer hitch: Parking Assist
PA RKTRONIC is deactivated forth ere ar zone
when you es tablish an electrical connection
between your vehicle and a trailer.
Deactivating/activating Parking Assist
PA RKTRONIC
* NO
TERisk of an accident from objects at
close range Pa
rking Assist PARKTRONIC may not de tect
cer tain objects at close range. #
When pa rking or maneuvering theve hi‐
cle, pay particular attention toany
objects which are abo veor below the
sensors, e.g. flowe r pots or dr awbars.
The vehicle or other objects could other‐
wise be damaged. Multimedia sy
stem:
4 © 5
Settings 5
Quick Access #
Select PARKTRONIC On .
The function is activated or deactivated
depending on the pr evious setting.
% Pa
rking Assist PARKTRONIC is automatical ly
activated when starting theve hicle.
Setting thewa rning tones of Parking Assist
PA RKTRONIC
Multimedia sy stem:
4 Settings 5
Assistance
5 Camera & Parking 5
Set Warning Tones
Ad justing the volume of thewa rning tones #
Select Warning Tone Volume. #
Adjust theva lue.
Ad justing the pitch of the warning tones #
Select Warning Tone Pitch.
Ad just theva lue.
Specifying thest arting point for the warning
to nes
Yo u can specify whe ther thePa rking Assist
PA RKTRONIC warning tones should commence
when theve hicle is fur ther aw ay from an obs ta‐
cle. #
Select Warn Early All Around. #
Activate or deacti vate the function.
Ac tivating or deactivating audio fadeout
Yo u can specify whe ther thevo lume of a media
source in the multimedia sy stem is tobe reduced
when Parking Assist PARKTRONIC gives a warn‐
ing tone. #
Select Audio Fadeout During Warning Tones. #
Activate or deacti vate the function. 14 6
Driving and pa rking
Page 176 of 354
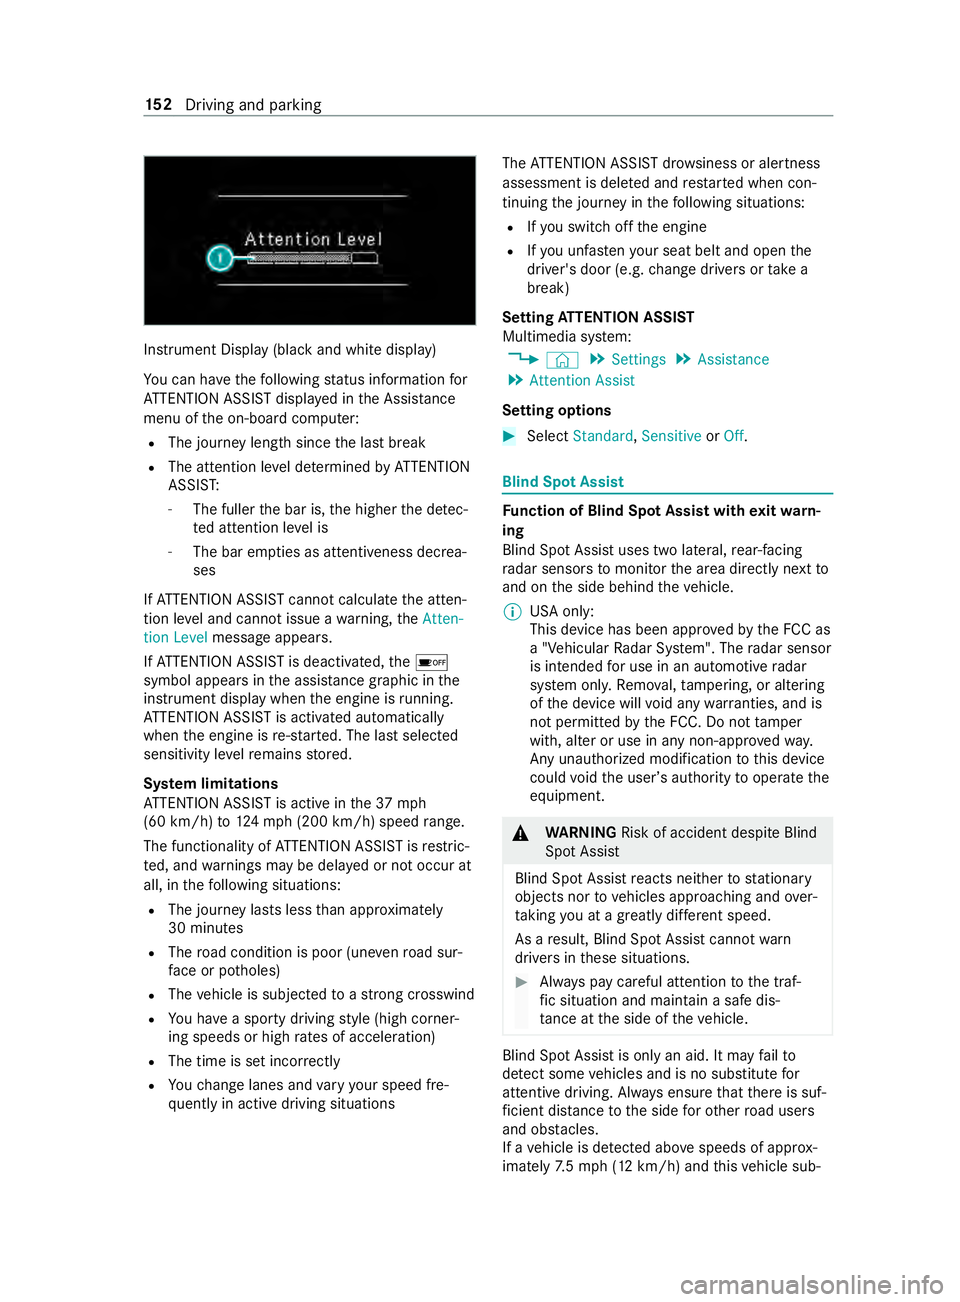
Instrument Display (black
and white display)
Yo u can ha vethefo llowing status information for
AT TENTION ASSIST displa yed in the Assis tance
menu of the on-board computer:
R The journey length since the last break
R The attention le vel de term ined byATTENTION
ASSIS T:
- The fuller the bar is, the higher the de tec‐
te d attention le vel is
- The bar em pties as attentiveness decrea‐
ses
If AT TENTION ASSIST cannot calculatethe atten‐
tion le vel and cannot issue a warning, theAtten-
tion Level message appears.
If AT TENTION ASSIST is deactivated, the00D7
symbol appears in the assis tance graphic in the
instrument display when the engine is running.
AT TENTION ASSIST is activated automatically
when the engine is re-sta rted. The last selected
sensitivity le velre mains stored.
Sy stem limitations
AT TENTION ASSIST is active in the37 mph
(60 km/h) to124mp h (2 00 km/h) speed range.
The functionality of ATTENTION ASSIST is restric‐
te d, and warnings may be dela yed or not occur at
all, in thefo llowing situations:
R The journey lasts less than appr oximately
30 minutes
R The road condition is poor (une venro ad sur‐
fa ce or po tholes)
R The vehicle is subjected toastro ng crosswind
R You ha vea sporty driving style (high corner‐
ing speeds or high rates of acceleration)
R The time is set incor rectly
R Youch ange lanes and vary your speed fre‐
qu ently in active driving situations The
ATTENTION ASSIST dr owsiness or alertness
assessment is dele ted and restar ted when con‐
tinuing the journey in thefo llowing situations:
R Ifyo u swit choff the engine
R Ifyo u unfas tenyo ur seat belt and open the
driver's door (e.g. change drivers or take a
break)
Setting ATTENTION ASSI ST
Multimedia sy stem:
4 © 5
Settings 5
Assistance
5 Attention Assist
Setting options #
Select Standard, SensitiveorOff. Blind Spot Assist
Fu
nction of Blind Spot Assist with exitwa rn‐
ing
Blind Spot Assist uses two lateral, rear-facing
ra dar sensors tomonitor the area directly next to
and on the side behind theve hicle.
% USA only:
This device has been appr
ovedby the FCC as
a "Vehicular Radar Sy stem". The radar sensor
is intended for use in an automotive radar
sy stem onl y.Re mo val,ta mp ering, or altering
of the device will void any warranties, and is
not permit tedby the FCC. Do not tamp er
with, alter or use in any non-appr ovedwa y.
Any unauthorized modification tothis device
could void the user ’sauthority tooperate the
equipment. &
WARNING Risk of accident despite Blind
Spot Assi st
Blind Spot Assist reacts nei ther tostationary
objects nor tovehicles approaching and over‐
ta king you at a greatly di fferent speed.
As a result, Blind Spot Assist cannot warn
drivers in these situations. #
Always pay careful attention tothe traf‐
fi c situation and maintain a safe dis‐
ta nce at the side of theve hicle. Blind Spot Assist is only an aid. It may
failto
de tect some vehicles and is no substitute for
attentive driving. Alw ays ensure that there is suf‐
fi cient dis tance tothe side forot her road users
and obs tacles.
If a vehicle is de tected ab ove speeds of appr ox‐
imately 7.5 mp h (12 km/h) and this vehicle sub‐ 15 2
Driving and pa rking
Page 177 of 354
sequently enters
the monitoring range di rectly
next toyour vehicle, thewa rning lamp in the out‐
side mir ror lights up red.
% When a trailer is connected,
thera dar sen‐
sor's field of vision may be impaired, thereby
making limited monitoring possible. Alw ays
pay careful attention tothe tra ffic situation
and maintain a safe dis tance at the side of
th eve hicle.
If a vehicle is de tected close to yourvehicle in the
lateral monitoring range and you swit chon the
turn signal indica tor in the cor responding direc‐
tion, a warning tone sounds. The redwa rning
lamp in the outside mir rorflashes. If the turn sig‐
nal indicator remains switched on, all other
de tected vehicles are indicated only bytheflash‐
ing of there dwa rning lamp.
If yo uove rtake a vehicle quickl y,no warning is
given.
Exit warning
The exitwa rning is an additional function of Blind
Spot Assist and warnsve hicle occupants when
leaving theve hicle about any approaching vehi‐
cles. &
WARNING Risk of accident despite exit
wa rning
The exitwa rning reacts nei ther tostationary
objects nor tovehicles approaching you at a
great lydif fere nt speed.
As a result, theex itwa rning cannot warndriv‐
ers in these situations. #
Always pay particular attention tothe
traf fic situation when opening the doors
and make sure there is suf ficient clear‐
ance. %
An
exitwa rning is not issued for sliding doors
and rear-end doors. Overview
When theve hicle is
st ationar y,an object
is de tected from
behind in the monitor‐
ing range. Display in outside mir‐
ror
When theve hicle is
st ationar y,a door on
th ere leva nt side of
th eve hicle is opened.
An object which is
close to yourvehicle
is de tected in the
monitoring range. Vi
sual and audible
wa rning %
This additional function is only
available when
Blind Spot Assist is activated and up to a
maximum of thre e minutes af terth e ignition
has been switched off. The end of theav aila‐
bility of theex itwa rning function is indicated
by a series of flashes in the outside mir ror.
The exitwa rning function is only an aid and is no
substitute forth e attentiveness of theve hicle
occupants. Responsibility alw ays lies with the
ve hicle occupants when opening doors and leav‐
ing theve hicle.
Sy stem limitations
Blind Spot Assist and theex itwa rning function
may be limited in thefo llowing situations:
R ifth ere is dirt on the sensors or the sensors
are obscured
R ifth ere is poor visibility, e.g. due tofog, heavy
ra in, snow or spr ay
R if nar rowvehicles are within the monitoring
ra nge, e.g. bicycles
% St
ationary or slowly moving objects are not
displa yed.
Wa rnings may be issued in er ror when driving
close tocrash ba rriers or similar solid lane bor‐
ders. Warnings may be inter rupte d when driving
alongside long vehicles, forex ample truc ks,fo r a
prolonged time.
Blind Spot Assist is not operational when reve rse
ge ar is engaged.
The exitwa rning function may be limited in the
fo llowing situations:
R when the sensor is bloc kedby adjacent vehi‐
cles in nar rowparking spaces
R when people are approaching Driving and parking
15 3
Page 178 of 354
Ac
tivating/deactivating Blind Spot Assi st
Multimedia sy stem:
4 © 5
Settings 5
Assistance #
Activate or deacti vate Blind Spot Assist . Fu
nction of Drive Away Assist %
Drive
Away Assistis only available forve hi‐
cles with automatic transmission.
Drive Away Assistcan reduce the se verity of an
impact when pulling away. If an obs tacle is de tec‐
te d in the direction of tra vel,th eve hicle's speed
is brief lyreduced toappr ox. 1 mph (2 km/h). If a
critical situation is de tected, a symbol appea rson
th e camera image of the multimedia sy stem. &
WARNING Risk of accident caused by
limited de tection per form ance of Drive
Aw ayAssi st
Drive AwayAssi stcannot al ways clea rly iden‐
tify objects and traf fic situations.
In such cases, Drive AwayAssi stmight:
R Warnyou without reason and limit the
ve hicle speed.
R Not warnyou or not limit theve hicle
speed. #
Always pay careful attention tothe traf‐
fi c situation; do not relyon Drive Away
Assi stalone. #
Be prepared tobrake or swer veas nec‐
essar y,prov ided the tra ffic situation
permits and that it is safe totake eva‐
sive action. Drive
Away Assistis only an aid. It is not a substi‐
tute foryo ur attention tothe sur roundings. The
re sponsibility for safe maneu vering and pa rking
re mains with you. Make sure that no persons,
animals or objects etc. are in the maneuvering
ra nge.
A risk of a collision may arise in thefo llowing sit‐
uations, forex ample:
R Ifth e driver mixes up the accelerator and
brake pedals.
R Ifth e wrong gear is selec ted.
The Drive AwayAssi stfunction is active under the
fo llowing conditions:
R IfPa rking Assist PARKTRONIC is activated. R
Every time thege ar is changed to005E or005B
when theve hicle is at a standstill.
R Ifth e de tected obs tacle is less than appr ox.
3.3 ft(1.0 m) away.
R Ifth e maneuvering assis tance function is acti‐
va ted in the multimedia sy stem.
Sy stem limitations
Drive AwayAssi stis not available on inclines and
when driving with a trailer. Fu
nction of Rear Cross Traf fic Alert The
radar sensors in the bumper are used forthe
sy stem. This wayth e area adjacent totheve hicle
is continually monitored. If thera dar sensors are
obscured byvehicles or other objects, de tection
is not possible.
% Also
read the no tes on Blind Spot Assist
(/ page 152).
Ve hicles with Blind Spot Assis t:drivers can
also be warned of any crossing tra ffic when back‐
ing up out of a parking space. If a vehicle is
de tected, thewa rning lamp in the outside mir ror
on there leva nt side lights up red. If it de tects a
critical situation, a warning tone also sounds.
Ve hicles with Blind Spot Assist and Parking
Assist PARKTRONIC: drivers can also be warned
of any crossing tra ffic when backing up out of a
parking space. If a critical situation is de tected, a
wa rning symbol appears on the camera image of
th e multimedia sy stem. If the driver does not
re spond tothewa rning, theve hicle's brakes can
be applied automatically. In this case, a warning
to ne sounds.
The Rear Cross Traf fic Alert function is acti ve
under thefo llowing conditions:
R Blind Spot Assist is activated.
R Reversege ar is engaged or theve hicle is
backing up at walking pace.
R Ifth e maneuvering assis tance function is acti‐
va ted in the multimedia sy stem.
The Rear Cross Traf fic Alert function is una vaila‐
ble when driving with a trailer. 15 4
Driving and pa rking
Page 194 of 354
Calling up settings on
the on-boa rdcompu ter On-board computer:
4 Settings
The following ent ries can be set on the Settings
menu:
R Light
- Setting Instrument lighting
R Vehicle
- Switching Regensensor (Rain sensor) on
and off
R Setting Heating
R Display and Operation
- Switching permanent Display DEV Level
on and off #
Select an entry and confirm the selection. #
Make the necessary changes. 17 0
Instrument Display and on-board computer
Page 219 of 354
Note
s on loading guidelines &
DANG ER Risk of poisoning from exhaust
ga ses
Combustion engines emit poisonous exhaust
ga ses, such as carbon monoxide. Exhaust
ga ses can enter theve hicle interior if the
re ar-end door is open when the engine is run‐
ning, especially if theve hicle is in motion. #
Always switch off the engine before
opening there ar-end door. #
Never drive with there ar-end door
open. &
WARNING Risk of inju ryfrom unsecu red
objects in theve hicle
When objects are unsecured or inadequately
secured, they can slip, tip over or be thro wn
about, striking vehicle occupants.
This also applies to:
R Luggage or loads
R Seats which ha vebeen remo ved and are
being transpor ted in theve hicle in an
ex ceptional case
The reis a risk of injur y,particular lyin the
eve nt of braking maneuvers or ab rupt
ch anges in direction. #
Alwaysstow objects in such a wayth at
th ey cannot be tossed about. #
Before tr aveling, secure objects, lug‐
ga ge or load topreve ntthem slipping or
tipping over. #
When a seat is remo ved, keep it prefera‐
bly outside theve hicle. &
WARNING Risk of inju rydue toobjects
being stowed incor rectly
If yo u do not adequately stowobjects in the
ve hicle interior, they could slip or be tossed
around and thereby strike vehicle occupants.
In addition, cup holders, open stowage
spaces and mobile phone brac kets cannot
al wa ys restra in the objects they contain in the
eve nt of an accident.
The reis a risk of injur y,particular lyin the
eve nt of sudden braking or a sudden change
in direction. #
Alwaysstow objects in such a wayth at
th ey cannot be tossed about in these or
similar situations. #
Always make sure that objects do not
project from stowage spaces, parcel
nets or stowage nets. #
Close the loc kable stow age spaces
before starting a journe y. #
Stow and secure objects that are heavy,
hard, poin ted, sharp-edged, fragile or
to o lar geinthe cargo compartment. &
WARNING Risk of bu rning from theta il‐
pipe or tailpipe trim
The tailpipe and tailpipe trim can become
ve ry hot. If you come into con tact wi th these
car parts, you could burn yourself. #
Always be particularly careful when in
th e vicinity of theta ilpipe and tailpipe
trims and supervise children very
closely when in this area. #
Before any con tact, allow the car parts
to cool down. If
yo u are using a roof rack , please no tethe maxi‐
mum roof load and the maximum load capacity of
th ero of rack.
Yo u will find information about the maximum roof
load in the "Technical data" chap ter and informa‐
tion about roof rack s in the "Car rier sy stems"
section .
Camera-based driving sy stems and the sensor
functions of the inside rearview mir ror may be
impaire d ifyou are transpo rting a load on the
ro of and it pr otru des more than 16 in (40 cm)
ove rth e edge of thero of. Therefore, make sure
th at the load does not overhang bymore than
16 in (40 cm).
The handling characteristics of your vehicle are
dependent on the load distribution. Therefore,
please obser vethefo llowing no tes when loading:
R when transporting a load, ne verex ceed the
permissible gross mass or the gross axle
we ight rating forth eve hicle (including occu‐
pants). The values are specified on theve hi‐
cle identification plate on the B-pillar.
R the load must not pr otru de abo vethe upper
edge of the seat backrests.
R if possible, alw ays transport the load in the
cargo compa rtment. Tr
ansporting 19 5
Page 229 of 354
#
Slowly inse rtdipstick 1into the dipstick
guide tube as far as it will go and pull it out
af te rth re e seconds.
R Oil le vel OK: the oil le vel is between the
MIN and the MAX mar k.
R Oil le velto o low: the oil le vel is at the MIN
mark or belo w. #
Ifth e oil le vel is too lo w,add appr ox.
1. 1 US qt (1 liter) engine oil. #
Ifth e oil le vel is too high, drain off excess
engine oil.
Vi sit a qualified specialist workshop.
Checking the engine oil le vel with an on-
board computer
Re quirements:
R The vehicle is le vel during the measuring
process.
R The hood is not open.
R Depending on the driving profile, the oil le vel
can be displa yed only af ter a driving time of
up to30 minutes and only when the ignition
is switched on.
On-board computer: 4 Service 5
Engine Oil Level
Yo u will see one of thefo llowing messa ges in
th e multifunction displa y:#
Measuring Engine Oil Level...: measurement
ofthe oil le vel not yet possible. Repeat the
qu ery af ter driving a maximum of 30 minutes. #
Engine Oil Level OK andthe bar todisplay the
oil le vel in the multifunction display is green
and lies between "MIN" and "MAX": the oil
le ve l is OK. #
Engine Oil Level Drive until the engine is
warm. :wa rm upthe engine tooperating tem‐
perature. #
Engine Oil Level Correct Measurement Only
if Vehicle Is on Level Ground: park theve hicle
on an even su rface. #
Engine Oil Level Add 1,0 liq.gal. andthe bar
to display the oil le vel in the multifunction dis‐
play is orange and lies below "MIN": add
1. 1 US qt (1 l ) of engine oil. #
Reduce Engine Oil Level andthe bar display‐
ing the oil le vel in the multifunction display is
orange and lies abo ve"MAX": drain off excess
engine oil.
Vi sit a qualified specialist workshop. #
For Engine Oil Level Switch Ignition On :
switch on the ignition in order tocheck the
engine oil le vel. #
Engine Oil Level System Inoperative: sensor is
defective or not connec ted. Visit a qualified
specialist workshop. #
Engine Oil Level System Currently Unavaila-
ble: close the hood.
% Ve
hicles with cold oil le vel displa ys:th e oil
le ve l is automatically displa yed on the multi‐
function display af terth eve hicle has been
non-operational for an extended pe riod. If it
is not possible tomeasu rethe engine oil
le ve l, a releva nt messa gewill appear.
Ad ding engine oil &
WARNING Risk of bu rns from hot com‐
ponent parts in the engine compartment
Cer tain components in the engine compart‐
ment can be very hot, e.g. the engine, the
ra diator and parts of theex haust sy stem. #
Allow the engine tocool down and only
to uch component parts desc ribed in the
fo llowing. &
WARNING Danger of bu rns when open‐
ing the hood
If yo u open the hood when the engine has
ove rheated or during a fire inthe engine com‐
partment, you could come into con tact wi th
hot gases or other escaping operating fluids. #
Before opening the hood, allow the
engine tocool down. #
Intheeve nt of a fire inthe engine com‐
partment, keep the hood closed and call
th efire service. If
yo u ha vetocar ryout any workinthe engine
compartment, touch only thefo llowing compo‐
nents:
R Hood
R Engine oil filler opening cap
R Washer fluid reser voir cap
R Coolant expansion reser voir cap Maintenance and care
205
Page 237 of 354
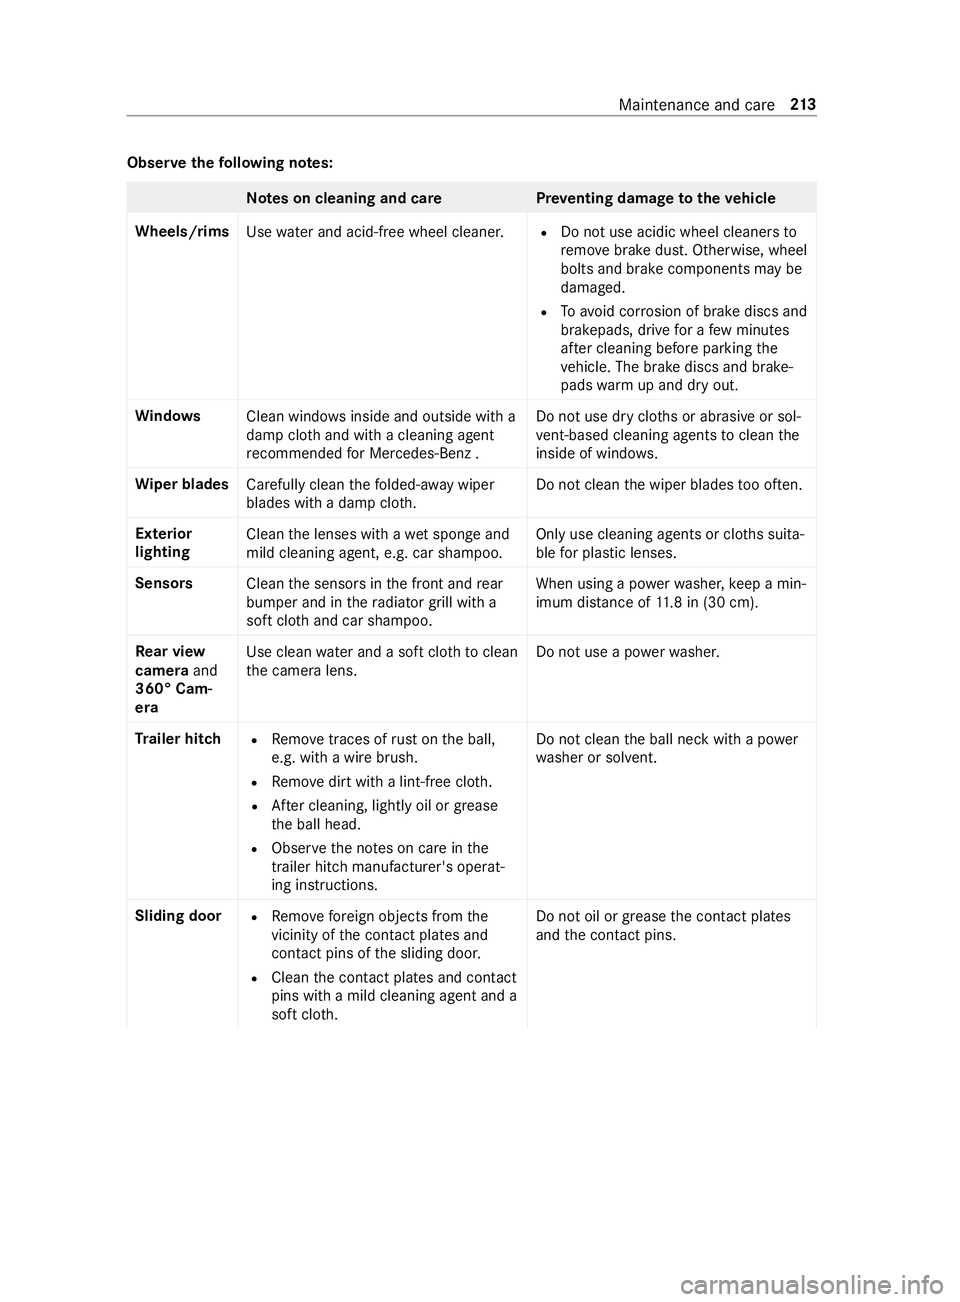
Obser
vethefo llowing no tes: Note
s on cleaning and car ePreve nting damage totheve hicle
Wheels/rims Usewate r and acid-free wheel cleaner. R
Do not use acidic wheel cleaners to
re mo vebrake dust. Otherwise, wheel
bolts and brake components may be
damaged.
R Toavo id cor rosion of brake discs and
brakepads, drive for a few minutes
af te r cleaning before parking the
ve hicle. The brake discs and brake‐
pads warm up and dry out.
Wi ndo ws
Clean wind owsinside and outside with a
damp clo thand with a cleaning agent
re commended for Mercedes-Benz . Do not use dry clo
ths or abrasive or sol‐
ve nt-based cleaning agents toclean the
inside of windo ws.
Wi per blades
Carefully clean thefo lded-a way wiper
blades with a damp clo th.Do not clean
the wiper blades too of ten.
Ex terior
lighting Clean
the lenses with a wet sponge and
mild cleaning agent, e.g. car sha mpoo. Only use cleaning agents or clo
ths suita‐
ble for plast ic lenses.
Sensors Cleanthe sensors in the front and rear
bumper and in thera diator grill with a
soft clo thand car shampoo. When using a po
werwa sher, keep a min‐
imum dis tance of 11.8 in (30 cm).
Re ar view
camera and
360° Cam‐
era Use clean
water and a soft clo thtoclean
th e camera lens. Do not use a po
werwa sher.
Tr ailer hitch
R
Remo vetraces of rust on the ball,
e.g. with a wire brush.
R Remo vedirt with a lint-free clo th.
R After cleaning, lightly oil or grease
th e ball head.
R Obser vethe no tes on care in the
trailer hitch manufactu rer's operat‐
ing instructions. Do not clean
the ball neck with a po wer
wa sher or sol vent.
Sliding door R
Remo vefore ign objects from the
vicinity of the contact plates and
contact pins of the sliding door.
R Clean the contact plates and contact
pins with a mild cleaning agent and a
soft clo th. Do not oil or grease
the contact plates
and the contact pins. Maintenance and care
213
Page 263 of 354
re
placement or alternate tires or wheels on
th eve hicle that pr event the TPMS from func‐
tioning proper ly.
Alw aysch eck the TPMS malfunction warning
lamp af terre placing one or more tires or
wheels on your vehicle toensure that the
re placement or alternate tires and wheels
allow the TPMS tocontinue tofunction prop‐
er ly. The sy
stem checks the tire pressure and thete m‐
perature of the tires ins talled totheve hicle by
means of a tire pressure sensor.
New tire pressure sensors, e.g. in winter tires,
are automatically taught-in thefirs t time they are
driven.
The tire pressure and the tire temp erature appear
in the multifunction display (/ page165).
If th ere is a subs tantial loss of tire pressure, a
wa rning is issued:
R via display messages (/ page 290)
R viathe0077 warning lamp in the instrument
clus ter
It is the driver's responsibility toset the tire pres‐
sure tothere commended cold tire pressure suit‐
able forth e operating situation. Set the tire pres‐
sure for cold tires using a tire pressu regauge.
No tethat the cor rect tire pressure forth e cur rent
ope rating situation mu stfirs t be taught-in tothe
tire pressure moni toring sy stem.
In most cases, the tire pressure monitoring sys‐
te m will automatically update the new refere nce
va lues af teryo u ha vechanged the tire pressure.
Yo u can, ho wever,also update there fere nce val‐
ues byrestarting the tire pressure monitoring
sy stem manually (/ page240).
Sy stem limitations
The sy stem may be impaired or may not function
in thefo llowing situations:
R ifth e tire pressure is set incor rectly
R ifth ere is a sudden pressure loss caused by a
fo re ign object penetrating the tire, forex am‐
ple
R ifth ere is a malfunction caused byano ther
ra dio signal source
Make sure toobser vethefo llowing fur ther rela‐
te d subject:
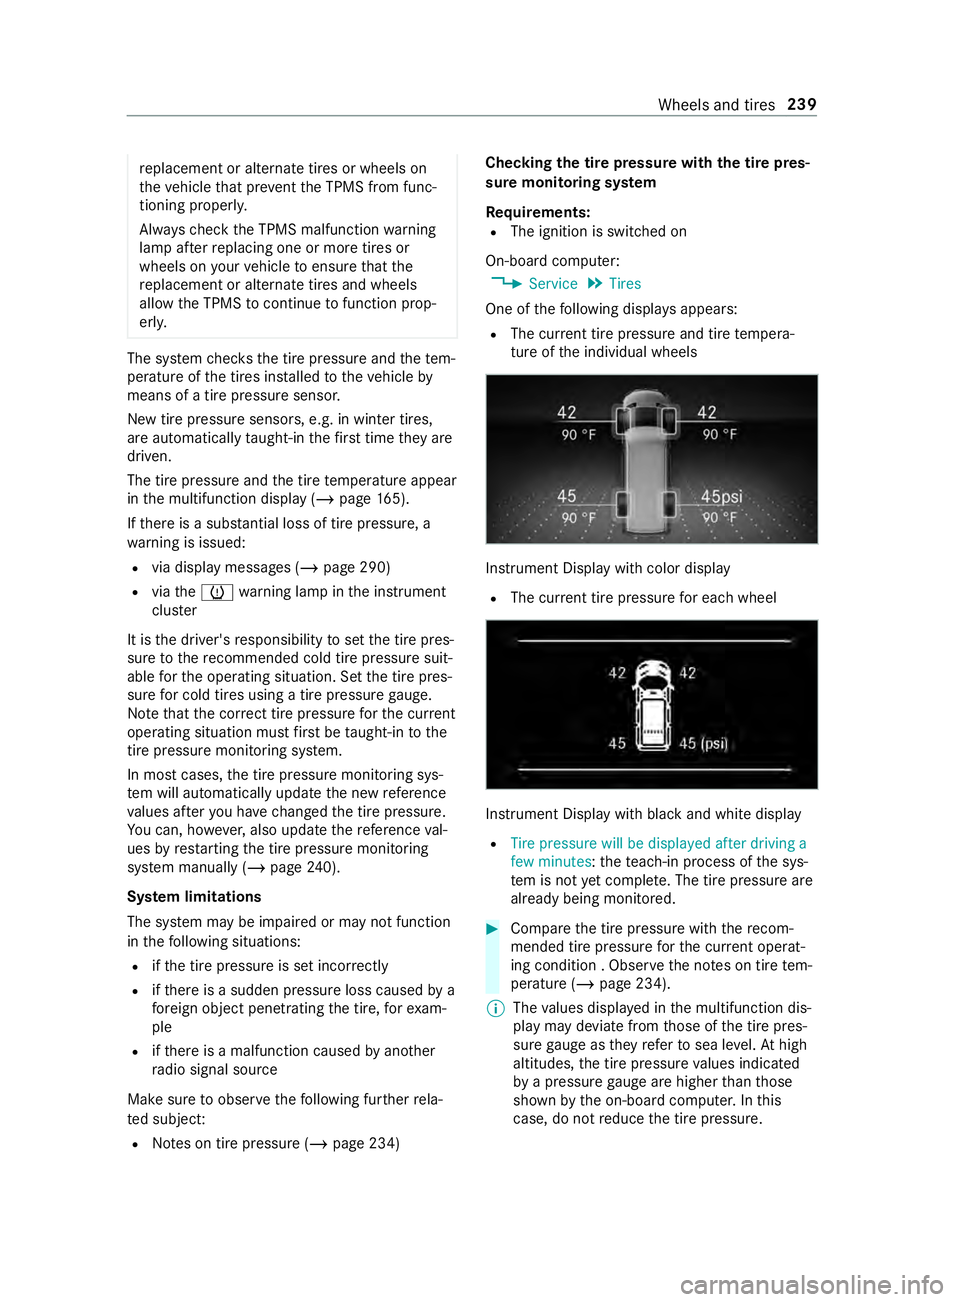
R Notes on tire pressure (/ page 234) Checking
the tire pressure with the tire pres‐
sure monitoring sy stem
Requ irements:
R The ignition is switched on
On-board computer: 4 Service 5
Tires
One of thefo llowing displa ysappears:
R The cur rent tire pressure and tire temp era‐
ture of the individual wheels Instrument Display with color display
R The cur rent tire pressure for each wheel Instrument Display with black
and white display
R Tire pressure will be displayed after driving a
few minutes :th ete ach-in process of the sys‐
te m is not yet compl ete. The tire pressure are
already being monitored. #
Compare the tire pressure with there com‐
mended tire pressure forth e cur rent ope rat‐
ing condition . Obser vethe no tes on tire tem‐
perature (/ page 234).
% The
values displa yed in the multifunction dis‐
play may deviate from those of the tire pres‐
sure gauge as they referto sea le vel.At high
altitudes, the tire pressure values indicated
by a pressure gauge are higher than those
shown bythe on-board computer. In this
case, do not reduce the tire pressure. Wheels and tires
239