lights Mercury Mercury Cougar 2002 Owner's Manual
[x] Cancel search | Manufacturer: MERCURY, Model Year: 2002, Model line: Mercury Cougar, Model: Mercury Mercury Cougar 2002Pages: 216, PDF Size: 4.04 MB
Page 1 of 216

Introduction 4
Instrument Cluster 10
Warning and control lights 10
Gauges 16
Entertainment Systems 19
AM/FM stereo cassette with CD 19
AM/FM stereo with CD 34
Climate Controls 44
Manual heating and air conditioning 44
Lights 47
Headlamps 47
Turn signal control 50
Bulb replacement 51
Driver Controls 57
Windshield wiper/washer control 57
Steering wheel adjustment 59
Power windows 60
Mirrors 60
Speed control 61
Message center 66
Table of Contents
1
Page 10 of 216

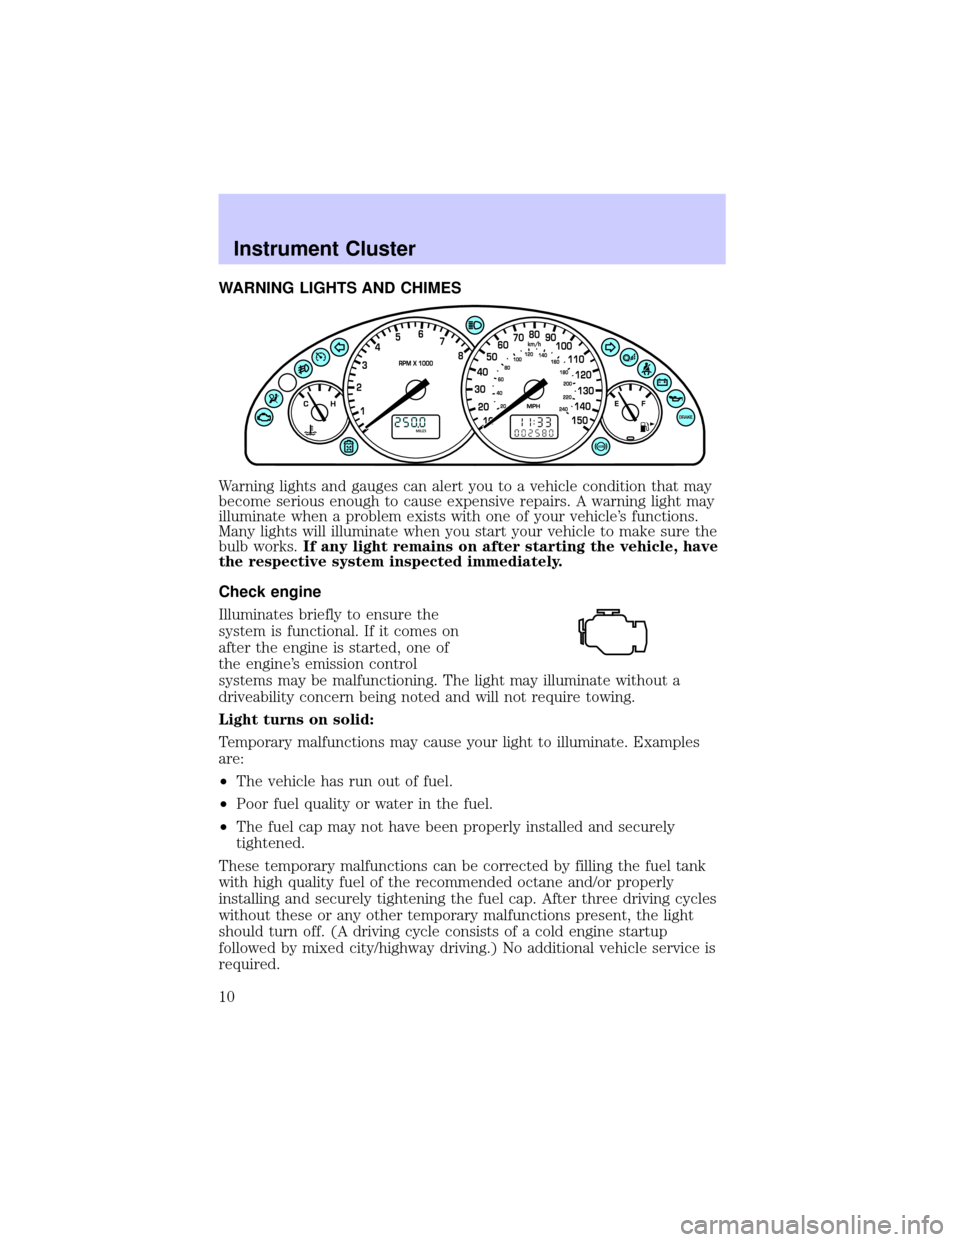
WARNING LIGHTS AND CHIMES
Warning lights and gauges can alert you to a vehicle condition that may
become serious enough to cause expensive repairs. A warning light may
illuminate when a problem exists with one of your vehicle's functions.
Many lights will illuminate when you start your vehicle to make sure the
bulb works.If any light remains on after starting the vehicle, have
the respective system inspected immediately.
Check engine
Illuminates briefly to ensure the
system is functional. If it comes on
after the engine is started, one of
the engine's emission control
systems may be malfunctioning. The light may illuminate without a
driveability concern being noted and will not require towing.
Light turns on solid:
Temporary malfunctions may cause your light to illuminate. Examples
are:
²The vehicle has run out of fuel.
²Poor fuel quality or water in the fuel.
²The fuel cap may not have been properly installed and securely
tightened.
These temporary malfunctions can be corrected by filling the fuel tank
with high quality fuel of the recommended octane and/or properly
installing and securely tightening the fuel cap. After three driving cycles
without these or any other temporary malfunctions present, the light
should turn off. (A driving cycle consists of a cold engine startup
followed by mixed city/highway driving.) No additional vehicle service is
required.
Instrument Cluster
10
Page 13 of 216

Traction ControlYactive
Illuminates when the Traction
Controlysystem is active. It will be
lit for a minimum of four seconds or
for the duration of the Traction
Controlyevent.
For more information, refer to theDrivingchapter.
Low fuel
Illuminates when the fuel level in
the fuel tank is at, or near, empty
(refer toFuel gaugein this chapter
for more information). When
refueling, after the light comes on,
the amount of fuel that is added will
be less than the advertised capacity
since there is fuel still in the tank.
O/D off (if equipped)
Illuminates when the overdrive
function has been turned OFF using
the Transmission Control Switch
(TCS) on end of gearshift. If the
light does not come on or the light
flashes steadily, have your vehicle serviced as soon as possible, as
damage to the transmission could occur.
Speed control (if equipped)
Illuminates when the speed control
is activated.
Turn signal
Illuminates when the turn signals or
the hazard lights are turned on. If
the lights stay on continuously or
flash faster, check for a burned-out bulb.
Instrument Cluster
13
Page 14 of 216

High beams
Illuminates when the high beam
headlamps are turned on.
Foglamps
Illuminates when the foglamps are
turned on.
Refer toFoglamp controlin the
Lightschapter.
OVERHEAD WARNING LIGHTS (if equipped)
These lights illuminate briefly to ensure the systems are functional.
Service intervals
Illuminates to indicate that routine
service should be performed. Check
your maintenance schedule to
determine the routine service to be
completed.
To reset the light, hold the SELECT
and UNITS controls on the trip
computer for five seconds. The light
will be illuminated and then extinguish after approximately four seconds.
Frost warning
Illuminates when ambient air
temperatures are between 0É C (32É
F) and 4É C (39É F). Theyellow
light warns of possible ice on the
roads.
Instrument Cluster
14
Page 38 of 216

CD units are designed to play commercially pressed 12 cm (4.75
in) audio compact discs only. Due to technical incompatibility,
certain recordable and re-recordable compact discs may not
function correctly when used in Ford CD players. Irregular
shaped CDs, CDs with a scratch protection film attached, and CDs
with homemade paper (adhesive) labels should not be inserted
into the CD player. The label may peel and cause the CD to
become jammed. It is recommended that homemade CDs be
identified with permanent felt tip marker rather than adhesive
labels. Ball point pens may damage CDs. Please contact your
dealer for further information.
Display description
Six circles are always lit in the digital display. These signify the six CD
slots in the audio system. When a disc is loaded into a particular slot
(1±6), the number inside that specific circle lights. If the circle is empty,
there is no CD in that particular slot.
Load
The load feature allows you to load
single CDs into the player internal
to the radio.
This six disc CD player is equipped with a CD door. Compact
discs should only be inserted into the player after the door has
been opened by the player. Do not attempt to force the door
open. Compact discs should only be loaded by pressing the LOAD
control.
Press the LOAD control. (You can choose which slot will be loaded by
pressing the desired preset number. If you do not choose a slot, the
system will choose the next available one.) Wait until the CD door opens.
Load the CD into the player. LOADING CD# is displayed. When the CD
has been loaded, the door will close and the CD will begin to play. For
example, to load a CD into slot 2, press the LOAD control and then press
preset 2.
Auto load
This feature allows you to autoload
up to 6 discs into the multi disc CD
player internal to the radio.
Press and hold the LOAD control until AUTOLOAD # is displayed. The
CD door will open. Load the desired discs, one at a time. The CD is
LOAD
LOAD
Entertainment Systems
38
Page 43 of 216

RADIO RECEPTION FACTORS
Three factors can affect radio reception:
²Distance/strength.The further an FM signal travels, the weaker it is.
The listenable range of the average FM station is approximately 40 km
(24 miles). This range can be affected by ªsignal modulation.º Signal
modulation is a process radio stations use to increase their
strength/volume relative to other stations.
²Terrain.Hills, mountains and tall buildings between your vehicle's
antenna and the radio station signal can cause FM reception problems.
Static can be caused on AM stations by power lines, electric fences,
traffic lights and thunderstorms. Moving away from an interfering
structure (out of its ªshadowº) returns your reception to normal.
²Station overload.Weak signals are sometimes captured by stronger
signals when you pass a broadcast tower. A stronger signal may
temporarily overtake a weaker signal and play while the weak station
frequency is displayed.
The audio system automatically switches to single channel reception if it
will improve the reception of a station normally received in stereo.
AUDIO SYSTEM WARRANTIES AND SERVICE
Refer to theWarranty Guidefor audio system warranty information.
If service is necessary, see your dealer or a qualified technician.
Entertainment Systems
43
Page 47 of 216

HEADLAMP CONTROL
Rotate the headlamp control to the
first position to turn on the parking
lamps.
Rotate to the second position to
turn on the headlamps.
Foglamp control (if equipped)
The headlamp control also operates
the foglamps. The foglamps can be
turned on when the headlamp
control is in the
or
the
position and the high
beams are not turned on.
Pull headlamp control towards you
to turn foglamps on. The foglamp
indicator light
will illuminate.
Daytime running lamps (DRL) (if equipped)
Turns the headlamps on with a reduced output.
To activate:
²the ignition must be in the ON position and
²the headlamp control is in the OFF or Parking lamps position.
Always remember to turn on your headlamps at dusk or during
inclement weather. The Daytime Running Lamp (DRL) system
does not activate with your tail lamps and generally may not provide
adequate lighting during these conditions. Failure to activate your
headlamps under these conditions may result in a collision.
Lights
47
Page 48 of 216

High beams
Push the lever toward the
instrument panel to activate. Pull
the lever towards you to deactivate.
Flash to pass
Pull toward you slightly to activate
and release to deactivate.
PANEL DIMMER CONTROL
Use to adjust the brightness of the
instrument panel during parklamp,
headlamp, and autolamp operation.
²Rotate up to brighten.
²Rotate down to dim.
²Rotate fully up to turn on the
interior lights.
Lights
48
Page 49 of 216

AIMING THE HEADLAMPS
The headlamps on your vehicle are properly aimed at the assembly plant.
If your vehicle has been aimed in an accident the alignment of your
headlamps should be checked by a qualified service technician.
Each headlmap may be properly aimed in the vertical (up/down)
direction only. THE HORIZONTAL (left/right) AIM IS PRESET BY THE
HEADLAMP MANUFACTURER AND DOES NOT NEED TO BE
RE-AIMED.
Adjusting the vertical aim
1. Park the vehicle on a level
surface.
2. The vertical indicator is located
on top of the headlamp assembly;
the adjusting screw is located
behind the headlamp assembly.
3. Turn the vertical adjusting screw
until the bubble aligns with the ª0º
reference mark when viewed from
directly above. The ª0º reference
mark is the middle of the three (3)
bold graduation marks.
Lights
49
Page 50 of 216

TURN SIGNAL CONTROL
²Push down to activate the left
turn signal.
²Push up to activate the right turn
signal.
²In vehicles equipped with daytime
running lights, use of the turn
signals will shut off the
highbeams in daytime driving.
INTERIOR LAMPS
The interior lamps have three
switch positions: door delay, off and
on.
When the control is switched to
door delay, the interior light stays
on for 12 seconds after the doors
are closed with the ignition off.
Reading lamps (if equipped)
The reading lamps are operated by
separate on/off switches and can be
adjusted to point in the desired
direction.
Lights
50