wheel Mercury Mountaineer 1997 s User Guide
[x] Cancel search | Manufacturer: MERCURY, Model Year: 1997, Model line: Mountaineer, Model: Mercury Mountaineer 1997Pages: 197, PDF Size: 2.08 MB
Page 102 of 197
Do not drive your vehicle
until you verify that the
brakelamps are working.
If your vehicle gets stuck in the
mud or snow it may be rocked out
of the spot. To rock the vehicle
out, shift between forward and
reverse gears in a steady rhythm.
Press lightly on the accelerator in
each gear. Do not rock the vehicle
for more than a few minutes,
because it could damage the
vehicle.
Do not spin the wheels at
over 55 km/h (35 mph).
The tires may fail and injure a
passenger or bystander.
ALL-WHEEL DRIVE (AWD)
SYSTEM (IF EQUIPPED)
Your vehicle is equipped with a
full-time All-Wheel Drive (AWD)
transfer case. Power is constantly
supplied to all four wheels through
a transfer case. The AWD system is
full-time and has no external
controls.
The AWD transfer case utilizes a
viscous clutch that distributes
torque to the front and rear
differentials (approximately 35%
front and 65% rear). The viscous
clutch is filled with a high viscosity
fluid; seeLubricant specifications
for more information.
All utility-type and AWD vehicles
have special design and equipment
Driving
102
Page 103 of 197

features to make them capable of
performing in a wide variety of
off-road applications. Specific
design characteristics give them
higher centers of gravity than
ordinary passenger cars.
Utility and four-wheel
drive vehicles are NOT
designed for cornering at speeds
as high as passenger cars any
more than low-slung sports cars
are designed to perform
satisfactorily under off-road
conditions. Avoid sharp turns or
abrupt maneuvers in these
vehicles.
DRIVING OFF ROAD WITH ALL-
WHEEL DRIVE (AWD)
Your vehicle is specially equipped
for driving on sand, snow, mud,
and rough terrain and has
operating characteristics that are
somewhat different from
conventional vehicles, both on and
off road. The following information
will help you learn to properly use
AWD.
When using AWD, maintain
steering wheel control at all times,
especially in rough terrain. Since
sudden changes in terrain can
result in abrupt steering wheel
motion, make sure you grip the
steering wheel from the outside.
Do not grip the spokes.
Drive cautiously to avoid vehicle
damage from concealed objects
such as rocks and stumps. You
Driving
103
Page 104 of 197

should either know the terrain or
examine maps of the area before
driving. Map out your route before
driving in the area. For more
information on driving off-road,
readFour-Wheelingin your
owner's portfolio.
Sand
When driving over sand, try to
keep all four wheels on the most
solid area of the trail. Do not
reduce the tire pressures but shift
to a lower gear and drive steadily
through the terrain. Apply the
accelerator slowly and avoid
spinning the wheels.
Mud and water
If you must drive through high
water, drive slowly. Traction or
brake capability may be limited.
When driving through water,
determine the depth; avoid water
higher than the bottom of the hubs
(if possible) and proceed slowly. If
the ignition system gets wet, the
vehicle may stall.
Once through water, always try the
brakes. Wet brakes do not stop the
vehicle as effectively as dry brakes.
Drying can be improved by moving
your vehicle slowly while applying
light pressure on the brake pedal.
After driving through mud, clean
off residue stuck to rotating
driveshafts and tires. Excess mud
stuck on tires and rotating
driveshafts causes an imbalance
Driving
104
Page 106 of 197

heavy load. If vehicle speed drops
more than 15 - 25 km/h (8 - 14
mph) the speed control will cancel
automatically. Resume speed with
accelerator pedal.
If speed control cancels after
climbing the hill, reset speed by
pressing and holding the SET
ACCEL button or returning to
previous speed by pressing the
RESUME button (to resume
speeds over 50 km/h [30 mph]).
Automatic transmissions may shift
frequently while driving up on
steep grades. Eliminate frequent
shifting by shifting out of
D(Overdrive) into D (Drive).
Driving on snow and ice
An AWD vehicle has advantages
over two-wheel drive vehicles in
snow and ice but can skid like any
other vehicle.
Avoid sudden applications of
power and quick changes of
direction on snow and ice. Apply
the accelerator slowly and steadily
when starting from a full stop.
When braking, apply the brakes as
you normally would. In order to
allow the anti-lock brake system
(ABS) to operate properly, keep
steady pressure on the brake
pedal.
Allow more stopping distance and
drive slower than usual. Consider
using one of the lower gears.
If the vehicle is stuck, shift the
transmission in a steady motion
Driving
106
Page 107 of 197
between forward and reverse
gears. DO NOT rock the vehicle for
more than a few minutes. The
transmission and tires may be
damaged or the engine can
overheat.
Do not spin the wheels at
over 55 km/h (35 mph).
The tires may fail and injure a
passenger or bystander.
VEHICLE LOADING
It is extremely dangerous
to ride in a cargo area,
inside or outside of a vehicle. In
a collision, people riding in these
areas are more likely to be
seriously injured or killed.
Do not allow people to
ride in any area of your
vehicle that is not equipped with
seats and safety belts.
Be sure everyone in your
vehicle is in a seat and
using a safety belt properly.
Before loading a vehicle, familiarize
yourself with the following terms:
²Base Curb Weight: Weight of the
vehicle including any standard
equipment, fluids, lubricants,
etc. It does not include
passengers or aftermarket
equipment.
Driving
107
Page 112 of 197

below the maximum shown under
maximum trailer weight on the
chart.
Trailer Towing Table
4R70W Automatic Transmission
EngineRear
Axle
RatioMaximum
GCWR kg (lb)
1
Maximum
Trailer Weight
kg (lb)
2
Maximum
Frontal Area of
Trailer ft
2-Wheel Drive
5.0L 3.73 4,990 (11,000) 3,039 (6,700) 50
All-Wheel Drive
5.0L 3.73 4,990 (11,000) 2,944 (6,500) 50
1For high altitude operation, reduce GCWR by 2% per 300 meters
(1,000 ft) elevation.
2To determine the maximum trailer weight designed for your particular
vehicle as equipped, follow the sectionCalculating the load your
vehicle can carry/towearlier in this section.
Preparing to tow
Use the proper equipment for
towing a trailer, and make sure it
is properly attached to your
vehicle. See your dealer or a
reliable trailer dealer if you require
assistance.
Hitches
Do not use or install hitches that
clamp onto the bumper or to the
axle. Underbody hitches are
acceptable if installed properly.
The rear bumper has an integral
hitch and only requires a ball with
a 3/4 inch shank diameter. The
Driving
112
Page 115 of 197

Servicing while towing
If you tow a trailer for long
distances, your vehicle will require
more frequent service intervals.
Refer to theService Guidefor
more information.
Trailer towing
²Practice turning, stopping and
backing in an area before
starting on a trip to get the feel
of the vehicle/trailer
combination. When turning,
drive slightly beyond the normal
turning point so the trailer
wheels will clear curbs and
other obstacles.
²Allow more room for stopping
with a trailer attached.
²The trailer tongue weight should
be 10-15% of the loaded trailer
weight for a Class I or II rear
bumper hitch.
²After you have travelled about
80 km (50 miles), thoroughly
check your hitch, electrical
connections and trailer wheel
lug nuts.
²When stopped in traffic for long
periods of time in hot weather,
place the gearshift in P (Park)
to increase idle speed. This aids
engine cooling and air
conditioner efficiency.
²Vehicles with trailers should not
be parked on a grade. If you
must park on a grade, place
wheel chocks under the trailer's
wheels.
Driving
115
Page 116 of 197
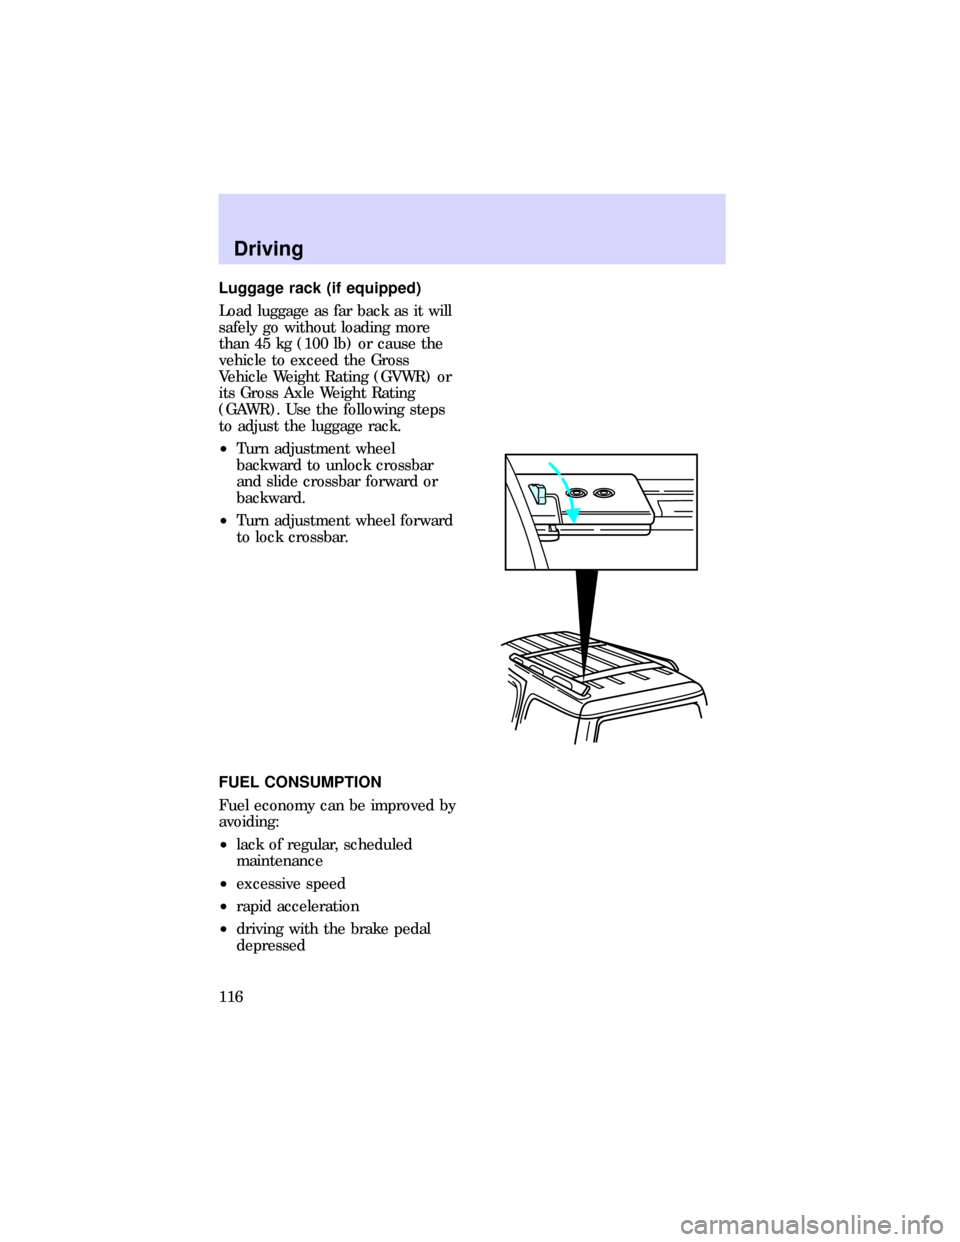
Luggage rack (if equipped)
Load luggage as far back as it will
safely go without loading more
than 45 kg (100 lb) or cause the
vehicle to exceed the Gross
Vehicle Weight Rating (GVWR) or
its Gross Axle Weight Rating
(GAWR). Use the following steps
to adjust the luggage rack.
²Turn adjustment wheel
backward to unlock crossbar
and slide crossbar forward or
backward.
²Turn adjustment wheel forward
to lock crossbar.
FUEL CONSUMPTION
Fuel economy can be improved by
avoiding:
²lack of regular, scheduled
maintenance
²excessive speed
²rapid acceleration
²driving with the brake pedal
depressed
Driving
116
Page 128 of 197
Relay number Circuits connected
1 Wiper run relay
2 Horn relay
3 Wiper HI/LO relay
4 WOT A/C relay
5 PCM power relay
6 Fuel pump relay
Diode number Circuits connected
1 ABS diode
2 PCM diode
CHANGING TIRES
Tire change procedure
1. Park on a level surface.
2. Activate the hazard flashers.
3. Set the parking brake.
4. Place the gearshift in P (Park).
5. Block the diagonally opposite
wheel.
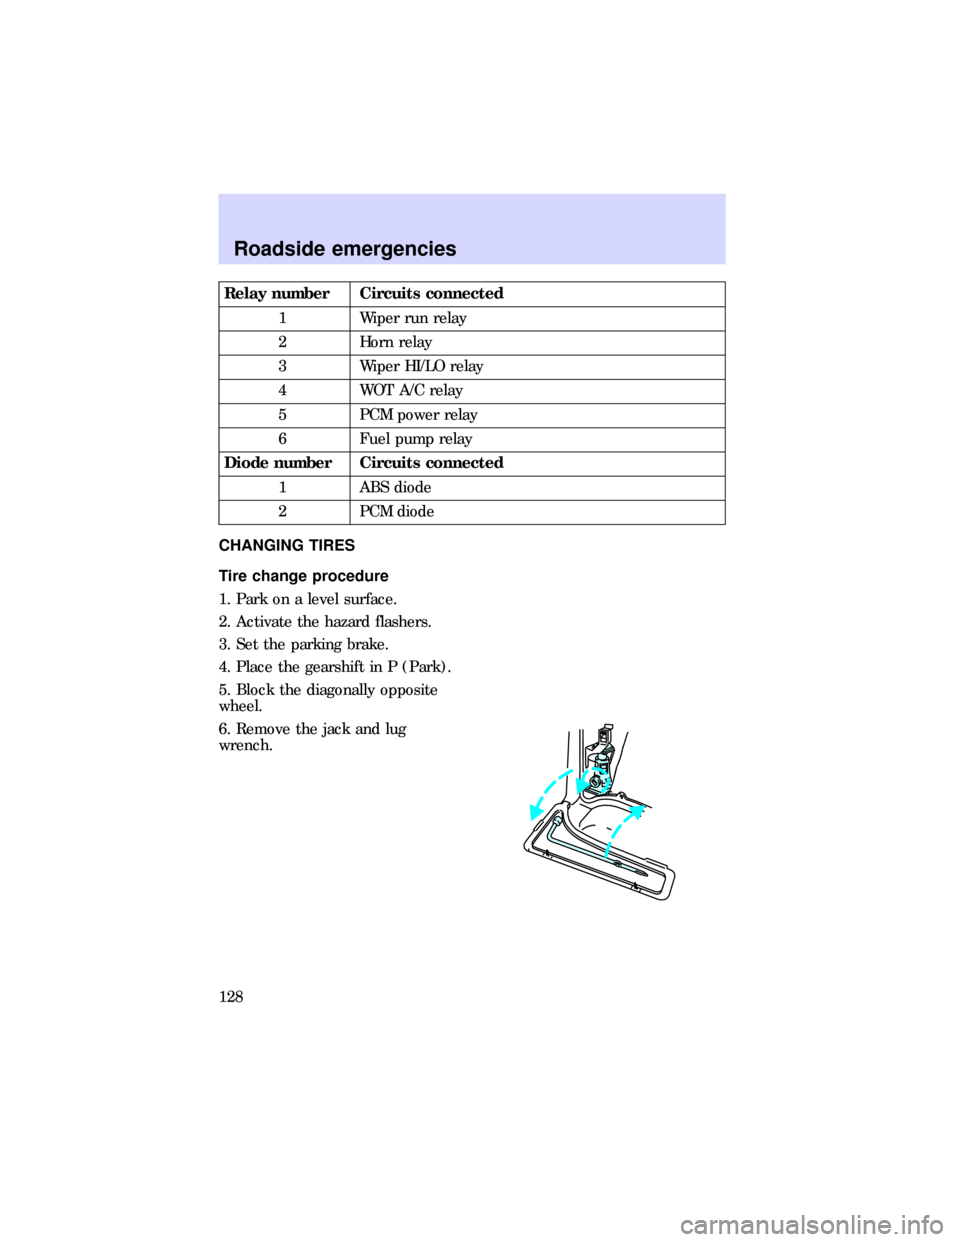
6. Remove the jack and lug
wrench.
Roadside emergencies
128
Page 130 of 197

11. Insert tapered end of the lug
nut wrench behind hubcaps and
twist off.
Not using the tapered end
of the lug nut wrench at
the pry-off notches may result in
damage to the finish of the
wheel and ornament.
12. Loosen the wheel lug nuts with
the lug wrench about one half
turn.
13. Position the jack on the lower
suspension arm to raise front
wheel.
Roadside emergencies
130