tow Mercury Mountaineer 1997 Owner's Manuals
[x] Cancel search | Manufacturer: MERCURY, Model Year: 1997, Model line: Mountaineer, Model: Mercury Mountaineer 1997Pages: 197, PDF Size: 2.08 MB
Page 3 of 197

differences for towing, hauling, and
off-road operation. For this reason,
Mercury urges you to read and
understand the contents of the
Four-Wheelingsupplement.
Breaking in your vehicle
Your new vehicle goes through an
adjustment or breaking-in period
during the first 1,000 miles (1,600
km) of driving. During this period:
²Change your vehicle's speed
often as you drive. Do not drive
at one speed for a long time.
²Use only the type of engine oil
Ford recommends. Do not use
special ªbreak-inº oils.
²Avoid sudden stops. The
break-in period for brake linings
lasts for 1,600 km (1,000 miles)
of highway driving or 160 km
(100 miles) of city driving.
Information about this guide
This guide describes equipment
and gives specifications for
equipment that was in effect when
this guide was approved for
printing. Mercury may discontinue
models or change specifications or
design without any notice and
without incurring obligation.
Introduction
3
Page 25 of 197

Activating high beams
Push the lever forward to activate
the high beam lamps. Pull the
lever towards you to activate the
ªflash to passº function.
Push the lever down to activate
the left turn signal.
Push the lever up to activate the
right turn signal.
0P RND21
UNLEADED
FUEL ONLY
RPM x 100012345
6H
C
F
E
RSM
SET
ACC
COAST OFF ON
SRS
- +H
H
L L020
1030405060
70
80
90
110
120000000oooo
km/h100
20406080100
120
140
160
180
Controls and features
25
Page 27 of 197

Hazard flasher
Push the hazard flasher button.
The button will pop out and the
lamps will begin to flash.
To stop the flashers, push the
flasher button again.
Tilt steering
Never adjust the steering
column while the vehicle is
moving.
Pull the tilt steering lever towards
you and move the wheel to the
desired position.
0P RND21
UNLEADED
FUEL ONLY
RPM x 100012345
6H
C
F
E
RSM
SET
ACC
COAST OFF ON
SRS
- +H
H
L L020
1030405060
70
80
90
110
120000000oooo
km/h100
20406080100
120
140
160
180
0P RND21
UNLEADED
FUEL ONLY
RPM x 100012345
6H
C
F
E
RSM
SET
ACC
COAST OFF ON
SRS
- +H
H
L L020
1030405060
70
80
90
110
120000000oooo
km/h100
20406080100
120
140
160
180
Controls and features
27
Page 47 of 197

Installing shade
1. Position shade in mounting
brackets as shown (tongue faces
rear of vehicle).
2. Pull end of shade towards you
and hook sides into notches in rear
trim panels.
To avoid possible injury
during a sudden stop or
collision, the cover should be
attached to the brackets when
not in use.
Rewinding shade to regain lost
tension
Over time, the cargo shade may
lose its spring tension. If this
happens, then follow these
instructions to rewind the shade.
You will need the help of another
person.
1. Remove the shade from the side
anchor slots by compressing
telescoping tube. Extend the shade
fully. Make sure smooth grain is
facing you.
2. Wrap the vinyl around the roller
tube twice. Tuck the edges of the
vinyl inside the end cap with each
wrap.
Controls and features
47
Page 48 of 197

3. Fold vinyl edges towards center,
making sure that the edges clear
the end cap slots. Use tape or
rubber band to hold the vinyl on
the left side of the roller tube.
4. While holding the vinyl and
roller tube, push in the right end
cap (marked RH) about 6.4 mm
(1/4 inch) to disengage the clutch.
Hold end cap in while turning
roller tube towards you 14 times.
5. Let go of the right end cap. The
clutch should now engage and stop
the shade from losing its spring
tension.
6. Unfold the vinyl and place it
into the end cap slots.
7. Insert the shade into the side
mounting brackets (the opening
for the right mounting bracket is
narrower than the left). Check to
see if the shade operates properly.
Spare tire and jack
Your vehicle is equipped with a
full-size spare tire located behind
the rear bumper. For instructions
on how remove and mount the
spare tire, refer to theRoadside
emergenciessection later in this
Owner's Guide.
Controls and features
48
Page 54 of 197

Press the PANIC button to activate
the alarm.
To turn off the alarm, press the
PANIC button again or turn the
ignition key to the ON or ACC
position.
This device complies with Part 15
of the FCC rules. Operation is
subject to the following two
conditions: (1)This device may not
cause harmful interference, and
(2)This device must accept any
interference received, including
interference that may cause
undesired operation.
Replacing the batteries
If you notice a decrease in
operating range, replace the
transmitter batteries. Replacement
batteries can be purchased at most
pharmacies or through your Ford
or Lincoln-Mercury dealer. The
transmitter is powered by two coin
type three-volt lithium 2016
batteries.
The operating range of the remote
entry transmitters can also be
affected by adverse weather
conditions, nearby radio/tv towers,
or large structures around the
vehicle. Typical operating range is
up to 10 meters (33 feet).
Opening the transmitter
Insert and twist a thin coin
between the two halves of the
transmitter; the transmitter will
snap apart.
LOCK
PANICUN
LOCK
Controls and features
54
Page 62 of 197

Rear seat four-way head
restraints (if equipped)
Push the lock release button to
raise or lower the head restraint.
Push or pull head restraint to
desired position.
Folding rear seat
If your vehicle is equipped with a
built-in child seat, the seatback
cannot be folded down unless the
built-in child seat is fully stowed.
1. Push the lower release handle
downward to unlatch seat back.
2. Rotate seatback downward into
the load floor position.
3. Push down on the top outboard
area of the seatback until you hear
a ``click.'' The seat is latched in the
load floor position.
Seating and safety restraints
62
Page 68 of 197

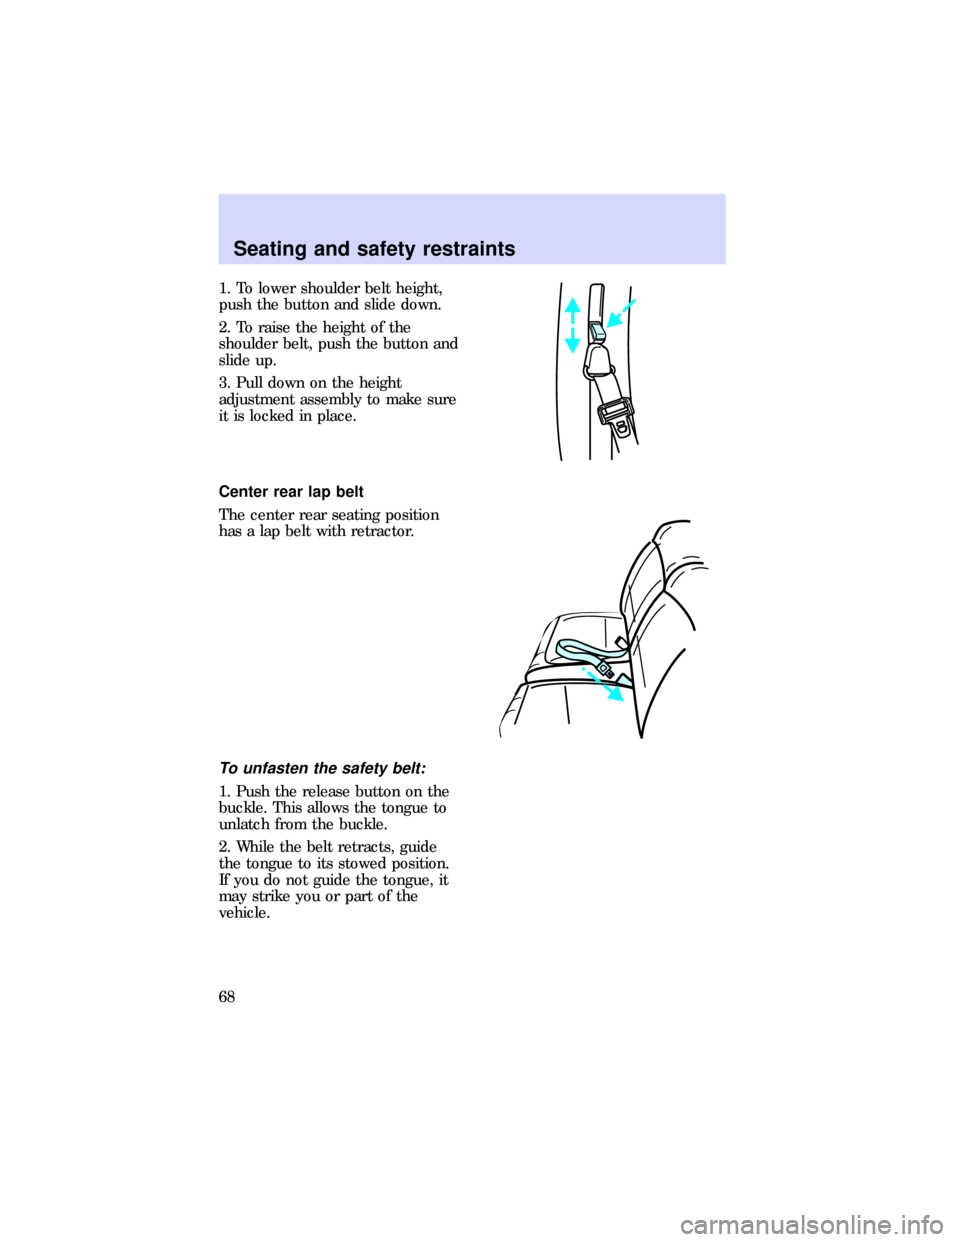
1. To lower shoulder belt height,
push the button and slide down.
2. To raise the height of the
shoulder belt, push the button and
slide up.
3. Pull down on the height
adjustment assembly to make sure
it is locked in place.
Center rear lap belt
The center rear seating position
has a lap belt with retractor.
To unfasten the safety belt:
1. Push the release button on the
buckle. This allows the tongue to
unlatch from the buckle.
2. While the belt retracts, guide
the tongue to its stowed position.
If you do not guide the tongue, it
may strike you or part of the
vehicle.
Seating and safety restraints
68
Page 79 of 197

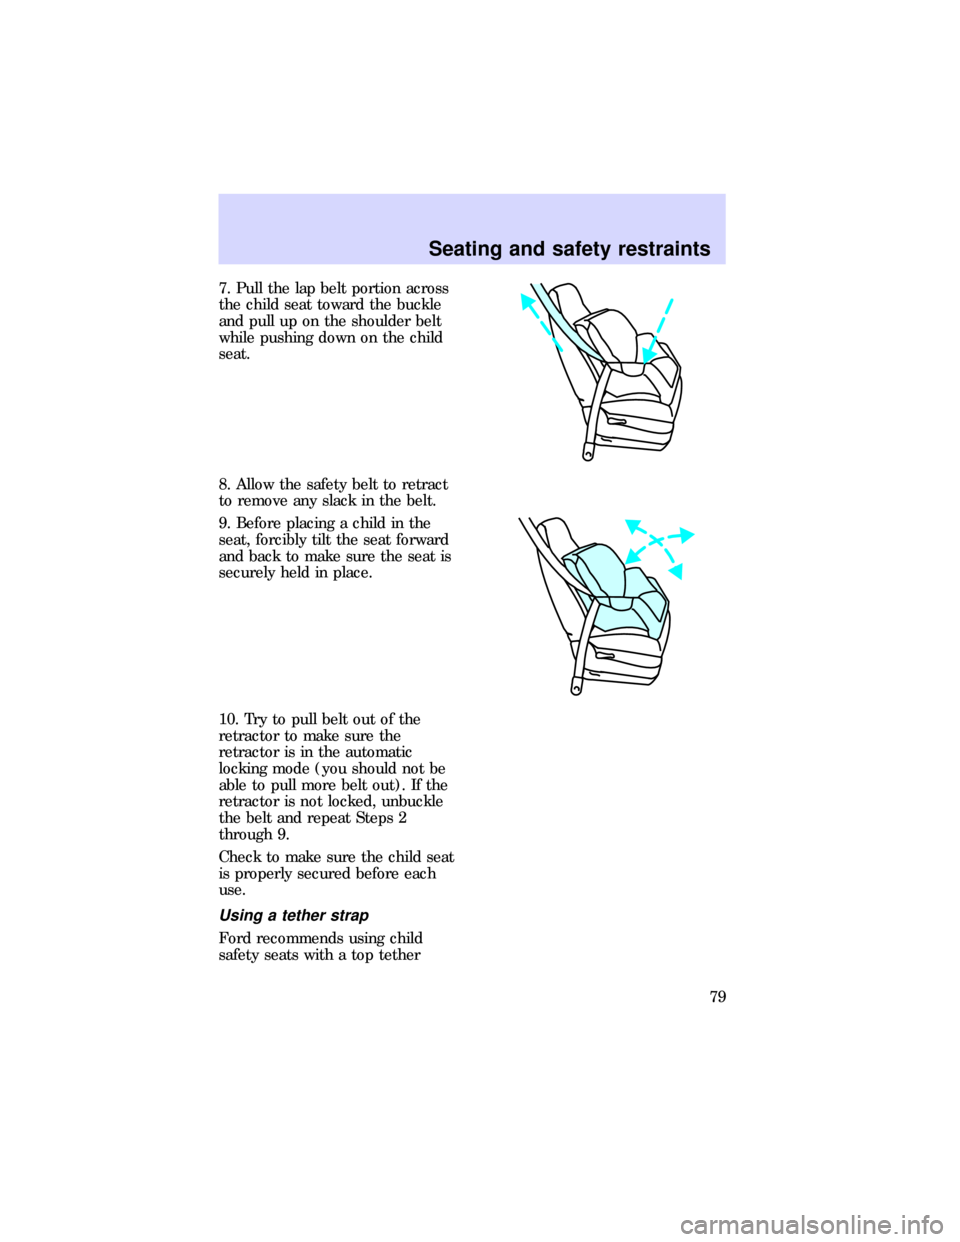
7. Pull the lap belt portion across
the child seat toward the buckle
and pull up on the shoulder belt
while pushing down on the child
seat.
8. Allow the safety belt to retract
to remove any slack in the belt.
9. Before placing a child in the
seat, forcibly tilt the seat forward
and back to make sure the seat is
securely held in place.
10. Try to pull belt out of the
retractor to make sure the
retractor is in the automatic
locking mode (you should not be
able to pull more belt out). If the
retractor is not locked, unbuckle
the belt and repeat Steps 2
through 9.
Check to make sure the child seat
is properly secured before each
use.
Using a tether strap
Ford recommends using child
safety seats with a top tether
Seating and safety restraints
79
Page 82 of 197

Placing your child in the built-in
child seat
Failure to follow all of the
instructions on the use of
this child restraint system can
result in your child striking the
vehicle's interior during a sudden
stop or crash.
Never use the built-in
child seat as a booster
cushion with the adult safety
belts. A child using the adult
belts could slide forward and out
from under the safety belts.
The rear seatback must be
fully locked before
operating the child restraint
system.
1. Grasp the pull strap and pull
toward you approximately one
inch, then slide hand under head
restraint and slide upwards to full
position.
Seating and safety restraints
82