ignition Mercury Mountaineer 2003 Owner's Manuals
[x] Cancel search | Manufacturer: MERCURY, Model Year: 2003, Model line: Mountaineer, Model: Mercury Mountaineer 2003Pages: 264, PDF Size: 2.5 MB
Page 10 of 264
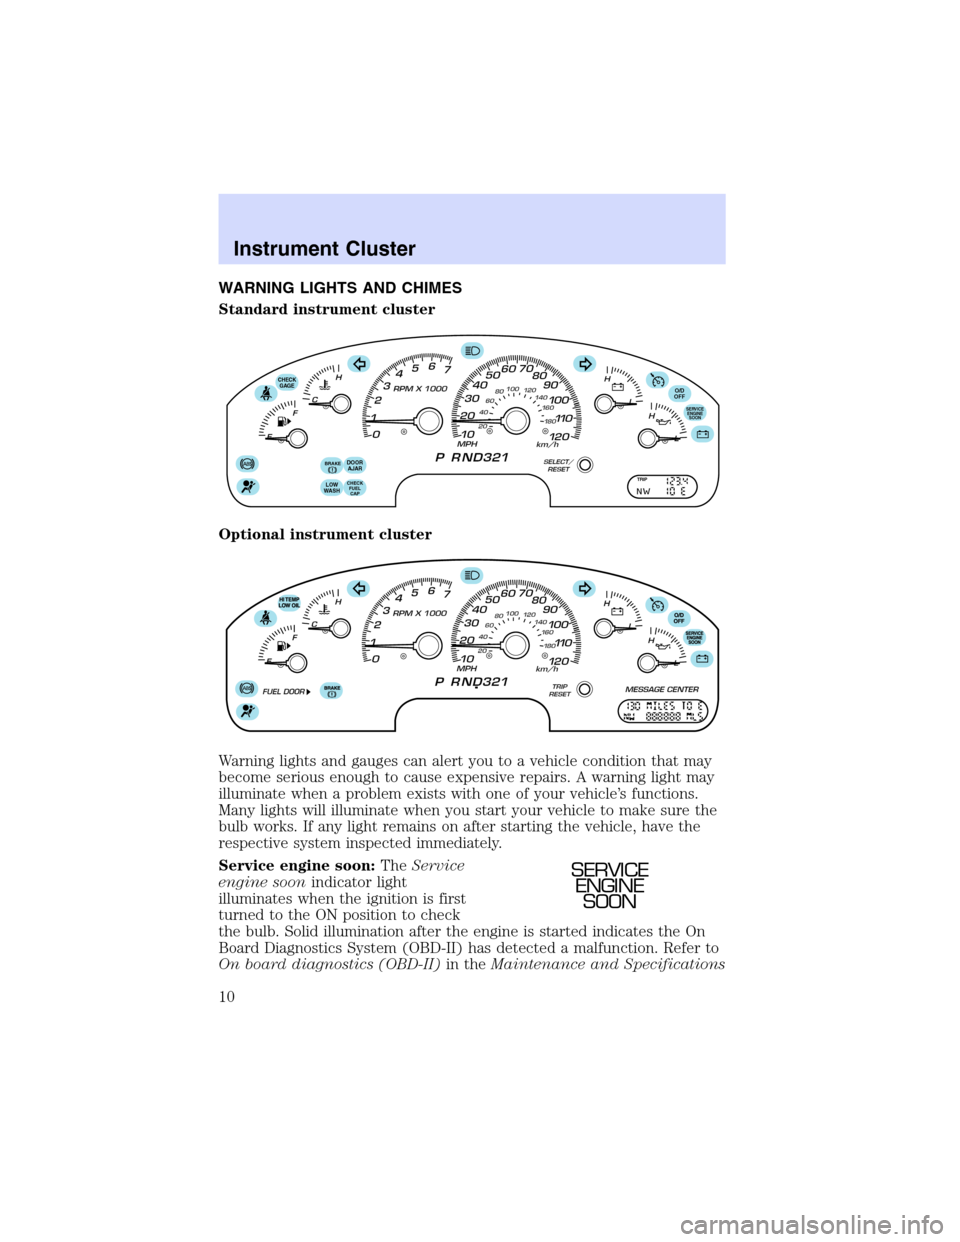
WARNING LIGHTS AND CHIMES
Standard instrument cluster
Optional instrument cluster
Warning lights and gauges can alert you to a vehicle condition that may
become serious enough to cause expensive repairs. A warning light may
illuminate when a problem exists with one of your vehicle’s functions.
Many lights will illuminate when you start your vehicle to make sure the
bulb works. If any light remains on after starting the vehicle, have the
respective system inspected immediately.
Service engine soon:TheService
engine soonindicator light
illuminates when the ignition is first
turned to the ON position to check
the bulb. Solid illumination after the engine is started indicates the On
Board Diagnostics System (OBD-II) has detected a malfunction. Refer to
On board diagnostics (OBD-II)in theMaintenance and Specifications
O/D
OFF
DOOR
AJARCHECK
GAGE
CHECK
FUEL
CAPLOW
WASH
BRAKE
SERVICE
ENGINE
SOON
TRIP
SERVICE
ENGINE
SOON
Instrument Cluster
Instrument Cluster
10
Page 11 of 264

chapter. If the light is blinking, engine misfire is occurring which could
damage your catalytic converter. Drive in a moderate fashion (avoid
heavy acceleration and deceleration) and have your vehicle serviced
immediately.
Under engine misfire conditions, excessive exhaust temperatures
could damage the catalytic converter, the fuel system, interior
floor coverings or other vehicle components, possibly causing a fire.
Check fuel cap (if equipped):
Illuminates when the fuel cap may
not be properly installed. Continued
driving with this light on may cause
the Service engine soon light to
come on, refer toFuel filler capin theMaintenance and
Specificationschapter.
Brake system warning light:To
confirm the brake system warning
light is functional, it will
momentarily illuminate when the
ignition is turned to the ON position when the engine is not running, or
in a position between ON and START, or by applying the parking brake
when the ignition is turned to the ON position. If the brake system
warning light does not illuminate at this time, seek service immediately
from your dealership. Illumination after releasing the parking brake
indicates low brake fluid level and the brake system should be inspected
immediately by your servicing dealership.
Driving a vehicle with the brake system warning light on is
dangerous. A significant decrease in braking performance may
occur. It will take you longer to stop the vehicle. Have the vehicle
checked by your dealer immediately.
CHECK
FUEL
CAP
Instrument Cluster
11
Page 12 of 264
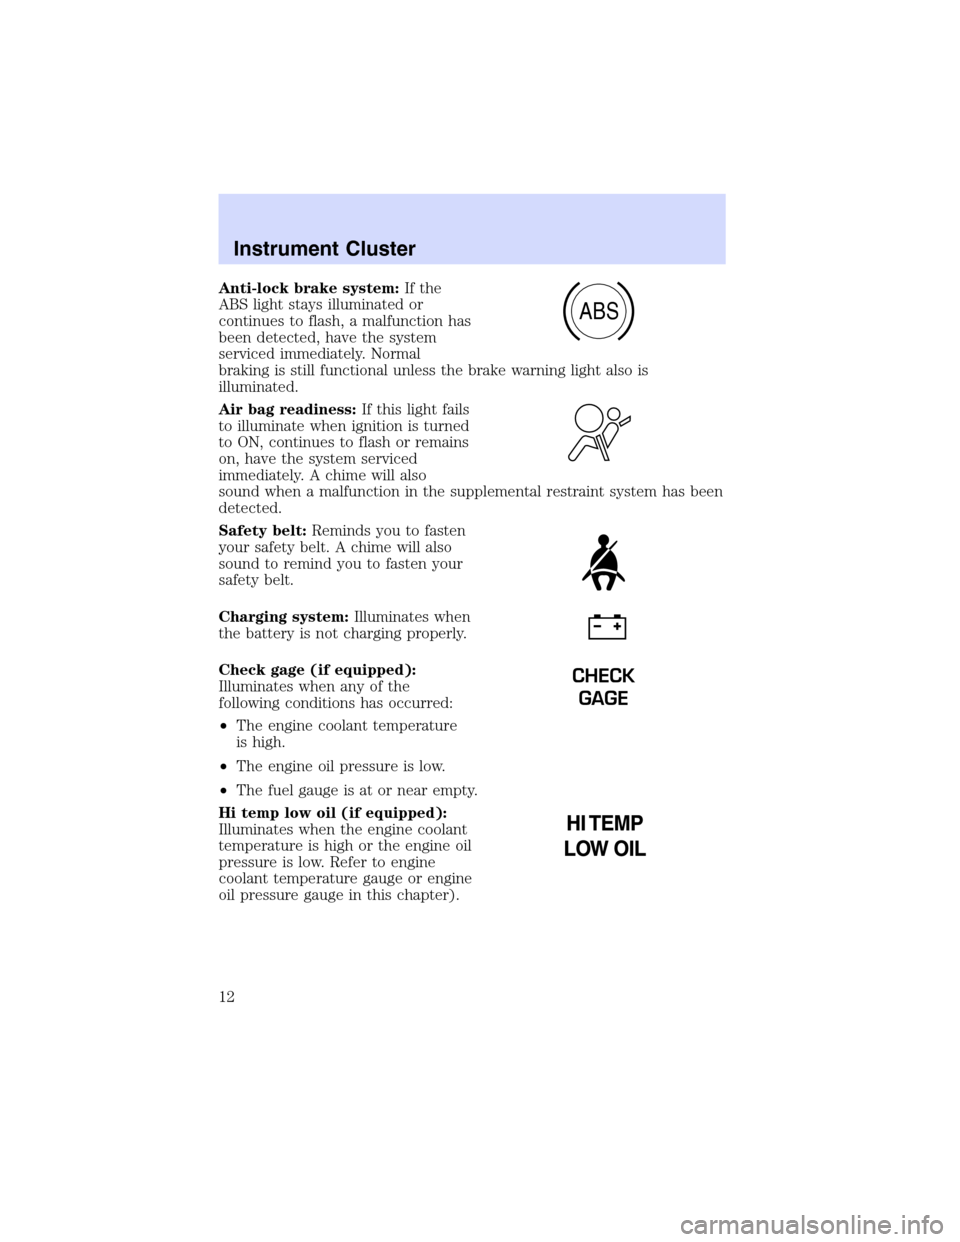
Anti-lock brake system:If the
ABS light stays illuminated or
continues to flash, a malfunction has
been detected, have the system
serviced immediately. Normal
braking is still functional unless the brake warning light also is
illuminated.
Air bag readiness:If this light fails
to illuminate when ignition is turned
to ON, continues to flash or remains
on, have the system serviced
immediately. A chime will also
sound when a malfunction in the supplemental restraint system has been
detected.
Safety belt:Reminds you to fasten
your safety belt. A chime will also
sound to remind you to fasten your
safety belt.
Charging system:Illuminates when
the battery is not charging properly.
Check gage (if equipped):
Illuminates when any of the
following conditions has occurred:
•The engine coolant temperature
is high.
•The engine oil pressure is low.
•The fuel gauge is at or near empty.
Hi temp low oil (if equipped):
Illuminates when the engine coolant
temperature is high or the engine oil
pressure is low. Refer to engine
coolant temperature gauge or engine
oil pressure gauge in this chapter).
ABS
CHECK
GAGE
Instrument Cluster
12
Page 13 of 264
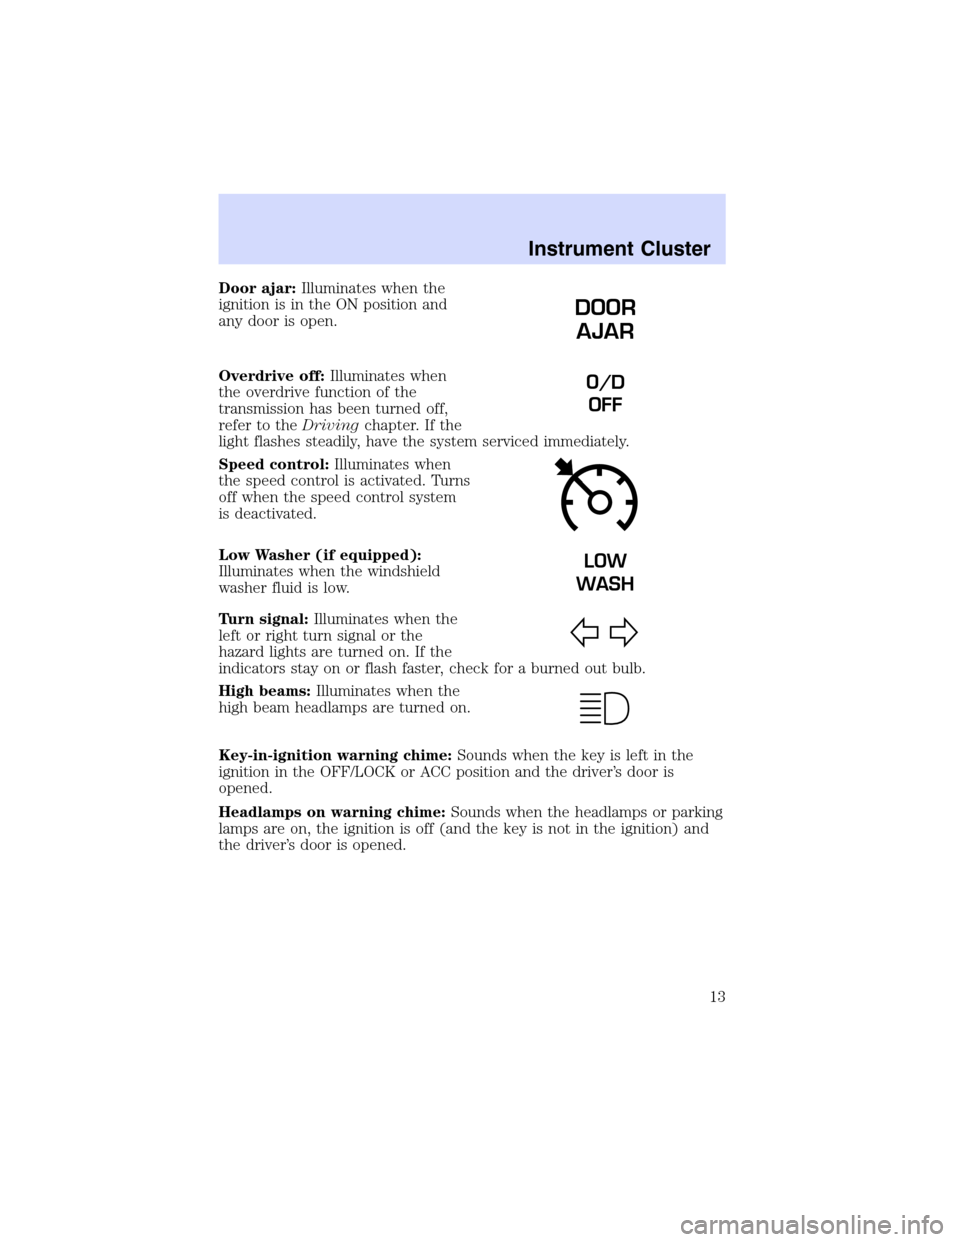
Door ajar:Illuminates when the
ignition is in the ON position and
any door is open.
Overdrive off:Illuminates when
the overdrive function of the
transmission has been turned off,
refer to theDrivingchapter. If the
light flashes steadily, have the system serviced immediately.
Speed control:Illuminates when
the speed control is activated. Turns
off when the speed control system
is deactivated.
Low Washer (if equipped):
Illuminates when the windshield
washer fluid is low.
Turn signal:Illuminates when the
left or right turn signal or the
hazard lights are turned on. If the
indicators stay on or flash faster, check for a burned out bulb.
High beams:Illuminates when the
high beam headlamps are turned on.
Key-in-ignition warning chime:Sounds when the key is left in the
ignition in the OFF/LOCK or ACC position and the driver’s door is
opened.
Headlamps on warning chime:Sounds when the headlamps or parking
lamps are on, the ignition is off (and the key is not in the ignition) and
the driver’s door is opened.
DOOR
AJAR
O/D
OFF
LOW
WASH
Instrument Cluster
13
Page 16 of 264
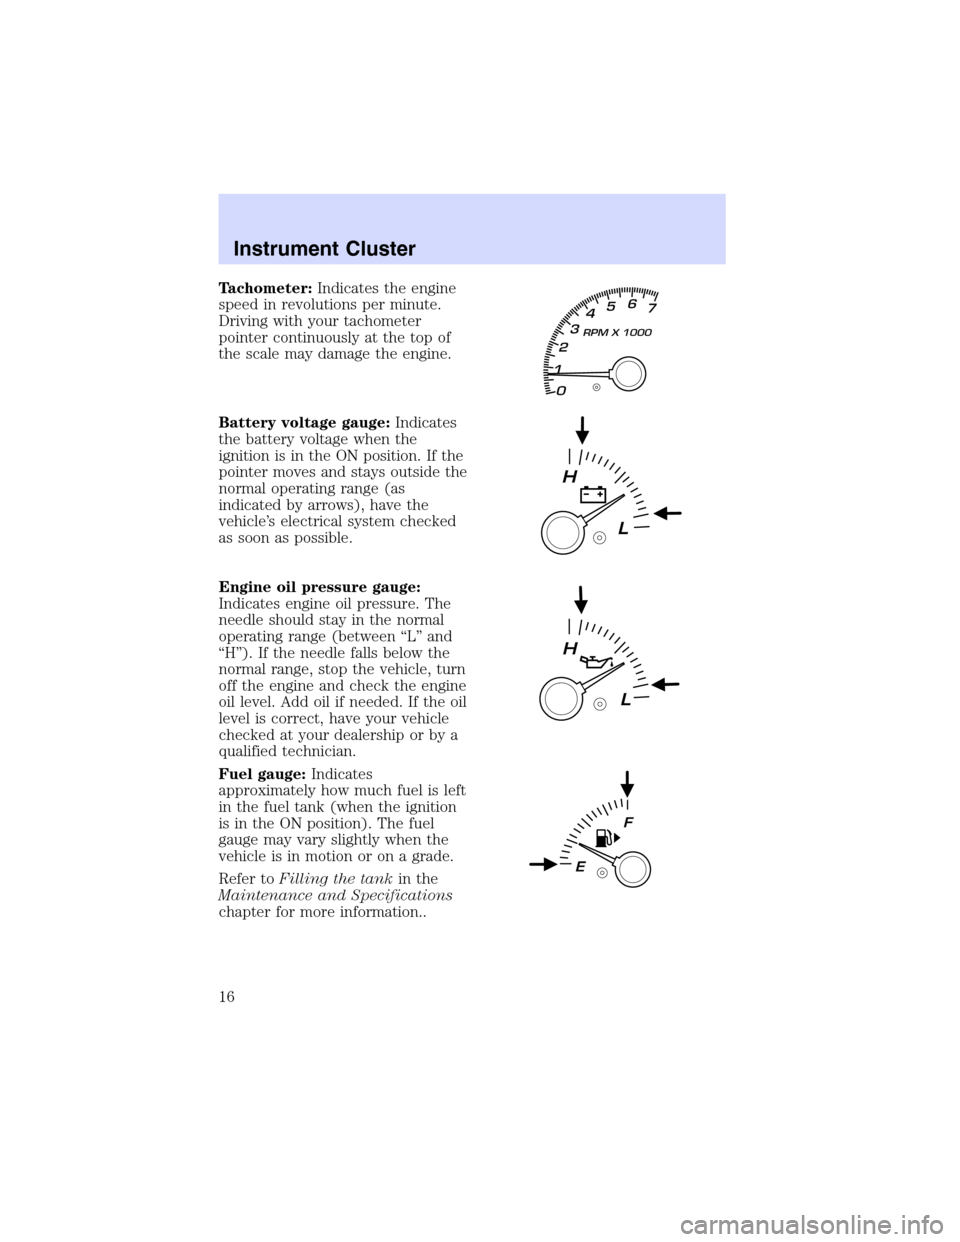
Tachometer:Indicates the engine
speed in revolutions per minute.
Driving with your tachometer
pointer continuously at the top of
the scale may damage the engine.
Battery voltage gauge:Indicates
the battery voltage when the
ignition is in the ON position. If the
pointer moves and stays outside the
normal operating range (as
indicated by arrows), have the
vehicle’s electrical system checked
as soon as possible.
Engine oil pressure gauge:
Indicates engine oil pressure. The
needle should stay in the normal
operating range (between“L”and
“H”). If the needle falls below the
normal range, stop the vehicle, turn
off the engine and check the engine
oil level. Add oil if needed. If the oil
level is correct, have your vehicle
checked at your dealership or by a
qualified technician.
Fuel gauge:Indicates
approximately how much fuel is left
in the fuel tank (when the ignition
is in the ON position). The fuel
gauge may vary slightly when the
vehicle is in motion or on a grade.
Refer toFilling the tankin the
Maintenance and Specifications
chapter for more information..
Instrument Cluster
16
Page 36 of 264

2.Mode selector:Press to select between air flow to(Floor)
or
(Panel).
Directs air to the floor of the third row seating.
directs air to the overhead registers of the second and third row
seating. The selected mode will illuminate on the temperature control.
3.Fan control:Determines fan speed levels.
Floor console climate controls (if equipped)
Controls the direction of the airflow
to the rear of the vehicle.
selects air flow from the console
panel registers.
selects air flow
from the floor console registers.
REAR WINDOW DEFROSTER
The rear defroster control is located
on the instrument panel.
Press the rear defroster control to
clear the rear window of thin ice
and fog.
•A small LED will illuminate when
the rear defroster is activated.
The ignition must be in the ON position to operate the rear window
defroster.
The defroster turns off automatically after 10 minutes or when the
ignition is turned to the OFF position. To manually turn off the defroster
before 10 minutes have passed, push the control again.
R
Climate Controls
36
Page 37 of 264
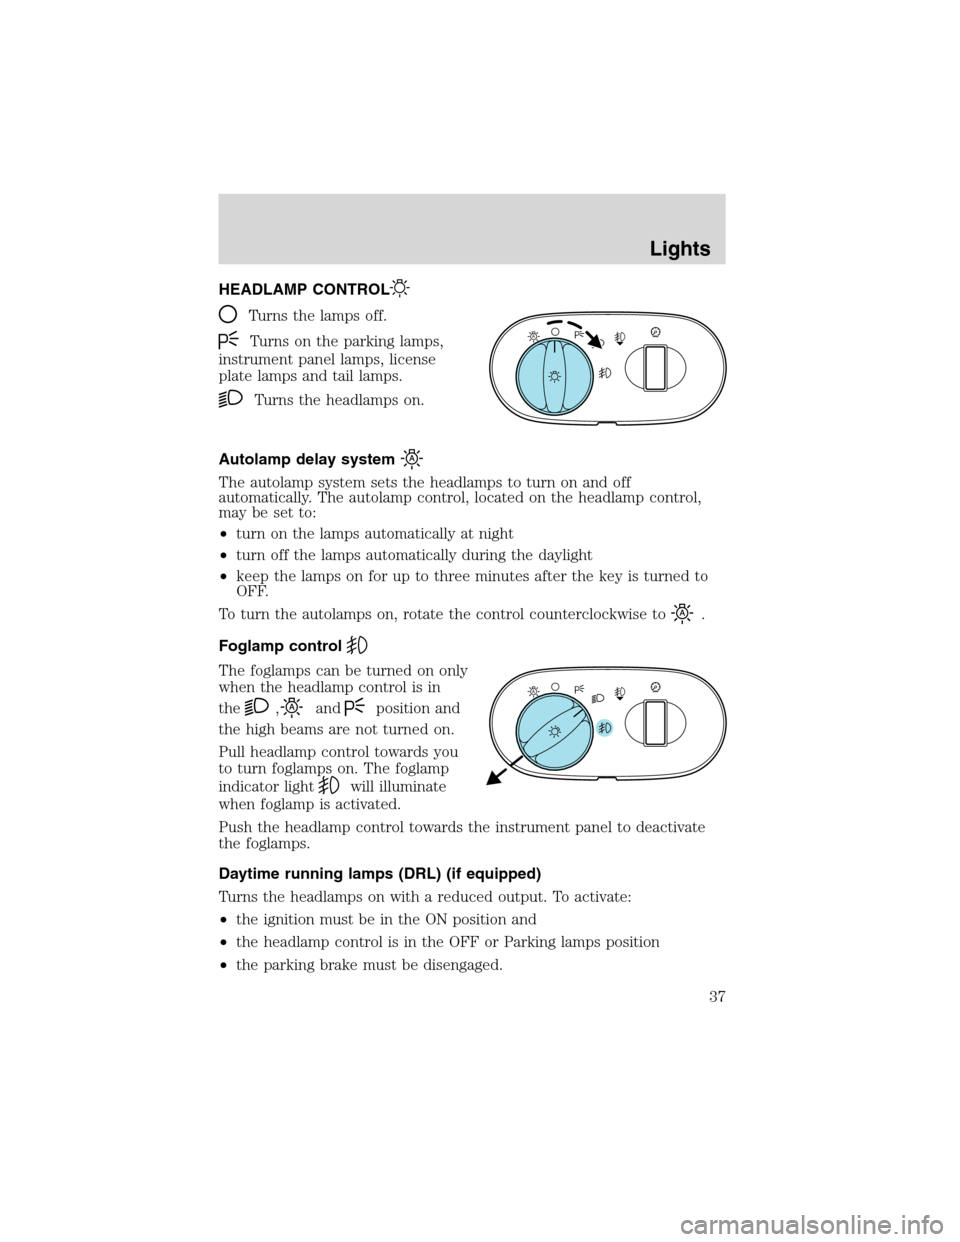
HEADLAMP CONTROL
Turns the lamps off.
Turns on the parking lamps,
instrument panel lamps, license
plate lamps and tail lamps.
Turns the headlamps on.
Autolamp delay system
The autolamp system sets the headlamps to turn on and off
automatically. The autolamp control, located on the headlamp control,
may be set to:
•turn on the lamps automatically at night
•turn off the lamps automatically during the daylight
•keep the lamps on for up to three minutes after the key is turned to
OFF.
To turn the autolamps on, rotate the control counterclockwise to
.
Foglamp control
The foglamps can be turned on only
when the headlamp control is in
the
,andposition and
the high beams are not turned on.
Pull headlamp control towards you
to turn foglamps on. The foglamp
indicator light
will illuminate
when foglamp is activated.
Push the headlamp control towards the instrument panel to deactivate
the foglamps.
Daytime running lamps (DRL) (if equipped)
Turns the headlamps on with a reduced output. To activate:
•the ignition must be in the ON position and
•the headlamp control is in the OFF or Parking lamps position
•the parking brake must be disengaged.
A
A
Lights
Lights
37
Page 40 of 264
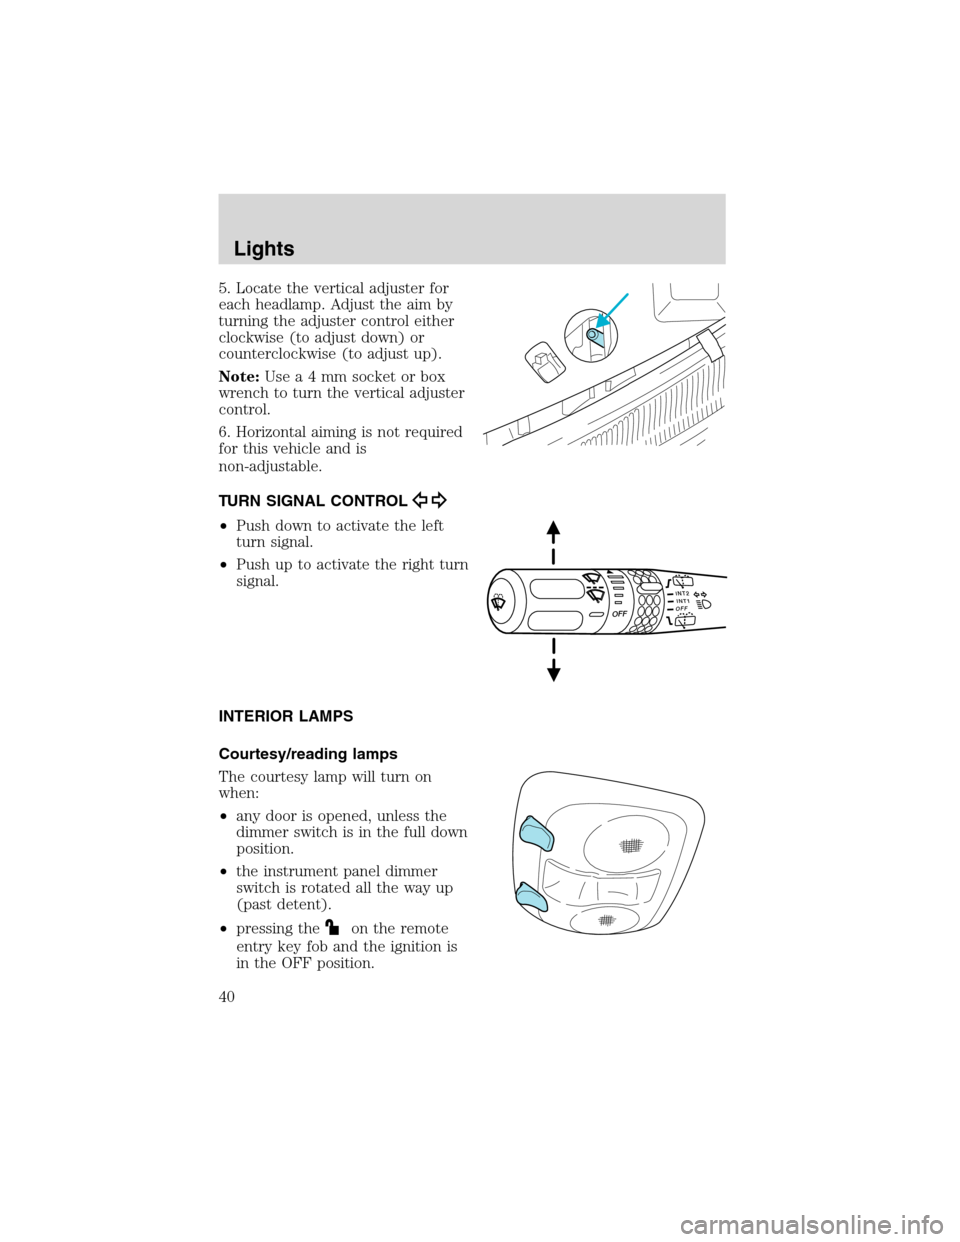
5. Locate the vertical adjuster for
each headlamp. Adjust the aim by
turning the adjuster control either
clockwise (to adjust down) or
counterclockwise (to adjust up).
Note:Usea4mmsocket or box
wrench to turn the vertical adjuster
control.
6. Horizontal aiming is not required
for this vehicle and is
non-adjustable.
TURN SIGNAL CONTROL
•Push down to activate the left
turn signal.
•Push up to activate the right turn
signal.
INTERIOR LAMPS
Courtesy/reading lamps
The courtesy lamp will turn on
when:
•any door is opened, unless the
dimmer switch is in the full down
position.
•the instrument panel dimmer
switch is rotated all the way up
(past detent).
•pressing the
on the remote
entry key fob and the ignition is
in the OFF position.
INT2OFFOFFINT1
Lights
40
Page 41 of 264
NOTE:If your vehicle is equipped with the Remote Keyless Entry
feature, the courtesy lamp will remain on for 25 seconds after the door is
shut or until the ignition is turned to the ON position.
To use the reading lamps:
•Press the rocker control located near each reading lamp to turn it on.
•Press the rocker control again to turn it off.
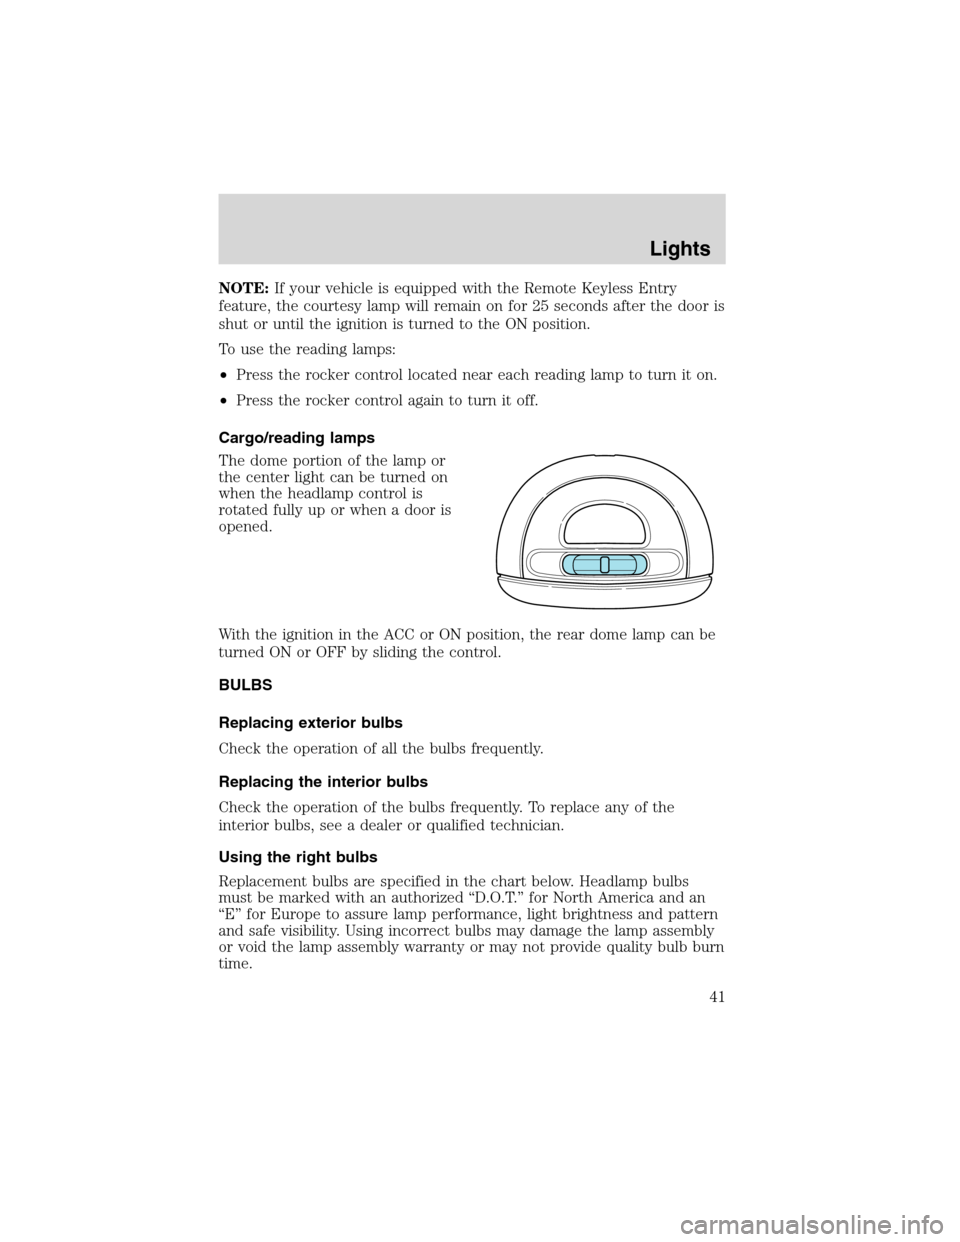
Cargo/reading lamps
The dome portion of the lamp or
the center light can be turned on
when the headlamp control is
rotated fully up or when a door is
opened.
With the ignition in the ACC or ON position, the rear dome lamp can be
turned ON or OFF by sliding the control.
BULBS
Replacing exterior bulbs
Check the operation of all the bulbs frequently.
Replacing the interior bulbs
Check the operation of the bulbs frequently. To replace any of the
interior bulbs, see a dealer or qualified technician.
Using the right bulbs
Replacement bulbs are specified in the chart below. Headlamp bulbs
must be marked with an authorized“D.O.T.”for North America and an
“E”for Europe to assure lamp performance, light brightness and pattern
and safe visibility. Using incorrect bulbs may damage the lamp assembly
or void the lamp assembly warranty or may not provide quality bulb burn
time.
Lights
41
Page 55 of 264

Window lock
The window lock feature allows only
the driver to operate the power
windows.
To lock out all the window controls
except for the driver’s press the left
side of the control. Press the right
side to restore the window controls.
Accessory delay
With accessory delay, the window switches and audio system may be
used for up to ten minutes after the ignition switch is turned to the OFF
position or until any door is opened.
POWER SIDE VIEW MIRRORS
The ignition must be in the ACC or ON position to adjust the power side
view mirrors.
To adjust your mirrors:
1. Rotate the control clockwise to
adjust the right mirror and rotate
the control counterclockwise to
adjust the left mirror.
2. Move the control in the direction
you wish to tilt the mirror.
3. Return to the center position to
lock mirrors in place.
Heated outside mirrors
(if equipped)
Both mirrors are heated
automatically to remove ice, mist
and fog when the rear window
defrost is activated.
Do not remove ice from the
mirrors with a scraper or
attempt to readjust the mirror
glass if it is frozen in place.
These actions could cause damage to the glass and mirrors.
Driver Controls
55