lock Mercury Sable 2001 s User Guide
[x] Cancel search | Manufacturer: MERCURY, Model Year: 2001, Model line: Sable, Model: Mercury Sable 2001Pages: 240, PDF Size: 2.22 MB
Page 43 of 240

If you pull too hard on the disc holder, the disc holder may come
completely out of the magazine. If this happens, reinsert the disc holder
back into the magazine while pressing on the lever (A).
5. Line up the CD with the groove
of the disc holder. Ensure that the
label on the CD faces downwards.
6. Press in on the disc holder until it
locks securely into the magazine. If
the disc holders are not fully locked
into the magazine, the unit will not
operate.
Ensure that the disc holder is
evenly inserted and at the same
level as the magazine (A). The unit
will not operate if the disc holder is
not inserted at the same level (B).
Radio power must be turned on to play the CDs in the changer. The
magazine may be stored in the glove box when not being used.
The CD magazine may be inserted or ejected with the radio power off.
A
A
B
Controls and features
43
Page 47 of 240
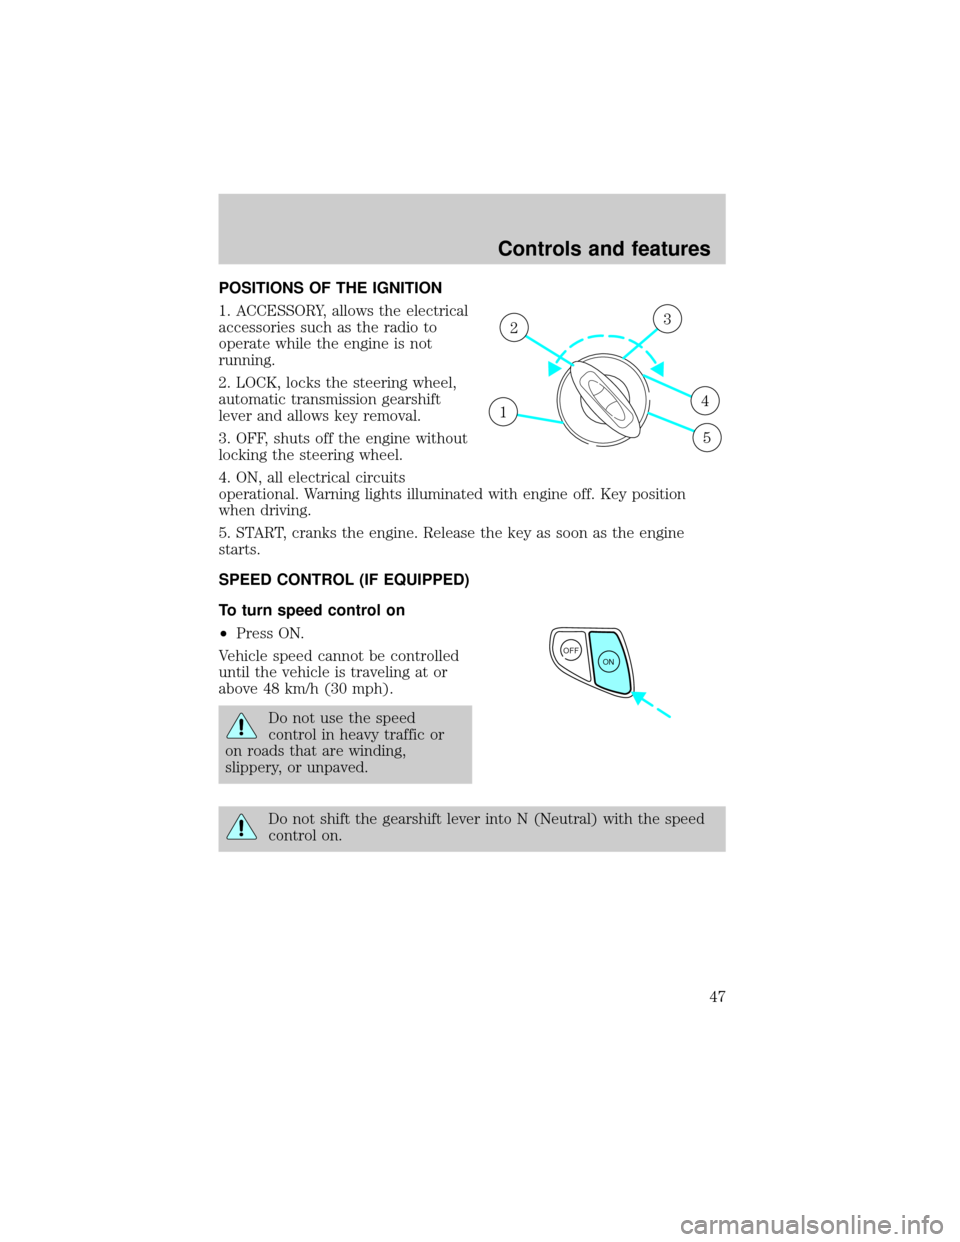
POSITIONS OF THE IGNITION
1. ACCESSORY, allows the electrical
accessories such as the radio to
operate while the engine is not
running.
2. LOCK, locks the steering wheel,
automatic transmission gearshift
lever and allows key removal.
3. OFF, shuts off the engine without
locking the steering wheel.
4. ON, all electrical circuits
operational. Warning lights illuminated with engine off. Key position
when driving.
5. START, cranks the engine. Release the key as soon as the engine
starts.
SPEED CONTROL (IF EQUIPPED)
To turn speed control on
²Press ON.
Vehicle speed cannot be controlled
until the vehicle is traveling at or
above 48 km/h (30 mph).
Do not use the speed
control in heavy traffic or
on roads that are winding,
slippery, or unpaved.
Do not shift the gearshift lever into N (Neutral) with the speed
control on.
1
23
4
5
OFF
ON
Controls and features
47
Page 57 of 240

Window lock
The window lock feature allows only
the driver to operate the power
windows.
To lock out all the window controls
except for the driver's press the left
side of the control. Press the right side to restore the window controls.
Accessory delay (if equipped)
With accessory delay, the window switches may be used for up to ten
minutes after the ignition switch is turned to the OFF position or until
any door is opened.
POWER DOOR LOCKS (IF EQUIPPED)
Press control to unlock or lock all
doors.
CHILDPROOF DOOR LOCKS
When these locks are set, the rear
doors cannot be opened from the
inside. The rear doors can be
opened from the outside when the
doors are unlocked.
The childproof locks are located on
rear edge of each rear door and
must be set separately for each
door. Setting the lock for one door
will not automatically set the lock
for both doors.
Move lock control up to engage the childproof lock. Move control down
to disengage childproof locks.
Controls and features
57
Page 59 of 240

CENTER CONSOLE
Your vehicle may be equipped with a variety of console features. These
include:
²Utility compartment
²Bin mat (snap-in)
²Cupholders (front and rear)
²Coin holder slots
²Compact disc changer (if equipped)
²Tissue holder
²Rear A/C vent
²Rear ashtray (see your Ford, Lincoln Mercury dealer to obtain rear
ashtray
Use only soft cups in the cupholder. Hard objects can injure you
in a collision.
If your vehicle is equipped with the column shift and a bench seat, it has
a center console in the center front seating position.
The center console has similar features as the full console. To open the
storage compartment, raise the armrest and pull the strap on the seat up
and toward the front of the vehicle. The rear seat area is provided with
dual cupholders.
POSITIVE RETENTION FLOOR MAT
Position the floor mat so that the
eyelet is over the pointed end of the
retention post and rotate forward to
lock in. Make sure that the mat does
not interfere with the operation of
the accelerator or the brake pedal.
To remove the floor mat, reverse the
installation procedure.
Controls and features
59
Page 60 of 240
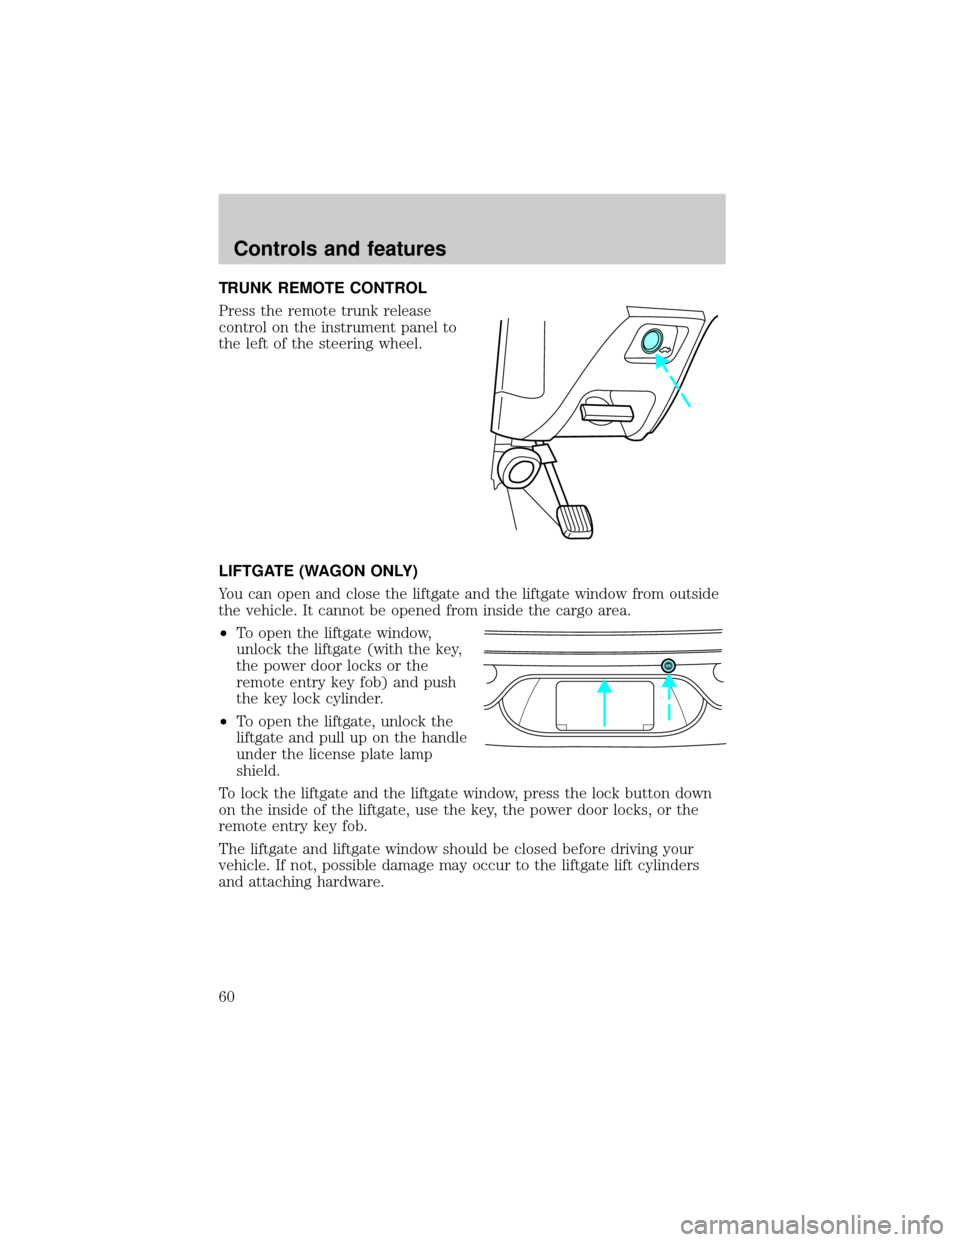
TRUNK REMOTE CONTROL
Press the remote trunk release
control on the instrument panel to
the left of the steering wheel.
LIFTGATE (WAGON ONLY)
You can open and close the liftgate and the liftgate window from outside
the vehicle. It cannot be opened from inside the cargo area.
²To open the liftgate window,
unlock the liftgate (with the key,
the power door locks or the
remote entry key fob) and push
the key lock cylinder.
²To open the liftgate, unlock the
liftgate and pull up on the handle
under the license plate lamp
shield.
To lock the liftgate and the liftgate window, press the lock button down
on the inside of the liftgate, use the key, the power door locks, or the
remote entry key fob.
The liftgate and liftgate window should be closed before driving your
vehicle. If not, possible damage may occur to the liftgate lift cylinders
and attaching hardware.
Controls and features
60
Page 63 of 240
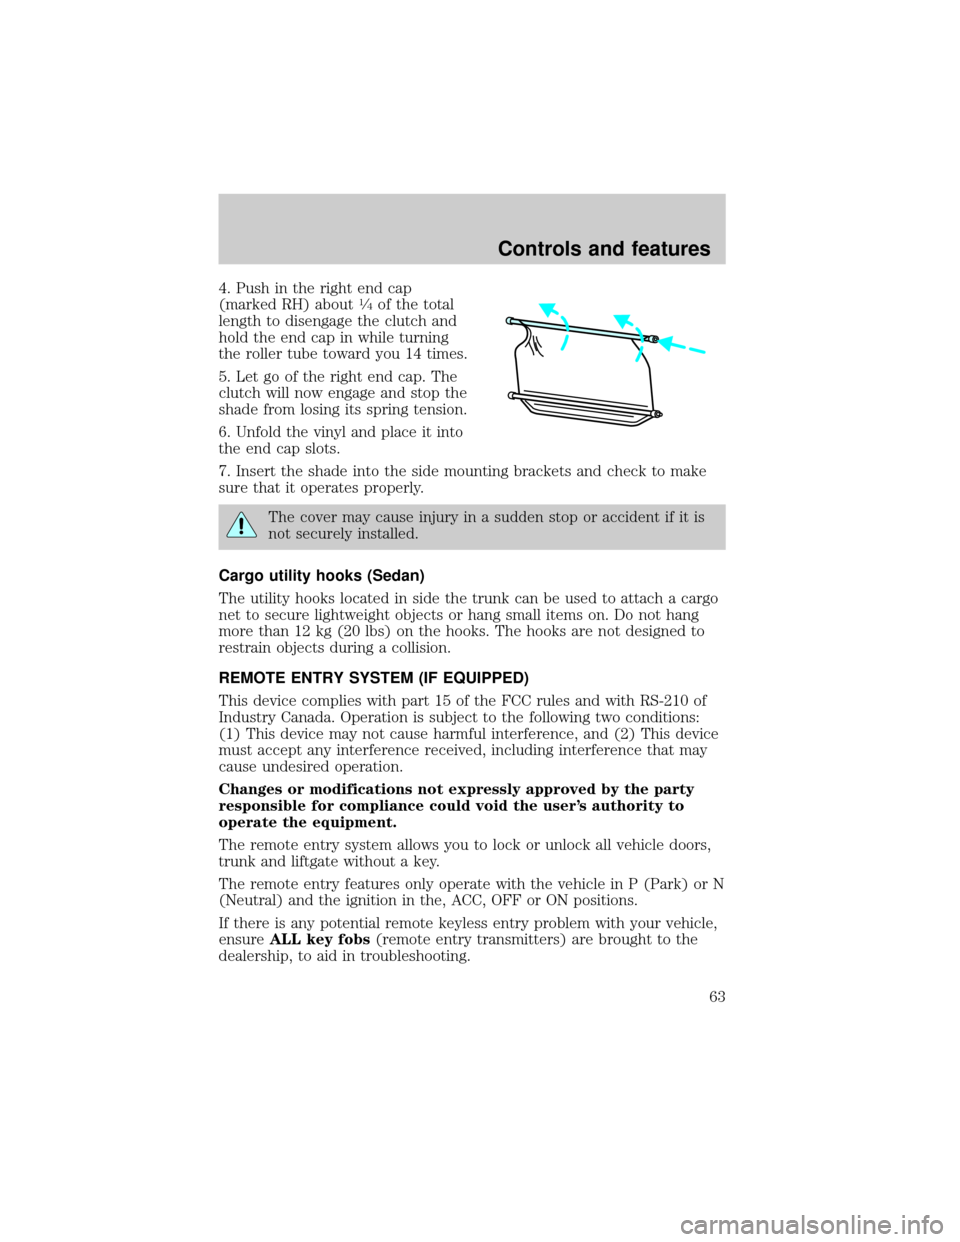
4. Push in the right end cap
(marked RH) about1¤4of the total
length to disengage the clutch and
hold the end cap in while turning
the roller tube toward you 14 times.
5. Let go of the right end cap. The
clutch will now engage and stop the
shade from losing its spring tension.
6. Unfold the vinyl and place it into
the end cap slots.
7. Insert the shade into the side mounting brackets and check to make
sure that it operates properly.
The cover may cause injury in a sudden stop or accident if it is
not securely installed.
Cargo utility hooks (Sedan)
The utility hooks located in side the trunk can be used to attach a cargo
net to secure lightweight objects or hang small items on. Do not hang
more than 12 kg (20 lbs) on the hooks. The hooks are not designed to
restrain objects during a collision.
REMOTE ENTRY SYSTEM (IF EQUIPPED)
This device complies with part 15 of the FCC rules and with RS-210 of
Industry Canada. Operation is subject to the following two conditions:
(1) This device may not cause harmful interference, and (2) This device
must accept any interference received, including interference that may
cause undesired operation.
Changes or modifications not expressly approved by the party
responsible for compliance could void the user's authority to
operate the equipment.
The remote entry system allows you to lock or unlock all vehicle doors,
trunk and liftgate without a key.
The remote entry features only operate with the vehicle in P (Park) or N
(Neutral) and the ignition in the, ACC, OFF or ON positions.
If there is any potential remote keyless entry problem with your vehicle,
ensureALL key fobs(remote entry transmitters) are brought to the
dealership, to aid in troubleshooting.
Controls and features
63
Page 64 of 240
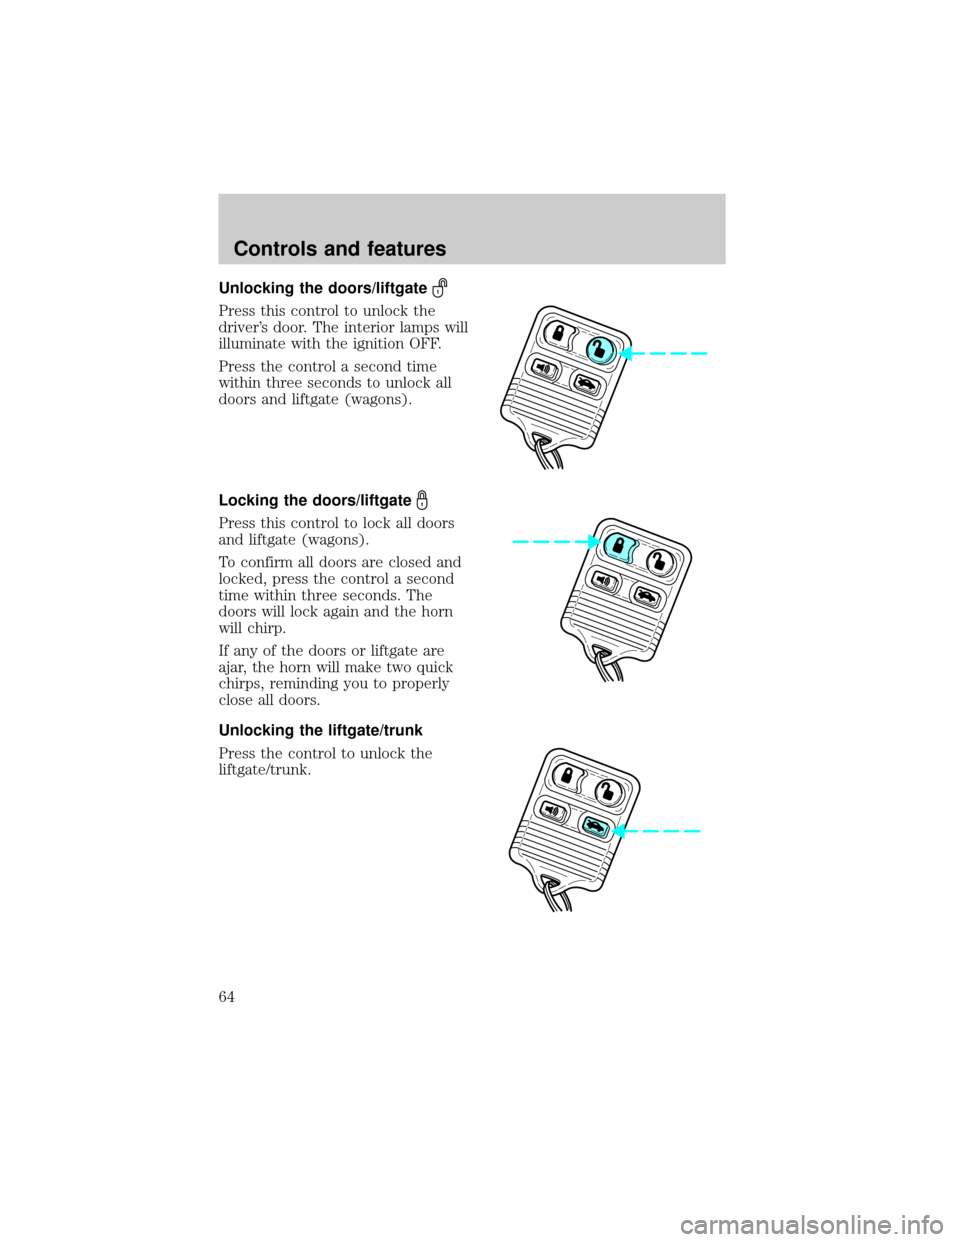
Unlocking the doors/liftgate
Press this control to unlock the
driver's door. The interior lamps will
illuminate with the ignition OFF.
Press the control a second time
within three seconds to unlock all
doors and liftgate (wagons).
Locking the doors/liftgate
Press this control to lock all doors
and liftgate (wagons).
To confirm all doors are closed and
locked, press the control a second
time within three seconds. The
doors will lock again and the horn
will chirp.
If any of the doors or liftgate are
ajar, the horn will make two quick
chirps, reminding you to properly
close all doors.
Unlocking the liftgate/trunk
Press the control to unlock the
liftgate/trunk.
Controls and features
64
Page 65 of 240
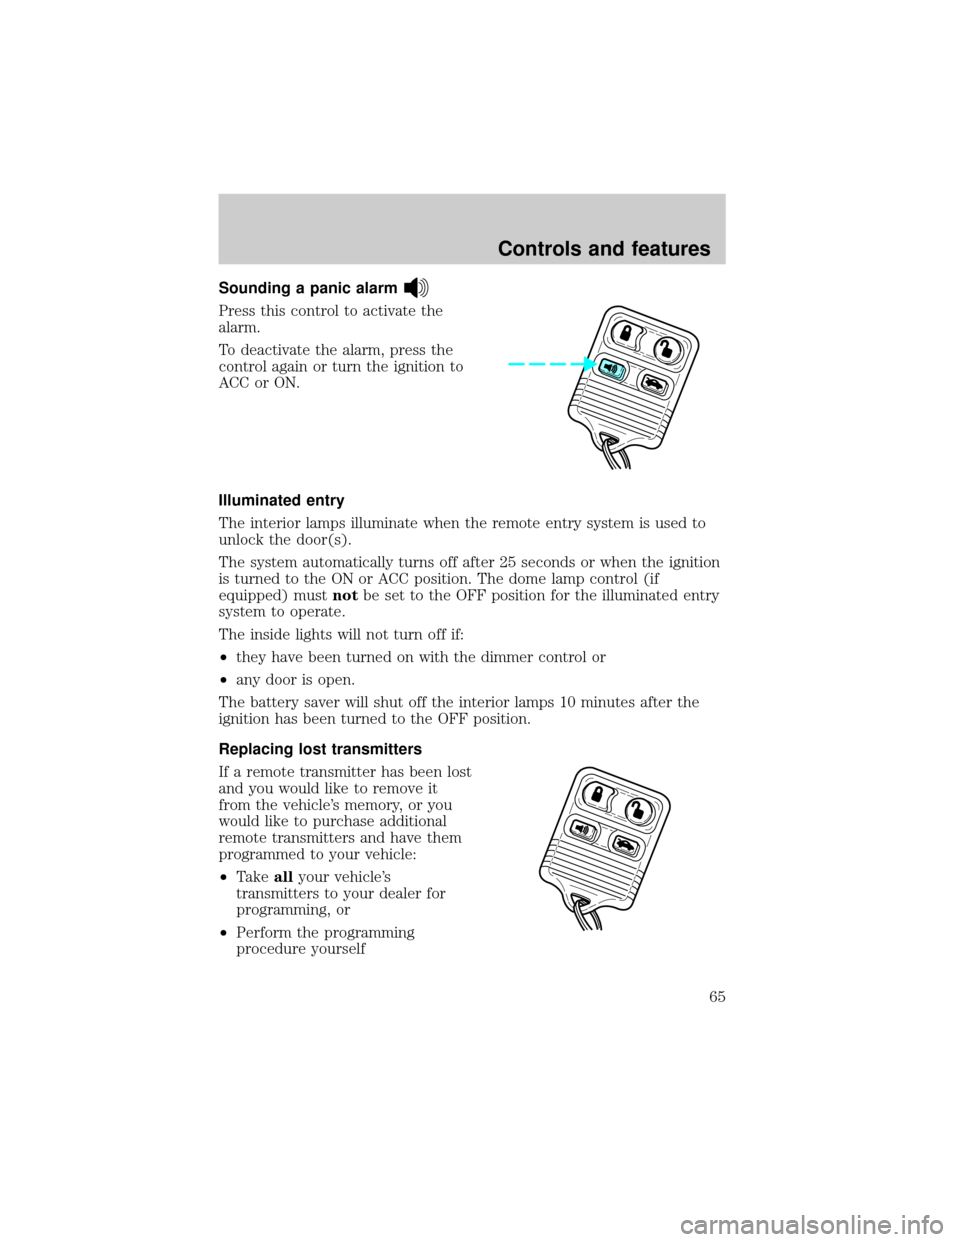
Sounding a panic alarm
Press this control to activate the
alarm.
To deactivate the alarm, press the
control again or turn the ignition to
ACC or ON.
Illuminated entry
The interior lamps illuminate when the remote entry system is used to
unlock the door(s).
The system automatically turns off after 25 seconds or when the ignition
is turned to the ON or ACC position. The dome lamp control (if
equipped) mustnotbe set to the OFF position for the illuminated entry
system to operate.
The inside lights will not turn off if:
²they have been turned on with the dimmer control or
²any door is open.
The battery saver will shut off the interior lamps 10 minutes after the
ignition has been turned to the OFF position.
Replacing lost transmitters
If a remote transmitter has been lost
and you would like to remove it
from the vehicle's memory, or you
would like to purchase additional
remote transmitters and have them
programmed to your vehicle:
²Takeallyour vehicle's
transmitters to your dealer for
programming, or
²Perform the programming
procedure yourself
Controls and features
65
Page 66 of 240
Programming remote transmitters
It is necessary to haveall(maximum of four Ð original and/or new) of
your remote transmitters available prior to beginning this procedure.
To program the transmitters yourself:
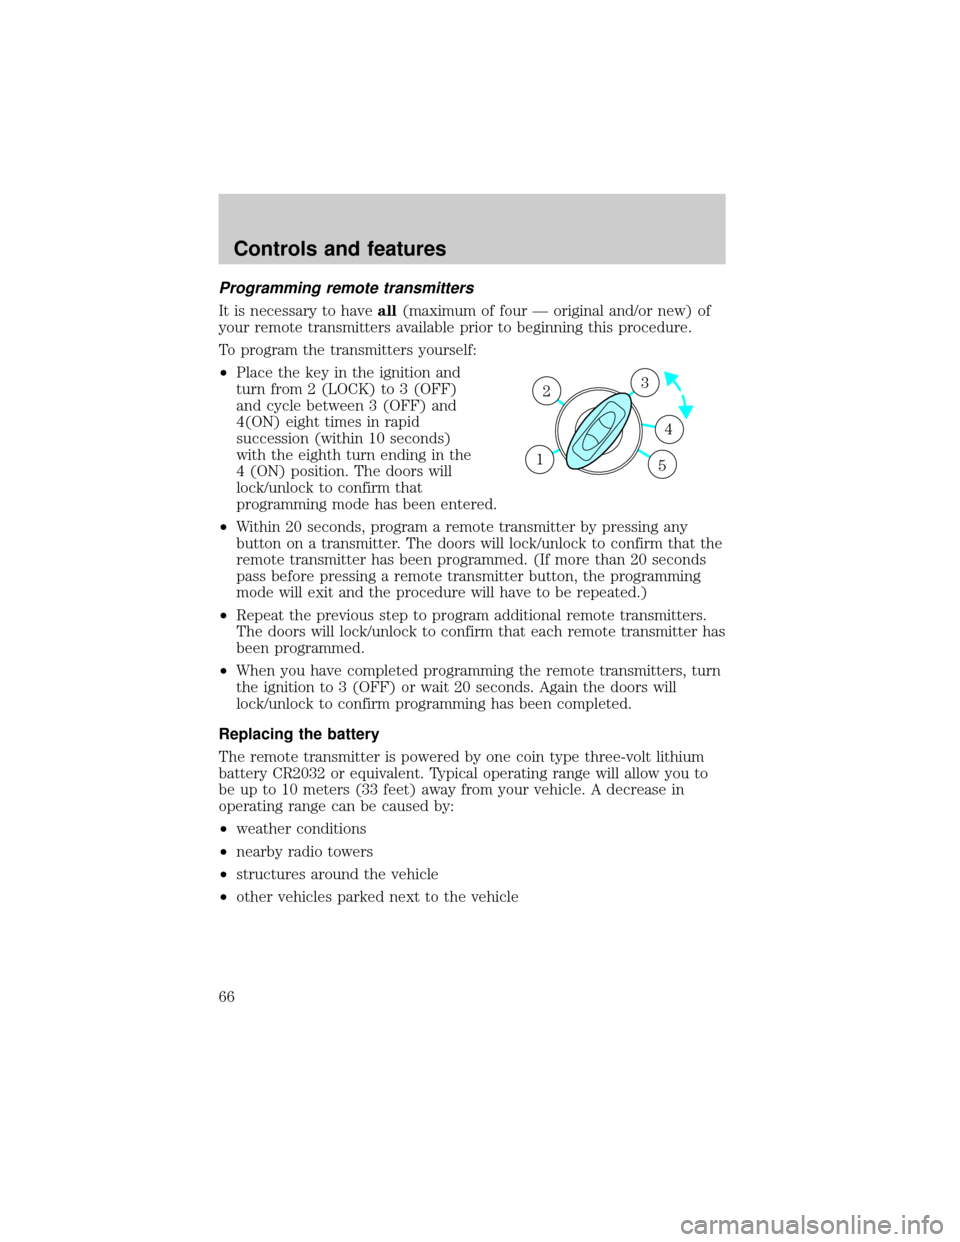
²Place the key in the ignition and
turn from 2 (LOCK) to 3 (OFF)
and cycle between 3 (OFF) and
4(ON) eight times in rapid
succession (within 10 seconds)
with the eighth turn ending in the
4 (ON) position. The doors will
lock/unlock to confirm that
programming mode has been entered.
²Within 20 seconds, program a remote transmitter by pressing any
button on a transmitter. The doors will lock/unlock to confirm that the
remote transmitter has been programmed. (If more than 20 seconds
pass before pressing a remote transmitter button, the programming
mode will exit and the procedure will have to be repeated.)
²Repeat the previous step to program additional remote transmitters.
The doors will lock/unlock to confirm that each remote transmitter has
been programmed.
²When you have completed programming the remote transmitters, turn
the ignition to 3 (OFF) or wait 20 seconds. Again the doors will
lock/unlock to confirm programming has been completed.
Replacing the battery
The remote transmitter is powered by one coin type three-volt lithium
battery CR2032 or equivalent. Typical operating range will allow you to
be up to 10 meters (33 feet) away from your vehicle. A decrease in
operating range can be caused by:
²weather conditions
²nearby radio towers
²structures around the vehicle
²other vehicles parked next to the vehicle
3
4
1 2
5
Controls and features
66
Page 67 of 240
To replace the battery:
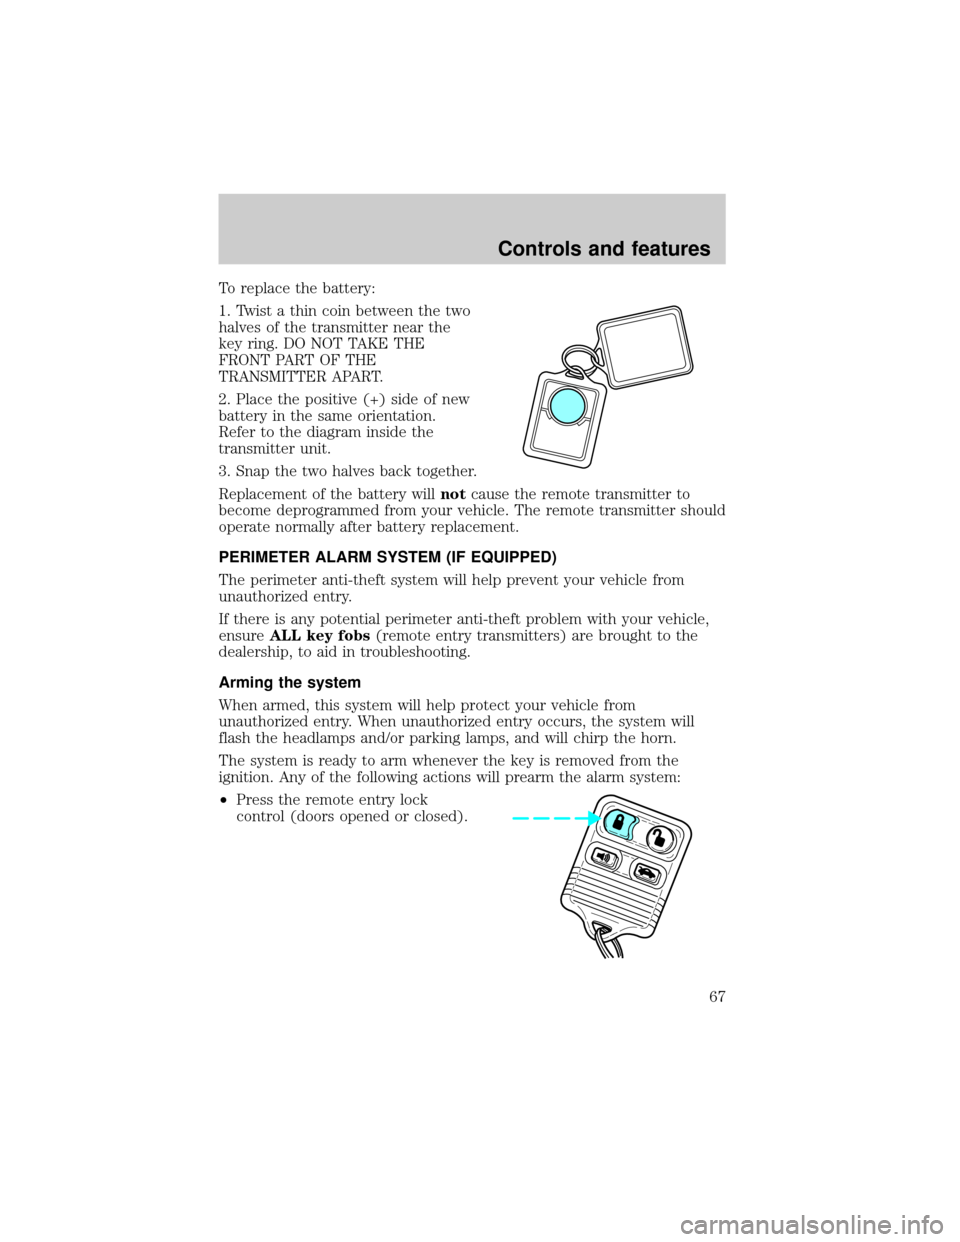
1. Twist a thin coin between the two
halves of the transmitter near the
key ring. DO NOT TAKE THE
FRONT PART OF THE
TRANSMITTER APART.
2. Place the positive (+) side of new
battery in the same orientation.
Refer to the diagram inside the
transmitter unit.
3. Snap the two halves back together.
Replacement of the battery willnotcause the remote transmitter to
become deprogrammed from your vehicle. The remote transmitter should
operate normally after battery replacement.
PERIMETER ALARM SYSTEM (IF EQUIPPED)
The perimeter anti-theft system will help prevent your vehicle from
unauthorized entry.
If there is any potential perimeter anti-theft problem with your vehicle,
ensureALL key fobs(remote entry transmitters) are brought to the
dealership, to aid in troubleshooting.
Arming the system
When armed, this system will help protect your vehicle from
unauthorized entry. When unauthorized entry occurs, the system will
flash the headlamps and/or parking lamps, and will chirp the horn.
The system is ready to arm whenever the key is removed from the
ignition. Any of the following actions will prearm the alarm system:
²Press the remote entry lock
control (doors opened or closed).
Controls and features
67