Mercury Sable 2002 s Owners Manual
Manufacturer: MERCURY, Model Year: 2002, Model line: Sable, Model: Mercury Sable 2002Pages: 240, PDF Size: 3.53 MB
Page 91 of 240
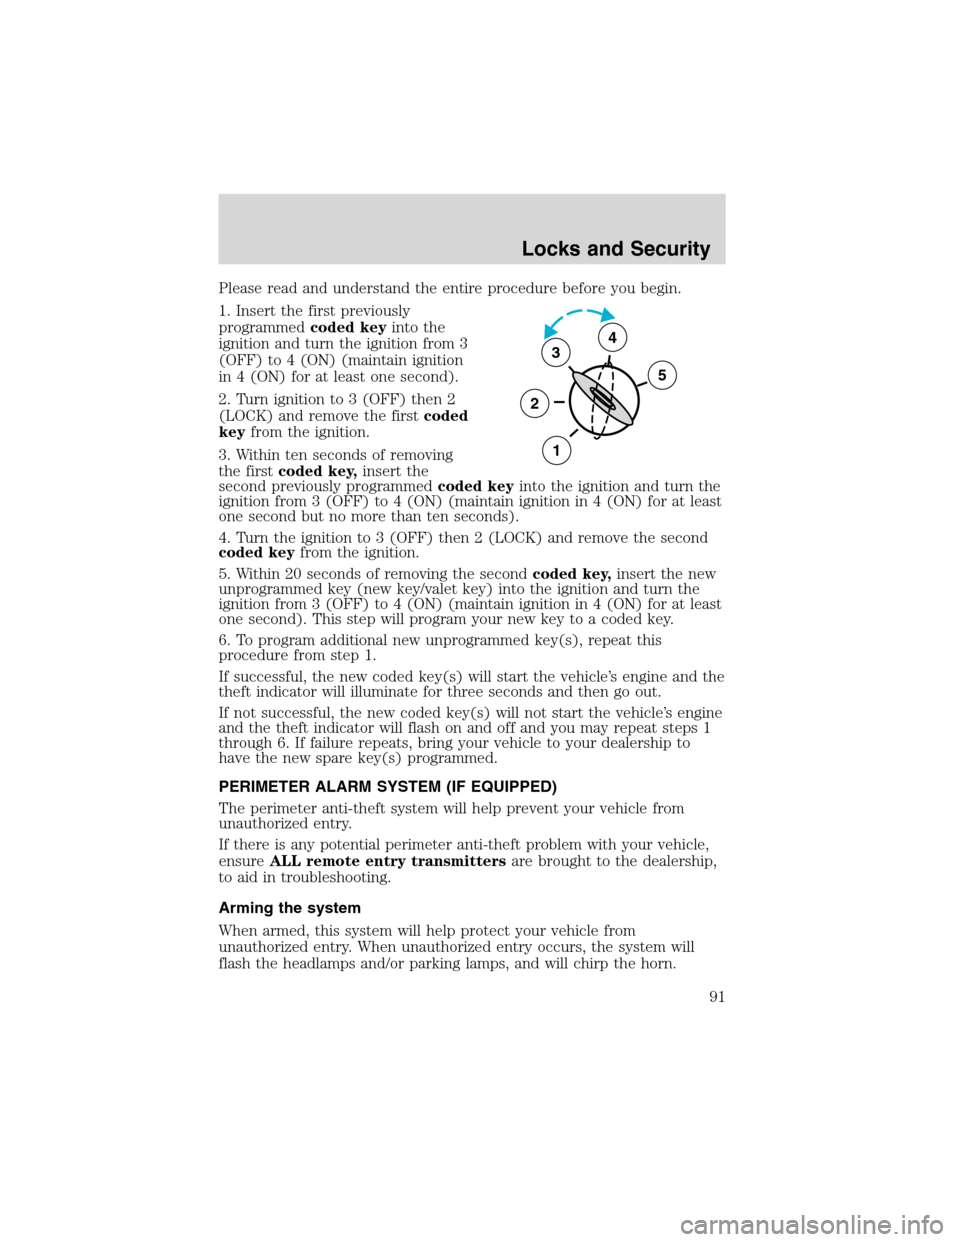
Please read and understand the entire procedure before you begin.
1. Insert the first previously
programmedcoded keyinto the
ignition and turn the ignition from 3
(OFF) to 4 (ON) (maintain ignition
in 4 (ON) for at least one second).
2. Turn ignition to 3 (OFF) then 2
(LOCK) and remove the firstcoded
keyfrom the ignition.
3. Within ten seconds of removing
the firstcoded key,insert the
second previously programmedcoded keyinto the ignition and turn the
ignition from 3 (OFF) to 4 (ON) (maintain ignition in 4 (ON) for at least
one second but no more than ten seconds).
4. Turn the ignition to 3 (OFF) then 2 (LOCK) and remove the second
coded keyfrom the ignition.
5. Within 20 seconds of removing the secondcoded key,insert the new
unprogrammed key (new key/valet key) into the ignition and turn the
ignition from 3 (OFF) to 4 (ON) (maintain ignition in 4 (ON) for at least
one second). This step will program your new key to a coded key.
6. To program additional new unprogrammed key(s), repeat this
procedure from step 1.
If successful, the new coded key(s) will start the vehicle’s engine and the
theft indicator will illuminate for three seconds and then go out.
If not successful, the new coded key(s) will not start the vehicle’s engine
and the theft indicator will flash on and off and you may repeat steps 1
through 6. If failure repeats, bring your vehicle to your dealership to
have the new spare key(s) programmed.
PERIMETER ALARM SYSTEM (IF EQUIPPED)
The perimeter anti-theft system will help prevent your vehicle from
unauthorized entry.
If there is any potential perimeter anti-theft problem with your vehicle,
ensureALL remote entry transmittersare brought to the dealership,
to aid in troubleshooting.
Arming the system
When armed, this system will help protect your vehicle from
unauthorized entry. When unauthorized entry occurs, the system will
flash the headlamps and/or parking lamps, and will chirp the horn.
3
2
1
5
4
Locks and Security
91
Page 92 of 240
The system is ready to arm whenever the key is removed from the
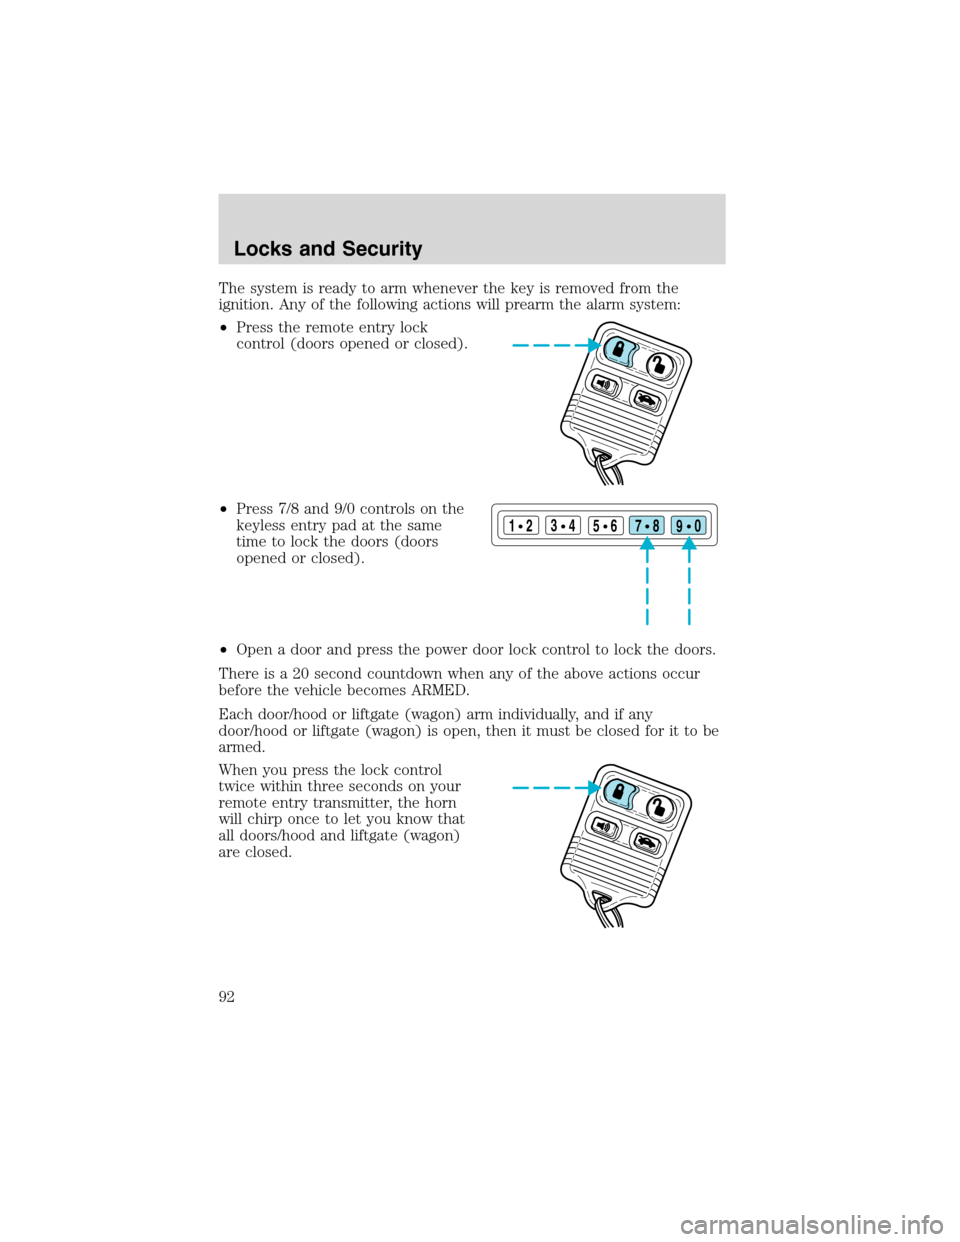
ignition. Any of the following actions will prearm the alarm system:
•Press the remote entry lock
control (doors opened or closed).
•Press 7/8 and 9/0 controls on the
keyless entry pad at the same
time to lock the doors (doors
opened or closed).
•Open a door and press the power door lock control to lock the doors.
There is a 20 second countdown when any of the above actions occur
before the vehicle becomes ARMED.
Each door/hood or liftgate (wagon) arm individually, and if any
door/hood or liftgate (wagon) is open, then it must be closed for it to be
armed.
When you press the lock control
twice within three seconds on your
remote entry transmitter, the horn
will chirp once to let you know that
all doors/hood and liftgate (wagon)
are closed.
123
45678
90
Locks and Security
92
Page 93 of 240
If the doors/hood or liftgate (wagon) are not closed and you press the
remote entry transmitter twice to confirm the doors are locked, the horn
will chirp twice to warn you that a door/hood or liftgate (wagon) is still
open.
Disarming the system
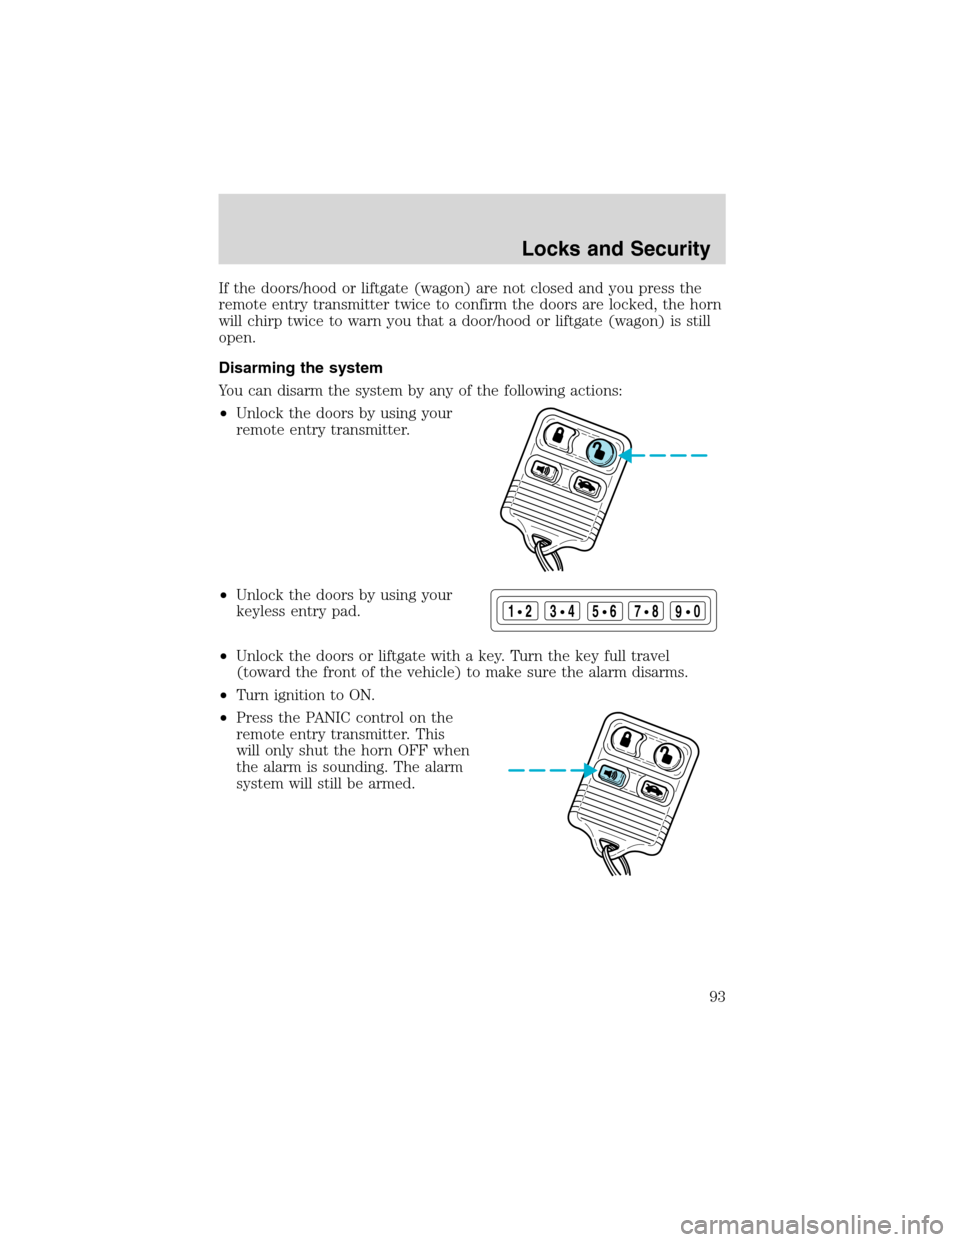
You can disarm the system by any of the following actions:
•Unlock the doors by using your
remote entry transmitter.
•Unlock the doors by using your
keyless entry pad.
•Unlock the doors or liftgate with a key. Turn the key full travel
(toward the front of the vehicle) to make sure the alarm disarms.
•Turn ignition to ON.
•Press the PANIC control on the
remote entry transmitter. This
will only shut the horn OFF when
the alarm is sounding. The alarm
system will still be armed.
123
45678
90
Locks and Security
93
Page 94 of 240

Triggering the anti-theft system
The armed system will be triggered if:
•Any door, liftgate or hood is opened without using the door key or the
remote entry transmitter.
•The trunk is forced opened.
Locks and Security
94
Page 95 of 240

SEATING
Adjustable head restraints
Your vehicle’s seats are equipped with head restraints which are
vertically adjustable. The purpose of these head restraints is to help limit
head motion in the event of a rear collision. To properly adjust your head
restraints, lift the head restraint so that it is located directly behind your
head or as close to that position as possible. Refer to the following to
raise and lower the head restraints.
The head restraints can be moved
up and down.
Push control to lower head restraint.
Using the manual lumbar support (if equipped)
The lumbar control is located on the
front of the seat cushion.
Turn to adjust lumbar support.
Seating and Safety Restraints
95
Page 96 of 240
Adjusting the front manual seat
Never adjust the driver’s seat or seatback when the vehicle is
moving.
Do not pile cargo higher than the seatbacks to reduce the risk of
injuring people in a collision or sudden stop.
Always drive and ride with your seatback upright and the lap
belt snug and low across the hips.
Reclining the seatback can cause an occupant to slide under the
seat’s safety belt, resulting in severe personal injuries in the
event of a collision.
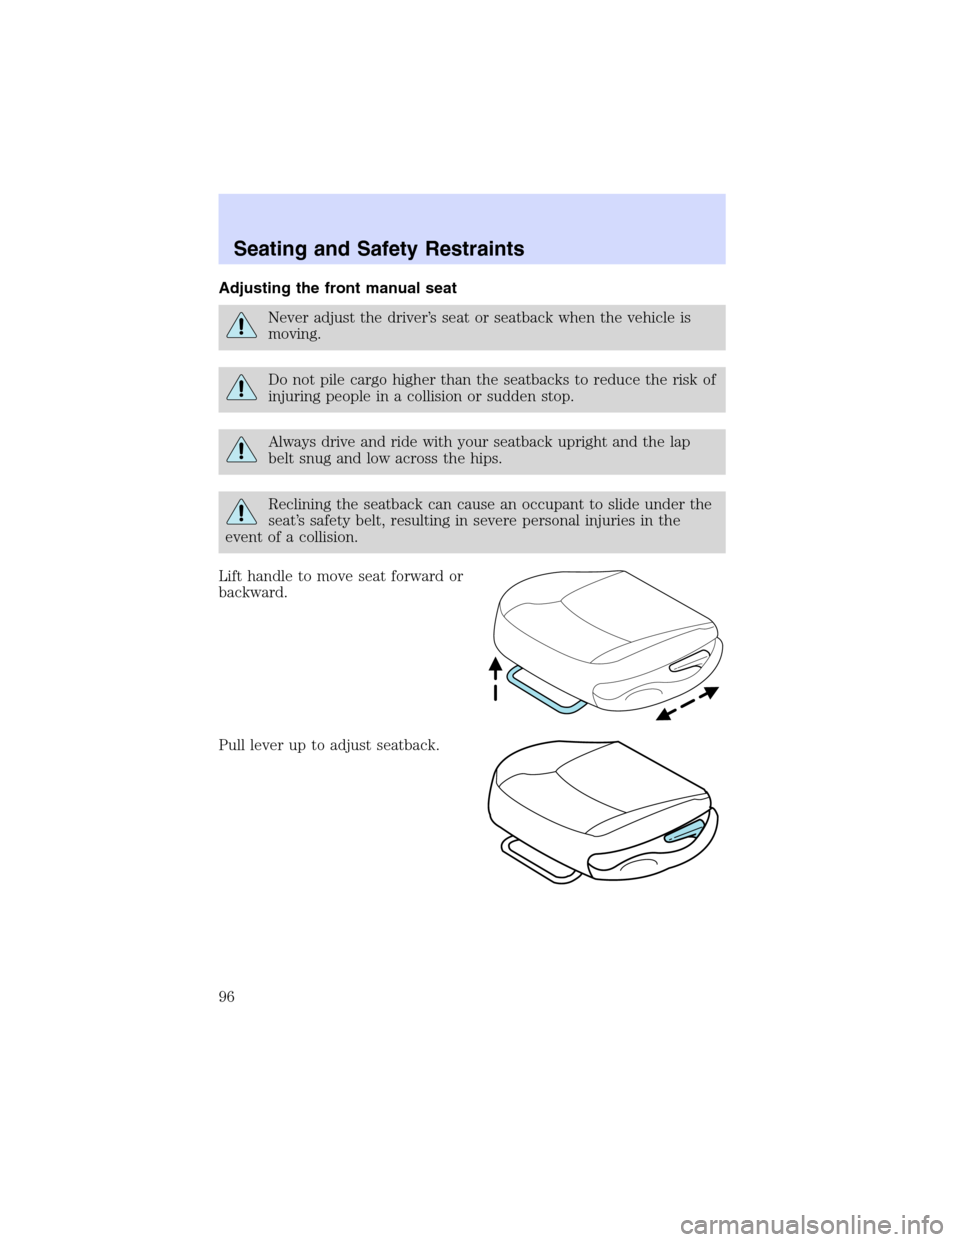
Lift handle to move seat forward or
backward.
Pull lever up to adjust seatback.
Seating and Safety Restraints
96
Page 97 of 240
Adjusting the front power seat (if equipped)
Never adjust the driver’s seat or seatback when the vehicle is
moving.
Do not pile cargo higher than the seatbacks to avoid injuring
people in a collision or sudden stop.
Always drive and ride with your seatback upright and the lap
belt snug and low across the hips.
Reclining the seatback can cause an occupant to slide under the
seat’s safety belt, resulting in severe personal injuries in the
event of a collision.
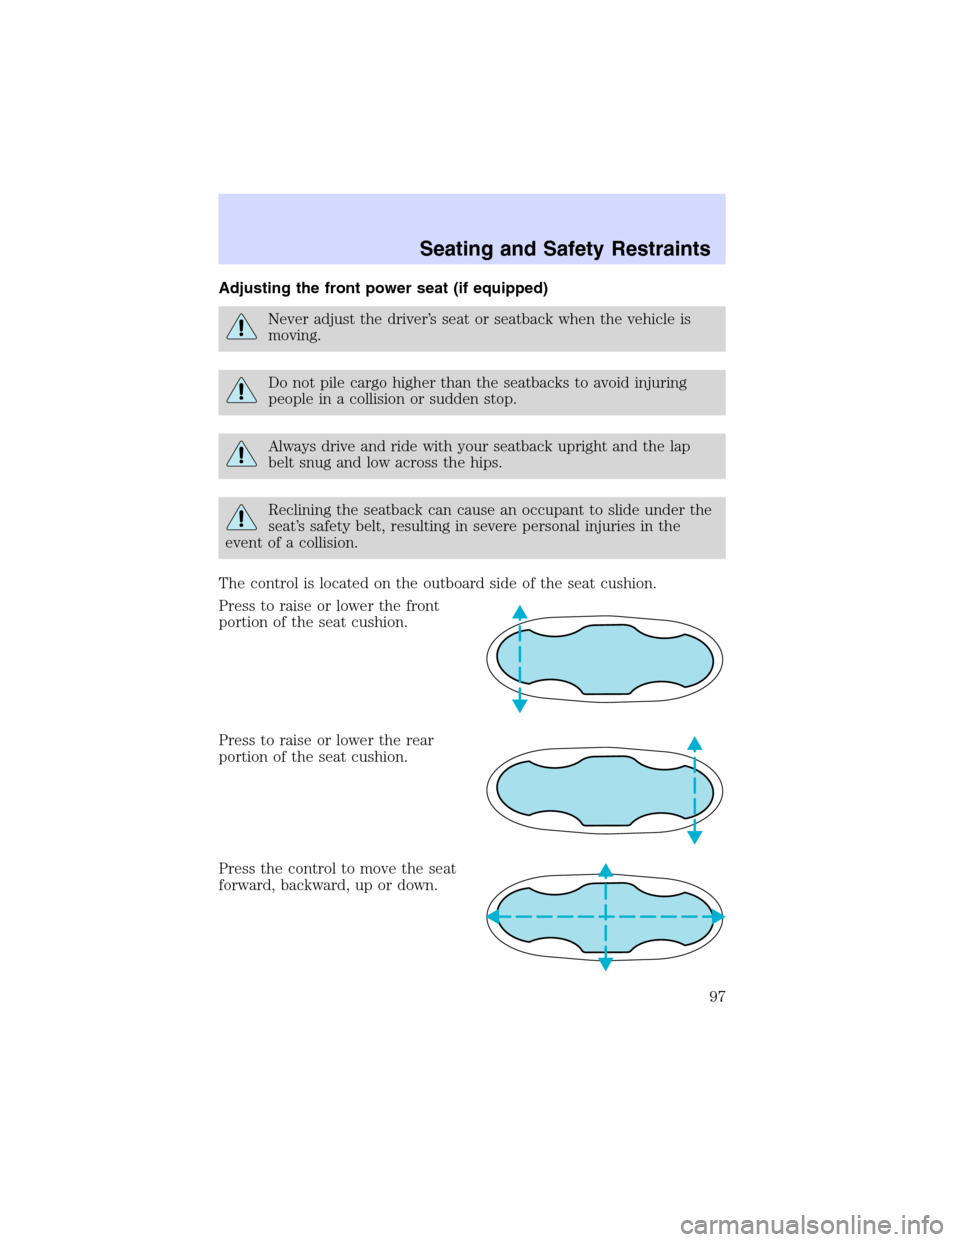
The control is located on the outboard side of the seat cushion.
Press to raise or lower the front
portion of the seat cushion.
Press to raise or lower the rear
portion of the seat cushion.
Press the control to move the seat
forward, backward, up or down.
Seating and Safety Restraints
97
Page 98 of 240
REAR SEATS
2nd seat/split-folding rear seat (if equipped)
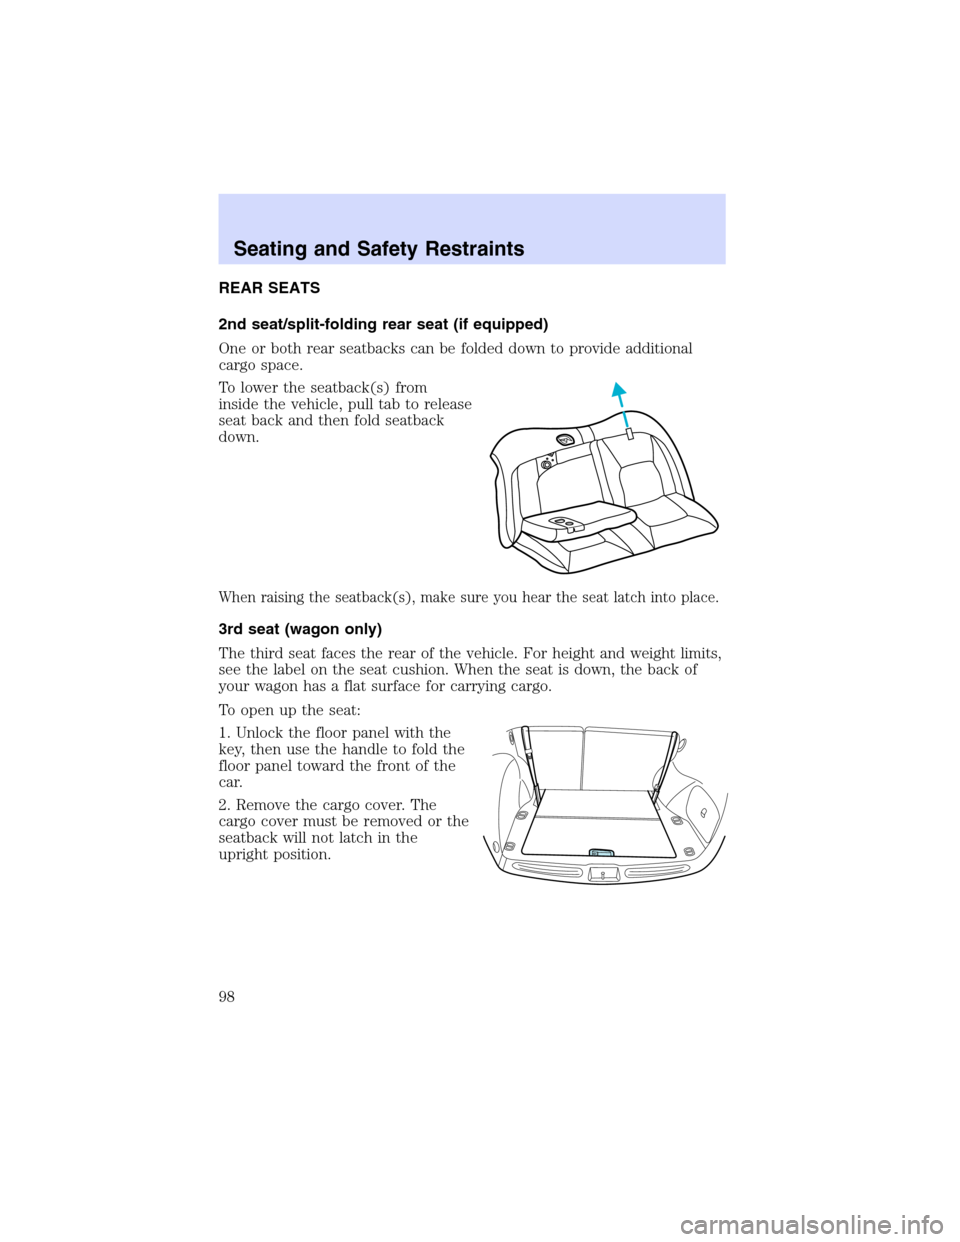
One or both rear seatbacks can be folded down to provide additional
cargo space.
To lower the seatback(s) from
inside the vehicle, pull tab to release
seat back and then fold seatback
down.
When raising the seatback(s), make sure you hear the seat latch into place.
3rd seat (wagon only)
The third seat faces the rear of the vehicle. For height and weight limits,
see the label on the seat cushion. When the seat is down, the back of
your wagon has a flat surface for carrying cargo.
To open up the seat:
1. Unlock the floor panel with the
key, then use the handle to fold the
floor panel toward the front of the
car.
2. Remove the cargo cover. The
cargo cover must be removed or the
seatback will not latch in the
upright position.
Seating and Safety Restraints
98
Page 99 of 240
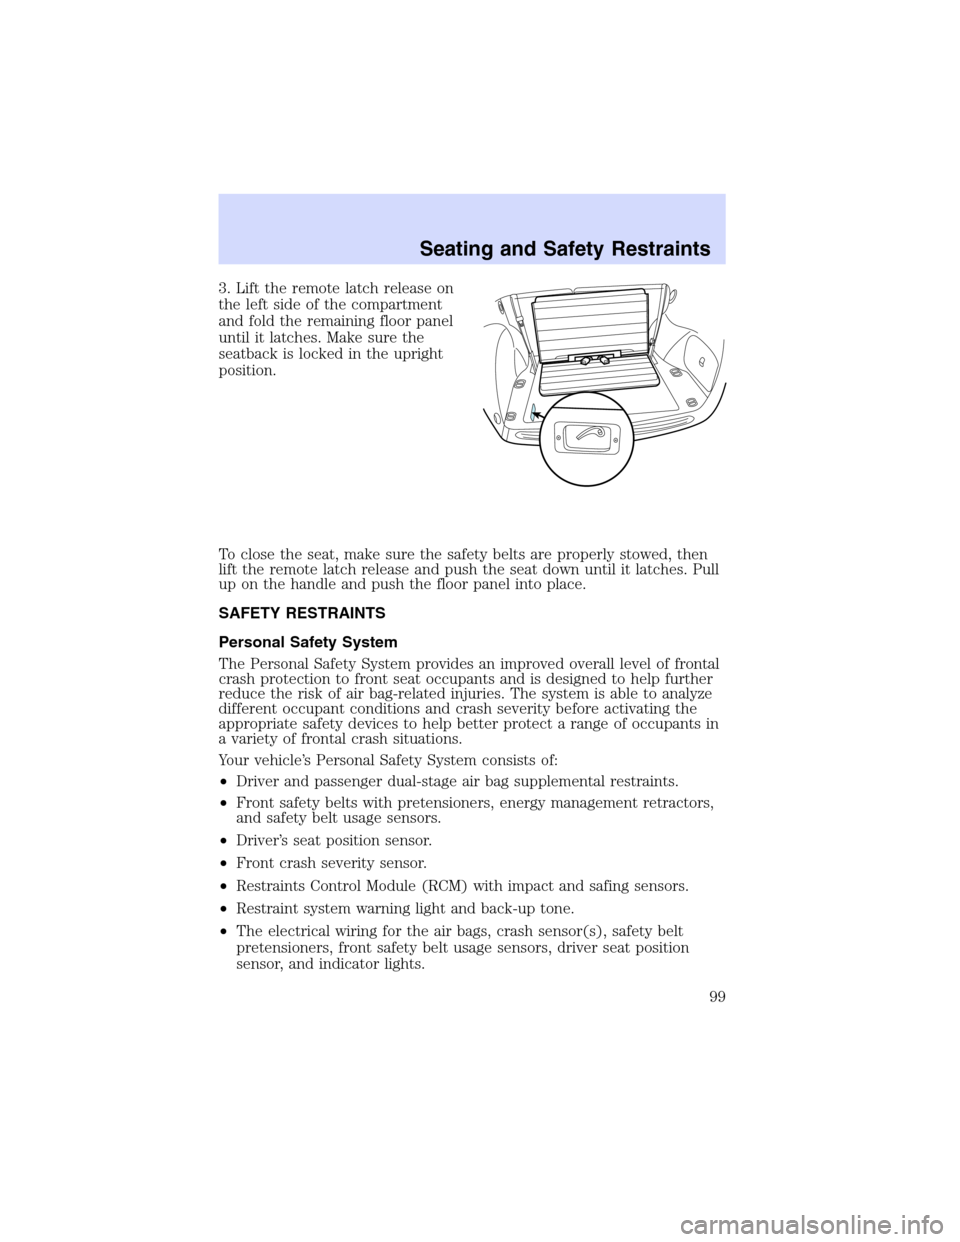
3. Lift the remote latch release on
the left side of the compartment
and fold the remaining floor panel
until it latches. Make sure the
seatback is locked in the upright
position.
To close the seat, make sure the safety belts are properly stowed, then
lift the remote latch release and push the seat down until it latches. Pull
up on the handle and push the floor panel into place.
SAFETY RESTRAINTS
Personal Safety System
The Personal Safety System provides an improved overall level of frontal
crash protection to front seat occupants and is designed to help further
reduce the risk of air bag-related injuries. The system is able to analyze
different occupant conditions and crash severity before activating the
appropriate safety devices to help better protect a range of occupants in
a variety of frontal crash situations.
Your vehicle’s Personal Safety System consists of:
•Driver and passenger dual-stage air bag supplemental restraints.
•Front safety belts with pretensioners, energy management retractors,
and safety belt usage sensors.
•Driver’s seat position sensor.
•Front crash severity sensor.
•Restraints Control Module (RCM) with impact and safing sensors.
•Restraint system warning light and back-up tone.
•The electrical wiring for the air bags, crash sensor(s), safety belt
pretensioners, front safety belt usage sensors, driver seat position
sensor, and indicator lights.
Seating and Safety Restraints
99
Page 100 of 240
How does the personal safety system work?
The Personal Safety System can adapt the deployment strategy of your
vehicle’s safety devices according to crash severity and occupant
conditions. A collection of crash and occupant sensors provides
information to the Restraints Control Module (RCM). During a crash, the
RCM activates the safety belt pretensioners and/or either one or both
stages of the dual-stage air bag supplemental restraints based on crash
severity and occupant conditions.
The fact that the pretensioners or air bags did not activate for both front
seat occupants in a collision does not mean that something is wrong with
the system. Rather, it means the Personal Safety System determined the
accident conditions (crash severity, belt usage, etc.) were not
appropriate to activate these safety devices. Front air bags and
pretensioners are designed to activate only in frontal and near-frontal
collisions, not rollovers, side-impacts, or rear-impacts unless the collision
causes sufficient longitudinal deceleration.
Driver and passenger dual-stage air bag supplemental restraints
The dual-stage air bags offer the capability to tailor the level of air bag
inflation energy. A lower, less forceful energy level is provided for more
common, moderate-severity impacts. A higher energy level is used for
the most severe impacts. Refer toAir bag Supplemental Restraints
section in this chapter.
Front crash severity sensor
The front crash severity sensor enhances the ability to detect the
severity of an impact. Positioned up front, it provides valuable
information early in the crash event on the severity of the impact. This
allows your Personal Safety System to distinguish between different
levels of crash severity and modify the deployment strategy of the
dual-stage air bags and safety belt pretensioners.
Driver’s seat position sensor
The driver’s seat position sensor allows your Personal Safety System to
tailor the deployment level of the driver dual-stage air bag based on seat
position. The system is designed to help protect smaller drivers sitting
close to the driver air bag by providing a lower air bag output level.
Front safety belt usage sensors
The front safety belt usage sensors detect whether or not the driver and
front outboard passenger safety belts are fastened. This information
allows your Personal Safety System to tailor the air bag deployment and
Seating and Safety Restraints
100