ignition Mercury Sable 2002 s User Guide
[x] Cancel search | Manufacturer: MERCURY, Model Year: 2002, Model line: Sable, Model: Mercury Sable 2002Pages: 240, PDF Size: 3.53 MB
Page 44 of 240
cooling the vehicle if driven for two or three minutes with the
windows open. This will force most of the hot, stale air out of the
vehicle. Once the vehicle has been“aired out”, operate the climate
control system as desired.
•Do not place objects under the front seat that will interfere with the
airflow to the rear seats.
•Remove any snow, ice or leaves from the air intake area at the base of
the windshield.
•Do not place objects over the defroster outlets. These objects can
block airflow and reduce your ability to see through your windshield.
Avoid placing small objects on top of the instrument panel. These
objects may fall down into the defroster outlets and block airflow, in
addition to damaging the climate control system.
Do not place objects on top of the instrument panel, as these
objects may become projectiles in a collision or sudden stop.
REAR WINDOW DEFROSTER
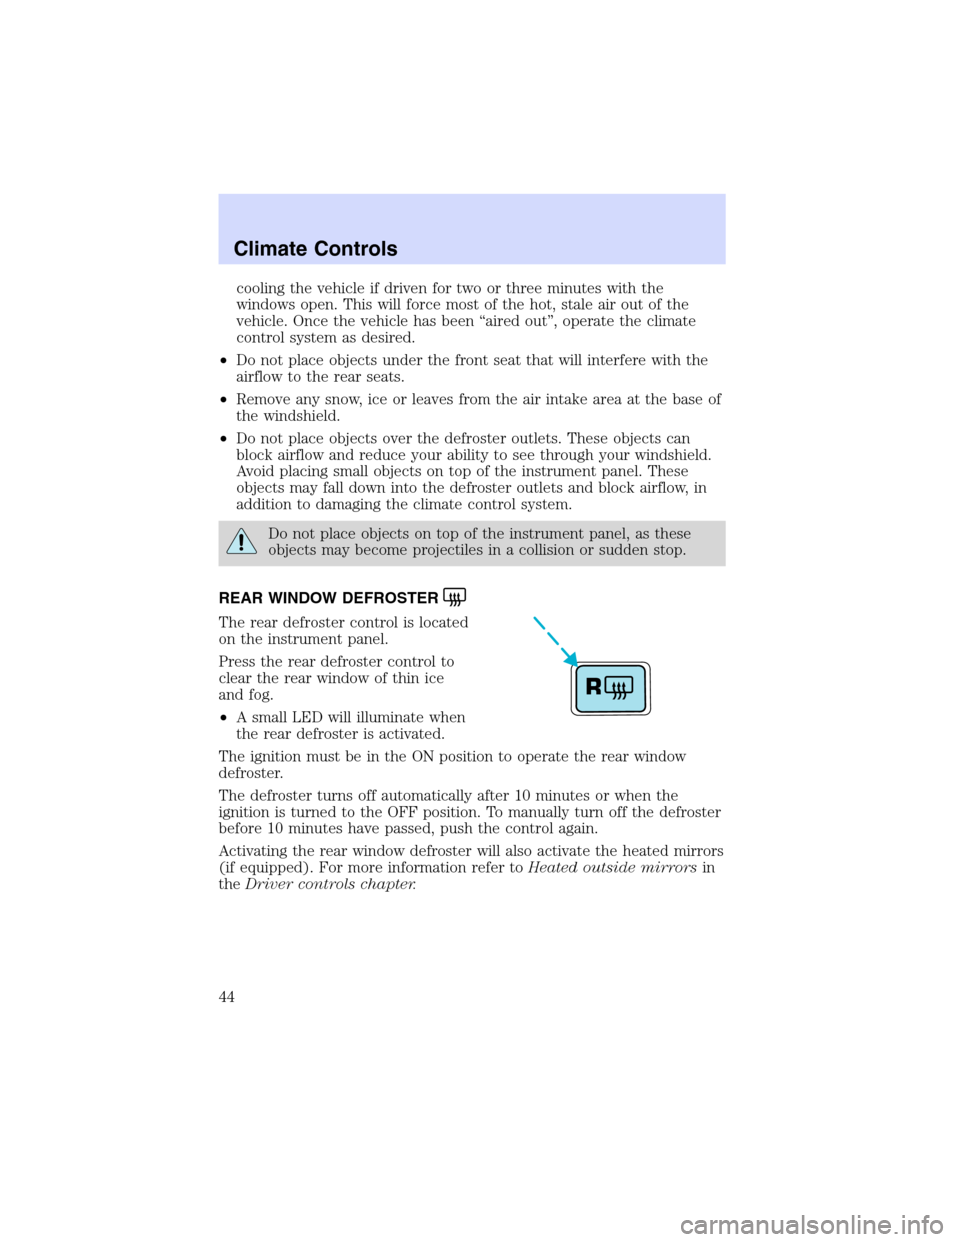
The rear defroster control is located
on the instrument panel.
Press the rear defroster control to
clear the rear window of thin ice
and fog.
•A small LED will illuminate when
the rear defroster is activated.
The ignition must be in the ON position to operate the rear window
defroster.
The defroster turns off automatically after 10 minutes or when the
ignition is turned to the OFF position. To manually turn off the defroster
before 10 minutes have passed, push the control again.
Activating the rear window defroster will also activate the heated mirrors
(if equipped). For more information refer toHeated outside mirrorsin
theDriver controls chapter.
R
Climate Controls
44
Page 46 of 240
HEADLAMP CONTROL
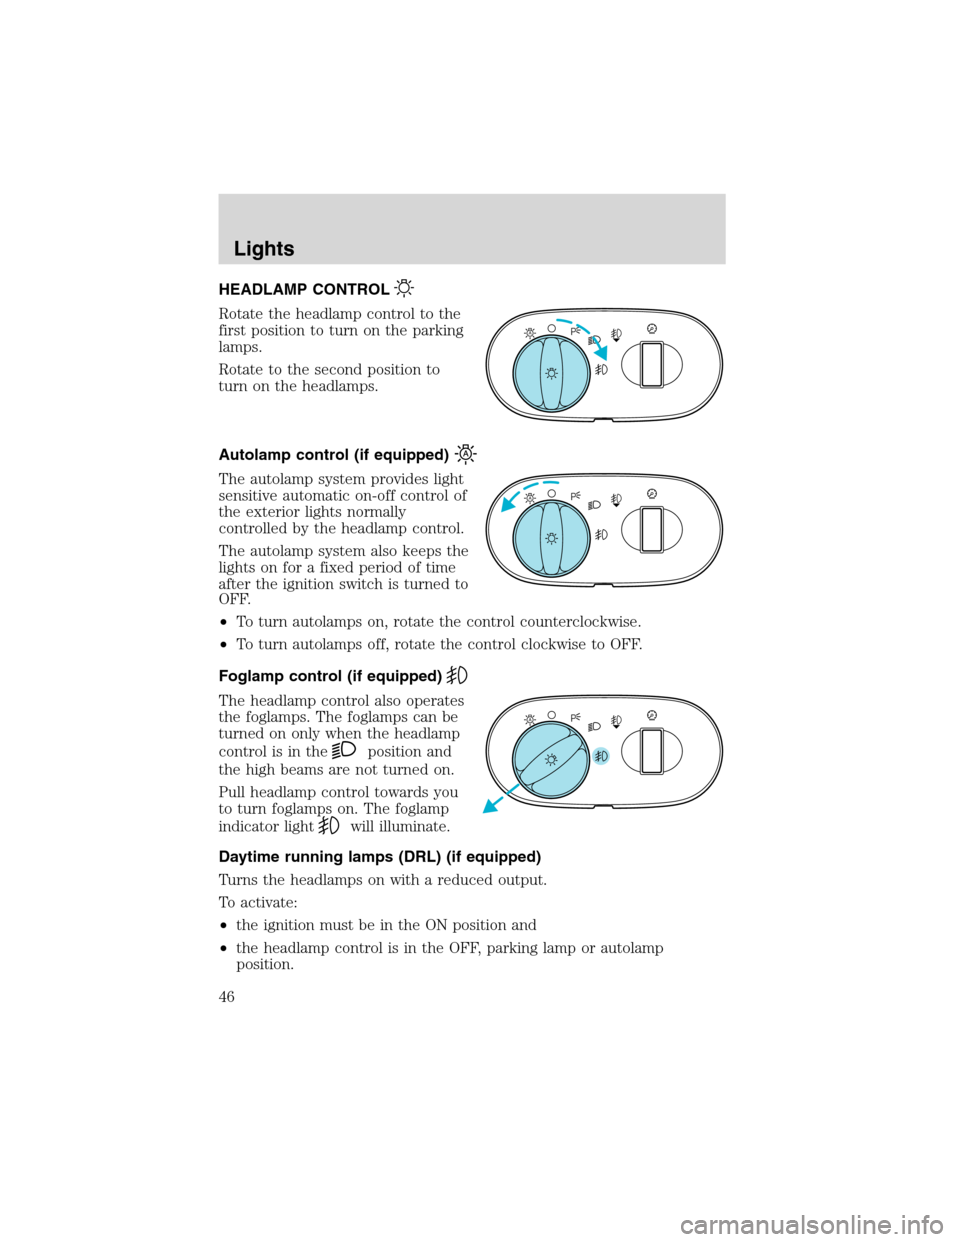
Rotate the headlamp control to the
first position to turn on the parking
lamps.
Rotate to the second position to
turn on the headlamps.
Autolamp control (if equipped)
The autolamp system provides light
sensitive automatic on-off control of
the exterior lights normally
controlled by the headlamp control.
The autolamp system also keeps the
lights on for a fixed period of time
after the ignition switch is turned to
OFF.
•To turn autolamps on, rotate the control counterclockwise.
•To turn autolamps off, rotate the control clockwise to OFF.
Foglamp control (if equipped)
The headlamp control also operates
the foglamps. The foglamps can be
turned on only when the headlamp
control is in the
position and
the high beams are not turned on.
Pull headlamp control towards you
to turn foglamps on. The foglamp
indicator light
will illuminate.
Daytime running lamps (DRL) (if equipped)
Turns the headlamps on with a reduced output.
To activate:
•the ignition must be in the ON position and
•the headlamp control is in the OFF, parking lamp or autolamp
position.
A
A
A
Lights
46
Page 51 of 240
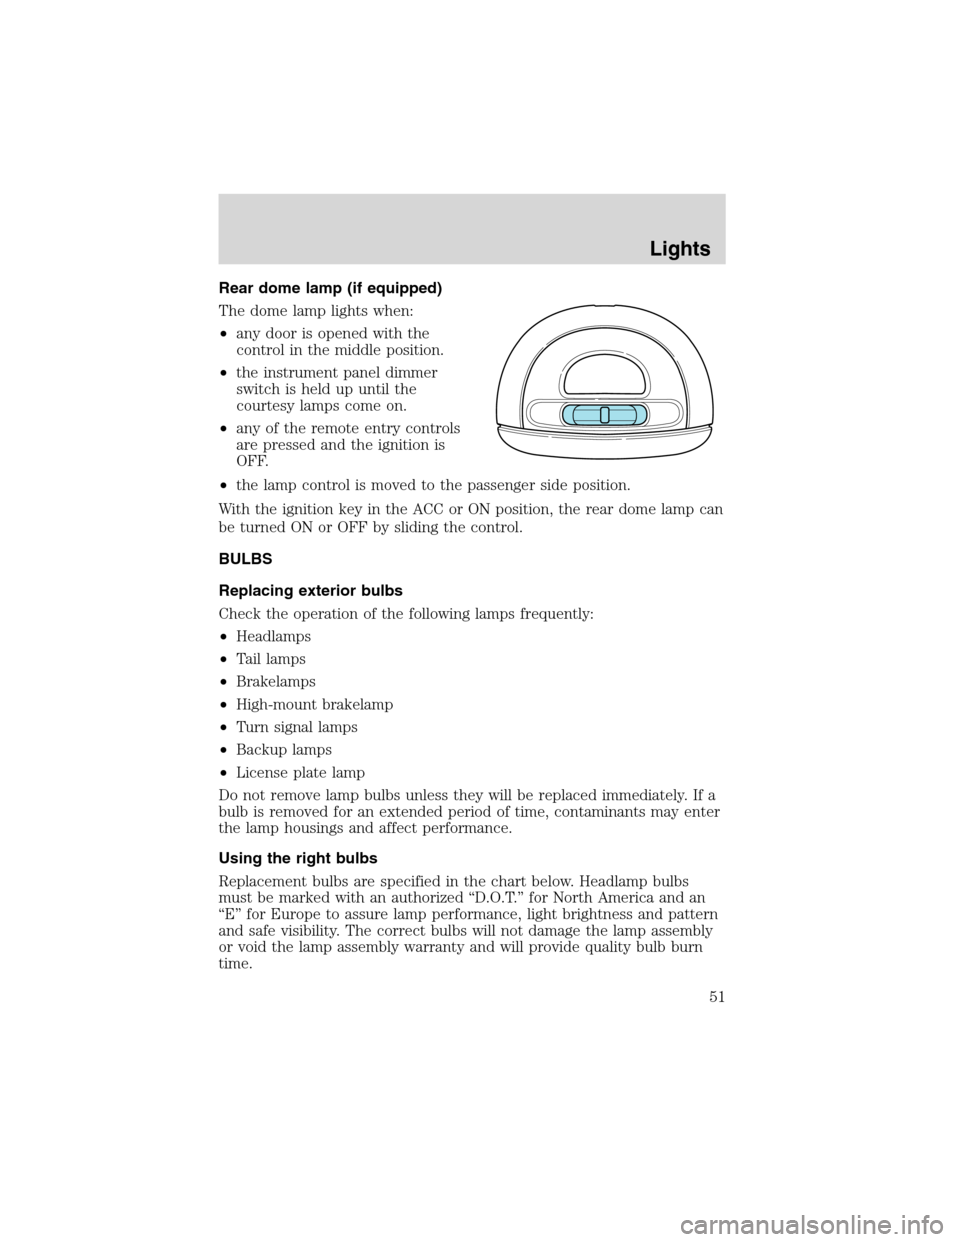
Rear dome lamp (if equipped)
The dome lamp lights when:
•any door is opened with the
control in the middle position.
•the instrument panel dimmer
switch is held up until the
courtesy lamps come on.
•any of the remote entry controls
are pressed and the ignition is
OFF.
•the lamp control is moved to the passenger side position.
With the ignition key in the ACC or ON position, the rear dome lamp can
be turned ON or OFF by sliding the control.
BULBS
Replacing exterior bulbs
Check the operation of the following lamps frequently:
•Headlamps
•Tail lamps
•Brakelamps
•High-mount brakelamp
•Turn signal lamps
•Backup lamps
•License plate lamp
Do not remove lamp bulbs unless they will be replaced immediately. If a
bulb is removed for an extended period of time, contaminants may enter
the lamp housings and affect performance.
Using the right bulbs
Replacement bulbs are specified in the chart below. Headlamp bulbs
must be marked with an authorized“D.O.T.”for North America and an
“E”for Europe to assure lamp performance, light brightness and pattern
and safe visibility. The correct bulbs will not damage the lamp assembly
or void the lamp assembly warranty and will provide quality bulb burn
time.
Lights
51
Page 66 of 240

Window lock
The window lock feature allows only
the driver to operate the power
windows.
To lock out all the window controls
except for the driver’s press the left
side of the control. Press the right
side to restore the window controls.
Accessory delay (if equipped)
With accessory delay, the window switches may be used for up to ten
minutes after the ignition switch is turned to the OFF position or until
any door is opened.
MIRRORS
Automatic dimming inside rear view mirror (if equipped)
Your vehicle is equipped with an
inside rear view mirror which has an
auto-dimming function. The
electronic day/night mirror will
change from the normal state to the
non-glare state when bright lights
(glare) reach the mirror. When the mirror detects bright light from front
or behind, it will automatically adjust (darken) to minimize glare.
Do not block the sensor on the backside of the mirror since this may
impair proper mirror performance.
Press the control to turn the mirror OFF or AUTO.
The mirror will automatically return to the normal state whenever the
vehicle is placed in R (Reverse)(when the mirror is on) to ensure a
bright clear view when backing up.
Electronic compass (if equipped)
The compass reading will remain accurate during most driving
conditions. Unknown to the driver, the compass is continuously
recalibrating due to magnetic fields and subtle, slow changes in vehicle
magnetics which can occur over the life of the vehicle.
The compass reading will remain fixed when significant changes in the
local magnetic field are experienced (such as steel bridges). The
compass will return to normal operation upon leaving the magnetized
area.
OFF AUTO
Driver Controls
66
Page 70 of 240
Do not use the speed control in heavy traffic or on roads that
are winding, slippery, or unpaved.
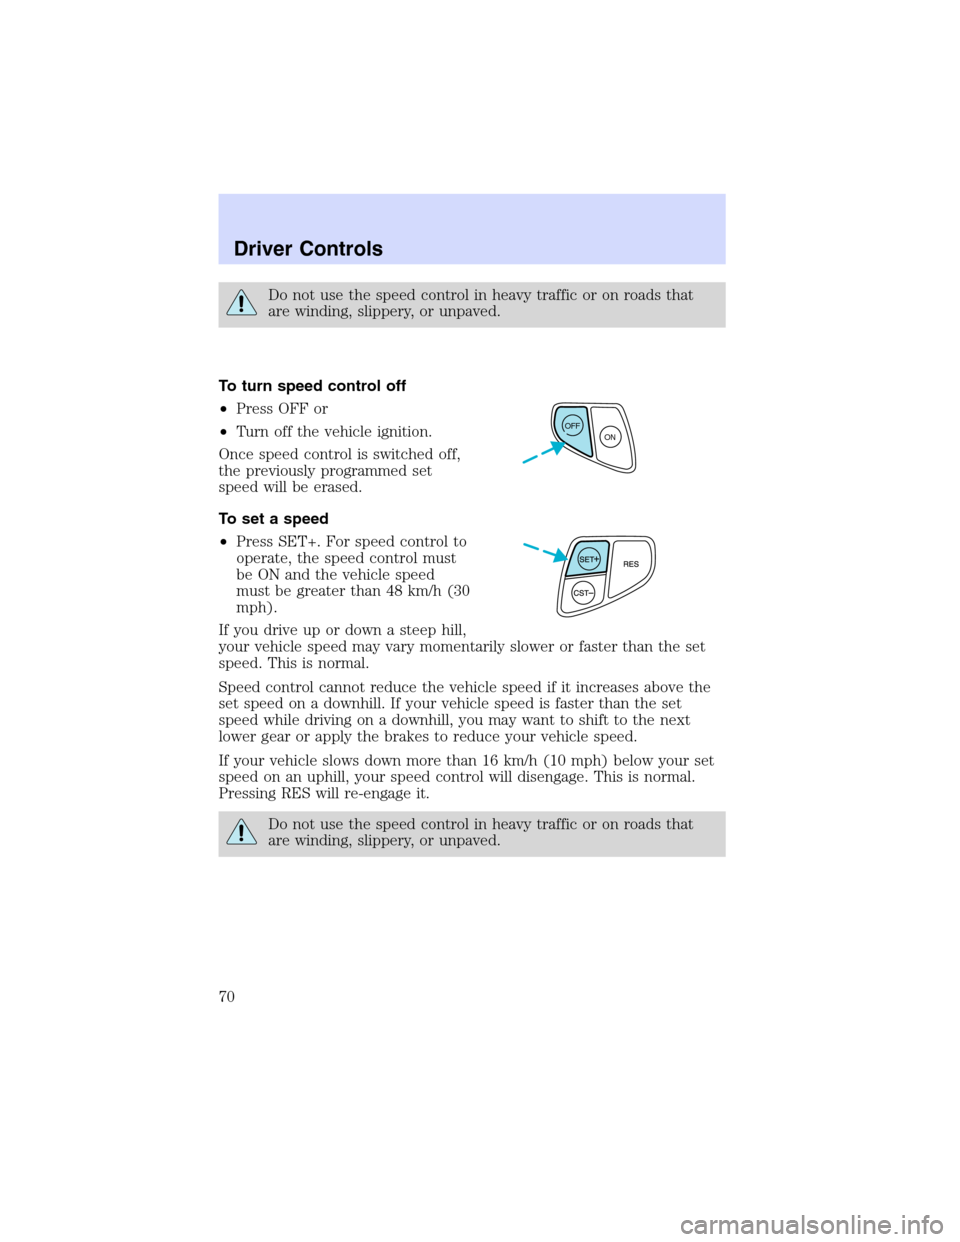
To turn speed control off
•Press OFF or
•Turn off the vehicle ignition.
Once speed control is switched off,
the previously programmed set
speed will be erased.
To set a speed
•Press SET+. For speed control to
operate, the speed control must
be ON and the vehicle speed
must be greater than 48 km/h (30
mph).
If you drive up or down a steep hill,
your vehicle speed may vary momentarily slower or faster than the set
speed. This is normal.
Speed control cannot reduce the vehicle speed if it increases above the
set speed on a downhill. If your vehicle speed is faster than the set
speed while driving on a downhill, you may want to shift to the next
lower gear or apply the brakes to reduce your vehicle speed.
If your vehicle slows down more than 16 km/h (10 mph) below your set
speed on an uphill, your speed control will disengage. This is normal.
Pressing RES will re-engage it.
Do not use the speed control in heavy traffic or on roads that
are winding, slippery, or unpaved.
OFF
ON
Driver Controls
70
Page 72 of 240

To disengage speed control
•Depress the brake pedal.
Disengaging the speed control will
not erase the previously
programmed set speed.
Pressing OFF will erase the
previously programmed set speed.
To return to a previously set speed
•Press RES. For RES to operate,
the vehicle speed must be faster
than 48 km/h (30 mph).
Indicator light
This light comes on when either the
SET or RES controls are pressed. It
turns off when the speed control
OFF control is pressed, the brake is applied or the ignition is turned to
the OFF position.
OFF
ON
CRUISE
Driver Controls
72
Page 82 of 240
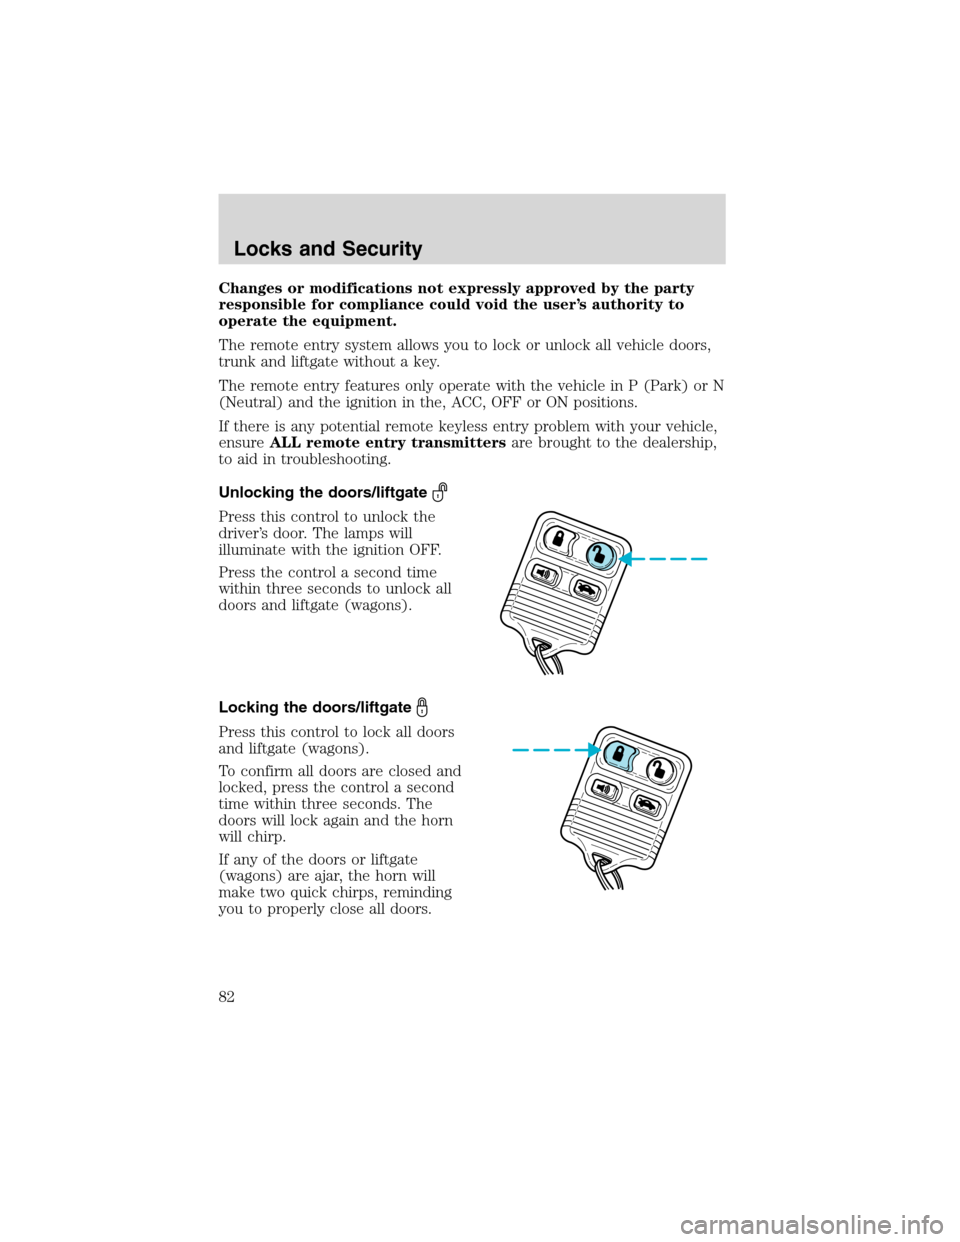
Changes or modifications not expressly approved by the party
responsible for compliance could void the user’s authority to
operate the equipment.
The remote entry system allows you to lock or unlock all vehicle doors,
trunk and liftgate without a key.
The remote entry features only operate with the vehicle in P (Park) or N
(Neutral) and the ignition in the, ACC, OFF or ON positions.
If there is any potential remote keyless entry problem with your vehicle,
ensureALL remote entry transmittersare brought to the dealership,
to aid in troubleshooting.
Unlocking the doors/liftgate
Press this control to unlock the
driver’s door. The lamps will
illuminate with the ignition OFF.
Press the control a second time
within three seconds to unlock all
doors and liftgate (wagons).
Locking the doors/liftgate
Press this control to lock all doors
and liftgate (wagons).
To confirm all doors are closed and
locked, press the control a second
time within three seconds. The
doors will lock again and the horn
will chirp.
If any of the doors or liftgate
(wagons) are ajar, the horn will
make two quick chirps, reminding
you to properly close all doors.
Locks and Security
82
Page 83 of 240
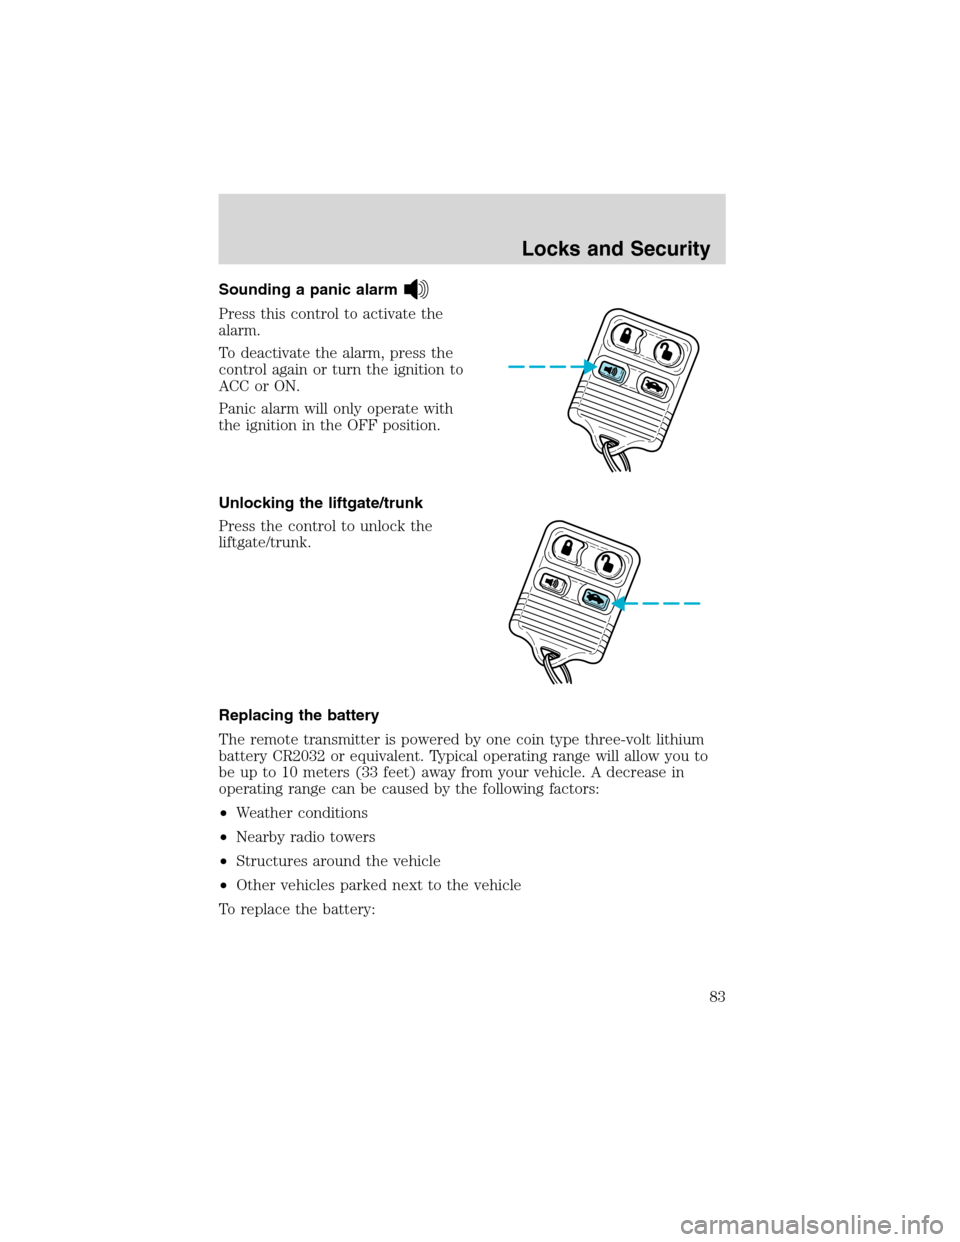
Sounding a panic alarm
Press this control to activate the
alarm.
To deactivate the alarm, press the
control again or turn the ignition to
ACC or ON.
Panic alarm will only operate with
the ignition in the OFF position.
Unlocking the liftgate/trunk
Press the control to unlock the
liftgate/trunk.
Replacing the battery
The remote transmitter is powered by one coin type three-volt lithium
battery CR2032 or equivalent. Typical operating range will allow you to
be up to 10 meters (33 feet) away from your vehicle. A decrease in
operating range can be caused by the following factors:
•Weather conditions
•Nearby radio towers
•Structures around the vehicle
•Other vehicles parked next to the vehicle
To replace the battery:
Locks and Security
83
Page 84 of 240
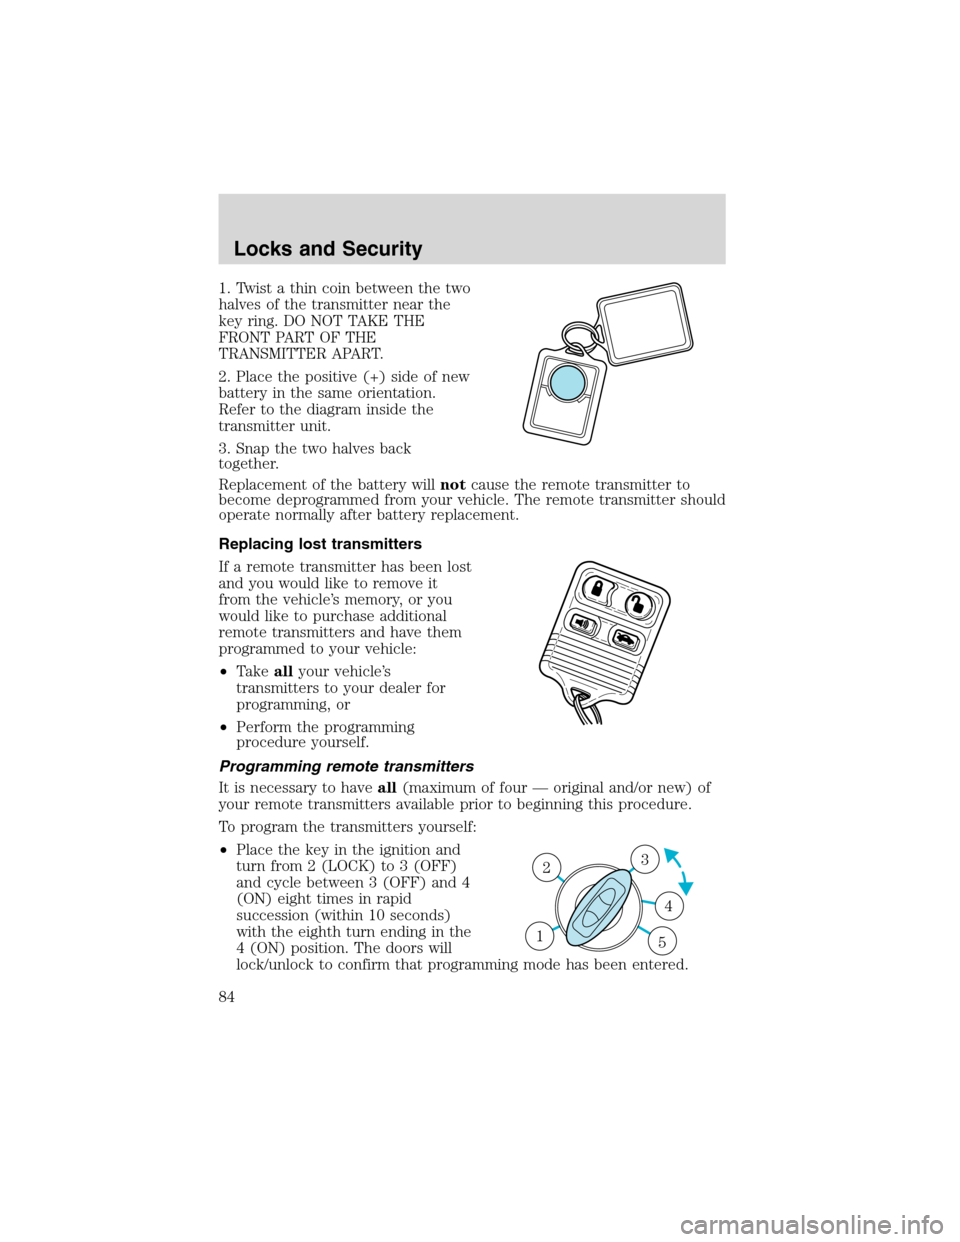
1. Twist a thin coin between the two
halves of the transmitter near the
key ring. DO NOT TAKE THE
FRONT PART OF THE
TRANSMITTER APART.
2. Place the positive (+) side of new
battery in the same orientation.
Refer to the diagram inside the
transmitter unit.
3. Snap the two halves back
together.
Replacement of the battery willnotcause the remote transmitter to
become deprogrammed from your vehicle. The remote transmitter should
operate normally after battery replacement.
Replacing lost transmitters
If a remote transmitter has been lost
and you would like to remove it
from the vehicle’s memory, or you
would like to purchase additional
remote transmitters and have them
programmed to your vehicle:
•Takeallyour vehicle’s
transmitters to your dealer for
programming, or
•Perform the programming
procedure yourself.
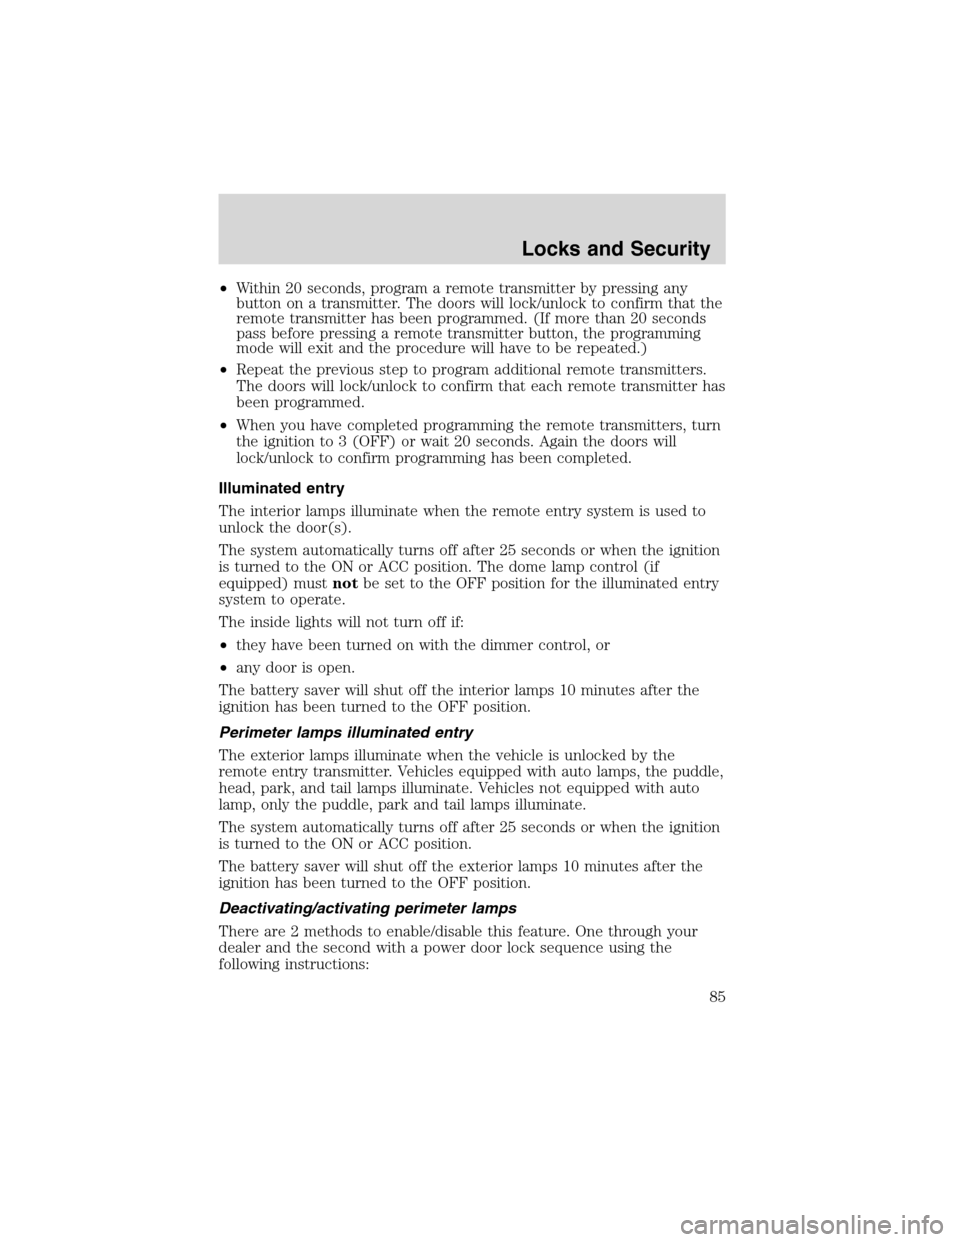
Programming remote transmitters
It is necessary to haveall(maximum of four—original and/or new) of
your remote transmitters available prior to beginning this procedure.
To program the transmitters yourself:
•Place the key in the ignition and
turn from 2 (LOCK) to 3 (OFF)
and cycle between 3 (OFF) and 4
(ON) eight times in rapid
succession (within 10 seconds)
with the eighth turn ending in the
4 (ON) position. The doors will
lock/unlock to confirm that programming mode has been entered.
3
4
1 2
5
Locks and Security
84
Page 85 of 240
•Within 20 seconds, program a remote transmitter by pressing any
button on a transmitter. The doors will lock/unlock to confirm that the
remote transmitter has been programmed. (If more than 20 seconds
pass before pressing a remote transmitter button, the programming
mode will exit and the procedure will have to be repeated.)
•Repeat the previous step to program additional remote transmitters.
The doors will lock/unlock to confirm that each remote transmitter has
been programmed.
•When you have completed programming the remote transmitters, turn
the ignition to 3 (OFF) or wait 20 seconds. Again the doors will
lock/unlock to confirm programming has been completed.
Illuminated entry
The interior lamps illuminate when the remote entry system is used to
unlock the door(s).
The system automatically turns off after 25 seconds or when the ignition
is turned to the ON or ACC position. The dome lamp control (if
equipped) mustnotbe set to the OFF position for the illuminated entry
system to operate.
The inside lights will not turn off if:
•they have been turned on with the dimmer control, or
•any door is open.
The battery saver will shut off the interior lamps 10 minutes after the
ignition has been turned to the OFF position.
Perimeter lamps illuminated entry
The exterior lamps illuminate when the vehicle is unlocked by the
remote entry transmitter. Vehicles equipped with auto lamps, the puddle,
head, park, and tail lamps illuminate. Vehicles not equipped with auto
lamp, only the puddle, park and tail lamps illuminate.
The system automatically turns off after 25 seconds or when the ignition
is turned to the ON or ACC position.
The battery saver will shut off the exterior lamps 10 minutes after the
ignition has been turned to the OFF position.
Deactivating/activating perimeter lamps
There are 2 methods to enable/disable this feature. One through your
dealer and the second with a power door lock sequence using the
following instructions:
Locks and Security
85