ignition Mercury Sable 2002 s Service Manual
[x] Cancel search | Manufacturer: MERCURY, Model Year: 2002, Model line: Sable, Model: Mercury Sable 2002Pages: 240, PDF Size: 3.53 MB
Page 149 of 240
When parking, do not use the gearshift in place of the parking
brake. Always set the parking brake fully and make sure that the
gearshift is securely latched in Park (P). Turn off the ignition
whenever you leave your vehicle. Never leave your vehicle unattended
while it is running. If you do not take these precautions, your vehicle
may move unexpectedly and injure someone.
DRIVING THROUGH WATER
Do not drive quickly through standing water, especially if the depth is
unknown. Traction or brake capability may be limited and if the ignition
system gets wet, your engine may stall. Water may also enter your
engine’s air intake and severely damage your engine.
If driving through deep or standing water is unavoidable, proceed very
slowly. Never drive through water that is higher than the bottom of the
hubs (for trucks) or the bottom of the wheel rims (for cars).
Once through the water, always try the brakes. Wet brakes do not stop
the vehicle as effectively as dry brakes. Drying can be improved by
moving your vehicle slowly while applying light pressure on the brake
pedal.
Driving through deep water where the transmission vent tube is
submerged may allow water into the transmission and cause
internal transmission damage. Have the fluid checked and, if
water is found, replace the fluid.
VEHICLE LOADING
Before loading a vehicle, familiarize yourself with the following terms:
•Base Curb Weight:Weight of the vehicle including any standard
equipment, fluids, lubricants, etc. It does not include occupants or
aftermarket equipment.
•Payload:Combined maximum allowable weight of cargo, occupants
and optional equipment. The payload equals the gross vehicle weight
rating minus base curb weight.
•GVW (Gross Vehicle Weight):Base curb weight plus payload
weight. The GVW is not a limit or a specification.
•GVWR (Gross Vehicle Weight Rating):Maximum permissible total
weight of the base vehicle, occupants, optional equipment and cargo.
The GVWR is specific to each vehicle and is listed on the Safety
Certification Label on the driver’s door pillar.
Driving
149
Page 156 of 240
Canadian customers who require roadside assistance, call
1–800–665–2006.
If you need to arrange roadside assistance for yourself, Ford Motor
Company will reimburse a reasonable amount. To obtain reimbursement
information, U.S. Ford or Mercury vehicles customers call
1-800-241-3673; Lincoln vehicle customers call 1–800–521–4140.
Canadian customers who need to obtain reimbursement information, call
1–800–665–2006.
ROADSIDE COVERAGE BEYOND BASIC WARRANTY
In the United States, you may purchase additional roadside assistance
coverage beyond this period through the Ford Auto Club by contacting
your Ford or Lincoln Mercury dealer.
Similarly in Canada, for uninterrupted Roadside Assistance coverage, you
may purchase extended coverage prior to your Basic Warranty’s Roadside
Assistance expiring. For more information and enrollment, contact
1–877–294–2582 or visit our website at www.ford.ca.
HAZARD FLASHER
Use only in an emergency to warn traffic of vehicle breakdown,
approaching danger, etc. The hazard flashers can be operated when the
ignition is off.
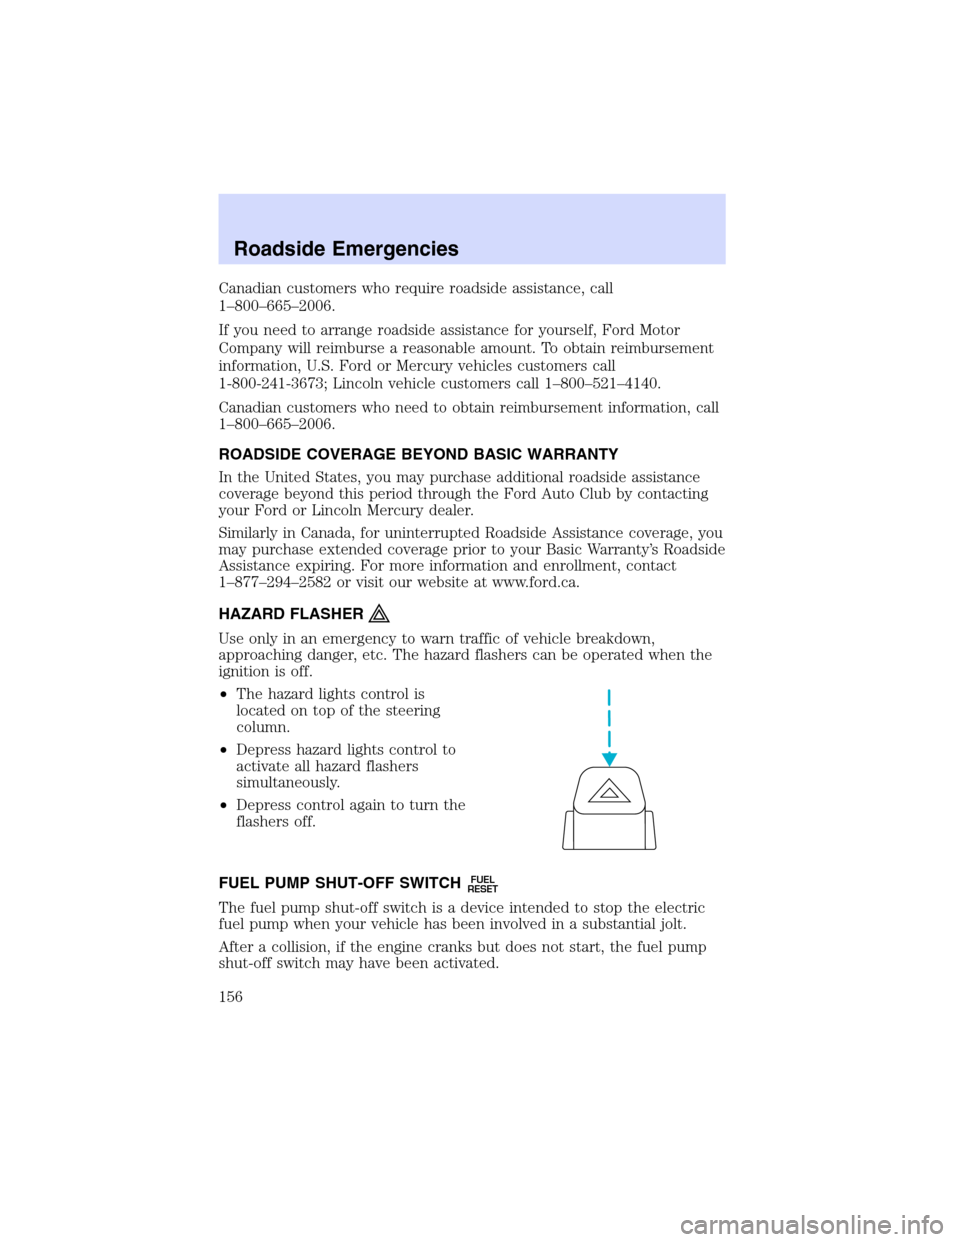
•The hazard lights control is
located on top of the steering
column.
•Depress hazard lights control to
activate all hazard flashers
simultaneously.
•Depress control again to turn the
flashers off.
FUEL PUMP SHUT-OFF SWITCH
FUEL
RESET
The fuel pump shut-off switch is a device intended to stop the electric
fuel pump when your vehicle has been involved in a substantial jolt.
After a collision, if the engine cranks but does not start, the fuel pump
shut-off switch may have been activated.
Roadside Emergencies
156
Page 157 of 240

If your vehicle is a sedan, the fuel
pump shut-off switch is located on
the right side of the trunk behind
the trunk liner.
If your vehicle is a wagon, the fuel
pump shut-off switch is located
behind the service panel on the
right side of the cargo area.
Use the following procedure to reset the fuel pump shut-off switch.
1. Turn the ignition to the OFF position.
2. Check the fuel system for leaks.
3. If no fuel leak is apparent, reset the fuel pump shut-off switch by
pushing in on the reset button.
4. Turn the ignition to the ON position. Pause for a few seconds and
return the key to the OFF position.
5. Make a further check for leaks in the fuel system.
Roadside Emergencies
157
Page 162 of 240
To reduce risk of electrical shock, always replace the cover to
the Power Distribution Box before reconnecting the battery or
refilling fluid reservoirs.
If the battery has been disconnected and reconnected, refer to the
Batterysection of theMaintenance and specificationschapter.
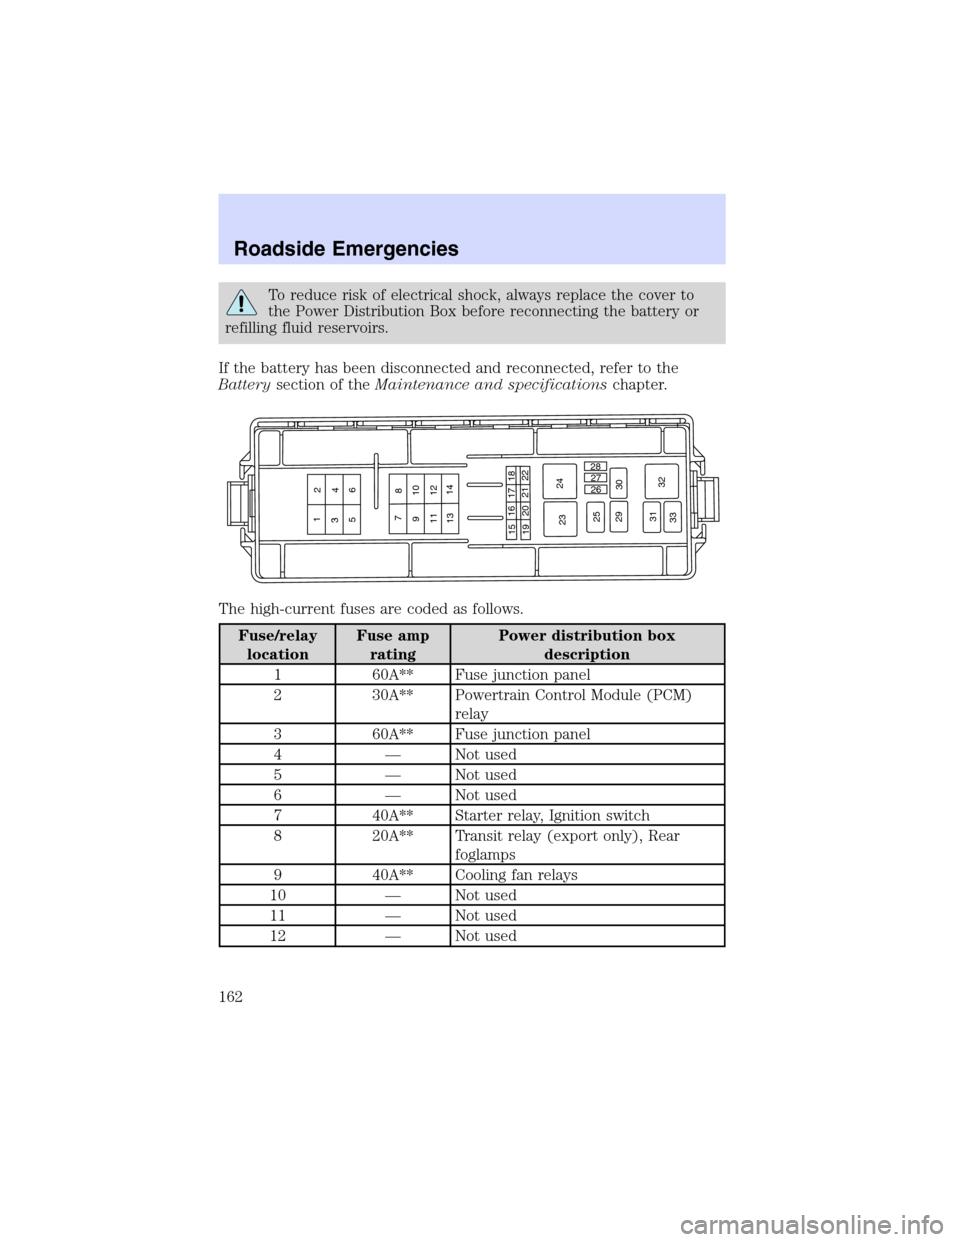
The high-current fuses are coded as follows.
Fuse/relay
locationFuse amp
ratingPower distribution box
description
1 60A** Fuse junction panel
2 30A** Powertrain Control Module (PCM)
relay
3 60A** Fuse junction panel
4—Not used
5—Not used
6—Not used
7 40A** Starter relay, Ignition switch
8 20A** Transit relay (export only), Rear
foglamps
9 40A** Cooling fan relays
10—Not used
11—Not used
12—Not used
1
23
4
56
7
8
910
11 12
1314
1516 17
18
19202122
2324
25
29
3026 27 28
31
32
33
Roadside Emergencies
162
Page 211 of 240
Cleaner air
Ford endorses the use of reformulated“cleaner-burning”gasolines to
improve air quality.
Running out of fuel
Avoid running out of fuel because this situation may have an adverse
affect on powertrain components.
If you have run out of fuel:
•You may need to cycle the ignition from OFF to ON several times after
refueling, to allow the fuel system to pump the fuel from the tank to
the engine.
•The
indicator may come on. For more information on the
“Service Engine Soon”indicator, refer to theInstrument Cluster
chapter.
Fuel Filter
For fuel filter replacement, see your dealer or a qualified service
technician. Refer to the scheduled maintenance guide for the appropriate
intervals for changing the fuel filter.
Replace the fuel filter with an authorized Motorcraft part. The
customer warranty may be void for any damage to the fuel system
if an authorized Motorcraft fuel filter is not used.
ESSENTIALS OF GOOD FUEL ECONOMY
Measuring techniques
Your best source of information about actual fuel economy is you, the
driver. You must gather information as accurately and consistently as
possible. Fuel expense, frequency of fill-ups or fuel gauge readings are
NOT accurate as a measure of fuel economy. We do not recommend
taking fuel economy measurements during the first 1,600 km (1,000
miles) of driving (engine break-in period). You will get a more accurate
measurement after 3,000 km–5,000 km (2,000 miles-3,000 miles).
Filling the tank
The advertised fuel capacity of the fuel tank on your vehicle is equal to
the rated refill capacity of the fuel tank as listed in theRefill capacities
section of this chapter.
The advertised capacity is the amount of the indicated capacity and the
empty reserve combined. Indicated capacity is the difference in the
Maintenance and Specifications
211
Page 212 of 240
amount of fuel in a full tank and a tank when the fuel gauge indicates
empty. Empty reserve is the small amount of fuel remaining in the fuel
tank after the fuel gauge indicates empty.
The amount of usable fuel in the empty reserve varies and should
not be relied upon to increase driving range. When refueling your
vehicle after the fuel gauge indicates empty, you might not be
able to refuel the full amount of the advertised capacity of the
fuel tank due to the empty reserve still present in the tank.
For consistent results when filling the fuel tank:
•Turn the engine/ignition switch to the off position prior to refueling,
an error in the reading will result if the engine is left running.
•Use the same filling rate setting (low—medium—high) each time
the tank is filled.
•Allow no more than 2 automatic click-offs when filling.
•Always use fuel with the recommended octane rating.
•Use a known quality gasoline, preferably a national brand.
•Use the same side of the same pump and have the vehicle facing the
same direction each time you fill up.
•Have the vehicle loading and distribution the same every time.
Your results will be most accurate if your filling method is consistent.
Calculating fuel economy
1. Fill the fuel tank completely and record the initial odometer reading
(in kilometers or miles).
2. Each time you fill the tank, record the amount of fuel added (in liters
or gallons).
3. After at least three to five tank fill-ups, fill the fuel tank and record
the current odometer reading.
4. Subtract your initial odometer reading from the current odometer
reading.
5. Follow one of the simple calculations in order to determine fuel
economy:
Calculation 1:Multiply liters used by 100, then divide by total
kilometers traveled.
Calculation 2:Divide total miles traveled by total gallons used.
Keep a record for at least one month and record the type of driving (city
or highway). This will provide an accurate estimate of the vehicle’s fuel
Maintenance and Specifications
212
Page 215 of 240
•Avoid running out of fuel.
•Do not turn off the ignition while your vehicle is moving, especially at
high speeds.
•Have the items listed in your scheduled maintenance guide performed
according to the specified schedule.
The scheduled maintenance items listed in the scheduled maintenance
guide are essential to the life and performance of your vehicle and to its
emissions system.
If other than Ford, Motorcraft or Ford-authorized parts are used for
maintenance replacements or for service of components affecting
emission control, such non-Ford parts should be equivalent to genuine
Ford Motor Company parts in performance and durability.
Do not park, idle, or drive your vehicle in dry grass or other dry
ground cover. The emission system heats up the engine
compartment and exhaust system, which can start a fire.
Illumination of the
indicator, charging system warning light or the
temperature warning light, fluid leaks, strange odors, smoke or loss of
engine power, could indicate that the emission control system is not
working properly.
Exhaust leaks may result in entry of harmful and potentially
lethal fumes into the passenger compartment.
Do not make any unauthorized changes to your vehicle or engine. By
law, vehicle owners and anyone who manufactures, repairs, services,
sells, leases, trades vehicles, or supervises a fleet of vehicles are not
permitted to intentionally remove an emission control device or prevent
it from working. Information about your vehicle’s emission system is on
the Vehicle Emission Control Information Decal located on or near the
engine. This decal identifies engine displacement and gives some tune up
specifications.
Please consult your“Warranty Guide”for complete emission warranty
information.
Readiness for Inspection/Maintenance (I/M) testing
In some localities, it may be a legal requirement to pass an I/M test of
the on-board diagnostics system. If your
indicator is on, refer to the
Maintenance and Specifications
215
Page 228 of 240
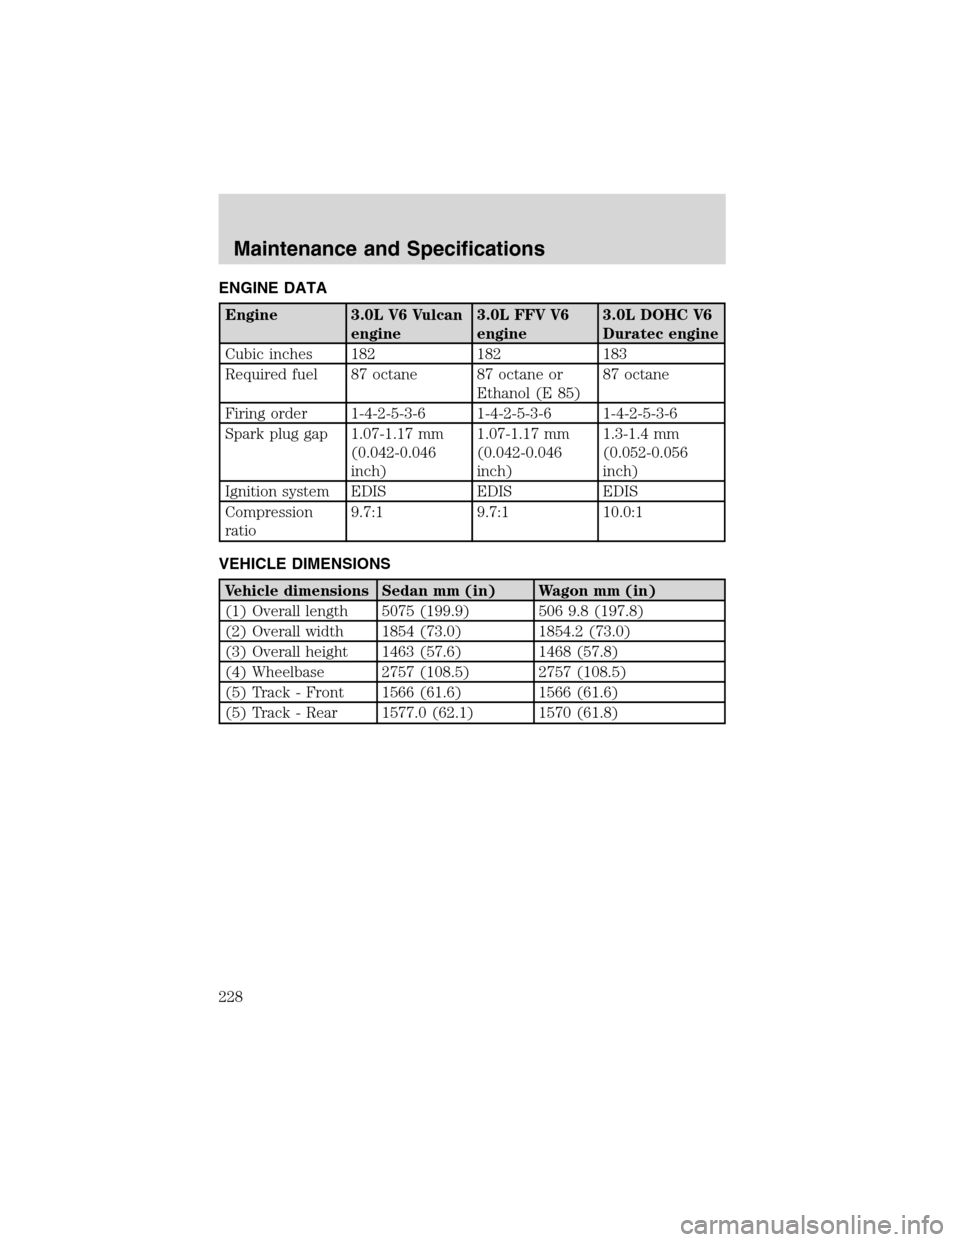
ENGINE DATA
Engine 3.0L V6 Vulcan
engine3.0L FFV V6
engine3.0L DOHC V6
Duratec engine
Cubic inches 182 182 183
Required fuel 87 octane 87 octane or
Ethanol (E 85)87 octane
Firing order 1-4-2-5-3-6 1-4-2-5-3-6 1-4-2-5-3-6
Spark plug gap 1.07-1.17 mm
(0.042-0.046
inch)1.07-1.17 mm
(0.042-0.046
inch)1.3-1.4 mm
(0.052-0.056
inch)
Ignition system EDIS EDIS EDIS
Compression
ratio9.7:1 9.7:1 10.0:1
VEHICLE DIMENSIONS
Vehicle dimensions Sedan mm (in) Wagon mm (in)
(1) Overall length 5075 (199.9) 506 9.8 (197.8)
(2) Overall width 1854 (73.0) 1854.2 (73.0)
(3) Overall height 1463 (57.6) 1468 (57.8)
(4) Wheelbase 2757 (108.5) 2757 (108.5)
(5) Track - Front 1566 (61.6) 1566 (61.6)
(5) Track - Rear 1577.0 (62.1) 1570 (61.8)
Maintenance and Specifications
228
Page 237 of 240
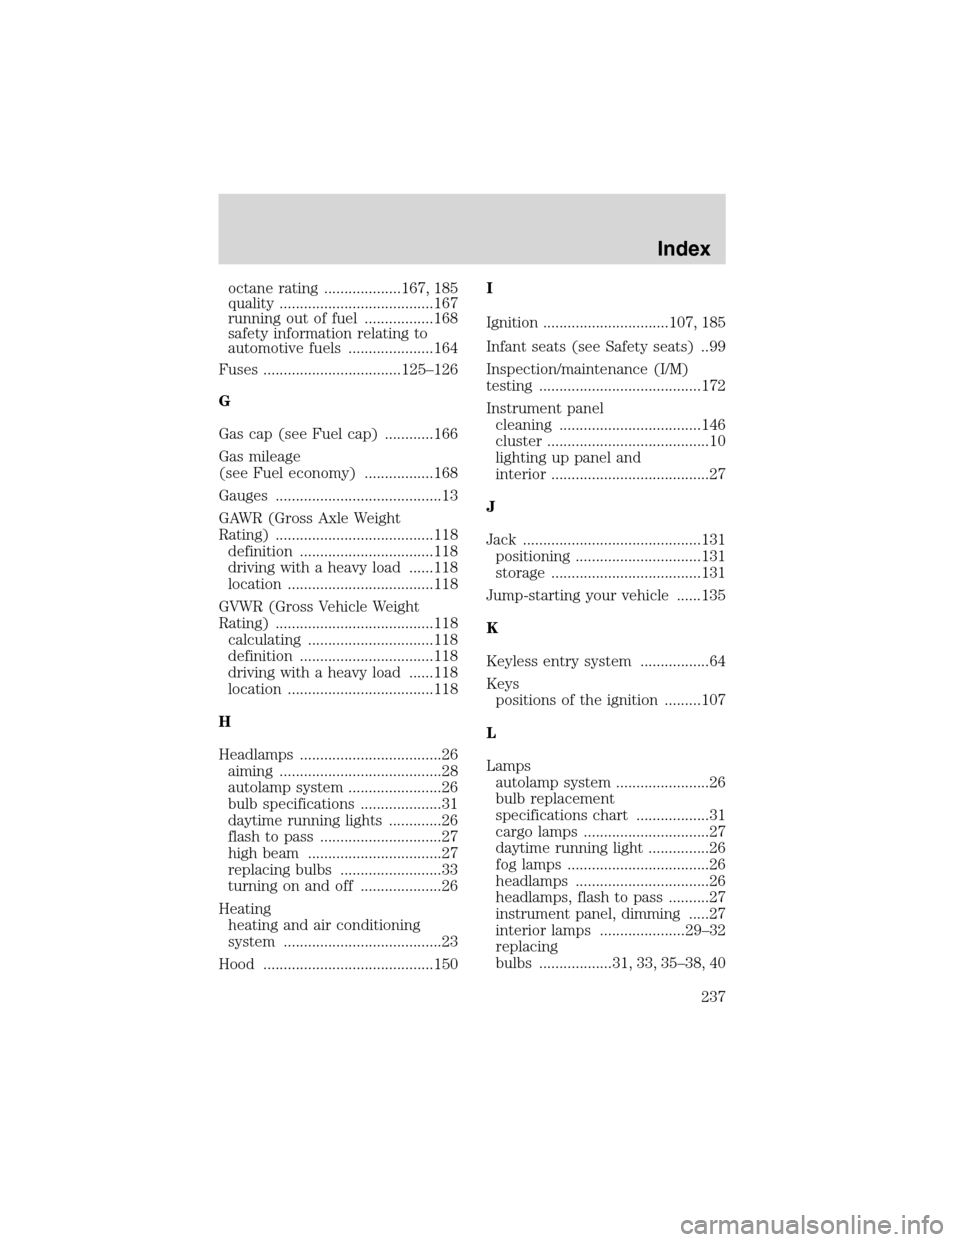
octane rating ...................167, 185
quality ......................................167
running out of fuel .................168
safety information relating to
automotive fuels .....................164
Fuses ..................................125–126
G
Gas cap (see Fuel cap) ............166
Gas mileage
(see Fuel economy) .................168
Gauges .........................................13
GAWR (Gross Axle Weight
Rating) .......................................118
definition .................................118
driving with a heavy load ......118
location ....................................118
GVWR (Gross Vehicle Weight
Rating) .......................................118
calculating ...............................118
definition .................................118
driving with a heavy load ......118
location ....................................118
H
Headlamps ...................................26
aiming ........................................28
autolamp system .......................26
bulb specifications ....................31
daytime running lights .............26
flash to pass ..............................27
high beam .................................27
replacing bulbs .........................33
turning on and off ....................26
Heating
heating and air conditioning
system .......................................23
Hood ..........................................150I
Ignition ...............................107, 185
Infant seats (see Safety seats) ..99
Inspection/maintenance (I/M)
testing ........................................172
Instrument panel
cleaning ...................................146
cluster ........................................10
lighting up panel and
interior .......................................27
J
Jack ............................................131
positioning ...............................131
storage .....................................131
Jump-starting your vehicle ......135
K
Keyless entry system .................64
Keys
positions of the ignition .........107
L
Lamps
autolamp system .......................26
bulb replacement
specifications chart ..................31
cargo lamps ...............................27
daytime running light ...............26
fog lamps ...................................26
headlamps .................................26
headlamps, flash to pass ..........27
instrument panel, dimming .....27
interior lamps .....................29–32
replacing
bulbs ..................31, 33, 35–38, 40
Index
237