child restraint Mercury Villager 1998 s User Guide
[x] Cancel search | Manufacturer: MERCURY, Model Year: 1998, Model line: Villager, Model: Mercury Villager 1998Pages: 400, PDF Size: 2.06 MB
Page 163 of 400

6. Before placing the child in the child seat or infant carrier, use
force to tilt the seat from side to side, and tug it forward to
make sure that the seat is securely held in place.
7. Check that the retractor is in the automatic locking mode.
Try to pull more belt out of the retractor. If you cannot, the belt
is in the automatic locking mode.
8. Check to make sure the child seat or infant carrier is properly
secured prior to each use. If the safety belt is not locked,
repeat steps 3 through 6.
NOTE: When the lap/shoulder belt is unbuckled and allowed
to retract completely, the retractor will switch to the
vehicle sensitive (emergency) locking mode.
Testing the security of the child seat
Seating and Safety Restraints
159
Page 168 of 400

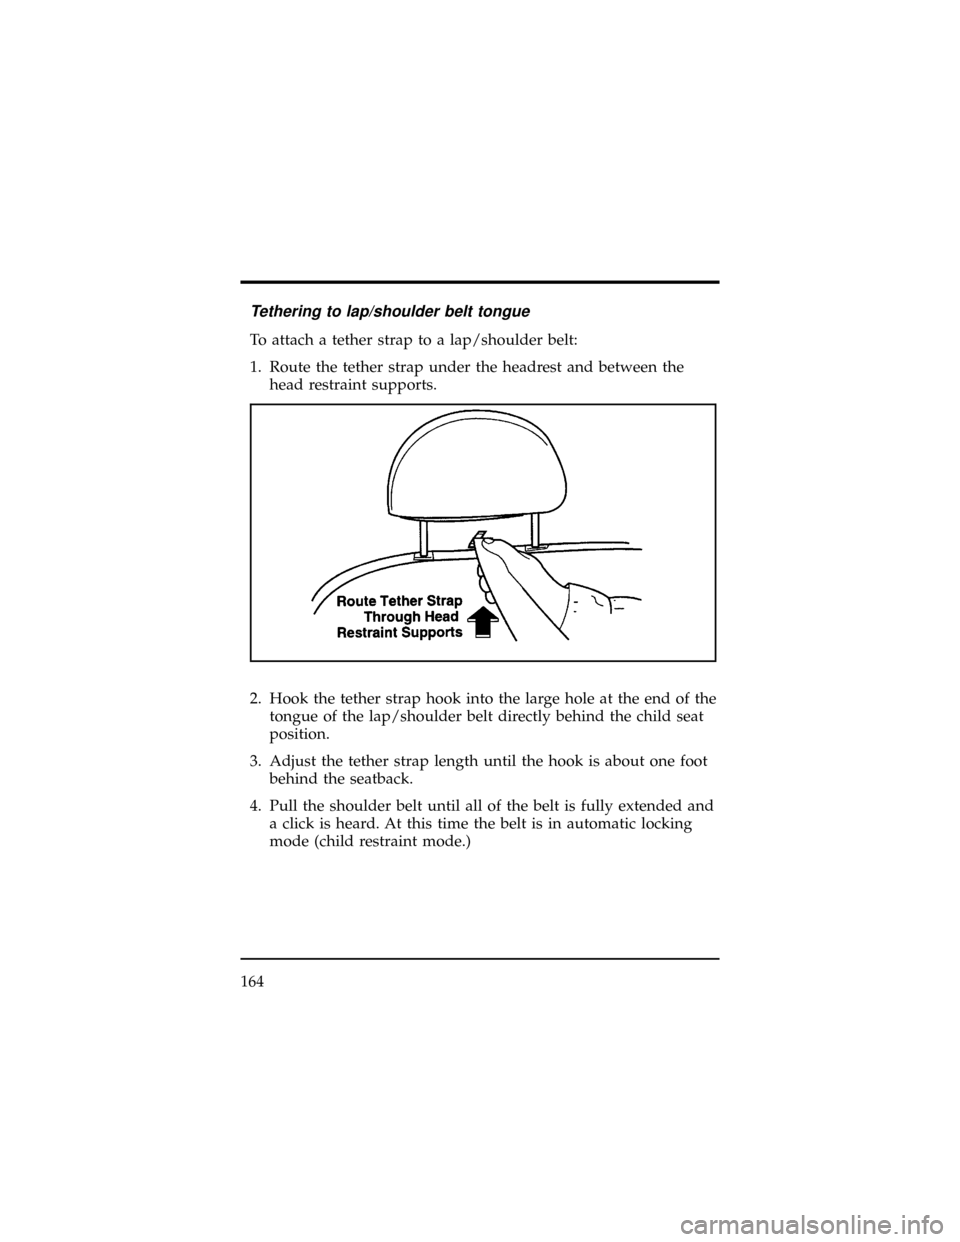
Tethering to lap/shoulder belt tongue
To attach a tether strap to a lap/shoulder belt:
1. Route the tether strap under the headrest and between the
head restraint supports.
2. Hook the tether strap hook into the large hole at the end of the
tongue of the lap/shoulder belt directly behind the child seat
position.
3. Adjust the tether strap length until the hook is about one foot
behind the seatback.
4. Pull the shoulder belt until all of the belt is fully extended and
a click is heard. At this time the belt is in automatic locking
mode (child restraint mode.)
164
Page 169 of 400

5. Let the retractor wind up the slack from the lap/shoulder
belt. A clicking sound should be heard as the belt retracts,
indicating that the retractor is in automatic locking mode.
Tighten the tether strap to remove any slack.
6. Before placing a child in the child restraint, use force to tilt the
child restraint from side to side and tug it forward to make
sure it is securely held in place.
7. Check that the retractor is in automatic locking mode by
trying to pull more belt out of the retractor. If you cannot pull
any more belt webbing out of the retractor, the belt is in
automatic locking mode.
8. Check to make sure the child restraint is properly secured
prior to each use. If the belt is not locked, repeat steps 4
through 7.
Seating and Safety Restraints
165
Page 171 of 400

WARNING
If the shoulder belt portion of one of the lap/shoulder
belts can be positioned so that it does not cross or rest in
front of the child's face or neck, the child should wear
the lap/shoulder belt. Moving the child closer to the center
of the vehicle may help provide a good shoulder belt
fit.
To improve the fit of lap and shoulder belts on children who
have outgrown child safety seats, Ford recommends use of a
belt-positioning booster seat that is labelled as conforming to all
Federal motor vehicle safety standards. Belt-positioning
booster seats raise the child and provide a shorter, firmer seating
cushion that encourages safer seating posture and better fit of
lap and shoulder belts on the child. A belt-positioning booster
should be used if the shoulder belt rests in front of the
child's face or neck, or if the lap belt does not fit snugly on both
thighs, or if the thighs are too short to let the child sit all the
way back on the seat cushion when the lower legs hang over the
edge of the seat cushion. You may wish to discuss the specific
needs of your child with your pediatrician.
WARNING
Do not use a belt-positioning booster with a lap-only belt.
WARNING
The lap belt portion of combination lap/shoulder belts
should always be worn snugly and below the hips, touching
the child's thighs.
Seating and Safety Restraints
167
Page 172 of 400

Built-In Child Seats (If equipped)
The optional second row bench seat includes two built-in child
seats. These child restraints are to be used only by children who:
mare at least one year old
AND
mweigh between 10 and 27 kilograms (22 and 60 pounds)
AND
mwhose shoulders are below the shoulder harness slots
Children not meeting these requirements should be restrained
in an approved aftermarket child safety seat. Follow the specific
manufacturer's instructions for weight and height restrictions.
Children must be properly buckled before riding in the vehicle. It
is the law in every state and province. These child seats
conform to all Federal/Canadian motor vehicle safety standards.
168
Page 173 of 400

WARNING
The second row seatback must be fully locked before
operating the child restraint system. Check the position of
the seatback release lever.
Second row bench built-in child seats
Seating and Safety Restraints
169
Page 174 of 400

Built-In Child Seat Retractors
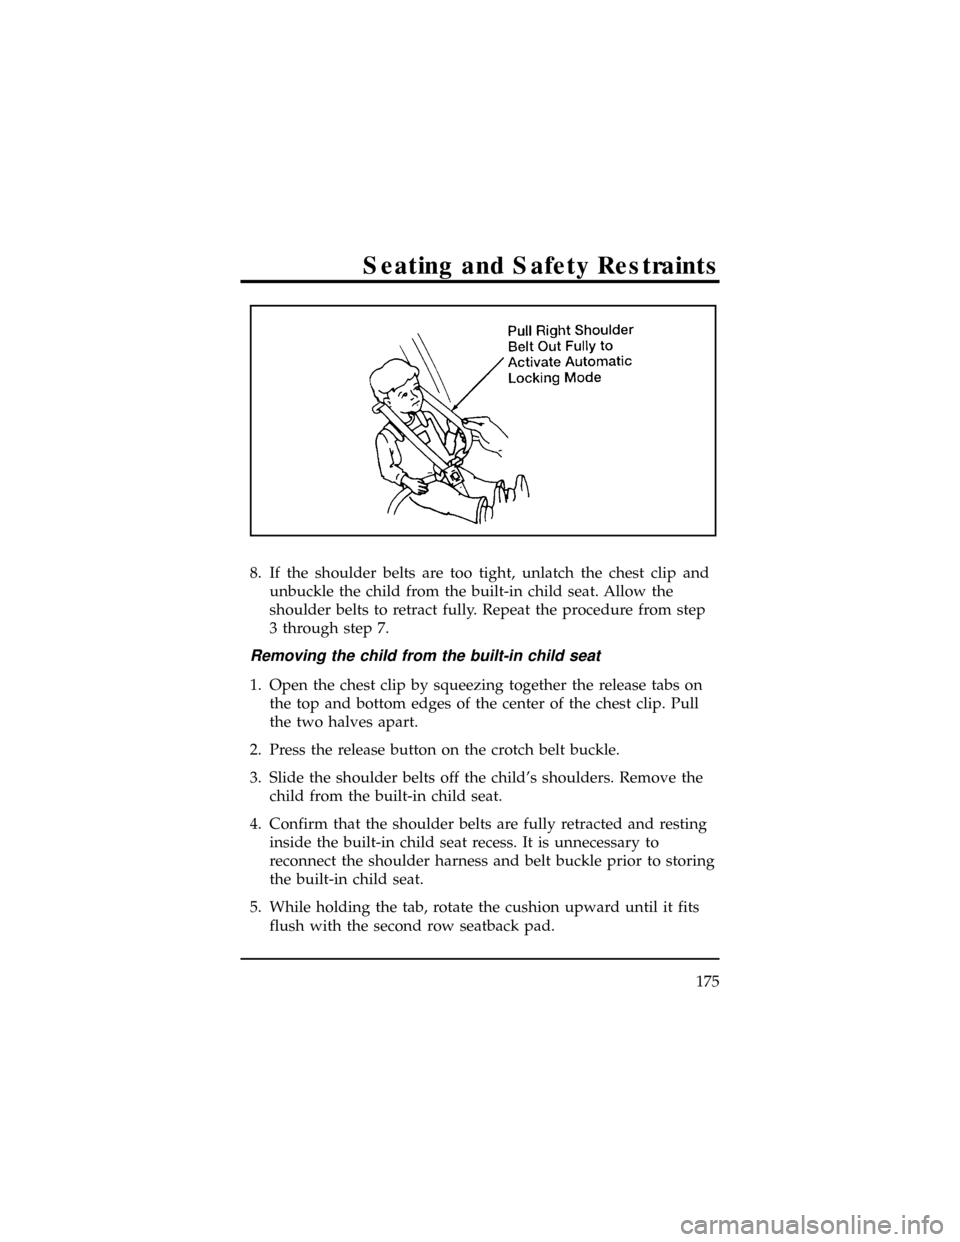
The retractor will switch from the emergency locking mode to the
automatic locking mode when the right shoulder belt is pulled
all the way out. The retractor will switch back to emergency locking
mode when the belts are unbuckled and the shoulder belts
retract completely.
The automatic locking mode must be used to hold small children
in position, particularly sleeping children and those who may
try to squirm out of the belts. The emergency locking mode is used
while buckling the belts.
Always adjust the lap and shoulder harness belts provided with
this child seat snugly around your child.
WARNING
Failure to follow all of the instructions on the use of this
child restraint system can result in your child striking
the vehicle's interior during a sudden stop or crash.
How to Use the Built-In Child Seat
Read the following procedures and all of the labels on the
built-in child seat before using the seat.
WARNING
Never use the Built-In Child Seat as a booster cushion
with the adult safety belts. A child using the adult belts
could slide forward and out from under the safety belts.
170
Page 175 of 400

1. Hold the tab from the lower outboard side of the child seat
and lower the cushion completely.
Seating and Safety Restraints
171
Page 177 of 400

3. Place the child in the built-in child seat. Position the crotch
belt buckle between the child's legs.
Seating and Safety Restraints
173
Page 179 of 400

8. If the shoulder belts are too tight, unlatch the chest clip and
unbuckle the child from the built-in child seat. Allow the
shoulder belts to retract fully. Repeat the procedure from step
3 through step 7.
Removing the child from the built-in child seat
1. Open the chest clip by squeezing together the release tabs on
the top and bottom edges of the center of the chest clip. Pull
the two halves apart.
2. Press the release button on the crotch belt buckle.
3. Slide the shoulder belts off the child's shoulders. Remove the
child from the built-in child seat.
4. Confirm that the shoulder belts are fully retracted and resting
inside the built-in child seat recess. It is unnecessary to
reconnect the shoulder harness and belt buckle prior to storing
the built-in child seat.
5. While holding the tab, rotate the cushion upward until it fits
flush with the second row seatback pad.
Seating and Safety Restraints
175