rear view mirror MINI 3 door 2013 Owner's Manual
[x] Cancel search | Manufacturer: MINI, Model Year: 2013, Model line: 3 door, Model: MINI 3 door 2013Pages: 233, PDF Size: 17.19 MB
Page 32 of 233
Tailgate and armed alarm systemThe tailgate can be opened with the remotecontrol even when the alarm system is armed.
Press the button on the remote control
for approx. 1 second.
Depending on the version and the country var‐
iant, it is possible to set whether the doors are
also unlocked. Settings, refer to page 26.
The tailgate is somewhat raised.
If the doors were also unlocked with the tail‐
gate, the alarm system is disarmed.
After the tailgate is closed, it is locked and
monitored again if the doors are locked. The
hazard warning system flashes once.
Panic mode You can trigger the alarm system if you find
yourself in a dangerous situation.
Press the button on the remote control
for at least 3 seconds.
To switch off the alarm: press any button.
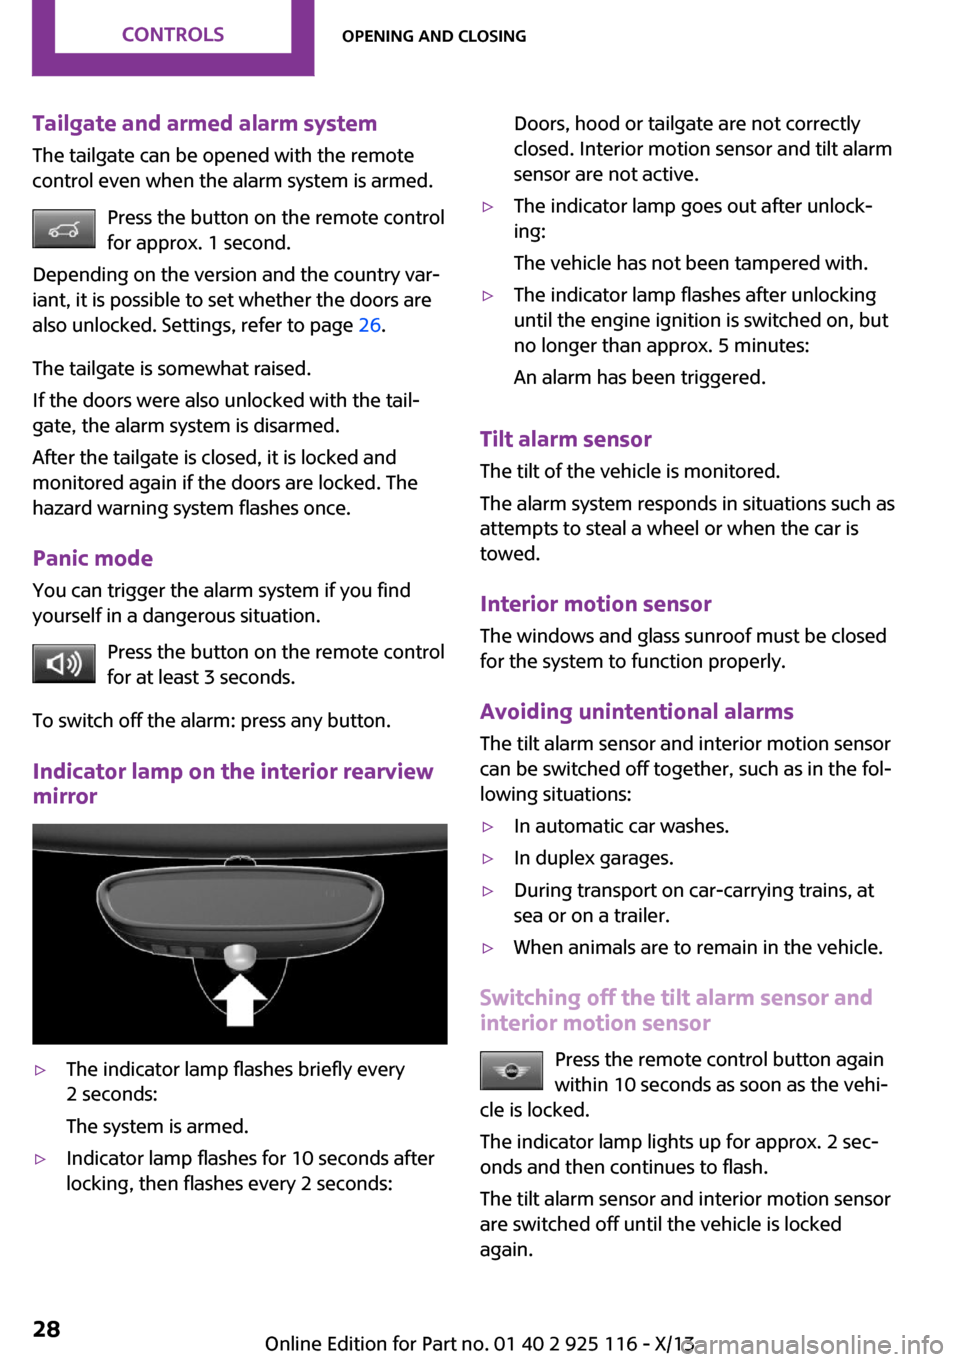
Indicator lamp on the interior rearview
mirror▷The indicator lamp flashes briefly every
2 seconds:
The system is armed.▷Indicator lamp flashes for 10 seconds after
locking, then flashes every 2 seconds:Doors, hood or tailgate are not correctly
closed. Interior motion sensor and tilt alarm
sensor are not active.▷The indicator lamp goes out after unlock‐
ing:
The vehicle has not been tampered with.▷The indicator lamp flashes after unlocking
until the engine ignition is switched on, but
no longer than approx. 5 minutes:
An alarm has been triggered.
Tilt alarm sensor The tilt of the vehicle is monitored.
The alarm system responds in situations such as
attempts to steal a wheel or when the car is
towed.
Interior motion sensor The windows and glass sunroof must be closed
for the system to function properly.
Avoiding unintentional alarms
The tilt alarm sensor and interior motion sensor
can be switched off together, such as in the fol‐
lowing situations:
▷In automatic car washes.▷In duplex garages.▷During transport on car-carrying trains, at
sea or on a trailer.▷When animals are to remain in the vehicle.
Switching off the tilt alarm sensor and
interior motion sensor
Press the remote control button again
within 10 seconds as soon as the vehi‐
cle is locked.
The indicator lamp lights up for approx. 2 sec‐
onds and then continues to flash.
The tilt alarm sensor and interior motion sensor
are switched off until the vehicle is locked
again.
Seite 28ControlsOpening and closing28
Online Edition for Part no. 01 40 2 925 116 - X/13
Page 42 of 233
Fold in and outPress the button.
Possible up to approx. 15 mph/20 km/h.
For example, this is advantageous▷In car washes.▷In narrow streets.▷For folding back mirrors that were folded
away manually.
Mirrors that were folded in are folded out auto‐
matically at a speed of approx.
25 mph/40 km/h.
Fold in the mirror in a car wash
Before washing the car in an automatic
car wash, fold in the exterior mirrors by hand or
with the button; otherwise, the mirrors could
be damaged, depending on the width of the
vehicle. ◀
Automatic heating
Both exterior mirrors are automatically heated
whenever the engine is running.
Automatic dimming featureBoth exterior mirrors are automatically dim‐
med. Photocells are used for control in the Inte‐
rior rearview mirror, refer to page 38.
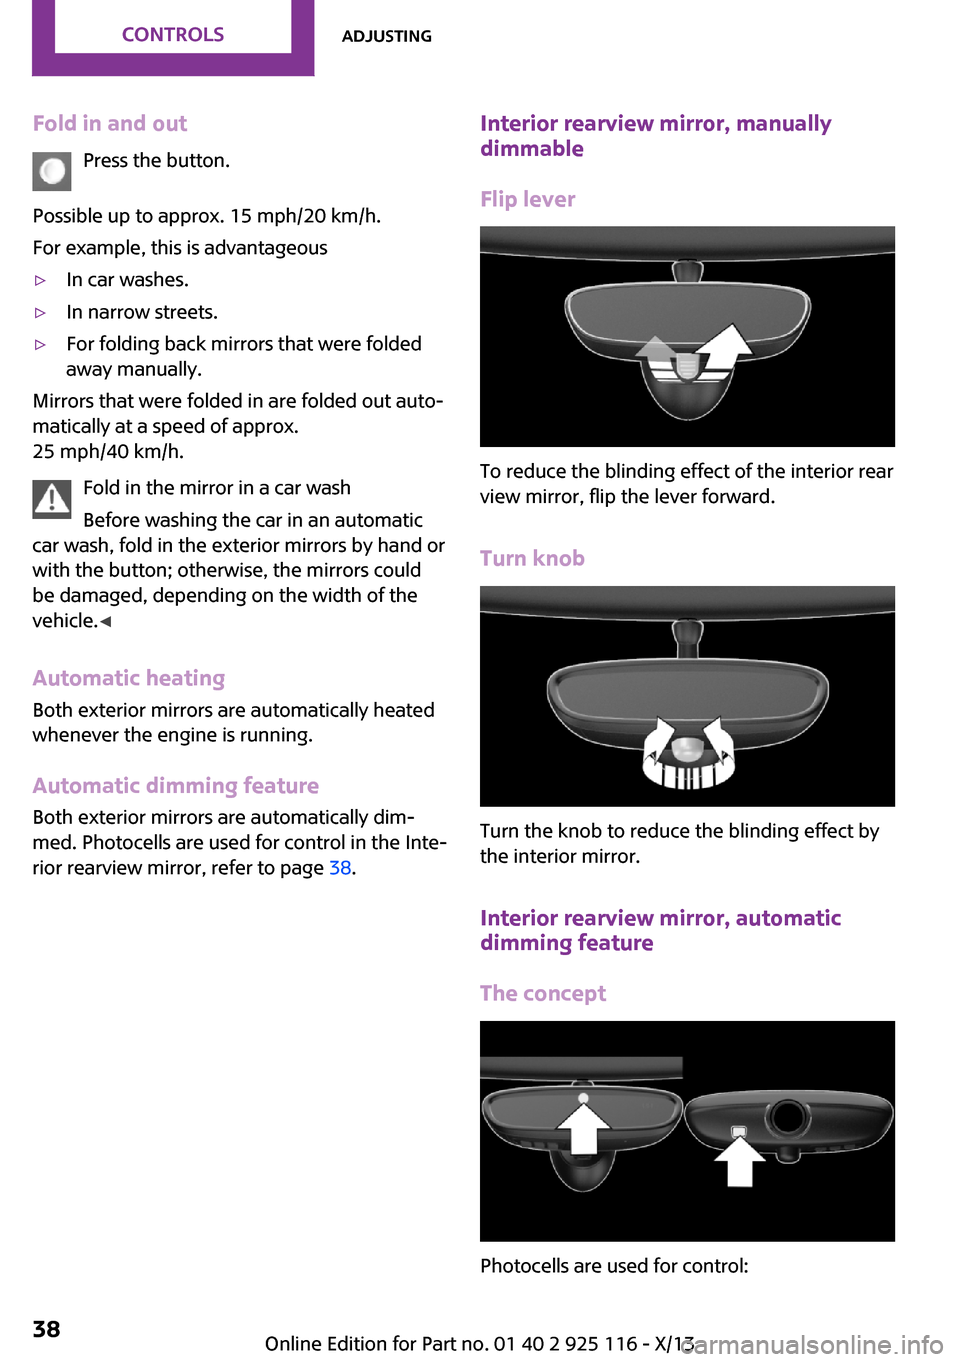
Interior rearview mirror, manually
dimmable
Flip lever
To reduce the blinding effect of the interior rear
view mirror, flip the lever forward.
Turn knob
Turn the knob to reduce the blinding effect by
the interior mirror.
Interior rearview mirror, automatic
dimming feature
The concept
Photocells are used for control:
Seite 38ControlsAdjusting38
Online Edition for Part no. 01 40 2 925 116 - X/13
Page 43 of 233
▷In the mirror glass.▷On the back of the mirror.
Functional requirement
For proper operation:
▷Keep the photocells clean.▷Do not cover the area between the inside
rearview mirror and the windshield.
Steering wheel
Note Do not adjust while driving
Do not adjust the steering wheel while
driving; otherwise, an unexpected movement
could result in an accident. ◀
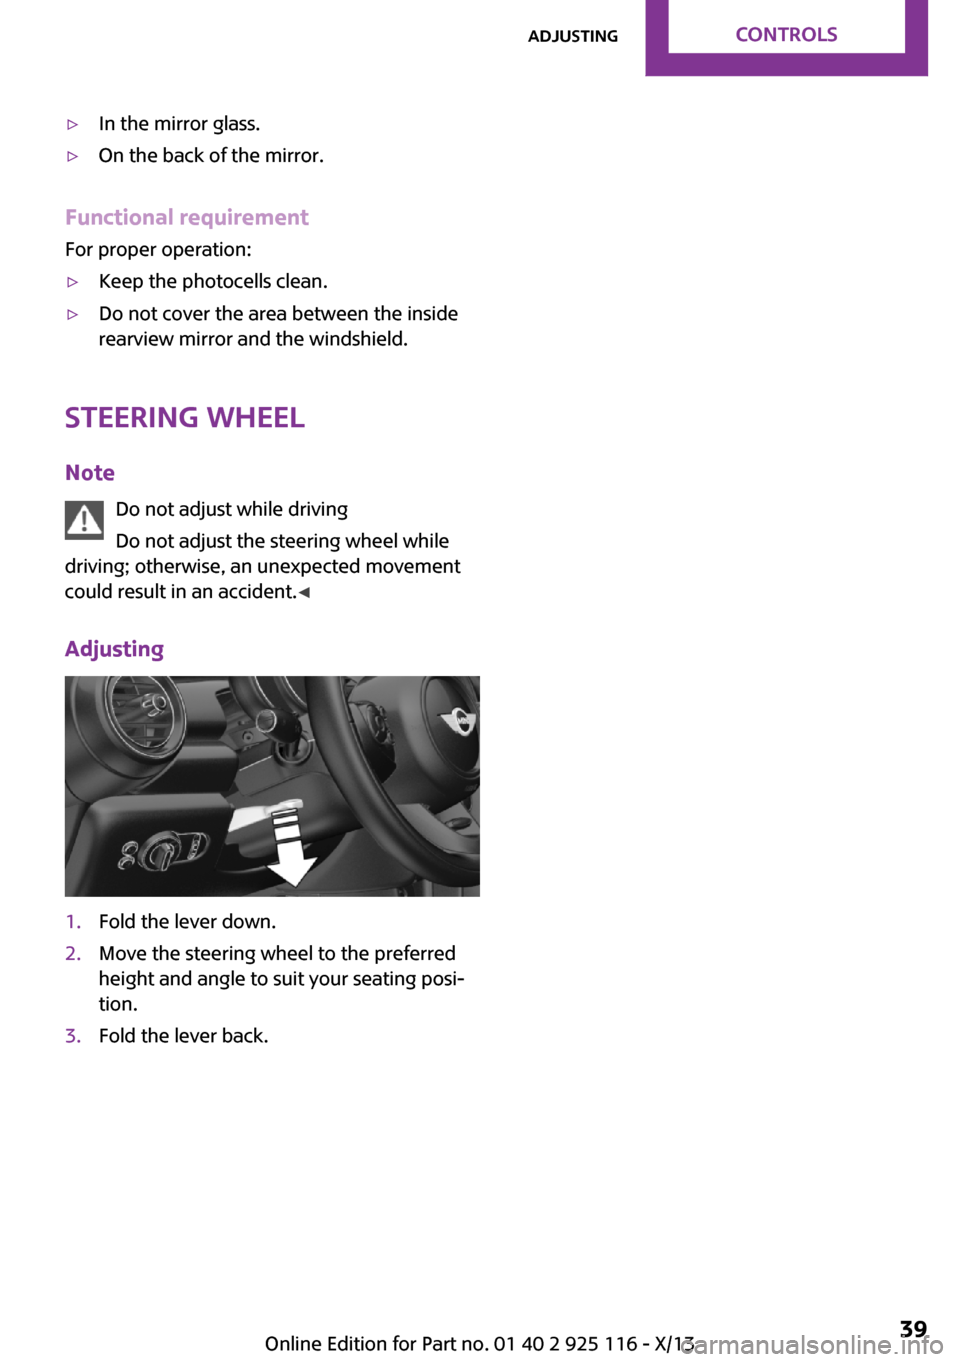
Adjusting
1.Fold the lever down.2.Move the steering wheel to the preferred
height and angle to suit your seating posi‐
tion.3.Fold the lever back.Seite 39AdjustingControls39
Online Edition for Part no. 01 40 2 925 116 - X/13
Page 65 of 233
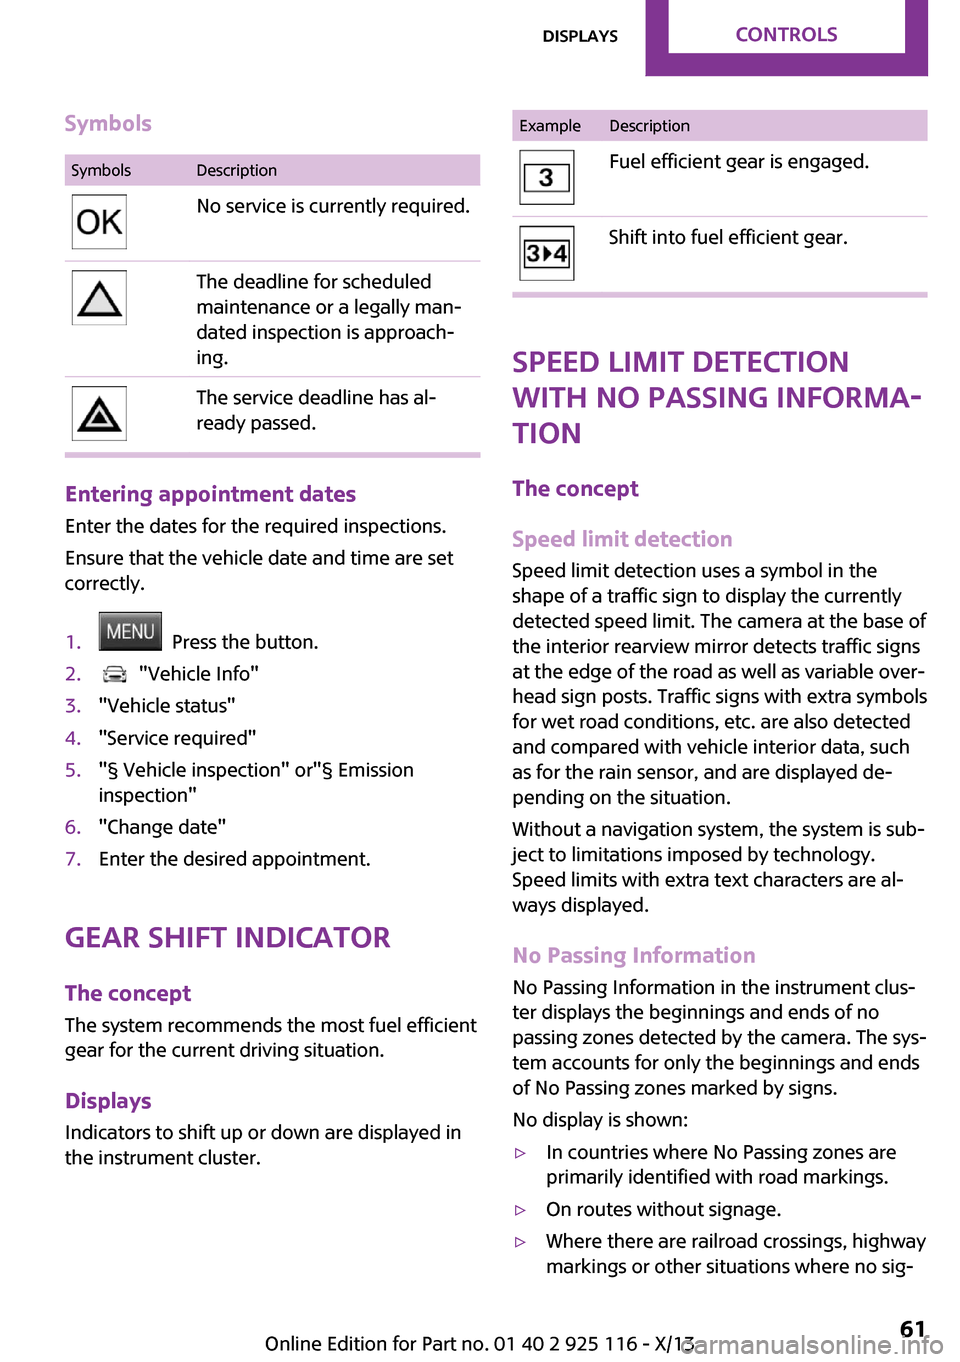
SymbolsSymbolsDescriptionNo service is currently required.The deadline for scheduled
maintenance or a legally man‐
dated inspection is approach‐
ing.The service deadline has al‐
ready passed.
Entering appointment dates
Enter the dates for the required inspections.
Ensure that the vehicle date and time are set
correctly.
1. Press the button.2. "Vehicle Info"3."Vehicle status"4."Service required"5."§ Vehicle inspection" or"§ Emission
inspection"6."Change date"7.Enter the desired appointment.
Gear shift indicator
The concept
The system recommends the most fuel efficient
gear for the current driving situation.
Displays Indicators to shift up or down are displayed in
the instrument cluster.
ExampleDescriptionFuel efficient gear is engaged.Shift into fuel efficient gear.
Speed limit detection
with No Passing Informa‐
tion
The concept
Speed limit detection
Speed limit detection uses a symbol in the
shape of a traffic sign to display the currently detected speed limit. The camera at the base of
the interior rearview mirror detects traffic signs
at the edge of the road as well as variable over‐
head sign posts. Traffic signs with extra symbols
for wet road conditions, etc. are also detected
and compared with vehicle interior data, such
as for the rain sensor, and are displayed de‐
pending on the situation.
Without a navigation system, the system is sub‐
ject to limitations imposed by technology. Speed limits with extra text characters are al‐
ways displayed.
No Passing Information No Passing Information in the instrument clus‐
ter displays the beginnings and ends of no
passing zones detected by the camera. The sys‐
tem accounts for only the beginnings and ends
of No Passing zones marked by signs.
No display is shown:
▷In countries where No Passing zones are
primarily identified with road markings.▷On routes without signage.▷Where there are railroad crossings, highway
markings or other situations where no sig‐Seite 61DisplaysControls61
Online Edition for Part no. 01 40 2 925 116 - X/13
Page 66 of 233
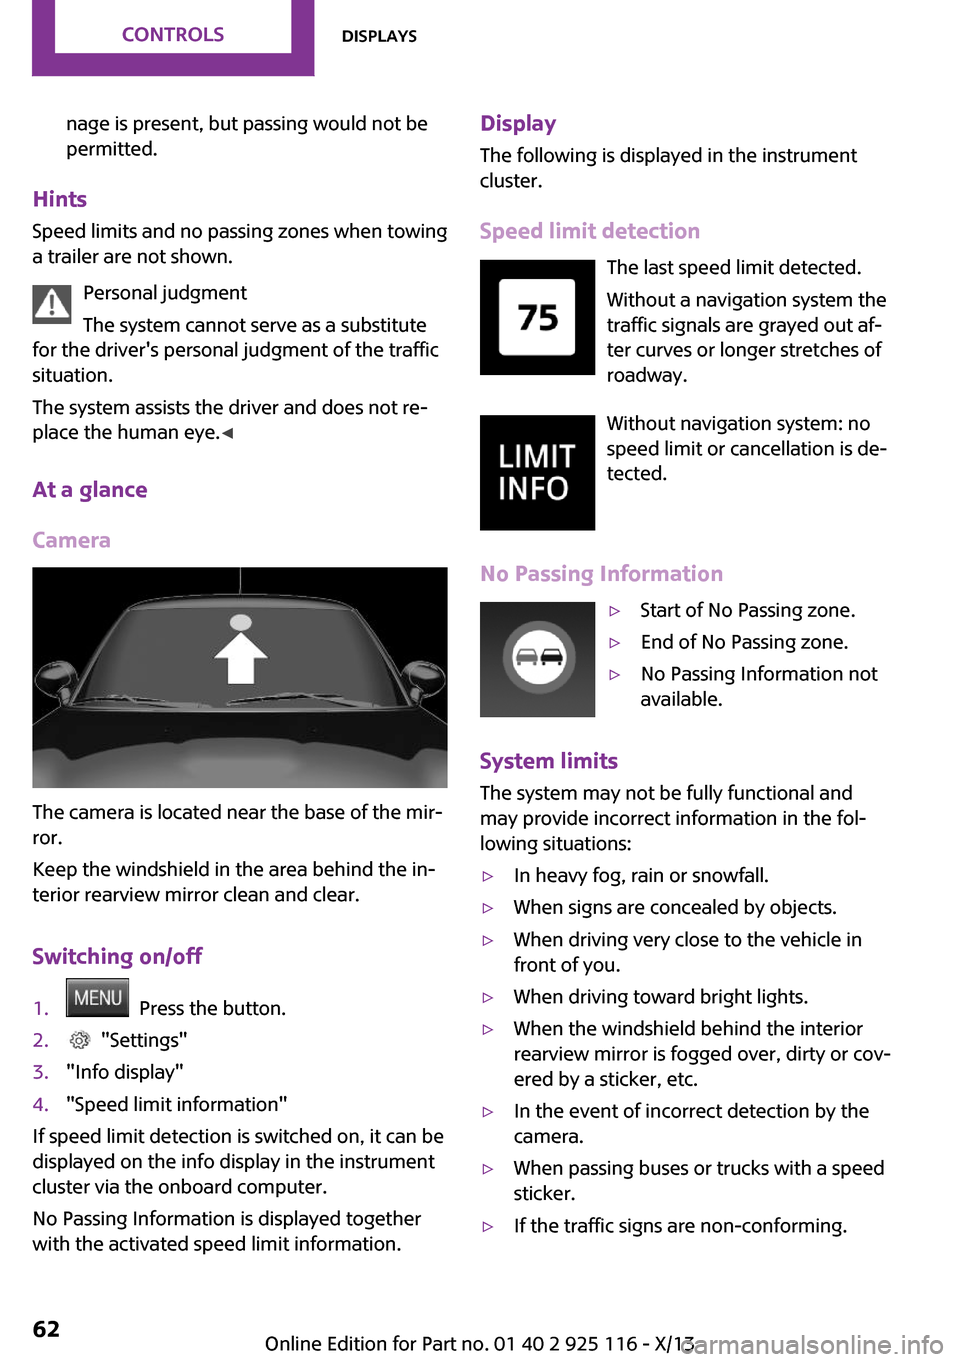
nage is present, but passing would not be
permitted.
Hints
Speed limits and no passing zones when towing
a trailer are not shown.
Personal judgment
The system cannot serve as a substitute
for the driver's personal judgment of the traffic
situation.
The system assists the driver and does not re‐
place the human eye. ◀
At a glance
Camera
The camera is located near the base of the mir‐
ror.
Keep the windshield in the area behind the in‐
terior rearview mirror clean and clear.
Switching on/off
1. Press the button.2. "Settings"3."Info display"4."Speed limit information"
If speed limit detection is switched on, it can be
displayed on the info display in the instrument
cluster via the onboard computer.
No Passing Information is displayed together
with the activated speed limit information.
Display
The following is displayed in the instrument
cluster.
Speed limit detection The last speed limit detected.Without a navigation system the
traffic signals are grayed out af‐ ter curves or longer stretches of
roadway.
Without navigation system: no
speed limit or cancellation is de‐
tected.
No Passing Information▷Start of No Passing zone.▷End of No Passing zone.▷No Passing Information not
available.
System limits
The system may not be fully functional and
may provide incorrect information in the fol‐
lowing situations:
▷In heavy fog, rain or snowfall.▷When signs are concealed by objects.▷When driving very close to the vehicle in
front of you.▷When driving toward bright lights.▷When the windshield behind the interior
rearview mirror is fogged over, dirty or cov‐
ered by a sticker, etc.▷In the event of incorrect detection by the
camera.▷When passing buses or trucks with a speed
sticker.▷If the traffic signs are non-conforming.Seite 62ControlsDisplays62
Online Edition for Part no. 01 40 2 925 116 - X/13
Page 72 of 233
The setting is stored for the remote control cur‐
rently in use.
Cornering lamp
Switch position
: during cornering, the cor‐
nering lamp also lights the interior area of the
curve. Below a speed of approx.
25 mph/40 km/h when the flasher is switched
on and the steering angle is detected, there is
automatic activation.
Malfunction
A Check Control message is displayed.
Cornering light is disrupted or failed. Have the
system checked as soon as possible.
High-beam Assistant The concept
When the low beams are switched on, this sys‐
tem automatically switches the high beams on
and off. The procedure is controlled by a sensor
on the front of the interior rearview mirror. The
assistant ensures that the high beams are
switched on whenever the traffic situation al‐
lows. The driver can intervene at any time and
switch the high beams on and off as usual.
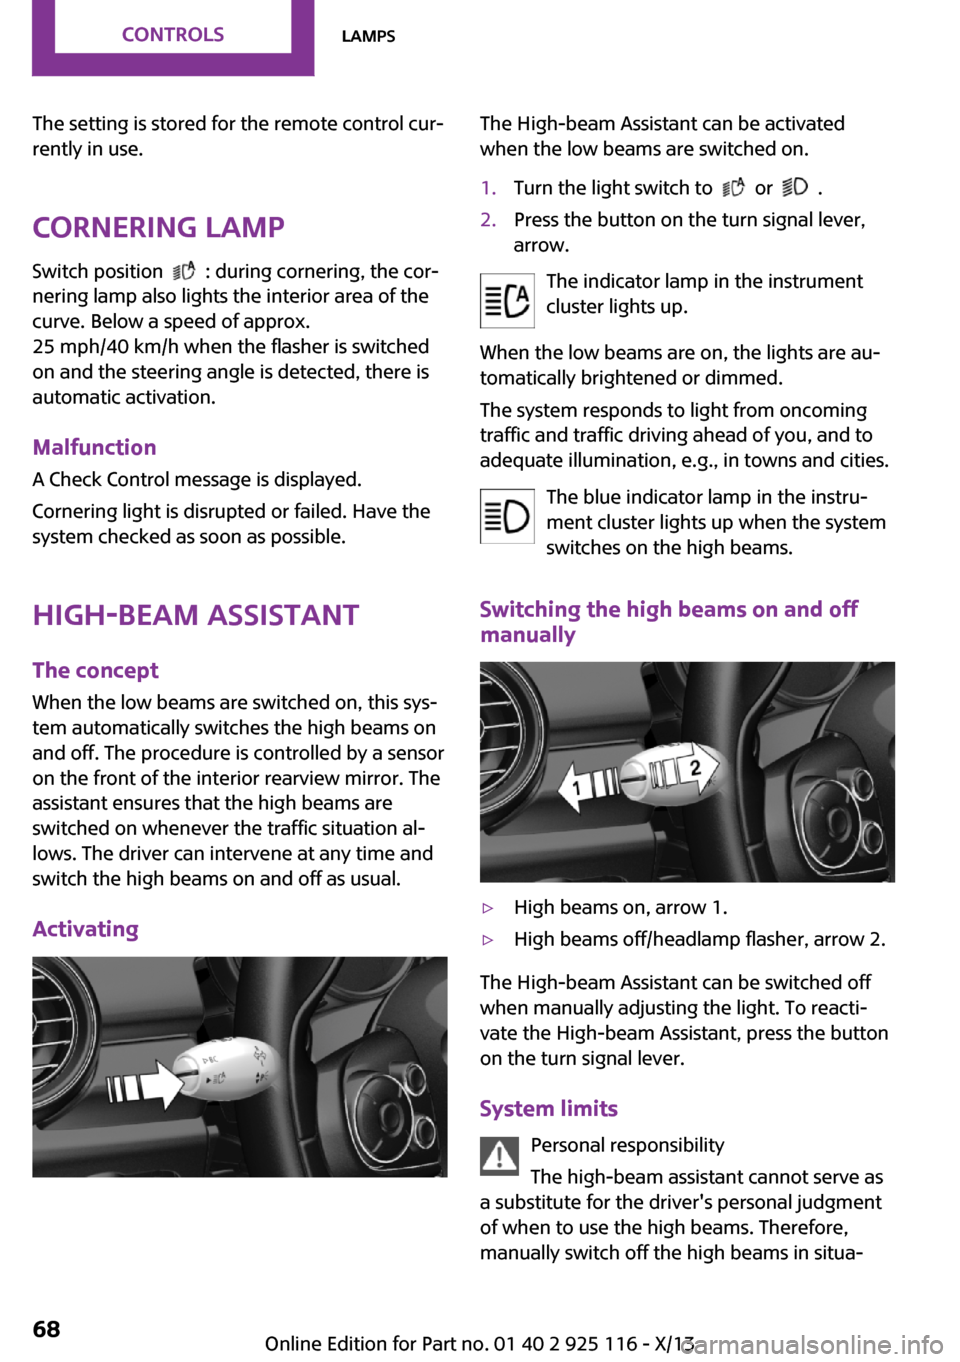
Activating
The High-beam Assistant can be activated
when the low beams are switched on.1.Turn the light switch to or .2.Press the button on the turn signal lever,
arrow.
The indicator lamp in the instrument
cluster lights up.
When the low beams are on, the lights are au‐
tomatically brightened or dimmed.
The system responds to light from oncoming
traffic and traffic driving ahead of you, and to
adequate illumination, e.g., in towns and cities.
The blue indicator lamp in the instru‐
ment cluster lights up when the system
switches on the high beams.
Switching the high beams on and off
manually
▷High beams on, arrow 1.▷High beams off/headlamp flasher, arrow 2.
The High-beam Assistant can be switched off
when manually adjusting the light. To reacti‐
vate the High-beam Assistant, press the button
on the turn signal lever.
System limits Personal responsibility
The high-beam assistant cannot serve as
a substitute for the driver's personal judgment
of when to use the high beams. Therefore,
manually switch off the high beams in situa‐
Seite 68ControlsLamps68
Online Edition for Part no. 01 40 2 925 116 - X/13
Page 73 of 233
tions where this is required to avoid a safety
risk. ◀
The system is not fully functional in situations
such as the following, and driver intervention
may be necessary:▷In very unfavorable weather conditions,
such as fog or heavy precipitation.▷In detecting poorly-lit road users, such as
pedestrians, cyclists, horseback riders and
wagons; when driving close to train or ship
traffic; and at animal crossings.▷In tight curves, on hilltops or in depressions,
in cross traffic or half-obscured oncoming
traffic on freeways.▷In poorly-lit towns and cities and in the
presence of highly reflective signs.▷At low speeds.▷When the windshield behind the interior
rearview mirror is fogged over, dirty or cov‐
ered with stickers, etc.
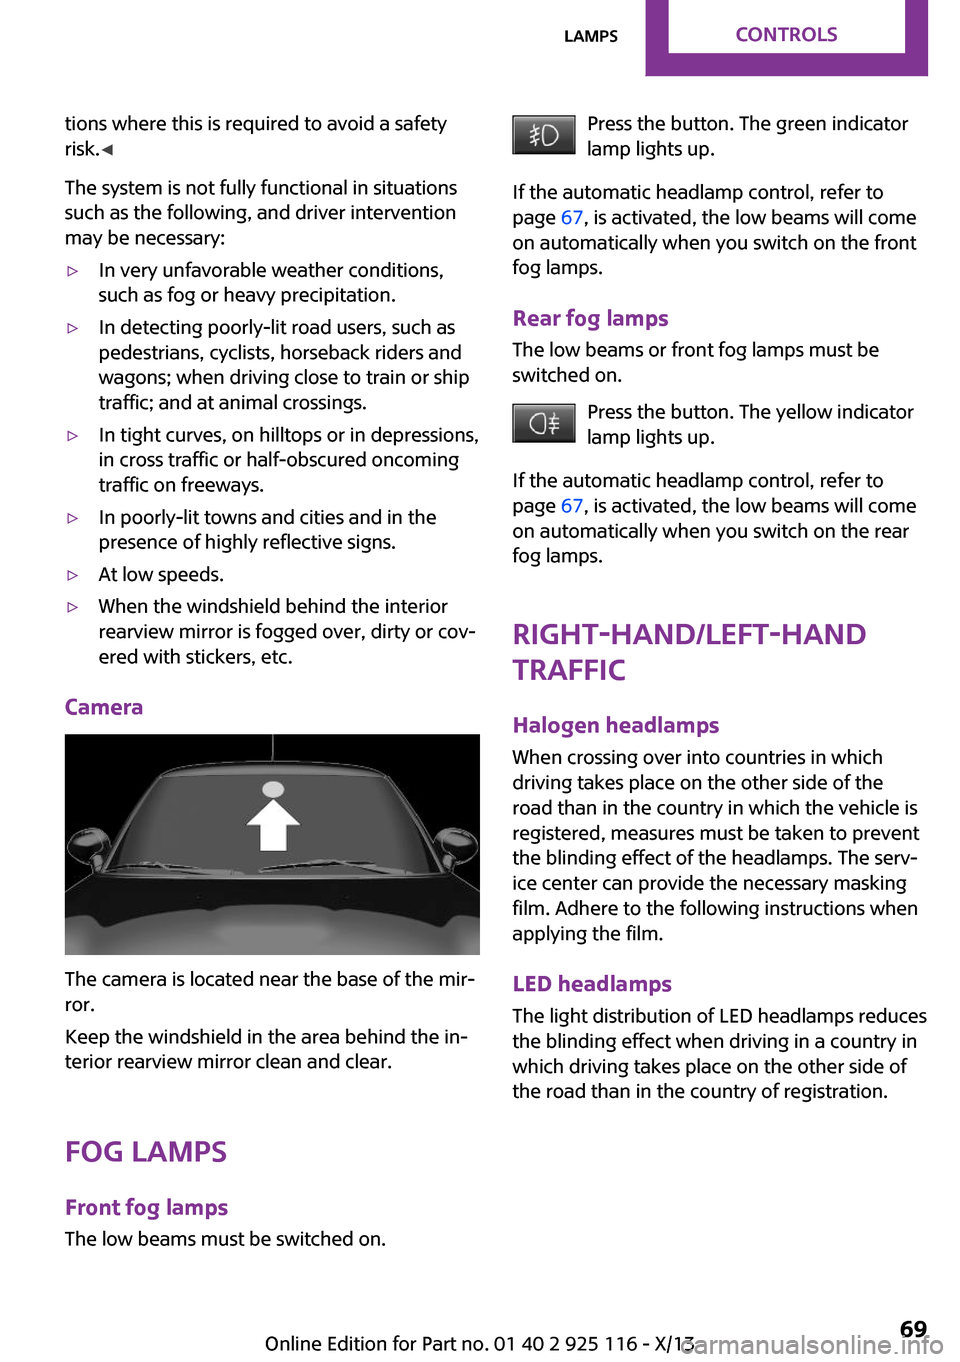
Camera
The camera is located near the base of the mir‐
ror.
Keep the windshield in the area behind the in‐
terior rearview mirror clean and clear.
Fog lamps Front fog lamps
The low beams must be switched on.
Press the button. The green indicator
lamp lights up.
If the automatic headlamp control, refer to
page 67, is activated, the low beams will come
on automatically when you switch on the front
fog lamps.
Rear fog lamps The low beams or front fog lamps must be
switched on.
Press the button. The yellow indicator
lamp lights up.
If the automatic headlamp control, refer to
page 67, is activated, the low beams will come
on automatically when you switch on the rear
fog lamps.
Right-hand/left-hand
traffic
Halogen headlamps When crossing over into countries in which
driving takes place on the other side of the
road than in the country in which the vehicle is
registered, measures must be taken to prevent
the blinding effect of the headlamps. The serv‐
ice center can provide the necessary masking
film. Adhere to the following instructions when
applying the film.
LED headlamps The light distribution of LED headlamps reduces
the blinding effect when driving in a country in
which driving takes place on the other side of
the road than in the country of registration.Seite 69LampsControls69
Online Edition for Part no. 01 40 2 925 116 - X/13
Page 85 of 233
located within the detection range of the sys‐
tem.
At a glance
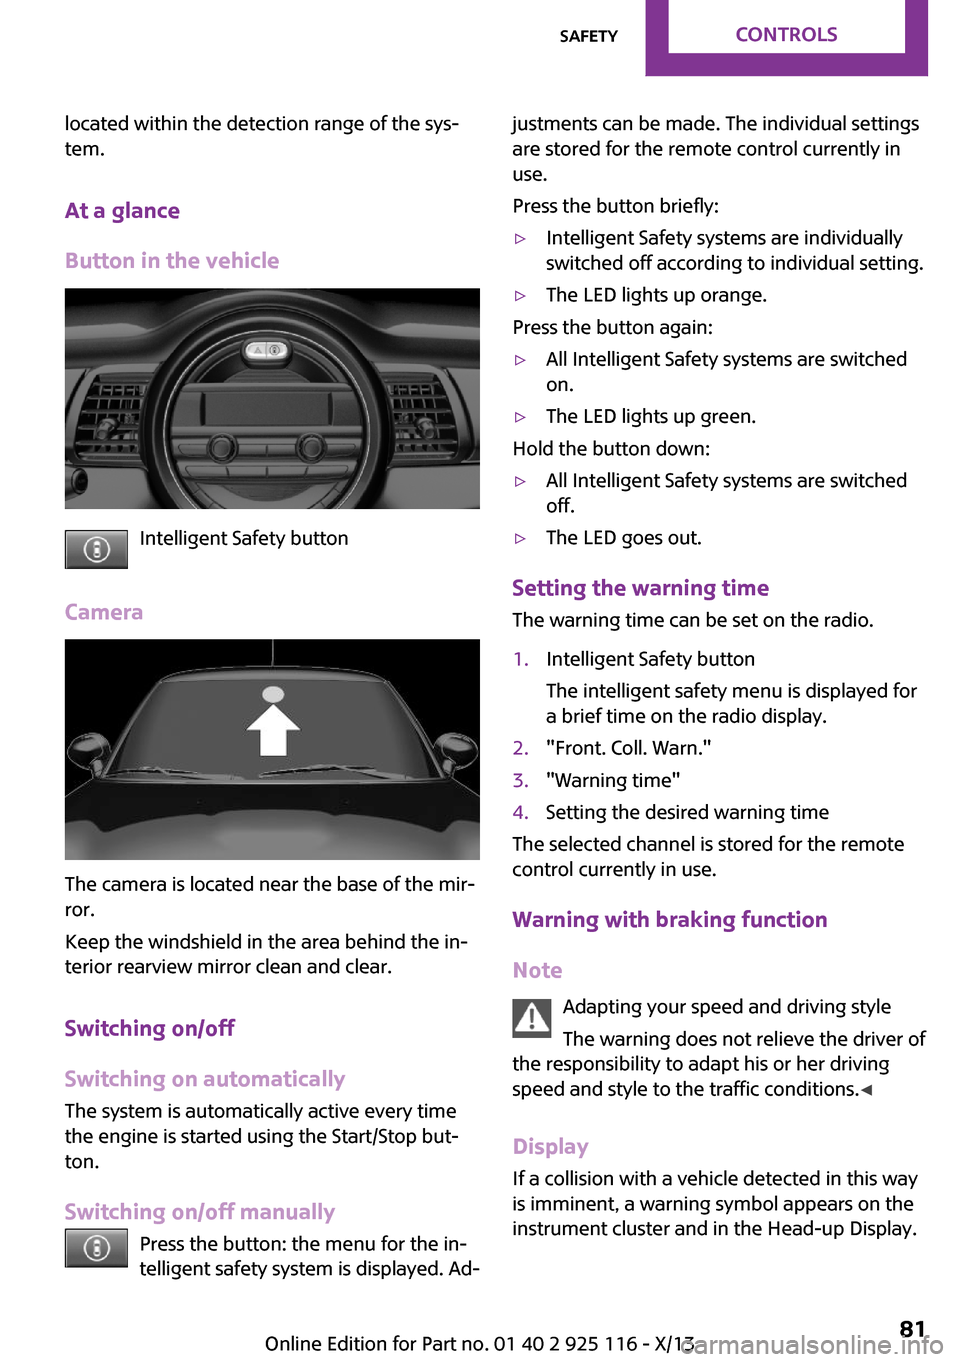
Button in the vehicle
Intelligent Safety button
Camera
The camera is located near the base of the mir‐
ror.
Keep the windshield in the area behind the in‐
terior rearview mirror clean and clear.
Switching on/off
Switching on automatically
The system is automatically active every time
the engine is started using the Start/Stop but‐
ton.
Switching on/off manually Press the button: the menu for the in‐
telligent safety system is displayed. Ad‐
justments can be made. The individual settings
are stored for the remote control currently in
use.
Press the button briefly:▷Intelligent Safety systems are individually
switched off according to individual setting.▷The LED lights up orange.
Press the button again:
▷All Intelligent Safety systems are switched
on.▷The LED lights up green.
Hold the button down:
▷All Intelligent Safety systems are switched
off.▷The LED goes out.
Setting the warning time
The warning time can be set on the radio.
1.Intelligent Safety button
The intelligent safety menu is displayed for
a brief time on the radio display.2."Front. Coll. Warn."3."Warning time"4.Setting the desired warning time
The selected channel is stored for the remote
control currently in use.
Warning with braking function Note Adapting your speed and driving style
The warning does not relieve the driver of
the responsibility to adapt his or her driving
speed and style to the traffic conditions. ◀
Display If a collision with a vehicle detected in this way
is imminent, a warning symbol appears on the
instrument cluster and in the Head-up Display.
Seite 81SafetyControls81
Online Edition for Part no. 01 40 2 925 116 - X/13
Page 87 of 233
Pedestrian warning with
city braking function
The concept
The system can help to prevent accidents with
pedestrians.
The system issues a warning in the city driving
speed area if there is imminent danger of a col‐
lision with pedestrians and includes a braking
function.
The system is controlled via the camera in the
base of the interior mirror.
General information
The system issues a warning with brightness
staring at approx. 6 mph/10 km/h to approx.
35 mph/60 km/h regarding a possible risk of
collision with pedestrians and assists with a
brake intervention shortly before a collision.
It responds to persons that are within the de‐
tection range of the system.
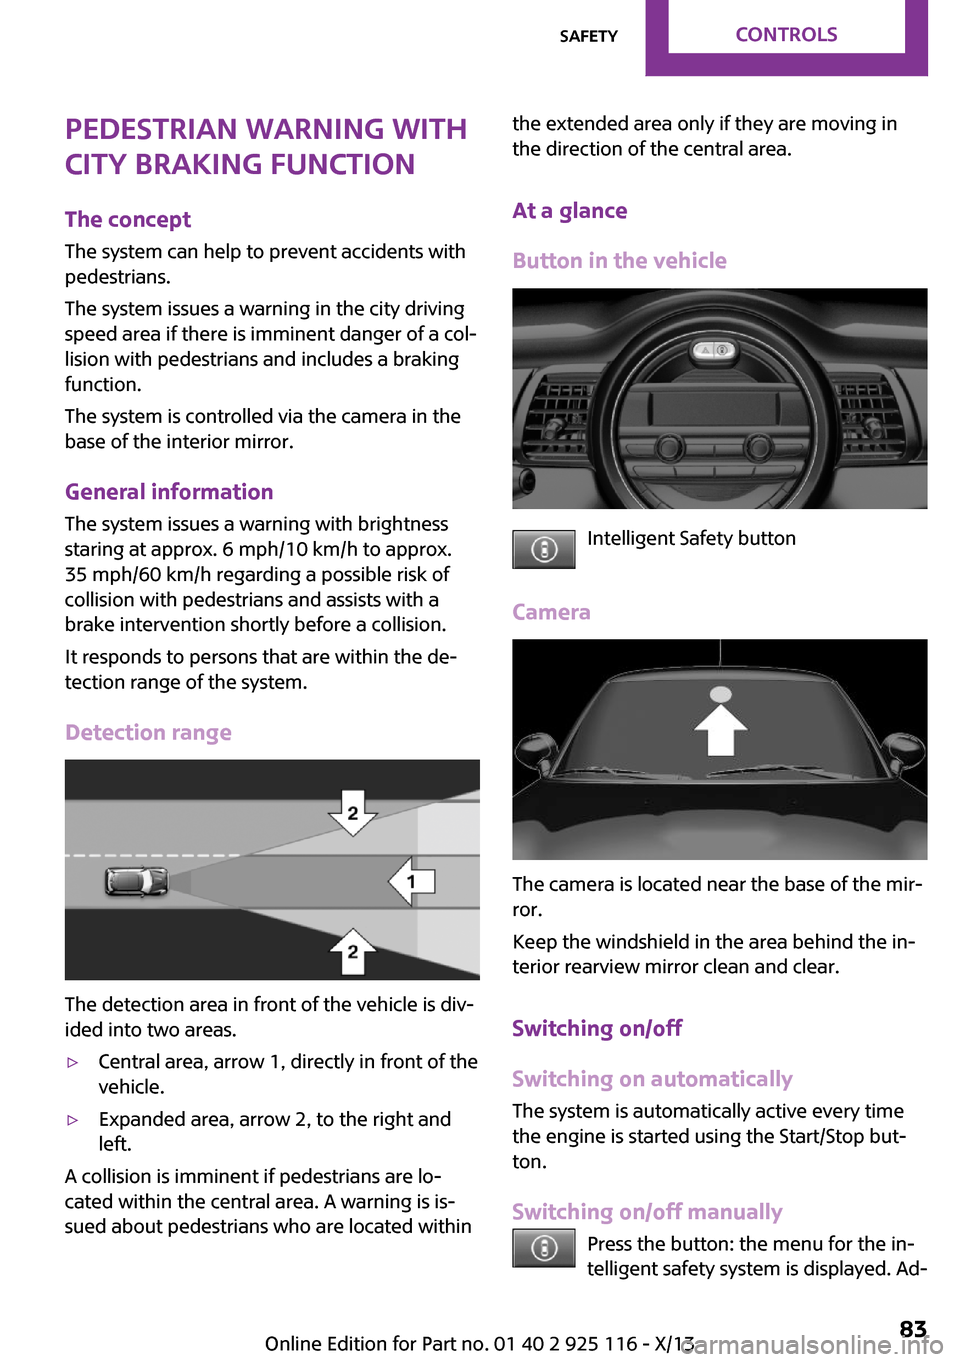
Detection range
The detection area in front of the vehicle is div‐
ided into two areas.
▷Central area, arrow 1, directly in front of the
vehicle.▷Expanded area, arrow 2, to the right and
left.
A collision is imminent if pedestrians are lo‐
cated within the central area. A warning is is‐
sued about pedestrians who are located within
the extended area only if they are moving in
the direction of the central area.
At a glance
Button in the vehicle
Intelligent Safety button
Camera
The camera is located near the base of the mir‐
ror.
Keep the windshield in the area behind the in‐
terior rearview mirror clean and clear.
Switching on/off
Switching on automatically
The system is automatically active every time
the engine is started using the Start/Stop but‐
ton.
Switching on/off manually Press the button: the menu for the in‐
telligent safety system is displayed. Ad‐
Seite 83SafetyControls83
Online Edition for Part no. 01 40 2 925 116 - X/13
Page 94 of 233
Driving comfortVehicle equipment
All standard, country-specific and optional
equipment that is offered in the model series is
described in this chapter. Therefore, equipment
is also described that is not available in a vehi‐
cle, e. g., because of the selected optional
equipment or country variant. This also applies
for safety-related functions and systems.
Camera-based cruise con‐
trol, ACC
The concept
This system can be used to select a desired
speed that the vehicle will maintain automati‐
cally on clear roads.
To the extent possible, the system automati‐
cally adjusts the speed to a slower vehicle
ahead of you.
A camera on the interior rear view mirror is
used to detect vehicles driving ahead.
The distance that the vehicle maintains to the
vehicle ahead of you can be varied.
For safety reasons, it depends on the speed.
To maintain a certain distance, the system au‐
tomatically decelerates, applies the brakes
lightly, or accelerates again if the vehicle ahead
begins moving faster.
As soon as the road is clear, it accelerates to the
desired speed.
The speed is also maintained on downhill gradi‐
ents, but may not be maintained on uphill
slopes if engine power is insufficient.
General information
Depending on the set drive mode, refer to
page 88, the characteristics of the cruise con‐
trol can change in certain areas.Hints
Personal responsibility
Even an active system does not release
the driver from personal responsibility for the
driving process, especially for lane tracking, adaptation of speed, distance and driving style
to the traffic conditions.
Because of technical system limits, the system
cannot independently react appropriately in all
traffic situations.
Monitor the driving process, the surrounding
area and what is occurring in traffic continu‐
ously and attentively and actively intervene as
required, e.g., by braking, steering or making
an evasive maneuver. ◀
Unfavorable weather conditions
Unfavorable weather conditions, e.g.,
rain, snowfall or slush, may result in worsened
detection of vehicles as well as short-term in‐
terruptions with already detected vehicles.
Drive attentively, and react to the current traffic
events. Intervene actively when necessary, e.g.,
by braking, steering or making an evasive ma‐
neuver, otherwise, there is danger of an acci‐
dent. ◀
At a glance
Buttons on the steering wheelPress the but‐
tonFunctionCruise control on/off, interrupt‐
ing, refer to page 91Store/maintain speed, refer to
page 92Resume speed, refer to
page 92Seite 90ControlsDriving comfort90
Online Edition for Part no. 01 40 2 925 116 - X/13