ECO mode MINI 3 door 2014 User Guide
[x] Cancel search | Manufacturer: MINI, Model Year: 2014, Model line: 3 door, Model: MINI 3 door 2014Pages: 240, PDF Size: 11.05 MB
Page 75 of 240
Release the release lever.5.Bring the selector lever into the desired po‐
sition.
Steptronic Sport transmission: Launch
Control
The concept
Launch Control enables optimum acceleration
on surfaces with good traction.
Hints Component wear
Do not use Launch Control too often; oth‐
erwise, this may result in premature wear of
components due to the high stress placed on
the vehicle. ◀
Do not use Launch Control during the break-in,
refer to page 152, period.
To increase vehicle stability, activate DSC again
as soon as possible.
An experienced driver may be able to achieve
better acceleration values in DSC OFF mode, re‐
fer to page 109.
Requirements Launch Control is available when the engine is
warmed up, that is, after uninterrupted driving
of at least 6 miles/10 km.
To start with Launch Control do not steer the
steering wheel.
Start with launch control
While the engine is running:
1. Press button and select Sport+ with
Driving Dynamics Control, refer to
page 111.
The instrument cluster displays TRACTION
in combination with SPORT. The DSC OFF
indicator lamp lights up.2.Engage selector lever position S.3.With the left foot, forcefully press down on
the brake.4.Step on the accelerator pedal beyond the
resistance point at the full throttle position.
A flag symbol appears in the instrument
cluster.5.The starting engine speed adjusts. Within
3 seconds, release the brake.
Before using Launch Control, allow the trans‐
mission to cool down for approx. 5 minutes.
Seite 71DrivingCONTROLS71
Online Edition for Part no. 01 40 2 957 280 - X/14
Page 105 of 240
System limitsSudden tire damage
Sudden serious tire damage caused by
external circumstances cannot be recognized in
advance. ◀
A natural, even tire inflation pressure loss in all
four tires will not be recognized. Therefore,
check the tire inflation pressure regularly.
The system could be delayed or malfunction in
the following situations:▷When the system has not been initialized.▷When driving on a snowy or slippery road
surface.▷Sporty driving style: spinning traction
wheels, high lateral acceleration (drifting).▷When driving with snow chains.
Actions in the event of a flat tire
Normal tires
1.Identify the damaged tire.
Do this by checking the air pressure in all
four tires.
The tire pressure gauge of the Mobility Sys‐
tem, refer to page 181, can be used for this
purpose.
If the tire inflation pressure in all four tires is
correct, the Flat Tire Monitor may not have
been initialized. In this case, initialize the
system.
If an identification is not possible, please
contact the service center.2.Fix the flat tire using the Mobility System,
refer to page 181.
Run-flat tires
Maximum speed
You may continue driving with a damaged tire at speeds up to 50 mph/80 km/h.
Continued driving with a flat tire
If continuing to drive with a damaged tire:1.Avoid sudden braking and steering maneu‐
vers.2.Do not exceed a speed of 50 mph/80 km/h.3.Check the air pressure in all four tires at the
next opportunity.
If the tire inflation pressure in all four tires is
correct, the Flat Tire Monitor may not have
been initialized. In this case, initialize the
system.
Possible driving distance with complete loss of
tire inflation pressure:
The possible driving distance after a loss of tire
inflation pressure depends on cargo load, driv‐
ing style and road conditions.
A vehicle with an average load has a possible
driving range of approx. 50 miles/80 km.
A vehicle with a damaged tire reacts differently,
e.g., it has reduced lane stability during brak‐
ing, a longer braking distance and different
self-steering properties. Adjust your driving
style accordingly. Avoid abrupt steering ma‐
neuvers or driving over obstacles, e.g., curbs,
potholes, etc.
Because the possible driving distance depends
on how the vehicle is used during the trip, the
actual distance may be shorter or longer de‐
pending on the driving speed, road conditions,
external temperature, cargo load, etc.
Continued driving with a flat tire
Drive moderately and do not exceed a
speed of 50 mph/80 km/h.
Your car handles differently when you lose tire
inflation pressure, e.g., your lane stability is re‐
duced when braking, braking distances are lon‐
ger and the self-steering properties will
change. ◀
Seite 101SafetyCONTROLS101
Online Edition for Part no. 01 40 2 957 280 - X/14
Page 116 of 240
Configure the program.
SPORT can also be configured before it is acti‐
vated:1. "Settings"2."Driving mode"3."Configure SPORT"
This configuration is retrieved when SPORT is
activated.
Configuring driving program
Settings can be made for the following driving
programs in Driving mode:
▷GREEN, refer to page 111.▷SPORT, refer to page 111.
Displays
Program selection With Driving Dynamics Control
turned on a list of programs is
displayed and can be selected.
Selected program The instrument cluster displays
the selected program.
Display on the onboard monitor
Program changes can be displayed on the on‐
board monitor.
1."Settings"2."Control display"3."Driving mode info"Drive-off assistant
This system supports driving off on inclines. The
parking brake is not required.1.Hold the vehicle in place with the foot
brake.2.Release the foot brake and drive off with‐
out delay.
After the foot brake is released, the vehicle is
held in place for approx. 2 seconds.
For vehicles with respective equipment ver‐
sions, the possible holding duration amounts to
2 minutes.
Driving off without delay
After releasing the foot brake, start driv‐
ing without delay, since the drive-off assistant
will not hold the vehicle in place for more than
approx. 2 seconds and the vehicle will begin to
roll back. ◀
Seite 112CONTROLSDriving stability control systems112
Online Edition for Part no. 01 40 2 957 280 - X/14
Page 117 of 240
Driving comfortVehicle features and op‐
tions
This chapter describes all standard, country-
specific and optional features offered with the
series. It also describes features that are not
necessarily available in your car, e. g., due to
the selected options or country versions. This
also applies to safety-related functions and sys‐
tems.
Camera-based cruise con‐
trol, ACC
The concept Use this system to select a desired speed that
the vehicle will maintain automatically on clear
roads.
To the extent possible, the system automati‐
cally adjusts the speed to a slower vehicle
ahead of you.
A camera on the interior rear view mirror is
used to detect vehicles driving ahead.
The distance that the vehicle maintains to the
vehicle ahead of you can be varied.
For safety reasons, it depends on the speed.
To maintain a certain distance, the system au‐
tomatically decelerates, applies the brakes
lightly, or accelerates again if the vehicle ahead
begins moving faster.
As soon as the road is clear, the vehicle acceler‐
ates to the desired speed.
The speed is also maintained downhill, but may
not be maintained uphill if engine power is in‐
sufficient.General information
The system is functional at speeds beginning at
approx. 20 mph/30 km/h.
Depending on the set drive mode, refer to
page 111, the features of the cruise control can
change in certain areas.
Hints Personal responsibility
Even an active system holds the driver re‐
sponsible for his or her driving, particularly for
staying in your lane, adjusting your speed,
keeping your distance and for your driving style
all in relation to traffic.
Technically the system has its limits, it cannot
independently react to all traffic situations.
Monitor your driving, be on the alert, observe
the vehicle surroundings and other traffic and
react when needed, e.g. through braking,
steering or make evasive maneuvers - risk of
accident. ◀
Unfavorable weather conditions
In the event of unfavorable weather and
light conditions, for instance if there is rain,
snowfall, slush, fog or glare, this may result in
poorer recognition of traffic situations as well
as short-term interruptions for vehicles that are
already detected. Drive attentively, and react to
the current traffic situation. Intervene actively
when necessary, e.g., by braking, steering or
making an evasive maneuver, otherwise, there
is the risk of an accident. ◀Seite 113Driving comfortCONTROLS113
Online Edition for Part no. 01 40 2 957 280 - X/14
Page 157 of 240
Hot exhaust systemHot exhaust system
High temperatures are generated in the
exhaust system.
Do not remove the heat shields installed and
never apply undercoating to them. Make sure
that flammable materials, e. g. hay, leaves,
grass, etc. do not come in contact with the hot
exhaust system while driving, while in idle posi‐
tion mode, or when parked. Such contact could
lead to a fire, resulting in an increased risk of
serious personal injury as well as property dam‐
age.
Do not touch hot exhaust pipes; otherwise,
there is a danger of getting burned. ◀
Mobile communication devices in the
vehicle
Mobile communication devices in the ve‐hicle
It is not recommended to use mobile phones,
such as mobile phones, in the vehicle interior
without a direct connection to an external aer‐
ial. Otherwise, the vehicle's electronics and mo‐
bile communication devices can interfere with
each other. In addition, there is no assurance
that the radiation generated during transmis‐
sion will be conducted away from the vehicle
interior. ◀
Hydroplaning On wet or slushy roads, a wedge of water can
form between the tires and road surface.
This phenomenon is referred to as hydroplan‐
ing. It is characterized by a partial or complete
loss of contact between the tires and the road
surface, ultimately undermining your ability to
steer and brake the vehicle.
Hydroplaning
When driving on wet or slushy roads, re‐
duce your speed to prevent hydroplaning. ◀Driving through water
Drive through calm water only if it is not deeper
than 9.8 inches/25 cm and at this height, no
faster than walking speed, up to 3 mph/5 km/h.
Observe water level and speed
Do not exceed the maximum water level
and maximum speed; otherwise, the vehicle's
engine, the electrical systems and the transmis‐
sion may be damaged. ◀
Braking safely
Your vehicle is equipped with ABS as a standard
feature.
Applying the brakes fully is the most effective
way of braking in situations needed.
Steering is still responsive. You can still avoid
any obstacles with a minimum of steering ef‐
fort.
Pulsation of the brake pedal and sounds from
the hydraulic circuits indicate that ABS is in its
active mode.
Objects in the area around the pedals No objects in the area around the pedals
Keep floor mats, carpets, and any other
objects out of the pedal area; otherwise, the
function of the pedals could be impeded while
driving and create the risk of an accident.
Do not place additional floor mats over existing
mats or other objects.
Only use floor mats that have been approved for the vehicle and can be properly attached to
floor.
Ensure that the floor mats are securely fastened
again after they were removed for cleaning,
e.g. ◀
Driving in wet conditions When roads are wet or in heavy rain, press
brake pedal ever so gently every few miles.Seite 153Things to remember when drivingDRIVING TIPS153
Online Edition for Part no. 01 40 2 957 280 - X/14
Page 164 of 240
By maintaining a suitable distance to the vehi‐
cle driving ahead of you.
Driving smoothly and proactively reduces fuel
consumption.
Avoid high engine speeds
As a rule: driving at low engine speeds lowers
fuel consumption and reduces wear.
Use 1st gear to get the vehicle moving. Starting
with the 2nd gear, accelerate rapidly. When ac‐
celerating, shift up before reaching high engine
speeds.
When you reach the desired speed, shift into
the highest applicable gear and drive with the
engine speed as low as possible and at a con‐
stant speed.
The gear shift indicator, refer to page 78, of
your vehicle indicates the most fuel efficient gear.
Use coasting conditions When approaching a red light, take your foot
off the accelerator and let the vehicle coast to a
halt.
For going downhill take your foot off the accel‐
erator and let the vehicle roll.
The flow of fuel is interrupted while coasting.
Switch off the engine
during longer stops
Switch off the engine during longer stops, e.g.,
at traffic lights, railroad crossings or in traffic
congestion.
Auto Start/Stop function
The Auto Start/Stop function of your vehicle au‐
tomatically switches off the engine during a
stop.If the engine is switched off and then restarted
rather than leaving the engine running con‐
stantly, fuel consumption and emissions are re‐
duced. Savings can begin within a few seconds
of switching off the engine.
In addition, fuel consumption is also deter‐
mined by other factors, such as driving style,
road conditions, maintenance or environmental
factors.
Switch off any functions
that are not currently
needed
Functions such as seat heating and the rear
window defroster require a lot of energy and
consume additional fuel, especially in city and stop-and-go traffic.
Therefore, reel off these functions if they are
not actually needed.
Have maintenance car‐
ried out
Have vehicles maintained regularly to achieve
optimal vehicle efficiency and operating life.
Have the maintenance carried out by your
service center.
Please also note the MINI Maintenance System,
refer to page 193.
GREEN mode The concept
The GREEN mode supports a driving style that
saves on fuel consumption. For this purpose,
the engine control and comfort features, e. g.
the climate control output, are adjusted.
For Steptronic transmission:Seite 160DRIVING TIPSSaving fuel160
Online Edition for Part no. 01 40 2 957 280 - X/14
Page 165 of 240
The Coasting driving condition is enabled under
certain conditions.
Under certain conditions the engine is auto‐
matically decoupled from the transmission in
selector lever position D. The vehicle continues
traveling with the engine idling to reduce fuel
consumption. Selector lever position D remains
engaged. An indicator provides information
about the distance traveled in Coasting mode.
In addition, context-sensitive instructions are
displayed to assist with an optimized fuel con‐
sumption driving style.
The achieved extended range is displayed in
the instrument cluster.
At a glance The system includes the following MINIMAL
functions and displays:▷GREEN bonus range, refer to page 162.▷GREEN tips driving instruction, refer to
page 162.▷GREEN climate control, refer to page 161.▷MINIMALISM analyzer, refer to page 164.▷Coasting driving condition, refer to
page 163.
Activating GREEN mode
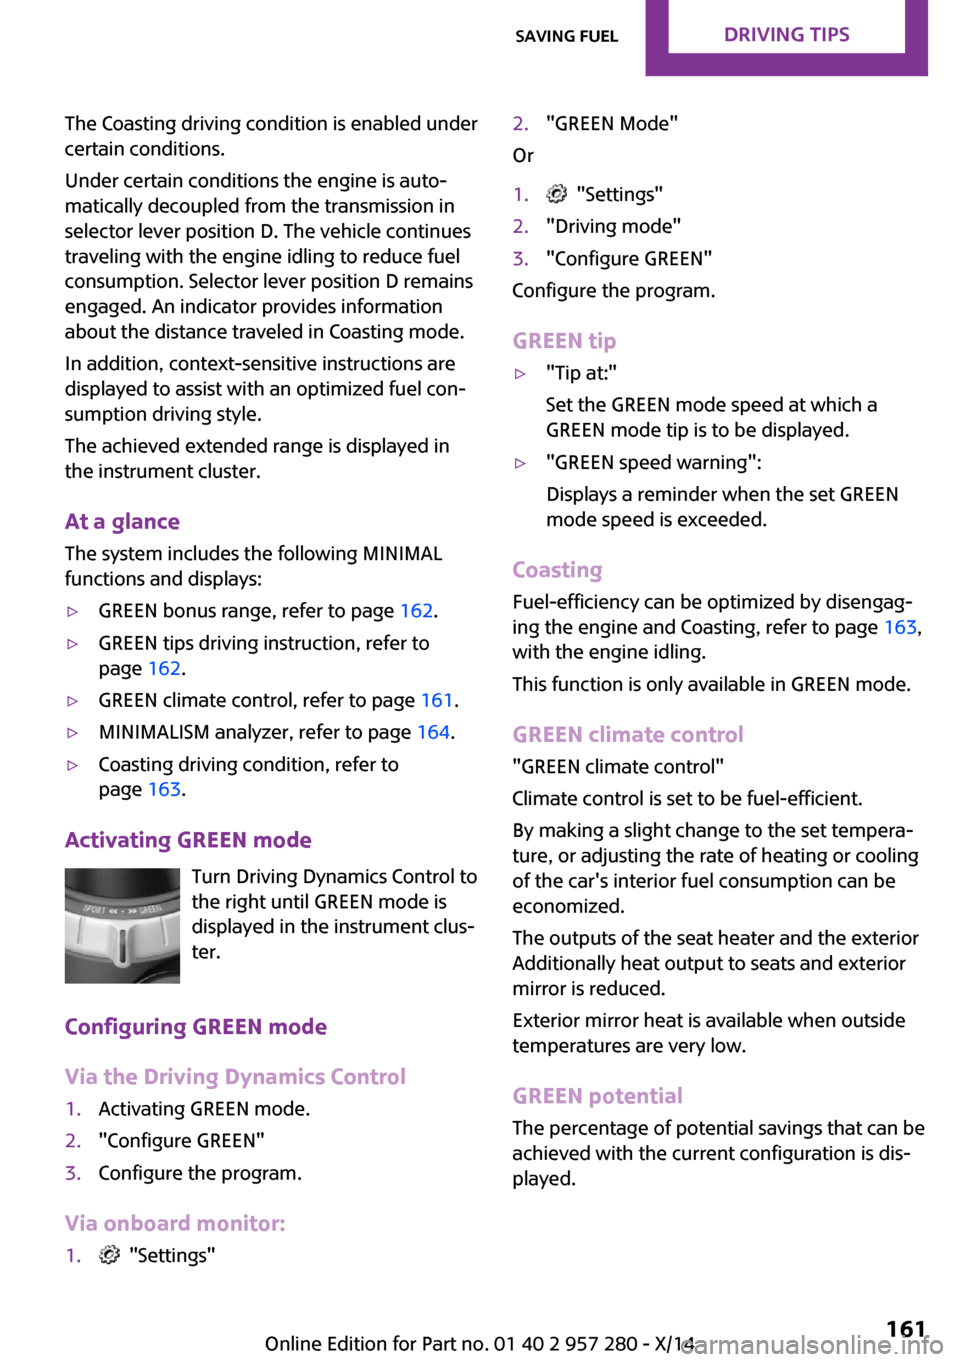
Turn Driving Dynamics Control to
the right until GREEN mode is
displayed in the instrument clus‐
ter.
Configuring GREEN mode
Via the Driving Dynamics Control
1.Activating GREEN mode.2."Configure GREEN"3.Configure the program.
Via onboard monitor:
1. "Settings"2."GREEN Mode"
Or
1. "Settings"2."Driving mode"3."Configure GREEN"
Configure the program.
GREEN tip
▷"Tip at:"
Set the GREEN mode speed at which a
GREEN mode tip is to be displayed.▷"GREEN speed warning":
Displays a reminder when the set GREEN
mode speed is exceeded.
Coasting
Fuel-efficiency can be optimized by disengag‐
ing the engine and Coasting, refer to page 163,
with the engine idling.
This function is only available in GREEN mode.
GREEN climate control
"GREEN climate control"
Climate control is set to be fuel-efficient.
By making a slight change to the set tempera‐
ture, or adjusting the rate of heating or cooling
of the car's interior fuel consumption can be
economized.
The outputs of the seat heater and the exterior
Additionally heat output to seats and exterior
mirror is reduced.
Exterior mirror heat is available when outside
temperatures are very low.
GREEN potential
The percentage of potential savings that can be
achieved with the current configuration is dis‐
played.
Seite 161Saving fuelDRIVING TIPS161
Online Edition for Part no. 01 40 2 957 280 - X/14
Page 166 of 240
Display in the instrument cluster
GREEN bonus range An adjusted driving style helps
you extend your driving range.
This may be displayed as the bo‐
nus range in the instrument clus‐
ter.
The bonus range is shown in the range display.
The bonus range is automatically reset every
time the vehicle is refueled.▷Green display: efficient driving style.▷Gray display: adjust driving style, e. g. by
backing off the accelerator pedal.
Driving style
A bar display in the instrument
cluster indicates your current
driving efficiency.
Mark in the left area, arrow 1:
display for energy recovered by
coasting or when braking.
Mark in the right area, arrow 2: display when
accelerating.
Your driving style's efficiency is shown by the
bar's color:
▷Green display: efficient driving style as long
as the mark moves within the green range.▷Gray display: adjust driving style, e. g. by
backing off the accelerator pedal.
The display switches to green as soon as all
conditions for fuel-efficiency-optimized driving
are met.
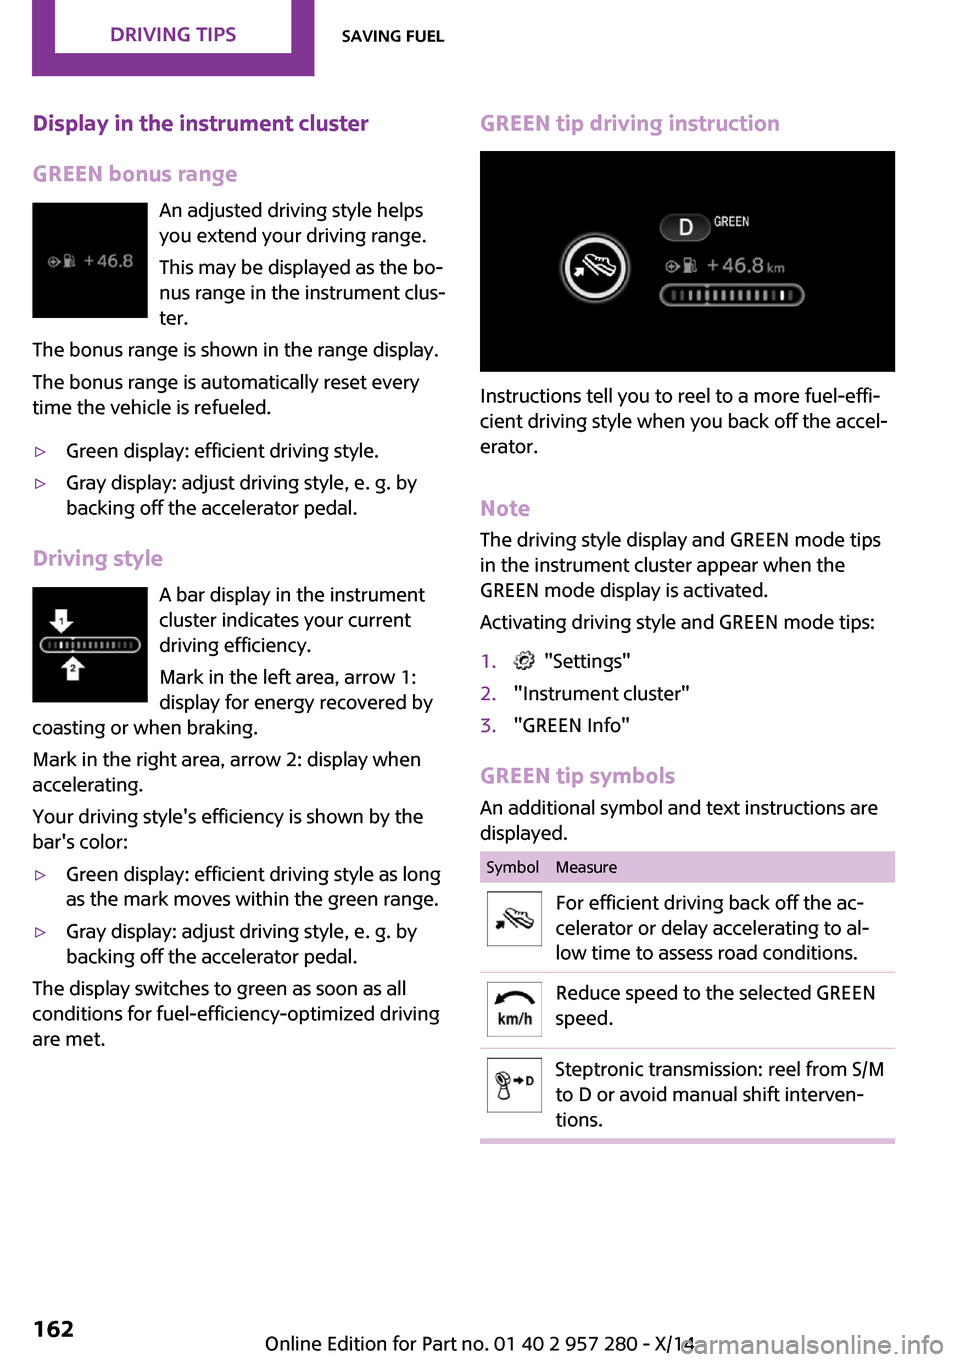
GREEN tip driving instruction
Instructions tell you to reel to a more fuel-effi‐
cient driving style when you back off the accel‐
erator.
Note The driving style display and GREEN mode tips
in the instrument cluster appear when the GREEN mode display is activated.
Activating driving style and GREEN mode tips:
1. "Settings"2."Instrument cluster"3."GREEN Info"
GREEN tip symbols An additional symbol and text instructions aredisplayed.
SymbolMeasureFor efficient driving back off the ac‐
celerator or delay accelerating to al‐
low time to assess road conditions.Reduce speed to the selected GREEN
speed.Steptronic transmission: reel from S/M
to D or avoid manual shift interven‐
tions.Seite 162DRIVING TIPSSaving fuel162
Online Edition for Part no. 01 40 2 957 280 - X/14
Page 167 of 240
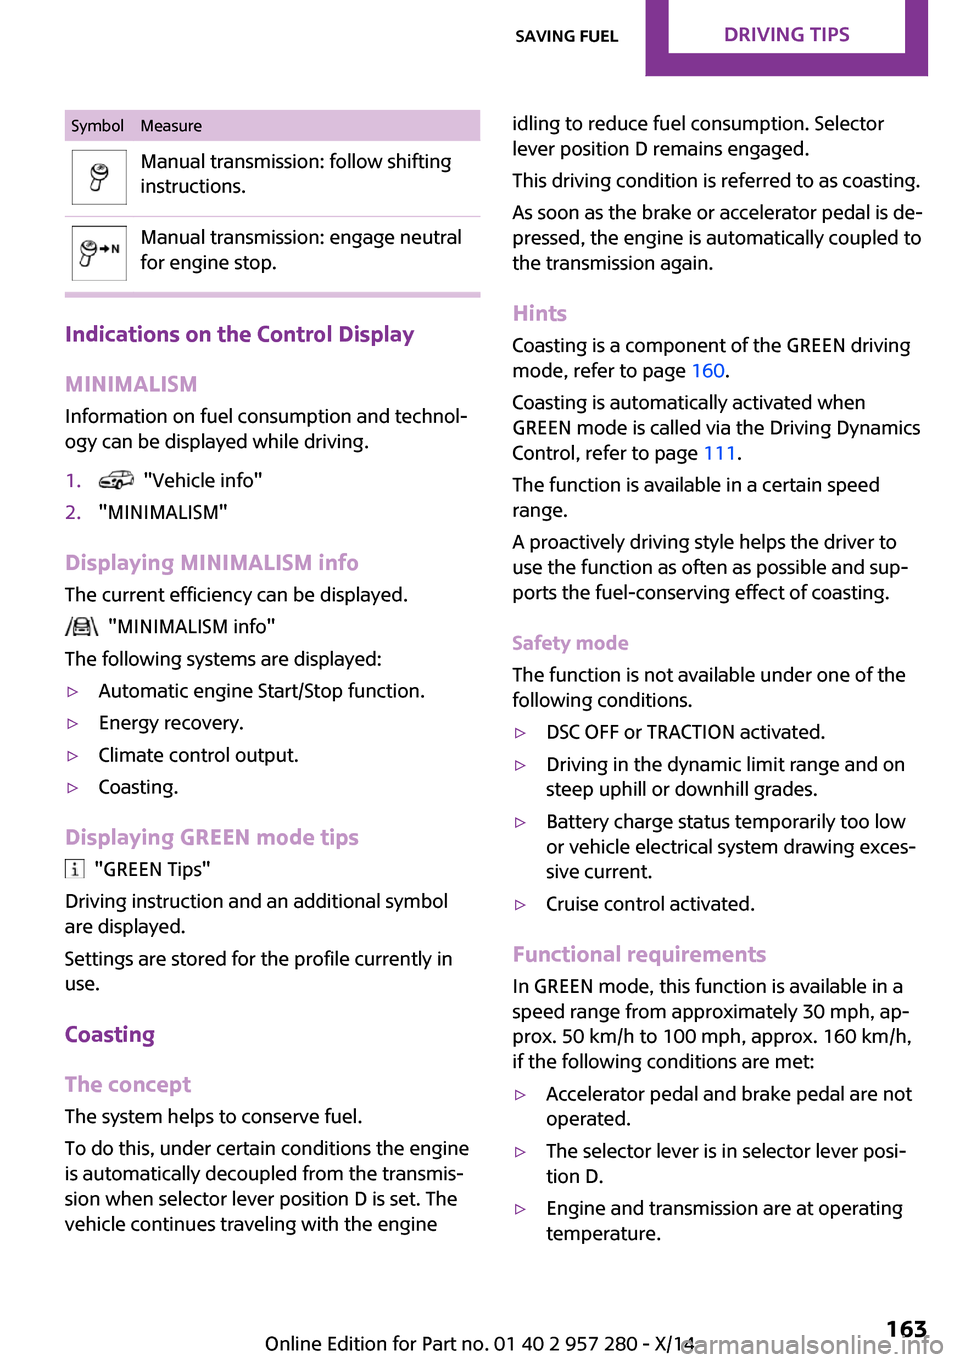
SymbolMeasureManual transmission: follow shifting
instructions.Manual transmission: engage neutral
for engine stop.
Indications on the Control Display
MINIMALISM
Information on fuel consumption and technol‐
ogy can be displayed while driving.
1. "Vehicle info"2."MINIMALISM"
Displaying MINIMALISM info
The current efficiency can be displayed.
"MINIMALISM info"
The following systems are displayed:
▷Automatic engine Start/Stop function.▷Energy recovery.▷Climate control output.▷Coasting.
Displaying GREEN mode tips
"GREEN Tips"
Driving instruction and an additional symbol
are displayed.
Settings are stored for the profile currently in
use.
Coasting
The concept
The system helps to conserve fuel.
To do this, under certain conditions the engine
is automatically decoupled from the transmis‐
sion when selector lever position D is set. The
vehicle continues traveling with the engine
idling to reduce fuel consumption. Selector
lever position D remains engaged.
This driving condition is referred to as coasting.
As soon as the brake or accelerator pedal is de‐
pressed, the engine is automatically coupled to
the transmission again.
Hints
Coasting is a component of the GREEN driving
mode, refer to page 160.
Coasting is automatically activated when
GREEN mode is called via the Driving Dynamics
Control, refer to page 111.
The function is available in a certain speed
range.
A proactively driving style helps the driver to
use the function as often as possible and sup‐
ports the fuel-conserving effect of coasting.
Safety mode
The function is not available under one of the
following conditions.▷DSC OFF or TRACTION activated.▷Driving in the dynamic limit range and on
steep uphill or downhill grades.▷Battery charge status temporarily too low
or vehicle electrical system drawing exces‐
sive current.▷Cruise control activated.
Functional requirements
In GREEN mode, this function is available in a
speed range from approximately 30 mph, ap‐
prox. 50 km/h to 100 mph, approx. 160 km/h,
if the following conditions are met:
▷Accelerator pedal and brake pedal are not
operated.▷The selector lever is in selector lever posi‐
tion D.▷Engine and transmission are at operating
temperature.Seite 163Saving fuelDRIVING TIPS163
Online Edition for Part no. 01 40 2 957 280 - X/14
Page 181 of 240
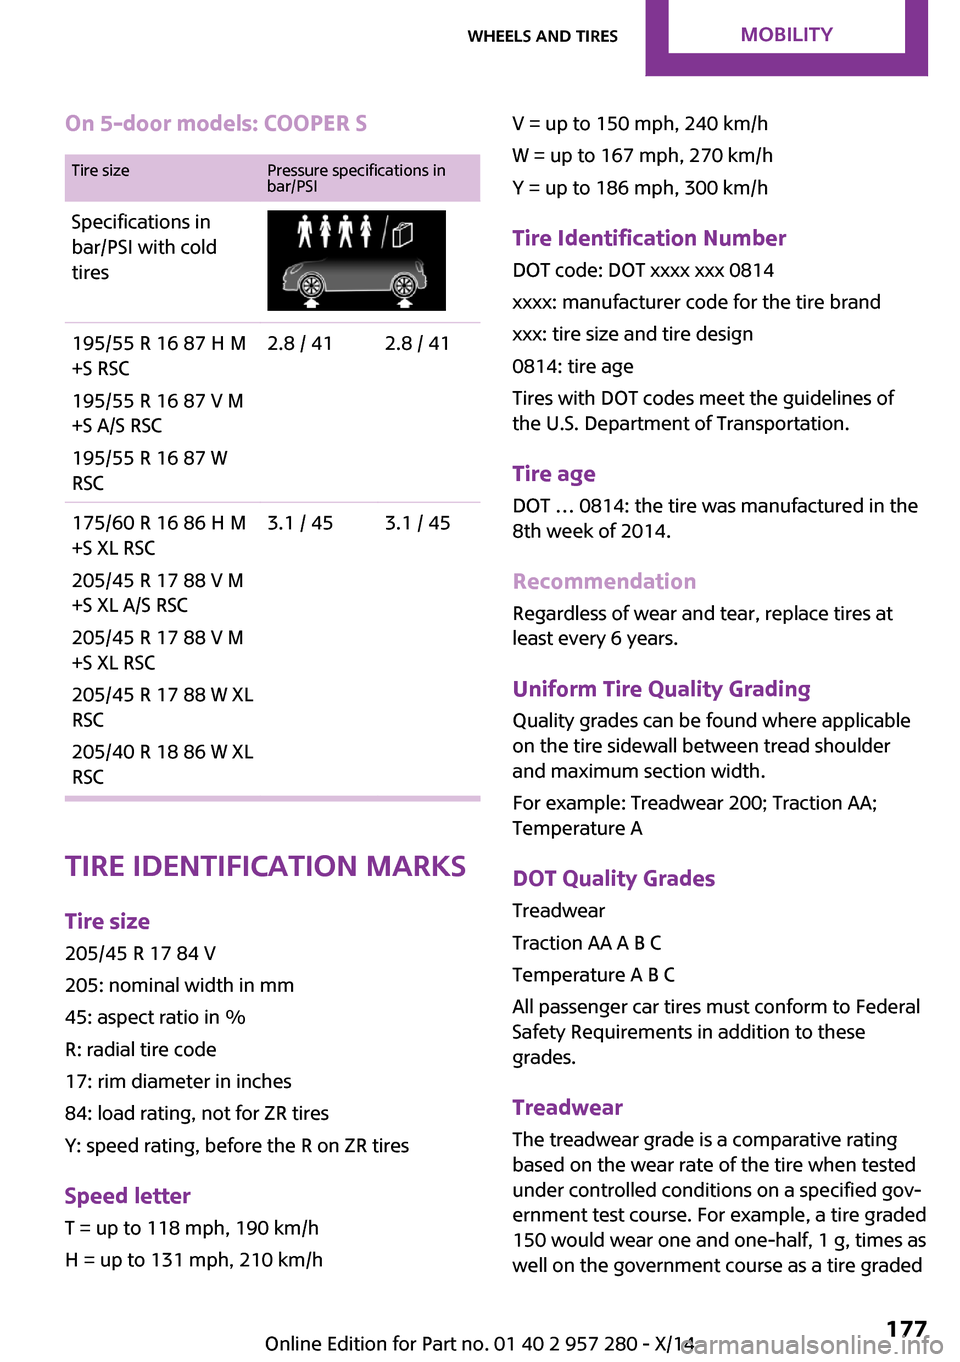
On 5-door models: COOPER STire sizePressure specifications in
bar/PSISpecifications in
bar/PSI with cold
tires195/55 R 16 87 H M
+S RSC
195/55 R 16 87 V M
+S A/S RSC
195/55 R 16 87 W
RSC2.8 / 412.8 / 41175/60 R 16 86 H M
+S XL RSC
205/45 R 17 88 V M
+S XL A/S RSC
205/45 R 17 88 V M
+S XL RSC
205/45 R 17 88 W XL
RSC
205/40 R 18 86 W XL
RSC3.1 / 453.1 / 45
Tire identification marks
Tire size 205/45 R 17 84 V
205: nominal width in mm
45: aspect ratio in %
R: radial tire code
17: rim diameter in inches
84: load rating, not for ZR tires
Y: speed rating, before the R on ZR tires
Speed letter T = up to 118 mph, 190 km/h
H = up to 131 mph, 210 km/h
V = up to 150 mph, 240 km/h
W = up to 167 mph, 270 km/h
Y = up to 186 mph, 300 km/h
Tire Identification NumberDOT code: DOT xxxx xxx 0814
xxxx: manufacturer code for the tire brand
xxx: tire size and tire design
0814: tire age
Tires with DOT codes meet the guidelines of
the U.S. Department of Transportation.
Tire age DOT … 0814: the tire was manufactured in the
8th week of 2014.
Recommendation Regardless of wear and tear, replace tires at
least every 6 years.
Uniform Tire Quality Grading
Quality grades can be found where applicable
on the tire sidewall between tread shoulder
and maximum section width.
For example: Treadwear 200; Traction AA;
Temperature A
DOT Quality Grades
Treadwear
Traction AA A B C
Temperature A B C
All passenger car tires must conform to Federal
Safety Requirements in addition to these
grades.
Treadwear The treadwear grade is a comparative rating
based on the wear rate of the tire when tested
under controlled conditions on a specified gov‐
ernment test course. For example, a tire graded
150 would wear one and one-half, 1 g, times as
well on the government course as a tire gradedSeite 177Wheels and tiresMOBILITY177
Online Edition for Part no. 01 40 2 957 280 - X/14