navigation MINI Clubman 2010 Owner's Manual (Mini Connected)
[x] Cancel search | Manufacturer: MINI, Model Year: 2010, Model line: Clubman, Model: MINI Clubman 2010Pages: 218, PDF Size: 3.97 MB
Page 5 of 218
MOBILITYAT A GLANCE CONTROLS DRIVING TIPS ENTERTAINMENT
3
NAVIGATION REFERENCE
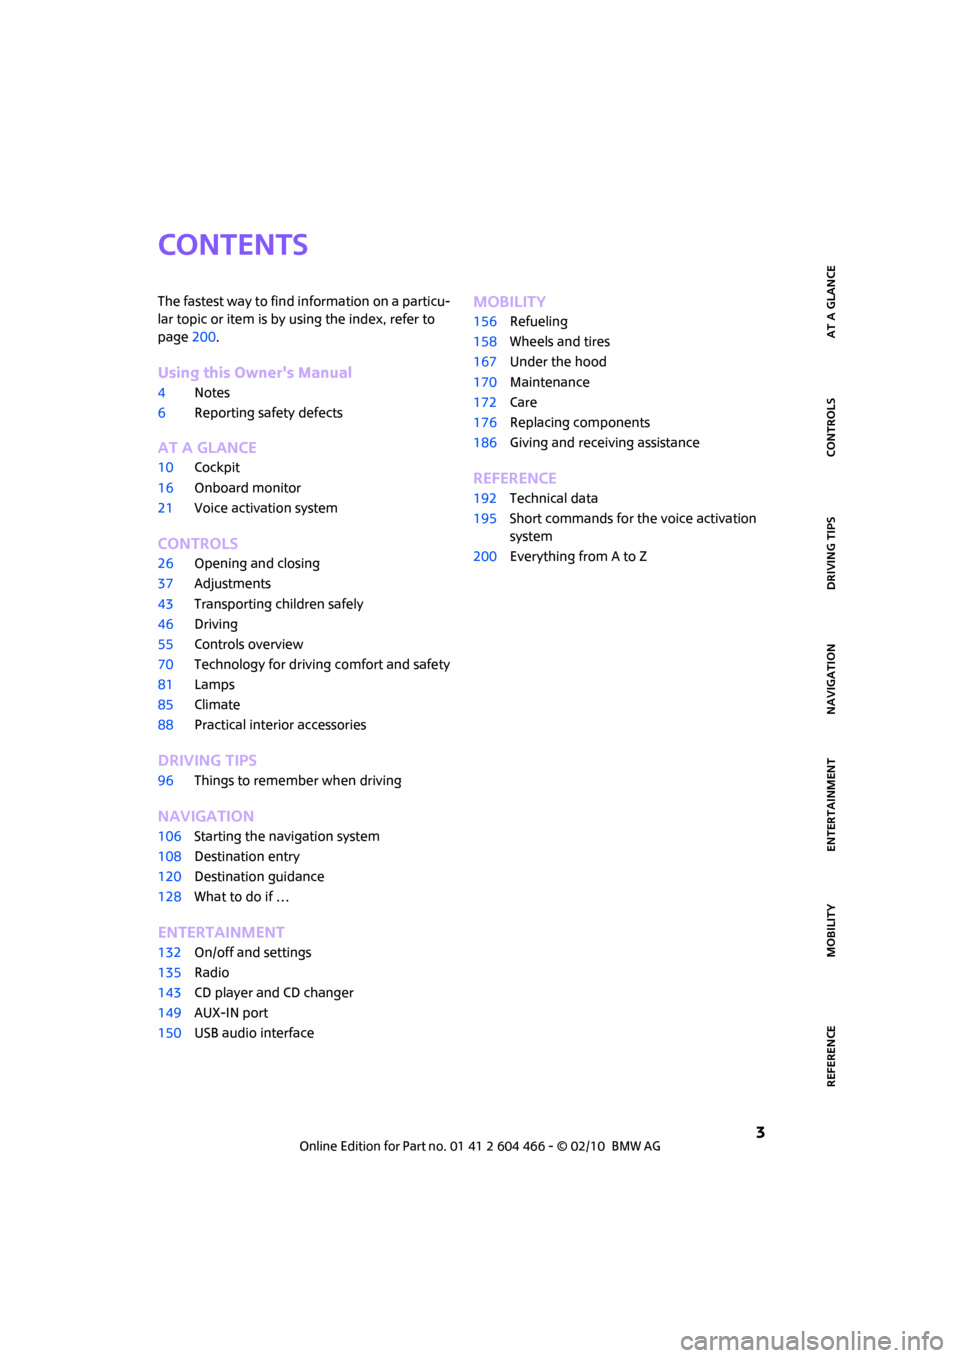
CONTENTS
The fastest way to find information on a particu-
lar topic or item is by using the index, refer to
page200.
Using this Owner's Manual
4Notes
6Reporting safety defects
AT A GLANCE
10Cockpit
16Onboard monitor
21Voice activation system
CONTROLS
26Opening and closing
37Adjustments
43Transporting children safely
46Driving
55Controls overview
70Technology for driving comfort and safety
81Lamps
85Climate
88Practical interior accessories
DRIVING TIPS
96Things to remember when driving
NAVIGATION
106Starting the navigation system
108Destination entry
120Destination guidance
128What to do if …
ENTERTAINMENT
132On/off and settings
135Radio
143CD player and CD changer
149AUX-IN port
150USB audio interface
MOBILITY
156Refueling
158Wheels and tires
167Under the hood
170Maintenance
172Care
176Replacing components
186Giving and receiving assistance
REFERENCE
192Technical data
195Short commands for the voice activation
system
200Everything from A to Z
Page 7 of 218
5
MOBILITYAT A GLANCE CONTROLS DRIVING TIPS ENTERTAINMENT NAVIGATION REFERENCE
For your safety
Maintenance and repair
Advanced technology, e.g. the use of
modern materials and powerful electron-
ics, requires specially adapted maintenance and
repair methods. Therefore, have the necessary
work on your MINI only carried out by a MINI
dealer or a workshop that has specially trained
personnel working in accordance with the spec-
ifications of the MINI manufacturer. If this work
is not carried out properly, there is a danger of
subsequent damage and related safety haz-
ards.<
Parts and accessories
For your own safety, use genuine parts
and accessories approved by the manu-
facturer of the MINI.
When you purchase accessories tested
and approved by the manufacturer of the MINI
and Original MINI Parts, you simultaneously
acquire the assurance that they have been thor-
oughly tested by the manufacturer of the MINI
to ensure optimum performance when installed
on your vehicle.
The manufacturer of the MINI warrants these
parts to be free from defects in material and
workmanship.
The manufacturer of the MINI will not accept any
liability for damage resulting from installation of
parts and accessories not approved by the man-
ufacturer of the MINI.
The manufacturer of the MINI cannot test every
product made by other manufacturers to verify
i f i t c a n b e u s e d o n a M I N I s a f e l y a n d w i t h o u t r i s k
to either the vehicle, its operation, or its occu-
pants.
Original MINI Parts, MINI Accessories and other
products approved by the manufacturer of the
MINI, together with professional advice on using
these items, are available from all MINI dealers.
Installation and operation of accessories that
have not been approved by the manufacturer of
your MINI, such as alarms, radios, amplifiers,
radar detectors, wheels, suspension compo-nents, brake dust shields, telephones, including
operation of any mobile phone from within the
vehicle without using an externally mounted
antenna, or transceiver equipment, for instance,
CBs, walkie-talkies, ham radios or similar acces-
sories, may cause extensive damage to the vehi-
cle, compromise its safety, interfere with the
vehicle's electrical system or affect the validity of
the MINI Limited Warranty. See your MINI dealer
for additional information.<
Maintenance, replacement, or repair of
the emission control devices and systems
may be performed by any automotive repair
establishment or individual using any certified
automotive part.
warning:
Engine exhaust and a wide variety of
automobile components and parts,
including components found in the interior fur-
nishings in a vehicle, contain or emit chemicals
known to the State of California to cause cancer
and birth defects and reproductive harm. In
addition, certain fluids contained in vehicles and
certain products of component wear contain or
emit chemicals known to the State of California
to cause cancer and birth defects or other repro-
ductive harm.
Battery posts, terminals and related accessories
contain lead and lead compounds. Wash your
hands after handling.
Used engine oil contains chemicals that have
caused cancer in laboratory animals. Always
protect your skin by washing thoroughly with
soap and water.<
Service and warranty
We recommend that you read this publication
thoroughly.
Your MINI is covered by the following warran-
ties:
>New Vehicle Limited Warranty
>Rust Perforation Limited Warranty
Page 9 of 218

7
MOBILITYAT A GLANCE CONTROLS DRIVING TIPS ENTERTAINMENT NAVIGATION REFERENCE
Page 11 of 218
AT A GLANCE
CONTROLS
DRIVING TIPS
NAVIGATION
ENTERTAINMENT
MOBILITY
REFERENCE AT A GLANCE
Page 13 of 218
MOBILITYAT A GLANCE CONTROLS DRIVING TIPS ENTERTAINMENT
11
NAVIGATION REFERENCE
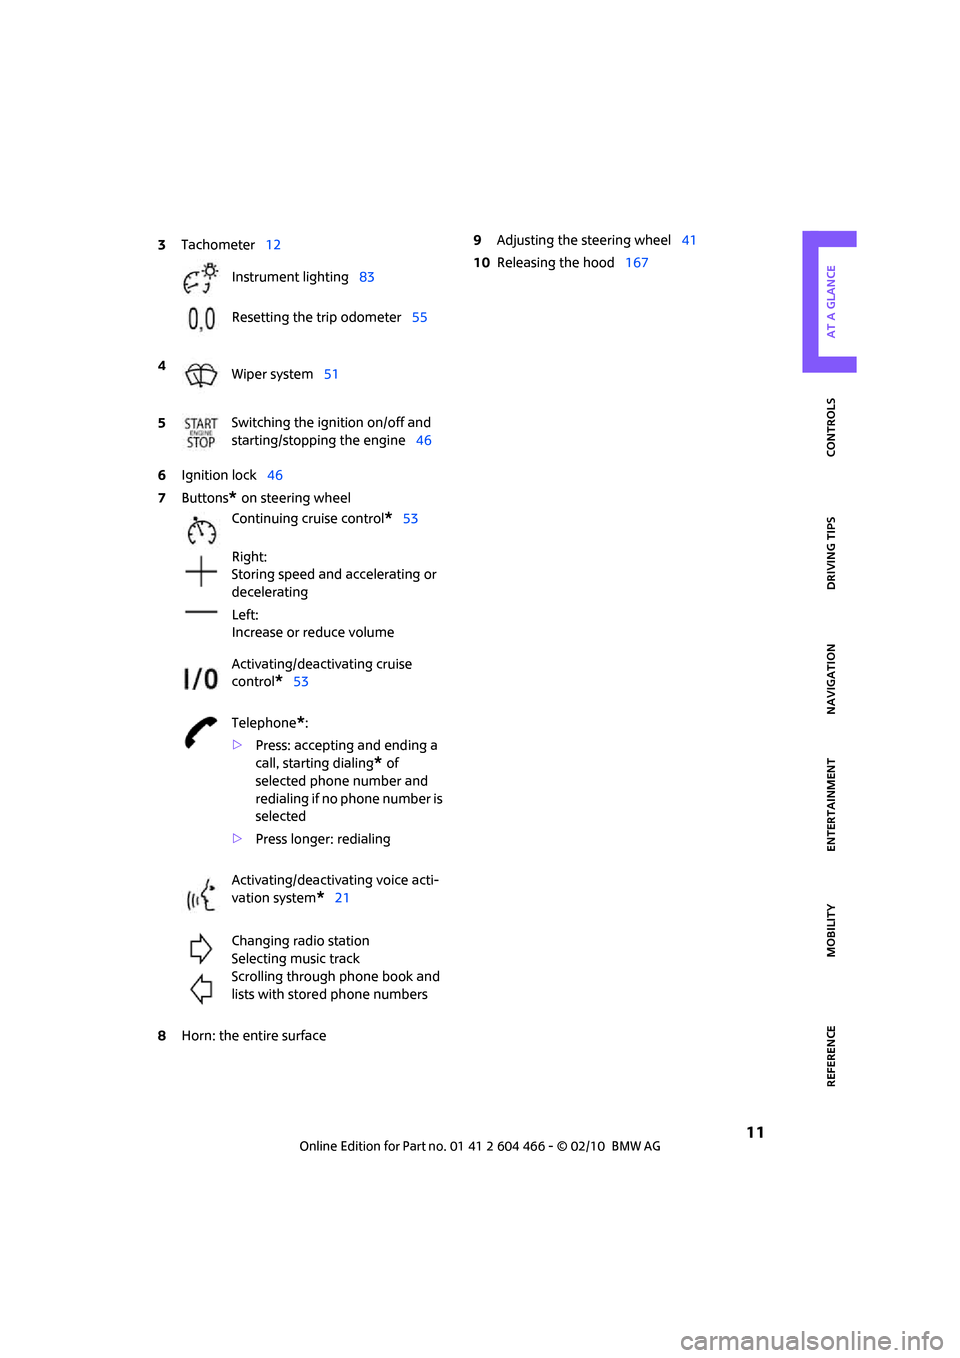
6Ignition lock46
7Buttons
* on steering wheel
8Horn: the entire surface9Adjusting the steering wheel41
10Releasing the hood167 3Tachometer12
Instrument lighting83
Resetting the trip odometer55
4
Wiper system51
5Switching the ignition on/off and
starting/stopping the engine46
Continuing cruise control
*53
Right:
Storing speed and accelerating or
decelerating
Left:
Increase or reduce volume
Activating/deactivating cruise
control
*53
Telephone
*:
>Press: accepting and ending a
call, starting dialing
* of
selected phone number and
redialing if no phone number is
selected
>Press longer: redialing
Activating/deactivating voice acti-
vation system
*21
Changing radio station
Selecting music track
Scrolling through phone book and
lists with stored phone numbers
Page 15 of 218
MOBILITYAT A GLANCE CONTROLS DRIVING TIPS ENTERTAINMENT
13
NAVIGATION REFERENCE
Indicator and warning
lamps
The concept
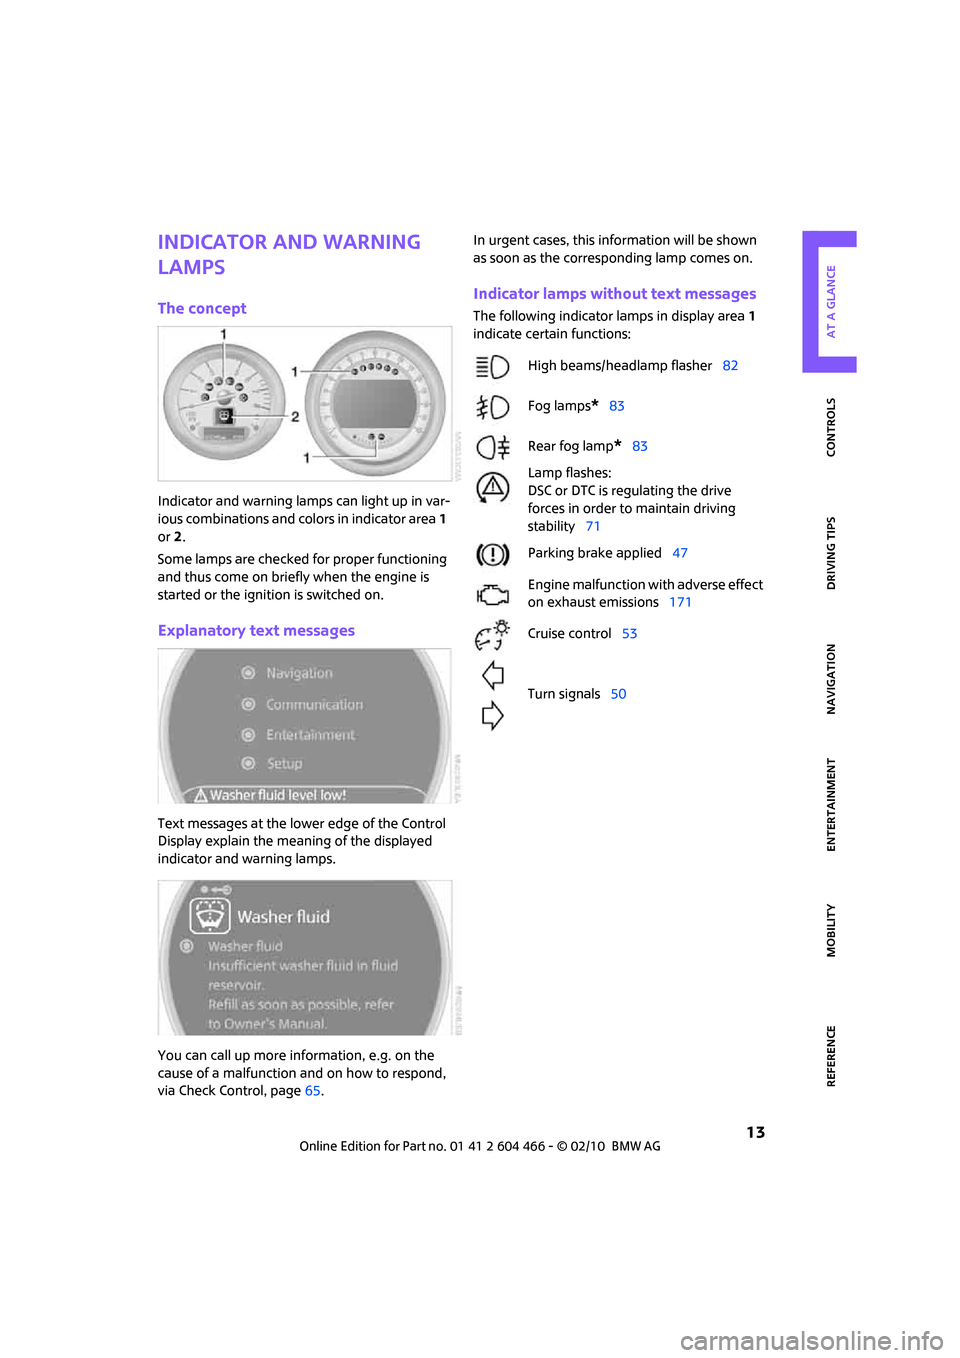
Indicator and warning lamps can light up in var-
ious combinations and colors in indicator area 1
or2.
Some lamps are checked for proper functioning
and thus come on briefly when the engine is
started or the ignition is switched on.
Explanatory text messages
Text messages at the lower edge of the Control
Display explain the meaning of the displayed
indicator and warning lamps.
You can call up more information, e.g. on the
cause of a malfunction and on how to respond,
via Check Control, page65.In urgent cases, this information will be shown
as soon as the corresponding lamp comes on.
Indicator lamps without text messages
The following indicator lamps in display area 1
indicate certain functions:
High beams/headlamp flasher82
Fog lamps
*83
Rear fog lamp
*83
Lamp flashes:
DSC or DTC is regulating the drive
forces in order to maintain driving
stability71
Parking brake applied47
Engine malfunction with adverse effect
on exhaust emissions171
Cruise control53
Turn signals50
Page 17 of 218
MOBILITYAT A GLANCE CONTROLS DRIVING TIPS ENTERTAINMENT
15
NAVIGATION REFERENCE
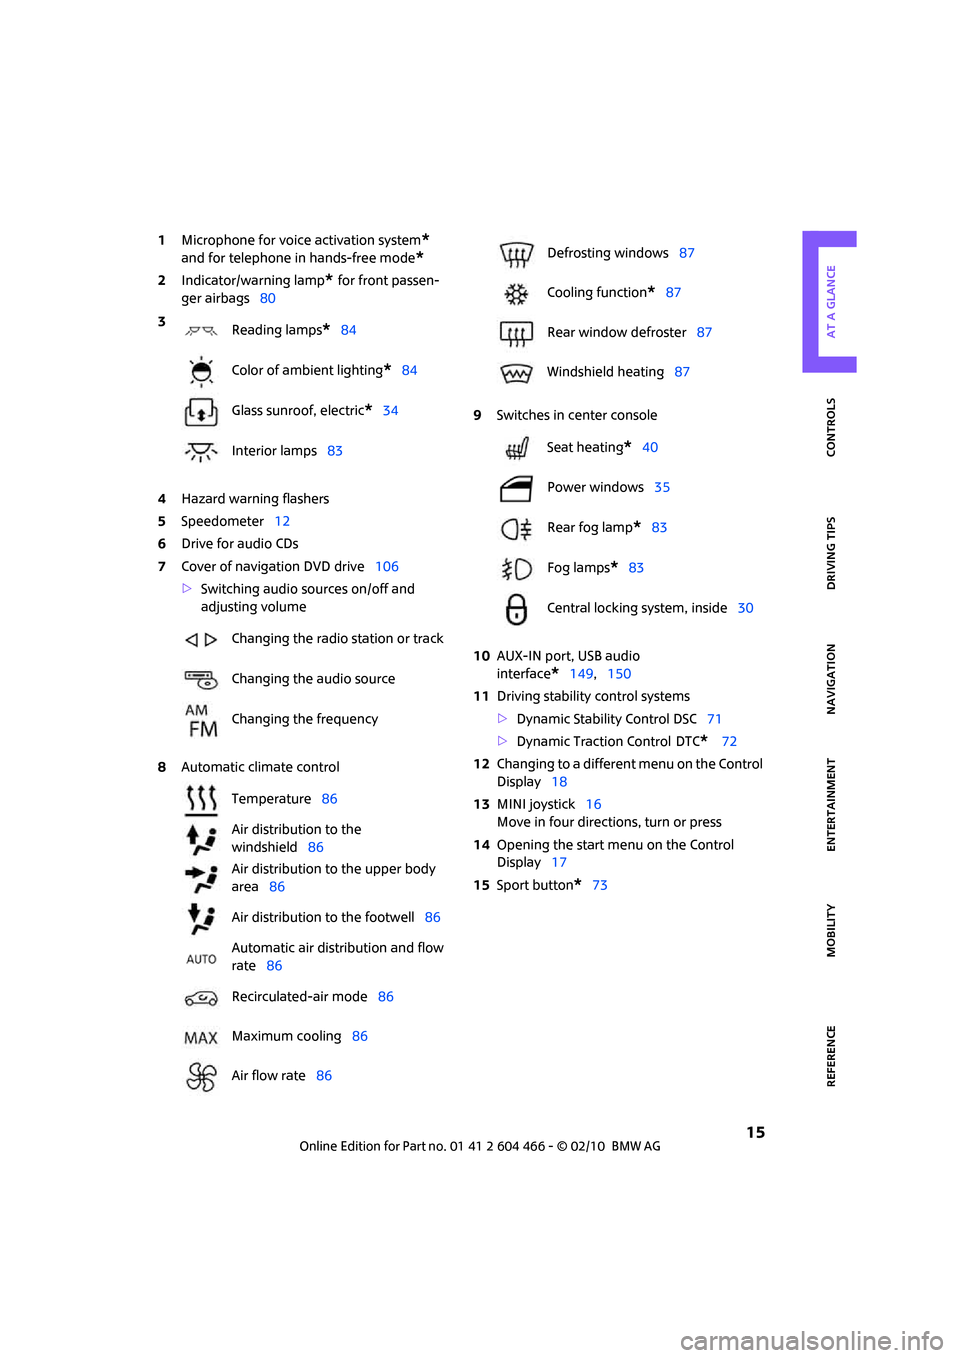
1Microphone for voice activation system*
and for telephone in hands-free mode*
2Indicator/warning lamp* for front passen-
ger airbags80
4Hazard warning flashers
5Speedometer12
6Drive for audio CDs
7Cover of navigation DVD drive106
>Switching audio sources on/off and
adjusting volume
8Automatic climate control9Switches in center console
10AUX-IN port, USB audio
interface
*149,150
11Driving stability control systems
>Dynamic Stability Control DSC71
>Dynamic Traction Control
DTC* 72
12Changing to a different menu on the Control
Display18
13MINI joystick16
Move in four directions, turn or press
14Opening the start menu on the Control
Display17
15Sport button
*73 3
Reading lamps
*84
Color of ambient lighting
*84
Glass sunroof, electric
*34
Interior lamps83
Changing the radio station or track
Changing the audio source
Changing the frequency
Temperature86
Air distribution to the
windshield86
Air distribution to the upper body
area86
Air distribution to the footwell86
Automatic air distribution and flow
rate86
Recirculated-air mode86
Maximum cooling86
Air flow rate86
Defrosting windows87
Cooling function
*87
Rear window defroster87
Windshield heating87
Seat heating
*40
Power windows35
Rear fog lamp
*83
Fog lamps
*83
Central locking system, inside30
Page 18 of 218
Onboard monitor
16
Onboard monitor
The onboard monitor integrates the functions of
a large number of switches. This allows these
functions to be operated from a single central
position. The following section provides an introduction to basic menu navigation. The con-
trol of the individual functions is described in
connection with the relevant equipment.
Controls
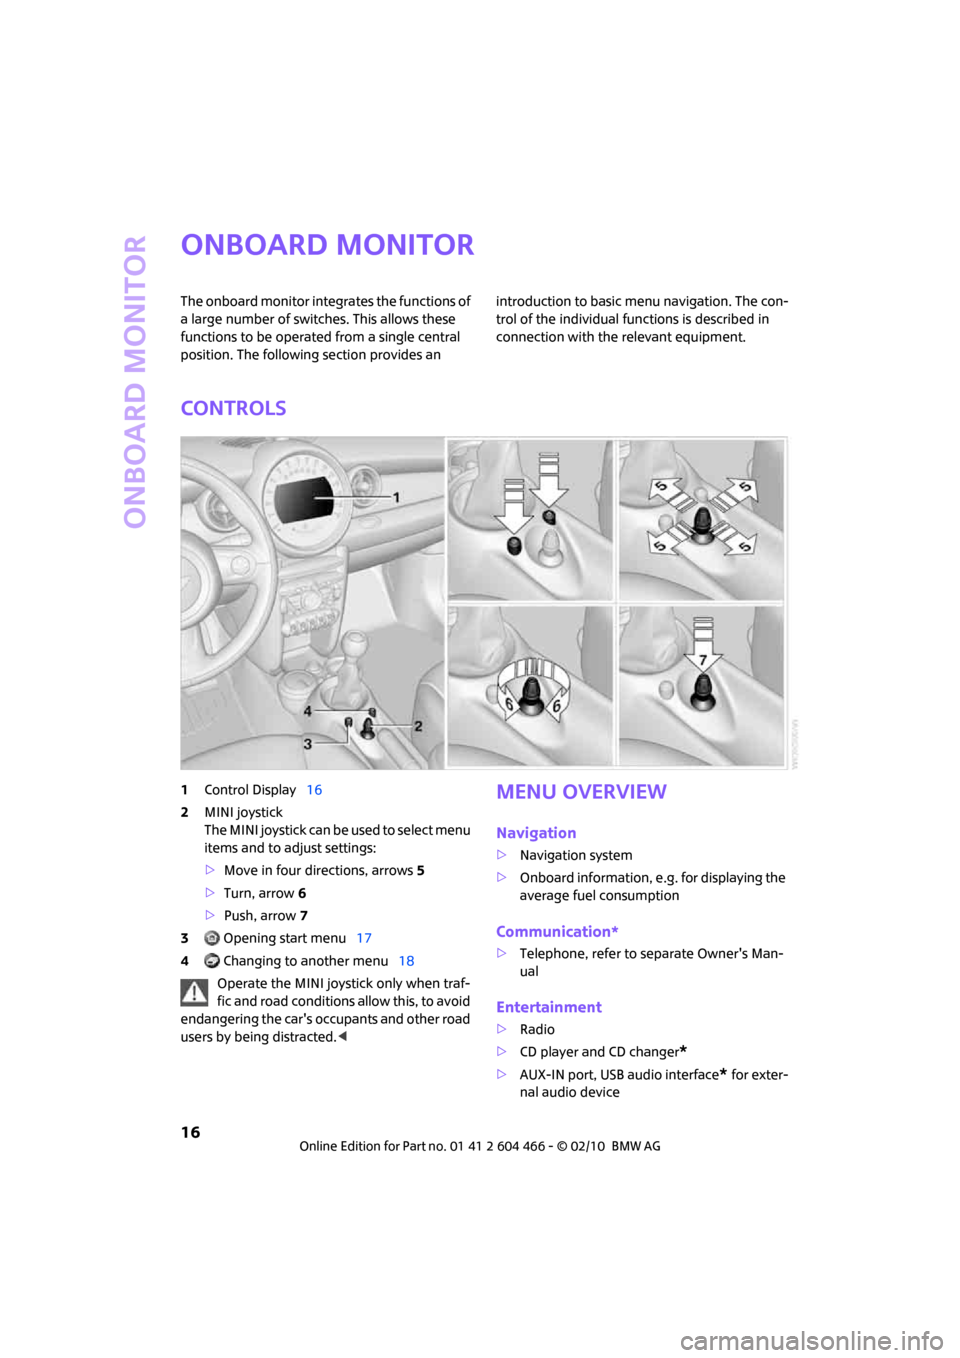
1Control Display16
2MINI joystick
The MINI joystick can be used to select menu
items and to adjust settings:
>Move in four directions, arrows5
>Turn, arrow 6
>Push, arrow 7
3 Opening start menu17
4 Changing to another menu18
Operate the MINI joystick only when traf-
fic and road conditions allow this, to avoid
endangering the car's occupants and other road
users by being distracted.
>Navigation system
>Onboard information, e.g. for displaying the
average fuel consumption
Communication*
>Telephone, refer to separate Owner's Man-
ual
Entertainment
>Radio
>CD player and CD changer
*
>AUX-IN port, USB audio interface* for exter-
nal audio device
Page 19 of 218
MOBILITYAT A GLANCE CONTROLS DRIVING TIPS ENTERTAINMENT
17
NAVIGATION REFERENCE
Setup
>Switching off Control Display
>Tone and display settings
>Settings for your vehicle, e.g. for the central
locking system
>Display of service requirements and dates
for statutory emissions and vehicle inspec-
tions
>Check Control
Operating principle
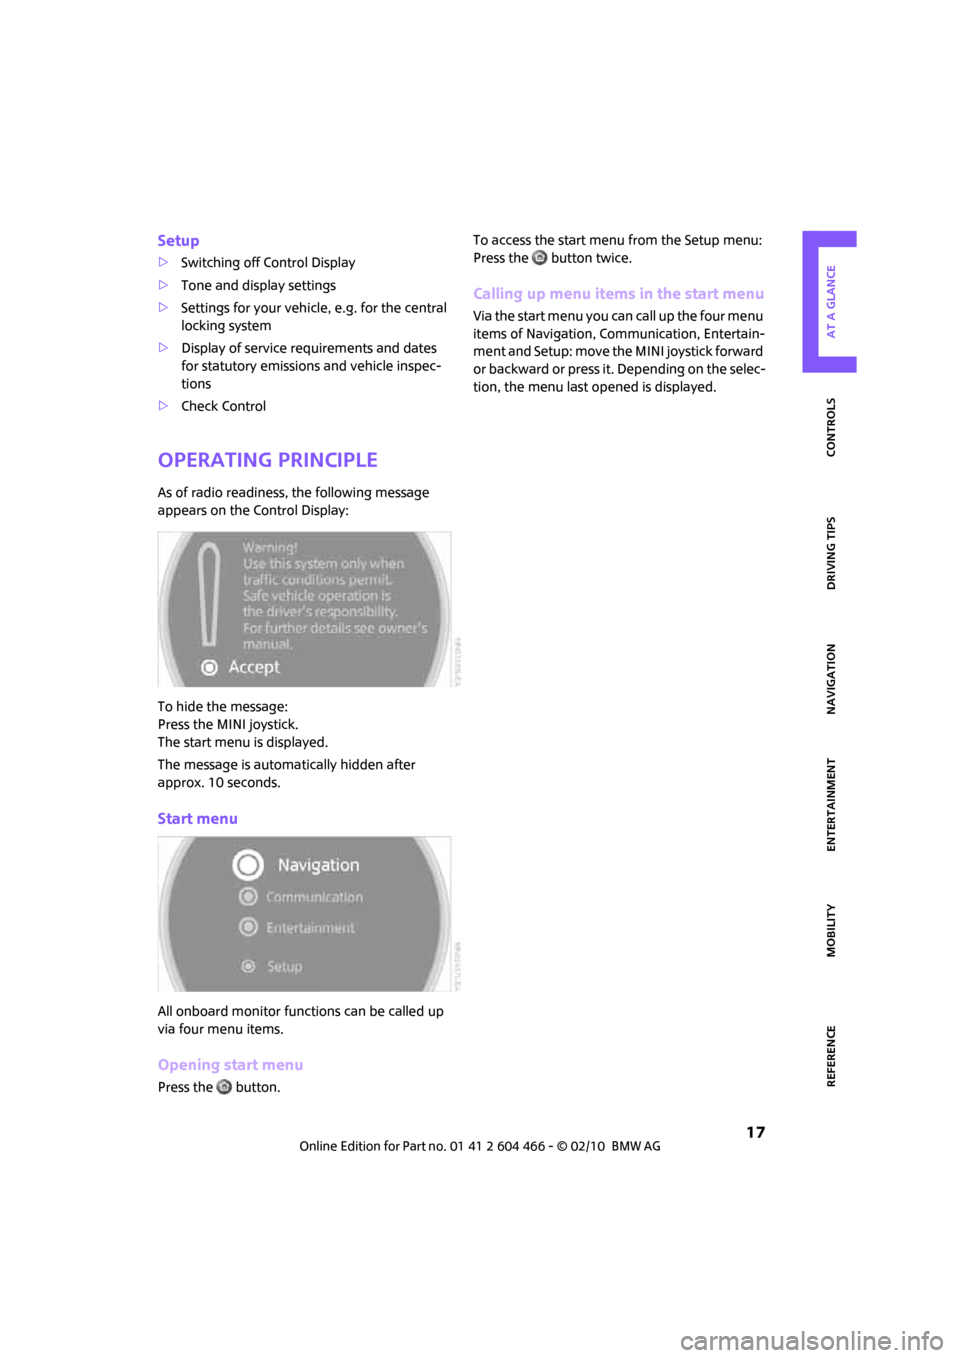
As of radio readiness, the following message
appears on the Control Display:
To hide the message:
Press the MINI joystick.
The start menu is displayed.
The message is automatically hidden after
approx. 10 seconds.
Start menu
All onboard monitor functions can be called up
via four menu items.
Opening start menu
Press the button.To access the start menu from the Setup menu:
Press the button twice.
Calling up menu items in the start menu
Via the start menu you can call up the four menu
items of Navigation, Communication, Entertain-
m e n t a n d S e t u p : m o v e t h e M I N I j o y s t i c k f o r w a r d
or backward or press it. Depending on the selec-
tion, the menu last opened is displayed.
Page 20 of 218
Onboard monitor
18
Changing between menu items
Press the button.
Pressing the button repeatedly opens the Com-
munication, Navigation and Entertainment
menu items in succession. The screen that was
last open is displayed.
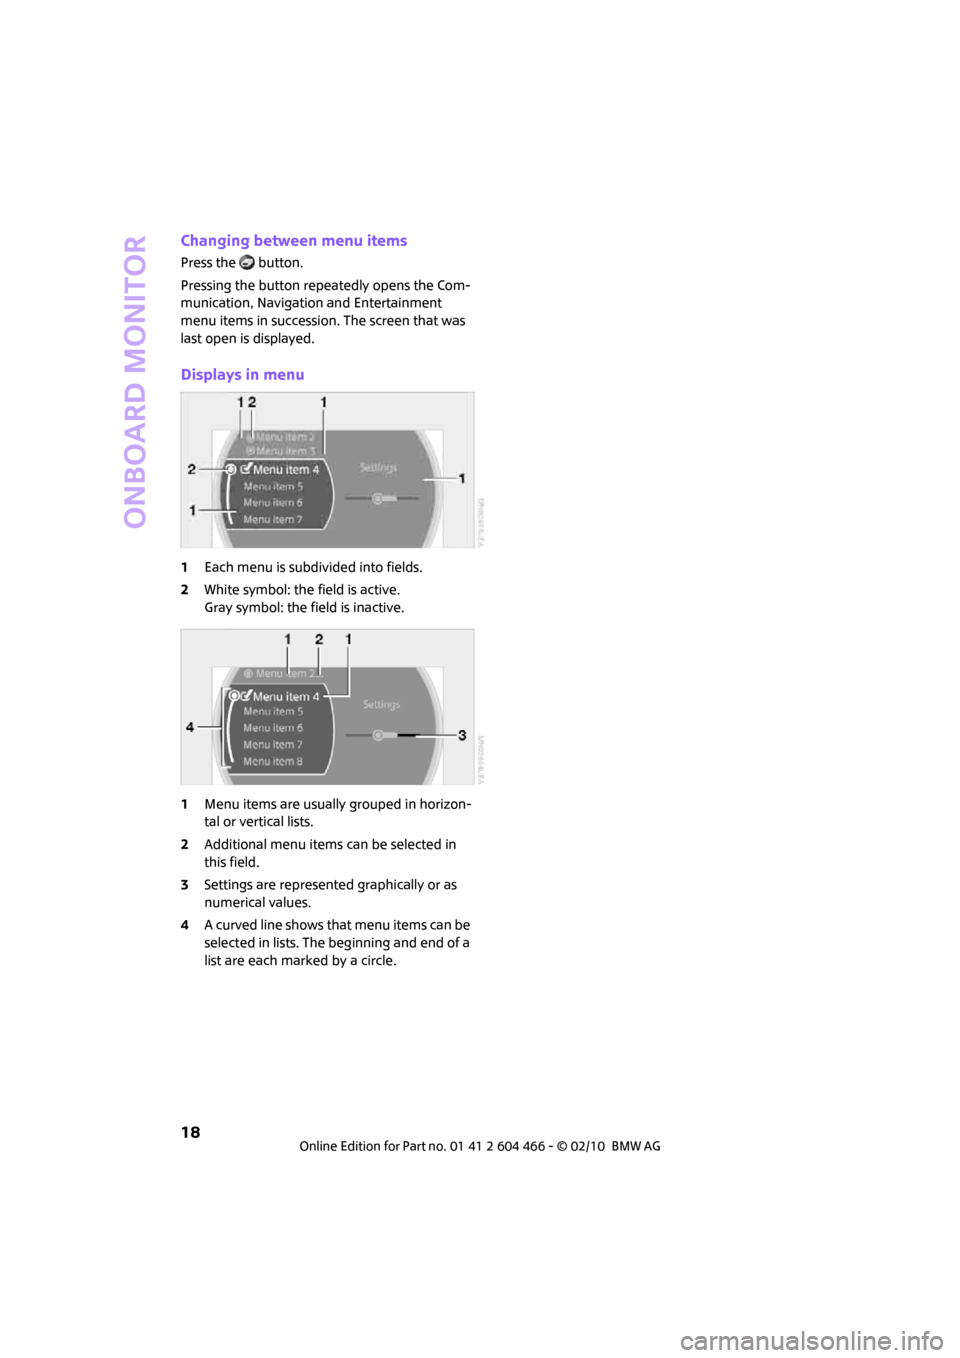
Displays in menu
1Each menu is subdivided into fields.
2White symbol: the field is active.
Gray symbol: the field is inactive.
1Menu items are usually grouped in horizon-
tal or vertical lists.
2Additional menu items can be selected in
this field.
3Settings are represented graphically or as
numerical values.
4A curved line shows that menu items can be
selected in lists. The beginning and end of a
list are each marked by a circle.