reset MINI Clubman 2011 (Mini Connected) User Guide
[x] Cancel search | Manufacturer: MINI, Model Year: 2011, Model line: Clubman, Model: MINI Clubman 2011Pages: 256, PDF Size: 3.75 MB
Page 79 of 256
Technology for driving comfort and safetyCONTROLS
77
On the on-board computer, the tires are shown
in gray and a message appears.
No punctures can be detected.
Display in the following situation:
>Malfunction because of other equipment or
devices, same radio frequency:
After leaving the interf erence area, the sys-
tem is again active automatically.
Message for unsuccessful system reset
Yellow warning light is on. A message
appears on the on-board computer.
The system has detected a wheel change, but
has not yet been reset. It is not possible to pro-
vide a reliable warning about the current infla-
tion pressure.
Check the tire inflation pressure and reset the
system, page 75.
Declaration according to NHTSA/
FMVSS 138 Tire Pressure Monitoring
Systems
Each tire, including the spare, should be
checked monthly when cold and inflated to the
inflation pressure recommended by the vehicle
manufacturer on the vehicle placard or tire infla-
tion pressure label. If yo ur vehicle has tires of a
different size than the size indicated on the vehi-
cle placard or tire inflat ion pressure label, you
should determine the prop er tire inflation pres-
sure for those tires. As an added safety feature,
your vehicle has been equipped with a tire pres-
sure monitoring system TPMS that illuminates a
low tire pressure telltale when one or more of
your tires are significantly underinflated.
Accordingly, when the low tire pressure telltale
illuminates, you should st op and check your tires
as soon as possible, an d inflate them to the
proper pressure. Drivin g on a significantly
underinflated tire causes the tire to overheat
and can lead to tire failure. Underinflation also
reduces fuel efficiency and tire tread life, and
may affect the vehicle's handling and stopping ability. Please note that the TPMS is not a substi-
tute for proper tire maintenance, and it is the
driver's responsibility to
maintain correct tire
pressure, even if underi nflation has not reached
the level at which the TPMS low tire pressure tell-
tale illuminates.
The TPMS malfunction indicator is combined
with the low tire pressure telltale. When the sys-
tem detects a malfunction, the telltale will flash
for approximately one minute and then remain
continuously lit. This sequence will continue
upon subsequent vehicle startups as long as the
malfunction exists. When the malfunction indi-
cator is illuminated, the system may not be able
to detect or signal low tire pressure as intended.
TPMS malfunctions may occur for a variety of
reasons, including the in stallation of replace-
ment or alternate tires or wheels on the vehicle
that prevent the TPMS from functioning prop-
erly. Always check the TP MS malfunction telltale
after replacing one or mo re tires or wheels on
your vehicle to ensure that the replacement or
alternate tires and wheels allow the TPMS to
continue to function properly.
Page 133 of 256
On/off and toneENTERTAINMENT
131
Tone control
Various tone settings can be changed, e.g. treble
and bass or the speed-dependent volume con-
trol.
The tone settings are set for all audio sources at
once.
The settings are stored for the remote control
currently in use; refer to Personal Profile,
page 26.
Treble, bass, balance, fader
> "Treble": treble setting.
> "Bass": bass.
> "Balance": volume distribution right/left.
> "Fader": volume distribution front/back.
Adjustments
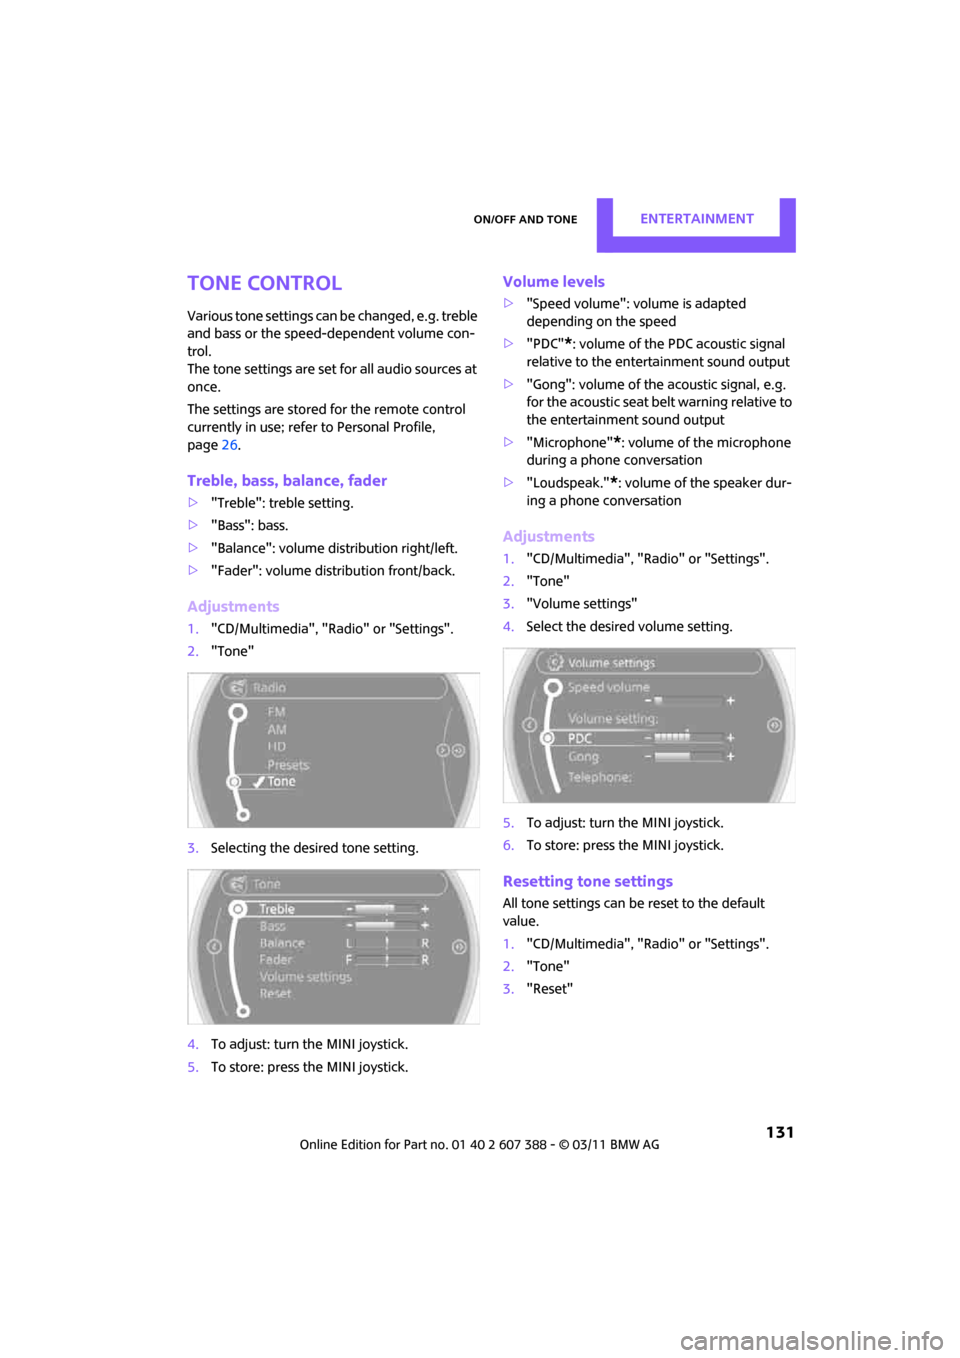
1."CD/Multimedia", "Rad io" or "Settings".
2. "Tone"
3. Selecting the desired tone setting.
4. To adjust: turn the MINI joystick.
5. To store: press the MINI joystick.
Volume levels
>"Speed volume": vo lume is adapted
depending on the speed
> "PDC"
*: volume of the PDC acoustic signal
relative to the entertainment sound output
> "Gong": volume of the acoustic signal, e.g.
for the acoustic seat belt warning relative to
the entertainment sound output
> "Microphone"
*: volume of the microphone
during a phone conversation
> "Loudspeak."
*: volume of the speaker dur-
ing a phone conversation
Adjustments
1. "CD/Multimedia", "Rad io" or "Settings".
2. "Tone"
3. "Volume settings"
4. Select the desired volume setting.
5. To adjust: turn the MINI joystick.
6. To store: press the MINI joystick.
Resetting tone settings
All tone settings can be reset to the default
value.
1."CD/Multimedia", "Rad io" or "Settings".
2. "Tone"
3. "Reset"
Page 136 of 256
ENTERTAINMENTRadio
134
Displaying additional information
Some stations broadcast additional information
on the current track, such as the name of the art-
ist.
1. Select the desired station.
2. Open "Options".
3. "Station info"
Selecting a substation
The symbol indicates that a main station also
broadcasts additional su bstations. The station
name of the main station ends in HD1. The sta-
tion names of the substa tions end in HD2, HD3,
etc.
1. Select the desired station.
2. Press the MINI joystick.
3. Select the substation.
When reception is poor, the substation is muted
for several seconds. If reception is interrupted
for an extended period, the radio switches back
to the main station.
Stored stations
It is possible to store up to 40 stations.
Selecting a station
1. "Radio"
2. "Presets"
3. Select the desired station.
Storing a station
The station currently selected is stored.
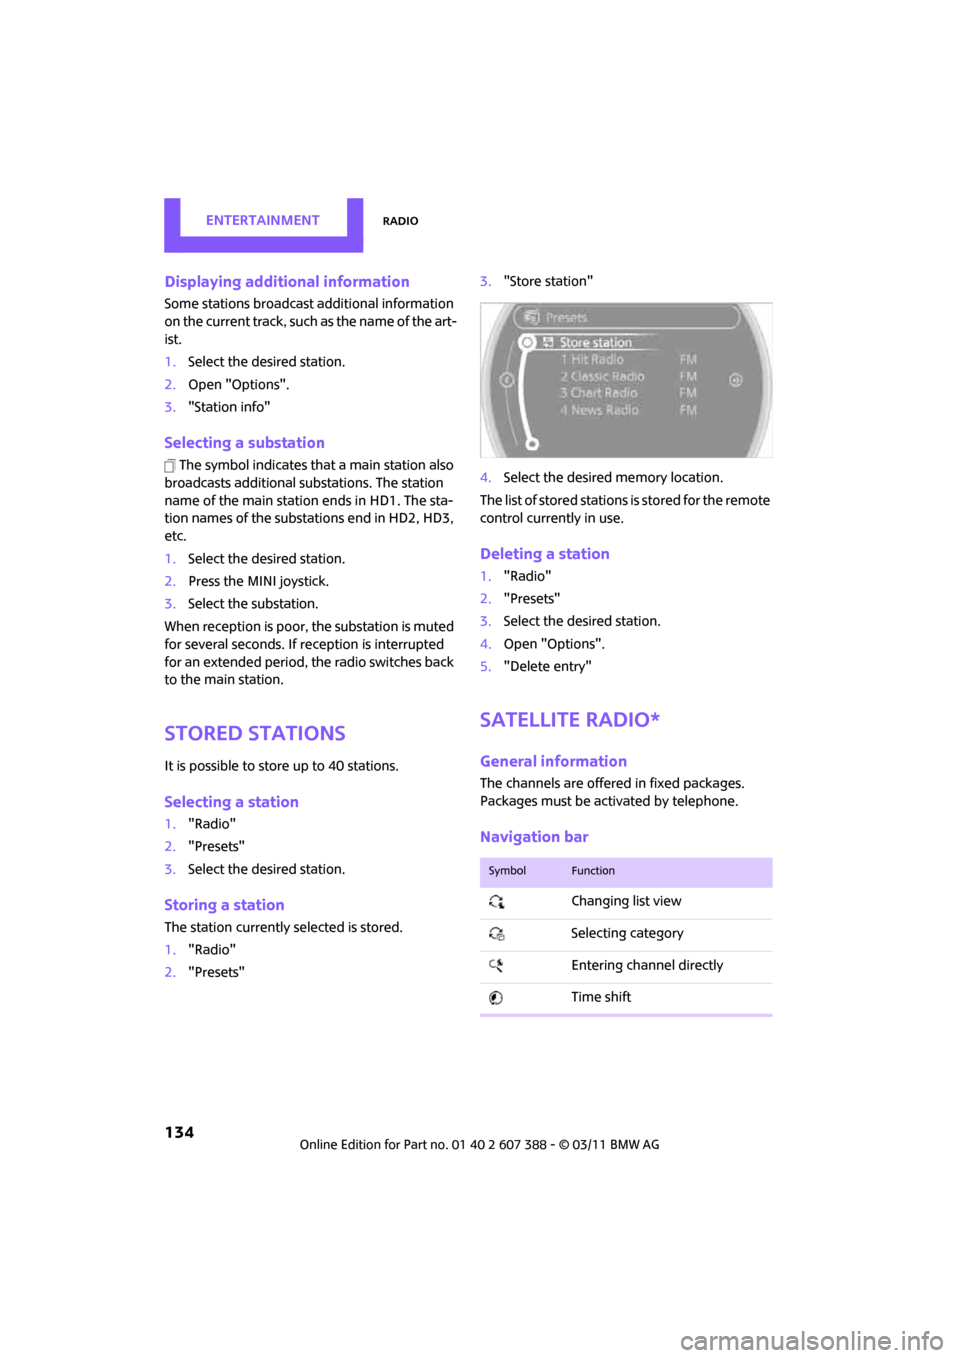
1. "Radio"
2. "Presets" 3.
"Store station"
4. Select the desired memory location.
The list of stored stations is stored for the remote
control currently in use.
Deleting a station
1. "Radio"
2. "Presets"
3. Select the desired station.
4. Open "Options".
5. "Delete entry"
Satellite radio*
General information
The channels are offered in fixed packages.
Packages must be activated by telephone.
Navigation bar
SymbolFunction
Changing list view
Selecting category
Entering channel directly
Time shift
Page 148 of 256
ENTERTAINMENTExternal devices
146
Information on connection
>The connected audio device is supplied with
a max. power of 500 mA if supported by the
device. Therefore, do not connect the device
to the power socket in the vehicle.
> Do not use force when plugging the connec-
tor into the USB interface.
> Do not connect any devi ces, e.g. fans or
lamps, to the USB audio interface.
> Do not connect USB hard drives.
> Do not use the USB audio interface to
recharge external devices.
Bluetooth audio*
Overview
>It is possible to use Bluetooth to play music
files from external devices, e.g. audio
devices or mobile phones.
> Bluetooth® is a regi stered trademark of
Bluetooth® SIG, Inc.
> Sound is output over the vehicle speakers.
> The volume of the sound output depends on
the device. If necessary, change the volume
setting on the device.
> Up to four external devices can be paired
with the vehicle.
Requirements
> Suitable device. Information is available at
www.mini.com/connectivity.
> Device operational.
> Ignition switched on.
> Bluetooth activated in vehicle, refer to
page 165, and in the device.
> Bluetooth presets in the device are required,
e.g. connection not confirmed or visible,
refer to Owner's Manu al for the device.
> A number with at least 4 and at most
16 digits has been established as the Blue-
tooth passkey. Only required once for pair-
ing.
Pairing and connecting
Only pair the device when the vehicle is
stopped; otherwise, inattention may lead
to endangerment of passengers or other road
users. <
1. "CD/Multimedia"
2. "Bluetooth® (audio)"
3. Or "Bluetooth® audio" if applicable
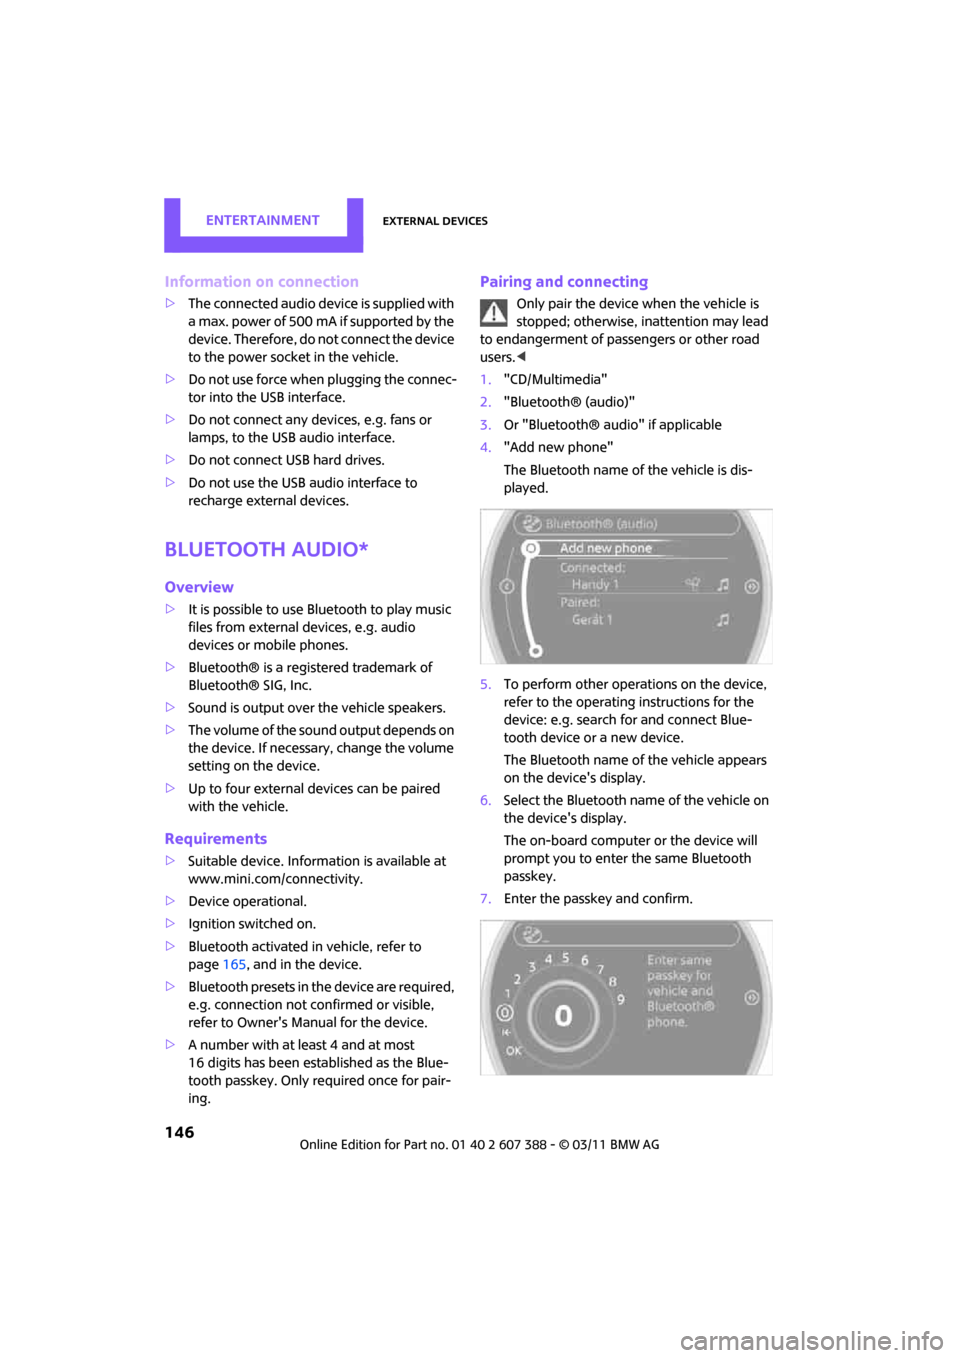
4. "Add new phone"
The Bluetooth name of the vehicle is dis-
played.
5. To perform other operations on the device,
refer to the operating instructions for the
device: e.g. search for and connect Blue-
tooth device or a new device.
The Bluetooth name of the vehicle appears
on the device's display.
6. Select the Bluetooth name of the vehicle on
the device's display.
The on-board computer or the device will
prompt you to enter the same Bluetooth
passkey.
7. Enter the passkey and confirm.
Page 156 of 256
CommunicationsHands-free device Bluetooth
154
Hands-free device Bluetooth
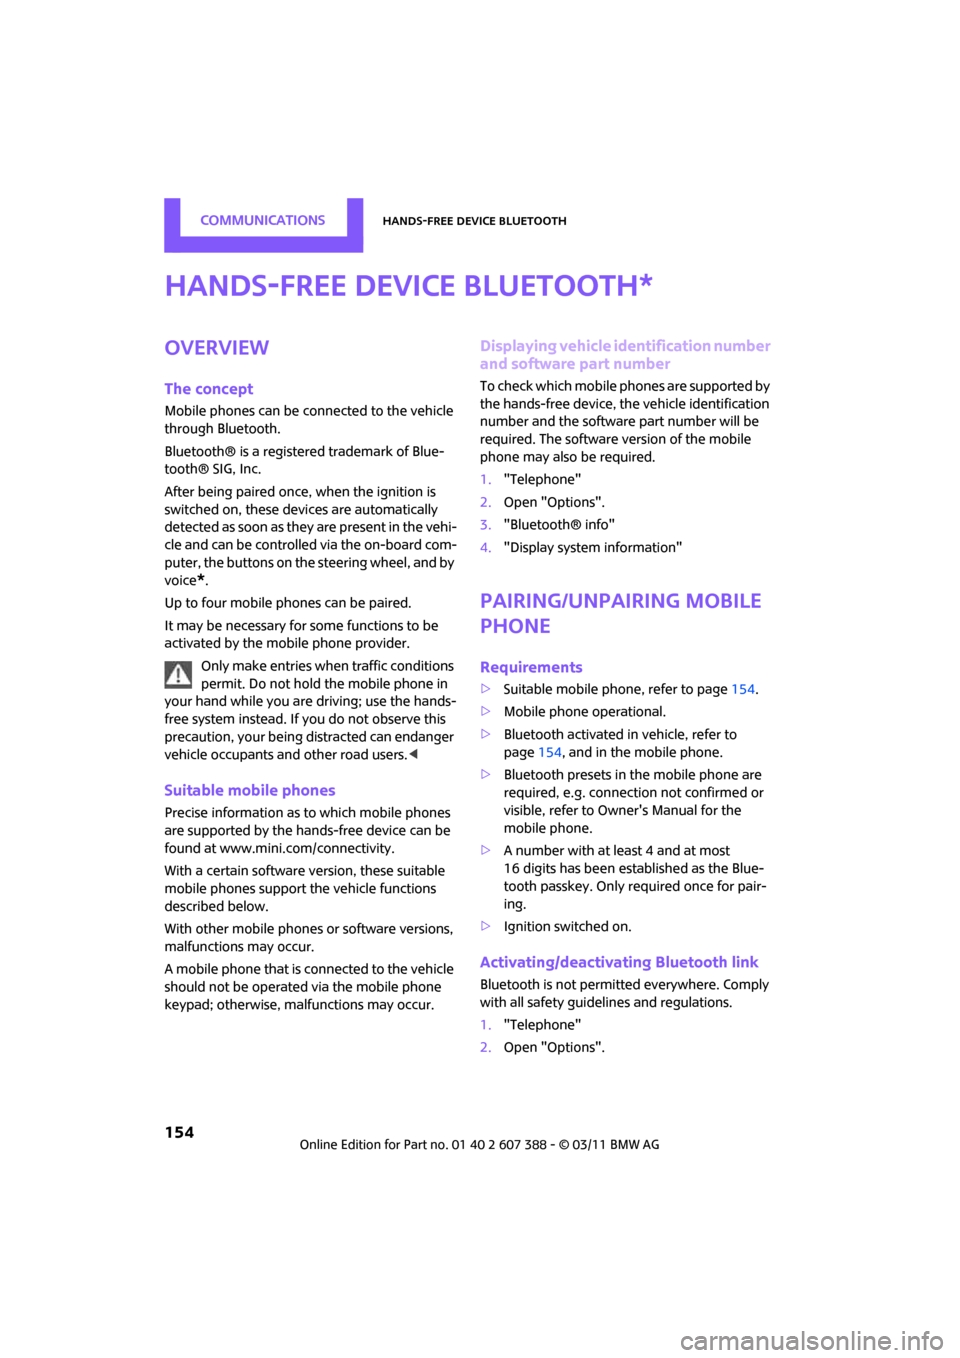
Overview
The concept
Mobile phones can be connected to the vehicle
through Bluetooth.
Bluetooth® is a registered trademark of Blue-
tooth® SIG, Inc.
After being paired once, when the ignition is
switched on, these devices are automatically
detected as soon as they are present in the vehi-
cle and can be controlled via the on-board com-
puter, the buttons on the steering wheel, and by
voice
*.
Up to four mobile phones can be paired.
It may be necessary for some functions to be
activated by the mobile phone provider. Only make entries when traffic conditions
permit. Do not hold the mobile phone in
your hand while you are driving; use the hands-
free system instead. If you do not observe this
precaution, your being distracted can endanger
vehicle occupants and other road users. <
Suitable mobile phones
Precise information as to which mobile phones
are supported by the hands-free device can be
found at www.mini.com/connectivity.
With a certain software version, these suitable
mobile phones support the vehicle functions
described below.
With other mobile phones or software versions,
malfunctions may occur.
A mobile phone that is connected to the vehicle
should not be operated via the mobile phone
keypad; otherwise, ma lfunctions may occur.
Displaying vehicle identification number
and software part number
To check which mobile phones are supported by
the hands-free device, th e vehicle identification
number and the software part number will be
required. The software version of the mobile
phone may also be required.
1. "Telephone"
2. Open "Options".
3. "Bluetooth® info"
4. "Display system information"
Pairing/unpairing mobile
phone
Requirements
>Suitable mobile phone, refer to page 154.
> Mobile phone operational.
> Bluetooth activated in vehicle, refer to
page 154, and in the mobile phone.
> Bluetooth presets in the mobile phone are
required, e.g. connection not confirmed or
visible, refer to Ow ner's Manual for the
mobile phone.
> A number with at least 4 and at most
16 digits has been established as the Blue-
tooth passkey. Only required once for pair-
ing.
> Ignition switched on.
Activating/deactivating Bluetooth link
Bluetooth is not permitted everywhere. Comply
with all safety guidelines and regulations.
1."Telephone"
2. Open "Options".
*
Page 167 of 256
Mobile phone preparation BluetoothCommunications
165
>Using a mobile phone as an audio source*
>Using an audio device as an audio source,
refer to page 146.
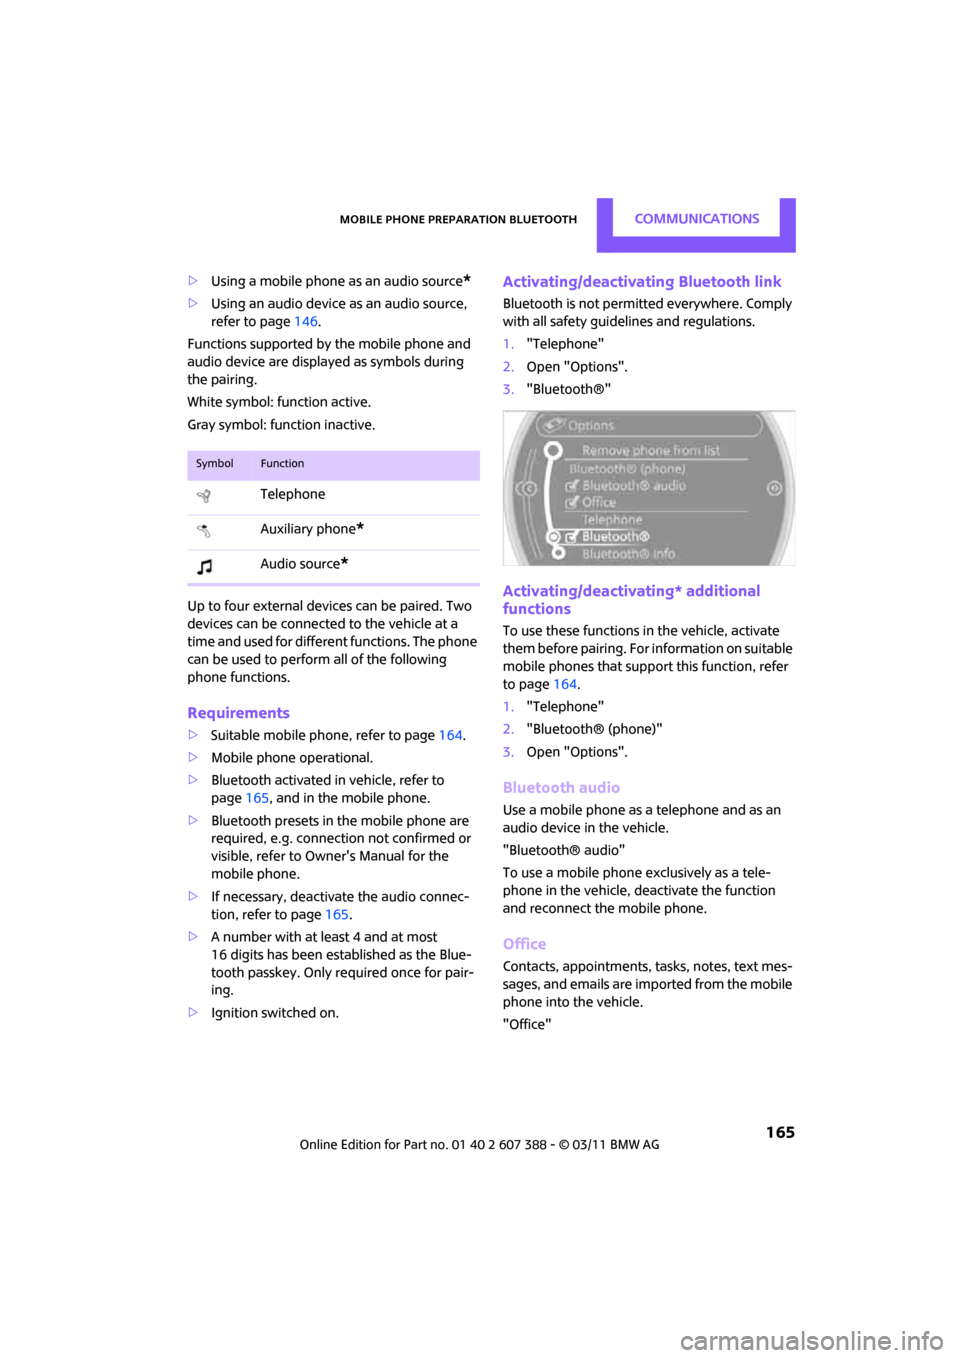
Functions supported by the mobile phone and
audio device are displayed as symbols during
the pairing.
White symbol: function active.
Gray symbol: function inactive.
Up to four external devices can be paired. Two
devices can be connecte d to the vehicle at a
time and used for different functions. The phone
can be used to perform all of the following
phone functions.
Requirements
> Suitable mobile phone, refer to page 164.
> Mobile phone operational.
> Bluetooth activated in vehicle, refer to
page 165, and in the mobile phone.
> Bluetooth presets in the mobile phone are
required, e.g. connection not confirmed or
visible, refer to Ow ner's Manual for the
mobile phone.
> If necessary, deactivate the audio connec-
tion, refer to page 165.
> A number with at le ast 4 and at most
16 digits has been established as the Blue-
tooth passkey. Only required once for pair-
ing.
> Ignition switched on.
Activating/deactivating Bluetooth link
Bluetooth is not permitted everywhere. Comply
with all safety guidel ines and regulations.
1. "Telephone"
2. Open "Options".
3. "Bluetooth®"
Activating/deactivat ing* additional
functions
To use these functions in the vehicle, activate
them before pairing. For information on suitable
mobile phones that suppo rt this function, refer
to page 164.
1. "Telephone"
2. "Bluetooth® (phone)"
3. Open "Options".
Bluetooth audio
Use a mobile phone as a telephone and as an
audio device in the vehicle.
"Bluetooth® audio"
To use a mobile phone exclusively as a tele-
phone in the vehicle, deactivate the function
and reconnect the mobile phone.
Office
Contacts, appointments, tasks, notes, text mes-
sages, and emails are imported from the mobile
phone into the vehicle.
"Office"
SymbolFunction
Telephone
Auxiliary phone
*
Audio source*
Page 177 of 256
Mobile phone preparation BluetoothCommunications
175
Delete all entries.
Listen to and select the entries:
Select an entry.
Adjusting volume
Turn knob during announcement.
>The volume remains the same, even if the
volume of other audio sources is changed.
> The volume is stored for the remote control
currently in use.
Notes
Do not use the voice activation system to initiate
an emergency call. In st ressful situations, the
voice and vocal pitch can change. This can
unnecessarily delay the establishment of a tele-
phone connection.
Ambient conditions
> Say the commands, numbers and letters
smoothly and with normal volume, empha-
sis and speed.
> Always say the commands using the lan-
guage of the system. The language for voice
operation is preset and can not be changed
via the Control Display. >
Keep doors, windows, glass sunroof
*/pan-
oramic sunroof
*, or convertible top* closed
to avoid noise interference.
> Avoid ambient noise in the vehicle while
speaking.
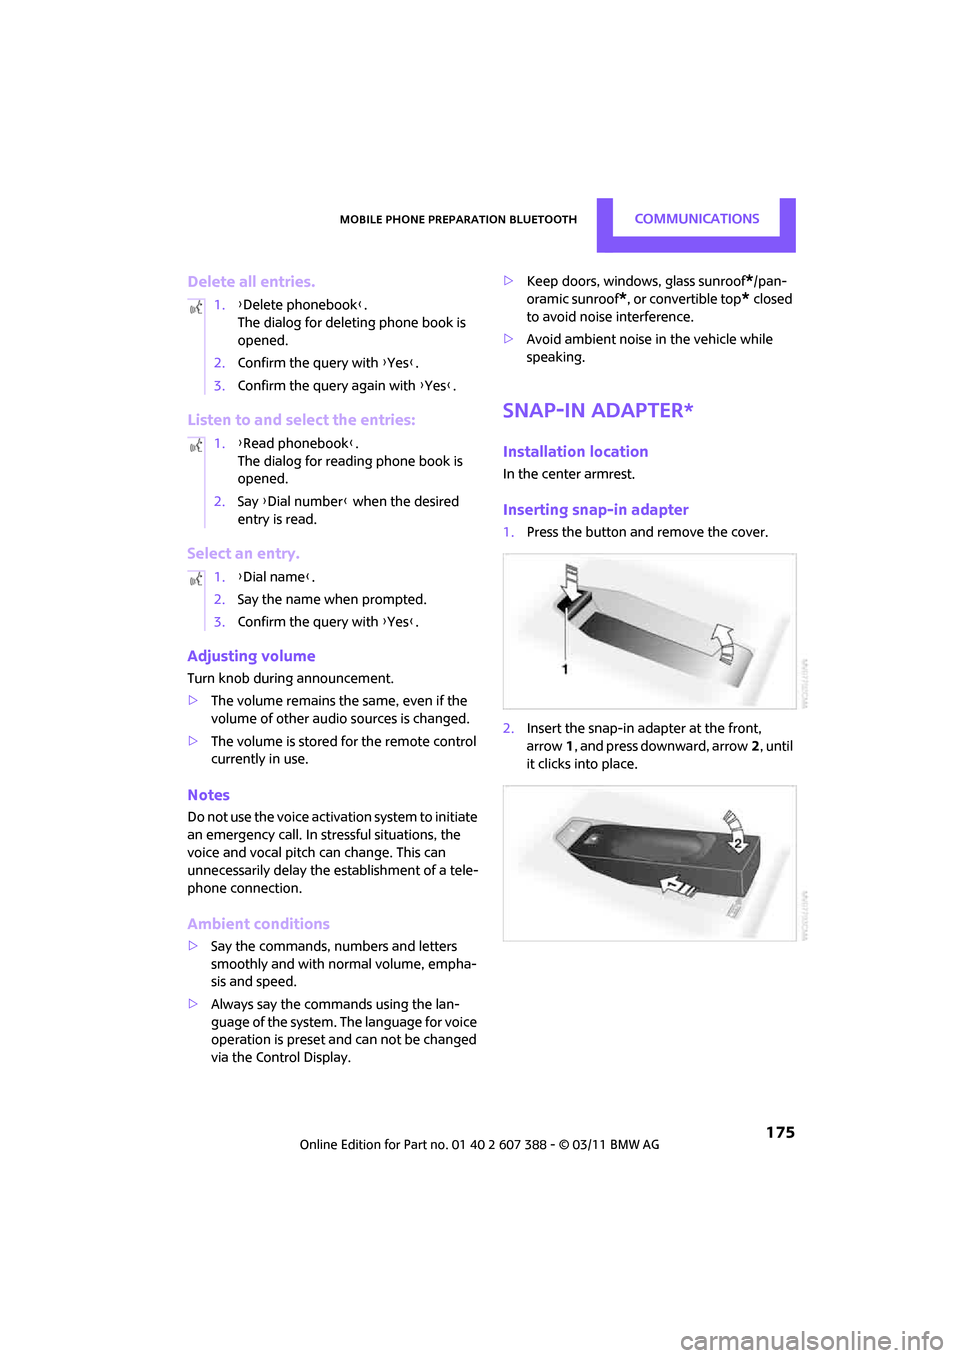
Snap-in adapter*
Installation location
In the center armrest.
Inserting snap-in adapter
1.Press the button an d remove the cover.
2. Insert the snap-in adapter at the front,
arrow 1, and press downward, arrow 2, until
it clicks into place.
1.
{Delete phonebook }.
The dialog for deleti ng phone book is
opened.
2. Confirm the query with {Yes }.
3. Confirm the query again with {Yes }.
1. {Read phonebook }.
The dialog for reading phone book is
opened.
2. Say {Dial number } when the desired
entry is read.
1. {Dial name }.
2. Say the name when prompted.
3. Confirm the query with {Yes }.
Page 192 of 256

MOBILITYWheels and tires
190
Wheels and tires
Tire inflation pressures
Information for your safety
It is not merely the tires' service life, but also
driving comfort and, to a great extent, driving
safety that depend on the condition of the tires
and the maintenance of the specified tire pres-
sure.
Checking pressure
Check the tire inflation pressure regularly
and correct it, if necessary: at least twice a
month and before starting long trips. If you fail
to observe this precauti on you may be driving
on tires with incorrect ti re pressures, a condition
that can not only compromise your vehicle's
driving stability, but also l e a d t o t i r e d a m a g e a n d
the risk of an accident. Do not drive with
deflated, i.e. flat tires, except when using run-
flat tires. A flat tire will seriously impair your
vehicle's handling and braking response.
Att empt s to drive o n a flat t ire can lead to lo ss of
control over the vehicle. <
Check the tire inflation pressures only on cold
tires. This means after a maximum of 1.25 miles/
2 km driving or when the vehicle has been
parked for at least 2 hou rs. When tires are warm,
the tire inflation pressure is higher.
After adjusting the tire inflation pressure,
reinitialize the flat tire monitor, page 72,
or reset the Tire Pressure Monitor, page 75.<
Checking the tire inflation pressure of
the compact tire*
To check the inflation pressure, fold up the flat
load floor. Remove the onboard vehicle toolkit
and the space-saver sp are tire, refer to
page 215.
Inflation pressure specifications
The tables below provide all the correct inflation
pressures for the specified tire sizes at ambient
temperature.
The tire inflation pressures apply to the
tire sizes approved and the tire brands
recommended by the manufacturer of your
MINI. Your MINI dealer will be glad to advise
you. <
For correct identification of the right tire infla-
tion pressures, ob serve the following:
> Tire sizes for your vehicle
> Maximum allowable driving speed
Tire inflation pressures for driving up to
100 mph or 160 km/h
For normal driving up to 100 mph or 160 km/h
and to achieve optimum driving comfort, adjust
pressures to the respective tire inflation values
listed on the following pages in the columns for
traveling speeds up to a maximum of 100 mph
or 160 km/h.
These tire inflation pre ssures can also be found
on the driver's side door pillar when the driver's
door is open.
The maximum permitted speed for these
tire inflation pressures is 100 mph or
160 km/h. Do not exceed this speed; otherwise,
tire damage and accidents may occur. <
Page 235 of 256

Short commands for the voice activation systemREFERENCE
233
Stored stations
Telephone
Contacts*
FunctionCommand
Selecting stored stations{Presets}
Choosing a stored station {Select preset }
Selecting a stored station {Preset … } e.g. stored station 2
FunctionCommand
Opening the Telephone menu {Telephone }
To display phone book {Phonebook }
To redial {Redial }
Displaying accepted calls {Received calls }
Dialing a phone number {Dial number }
Displaying the li st of messages {Messages }
Displaying Bluetooth devices {Bluetooth }
FunctionCommand
Accessing contacts {Contacts }
My contacts {My contacts }
New contact {New contact }
Page 248 of 256
REFERENCEEverything from A to Z
246
P
Paintwork, care205
Park Distance Control PDC 68
Parking
– vehicle 47
Parking aid, refer to Park
Distance Control PDC 68
Parking brake 48
– indicator lamp 13
Parking lamps, replacing bulb 211
Parking lamps/low beams 81
Parts and accessories, refer to Your individual vehicle 4
Pathway lighting 81
Personal Profile 26
Phone numbers
– dialing 157,170
Pinch protection system
– windows 36
Plastic parts, care 206
Pollen
– refer to Microfilter for air conditioner 87
– refer to Microfilter/activated- charcoal filter for automatic
climate control 89
Power failure 217
Power windows 36
Power windows, refer to Windows 35
Pressure monitoring of tires,
refer to Tire Pressure Monitor
TPM 74
Pressure moni toring, tires71
– Flat Tire Monitor 71
Pressure, tires 190
Protective function, refer to
Pinch protection system
– windows 36
Puncture
– Flat Tire Monitor 71
R
Radio
– controls130
– HD Radio 133
– satellite radio 134
– select waveband 132
– storing stations 133
– switching on/off 130
– tone control 131
– volume 130
Radio key, refer to Integrated key/remote control 26
Radio position, refer to Radio readiness 46
Radio readiness 46
– switched off 47
– switched on 46
Rain sensor 52
Random play sequence
– external devices 145
Range, refer to Cruising
range 57
Reading aloud 183
Reading lamps 84
Rear door, re fer to Club
Door 30
Rear doors, refer to Split Rear
Barn Doors 31
Rear double doors, refer to
Split Rear Barn Doors 31
Rear fog lamp 83
– indicator lamp 13
– replacing bulb 212
Rear lamps
– bulb replacement 212
Rear lamps, refer to Tail lamps 212
Rear seat back rest, folding100
Rear seats
– folding down the backrests 100
Rear window defroster 86,88
Rearview mirror, refer to Mirrors 41 Reception
– quality
133
– radio station 133
Recirculated-air mode 86,88
Recirculation of air, refer to Recirculated-air
mode 86,88
Reclining seat , refer to
Backrest 38
Refueling 188
Releasing
– hood 198
Reminders 183
Rem
ote control 26
– battery renewal 34
– Comfort Access 33
– garage door opener 90
– malfunctions 29,34
– service data 202
– Split Rear Barn Doors 28
Replacement remote control 26
Replacing bulbs, refer to Lamps and bulbs 209
Replacing tires, refer to New
wheels and tires 196
Reporting safety defects 6
Reserve warning, refer to Fuel
gauge 56
Reservoir for washer
systems 53
Reset, refer to Resetting tone settings 131
Restraint systems
– for children 43
– refer to Safety belts 40
Reverse
– CD player 141
Reverse gear
– automatic transmission with Steptronic 49
– manual transmission 48
Road map 120
Roadside Assistance 219
Roadside parking lamps 83
– replacing bulb 211