reset MINI Clubman 2011 Owner's Manual (Mini Connected)
[x] Cancel search | Manufacturer: MINI, Model Year: 2011, Model line: Clubman, Model: MINI Clubman 2011Pages: 256, PDF Size: 3.75 MB
Page 13 of 256
CockpitAT A GLANCE
11
6Ignition lock 46
7 Buttons
* on steering wheel
8 Horn: the entire surface
9 Adjusting the steering wheel 42
10 Releasing the hood 198
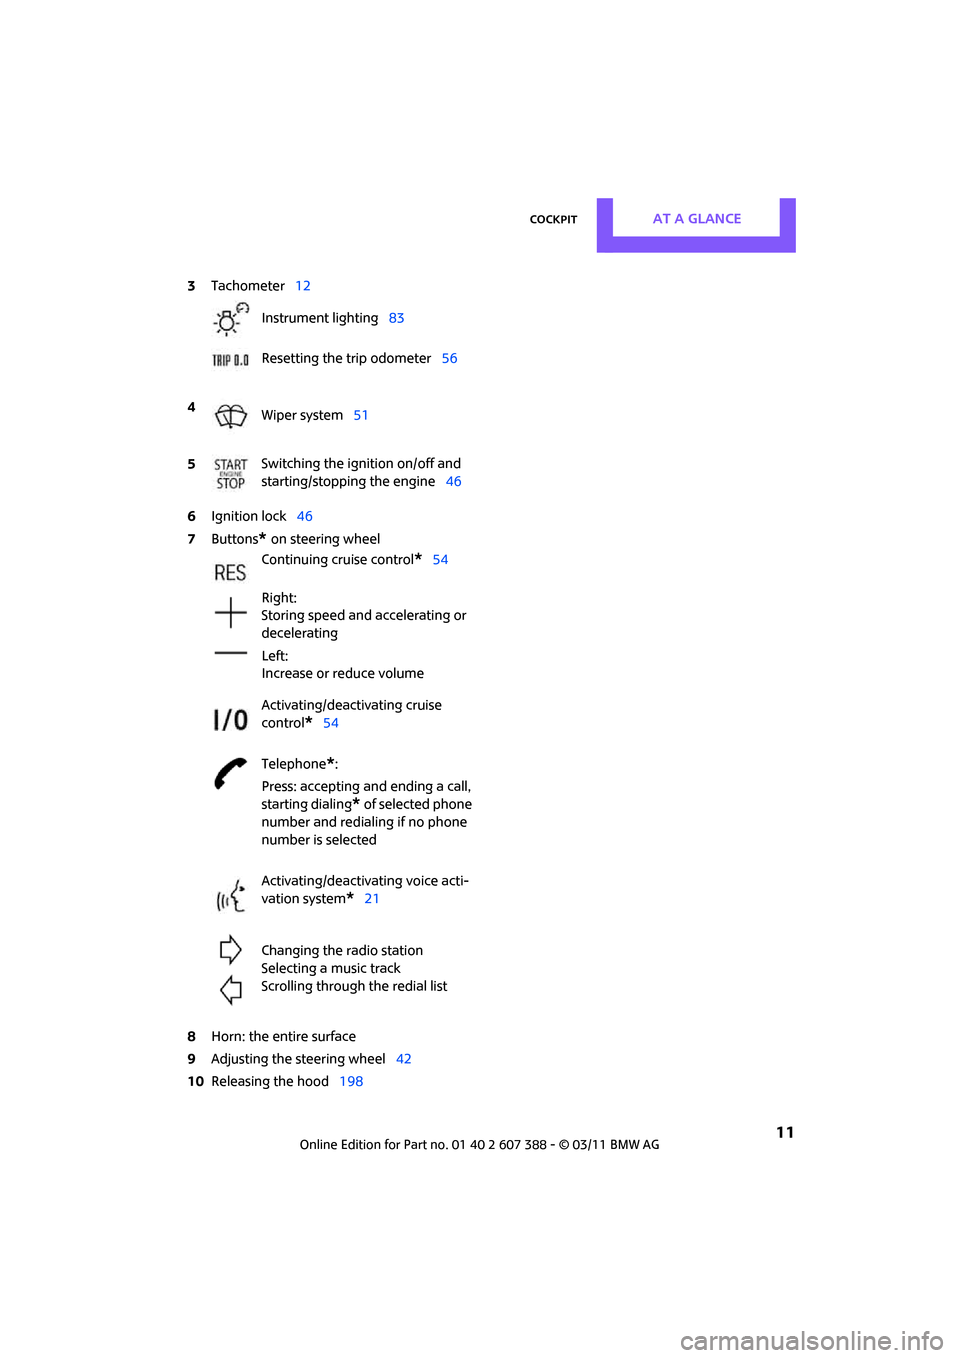
3
Tachometer 12
Instrument lighting 83
Resetting the trip odometer 56
4 Wiper system 51
5 Switching the ignition on/off and
starting/stopping the engine
46
Continuing cruise control
*54
Right:
Storing speed and accelerating or
decelerating
Left:
Increase or reduce volume
Activating/deactivating cruise
control
*54
Telephone
*:
Press: accepting an d ending a call,
starting dialing
* of selected phone
number and redialing if no phone
number is selected
Activating/deactivating voice acti-
vation system
*21
Changing the radio station
Selecting a music track
Scrolling through the redial list
Page 14 of 256
AT A GLANCECockpit
12
Displays
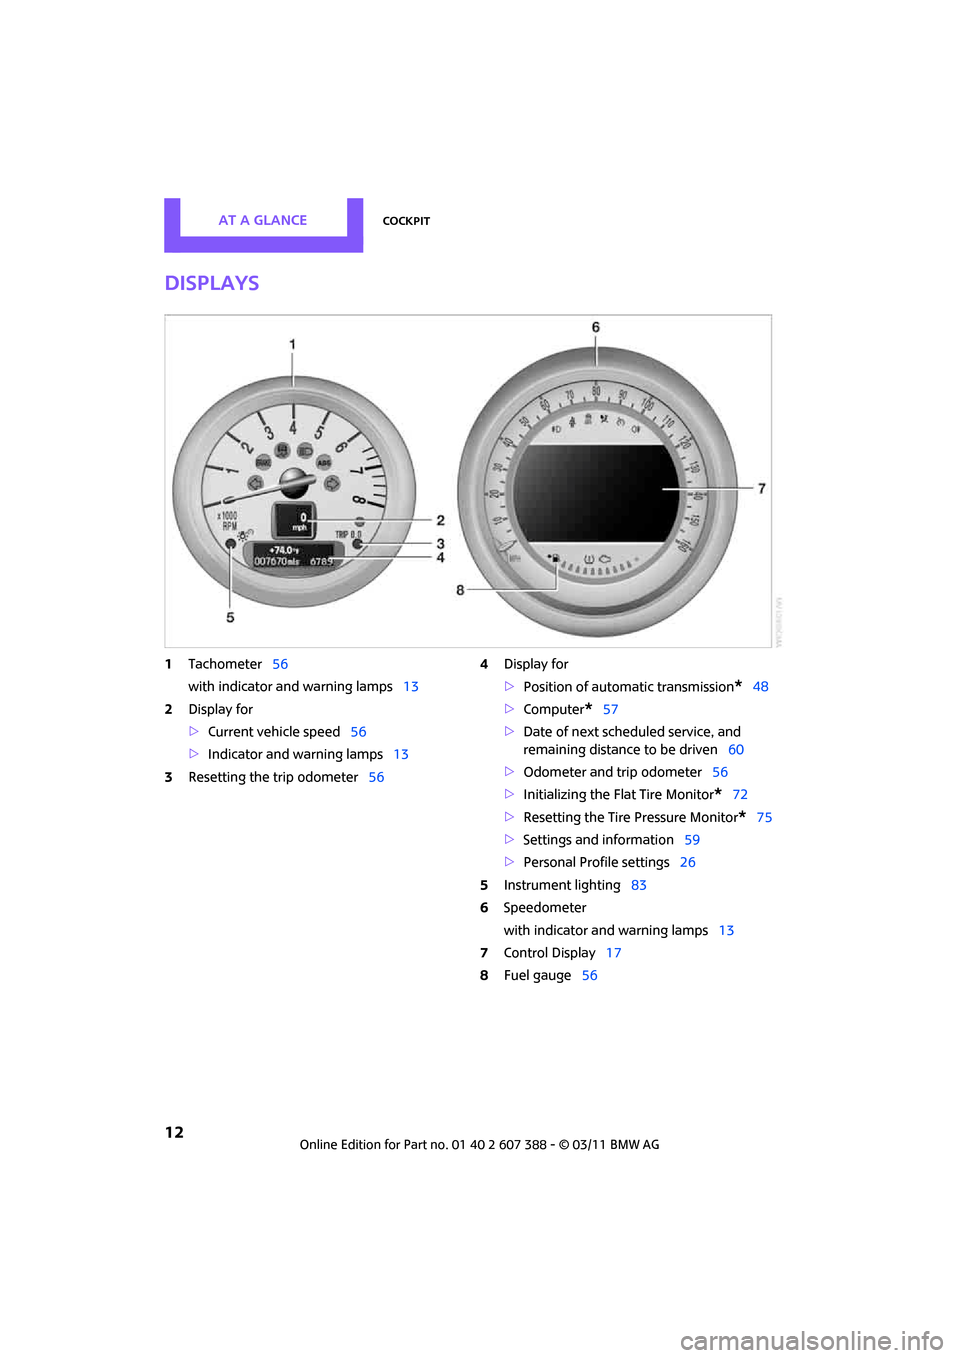
1Tachometer 56
with indicator and warning lamps 13
2 Display for
>Current vehicle speed 56
> Indicator and warning lamps 13
3 Resetting the trip odometer 564
Display for
>Position of automatic transmission
*48
> Computer
*57
> Date of next scheduled service, and
remaining distance to be driven 60
> Odometer and trip odometer 56
> Initializing the Flat Tire Monitor
*72
> Resetting the Tire Pressure Monitor
*75
> Settings and information 59
> Personal Prof ile settings26
5 Instrument lighting 83
6 Speedometer
with indicator and warning lamps 13
7 Control Display 17
8 Fuel gauge 56
Page 54 of 256

CONTROLSDriving
52
Fast wiper speed
Press twice or press beyond the resistance point.
The system switches to normal speed when the
vehicle is stationary.
Intermittent wipe or rain sensor*
If the car is not equipped with a rain sensor, the
intermittent-wipe time is preset.
If the car is equipped with a rain sensor, the time
between wipes is controlled automatically and
depends on the intensity of the rainfall. The rain
sensor is mounted on the windshield, directly in
front of the interior rearview mirror.
Activating intermittent wipe or rain
sensor
Press button, arrow 3.
This symbol is displayed in the tacho-
meter.
Deactivate the rain se nsor before entering
an automatic car wash . Failure to do so
could result in damage caused by undesired
wiper activation. <
Adjusting the sensitivity of the rain
sensor
1.Switch on the ignition, refer to page 46.
2. Briefly press the button in the turn signal
indicator repeatedly until "SET/INFO" is dis-
played.
3. Press and hold the button until the display
changes. 4.
Press the button as often as necessary until
the symbol and "SET" are displayed.
5. Press and hold the button until the display
changes.
6. Press the button to se lect the desired sensi-
tivity.
7. Wait, or press and hold the button until the
display changes.
The settings are stored.
Deactivating intermittent wipe or rain
sensor
Press the button again, arrow 3.
Brief wipe
Press the lever downward once, arrow 2.
Cleaning windshield and headlamps*
Pull the lever, arrow 4 .
Washer fluid is sprayed onto the windshield and
the wipers are operated briefly.
When the vehicle lighting system is switched on,
the headlamps are cleaned at regular and
appropriate intervals.
Page 58 of 256
CONTROLSControls overview
56
Controls overview
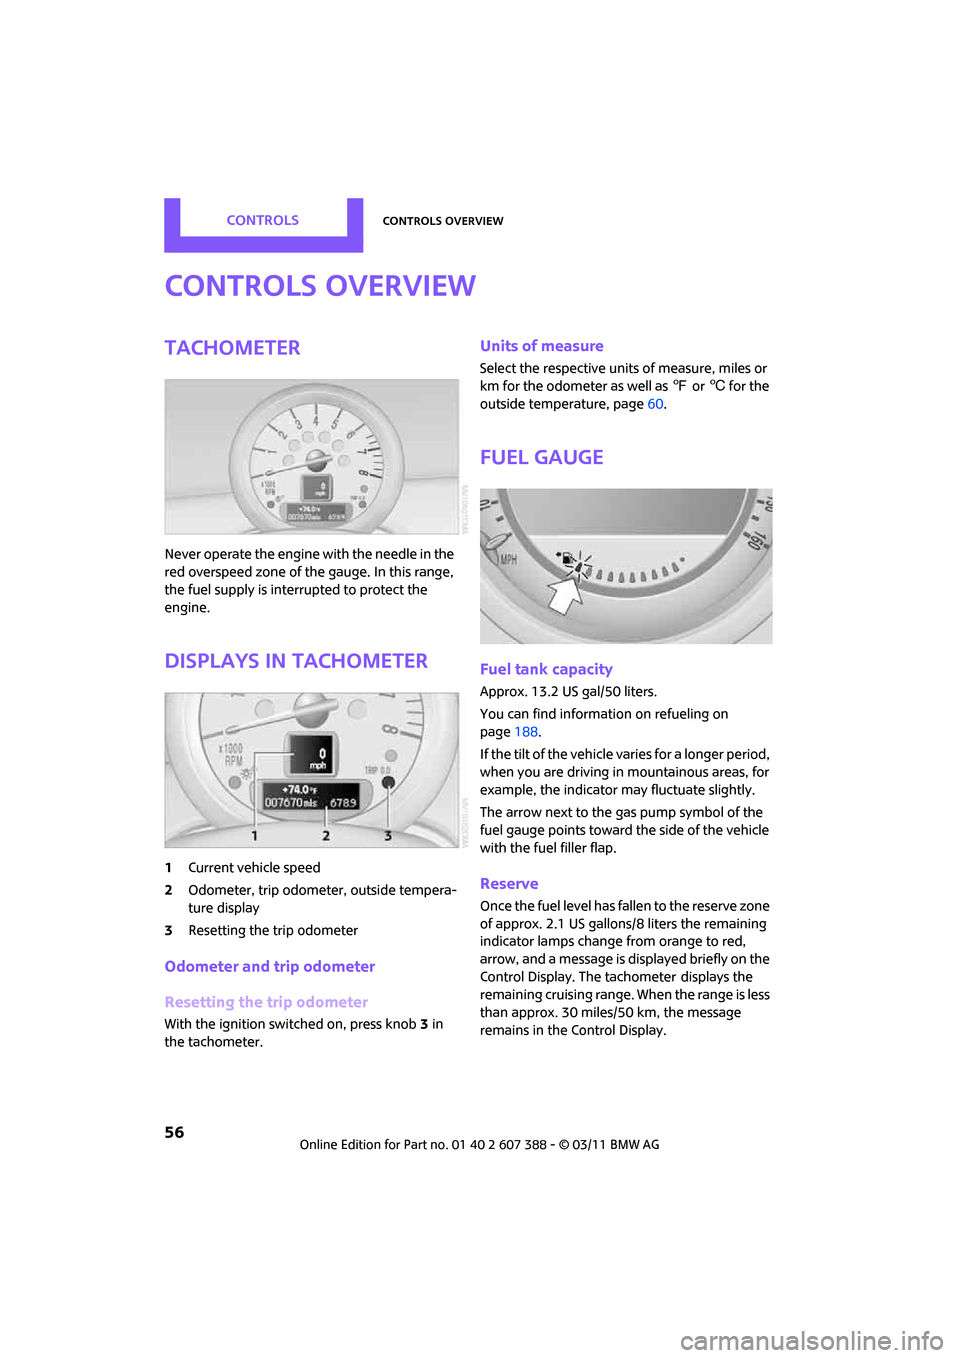
Tachometer
Never operate the engine with the needle in the
red overspeed zone of the gauge. In this range,
the fuel supply is interrupted to protect the
engine.
Displays in tachometer
1Current vehicle speed
2 Odometer, trip odometer, outside tempera-
ture display
3 Resetting the trip odometer
Odometer and trip odometer
Resetting the trip odometer
With the ignition switched on, press knob 3 in
the tachometer.
Units of measure
Select the respective unit s of measure, miles or
km for the odometer as well as 7 or 6 for the
outside temperature, page 60.
Fuel gauge
Fuel tank capacity
Approx. 13.2 US gal/50 liters.
You can find information on refueling on
page 188.
If the tilt of the vehicle varies for a longer period,
when you are driving in mountainous areas, for
example, the indicator may fluctuate slightly.
The arrow next to the gas pump symbol of the
fuel gauge points toward the side of the vehicle
with the fuel filler flap.
Reserve
Once the fuel level has fallen to the reserve zone
of approx. 2.1 US gallons/8 liters the remaining
indicator lamps change from orange to red,
arrow, and a message is displayed briefly on the
Control Display. The tachometer
displays the
remaining cruising range. When the range is less
than approx. 30 miles/50 km, the message
remains in the Control Display.
Page 59 of 256
Controls overviewCONTROLS
57
If the range displayed is less than
30 miles/50 km, be sure to refuel; other-
wise, engine functions are not guaranteed and
damage could occur. <
With a dynamic driving st yle, e.g. rapid corner-
ing, engine functions are not always assured.
Computer*
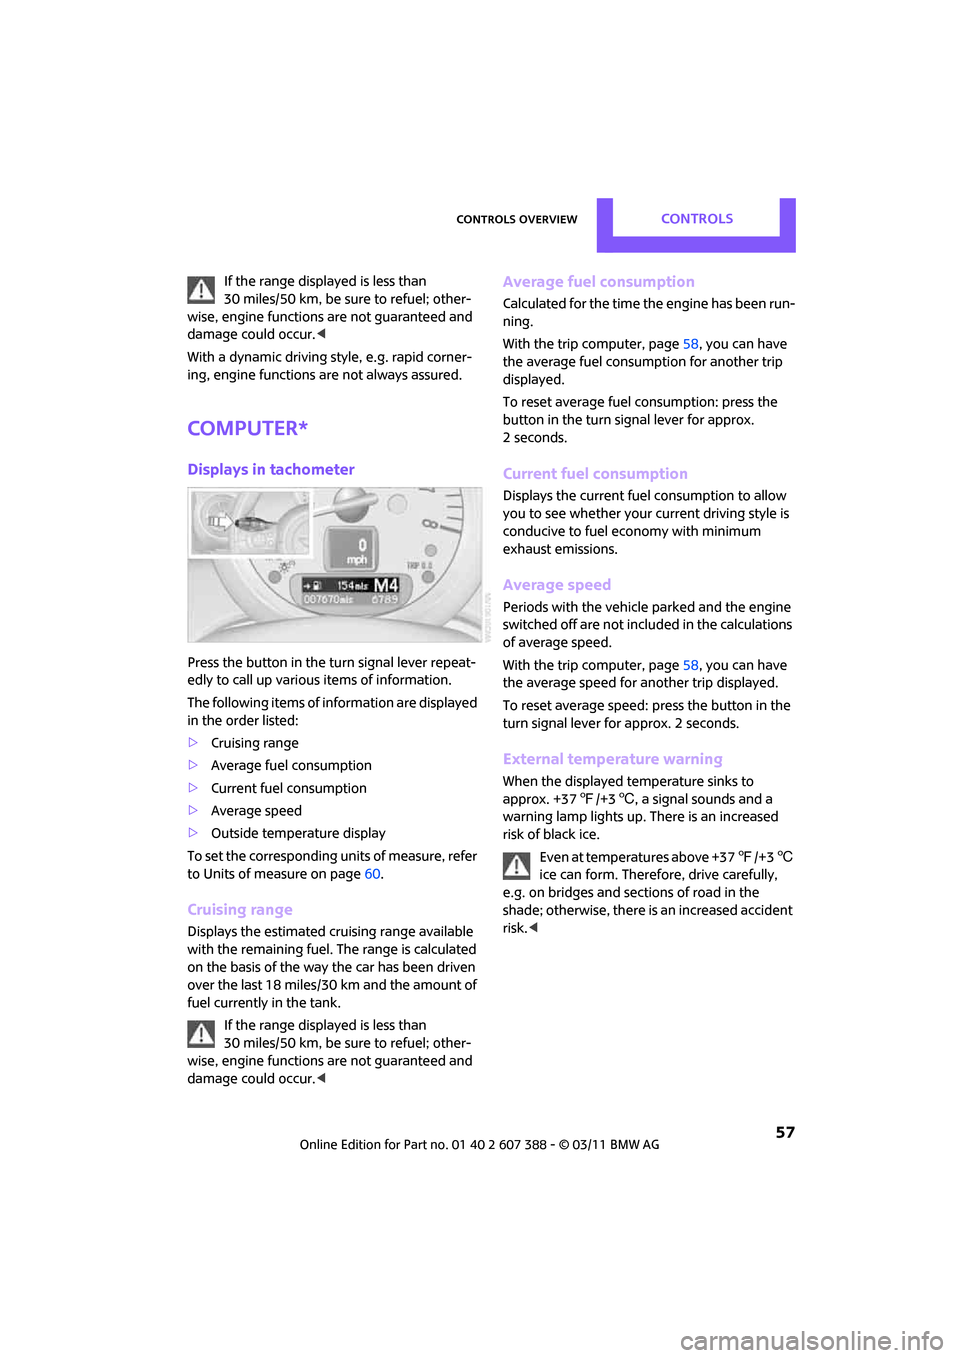
Displays in tachometer
Press the button in the turn signal lever repeat-
edly to call up various items of information.
The following items of information are displayed
in the order listed:
> Cruising range
> Average fuel consumption
> Current fuel consumption
> Average speed
> Outside temperature display
To set the corresponding units of measure, refer
to Units of measure on page 60.
Cruising range
Displays the estimated cruising range available
with the remaining fuel. The range is calculated
on the basis of the way the car has been driven
over the last 18 miles/30 km and the amount of
fuel currently in the tank.
If the range displayed is less than
30 miles/50 km, be sure to refuel; other-
wise, engine functions are not guaranteed and
damage could occur. <
Average fuel consumption
Calculated for the time the engine has been run-
ning.
With the trip computer, page 58, you can have
the average fuel consumption for another trip
displayed.
To reset average fuel consumption: press the
button in the turn signal lever for approx.
2 seconds.
Current fuel consumption
Displays the current fuel consumption to allow
you to see whether your current driving style is
conducive to fuel economy with minimum
exhaust emissions.
Average speed
Periods with the vehicle parked and the engine
switched off are not includ ed in the calculations
of average speed.
With the trip computer, page 58, you can have
the average speed for another trip displayed.
To reset average speed: press the button in the
turn signal lever for approx. 2 seconds.
External temperature warning
When the displayed temperature sinks to
approx. +37 7/+3 6, a signal sounds and a
warning lamp lights up. There is an increased
risk of black ice.
Even at temperatures above +37 7/+3 6
ice can form. Therefore, drive carefully,
e.g. on bridges and sections of road in the
shade; otherwise, there is an increased accident
risk. <
Page 60 of 256
CONTROLSControls overview
58
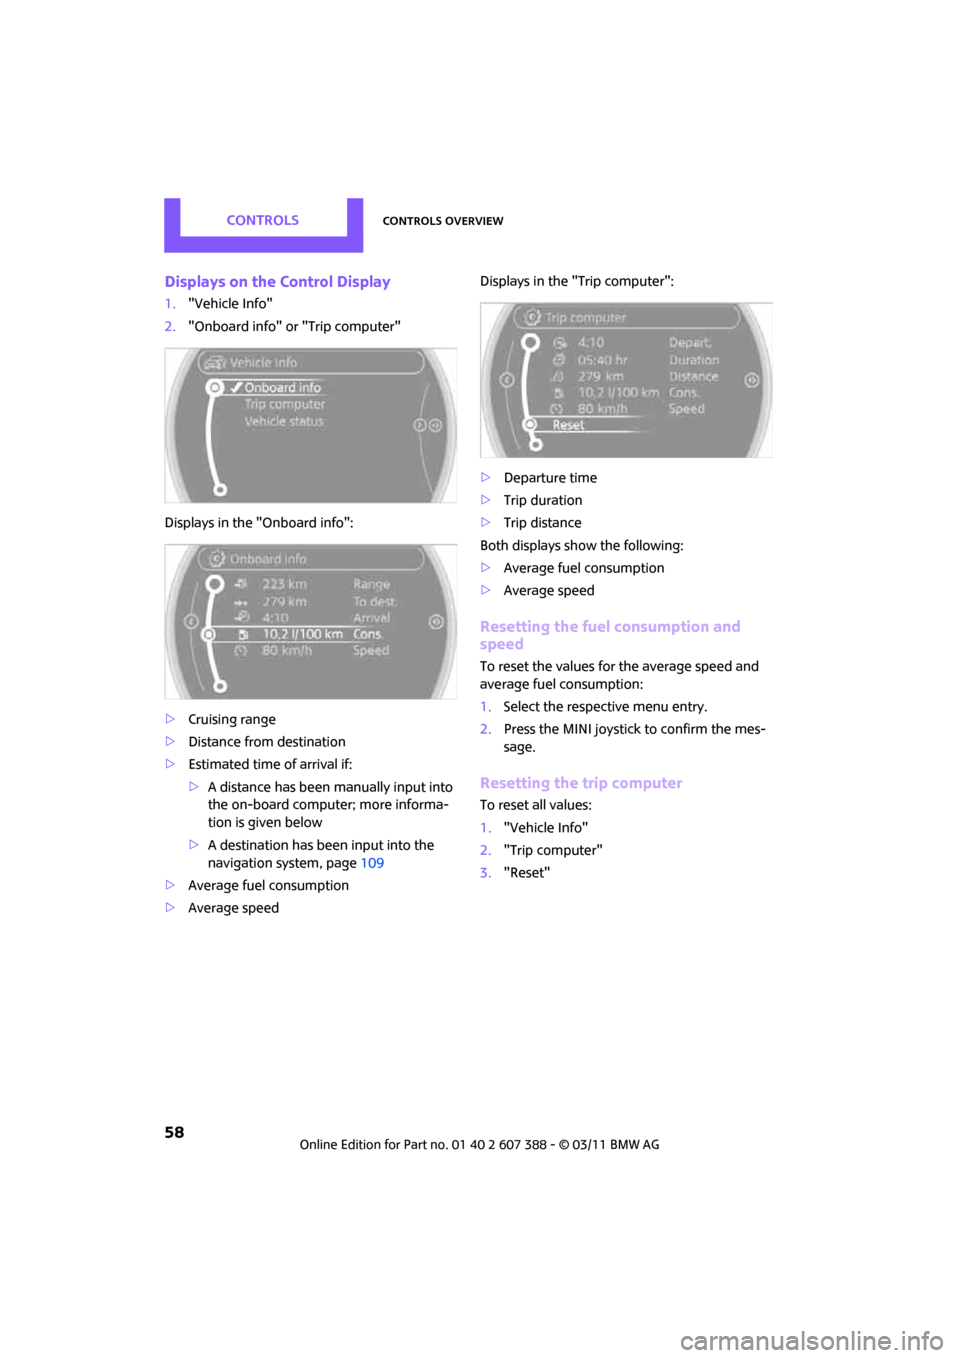
Displays on the Control Display
1."Vehicle Info"
2. "Onboard info" or "Trip computer"
Displays in the "Onboard info":
> Cruising range
> Distance from destination
> Estimated time of arrival if:
>A distance has been manually input into
the on-board computer; more informa-
tion is given below
> A destination has been input into the
navigation system, page 109
> Average fuel consumption
> Average speed Displays in the "Trip computer":
>
Departure time
> Trip duration
> Trip distance
Both displays show the following:
> Average fuel consumption
> Average speed
Resetting the fuel consumption and
speed
To reset the values for the average speed and
average fuel consumption:
1.Select the respective menu entry.
2. Press the MINI joystick to confirm the mes-
sage.
Resetting the trip computer
To reset all values:
1."Vehicle Info"
2. "Trip computer"
3. "Reset"
Page 74 of 256
CONTROLSTechnology for driving comfort and safety
72
sponding wheel change. This is detected and
reported as a flat tire.
Functional requirement
The system must have been initialized while the
tire inflation pressure was correct; otherwise,
reliable signaling of a fl at tire is not ensured.
Initialize the system afte r every correction of the
tire inflation pressure and after every tire or
wheel change.
System limitations
Sudden serious tire damage caused by
external influences cannot be indicated in
advance. <
A natural, even pressure loss in all four tires can-
not be detected. Therefore, check the tire infla-
tion pressure regularly.
In the following situatio ns, the system could be
delayed or malfunction:
> System has not been initialized
> Driving on snowy or sl ippery road surface
> Performance-oriented style of driving: slip in
the drive wheels, high lateral acceleration
> Snow chains are attached
When the vehicle is driven with a space-saver
spare tire
*, page 216, the Flat Tire Monitor can-
not function.
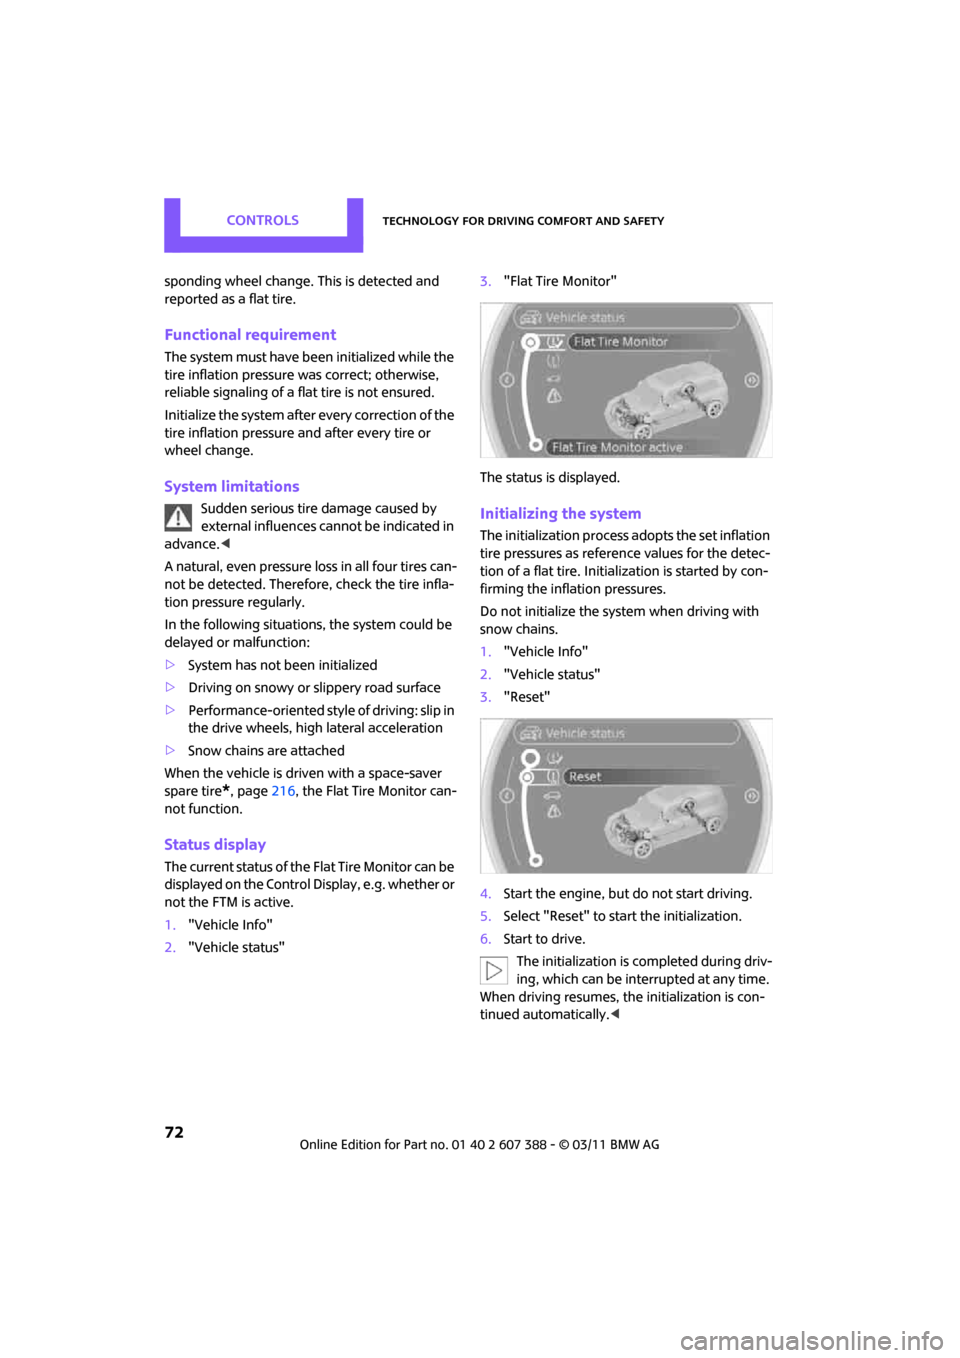
Status display
The current status of the Flat Tire Monitor can be
displayed on the Control Display, e.g. whether or
not the FTM is active.
1. "Vehicle Info"
2. "Vehicle status" 3.
"Flat Tire Monitor"
The status is displayed.
Initializing the system
The initialization process adopts the set inflation
tire pressures as refere nce values for the detec-
tion of a flat tire. Initia lization is started by con-
firming the inflation pressures.
Do not initialize the syst em when driving with
snow chains.
1. "Vehicle Info"
2. "Vehicle status"
3. "Reset"
4. Start the engine, but do not start driving.
5. Select "Reset" to start the initialization.
6. Start to drive.
The initialization is completed during driv-
ing, which can be interrupted at any time.
When driving resumes, the initialization is con-
tinued automatically. <
Page 76 of 256
CONTROLSTechnology for driving comfort and safety
74
Vibrations or loud noises while driving can
indicate final failure of the tire. Reduce
your speed and bring the vehicle to a stop; oth-
erwise, pieces of tire may come off, which could
result in an accident. Do not continue driving
and contact your MINI dealer. <
Tire Pressure Monitor
TPM*
The concept
Measuring the inflation pressure in the four
mounted tires. The system notifies you if there is
a significant loss of pressu re in one or more tires.
Functional requirement
The system must have been reset while the
inflation pressure was correct; otherwise, reli-
able signaling of a flat tire is not ensured.
Always use wheels with TPM electronics to
ensure that the system will operate properly.
Reset the system again af ter each correction of
the tire inflation pressure and after every tire or
wheel change.
System limitations
Sudden, serious tire damage caused by
external influences cannot be indicated in
advance. <
The system does not operate correctly if it has
not been reset. For exampl e, a flat tire may be
indicated despite correct tire inflation pressures.
The system is inactive an d cannot indicate a flat
tire:
> If a wheel without TPM electronics, e.g. a
compact spare wheel
*, is mounted.
> Interference with TPM by other systems or
devices with the same transmission fre-
quency.
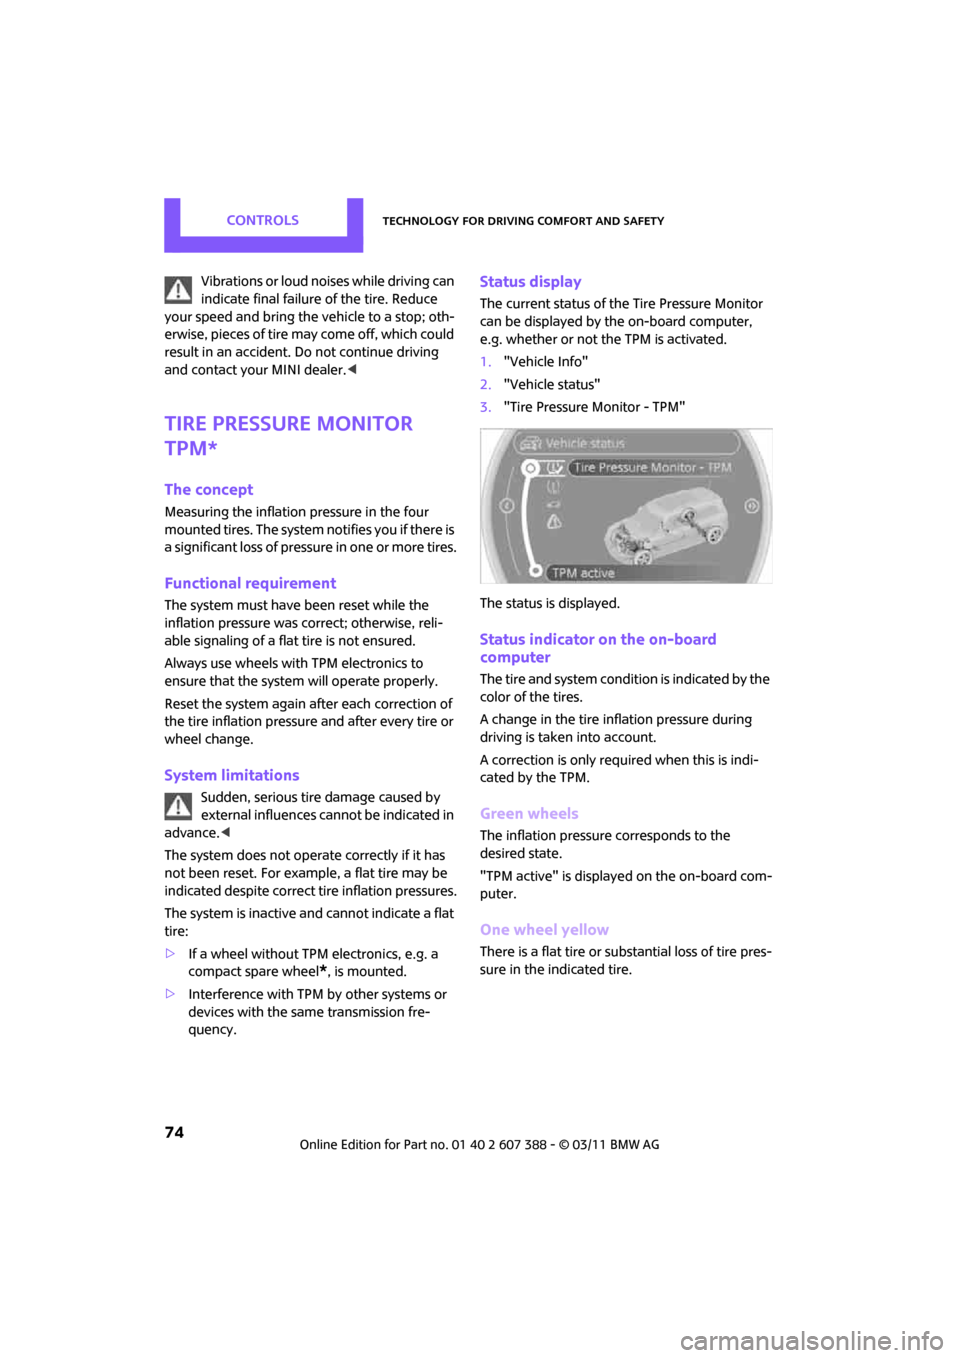
Status display
The current status of th e Tire Pressure Monitor
can be displayed by the on-board computer,
e.g. whether or not the TPM is activated.
1. "Vehicle Info"
2. "Vehicle status"
3. "Tire Pressure Monitor - TPM"
The status is displayed.
Status indicator on the on-board
computer
The tire and system condition is indicated by the
color of the tires.
A change in the tire inflation pressure during
driving is taken into account.
A correction is only required when this is indi-
cated by the TPM.
Green wheels
The inflation pressure corresponds to the
desired state.
"TPM active" is displayed on the on-board com-
puter.
One wheel yellow
There is a flat tire or substantial loss of tire pres-
sure in the indicated tire.
Page 77 of 256
Technology for driving comfort and safetyCONTROLS
75
All wheels yellow
>There is a flat tire or substantial loss of tire
pressure in several tires.
> The system was not reset after a wheel
change and thus issues a warning based on
the inflation pressures initialized last.
Gray wheels
The system cannot detect a puncture.
Reasons for this may be:
>TPM is being reset.
> Interference from systems or devices with
the same transmission frequency.
> Malfunction.
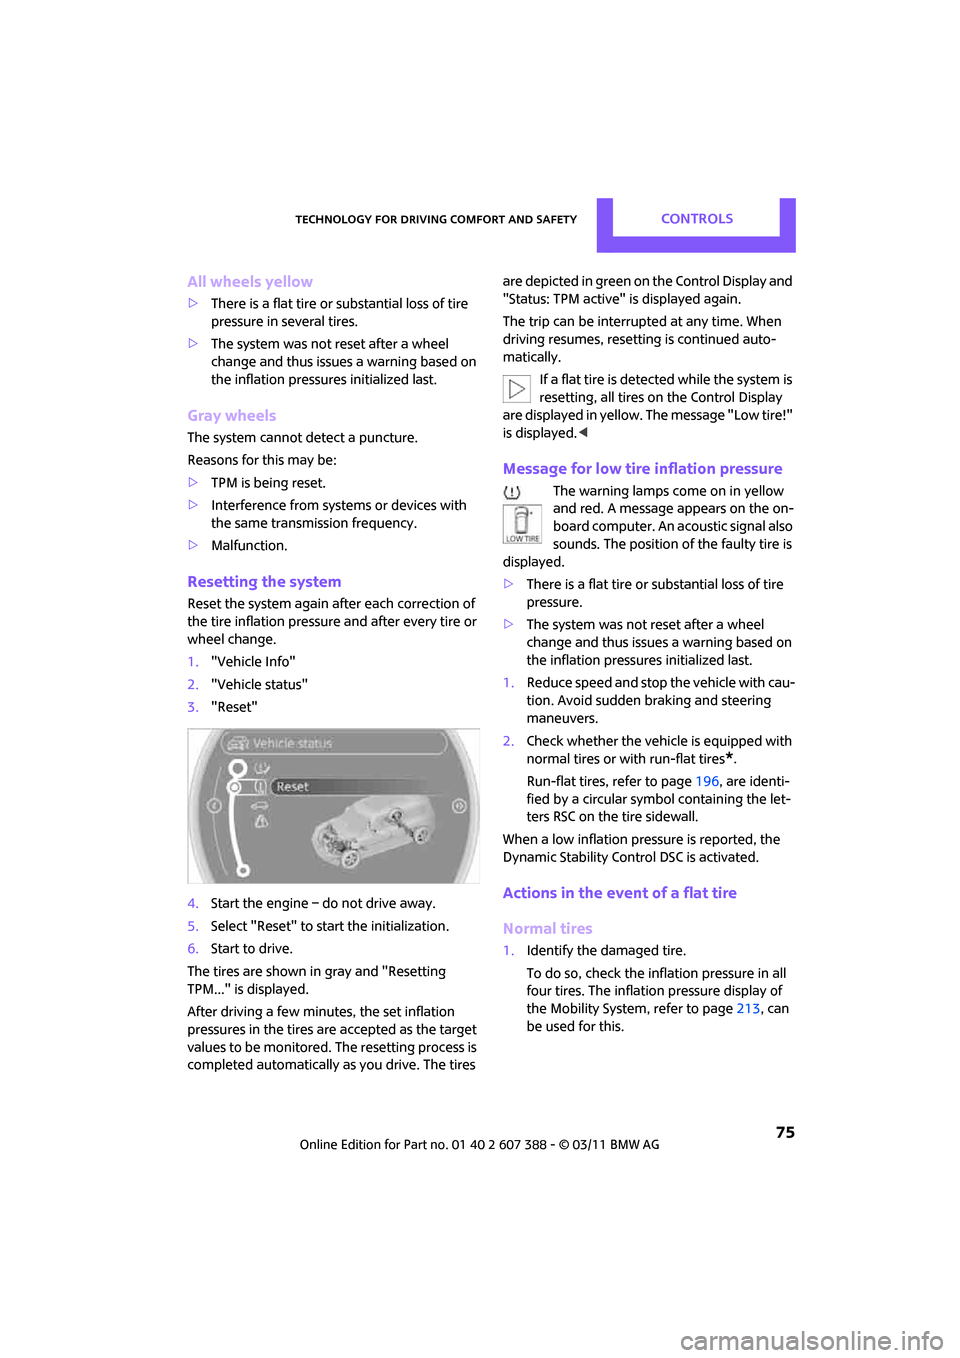
Resetting the system
Reset the system again after each correction of
the tire inflation pressure and after every tire or
wheel change.
1. "Vehicle Info"
2. "Vehicle status"
3. "Reset"
4. Start the engine – do not drive away.
5. Select "Reset" to start the initialization.
6. Start to drive.
The tires are shown in gray and "Resetting
TPM..." is displayed.
After driving a few minutes, the set inflation
pressures in the tires are accepted as the target
values to be monitored. The resetting process is
completed automatically as you drive. The tires are depicted in green on the Control Display and
"Status: TPM active" is displayed again.
The trip can be interrupt
ed at any time. When
driving resumes, resetti ng is continued auto-
matically.
If a flat tire is detected while the system is
resetting, all tires on the Control Display
are displayed in yellow. The message "Low tire!"
is displayed. <
Message for low tire inflation pressure
The warning lamps come on in yellow
and red. A message appears on the on-
board computer. An ac oustic signal also
sounds. The position of the faulty tire is
displayed.
> There is a flat tire or substantial loss of tire
pressure.
> The system was not reset after a wheel
change and thus issues a warning based on
the inflation pressures initialized last.
1. Reduce speed and stop the vehicle with cau-
tion. Avoid sudden braking and steering
maneuvers.
2. Check whether the vehicle is equipped with
normal tires or with run-flat tires
*.
Run-flat tires, refer to page 196, are identi-
fied by a circular symbol containing the let-
ters RSC on the tire sidewall.
When a low inflation pressure is reported, the
Dynamic Stability Control DSC is activated.
Actions in the event of a flat tire
Normal tires
1. Identify the damaged tire.
To do so, check the inflation pressure in all
four tires. The inflation pressure display of
the Mobility System, refer to page 213, can
be used for this.
Page 78 of 256
CONTROLSTechnology for driving comfort and safety
76
If the inflation pressure is correct in all four
tires, then the Tire Pressure Monitor may not
have been reset. The system must then be
reset.
If it is not possible to identify the damaged
tire, contact your MINI dealer.
2. Use the Mobility System to remedy the flat
tire on the damaged wheel, refer to
page 213, or to replace the damaged wheel,
refer to page. 215.
The use of tire sealant, e.g. Mobility System,
can damage the TPM wheel electronics. In
this case, have the el ectronics checked and
replaced if necessary at your earliest oppor-
tunity.
Run-flat tires*
You can continue driving with a damaged tire at
speeds up to 50 mph/80 km/h.
If the vehicle is not equipped with run-flat
tires, do not continue driving; continuing
to drive can result in serious accidents. <
Continued driving with a flat tire
When driving with a damaged tire:
1.Avoid sudden braking and steering maneu-
vers.
2. Do not exceed a speed of 50 mph/80 km/h.
3. At the next opportunity, check the air pres-
sure in all four tires.
If the inflation pressure is correct in all four
tires, then the Tire Pressure Monitor may not
have been reset. The system must then be
reset.
Possible driving distance with complete loss of
tire inflation pressure:
The distance it is possible to drive with a flat tire
depends on the load and the stress on the vehi-
cle while driving.
With an average load, it may be possible to drive
for approx. 50 miles/80 km.
When driving with damaged tires, the handling
characteristics change, e.g. the vehicle will skid sooner when braking, braking distances will be
longer, or self-steerin
g response will change.
Adapt your driving style accordingly. Avoid turn-
ing abruptly and driving over obstacles such as
curbs, potholes, etc.
Since the possible driving distance depends to a
considerable degree on the strain exerted on
the vehicle while driving, it can be shorter or,
with a gentle driving styl e, can also be longer,
depending on the speed, road condition, exter-
nal temperature, vehicle load, etc.
Drive cautiously and do not exceed a
speed of 50 mph/80 km/h.
A loss of tire inflation pressure results in a
change in the handling characteristics, e.g.
reduced lane stability during braking, a longer
braking distance and alte red self-steering prop-
erties. <
Vibrations or loud no ises while driving can
indicate complete failure of the tire.
Reduce your speed and bring the vehicle to a
stop; otherwise, pieces of tire may come off,
which could result in an accident. Do not con-
tinue driving and contac t your MINI dealer.
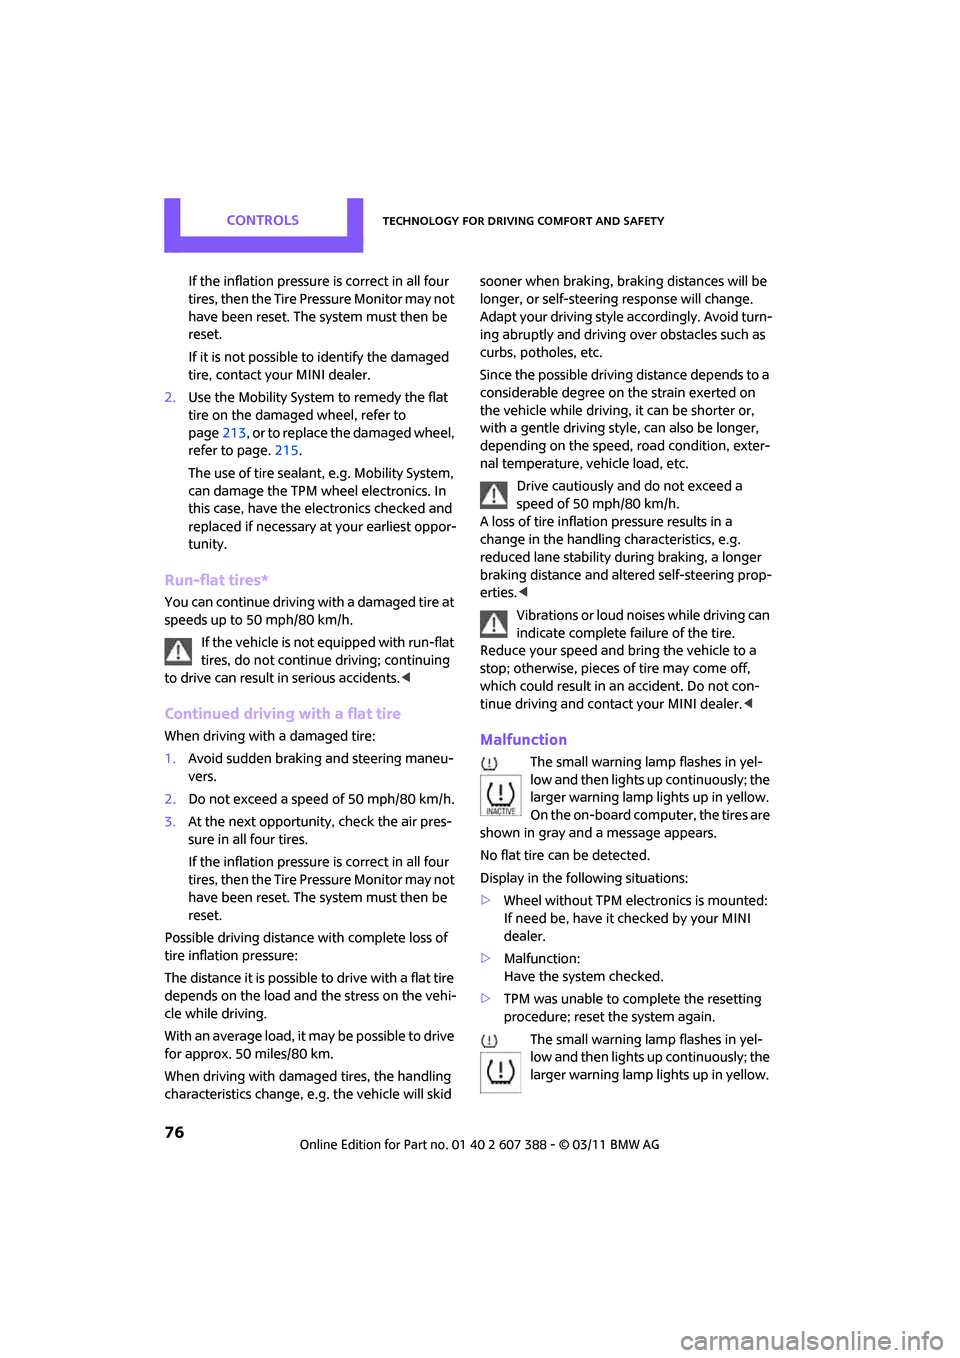
low and then lights up continuously; the
larger warning lamp lights up in yellow.
On the on-board computer, the tires are
shown in gray and a message appears.
No flat tire can be detected.
Display in the following situations:
> Wheel without TPM electronics is mounted:
If need be, have it checked by your MINI
dealer.
> Malfunction:
Have the system checked.
> TPM was unable to complete the resetting
procedure; reset the system again.
The small warning lamp flashes in yel-
low and then lights up continuously; the
larger warning lamp lights up in yellow.