service MINI Clubman 2011 (Mini Connected) User Guide
[x] Cancel search | Manufacturer: MINI, Model Year: 2011, Model line: Clubman, Model: MINI Clubman 2011Pages: 256, PDF Size: 3.75 MB
Page 126 of 256
NAVIGATIONRoute guidance
124
Traffic bulletins in the map
When the traffic info map is activated, the pic-
ture on the Control Display is switched to a gray-
scale. This permits an optimized depiction of
traffic information. The day/night mode is disre-
garded in this setting. The symbols for the spe-
cial destinations are no longer displayed.
1. "Navigation"
2. "Map"
3. Open "Options".
4. "Settings"
5. "Traffic conditions/gray map"
Symbols in map view
The symbols of traffic ob structions are displayed
differently, depending on the scale of the map
and location of the traffi c obstruction in relation
to the route.
Additional information in the map
display
Depending on the map scale, the length, direc-
tion, and effects of a traffic obstruction are
depicted by traffic symbol s in the map or by bars
along the planned route. The colors displayed
depend on the informatio n sent by the traffic
information service.
> Red: traffic congestion
> Orange: stop-and-go traffic
> Yellow: heavy traffic
> Green: clear roads
> Gray: general traffic information such as
road construction
The colors displayed depend on the information
sent by the traffic information service.
Filtering of traffic bulletins
To set which traffic bulletins the system should
display:
1."Navigation"
2. "Map" 3.
Open "Options".
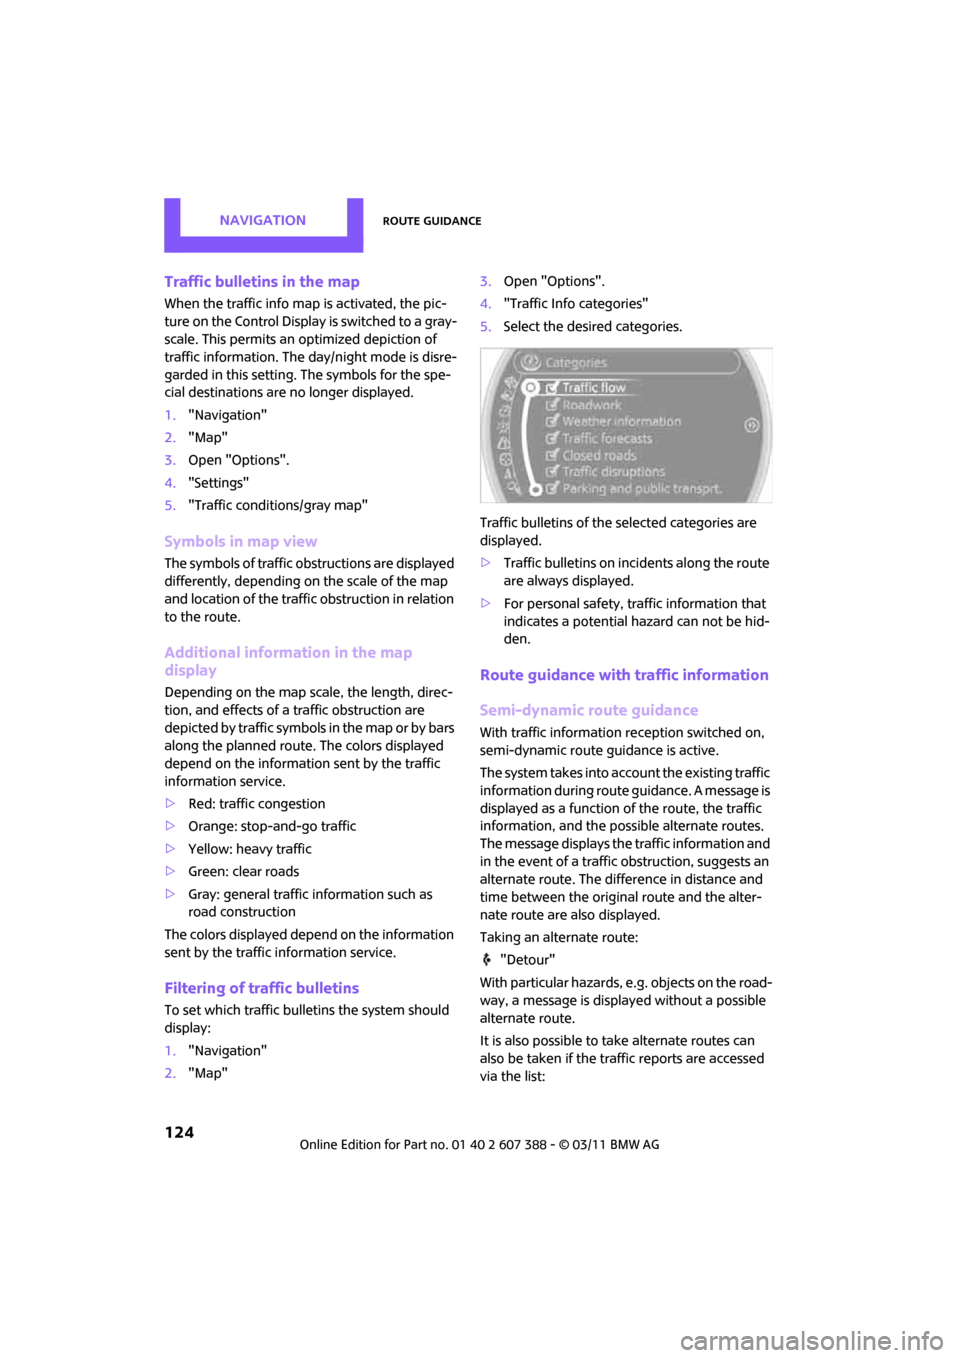
4. "Traffic Info categories"
5. Select the desired categories.
Traffic bulletins of the selected categories are
displayed.
> Traffic bulletins on in cidents along the route
are always displayed.
> For personal safety, traffic information that
indicates a potential hazard can not be hid-
den.
Route guidance with traffic information
Semi-dynamic route guidance
With traffic information reception switched on,
semi-dynamic route gu idance is active.
The system takes into account the existing traffic
information during route guidance. A message is
displayed as a function of the route, the traffic
information, and the po ssible alternate routes.
The message displays the traffic information and
in the event of a traffic obstruction, suggests an
alternate route. The difference in distance and
time between the origin al route and the alter-
nate route are also displayed.
Taking an alternate route:
"Detour"
With particular hazards, e.g. objects on the road-
way, a message is displayed without a possible
alternate route.
It is also possible to take alternate routes can
also be taken if the tr affic reports are accessed
via the list:
Page 160 of 256
CommunicationsHands-free device Bluetooth
158
Calls with multiple parties
General information
It is possible to switch between two calls and to
connect two calls to form a conference call.
These functions must be supported by the
mobile phone and by the service provider.
Accepting a call wh ile speaking to
another party
This function may have to be activated by the
service provider and the mobile phone may
need to be adjusted for this.
When a second call comes in during an ongoing
call, a call-waiting signal sounds.
"Accept"
The call is accepted and the existing call is put on
hold.
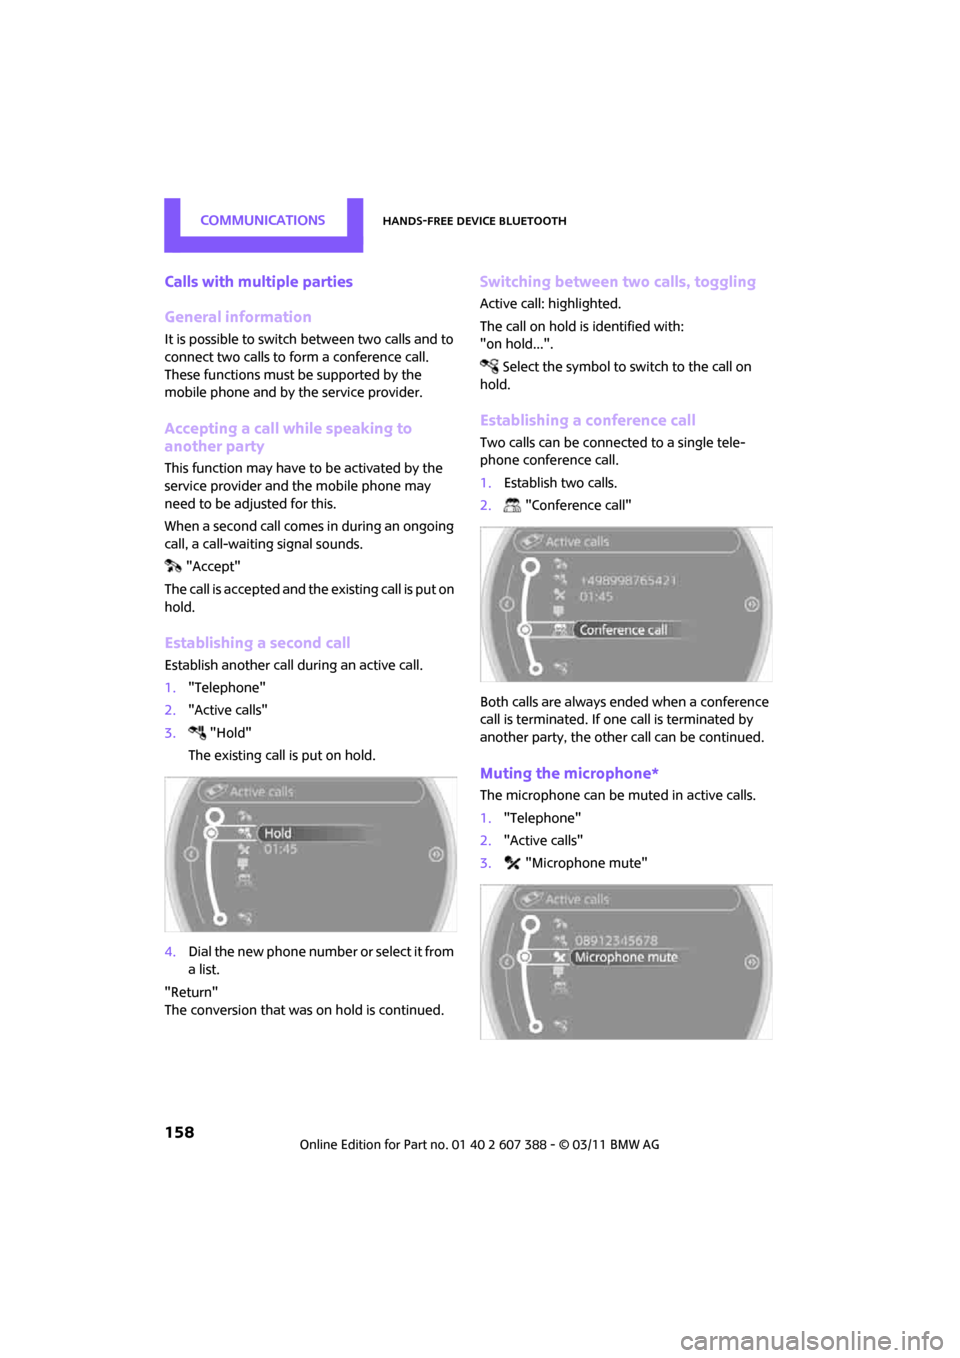
Establishing a second call
Establish another call during an active call.
1. "Telephone"
2. "Active calls"
3. "Hold"
The existing call is put on hold.
4. Dial the new phone number or select it from
a list.
"Return"
The conversion that was on hold is continued.
Switching between two calls, toggling
Active call: highlighted.
The call on hold is identified with:
"on hold...".
Select the symbol to switch to the call on
hold.
Establishing a conference call
Two calls can be connected to a single tele-
phone conference call.
1. Establish two calls.
2. "Conference call"
Both calls are always ended when a conference
call is terminated. If one call is terminated by
another party, the other call can be continued.
Muting the microphone*
The microphone can be muted in active calls.
1. "Telephone"
2. "Active calls"
3. "Microphone mute"
Page 161 of 256
Hands-free device BluetoothCommunications
159
The muted microphone is automatically acti-
vated:
>If a new call is made.
> When switching between callers on hold.
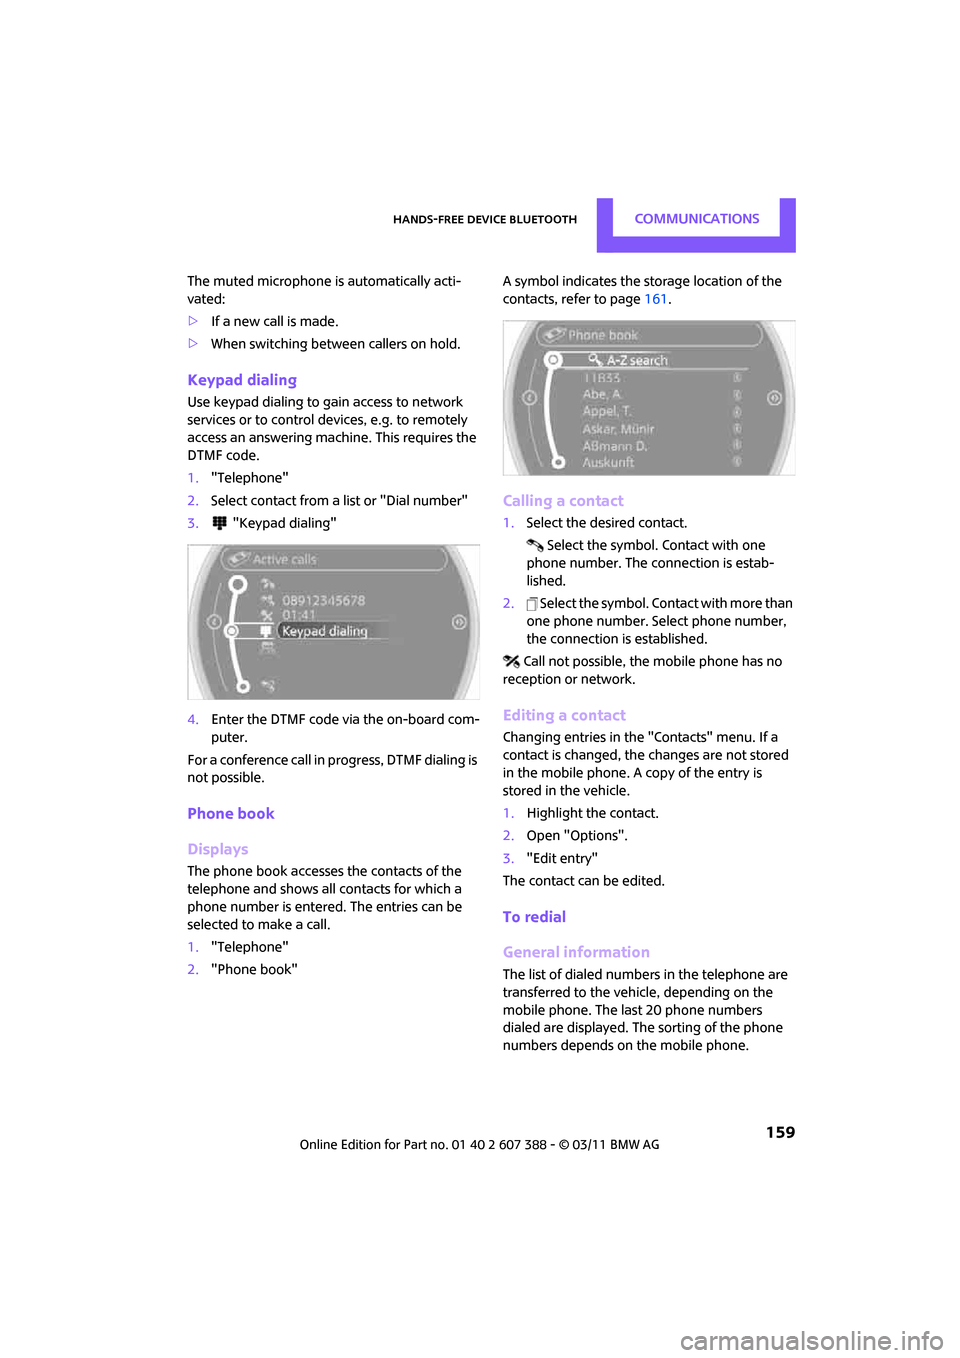
Keypad dialing
Use keypad dialing to gain access to network
services or to control de vices, e.g. to remotely
access an answering machine. This requires the
DTMF code.
1. "Telephone"
2. Select contact from a list or "Dial number"
3. "Keypad dialing"
4. Enter the DTMF code via the on-board com-
puter.
For a conference call in progress, DTMF dialing is
not possible.
Phone book
Displays
The phone book accesses the contacts of the
telephone and shows all contacts for which a
phone number is entered. The entries can be
selected to make a call.
1. "Telephone"
2. "Phone book" A symbol indicates the storage location of the
contacts, refer to page
161.
Calling a contact
1.Select the desired contact.
Select the symbol. Contact with one
phone number. The connection is estab-
lished.
2. Select the symbol. Contact with more than
one phone number. Select phone number,
the connection is established.
Call not possible, the mobile phone has no
reception or network.
Editing a contact
Changing entries in the "Contacts" menu. If a
contact is changed, the changes are not stored
in the mobile phone. A copy of the entry is
stored in the vehicle.
1. Highlight the contact.
2. Open "Options".
3. "Edit entry"
The contact can be edited.
To redial
General information
The list of dialed numbers in the telephone are
transferred to the vehicle, depending on the
mobile phone. The last 20 phone numbers
dialed are displayed. The sorting of the phone
numbers depends on the mobile phone.
Page 162 of 256
CommunicationsHands-free device Bluetooth
160
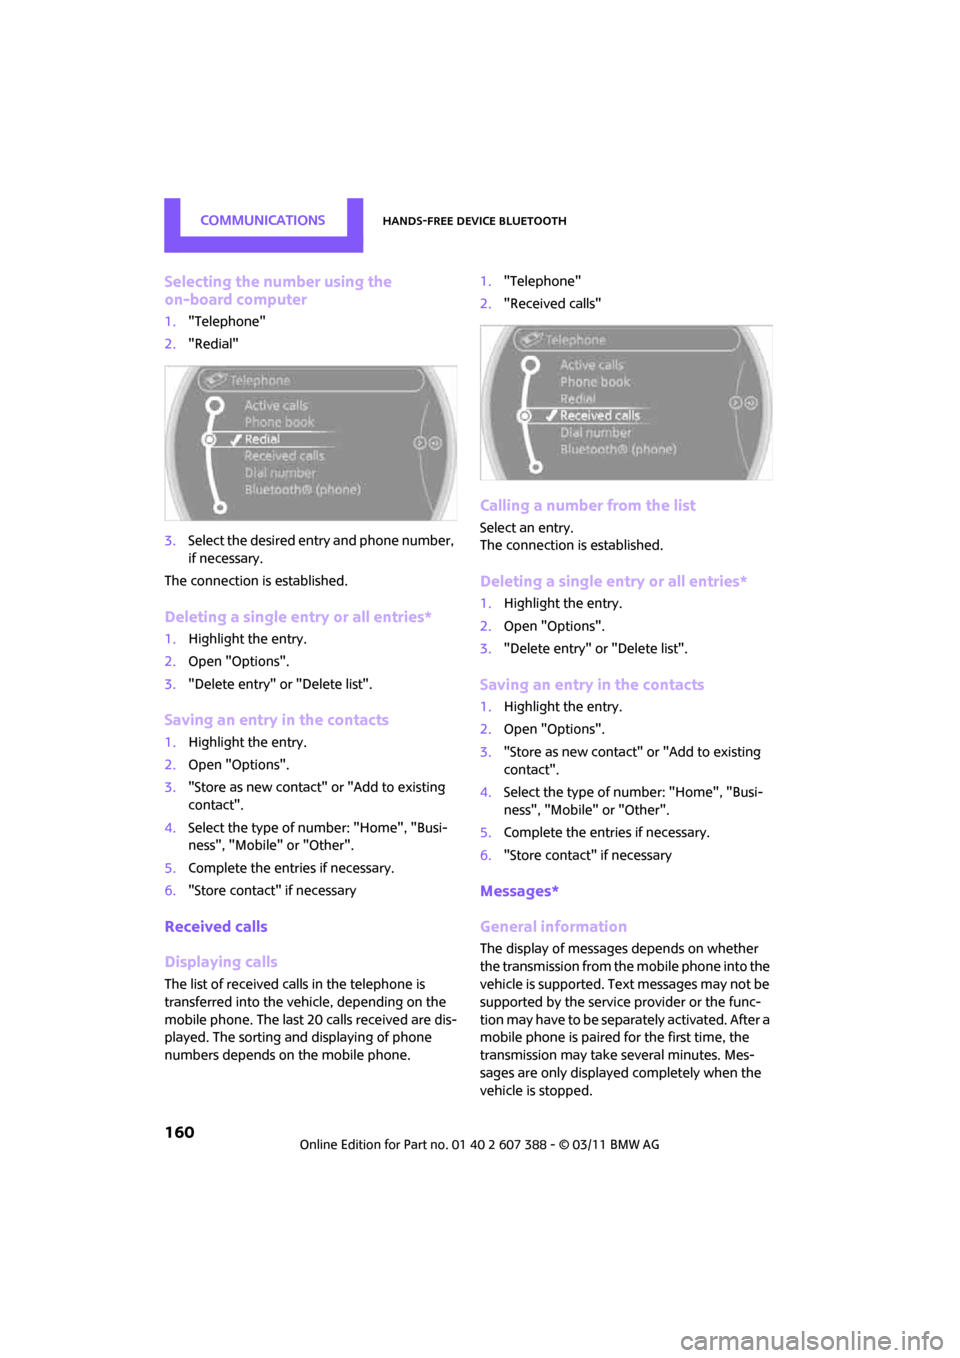
Selecting the number using the
on-board computer
1."Telephone"
2. "Redial"
3. Select the desired entry and phone number,
if necessary.
The connection is established.
Deleting a single entry or all entries*
1. Highlight the entry.
2. Open "Options".
3. "Delete entry" or "Delete list".
Saving an entry in the contacts
1.Highlight the entry.
2. Open "Options".
3. "Store as new contact" or "Add to existing
contact".
4. Select the type of number: "Home", "Busi-
ness", "Mobile" or "Other".
5. Complete the entries if necessary.
6. "Store contact" if necessary
Received calls
Displaying calls
The list of received calls in the telephone is
transferred into the vehi cle, depending on the
mobile phone. The last 20 calls received are dis-
played. The sorting and displaying of phone
numbers depends on the mobile phone. 1.
"Telephone"
2. "Received calls"
Calling a number from the list
Select an entry.
The connection is established.
Deleting a single entry or all entries*
1.Highlight the entry.
2. Open "Options".
3. "Delete entry" or "Delete list".
Saving an entry in the contacts
1.Highlight the entry.
2. Open "Options".
3. "Store as new contact" or "Add to existing
contact".
4. Select the type of number: "Home", "Busi-
ness", "Mobile" or "Other".
5. Complete the entries if necessary.
6. "Store contact" if necessary
Messages*
General information
The display of messages depends on whether
the transmission from the mobile phone into the
vehicle is supported. Te xt messages may not be
supported by the service provider or the func-
tion may have to be separately activated. After a
mobile phone is paired for the first time, the
transmission may take several minutes. Mes-
sages are only displayed completely when the
vehicle is stopped.
Page 172 of 256
CommunicationsMobile phone preparation Bluetooth
170
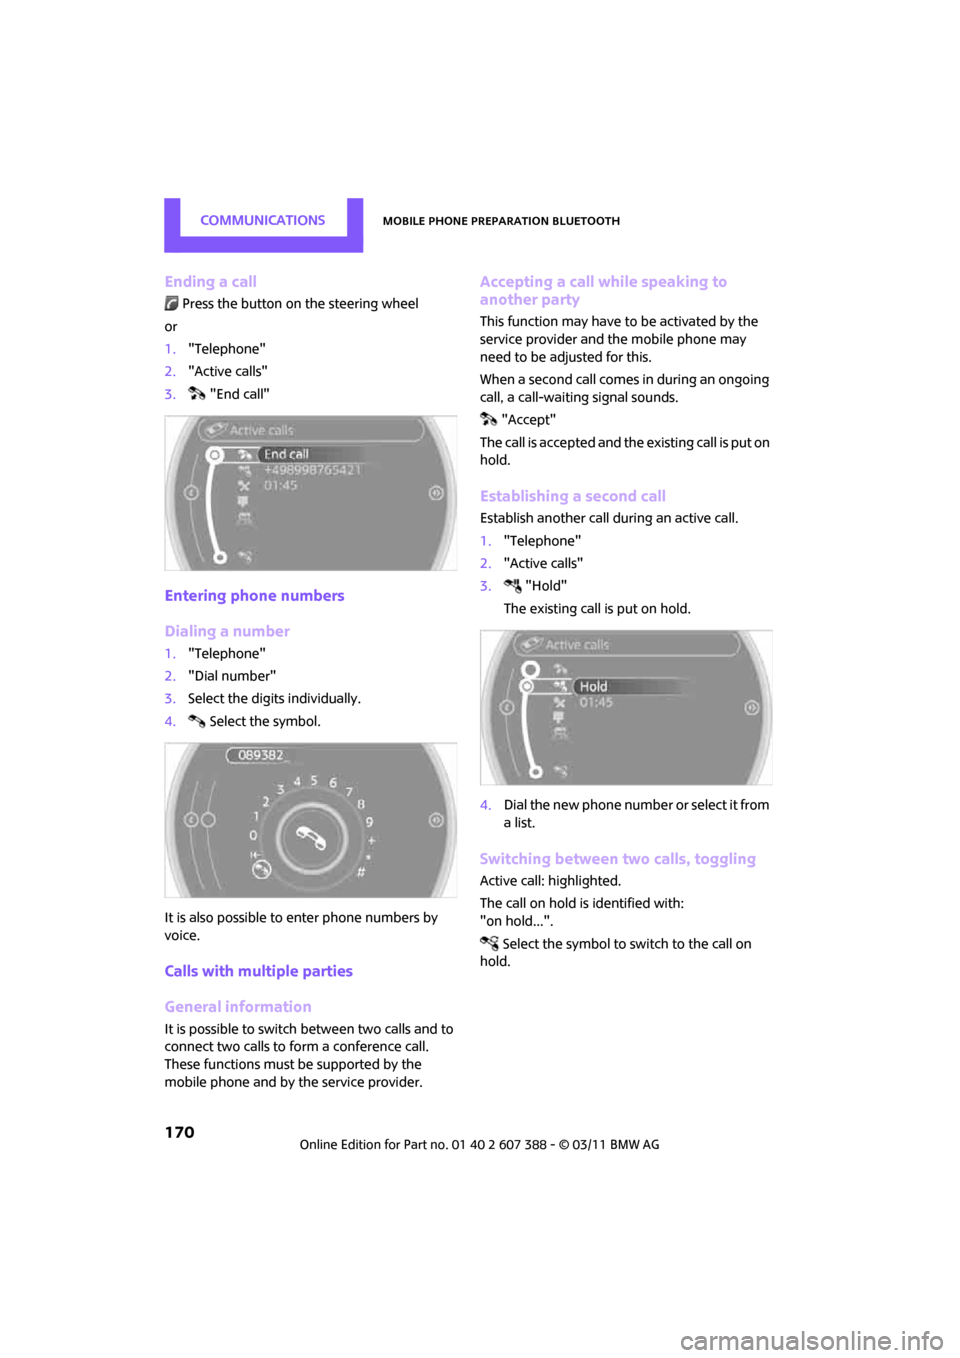
Ending a call
Press the button on the steering wheel
or
1. "Telephone"
2. "Active calls"
3. "End call"
Entering phone numbers
Dialing a number
1."Telephone"
2. "Dial number"
3. Select the digits individually.
4. Select the symbol.
It is also possible to enter phone numbers by
voice.
Calls with multiple parties
General information
It is possible to switch between two calls and to
connect two calls to fo rm a conference call.
These functions must be supported by the
mobile phone and by the service provider.
Accepting a call while speaking to
another party
This function may have to be activated by the
service provider and the mobile phone may
need to be adjusted for this.
When a second call comes in during an ongoing
call, a call-waiting signal sounds.
"Accept"
The call is accepted and the existing call is put on
hold.
Establishing a second call
Establish another call during an active call.
1. "Telephone"
2. "Active calls"
3. "Hold"
The existing call is put on hold.
4. Dial the new phone number or select it from
a list.
Switching between two calls, toggling
Active call: highlighted.
The call on hold is identified with:
"on hold...".
Select the symbol to switch to the call on
hold.
Page 173 of 256
Mobile phone preparation BluetoothCommunications
171
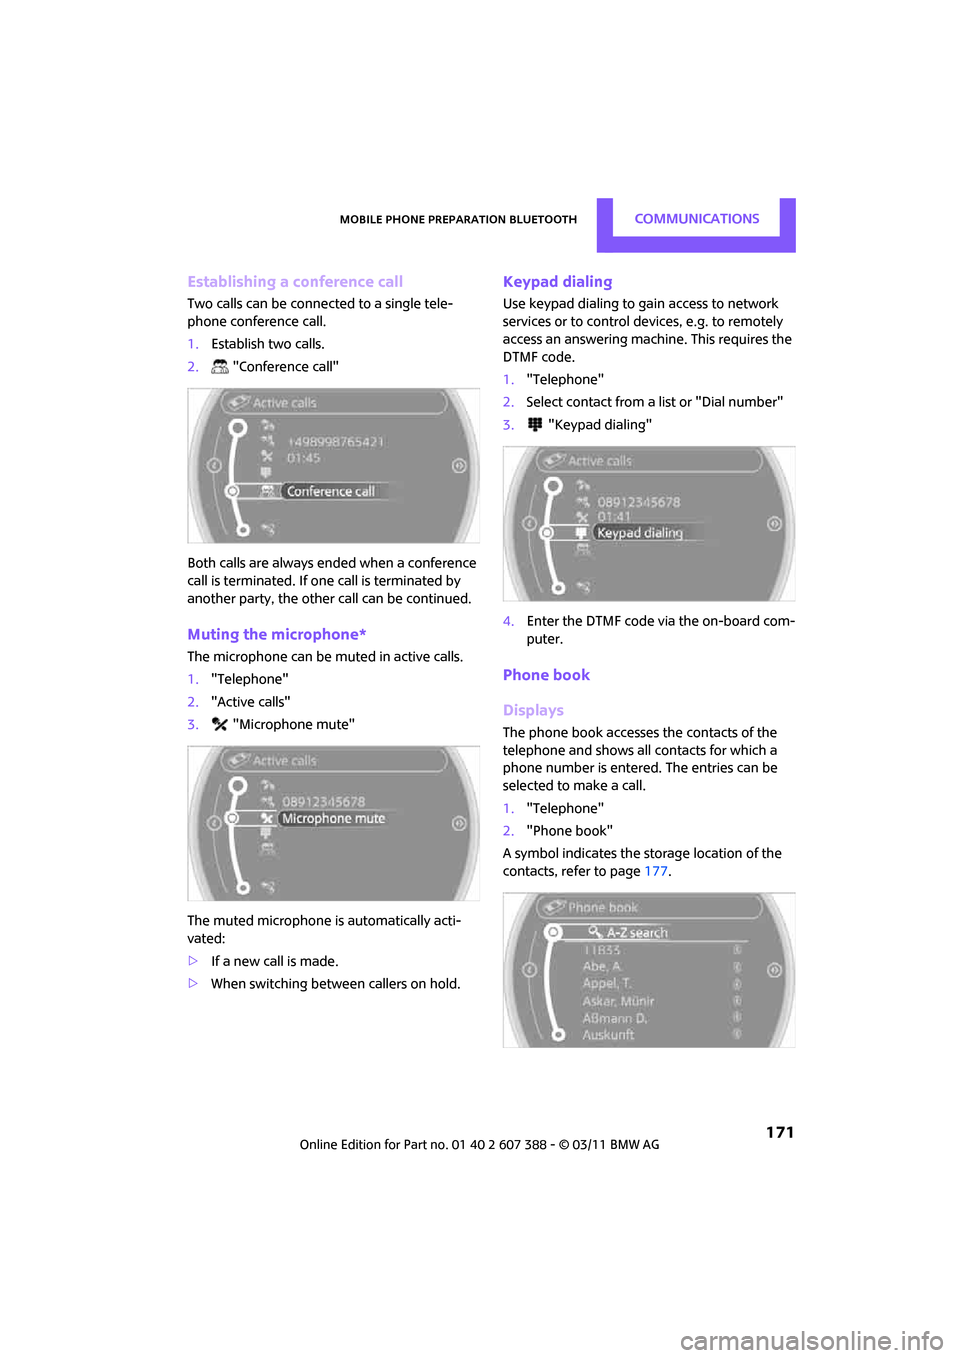
Establishing a conference call
Two calls can be connected to a single tele-
phone conference call.
1.Establish two calls.
2. "Conference call"
Both calls are always ended when a conference
call is terminated. If on e call is terminated by
another party, the other call can be continued.
Muting the microphone*
The microphone can be muted in active calls.
1. "Telephone"
2. "Active calls"
3. "Microphone mute"
The muted microphone is automatically acti-
vated:
> If a new call is made.
> When switching between callers on hold.
Keypad dialing
Use keypad dialing to gain access to network
services or to control de vices, e.g. to remotely
access an answering machine. This requires the
DTMF code.
1. "Telephone"
2. Select contact from a list or "Dial number"
3. "Keypad dialing"
4. Enter the DTMF code via the on-board com-
puter.
Phone book
Displays
The phone book accesses the contacts of the
telephone and shows all contacts for which a
phone number is entered. The entries can be
selected to make a call.
1. "Telephone"
2. "Phone book"
A symbol indicates the storage location of the
contacts, refer to page 177.
Page 182 of 256
CommunicationsOffice
180
Displaying contact pictures*
Pictures stored with contacts are stored in the
vehicle when the mobile phone is connected to
the vehicle. The number of pictures transmitted
depends on the mobile phone. The mobile
phone must support this function.
1."Contacts"
2. Open "Options".
3. "Show images"
The display of all contact pictures is activated or
deactivated.
Exporting/importing contacts*
Contacts can be exported and imported using
Personal Profile, refer to page26. Depending on
which ignition key is in use, only contacts that
are stored in the vehicle are stored.
Deleting contacts
Only contacts that are stored in the vehicle are
deleted. The contacts on the mobile phone
*
cannot be deleted.
1. "Contacts"
2. Highlight the contact.
3. "Options"
4. "Delete contact" or "Delete all contacts".
Messages
General information
The displaying of text messages depends on
whether the mobile phone supports transmis-
sion to the vehicle. Te xt messages may not be
supported by the service provider or the func-
tion may have to be separately activated. After a
mobile phone is paired for the first time, the
transmission may take several minutes. Mes-
sages are only displayed completely when the
vehicle is stopped. Messages from the auxiliary
phone are not transmitted.
Displaying messages
1. "Office"
2. "Messages"
Message type
A symbol indicates the type of message.
Read message.
Unread message.
Reading message aloud
Reading text messages aloud, refer to page183.
Text message
Calling a text message sender
1. Select the desired message.
2. Select the symbol.
Saving sender in the contacts
1.Highlight the desired message.
2. Open "Options".
3. "Store as new contact" or "Add to existing
contact"
Calendar
Displaying calendar
Appointments from the last 20 days and the
next 50 days can be displayed.
1."Office"
2. "Calendar"
Appointments of the current day are dis-
played.
SymbolMessage type
Text message
Page 192 of 256

MOBILITYWheels and tires
190
Wheels and tires
Tire inflation pressures
Information for your safety
It is not merely the tires' service life, but also
driving comfort and, to a great extent, driving
safety that depend on the condition of the tires
and the maintenance of the specified tire pres-
sure.
Checking pressure
Check the tire inflation pressure regularly
and correct it, if necessary: at least twice a
month and before starting long trips. If you fail
to observe this precauti on you may be driving
on tires with incorrect ti re pressures, a condition
that can not only compromise your vehicle's
driving stability, but also l e a d t o t i r e d a m a g e a n d
the risk of an accident. Do not drive with
deflated, i.e. flat tires, except when using run-
flat tires. A flat tire will seriously impair your
vehicle's handling and braking response.
Att empt s to drive o n a flat t ire can lead to lo ss of
control over the vehicle. <
Check the tire inflation pressures only on cold
tires. This means after a maximum of 1.25 miles/
2 km driving or when the vehicle has been
parked for at least 2 hou rs. When tires are warm,
the tire inflation pressure is higher.
After adjusting the tire inflation pressure,
reinitialize the flat tire monitor, page 72,
or reset the Tire Pressure Monitor, page 75.<
Checking the tire inflation pressure of
the compact tire*
To check the inflation pressure, fold up the flat
load floor. Remove the onboard vehicle toolkit
and the space-saver sp are tire, refer to
page 215.
Inflation pressure specifications
The tables below provide all the correct inflation
pressures for the specified tire sizes at ambient
temperature.
The tire inflation pressures apply to the
tire sizes approved and the tire brands
recommended by the manufacturer of your
MINI. Your MINI dealer will be glad to advise
you. <
For correct identification of the right tire infla-
tion pressures, ob serve the following:
> Tire sizes for your vehicle
> Maximum allowable driving speed
Tire inflation pressures for driving up to
100 mph or 160 km/h
For normal driving up to 100 mph or 160 km/h
and to achieve optimum driving comfort, adjust
pressures to the respective tire inflation values
listed on the following pages in the columns for
traveling speeds up to a maximum of 100 mph
or 160 km/h.
These tire inflation pre ssures can also be found
on the driver's side door pillar when the driver's
door is open.
The maximum permitted speed for these
tire inflation pressures is 100 mph or
160 km/h. Do not exceed this speed; otherwise,
tire damage and accidents may occur. <
Page 196 of 256

MOBILITYWheels and tires
194
Tire Identification Number
Tires with DOT codes meet the guidelines of the
US Department of Transportation.
DOT code:
Uniform Tire Quality Grading
Quality grades can be found where applicable
on the tire sidewall between tread shoulder and
maximum section width. For example:
Tread wear 200 Traction AA
Temperature A
DOT Quality Grades
Tread wear
Traction AA A B C
Temperature A B CAll passenger car tires must conform to
Federal Safety Requirements in addition
to these grades. <
Tread wear
The tread wear grade is a comparative rating
based on the wear rate of the tire when tested
under controlled conditions on a specified gov-
ernment test course. For example, a tire graded
150 would wear one and one-half (1 γ) times as
well on the government co urse as a tire graded
100. The relative performance of tires depends
upon the actual conditio ns of their use, how-
ever, and may depart significantly from the
norm due to variations in driving habits, service
practices and differences in road characteristics
and climate.
Traction
The traction grades, from highest to lowest, are
AA, A, B, and C.
Those grades represent the tire’s ability to stop
on wet pavement as measured under controlled
conditions on specified government test sur-
faces of asphalt and concrete. A tire marked C
may have poor traction performance.
The traction grade assigned to this tire is
based on straight-ahead braking traction
tests, and does not incl ude acceleration, corner-
ing, hydroplaning, or pe ak traction characteris-
tics. <
Temperature
The temperature grades are A, the highest, B,
and C, representing the tire's resistance to the
generation of heat and its ability to dissipate
heat when tested under controlled conditions
on a specified indoor labo ratory test wheel. Sus-
tained high temperature can cause the material
of the tire to degenerate and reduce tire life, and
excessive temperature can lead to sudden tire
failure. The grade C corre sponds to a level of
performance which all pa ssenger car tires must
meet under the Federal Motor Vehicle Safety
Standard No. 109. Grades B and A represent lev-
els of performance on the laboratory test wheel
that exceed the minimum required by law.
The temperature grade for this tire is
established for a tire that is properly
inflated and not overlo aded. Excessive speed,
underinflation, or excessive loading, either sep-
arately or in combination, can cause heat
buildup and possible tire failure. <
RSC - run-flat tires*
You will recognize run-flat tires by a circular
symbol containing the letters RSC on the side of
the tire, page 196.
For instance:
Manufacturer's
code for tire make
Tire size and tire design
Tire ageDOT xxxx xxx 0211
Page 198 of 256

MOBILITYWheels and tires
196
Run-flat tires*
The symbol identifying run-flat tires is a circle
with the letters RSC on the sidewall.
Run-flat tires comprise a conditionally self-sup-
porting tire and a special rim. The reinforcement
in the sidewalls ensures that the tire can con-
tinue to be used subject to certain restrictions,
even if depressurized.
For information on continui ng to drive with a flat
tire, refer to Indication of a flat tire, page 73.
New wheels and tires
Have new wheels and tires mounted only
by your MINI dealer or a specialized tire
shop that has specially trained personnel work-
ing in accordance with the specifications of the
MINI manufacturer. If this work is not carried out
properly, there is a danger of subsequent dam-
age and related safety haza rds. Make sure that
the new wheels are balanced. <
Retreaded tires
The manufacturer of your MINI recom-
mends that you avoid using retreaded
tires, as this could impair driving safety. The
causes for this include potentially different tire
casing structures and often wide variations in
tire age, which can resu lt in a limited service
life.<
Correct wheels and tires
The manufacturer of your MINI recom-
mends mounting only wheels and tires that it has specifically approved for use on your
particular model. Although other wheels and
tires may theoretically have the same dimen-
sions, variations in factors such as manufactur-
ing tolerances can result
in contact between tire
and bodywork, ultimately leading to serious
accidents. The manufacturer of your MINI can-
not evaluate non-approved wheels and tires to
determine if they are suited for use, and there-
fore cannot ensure the operating safety of the
vehicle if they are mounted. <
Your MINI dealer will be glad to inform you
about the correct wheel an d tire combination for
your vehicle.
The correct combin ation of wheels and tires is
also necessary to ensure reliable operation of
various vehicle systems such as ABS and DSC.
To maintain good handling and vehicle
response, use only tires of a single brand and
tread configuration. Afte r a tire has been dam-
aged, mount the previous wheel and tire combi-
nation again as soon as possible.
Wheels with Tire Pr essure Monitor TPM
electronics
When mounting new tires or changing over from
summer to winter tires, or vice versa, only use
wheels with TPM electronics; otherwise, the Tire
Pressure Monitor may not be able to detect a
puncture, refer to page 75. Your MINI dealer will
be glad to advise you.
Recommended tire brands
For each tire size, the manufacturer of your MINI
recommends certain tire brands. They are