audio MINI Clubman 2011 Owner's Manual (Mini Connected)
[x] Cancel search | Manufacturer: MINI, Model Year: 2011, Model line: Clubman, Model: MINI Clubman 2011Pages: 256, PDF Size: 3.75 MB
Page 17 of 256
CockpitAT A GLANCE
15
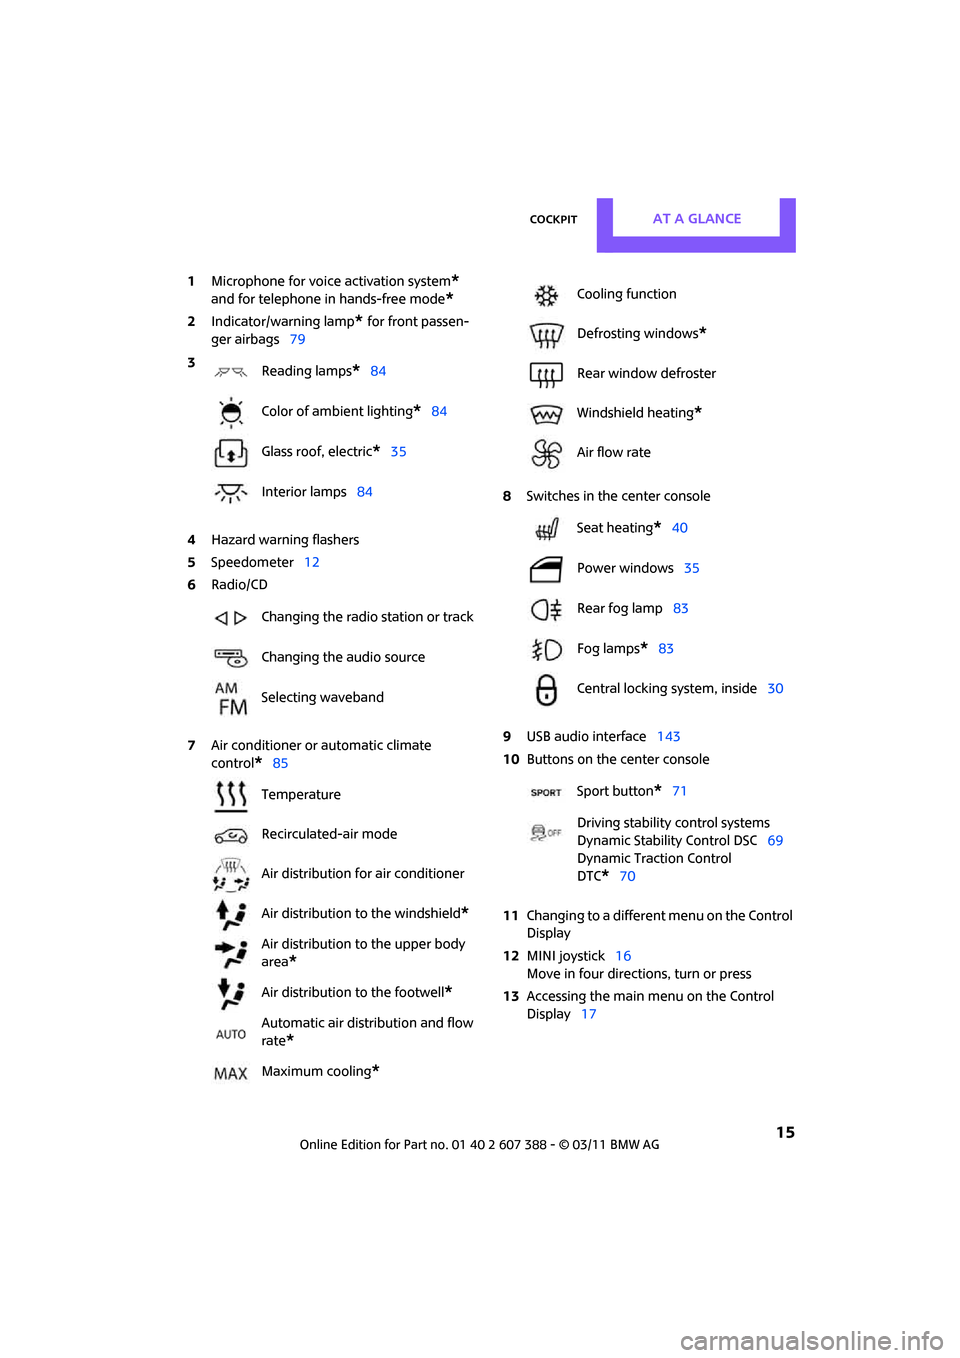
1Microphone for voice activation system*
and for telephone in hands-free mode*
2Indicator/warning lamp* for front passen-
ger airbags 79
4 Hazard warning flashers
5 Speedometer 12
6 Radio/CD
7 Air conditioner or automatic climate
control
*85 8
Switches in the center console
9 USB audio interface 143
10 Buttons on the center console
11 Changing to a differen t menu on the Control
Display
12 MINI joystick 16
Move in four directions, turn or press
13 Accessing the main me nu on the Control
Display 17
3
Reading lamps
*84
Color of ambient lighting
*84
Glass roof, electric
*35
Interior lamps 84
Changing the radio station or track
Changing the audio source
Selecting waveband
Temperature
Recirculated-air mode
Air distribution for air conditioner
Air distribution to the windshield
*
Air distribution to the upper body
area
*
Air distribution to the footwell*
Automatic air distribution and flow
rate
*
Maximum cooling*
Cooling function
Defrosting windows
*
Rear window defroster
Windshield heating
*
Air flow rate
Seat heating
*40
Power windows 35
Rear fog lamp 83
Fog lamps
*83
Central locking system, inside 30
Sport button
*71
Driving stability control systems
Dynamic Stability Control DSC 69
Dynamic Traction Control
DTC*70
Page 95 of 256

Practical interior accessoriesCONTROLS
93
Connection for external
audio device
You can connect an external audio device such
as a CD or MP3 player and play audio tracks over
the vehicle's speaker system, refer to the Enter-
tainment chapter starting on page 142.
Center armrest*
Storage compartment
The center armrest between the front seats con-
tains either a compartment or the cover for the
mobile phone base plate
* or the snap-in
adapter
*.
Opening
The cover slides along guide rails and can be
opened fully by pushing it back and lifting it.
Closing
Push the cover forward.
Storage compartments
In the vehicle interior
Depending on your vehicle's equipment, you
will find storage compartments in the doors,
next to the rear seats and in the center console
*.
Nets
* are located in the passenger footwell and
on the backs of the front seat backrests.
Storage compartment on the front
passenger side*
Opening
Briefly press the bottom edge of the cover.
Closing
Push the cover back into its original position.
To prevent injury in the event of an acci-
dent, close the storage compartment after
use while the vehicle is being driven. <
Clothes hooks
There are clothes hooks on the grab handles in
the rear passenger compartment.
Items of clothing hung from the hooks
must not obstruct the driver's view. Do not
hang heavy objects from the hooks; otherwise,
they could endanger the car's occupants, e.g. in
case of heavy braking or sudden swerving. <
In the cargo area
Depending on your vehicle's equipment, you
have the following storage options:
>Umbrella holder
* under the loading sill in
front of the warning triangle
> Storage compartment under the flat load
floor
*
>Removable box with lid* under the flat load
floor, e.g. for wet or dirty items
> Storage compartment in the Split Rear Barn
Doors
> Net
* on the rear cargo well for smaller
objects; for attaching to the lashing eyes
Page 110 of 256
NAVIGATIONNavigation system
108
Navigation system
General information
The navigation system can determine the pre-
cise position of the vehicle, with the aid of satel-
lites and vehicle sensors, and can reliably guide
you to every entered destination.
Enter data only with the vehicle station-
ary, and always give priority to the appli-
cable traffic regulations in the event of any con-
tradiction between traffic and road conditions
and the instructions issu ed by the navigation
system. Failure to take to this precaution can
place you in violation of the law and put vehicle
occupants and other ro ad users in danger.<
Navigation data
General information
Navigation data are stored in the vehicle and
can be updated.
You can obtain navigation data and an activa-
tion code from your MINI dealer.
Updating the data can take several hours,
depending on the volume of data.
> Update data while driving to reduce the
drain on the battery.
> The update is resumed automatically when
a trip is continued after an interruption.
> Only the main functions of the navigation
system are available during updating.
> You can inquire as to the status of the
update.
> The data are stored in the vehicle.
> After the updating process is complete, the
system restarts.
> The medium with the na vigation data can be
removed after the update.
Information on navigation data
1. "Navigation"
2. Open "Options".
3. "Navigation system version"
Information about the data version is displayed.
Updating the navigation data
1.Insert USB storage device with navigation
data
>Into the USB interface in the glove com-
partment
*
>Into the USB audio interface*.
2. Follow the instructions on the on-board
computer.
3. Enter the activation code of the USB storage
device.
4. Begin driving.
After you begin to drive, the system restarts and
updates the navigation data as you drive
*.
Selecting navigation
1. "Navigation"
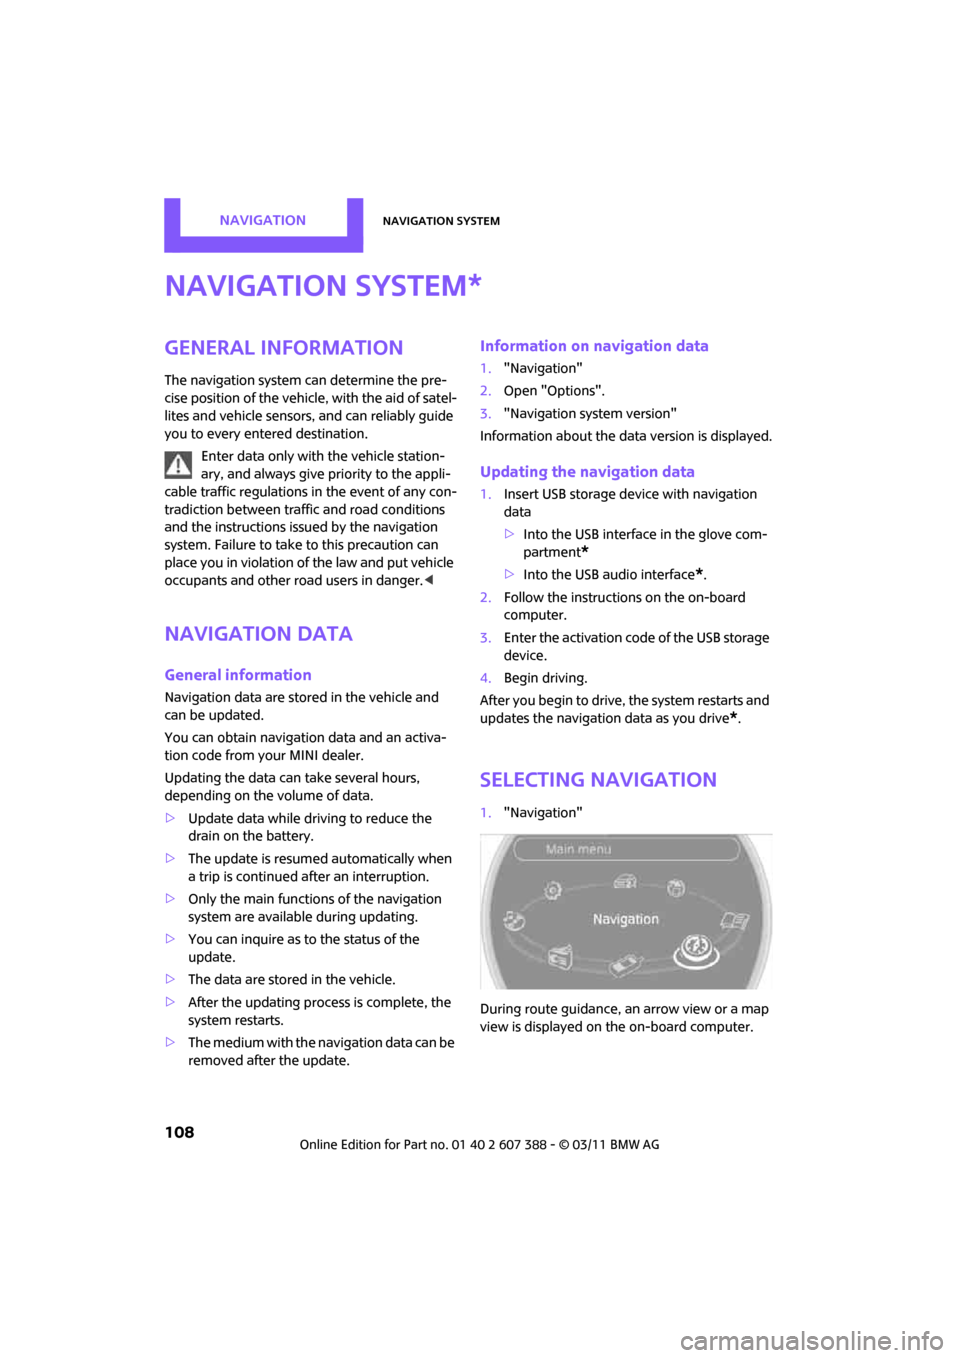
During route guidance, an arrow view or a map
view is displayed on the on-board computer.
*
Page 124 of 256
NAVIGATIONRoute guidance
122
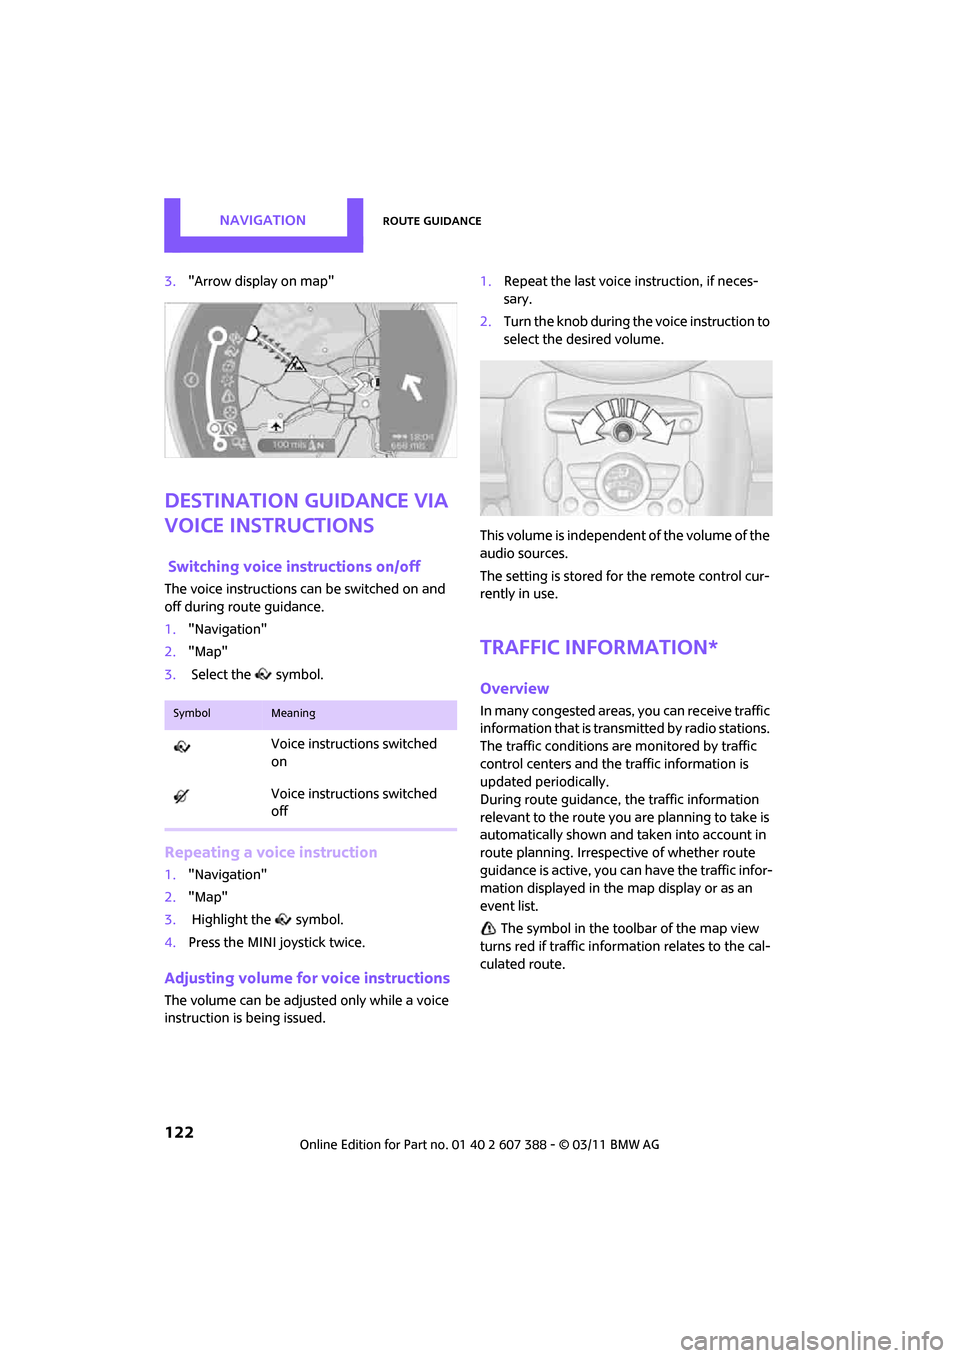
3."Arrow display on map"
Destination guidance via
voice instructions
Switching voice in structions on/off
The voice instructions can be switched on and
off during route guidance.
1. "Navigation"
2. "Map"
3. Select the symbol.
Repeating a voice instruction
1."Navigation"
2. "Map"
3. Highlight the symbol.
4. Press the MINI joystick twice.
Adjusting volume fo r voice instructions
The volume can be adjusted only while a voice
instruction is being issued. 1.
Repeat the last voice instruction, if neces-
sary.
2. Turn the knob during the voice instruction to
select the de sired volume.
This volume is independent of the volume of the
audio sources.
The setting is stored fo r the remote control cur-
rently in use.
Traffic information*
Overview
In many congested areas, you can receive traffic
information that is transmitted by radio stations.
The traffic conditions are monitored by traffic
control centers and the traffic information is
updated periodically.
During route guidance, the traffic information
relevant to the route you are planning to take is
automatically shown and taken into account in
route planning. Irrespective of whether route
guidance is active, you can have the traffic infor-
mation displayed in the map display or as an
event list.
The symbol in the toolbar of the map view
turns red if traffic inform ation relates to the cal-
culated route.SymbolMeaning
Voice instructions switched
on
Voice instructions switched
off
Page 132 of 256
ENTERTAINMENTOn/off and tone
130
On/off and tone
The following audio sources have shared control
elements and setting options:
> Radio
> CD player
> External devices, e.g. MP3 player
Controls
The audio sources can be operated using:
>Buttons near the CD player
> On-board computer
> Buttons on the steering wheel, refer to
page 10
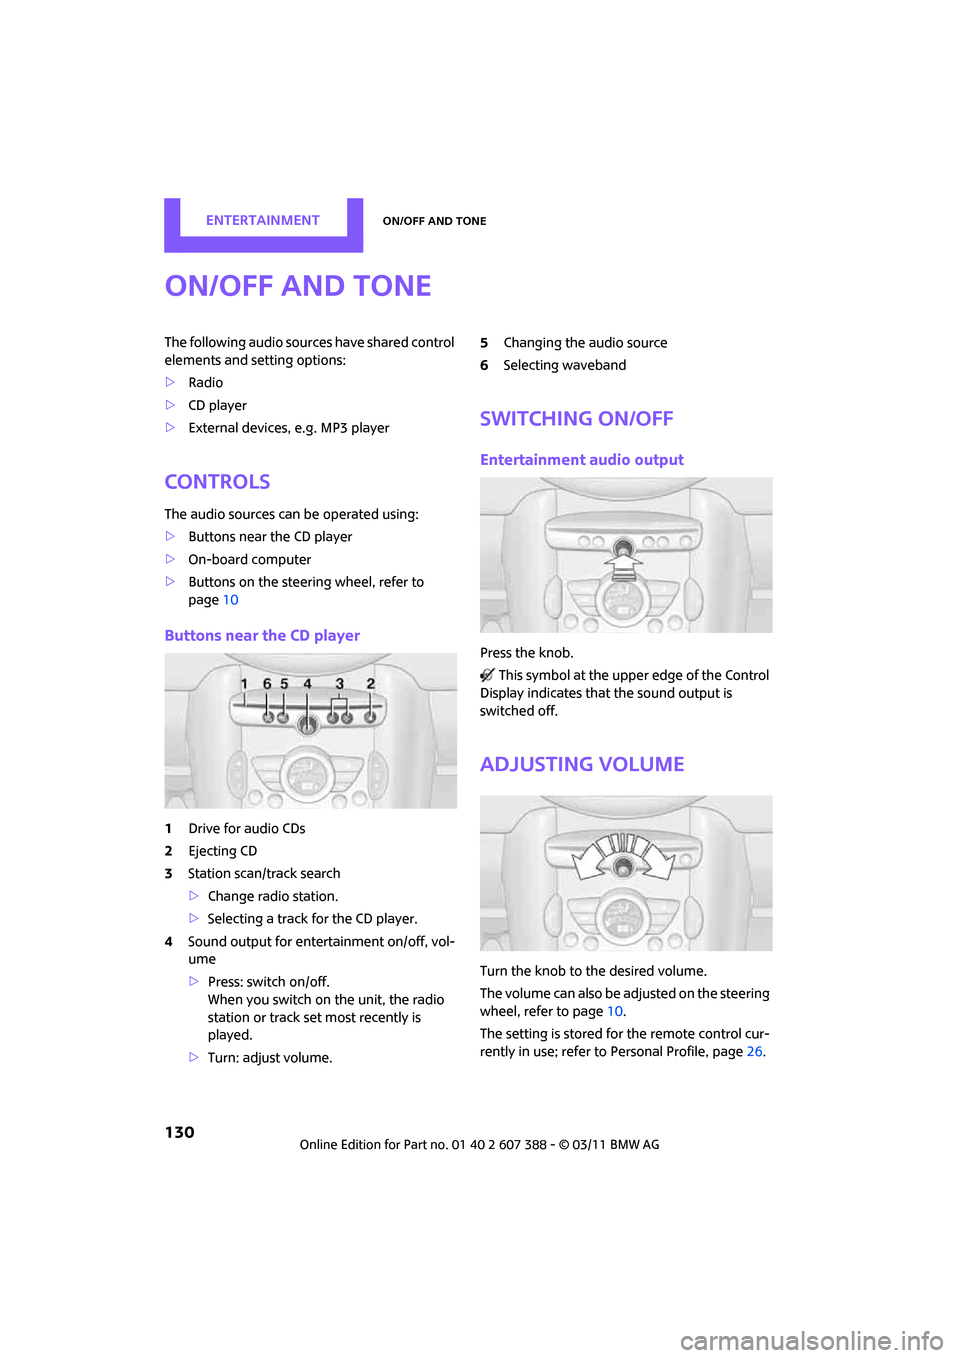
Buttons near the CD player
1Drive for audio CDs
2 Ejecting CD
3 Station scan/track search
>Change radio station.
> Selecting a track for the CD player.
4 Sound output for ente rtainment on/off, vol-
ume
> Press: switch on/off.
When you switch on the unit, the radio
station or track set most recently is
played.
> Turn: adjust volume. 5
Changing the audio source
6 Selecting waveband
Switching On/Off
Entertainment audio output
Press the knob.
This symbol at the upper edge of the Control
Display indicates that the sound output is
switched off.
Adjusting volume
Turn the knob to the desired volume.
The volume can also be adjusted on the steering
wheel, refer to page 10.
The setting is stored fo r the remote control cur-
rently in use; refer to Personal Profile, page 26.
Page 133 of 256
On/off and toneENTERTAINMENT
131
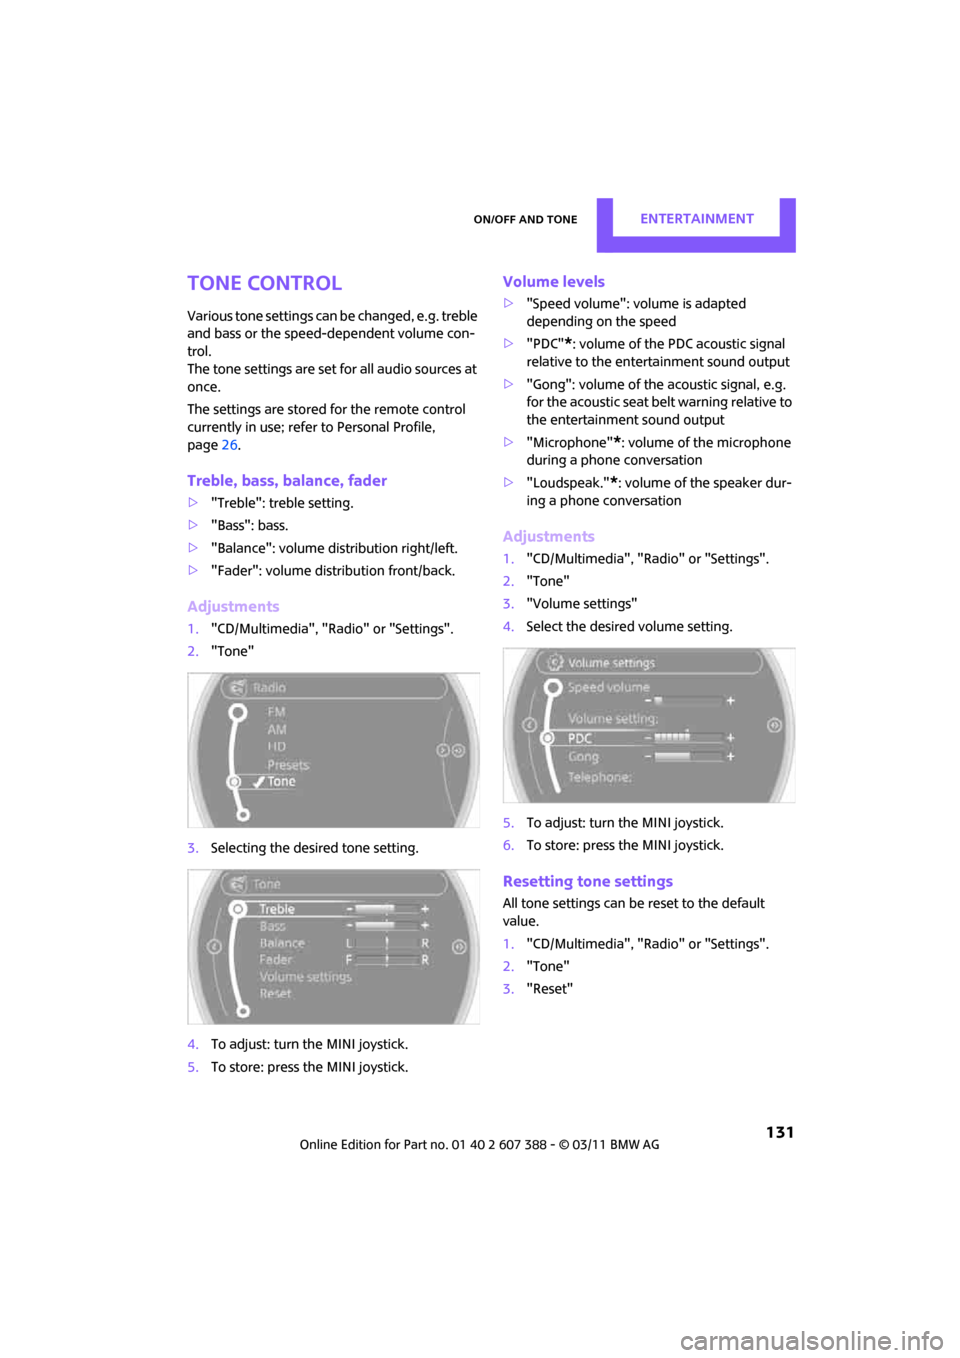
Tone control
Various tone settings can be changed, e.g. treble
and bass or the speed-dependent volume con-
trol.
The tone settings are set for all audio sources at
once.
The settings are stored for the remote control
currently in use; refer to Personal Profile,
page 26.
Treble, bass, balance, fader
> "Treble": treble setting.
> "Bass": bass.
> "Balance": volume distribution right/left.
> "Fader": volume distribution front/back.
Adjustments
1."CD/Multimedia", "Rad io" or "Settings".
2. "Tone"
3. Selecting the desired tone setting.
4. To adjust: turn the MINI joystick.
5. To store: press the MINI joystick.
Volume levels
>"Speed volume": vo lume is adapted
depending on the speed
> "PDC"
*: volume of the PDC acoustic signal
relative to the entertainment sound output
> "Gong": volume of the acoustic signal, e.g.
for the acoustic seat belt warning relative to
the entertainment sound output
> "Microphone"
*: volume of the microphone
during a phone conversation
> "Loudspeak."
*: volume of the speaker dur-
ing a phone conversation
Adjustments
1. "CD/Multimedia", "Rad io" or "Settings".
2. "Tone"
3. "Volume settings"
4. Select the desired volume setting.
5. To adjust: turn the MINI joystick.
6. To store: press the MINI joystick.
Resetting tone settings
All tone settings can be reset to the default
value.
1."CD/Multimedia", "Rad io" or "Settings".
2. "Tone"
3. "Reset"
Page 138 of 256
ENTERTAINMENTRadio
136
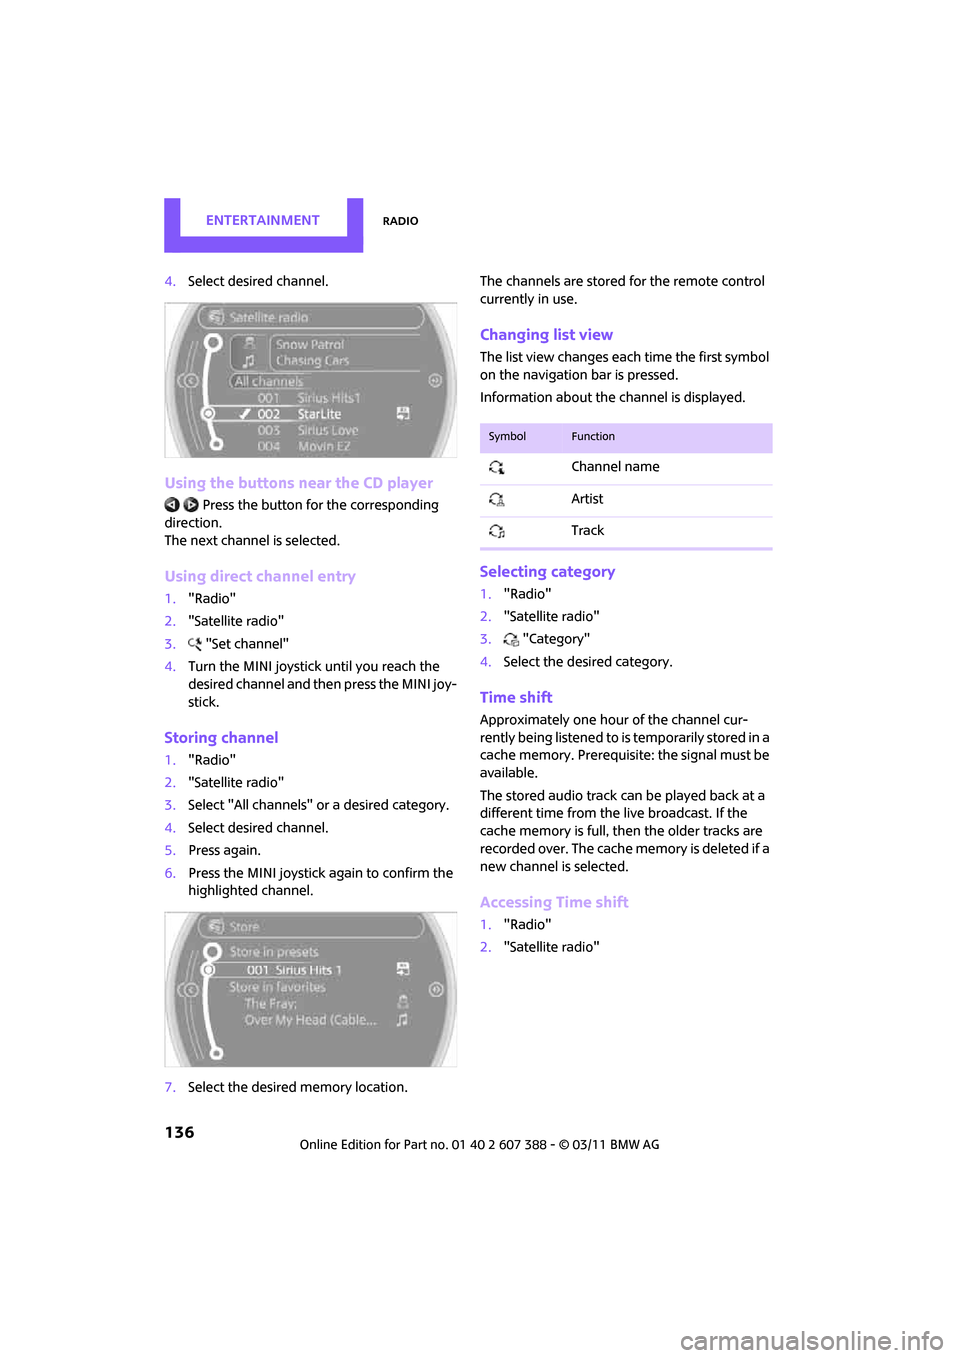
4.Select desired channel.
Using the buttons near the CD player
Press the button fo r the corresponding
direction.
The next channel is selected.
Using direct channel entry
1. "Radio"
2. "Satellite radio"
3. "Set channel"
4. Turn the MINI joystick until you reach the
desired channel and then press the MINI joy-
stick.
Storing channel
1."Radio"
2. "Satellite radio"
3. Select "All channels" or a desired category.
4. Select desired channel.
5. Press again.
6. Press the MINI joystick again to confirm the
highlighted channel.
7. Select the desired memory location. The channels are stored for the remote control
currently in use.
Changing list view
The list view changes each time the first symbol
on the navigation bar is pressed.
Information about the channel is displayed.
Selecting category
1.
"Radio"
2. "Satellite radio"
3. "Category"
4. Select the desired category.
Time shift
Approximately one hour of the channel cur-
rently being listened to is temporarily stored in a
cache memory. Prerequisite: the signal must be
available.
The stored audio track can be played back at a
different time from the live broadcast. If the
cache memory is full, then the older tracks are
recorded over. The cache memory is deleted if a
new channel is selected.
Accessing Time shift
1. "Radio"
2. "Satellite radio"
SymbolFunction
Channel name
Artist
Track
Page 139 of 256
RadioENTERTAINMENT
137
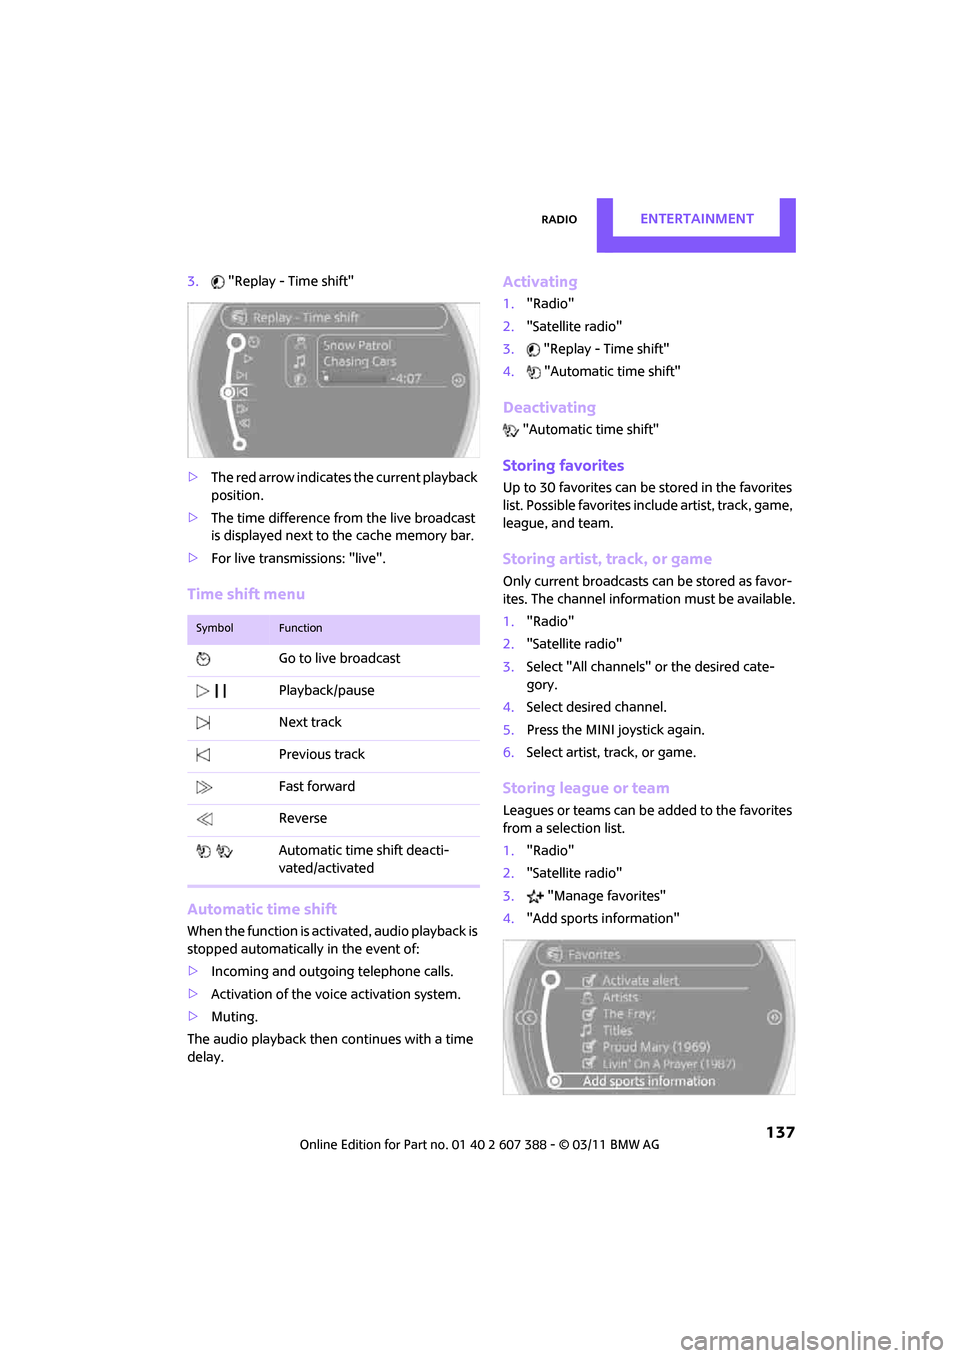
3."Replay - Time shift"
> The red arrow indicates the current playback
position.
> The time difference fr om the live broadcast
is displayed next to the cache memory bar.
> For live transmissions: "live".
Time shift menu
Automatic time shift
When the function is acti vated, audio playback is
stopped automatically in the event of:
> Incoming and outgoing telephone calls.
> Activation of the voice activation system.
> Muting.
The audio playback then continues with a time
delay.
Activating
1. "Radio"
2. "Satellite radio"
3. "Replay - Time shift"
4. "Automatic time shift"
Deactivating
"Automatic time shift"
Storing favorites
Up to 30 favorites can be stored in the favorites
list. Possible favorites include artist, track, game,
league, and team.
Storing artist, track, or game
Only current broadcasts can be stored as favor-
ites. The channel informat ion must be available.
1. "Radio"
2. "Satellite radio"
3. Select "All channels" or the desired cate-
gory.
4. Select desired channel.
5. Press the MINI joystick again.
6. Select artist, track, or game.
Storing league or team
Leagues or teams can be added to the favorites
from a selection list.
1."Radio"
2. "Satellite radio"
3. "Manage favorites"
4. "Add sports information"
SymbolFunction
Go to live broadcast
Playback/pause
Next track
Previous track
Fast forward
Reverse
Automatic time shift deacti-
vated/activated
Page 142 of 256
ENTERTAINMENTCD player
140
CD player
General information
Inserting CD
Insert the CD into the drive with the labeled side
up. Die CD is automatically pulled in.
Playback starts automatically if the sound out-
put is on. For CDs with compressed audio files, it
can take several minutes to the data, depending
on the folder structure.
Playable formats
CD player*
> CD: CD-ROM, CD-R, CD-RW, CD-DA
> Compressed audio files: MP3, WMA, AAC
Ejecting CD
Press the button on the CD player.
The CD will be slid a sh ort distance out from the
drive.
Audio playback
Selecting the track using the button
Press the button fo r the corresponding
direction repeatedly unti l you reach the desired
track.
Selecting the track using the on-board
computer
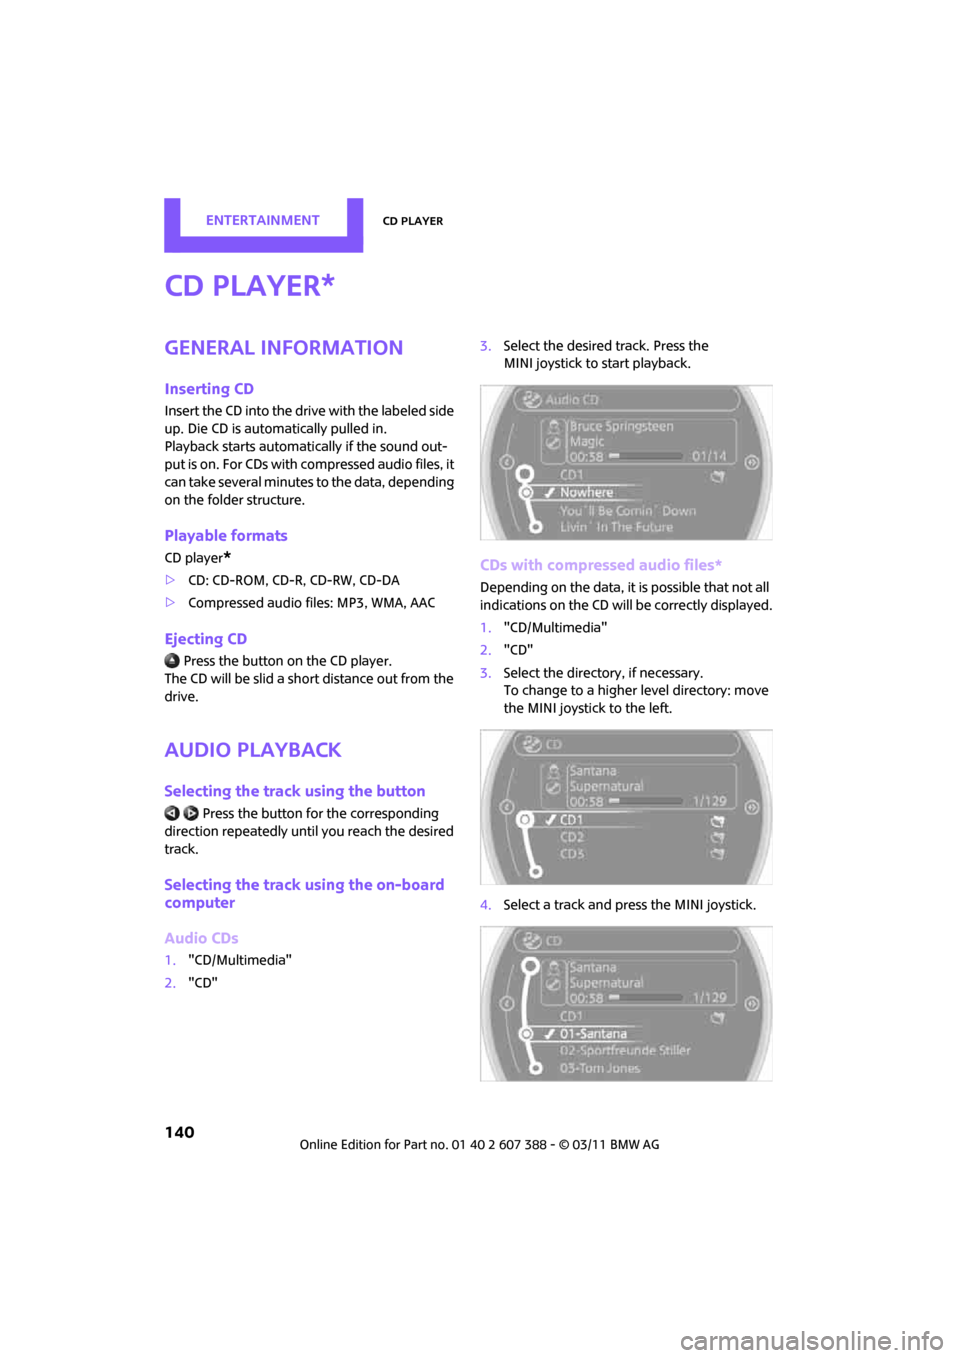
Audio CDs
1. "CD/Multimedia"
2. "CD" 3.
Select the desired track. Press the
MINI joystick to start playback.
CDs with compressed audio files*
Depending on the data, it is possible that not all
indications on the CD will be correctly displayed.
1."CD/Multimedia"
2. "CD"
3. Select the directory, if necessary.
To change to a higher level directory: move
the MINI joystick to the left.
4. Select a track and press the MINI joystick.
*
Page 143 of 256
CD playerENTERTAINMENT
141
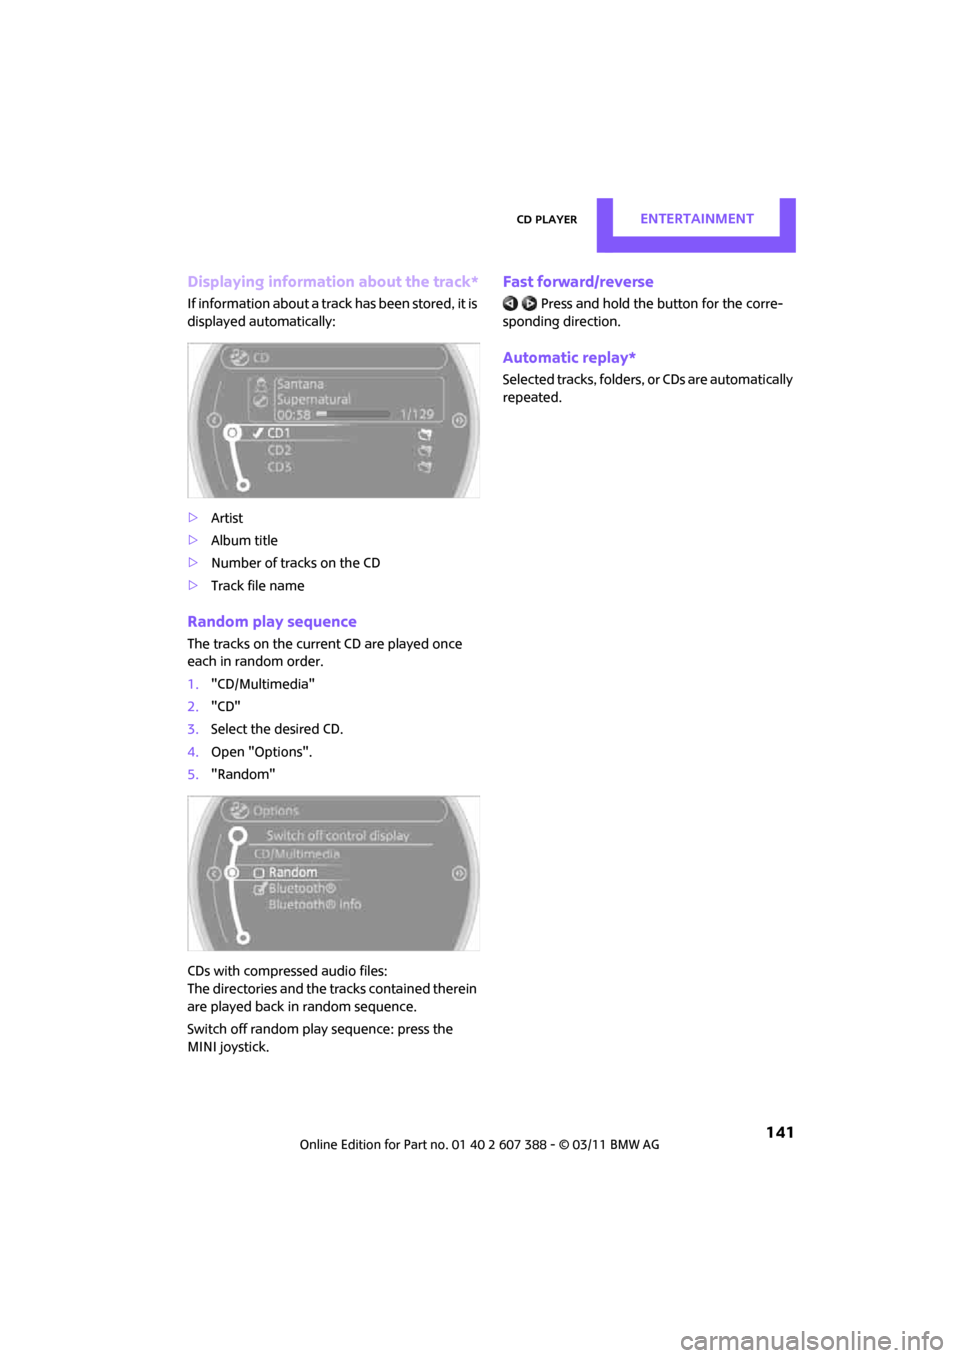
Displaying information about the track*
If information about a track has been stored, it is
displayed automatically:
>Artist
> Album title
> Number of tracks on the CD
> Track file name
Random play sequence
The tracks on the current CD are played once
each in random order.
1."CD/Multimedia"
2. "CD"
3. Select the desired CD.
4. Open "Options".
5. "Random"
CDs with compressed audio files:
The directories and the tr acks contained therein
are played back in random sequence.
Switch off random play sequence: press the
MINI joystick.
Fast forward/reverse
Press and hold the button for the corre-
sponding direction.
Automatic replay*
Selected tracks, folders, or CDs are automatically
repeated.