ESP MINI Clubman 2016 (Mini Connected) Owner's Guide
[x] Cancel search | Manufacturer: MINI, Model Year: 2016, Model line: Clubman, Model: MINI Clubman 2016Pages: 246, PDF Size: 5.21 MB
Page 64 of 246
DrivingVehicle features and op‐
tions
This chapter describes all standard, country-
specific and optional features offered with the
series. It also describes features that are not
necessarily available in your car, e. g., due to
the selected options or country versions. This
also applies to safety-related functions and sys‐
tems. The respectively applicable country provi‐
sions must be observed when using the respec‐
tive features and systems.
Start/Stop button
The concept
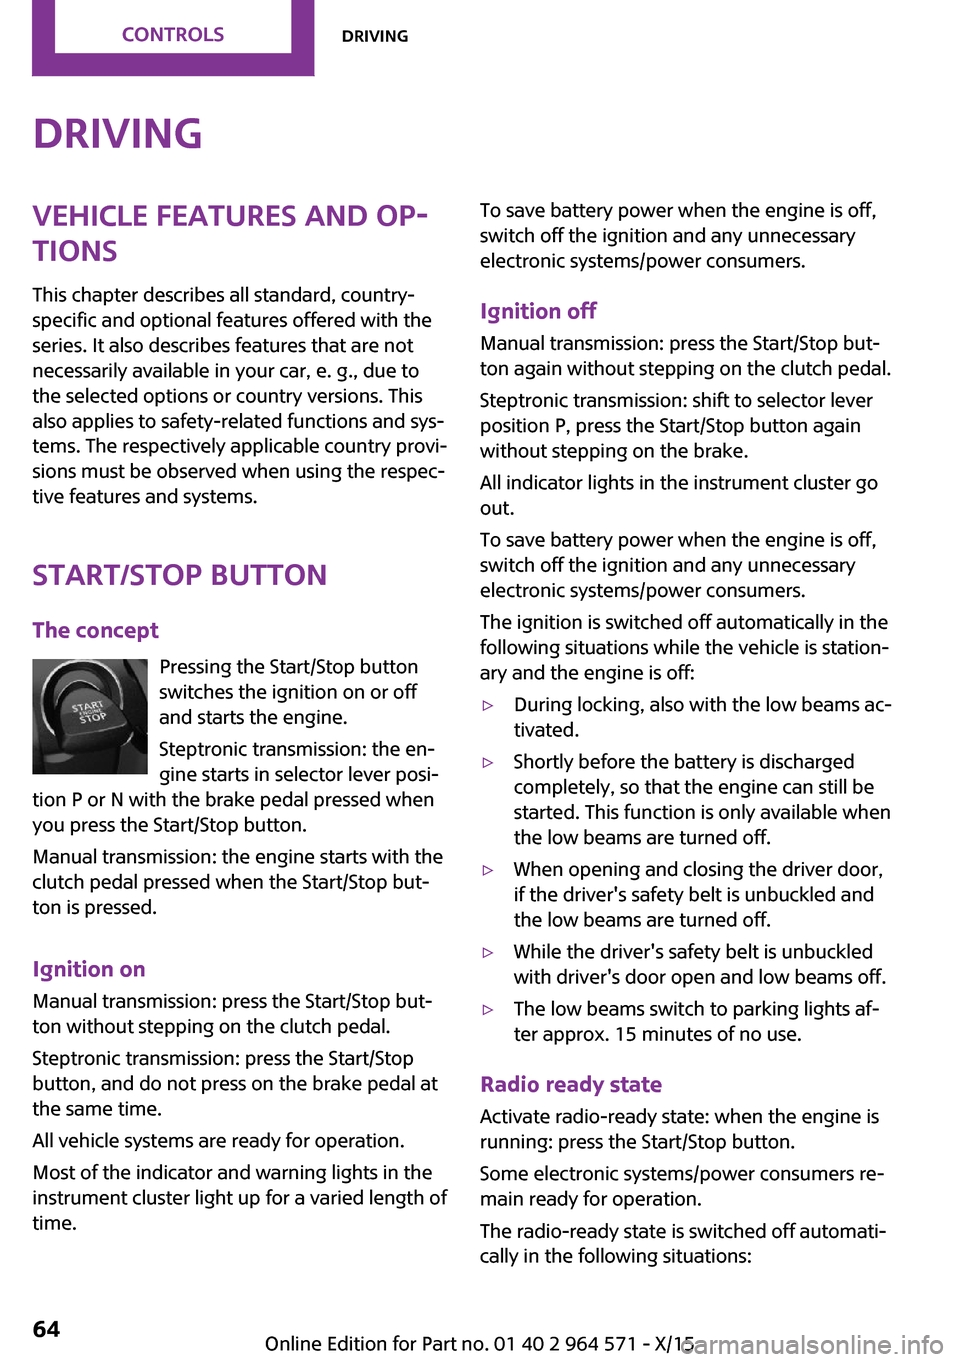
Pressing the Start/Stop button
switches the ignition on or off
and starts the engine.
Steptronic transmission: the en‐
gine starts in selector lever posi‐
tion P or N with the brake pedal pressed when
you press the Start/Stop button.
Manual transmission: the engine starts with the
clutch pedal pressed when the Start/Stop but‐
ton is pressed.
Ignition on
Manual transmission: press the Start/Stop but‐
ton without stepping on the clutch pedal.
Steptronic transmission: press the Start/Stop
button, and do not press on the brake pedal at
the same time.
All vehicle systems are ready for operation.
Most of the indicator and warning lights in the
instrument cluster light up for a varied length of
time.
To save battery power when the engine is off,
switch off the ignition and any unnecessary
electronic systems/power consumers.
Ignition off
Manual transmission: press the Start/Stop but‐
ton again without stepping on the clutch pedal.
Steptronic transmission: shift to selector lever
position P, press the Start/Stop button again
without stepping on the brake.
All indicator lights in the instrument cluster go
out.
To save battery power when the engine is off,
switch off the ignition and any unnecessary
electronic systems/power consumers.
The ignition is switched off automatically in the
following situations while the vehicle is station‐
ary and the engine is off:
▷During locking, also with the low beams ac‐
tivated.
▷Shortly before the battery is discharged
completely, so that the engine can still be
started. This function is only available when
the low beams are turned off.
▷When opening and closing the driver door,
if the driver's safety belt is unbuckled and
the low beams are turned off.
▷While the driver's safety belt is unbuckled
with driver's door open and low beams off.
▷The low beams switch to parking lights af‐
ter approx. 15 minutes of no use.
Radio ready state
Activate radio-ready state: when the engine is
running: press the Start/Stop button.
Some electronic systems/power consumers re‐
main ready for operation.
The radio-ready state is switched off automati‐
cally in the following situations:
Seite 64CONTROLSDriving64
Online Edition for Part no. 01 40 2 964 571 - X/15
Page 65 of 246
▷After approx. 8 minutes.▷When the vehicle is locked using the central
locking system.
▷Shortly before the battery is discharged
completely, so that the engine can still be
started.
The radio-ready state remains active if, for ex‐
ample, the ignition is automatically switched off
for the following reasons:
▷Opening or closing the driver's door.▷Unfastening of the driver's safety belt.▷When automatically switching from low
beams to parking lights.
If the engine is switched off and the ignition is
switched on, the system automatically switches
to the radio-ready state if the lights are turned
off or, if correspondingly equipped, the day‐
time running lights are activated.
Starting the engine
Information
DANGER
If the exhaust pipe is blocked or ventila‐
tion is insufficient, harmful exhaust gases can
enter into the vehicle. The exhaust gases con‐
tain carbon monoxide, an odorless and color‐
less but highly toxic gas. In enclosed areas, ex‐
haust gases can also accumulate outside of the
vehicle. There is danger to life. Keep the ex‐
haust pipe free and ensure sufficient ventila‐
tion.◀
WARNING
An unsecured vehicle can put itself into
motion and roll away. There is risk of an acci‐
dent. Before exiting, secure the vehicle against
rolling.
In order to ensure that the vehicle is secured
against rolling away, observe the following:
▷Set the parking brake.▷On uphill grades or on a slope, turn the
front wheels in the direction of the curb.
▷On uphill grades or on a slope, also secure
the vehicle, for example with a wheel
chock.◀
CAUTION
In the case of repeated starting attempts
or repeated starting in quick succession, the
fuel is not burned or is inadequately burned.
The catalytic converter can overheat. There is
risk of property damage. Avoid repeated start‐
ing in quick succession.◀
Steptronic transmission
Starting the engine
1.Depress the brake pedal.2.Engage selector lever position P or N.3.Press the Start/Stop button.
The ignition is activated automatically for a cer‐
tain time and is stopped as soon as the engine
starts.
Manual transmission
Starting the engine
1.Depress the brake pedal.2.Press on the clutch pedal and shift to neu‐
tral.
3.Press the Start/Stop button.
The ignition is activated automatically for a cer‐
tain time and is stopped as soon as the engine
starts.
Engine stop
Information
WARNING
Unattended children or animals can move
the vehicle and endanger themselves and traf‐
fic, for example with the following actions:
Seite 65DrivingCONTROLS65
Online Edition for Part no. 01 40 2 964 571 - X/15
Page 76 of 246
Sport program and manual mode M/S
Activating the sport program
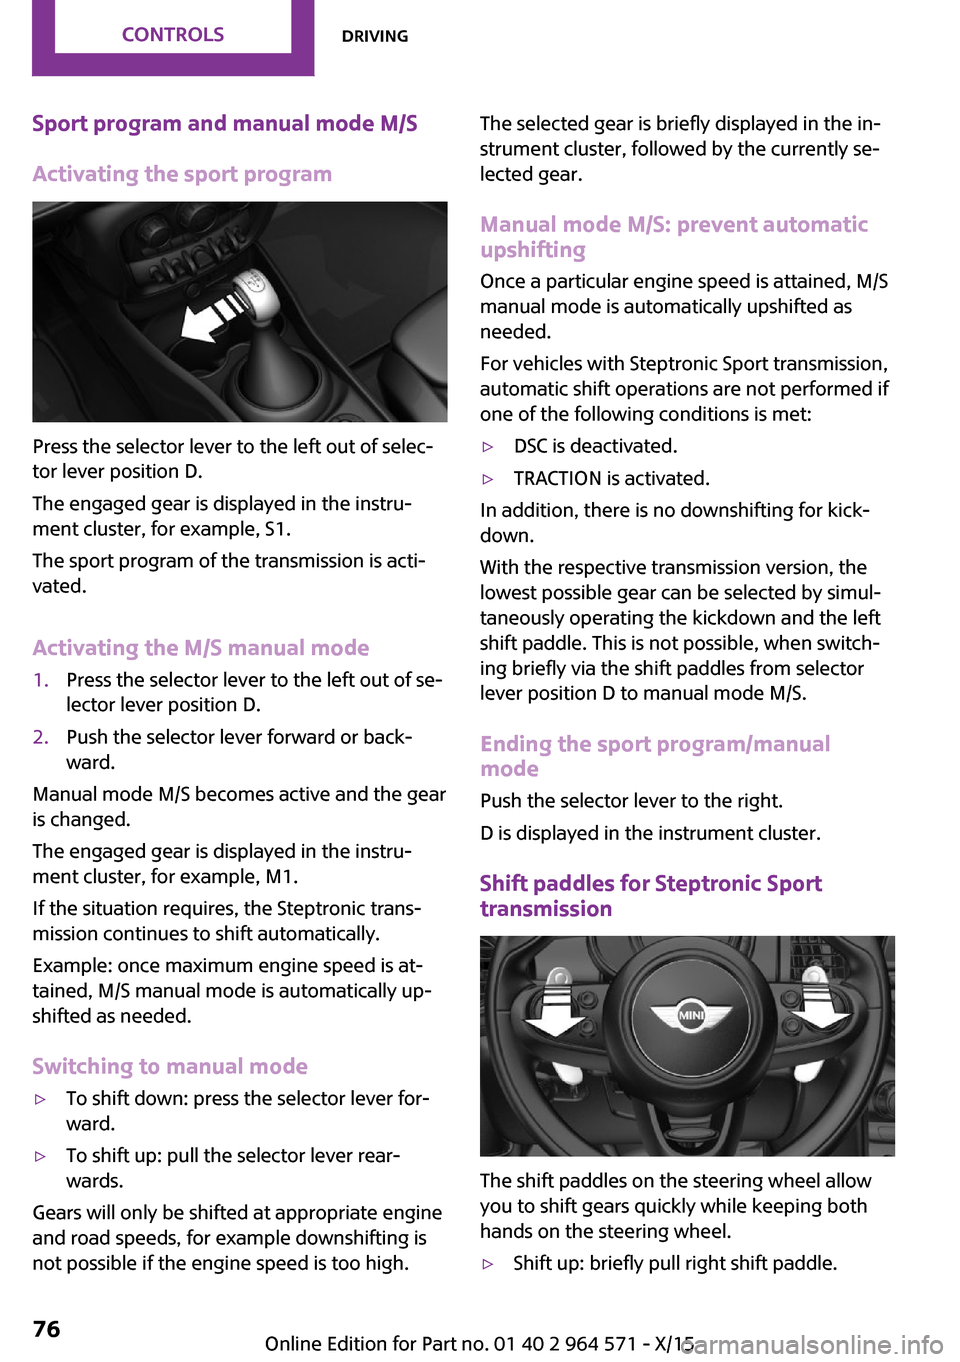
Press the selector lever to the left out of selec‐
tor lever position D.
The engaged gear is displayed in the instru‐
ment cluster, for example, S1.
The sport program of the transmission is acti‐
vated.
Activating the M/S manual mode
1.Press the selector lever to the left out of se‐
lector lever position D.
2.Push the selector lever forward or back‐
ward.
Manual mode M/S becomes active and the gear
is changed.
The engaged gear is displayed in the instru‐
ment cluster, for example, M1.
If the situation requires, the Steptronic trans‐
mission continues to shift automatically.
Example: once maximum engine speed is at‐
tained, M/S manual mode is automatically up‐
shifted as needed.
Switching to manual mode
▷To shift down: press the selector lever for‐
ward.
▷To shift up: pull the selector lever rear‐
wards.
Gears will only be shifted at appropriate engine
and road speeds, for example downshifting is
not possible if the engine speed is too high.
The selected gear is briefly displayed in the in‐
strument cluster, followed by the currently se‐
lected gear.
Manual mode M/S: prevent automatic
upshifting
Once a particular engine speed is attained, M/S
manual mode is automatically upshifted as
needed.
For vehicles with Steptronic Sport transmission,
automatic shift operations are not performed if
one of the following conditions is met:
▷DSC is deactivated.▷TRACTION is activated.
In addition, there is no downshifting for kick‐
down.
With the respective transmission version, the
lowest possible gear can be selected by simul‐
taneously operating the kickdown and the left
shift paddle. This is not possible, when switch‐
ing briefly via the shift paddles from selector
lever position D to manual mode M/S.
Ending the sport program/manual
mode
Push the selector lever to the right.
D is displayed in the instrument cluster.
Shift paddles for Steptronic Sport
transmission
The shift paddles on the steering wheel allow
you to shift gears quickly while keeping both
hands on the steering wheel.
▷Shift up: briefly pull right shift paddle.Seite 76CONTROLSDriving76
Online Edition for Part no. 01 40 2 964 571 - X/15
Page 77 of 246
▷Shift down: briefly pull left shift paddle.▷The lowest possible gear can be selected by
pulling and holding the left shift paddle.
Gears will only be shifted at appropriate engine
and road speeds, for example downshifting is
not possible if the engine speed is too high.
The selected gear is briefly displayed in the in‐
strument cluster, followed by the current gear.
If the shift paddles on the steering wheel are
used to shift gears in automatic mode, the
transmission temporarily switches to manual
mode.
In the manual mode, after conservative driving
for a certain amount of time or if there has
been no acceleration or shifting of the shift
paddles within a certain amount of time, the
transmission switches back to automatic mode.
It is possible to switch into the automatic mode:
▷Pull and hold right shift paddle.
or
▷In addition to the briefly pulled right shift
paddle, briefly pull the left shift paddle.
Displays in the instrument cluster
The selector lever position is dis‐
played, for example: P.
Manually release the transmission lock
Should the selector lever be blocked in selector
lever position P despite the ignition being
turned on, the brake being depressed and the
unlock button being pressed, the transmission
lock can be manually canceled:
Before unlocking the transmission lock man‐
ually, set the parking brake to prevent the vehi‐
cle from rolling away.
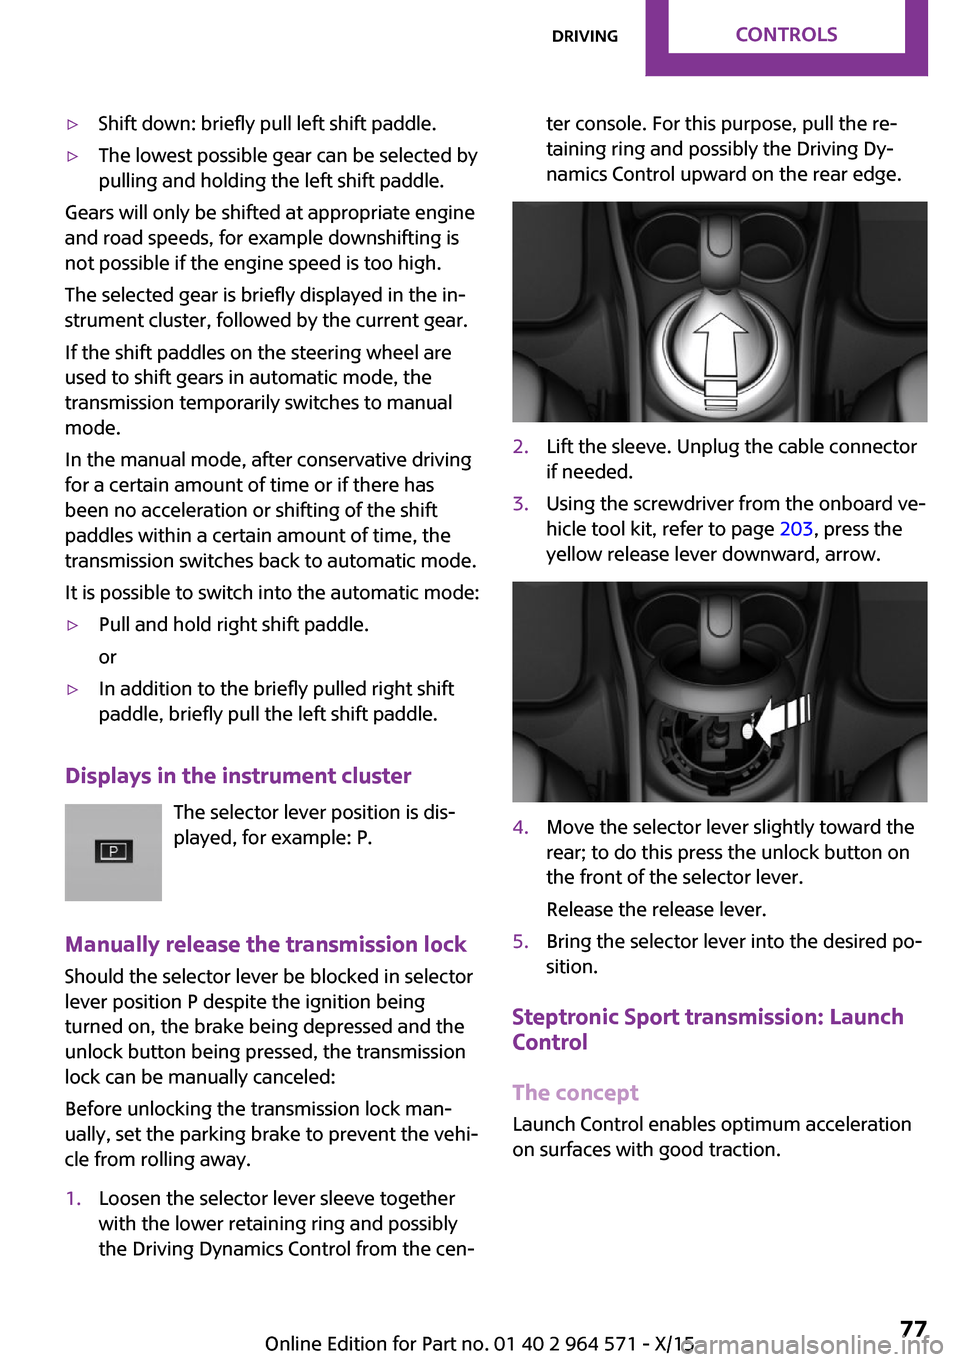
1.Loosen the selector lever sleeve together
with the lower retaining ring and possibly
the Driving Dynamics Control from the cen‐
ter console. For this purpose, pull the re‐
taining ring and possibly the Driving Dy‐
namics Control upward on the rear edge.
2.Lift the sleeve. Unplug the cable connector
if needed.
3.Using the screwdriver from the onboard ve‐
hicle tool kit, refer to page 203, press the
yellow release lever downward, arrow.
4.Move the selector lever slightly toward the
rear; to do this press the unlock button on
the front of the selector lever.
Release the release lever.
5.Bring the selector lever into the desired po‐
sition.
Steptronic Sport transmission: Launch
Control
The concept
Launch Control enables optimum acceleration
on surfaces with good traction.
Seite 77DrivingCONTROLS77
Online Edition for Part no. 01 40 2 964 571 - X/15
Page 79 of 246
DisplaysVehicle features and op‐
tions
This chapter describes all standard, country-
specific and optional features offered with the
series. It also describes features that are not
necessarily available in your car, e. g., due to
the selected options or country versions. This
also applies to safety-related functions and sys‐
tems. The respectively applicable country provi‐
sions must be observed when using the respec‐
tive features and systems.
Instrument cluster
Overview, instrument cluster
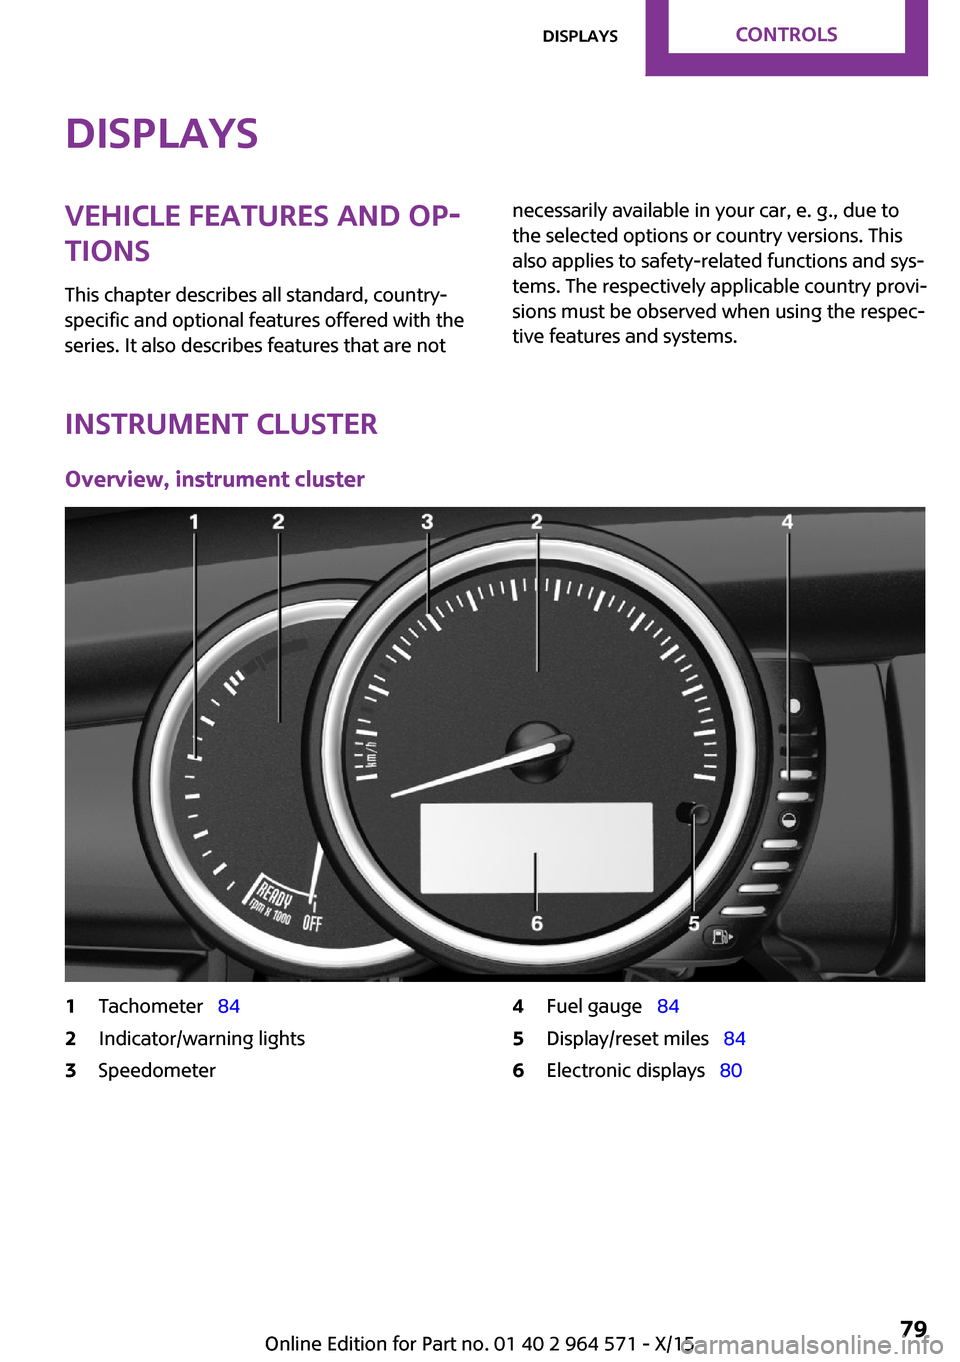
1Tachometer 842Indicator/warning lights3Speedometer4Fuel gauge 845Display/reset miles 846Electronic displays 80Seite 79DisplaysCONTROLS79
Online Edition for Part no. 01 40 2 964 571 - X/15
Page 86 of 246
On the Control Display:1. "Vehicle info"2."Vehicle status"3. "Service required"4."§ Vehicle inspection"5."Date:"6.Adjust the settings.7.Confirm.
The entered date is stored.
Gear shift indicator
The concept
The system recommends the most fuel efficient
gear for the current driving situation.
General information
Depending on the vehicle's features and coun‐
try version of the vehicle, the gear shift indica‐
tor is active in the manual mode of the Step‐
tronic transmission and with manual
transmission.
Suggestions to shift gear up or down are dis‐
played in the instrument cluster.
Manual transmission: displaying
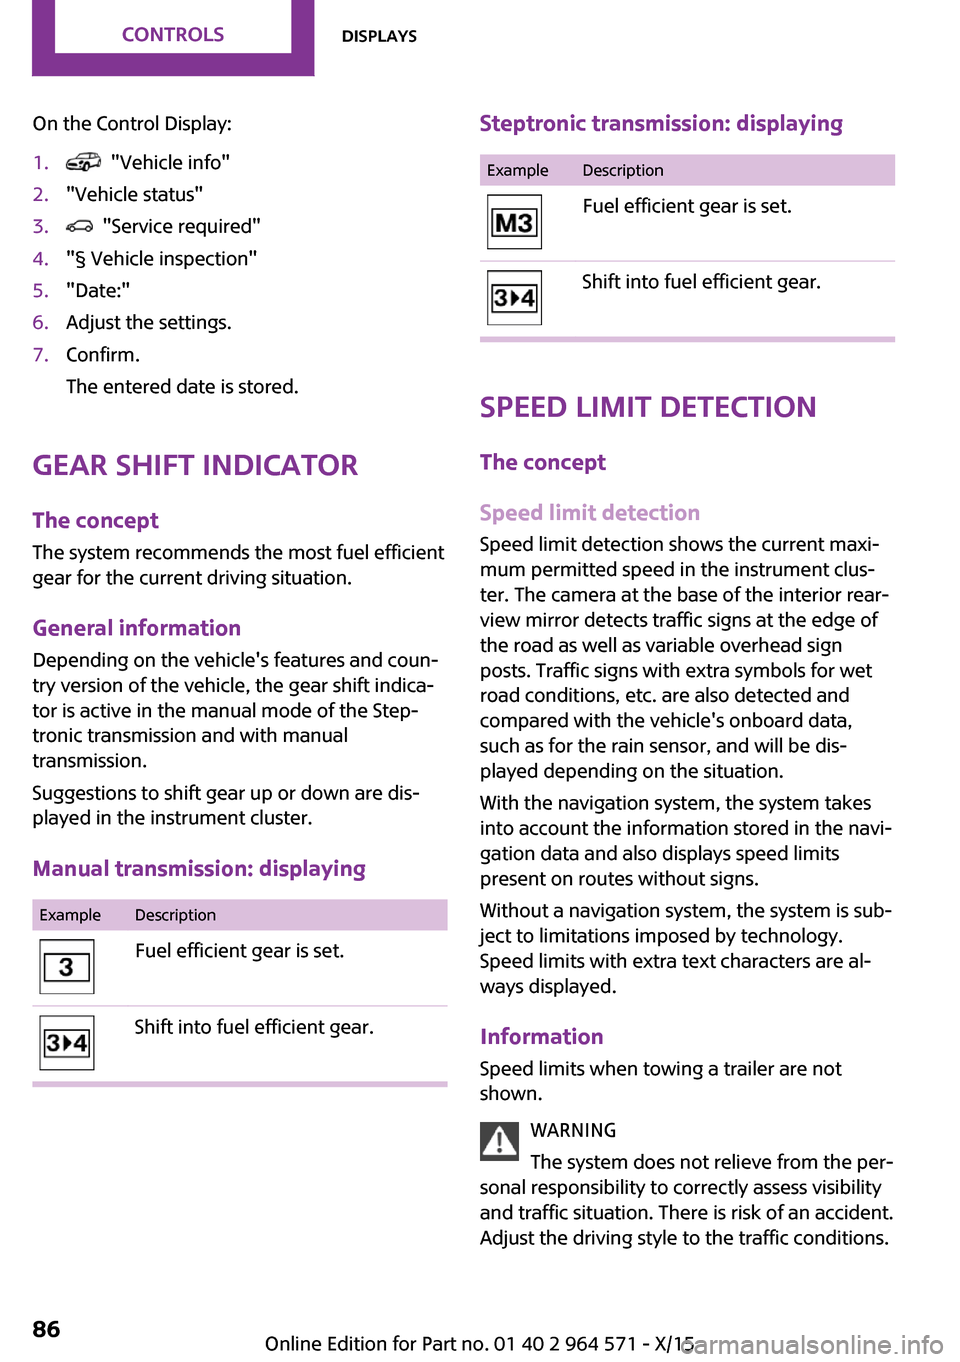
ExampleDescriptionFuel efficient gear is set.Shift into fuel efficient gear.Steptronic transmission: displayingExampleDescriptionFuel efficient gear is set.Shift into fuel efficient gear.
Speed limit detection
The concept
Speed limit detection
Speed limit detection shows the current maxi‐
mum permitted speed in the instrument clus‐
ter. The camera at the base of the interior rear‐
view mirror detects traffic signs at the edge of
the road as well as variable overhead sign
posts. Traffic signs with extra symbols for wet
road conditions, etc. are also detected and
compared with the vehicle's onboard data,
such as for the rain sensor, and will be dis‐
played depending on the situation.
With the navigation system, the system takes
into account the information stored in the navi‐
gation data and also displays speed limits
present on routes without signs.
Without a navigation system, the system is sub‐
ject to limitations imposed by technology.
Speed limits with extra text characters are al‐
ways displayed.
Information
Speed limits when towing a trailer are not
shown.
WARNING
The system does not relieve from the per‐
sonal responsibility to correctly assess visibility
and traffic situation. There is risk of an accident.
Adjust the driving style to the traffic conditions.
Seite 86CONTROLSDisplays86
Online Edition for Part no. 01 40 2 964 571 - X/15
Page 87 of 246
Watch traffic closely and actively interfere in
the respective situations.◀
Overview
Camera
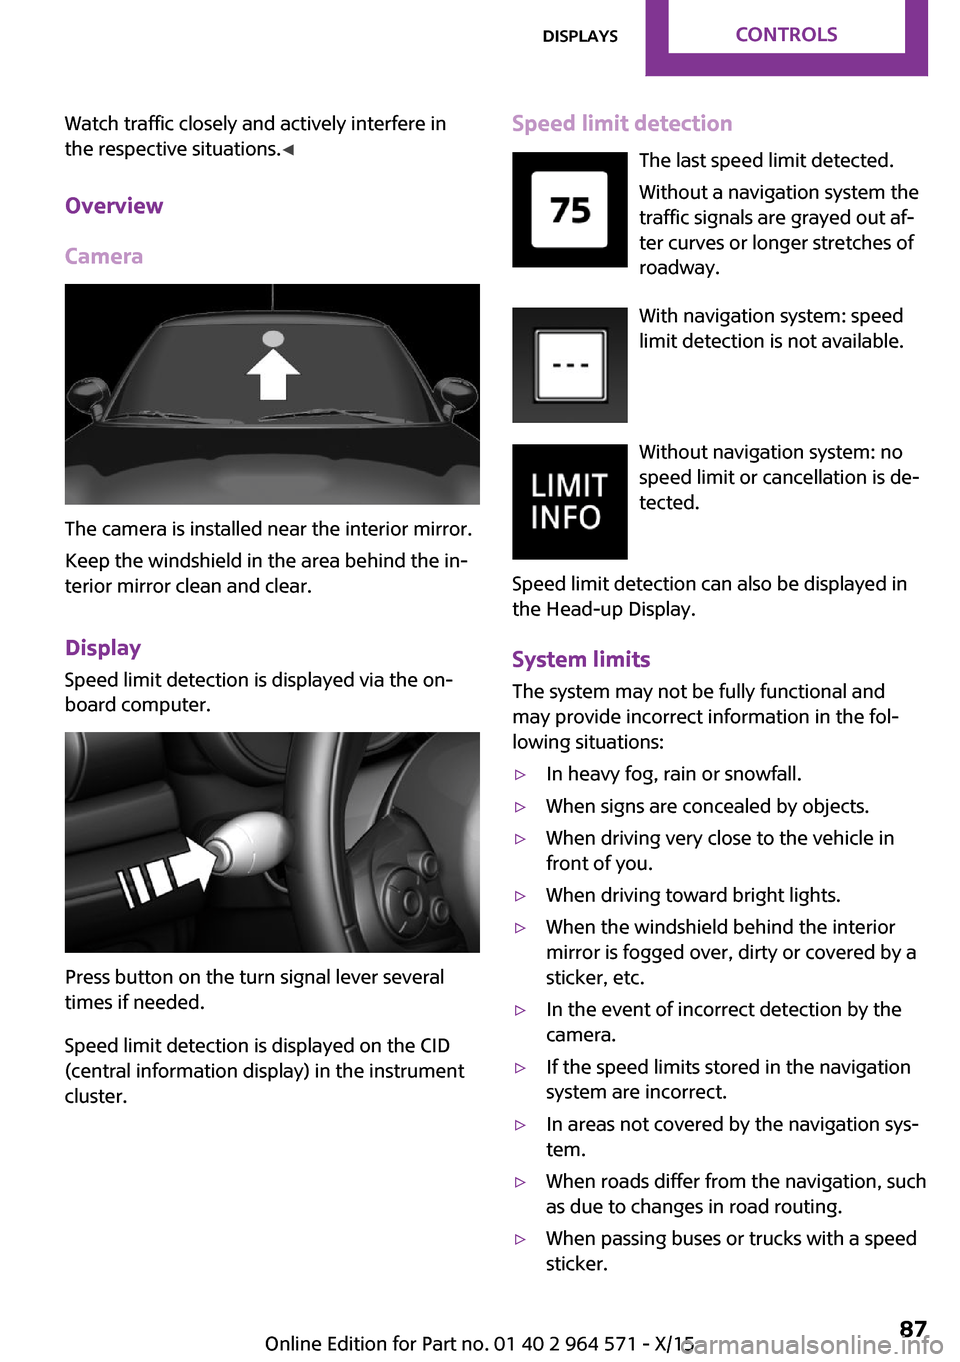
The camera is installed near the interior mirror.
Keep the windshield in the area behind the in‐
terior mirror clean and clear.
Display
Speed limit detection is displayed via the on‐
board computer.
Press button on the turn signal lever several
times if needed.
Speed limit detection is displayed on the CID
(central information display) in the instrument
cluster.
Speed limit detection
The last speed limit detected.
Without a navigation system the
traffic signals are grayed out af‐
ter curves or longer stretches of
roadway.
With navigation system: speed
limit detection is not available.
Without navigation system: no
speed limit or cancellation is de‐
tected.
Speed limit detection can also be displayed in
the Head-up Display.
System limits
The system may not be fully functional and
may provide incorrect information in the fol‐
lowing situations:
▷In heavy fog, rain or snowfall.▷When signs are concealed by objects.▷When driving very close to the vehicle in
front of you.
▷When driving toward bright lights.▷When the windshield behind the interior
mirror is fogged over, dirty or covered by a
sticker, etc.
▷In the event of incorrect detection by the
camera.
▷If the speed limits stored in the navigation
system are incorrect.
▷In areas not covered by the navigation sys‐
tem.
▷When roads differ from the navigation, such
as due to changes in road routing.
▷When passing buses or trucks with a speed
sticker.
Seite 87DisplaysCONTROLS87
Online Edition for Part no. 01 40 2 964 571 - X/15
Page 88 of 246
▷If the traffic signs are non-conforming.▷During calibration of the camera immedi‐
ately after vehicle delivery.
Selection lists in the in‐
strument cluster
The concept
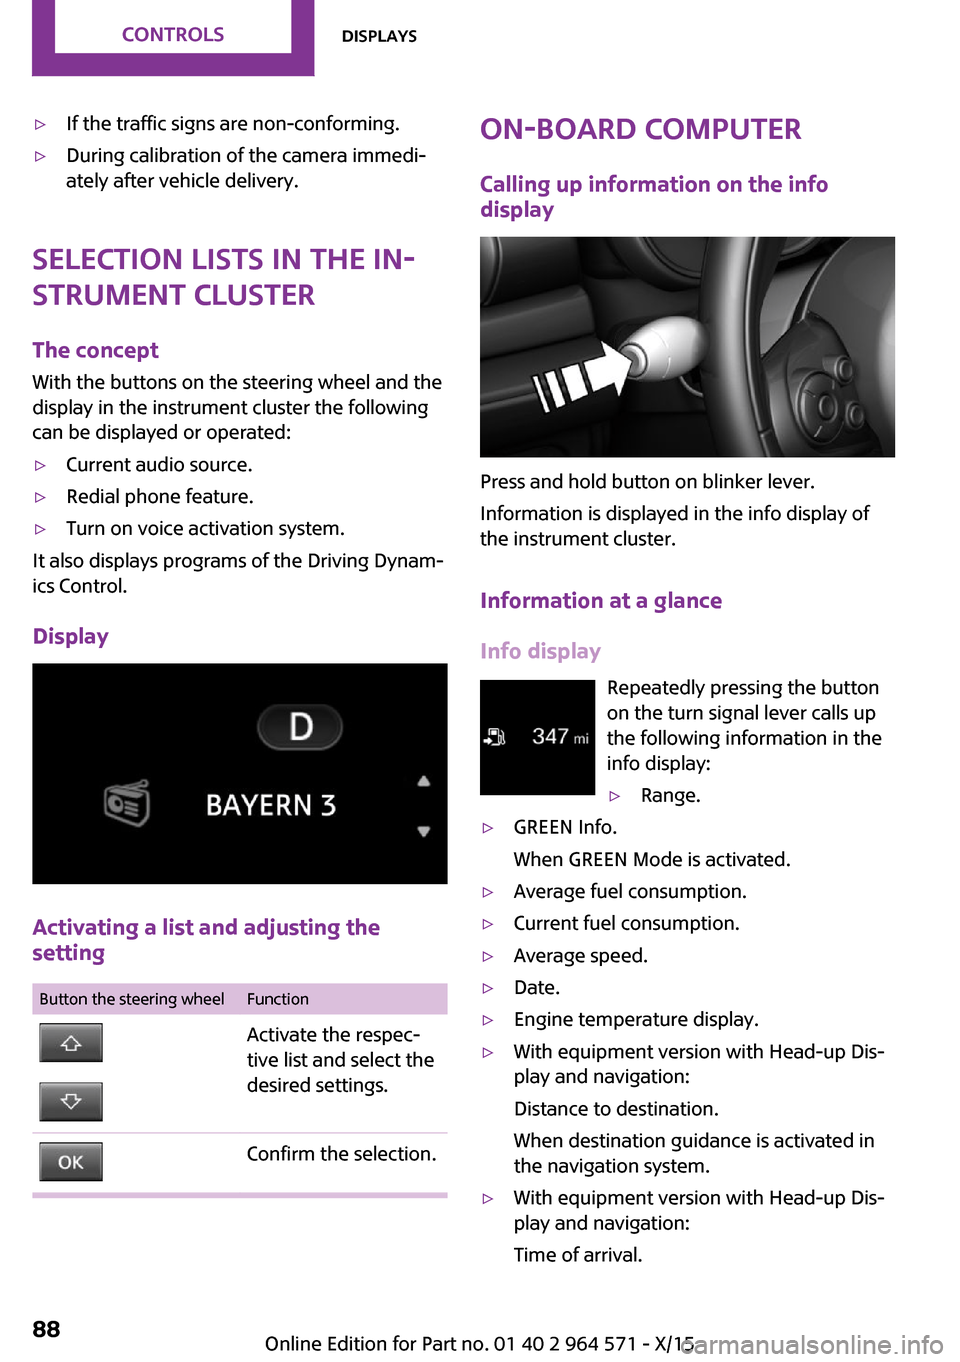
With the buttons on the steering wheel and the
display in the instrument cluster the following
can be displayed or operated:
▷Current audio source.▷Redial phone feature.▷Turn on voice activation system.
It also displays programs of the Driving Dynam‐
ics Control.
Display
Activating a list and adjusting the
setting
Button the steering wheelFunctionActivate the respec‐
tive list and select the
desired settings.
Confirm the selection.On-board computer
Calling up information on the info
display
Press and hold button on blinker lever.
Information is displayed in the info display of
the instrument cluster.
Information at a glance
Info display
Repeatedly pressing the button
on the turn signal lever calls up
the following information in the
info display:
▷Range.▷GREEN Info.
When GREEN Mode is activated.
▷Average fuel consumption.▷Current fuel consumption.▷Average speed.▷Date.▷Engine temperature display.▷With equipment version with Head-up Dis‐
play and navigation:
Distance to destination.
When destination guidance is activated in
the navigation system.
▷With equipment version with Head-up Dis‐
play and navigation:
Time of arrival.
Seite 88CONTROLSDisplays88
Online Edition for Part no. 01 40 2 964 571 - X/15
Page 92 of 246
5.Press the Controller.6.Make the necessary settings for the month
and year.
The date is stored.
Setting the date format
1. "Settings"2."Time/Date"3."Format:"4.Select the desired format.
The date format is stored.
Language
Setting the language
To set the language on the Control Display:
1. "Settings"2."Language/Units"3."Language:"4.Select the desired language.
Settings are stored for the profile currently
used.
Setting the voice dialog
Voice dialog for the voice activation system, re‐
fer to page 27.
Units of measurement
Setting the units of measurement
To set the units for fuel consumption, route/
distance and temperature:
1. "Settings"2."Language/Units"3.Select the desired menu item.4.Select the desired unit.
Settings are stored for the profile currently
used.
Brightness
Setting the brightness
To set the brightness of the Control Display:
1. "Settings"2."Control display"3."Brightness"4.Turn the Controller until the desired bright‐
ness is set.
5.Press the Controller.
Settings are stored for the profile currently
used.
Depending on the light conditions, the bright‐
ness settings may not be clearly visible.
LED ring on the central
instrument cluster
The concept
The LED ring displays light animations to repre‐
sent specific functions.
Basic displays
Basic functions, for example the tachometer,
can be set to be displayed continually if so de‐
sired.
Event displays
Functions that are only displayed temporarily,
for example the volume or temperature set‐
tings, can be set as event displays.
Several vehicle assistance functions can also be
displayed on the LED ring. This display corre‐
sponds with the displays of the function in the
respective display.
Example: tachometer
Like the tachometer in the instrument cluster,
the light animations of the tachometer's basic
display show the current RPMs and the respec‐
tive RPM warning margins.
Seite 92CONTROLSDisplays92
Online Edition for Part no. 01 40 2 964 571 - X/15
Page 96 of 246
LightsVehicle features and op‐
tions
This chapter describes all standard, country-
specific and optional features offered with the
series. It also describes features that are not
necessarily available in your car, e. g., due to
the selected options or country versions. This
also applies to safety-related functions and sys‐
tems. The respectively applicable country provi‐
sions must be observed when using the respec‐
tive features and systems.
Overview
Switches in the vehicle
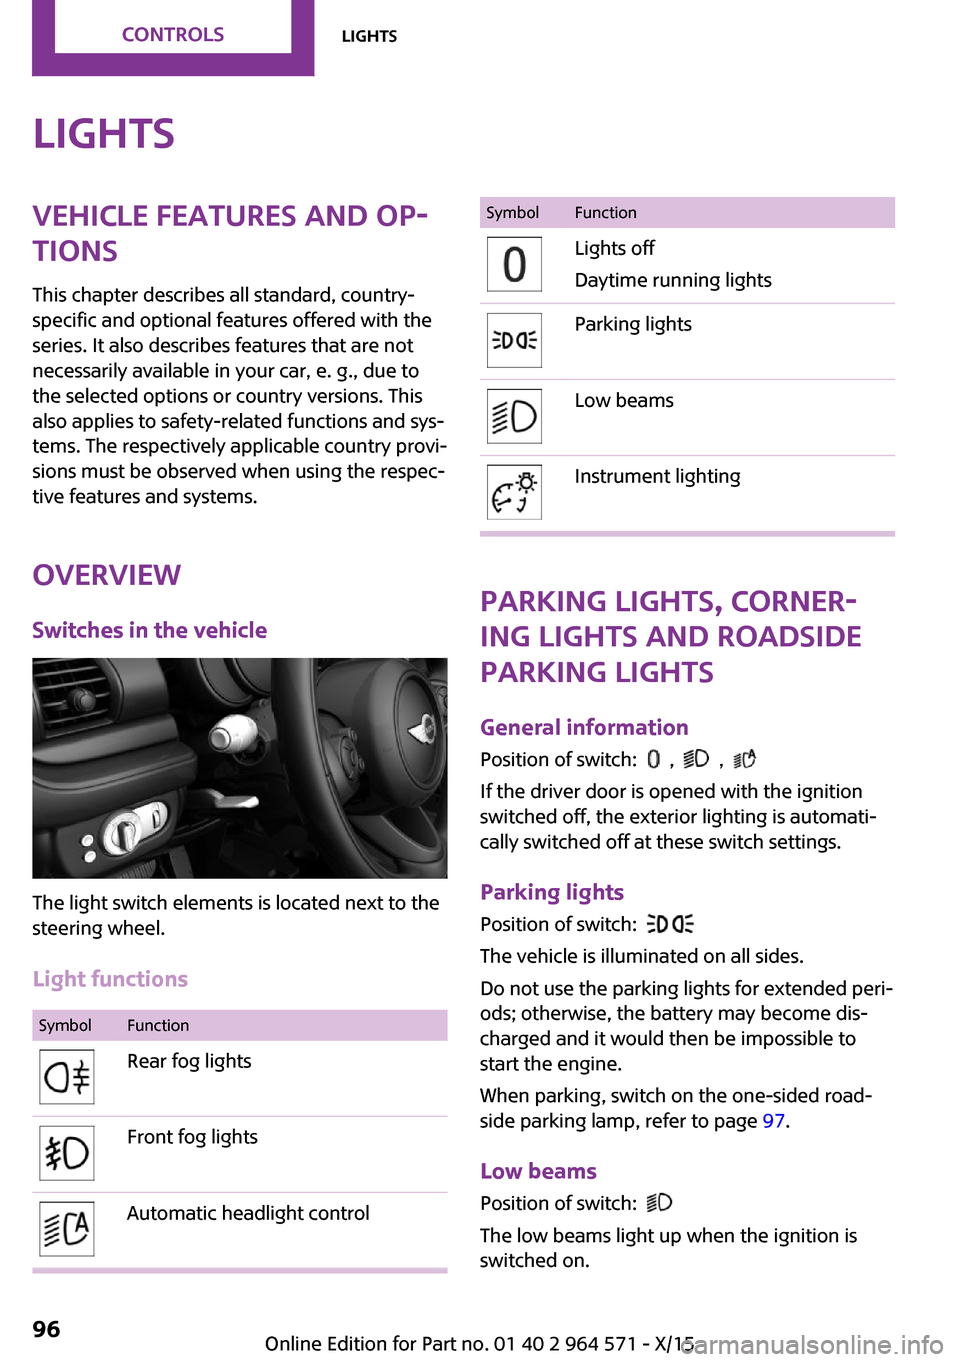
The light switch elements is located next to the
steering wheel.
Light functions
SymbolFunctionRear fog lightsFront fog lightsAutomatic headlight controlSymbolFunctionLights off
Daytime running lights
Parking lightsLow beamsInstrument lighting
Parking lights, corner‐
ing lights and roadside
parking lights
General information
Position of switch: , ,
If the driver door is opened with the ignition
switched off, the exterior lighting is automati‐
cally switched off at these switch settings.
Parking lights
Position of switch:
The vehicle is illuminated on all sides.
Do not use the parking lights for extended peri‐
ods; otherwise, the battery may become dis‐
charged and it would then be impossible to
start the engine.
When parking, switch on the one-sided road‐
side parking lamp, refer to page 97.
Low beams
Position of switch:
The low beams light up when the ignition is
switched on.
Seite 96CONTROLSLights96
Online Edition for Part no. 01 40 2 964 571 - X/15