warning MINI COOPER 2003 Owner's Manual
[x] Cancel search | Manufacturer: MINI, Model Year: 2003, Model line: COOPER, Model: MINI COOPER 2003Pages: 148, PDF Size: 3.17 MB
Page 99 of 148
97
OVERVIEW REPAIRSOPERATIONCONTROLS DATA INDEX
COOLANT BRAKE FLUIDTo add coolant
MINI COOPER:
1. Slowly open the cap by pulling at the tab
to allow accumulated pressure to
escape.
2. Pull open the cap completely.
3. If the coolant is low, slowly add coolant
until the correct level is reached – do not
overfill.
MINI COOPER S:
1. Open the cap by turning it slightly coun-
terclockwise to allow accumulated pres-
sure to escape.
2. Unscrew and open the cap completely.
3. If the coolant is low, slowly add coolant
until the correct level is reached – do not
overfill.
The coolant is made up of water and an
antifreeze with corrosion resistance. The
mixture ratio of 50 to 50 must be kept the
entire year due to the required anti-corro-
sion property. No other additives are
required.
Replace the coolant every three years.
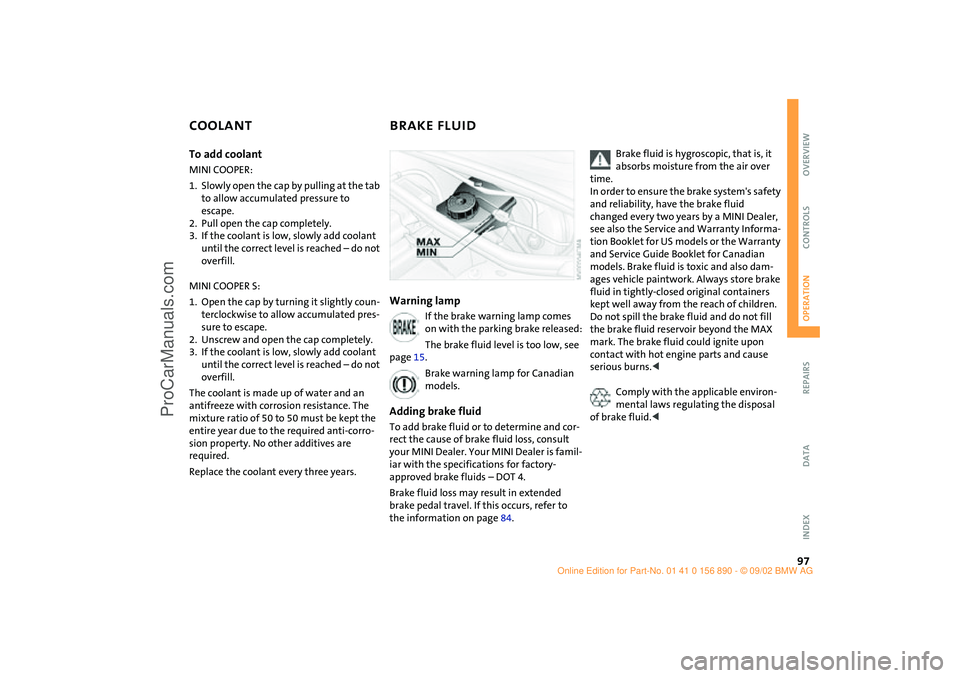
Warning lamp
If the brake warning lamp comes
on with the parking brake released:
The brake fluid level is too low, see
page 15.
Brake warning lamp for Canadian
models.
Adding brake fluidTo add brake fluid or to determine and cor-
rect the cause of brake fluid loss, consult
your MINI Dealer. Your MINI Dealer is famil-
iar with the specifications for factory-
approved brake fluids – DOT 4.
Brake fluid loss may result in extended
brake pedal travel. If this occurs, refer to
the information on page 84.
Brake fluid is hygroscopic, that is, it
absorbs moisture from the air over
time.
In order to ensure the brake system's safety
and reliability, have the brake fluid
changed every two years by a MINI Dealer,
see also the Service and Warranty Informa-
tion Booklet for US models or the Warranty
and Service Guide Booklet for Canadian
models. Brake fluid is toxic and also dam-
ages vehicle paintwork. Always store brake
fluid in tightly-closed original containers
kept well away from the reach of children.
Do not spill the brake fluid and do not fill
the brake fluid reservoir beyond the MAX
mark. The brake fluid could ignite upon
contact with hot engine parts and cause
serious burns.<
Comply with the applicable environ-
mental laws regulating the disposal
of brake fluid.<
ba.book Seite 97 Montag, 5. August 2002 8:09 20
ProCarManuals.com
Page 104 of 148

102
OBD SOCKET The interface socket for onboard diagnos-
tics is located on the driver's side, behind a
cover located beneath the instrument
panel. The cover has the letters OBD on it.
The purpose of the OBD system is to ensure
proper operation of the emission control
system for the vehicle‘s lifetime. The sys-
tem monitors emission-related compo-
nents for deterioration and malfunction.
An illuminated lamp informs you of
the need for service, not of the
need to stop the vehicle.
However, the system should be checked by
your MINI Dealer at the earliest possible
opportunity.
Under certain conditions, the indicator will
blink or flash. This indicates a rather severe
level of engine misfire. When this occurs,
you should reduce speed and consult the
nearest MINI Dealer as soon as possible.
Severe engine misfire over only a short
period of time can seriously damage emis-
sion control components, especially the
catalytic converter.
Service Engine Soon warning lamp
for Canadian models.
When the filler cap is not properly
tightened, the OBD system can detect
the vapor leak and the indicator will light
up. If the filler cap is subsequently tight-
ened, the indicator lamp should go out
within a few days.<
ba.book Seite 102 Montag, 5. August 2002 8:09 20
ProCarManuals.com
Page 105 of 148

103
OVERVIEW REPAIRSOPERATIONCONTROLS DATA INDEX
TECHNICAL MODIFICATIONS CALIFORNIA PROPOSITION 65 WARNINGAny MINI Dealer will be glad to inform you
of the advisability, legal regulations and
factory recommendations for technical
modifications to the vehicle.
To do so, they require the vehicle identifica-
tion number from your vehicle documents.California laws require us to state the fol-
lowing warning:
Engine exhaust, some of its constitu-
ents, and certain vehicle components
contain or emit chemicals known to the
State of California to cause cancer and birth
defects and reproductive harm. In addition,
certain fluids contained in vehicles and cer-
tain products of component wear contain
or emit chemicals known to the State of
California to cause cancer and birth defects
or other reproductive harm.
Battery posts, terminals and related acces-
sories contain lead and lead compounds.
Wash your hands after handling.
Used engine oil contains chemicals that
have caused cancer in laboratory animals.
Always protect your skin by washing thor-
oughly with soap and water.<
ba.book Seite 103 Montag, 5. August 2002 8:09 20
ProCarManuals.com
Page 114 of 148
112
REPAIRING A FLAT TIRE CHANGING TIRES – MINI WITH SPACE-SAVER SPARE TIRE
*
Safety measures in the event of a flat
tire:
Stop the vehicle as far as possible from
passing traffic. Switch on the hazard warn-
ing flashers.
Turn the steering wheel to the straight-
ahead wheel position and engage the
steering lock. Engage the parking brake and
shift into 1st or reverse gear – selector lever
in P.
All passengers should be outside the vehi-
cle and well away from your immediate
working area – behind a guardrail, for
instance.
If a warning triangle or portable hazard
warning lamp is available, set it up on the
roadside at an appropriate distance from
the rear of the vehicle. Comply with all
safety guidelines and regulations.<
In the event of a flat tire, different proce-
dures should be followed depending on the
equipment included in your MINI:
>Vehicles with space-saver spare tire, see
the next chapter
>Vehicles with Run Flat tires, see page 116
>Vehicles with MINI Mobility System, see
page 118.
Additional safety measures in the
event of a wheel change:
Change the wheel only on a level, firm sur-
face which is not slippery.
Avoid jacking the vehicle on a soft or slip-
pery support surface – on snow, ice, loose
gravel, etc. – as either the vehicle or the
jack could slip sideways.
Do not use a wooden block or similar object
as a support base for the jack, as this would
prevent it from extending to its full support
height and reduce its load-carrying capac-
ity.
Do not lie under the vehicle or start the
engine when the vehicle is supported by
the jack – risk of fatal injury.<
To change a space-saver tire, proceed as
follows:
>Remove the space-saver spare tire, see
page 113
>Prepare the vehicle, see page 114
>Jack up the vehicle, see page 114
>Fit the space-saver spare tire, see
page 115
>Tighten the lug bolts, see page 115
>Drive with space-saver spare tire, see
page 115.
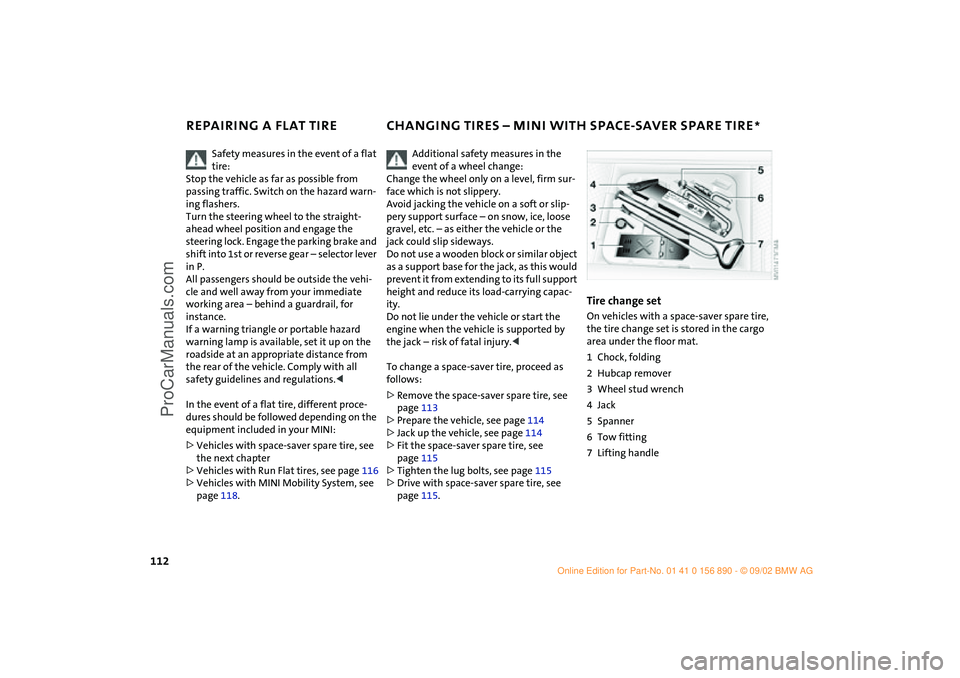
Tire change setOn vehicles with a space-saver spare tire,
the tire change set is stored in the cargo
area under the floor mat.
1Chock, folding
2Hubcap remover
3Wheel stud wrench
4Jack
5Spanner
6Tow fitting
7Lifting handle
ba.book Seite 112 Montag, 5. August 2002 8:09 20
ProCarManuals.com
Page 121 of 148
119
OVERVIEW REPAIRSOPERATION CONTROLS DATA INDEX
FLAT TIRE – MINI MOBILITY SYSTEM
*
Preparing for tire repair
Before using the MINI Mobility Sys-
tem read the warning and danger
precautions on the equipment.<
If possible, leave objects in which have
been forced into the tire.
Take off the tag regarding speed limits and
stick it onto the steering wheel.
Please remember that the liquid can-
ister must be replaced every four
years by your MINI Dealer if the equipment
has not been used.<
The instructions for using the MINI
Mobility System are also given on the
equipment.<
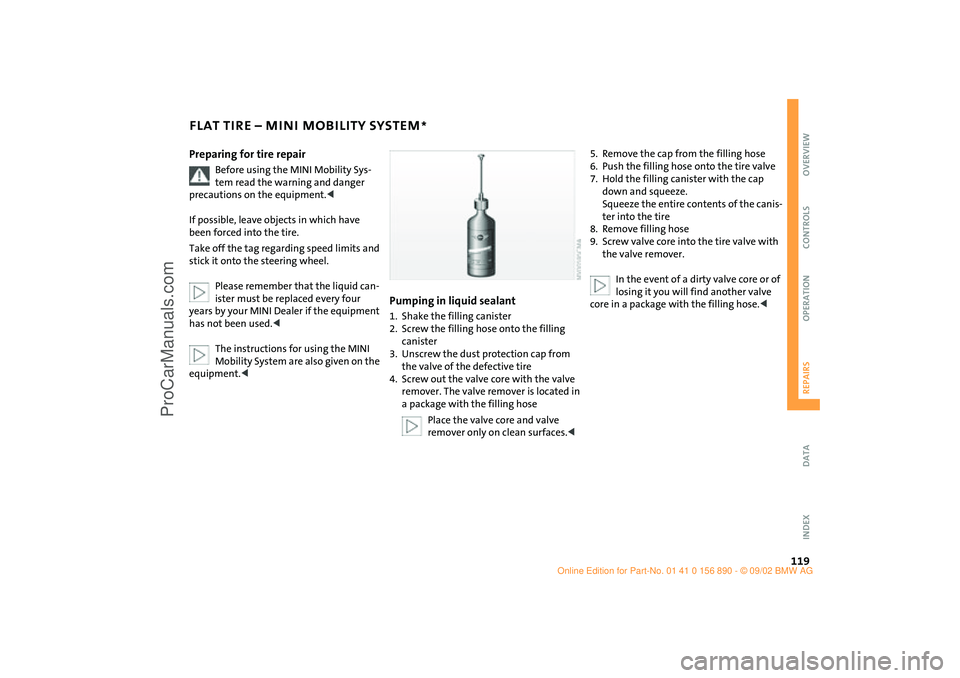
Pumping in liquid sealant1. Shake the filling canister
2. Screw the filling hose onto the filling
canister
3. Unscrew the dust protection cap from
the valve of the defective tire
4. Screw out the valve core with the valve
remover. The valve remover is located in
a package with the filling hose
Place the valve core and valve
remover only on clean surfaces.<
5. Remove the cap from the filling hose
6. Push the filling hose onto the tire valve
7. Hold the filling canister with the cap
down and squeeze.
Squeeze the entire contents of the canis-
ter into the tire
8. Remove filling hose
9. Screw valve core into the tire valve with
the valve remover.
In the event of a dirty valve core or of
losing it you will find another valve
core in a package with the filling hose.<
ba.book Seite 119 Montag, 5. August 2002 8:09 20
ProCarManuals.com
Page 126 of 148

124
WARNING TRIANGLE
*
FIRST-AID KIT
*
JUMP-STARTING
The warning triangle is located beneath the
luggage compartment cover.
Comply with legal requirements
requiring you to carry a hazard warn-
ing triangle in the vehicle.<
The first-aid kit is located on the left in the
luggage compartment, behind the side
trim panel.
Some articles in the first-aid kit are
perishable. For this reason, check the
expiration dates of each of the items regu-
larly, and replace any whose expiration
dates have passed. Source: any pharmacy.
Comply with legislation requiring you to
carry a first-aid kit in the vehicle.<
Do not use spray starter fluids to start
the engine.<
When your battery is discharged, you can
use two jumper cables to start your vehicle
with power from the battery in a second
vehicle. Correspondingly you can help start
another vehicle. Only use jumper cables
with fully insulated handles on the termi-
nal clamps.
Do not touch live wiring and cables
on a running engine. There is a risk of
fatal injury if you do this. Carefully observe
the following instructions to avoid personal
injury and/or damage to either vehicle or
both vehicles.<
ba.book Seite 124 Montag, 5. August 2002 8:09 20
ProCarManuals.com
Page 127 of 148

125
OVERVIEW REPAIRSOPERATION CONTROLS DATA INDEX
JUMP-STARTINGPreparing for jump-starting1. Check whether the battery of the sup-
port vehicle has 12 Volts and approxi-
mately the same capacity – measured in
Ah, printed on the battery
2. Switch off the engine of the support
vehicle
3. Switch off any electrical systems and
components in both vehicles – except
for the hazard warning flashers of the
support vehicle.
>Do not disconnect the discharged bat-
tery from the vehicle electrical system
>Make certain that there is no contact
between the bodywork of the two
vehicles – short circuit hazard!
4. With the battery of the MINI COOPER,
remove the cover panel. To do so, press
both clips at the same time
or
with the MINI COOPER S, open the cover
of the positive terminal connection for
jump-starting
*, see arrow 1.
Connect the jumper cables
Adhere to the sequence also when
providing support for other vehicles;
failure to observe this procedure can lead
to sparks at the terminals and pose an
injury hazard.<
1. On the MINI COOPER S, the positive ter-
minal connection for jump-starting, see
arrow 1, functions as the positive bat-
tery terminal.
Make a connection with the "+" jumper
cable between the positive terminal of
the discharged battery and the positive
terminal of the support battery
2. Use the second, "–" jumper cable to set
up the connection between the negative
terminals of both vehicles.
To do so:
>Connect one terminal clamp to the
negative terminal and/or to an engine
or body ground of the support vehicle
>Connect the second terminal clamp to
the negative terminal of the battery
and/or to an engine or body ground of
the vehicle to be started. For the MINI,
see arrow 2.
Performing the jump-start1. Start the engine of the vehicle providing
the current and allow to run at a fast idle
speed for several minutes
2. Start the engine on the vehicle with the
discharged battery in the usual manner.
>If the first start attempt is not suc-
cessful, wait a few minutes before
another attempt in order to allow the
discharged battery to recharge
On the MINI:
Before disconnecting the jumper
cables, switch on the lighting, rear window
defroster and the highest blower speed as
well as the engine for at least approx.
10 seconds to prevent a voltage surge from
the regulator to the electrical systems and
components.<
3. Then disconnect the jumper cables in
the reverse order.
If necessary have the battery checked and
completely charged at a MINI Dealer.
ba.book Seite 125 Montag, 5. August 2002 8:09 20
ProCarManuals.com
Page 129 of 148
127
OVERVIEW REPAIRSOPERATION CONTROLS DATA INDEX
TOWINGTow-startingIt is not possible to start the engine of a
vehicle equipped with an automatic trans-
mission by towing or pushing.
For instructions on jump starting, refer to
page 124.
Never attempt to use your vehicle to push
another car, since damage to the energy-
absorbing bumpers could result.Towing a vehicle
Only tow vehicles with Continuously
Variable automatic Transmission
(CVT) with the front wheels raised or on a
special transport vehicle, otherwise the
transmission can be damaged.<
1. Place gear selector lever in neutral or idle
2. Towing speed:
Max. 45 mph / 70 km/h
3. Towing distance:
Max. 95 miles / 150 km
4. Leave the ignition key at position 1 to
ensure that the brake lamps, turn sig-
nals, horn and windshield wipers remain
operative, and to prevent the steering
lock detent from engaging
5. Switch on the hazard-warning system,
observe country-specific regulations.
Find some means of identifying the vehicle
in tow, for instance, place a sign or warning
triangle in the rear window.
Make sure that the ignition key
remains in position 1 even when the
electrical system has failed to prevent the
steering lock from engaging.
The steering and brakes are without power
assist when the engine is off. This means
that increased effort is required for steer-
ing and braking.<
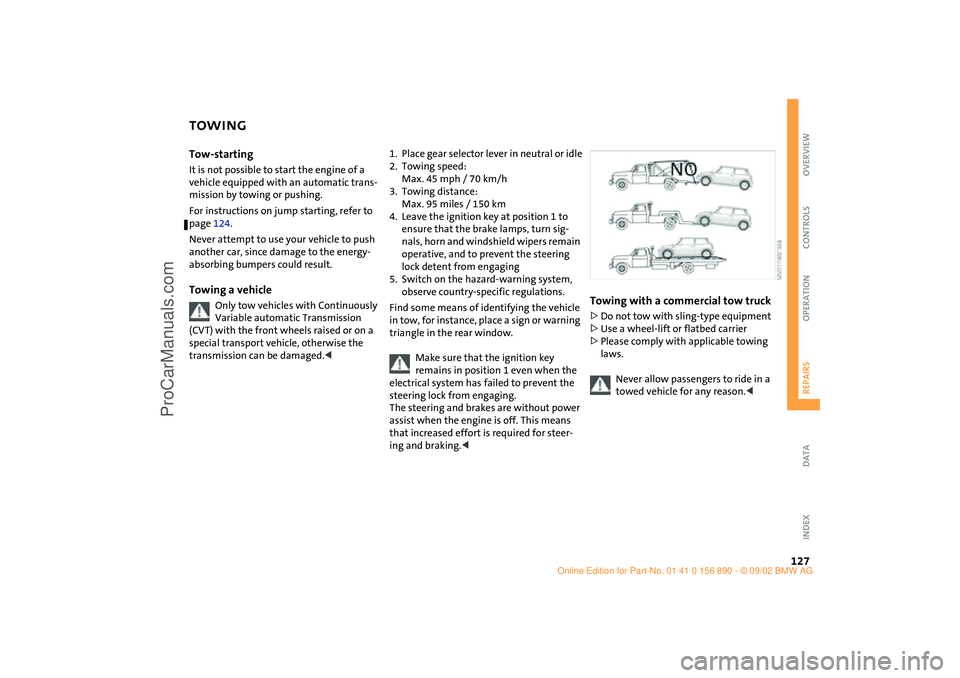
Towing with a commercial tow truck >Do not tow with sling-type equipment
>Use a wheel-lift or flatbed carrier
>Please comply with applicable towing
laws.
Never allow passengers to ride in a
towed vehicle for any reason.<
ba.book Seite 127 Montag, 5. August 2002 8:09 20
ProCarManuals.com
Page 138 of 148
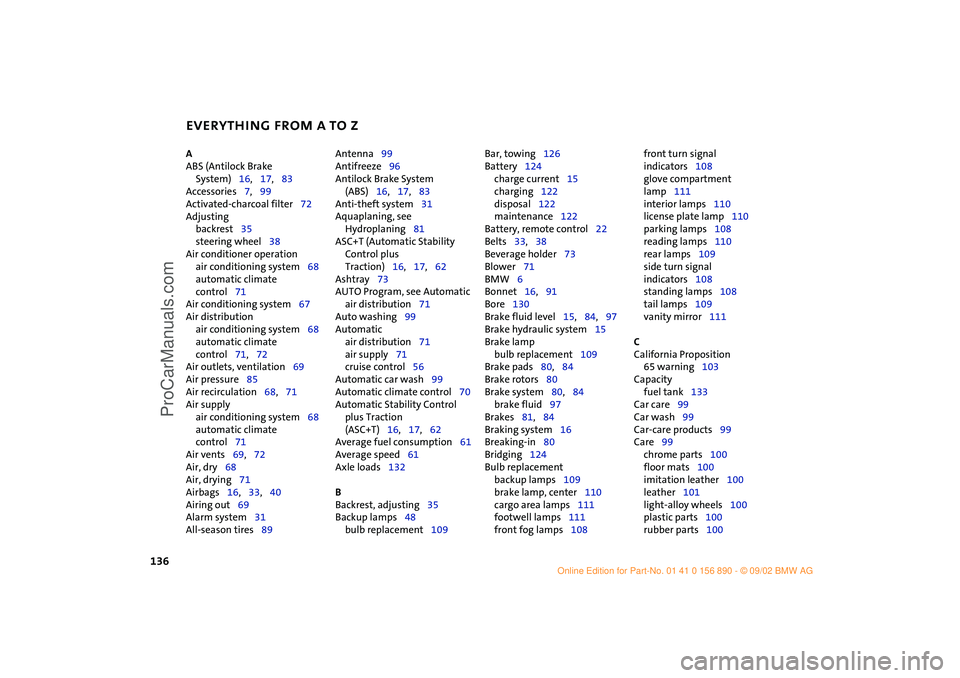
EVERYTHING FROM A TO Z
136
A
ABS (Antilock Brake
System)16,17,83
Accessories7,99
Activated-charcoal filter72
Adjusting
backrest35
steering wheel38
Air conditioner operation
air conditioning system68
automatic climate
control71
Air conditioning system67
Air distribution
air conditioning system68
automatic climate
control71,72
Air outlets, ventilation69
Air pressure85
Air recirculation68,71
Air supply
air conditioning system68
automatic climate
control71
Air vents69,72
Air, dry68
Air, drying71
Airbags16,33,40
Airing out69
Alarm system31
All-season tires89 Antenna99
Antifreeze96
Antilock Brake System
(ABS)16,17,83
Anti-theft system31
Aquaplaning, see
Hydroplaning81
ASC+T (Automatic Stability
Control plus
Traction)16,17,62
Ashtray73
AUTO Program, see Automatic
air distribution71
Auto washing99
Automatic
air distribution71
air supply71
cruise control56
Automatic car wash99
Automatic climate control70
Automatic Stability Control
plus Traction
(ASC+T)16,17,62
Average fuel consumption61
Average speed61
Axle loads132
B
Backrest, adjusting35
Backup lamps48
bulb replacement109 Bar, towing126
Battery124
charge current15
charging122
disposal122
maintenance122
Battery, remote control22
Belts33,38
Beverage holder73
Blower71
BMW6
Bonnet16,91
Bore130
Brake fluid level15,84,97
Brake hydraulic system15
Brake lamp
bulb replacement109
Brake pads80,84
Brake rotors80
Brake system80,84
brake fluid97
Brakes81,84
Braking system16
Breaking-in80
Bridging124
Bulb replacement
backup lamps109
brake lamp, center110
cargo area lamps111
footwell lamps111
front fog lamps108 front turn signal
indicators108
glove compartment
lamp111
interior lamps110
license plate lamp110
parking lamps108
reading lamps110
rear lamps109
side turn signal
indicators108
standing lamps108
tail lamps109
vanity mirror111
C
California Proposition
65 warning103
Capacity
fuel tank133
Car care99
Car wash99
Car-care products99
Care99
chrome parts100
floor mats100
imitation leather100
leather101
light-alloy wheels100
plastic parts100
rubber parts100
Hilfsrahmen für Querverweise
ba.book Seite 136 Montag, 5. August 2002 8:09 20
ProCarManuals.com
Page 140 of 148

EVERYTHING FROM A TO Z
138
Defrosting windows69,72
air conditioning system69
automatic climate
control72
Dimensions131
Dimming
interior mirror39
Dipstick, engine oil94
Dirt on the paintwork99
Disc brakes84
Displacement130
Display elements13,14
coolant thermometer59
fuel gauge58
indicator and warning
lamps15
odometer58
service interval display60
with navigation system14
Display lighting53
Distance remaining61
Doors
keys22
locking24
manual operation25
unlocking24
DOT quality grades87
Driving lamps52
Driving notes, general81
Dry air68,71 DSC (Dynamic Stability
Control)16,63
Dynamic Stability Control
(DSC)16,63
E
Easy entry35
EBD (Electronic Brake Force
Distribution)16,83
Electric power windows28
Electrical defect
driver's door25
sliding/tilt sunroof30
tailgate27
Electronic Brake Force
Distribution (EBD)16,83
Electronic transmission control
module
Continuously Variable
automatic Transmission
(CVT)51
Emergency operation
driver's door25
sliding/tilt sunroof30
tailgate27
Engine80
electronics17
power output17
speed17,58
starting46 Engine compartment
MINI COOPER92
MINI COOPER S93
Engine oil94
additives95
consumption94
dipstick94
High Performance
Synthetic Oil96
level94
pressure15
recommended grades of
oil95
viscosities96
Entry to the rear35
Exterior finish, care99
Exterior mirrors39
Eyelets, towing126
F
Failure, tires64
False alarm32
Fans68
Fastening safety belts16,38
Filling canister118,119
Filling hose118
First-aid kit124
Flat116 Flat tire64,112
MINI Mobility System118
Run Flat tires116
space-saver spare tire112
Flat Tire Monitor16,17,64
Floor coverings, floor
carpets100
Fluid capacities
fuel tank133
headlamp washer
system133
windshield washer
system133
Fog lamps53
Foldable rear backrest74
"Follow me home" lamps52
Foot mats100
Footbrake84
Footwell lamps53
bulb replacement111
Front airbags40
Front fog lamps
bulb replacement108
Front seat adjustment34
Fuel
consumption61
consumption display58
preparation130
quality83
tank capacity82,133
ba.book Seite 138 Montag, 5. August 2002 8:09 20
ProCarManuals.com