controls MINI COOPER 2005 Owner's Manual
[x] Cancel search | Manufacturer: MINI, Model Year: 2005, Model line: COOPER, Model: MINI COOPER 2005Pages: 165, PDF Size: 4.64 MB
Page 43 of 165

41
OVERVIEW REPAIRS OPERATIONCONTROLS DATA INDEX
SAFE SEATING POSITIONThe ideal seating position can make a vital
contribution to relaxed, relatively fatigue-
free driving. Together with the safety belts
and airbags, the seating position also plays
an important role in providing occupants
with maximum levels of passive safety in
an accident. To ensure that the safety sys
-
tems operate with optimal efficiency, we
strongly urge you to observe the instruc
-
tions contained in the following section.For additional information about trans
-
porting children safely, refer to page
48.
Sitting safely with airbags
Always maintain an adequate dis
-
tance between yourself and all of the
airbags. Always hold the steering wheel by
the rim with the hands at the 9 and
3
o'clock positions to keep any chance of
injury to hands or arms to an absolute min
-
imum, should the airbag be deployed.
No one and nothing is to come between
the airbags and the seat occupant. Do not
use the front passenger airbag cover as a
storage surface for objects of any kind.
Ensure that the front passenger is correctly
seated, i.e. that no feet or legs are propped
against the dashboad. Otherwise, leg injury
could result if the front passenger airbag
suddenly deployed. Never let an occupant's
head rest near or on a side airbag because
the inflating airbag could cause a serious or
fatal injury.
circumstances injury may result from con
-
tact with the airbags. In sensitive individu
-
als, the ignition and inflation noise may
induce a mild hearing loss that is usually
temporary. For airbag locations and additional infor
-
mation on airbags, refer to page
72.
Safe seating position with safety belt Fasten your safety belt before each drive.
Airbags are an additional safety device and
work in conjunction with the safety belts,
but do not replace them.Your vehicle is equipped with four seats,
each of which is provided with a safety belt.
At all times, occupants should sit upright and be properly restrained –
infants and small children in appropriate
child-restraint systems; larger children and
adults using the safety belts.
Expectant mothers should always wear
their safety belts, taking care to position
the lap belt against the lower hips, where it
will not exert pressure against the abdomi
-
nal area.
Never allow more than one person to wear
a single safety belt. Never allow infants or
small children to ride in a passenger's lap.
Do not route the belt across your neck, or
run it across sharp edges. Be sure that the
belt does not become caught or jammed.
Avoid twisting the belt while routing it
firmly across the hips and shoulder; wear it
as snugly against your body as possible and
do not allow it to rest against sharp or frag
-
ile objects. Otherwise, the belt could slide
over your hips in the event of a frontal
impact and cause abdominal injury. Avoid
wearing bulky clothing and pull on the lap
belt periodically to retension it over your
shoulder. Otherwise, the safety belt's
restraint effectiveness could be reduced.
45.
ProCarManuals.com
Page 45 of 165

43
OVERVIEW REPAIRS OPERATIONCONTROLS DATA INDEX
SEAT ADJUSTMENT
HEAD RESTRAINTS
Lumbar support* You can adjust the contour of the backrest
for additional support in the curvature of
your spine's lumbar region. The upper hips
and spinal column receive supplementary
support to help you maintain a relaxed,
upright posture. Turn the wheel.
The curvature is increased or decreased.
Backrest tilt 1. Pull up the lever at the inside of the seat2. Apply weight to or remove weight from
the backrest as required3. Release the lever so that the backrest
locks into place.
AdjustingTo raise: pull the head restraint upward.To lower: press the button and push the
head restraint downward.
You can reduce the risk of spinal injury and whiplash by adjusting the
head restraint to a height at which it is cen
-
tered roughly at ear level.
To avoid possible violation of traffic laws,
never retract the head restraints unless the
rear seats are empty. Always ensure that
the head restraints are raised before trans
-
porting passengers in the rear seat.<
ProCarManuals.com
Page 47 of 165

45
OVERVIEW REPAIRS OPERATIONCONTROLS DATA INDEX
SAFETY BELTS To closeMake sure you hear the lock engage in the
belt buckle.Indicator lamp
Lights up for several seconds or until the driver has fastened his or
her safety belt.
A signal
* also sounds depending on the
version.
To release1. Press the red button in the belt buckle2. Hold the belt3. Guide the belt back into its reel.
Safety belt height adjustment in the MINI Use the height adjustment mechanism to
adapt the safety belt to the ideal position
for your own body:Press the button and at the same time push
the entire unit upwards or downwards.Also observe the instructions on adjusting
the seats on page
41.
Safety belt height in the MINI
Convertible The seat belt height is adapted to your
body size if you are sitting correctly.
Damaged safety belts
If the safety belts are damaged or stretched in an accident: have the
safety belts including the seat-belt tension
-
ers and any child-restraint systems
replaced, and have the belt anchorages
checked. Have the necessary work carried
out only by a MINI Dealer or a workshop
that has specially trained personnel work
-
ing in accordance with the specifications of
the MINI manufacturer.<
ProCarManuals.com
Page 49 of 165

47
OVERVIEW REPAIRS OPERATIONCONTROLS DATA INDEX
MIRRORS
VEHICLE MEMORY
Interior rearview mirror To reduce glare from vehicles behind you
when you are driving at night:Turn the knob.Illuminated vanity mirror From ignition key position
1:
1. Fold down the sun visor2. Fold the cover panel upwards.Sun visorsCan be swung sideways.An additional sun visor is provided on the
driver's side to better protect the driver
from being blinded.
Interior mirror, automatic dimming* While the vehicle is being driven forward,
these mirrors dim light through an infi
-
nitely variable range depending on the
light's incidence. Two photocells in the
interior rearview mirror serve this purpose.
One is positioned on the underside of the
mirror frame, while the other is slightly off
-
set on the back of the mirror.In order for the photocells to work opti
-
mally, keep them clean and do not cover
the area between the interior rearview mir
-
ror and the windshield. Do not place stick
-
ers or toll tags on the windshield in front of
the mirror.
How the system functionsNo doubt you have often reflected on how
great it would be if you could configure
your vehicle's various adjustment settings
to meet your own personal requirements.
In developing this vehicle, the manufac
-
turer of the MINI has incorporated a num
-
ber of options which can be programmed
specifically for your vehicle. What the system can doYour MINI Dealer can provide you with
details on the capabilities of the Vehicle
Memory system.Examples for Vehicle Memory:>Automatic locking if none of the vehicle
doors are opened, refer to page
26
>Automatic locking after starting to drive,
refer to page
28
>Selective central locking system, refer to
pages
26, 27
>Convenience operation, refer to
pages
26, 27
>'Follow-me-home' lamps, refer to
page
57
>Daytime driving lamps, refer to page
58
>Speed-dependent windshield wipers,
refer to page
60
ProCarManuals.com
Page 51 of 165

49
OVERVIEW REPAIRS OPERATIONCONTROLS DATA INDEX
TRANSPORTING CHILDREN SAFELYInstalling child-restraint systemsBefore installing any child-restraint system
or child seat, read the following:
Always follow the manufacturer's instructions concerning installation
and use; otherwise the system's protective
function could be impaired. After an acci
-
dent, have all parts of the child-restraint
system and the affected safety belt system
inspected and/or replaced. Have the neces
-
sary work on your MINI carried out only by
a MINI Dealer or a workshop that has spe
-
cially trained personnel working in accor
-
dance with the specifications of the MINI
manufacturer.
tems are designed to be secured with a lap
belt or with the lap belt portion of a combi
-
nation lap/shoulder belt. Improperly or
inadequately installed restraint systems
can increase the risk of injury to children.
Always read and follow the instructions
that come with the system.
Child seat securityAll of the rear belt retractors and the front
passenger's safety belt can be locked for
mounting and securing child-restraint sys
-
tems.Information regarding this is located near
the buckle latch of each safety belt.
To lock the beltPull the entire length of the belt from the
belt retractor. Allow the reel to retract the
belt somewhat and engage the buckle,
then tighten the belt against the child-
restraint system.
The retraction mechanism is now locked. To unlock the beltRelease the buckle, remove the child-
restraint system and allow the belt retrac
-
tor to reel the belt completely in.
ProCarManuals.com
Page 53 of 165

51
OVERVIEW REPAIRS OPERATIONCONTROLS DATA INDEX
IGNITION LOCK
STARTING THE ENGINE
0 Steering locked
The key can be inserted or removed in this
position only.To lock the steering:1. Remove the key2. Turn the steering wheel slightly to the
left or right until the lock engages.A sound alarm goes off if the key remains in
the ignition after opening the driver's door.Interlock Vehicles with Continuously Variable auto
-
matic Transmission (CVT):
The ignition key cannot be turned to
position
0 and removed until the selector
lever is in position
P.
1 Steering unlocked
Individual electrical accessories are ready
for operation.You will find that it is often easier to turn
the ignition key from position
0 to
position
1 when you move the steering
wheel slightly to help disengage the lock.
2 Ignition switched on
All electrical accessories are ready for oper
-
ation.3 Starting the engine
Vehicles with manual transmission:
Step on the clutch when starting the
vehicle. A lockout prevents the engine from
starting if the clutch is not depressed.<
Do not allow the engine to run in enclosed spaces. Breathing the nox
-
ious exhaust gases can lead to uncon
-
sciousness and death. The exhaust gases
contain carbon monoxide, an odorless and
colorless, but highly toxic gas.
Do not leave the vehicle unattended with
the engine running. This is a safety hazard.
When driving, standing at idle, and parking
the vehicle, take care to avoid contact
between the hot exhaust system and flam
-
mable materials, e.g. hay, grass, leaves, etc.
Such contact could lead to a fire resulting in
serious personal injury and property dam
-
age.
vehicle at a standstill. Move off immedi
-
ately at a moderate engine speed.
ProCarManuals.com
Page 55 of 165

53
OVERVIEW REPAIRS OPERATIONCONTROLS DATA INDEX
PARKING BRAKE
MANUAL TRANSMISSION
The parking brake is designed primarily to prevent the vehicle from rolling when it is
parked. It operates against the rear wheels.To engageLever automatically locks in position.
The indicator lamp in the instrument clus
-
ter lights up from ignition key position
2,
refer to page
17.
To release1. Pull up slightly2. Press the button3. Push the lever downwards.
If, in exceptional circumstances, it should be necessary to engage the
parking brake while the vehicle is in
motion, do not pull the lever with excessive
pressure. Keep your thumb pressed against
the release button while carefully pulling
the lever up to apply moderate pressure.
Excessive pressure can lead to overbraking
and loss of traction, i.e. fishtailing, at the
rear axle. The brake lamps do not come on
when the parking brake is engaged.<
To avoid corrosion and one-sided braking, apply the parking brake
lightly from time to time when coasting to
a standstill, for instance at a traffic light,
provided that it is safe to do so.<
6-speed transmission*
When changing gear in the 5th/6th gear plane, press the gearshift lever
to the right to prevent inadvertently shift
-
ing to a gear of the
3rd/4th gear plane.<
ProCarManuals.com
Page 57 of 165

55
OVERVIEW REPAIRS OPERATIONCONTROLS DATA INDEX
CONTINUOUSLY VARIABLE AUTOMATIC TRANSMISSION (CVT)
*
selector lever to position
P and engage the
parking brake before getting out of your
vehicle with the engine running.
Do not leave the vehicle unattended with
the engine running. This is a safety haz
-
ard.<
If the selector lever is not placed in position
P when the vehicle is parked,
the position display of the selector lever
stays on. This can lead to battery dis
-
charge.<
P Park
Select only when the vehicle is completely
stopped. The transmission locks to prevent
the rear wheels from turning.R Reverse
Select only when the vehicle is completely
stopped.N Neutral Idle
Engage this gear, for example, when you
are in a car wash. The vehicle can roll.D Drive: CVT driving position
This position is designed for driving under
all normal operating conditions. Kickdown Kickdown can be used to achieve maxi
-
mum vehicle performance.
Press the accelerator pedal past the
increased resistance point at the full-throt
-
tle position.
M/S
+ – Manual mode and Sport
program Switch from D into M/S
+ –:
Activates the Sport program and displays
SD in the gear indicator in the speedome
-
ter. Press selector lever once:Shifts from the Sport program to the man
-
ual mode.Shifting with the selector lever>Press selector lever briefly towards +:
Transmission shifts upwards>Press selector lever briefly towards –:
Transmission shifts downwards.1 to 6 appear in the gear indicator.
ProCarManuals.com
Page 59 of 165
57
OVERVIEW REPAIRS OPERATIONCONTROLS DATA INDEX
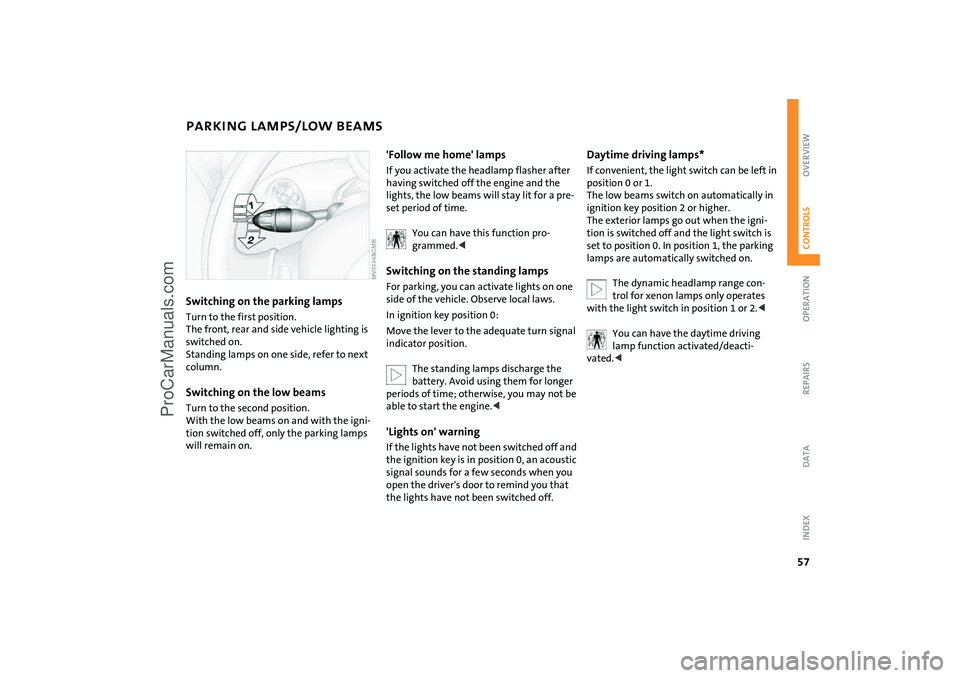
PARKING LAMPS/LOW BEAMS Switching on the parking lamps Turn to the first position.
The front, rear and side vehicle lighting is
switched on.
Standing lamps on one side, refer to next
column.Switching on the low beamsTurn to the second position.
With the low beams on and with the igni
-
tion switched off, only the parking lamps
will remain on.
'Follow me home' lampsIf you activate the headlamp flasher after
having switched off the engine and the
lights, the low beams will stay lit for a pre
-
set period of time.
You can have this function pro
-
grammed.<
Switching on the standing lamps For parking, you can activate lights on one
side of the vehicle. Observe local laws.In ignition key position
0:
Move the lever to the adequate turn signal
indicator position.
The standing lamps discharge the battery. Avoid using them for longer
periods of time; otherwise, you may not be
able to start the engine.<
'Lights on' warning If the lights have not been switched off and
the ignition key is in position
0, an acoustic
signal sounds for a few seconds when you
open the driver's door to remind you that
the lights have not been switched off.
Daytime driving lamps* If convenient, the light switch can be left in
position
0 or 1.
The low beams switch on automatically in
ignition key position 2 or higher.
The exterior lamps go out when the igni
-
tion is switched off and the light switch is
set to position 0. In position 1, the parking
lamps are automatically switched on.
The dynamic headlamp range con
-
trol for xenon lamps only operates
with the light switch in position
1 or 2.<
You can have the daytime driving lamp function activated/deacti
-
vated.<
ProCarManuals.com
Page 61 of 165

59
OVERVIEW REPAIRS OPERATIONCONTROLS DATA INDEX
INTERIOR LAMPS
WASHER/WIPER SYSTEM
Switching the interior light in the MINI on and off manuallyPress button 1 briefly.Permanently turn off interior light:Keep button
1 pressed until the light goes
out.
To switch the light back on, press the but
-
ton once more.
Switching the interior light in the MINI Convertible on and off manuallyPress button 1 briefly.Permanently turn off interior light:Keep button
1 pressed until the light goes
out.
To switch the light back on, press the but
-
ton once more.Switching the reading lamps on and
off Press button
2.
0Wipers parked1 Intermittent operation or rain sensor2 Normal wiper speed3 Fast wiper speed4 Brief wipe5 Clean windshield and headlamps Intermittent operation Not on vehicles with rain sensor.The interval time for the wipers is depen
-
dent on the vehicle speed.Rain sensor* The rain sensor is located on the wind
-
shield, directly in front of the interior rear
-
view mirror.
When the rain sensor is activated, the
ProCarManuals.com